Discussion


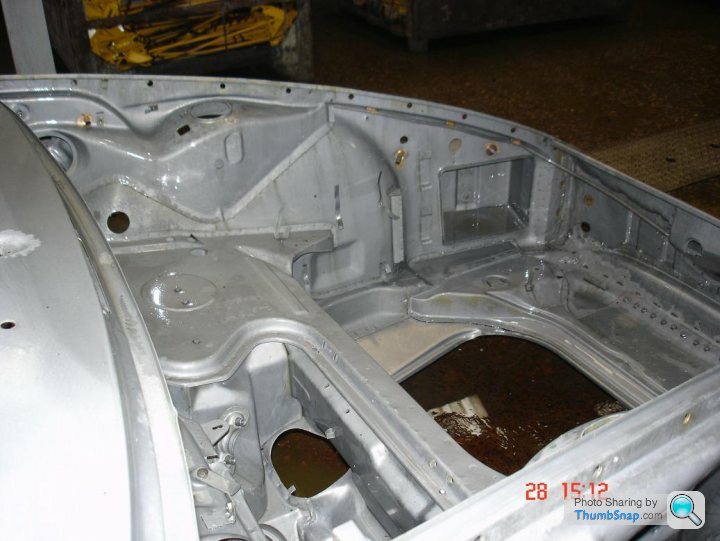
No, I've been back on forth on dipping and have spoken to several 911 restorers (that I trust) and they do not recommend it. It was my original plan as all that clean steel to weld to is so tempting.
The main issue is that the shell has many enclosed sections that are just fine end up completely bare and they are difficult to treat effectively again.
Additionally more than one 911 shell has come out a different shape to when it went in, even when braced. My car is currently straight, original and everything shuts and gaps as it should so I'd rather it stayed that way!
So it's going to be stage by stage, power wire brushing, heat gunning and blasting then priming with two pack epoxy before moving onto the next area. A lot messier, but probably better for the shell long term. Fingers crossed!
Edited by gary71 on Tuesday 28th August 22:33
gary71 said:
The main issue is that the shell has many enclosed sections that are just fine end up completely bare and they are difficult to treat effectively again.
It's the same for the E30. I also saw a dipped shell that had been returned to its own and once inverted on a spit, a considerable amount of chemical came flowing out. I can't say I've been impressed with what I have seen of the whole dipping process and certainly wouldn't go there myself.This little video has some excellent footage from 1972/3 showing the paint and assembly process. The cars were primed via dipping and you can see just how little care is taking over the paint application in the non A surface areas!
Health and safety has luckily moved on a little since then as well...
https://youtu.be/KVU3Ym8DvCs
Health and safety has luckily moved on a little since then as well...
https://youtu.be/KVU3Ym8DvCs
What the video doesn't show is the undersealing; after paint, they were turned upside down on a spit roast and the floor/inner wing areas undersealed by hand by blokes with brushes and a big pot of black bitumen. It shows this in the 1972 brochure (2.4) but they may have abandoned this and gone over to the sprayed - on textured underseal by this time.
After a few years you could tear strips of this stuff off the underside of German cars with a ton of rust underneath.
After a few years you could tear strips of this stuff off the underside of German cars with a ton of rust underneath.
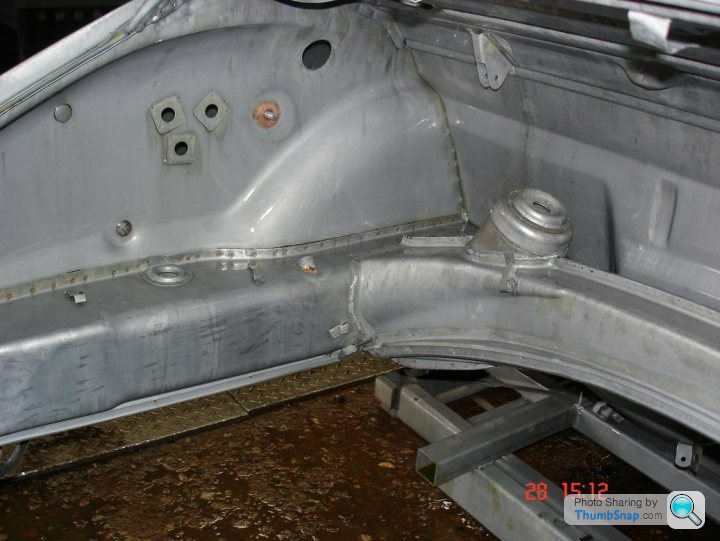
Swallowed the brave/stupid pill and cut the back out...

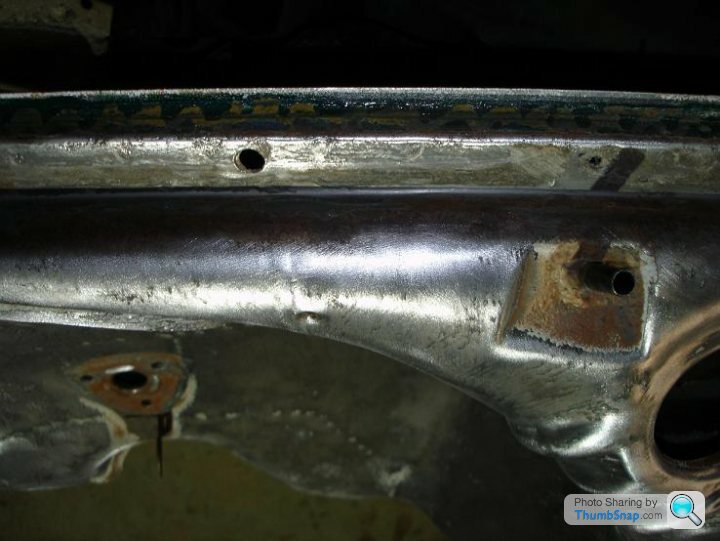
Porsche sneakily hid a load of spotwelds inside the crossmember to the longit.

So there was a fight to get that out!
Now I see why The 911 Guru (my mentor!) cuts a hole in the side of the longit, other than crash repair it’s just to replace these welds.
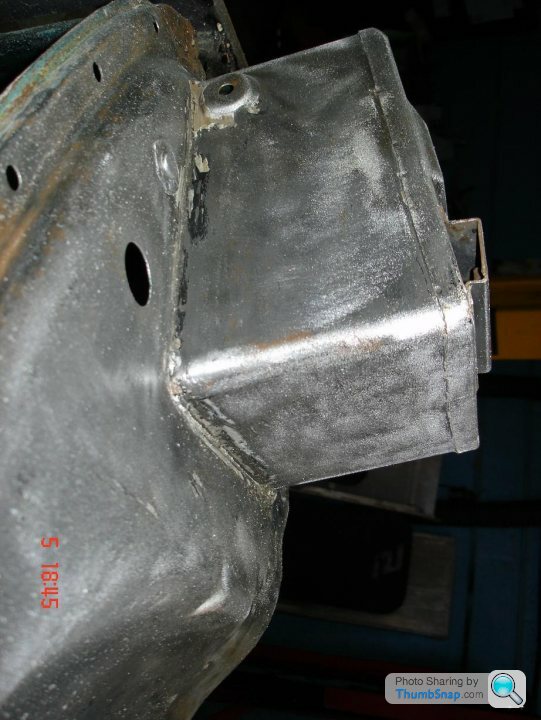
The new xmbr pretty much fits straight on, even though I had to release the jig to get the old one off due my poor design!
The jig went straight back on really well so I’m happy nothing has moved, and it has dead size holes.
New panel sort of goes where it should, this is literally just pushed into place.

Happy with that for the evening.
Time for a beer.
Porsche sneakily hid a load of spotwelds inside the crossmember to the longit.
So there was a fight to get that out!
Now I see why The 911 Guru (my mentor!) cuts a hole in the side of the longit, other than crash repair it’s just to replace these welds.
The new xmbr pretty much fits straight on, even though I had to release the jig to get the old one off due my poor design!
The jig went straight back on really well so I’m happy nothing has moved, and it has dead size holes.
New panel sort of goes where it should, this is literally just pushed into place.
Happy with that for the evening.
Time for a beer.


Looks familiar!
Deadline is a strange thing, as soon as I can but without compromising or getting divorced is one way to look at it.
Realistically I’ve accepted 2 years off the road. Last time I drove it was Classic Le Mans this year (still has dead French flies on it) and a plan would be to make the 2020 event.
Deadline is a strange thing, as soon as I can but without compromising or getting divorced is one way to look at it.
Realistically I’ve accepted 2 years off the road. Last time I drove it was Classic Le Mans this year (still has dead French flies on it) and a plan would be to make the 2020 event.
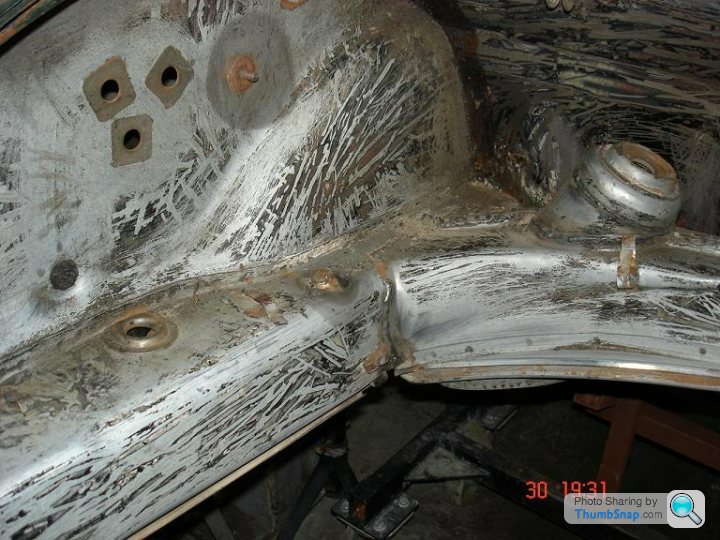
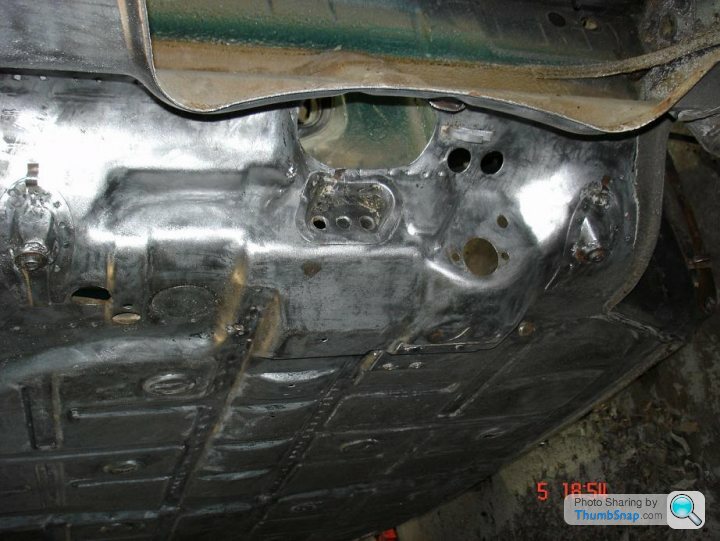
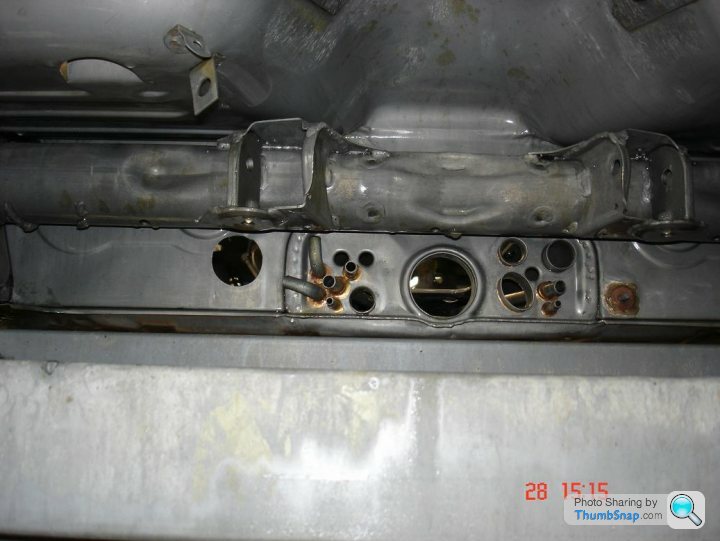
Task for today was prep both longits, flange repairs etc. Well I got one done...
I remember The Guru saying that the small jobs are like a time vacuum, no apparent progress for hours of work. I’d agree!
After today I wish I’d never found The Guru sheet metal art work as I’d have had this finished and the xmbr welded in by now!
How it started:

New flange:

This bit was ok, but by the time I’d cut all the old bits off it was quicker to make one.

Also I removed the seal mounting strip and replaced the bit I cut up at the back and the other end with parts salvaged from the part on the old xmbr. Then cleaned all the dusty rust from underneath and welded it back on.
Of course the OE Porsche xmbr doesn’t sit the same and the seal mounting flange is high on the LHS, as such it doesn’t line up with the new bit I just made that I put back in the right place. So a job during the backdate of this panel will be to remove a few spot welds and tweak the flange down to line up.

I reckon I can do the other side in half the time!
I remember The Guru saying that the small jobs are like a time vacuum, no apparent progress for hours of work. I’d agree!
After today I wish I’d never found The Guru sheet metal art work as I’d have had this finished and the xmbr welded in by now!
How it started:
New flange:
This bit was ok, but by the time I’d cut all the old bits off it was quicker to make one.
Also I removed the seal mounting strip and replaced the bit I cut up at the back and the other end with parts salvaged from the part on the old xmbr. Then cleaned all the dusty rust from underneath and welded it back on.
Of course the OE Porsche xmbr doesn’t sit the same and the seal mounting flange is high on the LHS, as such it doesn’t line up with the new bit I just made that I put back in the right place. So a job during the backdate of this panel will be to remove a few spot welds and tweak the flange down to line up.
I reckon I can do the other side in half the time!
Hi, If you’ve not found DDK yet then introduce yourself over there on the forum at:
http://www.ddk-online.com
Mountains of early 911 knowledge and inspiration.
The Guru as I call him on here is Barry Carter, a one man artisan 911 body restorer, doesn’t advertise, works on his own, and has recovered some of the most incredible wrecks to their former glory.
He’s also the nicest most decent genuine man you’ll ever meet.
I’ll be building most of the structural parts of my car with self tappers as it will be going on his Celette jig and he advises against doing anything permanent just in case it needs to be realigned.
Thank you!
I registered on DDK but haven't really posted anything yet as have just been using the car when possible.
Was my dads before mine and i know we've had stuff done with Tuthill's in the past when we rebuilt the engine but will write the name down so i dont forget.
Good plan on the self tappers. Had a few electrical gremlins myself sourced eventually to the 14 pin connector. Planning on rebuilding the loom?
Put an hour aside and absorb this thread: http://www.ddk-online.com/phpBB2/viewtopic.php?f=2...
Perfect body, paint and trim.
Perfect body, paint and trim.
Mwn11 said:
Thank you!
I registered on DDK but haven't really posted anything yet as have just been using the car when possible.
Was my dads before mine and i know we've had stuff done with Tuthill's in the past when we rebuilt the engine but will write the name down so i dont forget.
Good plan on the self tappers. Had a few electrical gremlins myself sourced eventually to the 14 pin connector. Planning on rebuilding the loom?
No major plan for the loom, tidy it up few repairs to remove my previous mods and a new fuse box. That’s at least a year away though! I registered on DDK but haven't really posted anything yet as have just been using the car when possible.
Was my dads before mine and i know we've had stuff done with Tuthill's in the past when we rebuilt the engine but will write the name down so i dont forget.
Good plan on the self tappers. Had a few electrical gremlins myself sourced eventually to the 14 pin connector. Planning on rebuilding the loom?
gary71 said:
Put an hour aside and absorb this thread: http://www.ddk-online.com/phpBB2/viewtopic.php?f=2...
Perfect body, paint and trim.
Needs more than an hour - that has blown my mind!Perfect body, paint and trim.
What incredible craftsmanship.
gary71 said:
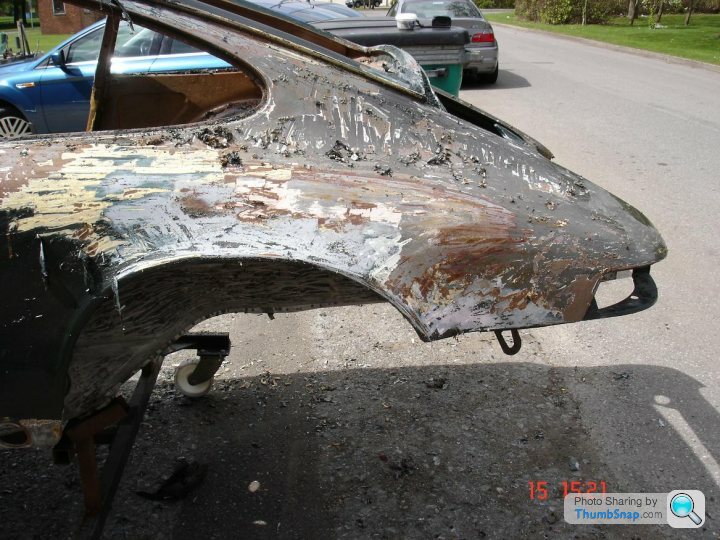
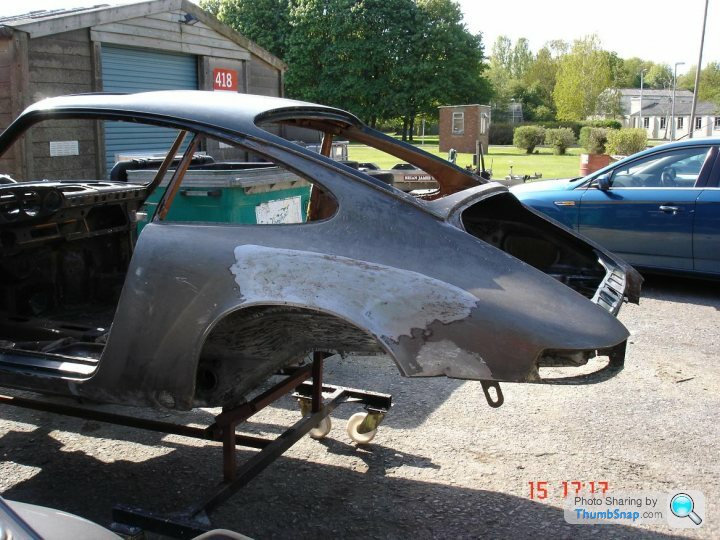
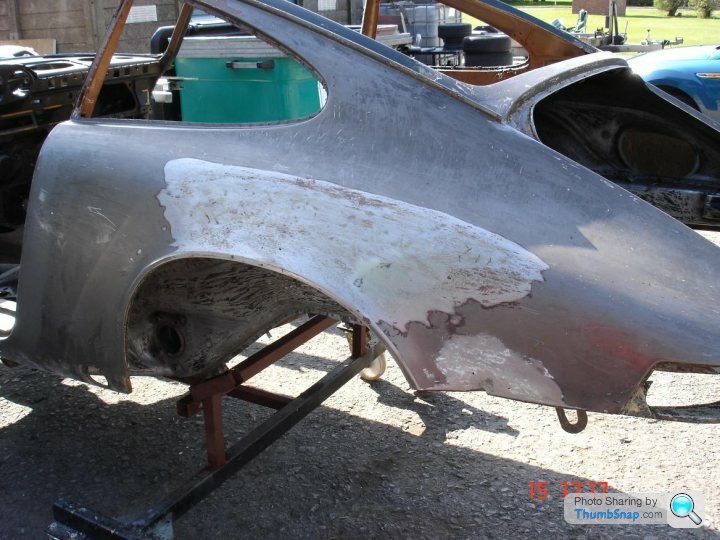
No, I've been back on forth on dipping and have spoken to several 911 restorers (that I trust) and they do not recommend it. It was my original plan as all that clean steel to weld to is so tempting.
The main issue is that the shell has many enclosed sections that are just fine end up completely bare and they are difficult to treat effectively again.
Additionally more than one 911 shell has come out a different shape to when it went in, even when braced. My car is currently straight, original and everything shuts and gaps as it should so I'd rather it stayed that way!
So it's going to be stage by stage, power wire brushing, heat gunning and blasting then priming with two pack epoxy before moving onto the next area. A lot messier, but probably better for the shell long term. Fingers crossed !
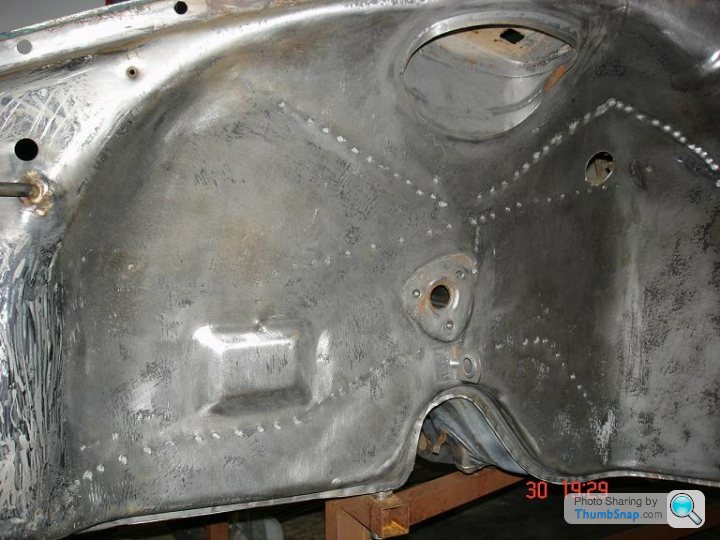
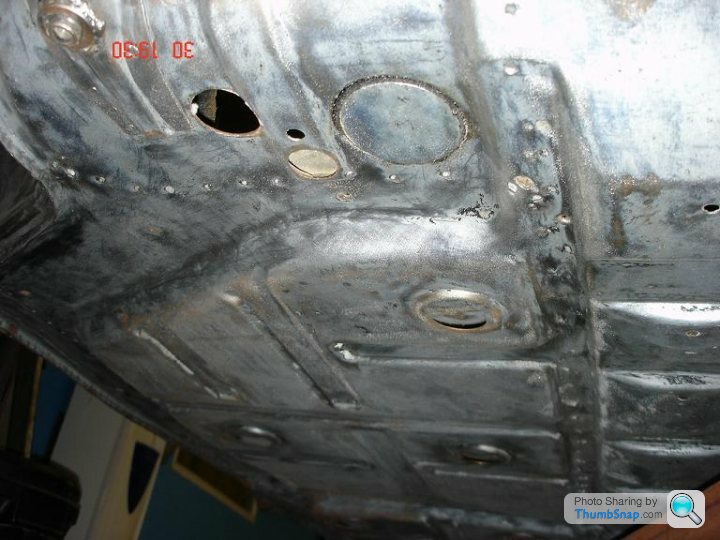
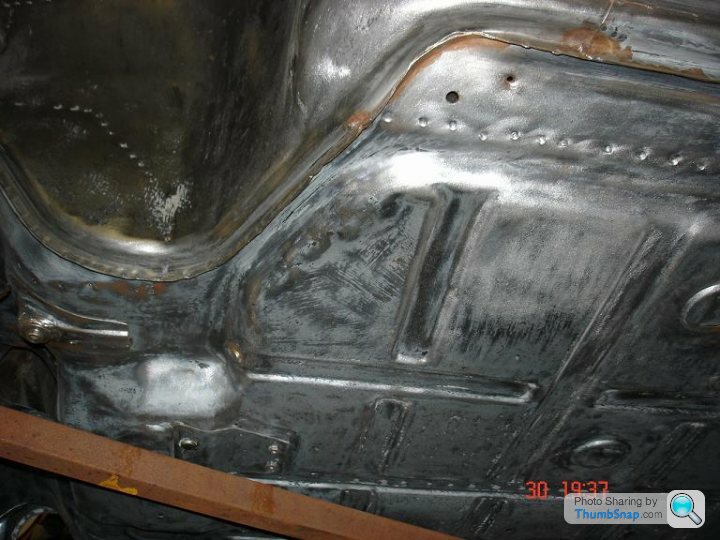
It took my fingers and wrists ages to recover, but wire brushing every inch of the metalwork was a great way to get to know the subtle nuances of the early 911 shell :The main issue is that the shell has many enclosed sections that are just fine end up completely bare and they are difficult to treat effectively again.
Additionally more than one 911 shell has come out a different shape to when it went in, even when braced. My car is currently straight, original and everything shuts and gaps as it should so I'd rather it stayed that way!
So it's going to be stage by stage, power wire brushing, heat gunning and blasting then priming with two pack epoxy before moving onto the next area. A lot messier, but probably better for the shell long term. Fingers crossed !

I did it because I wanted to avoid pyrolysis and to minimise the time the shell spent in acid. Whilst I avoided the former, the idiots (most will know who they are) left the shell in acid 3 X longer than required (and charged me for the "privilege") because I'd left seam sealer on the rotten front panel (which I knew we'd be cutting out) and thus I'd told them to ignore it

It did look rather good when it emerged from dipping mind ...
 zy4.jpg' target='_blank'/>
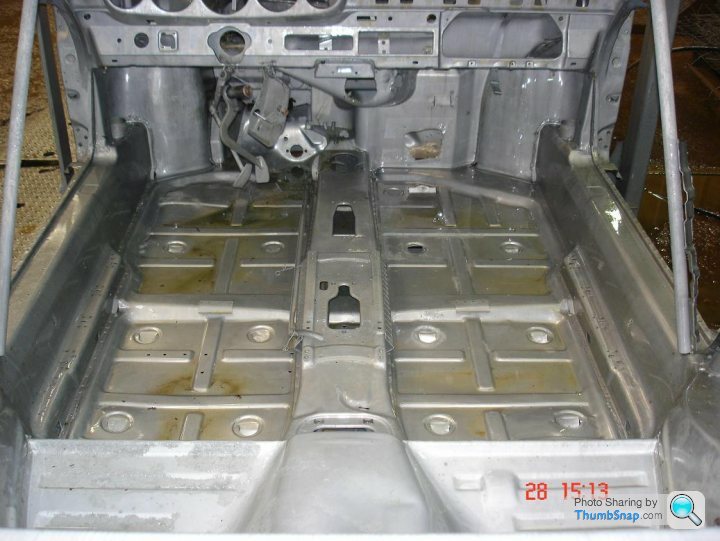
Gassing Station | Readers' Cars | Top of Page | What's New | My Stuff