500+bhp Mk3 Fiesta Project
Discussion


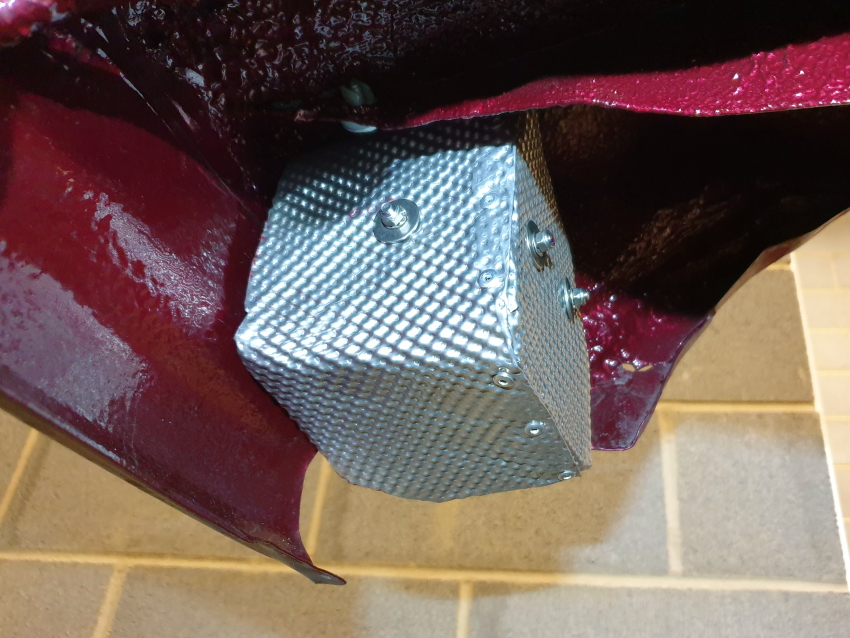
Exhaust Heat Shield - Battery Box
The exhaust will pass between the Focus subframe and the boot floor battery box that I had fabricated. Now the rear heat shield is finished I could pay attention to this area.
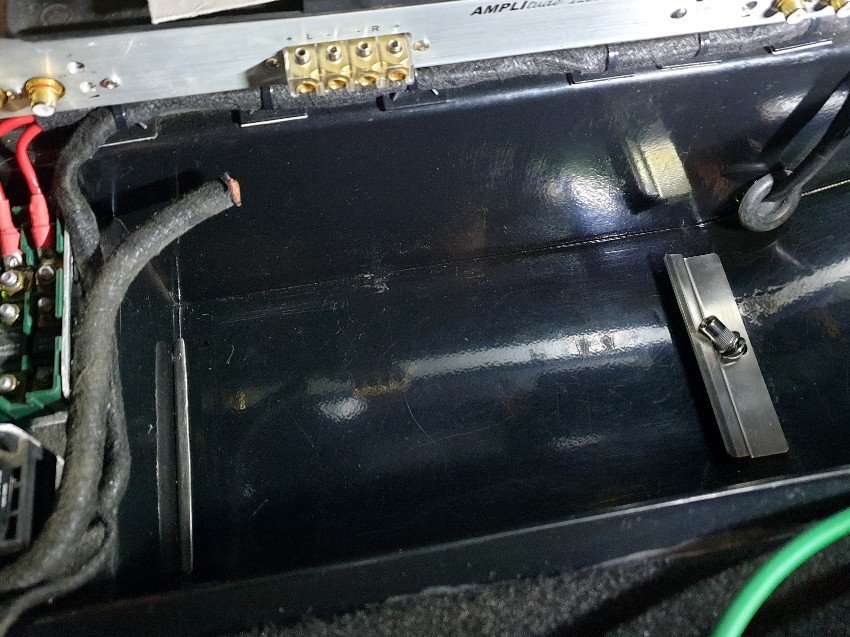
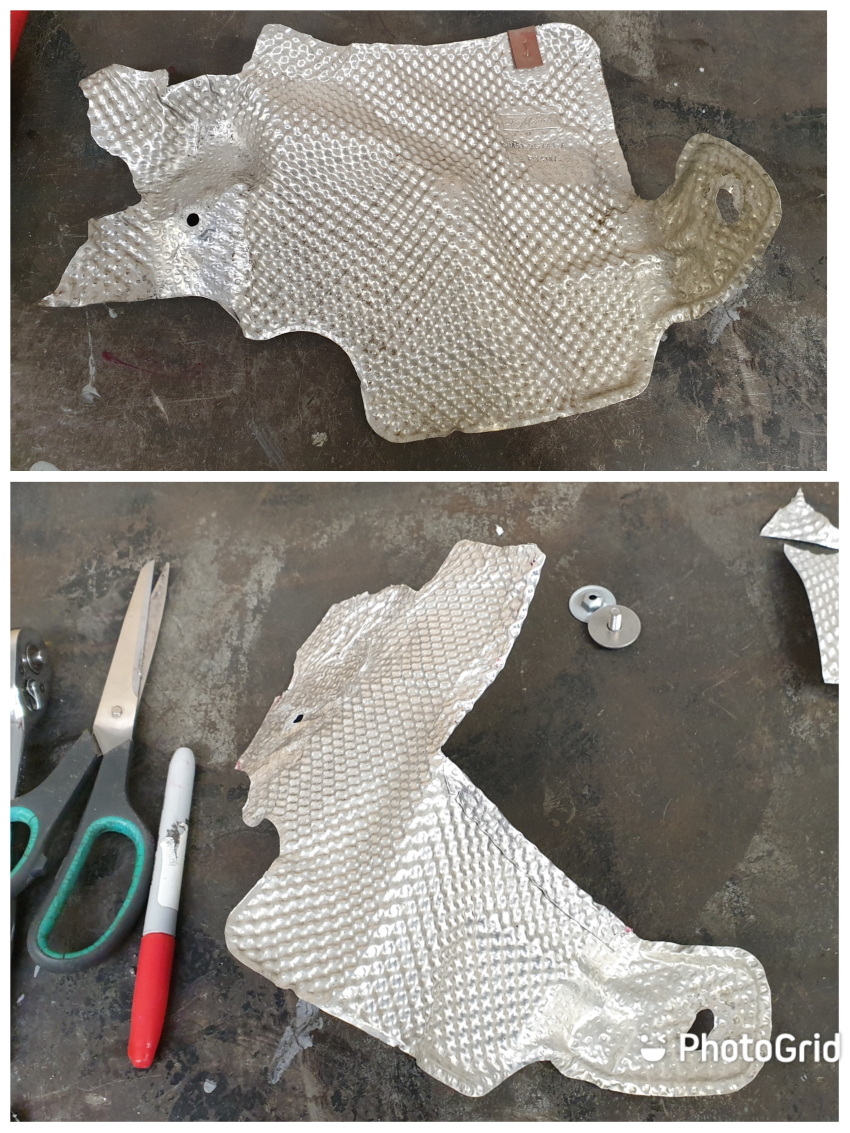
Space is tight in this particular area, so I chose 4mm thick adhesive foam back heat shield material designed for the inside of motorcycle fairings.
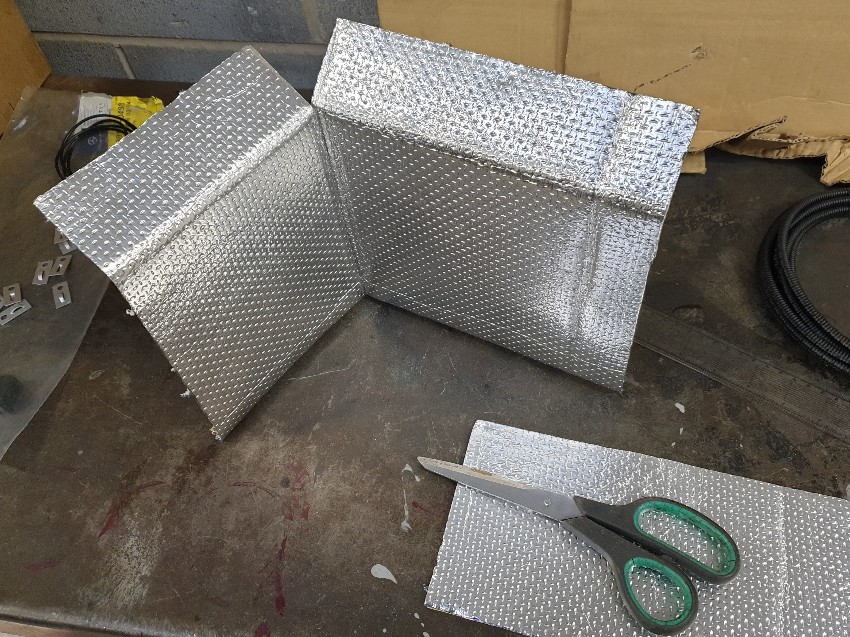
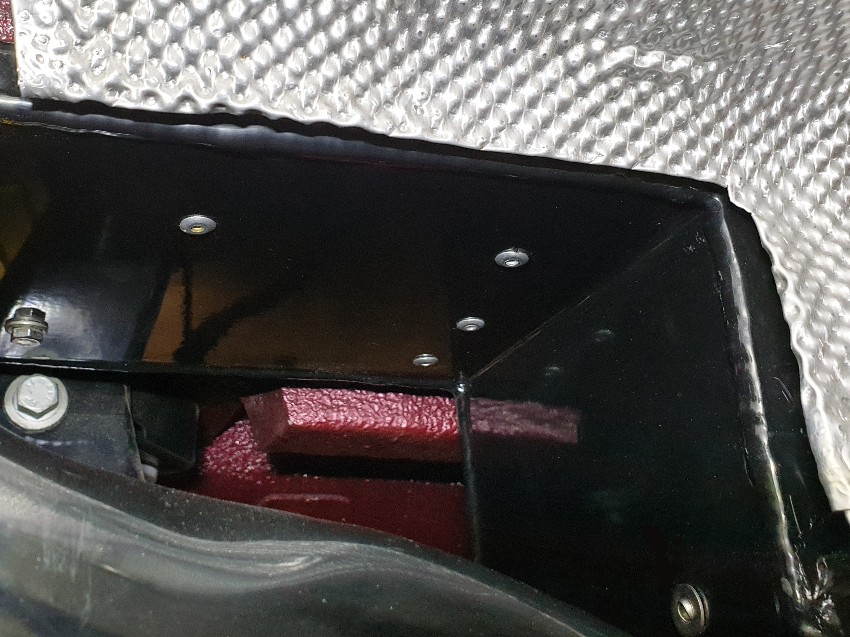
Job done. I used adhesive aluminium tape to seal joints and edges.
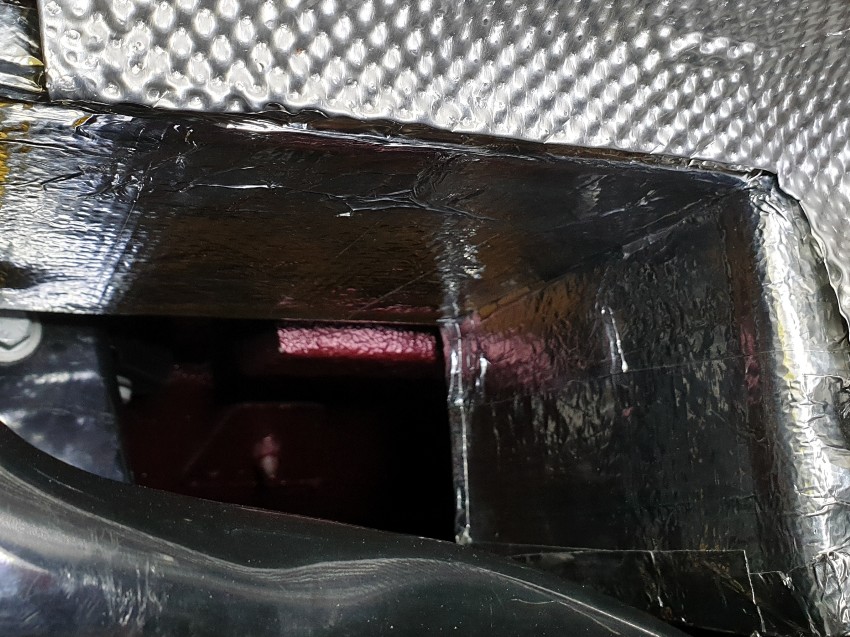
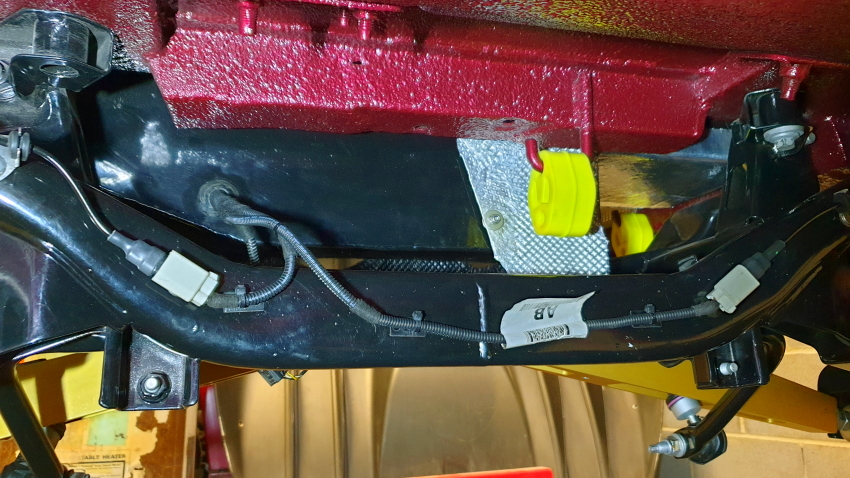
Looking to the rear of the car from in front of the subframe and battery box.
Rear ARB - Drop Links
For the Mk2 Focus onwards Ford upgraded from a rubber isolator design to a dual ball joint drop link. I've chosen the Mk3 Focus/C-Max version - part number 1856667 - which use an M12 lower stud.
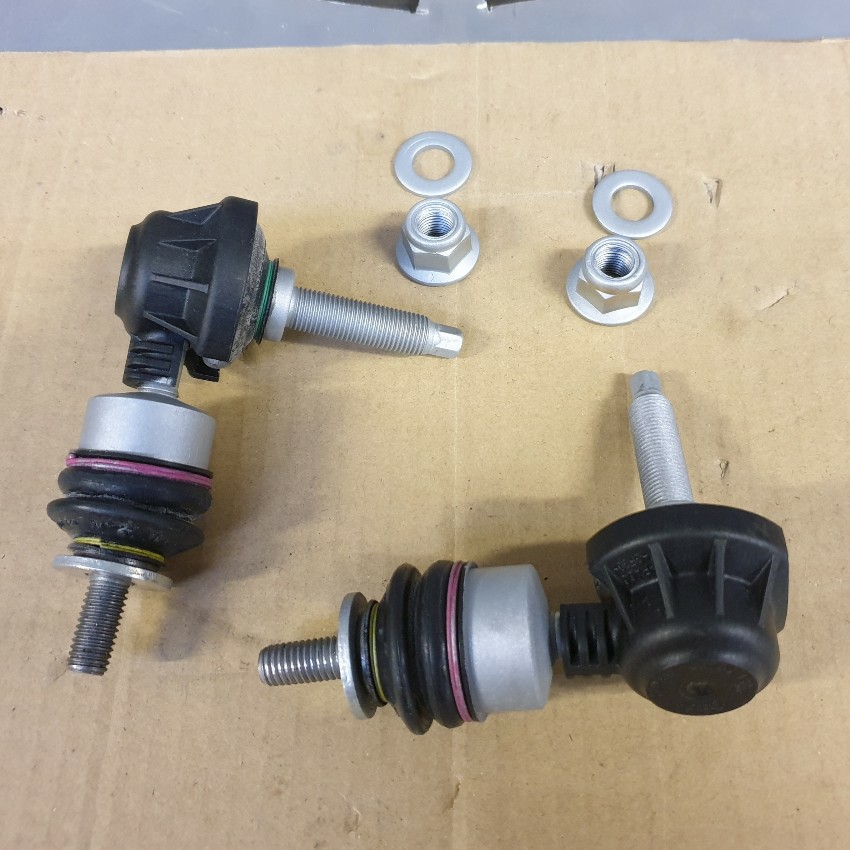
As with all parts on the car, for increased corrosion resistance I bolster electro-plating with an additional coat of zinc based primer.
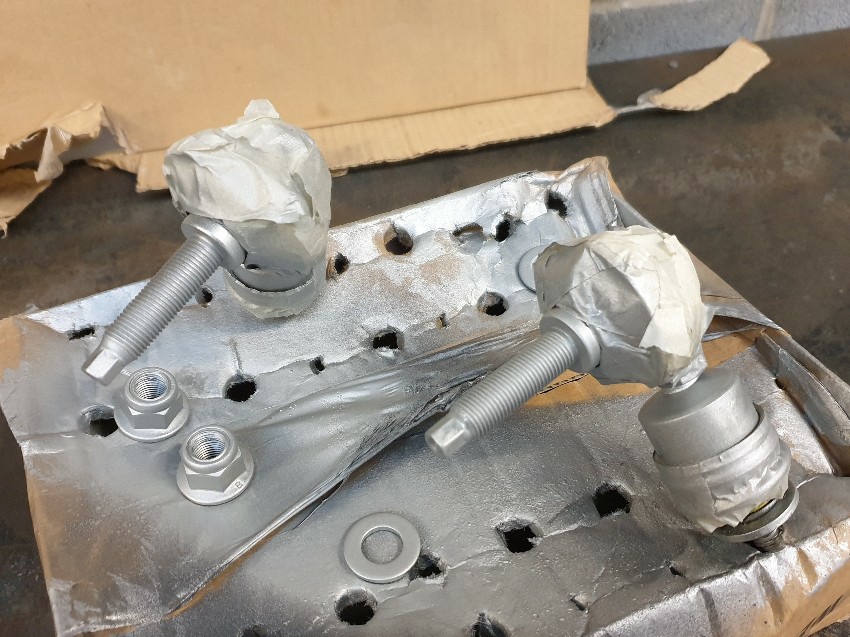
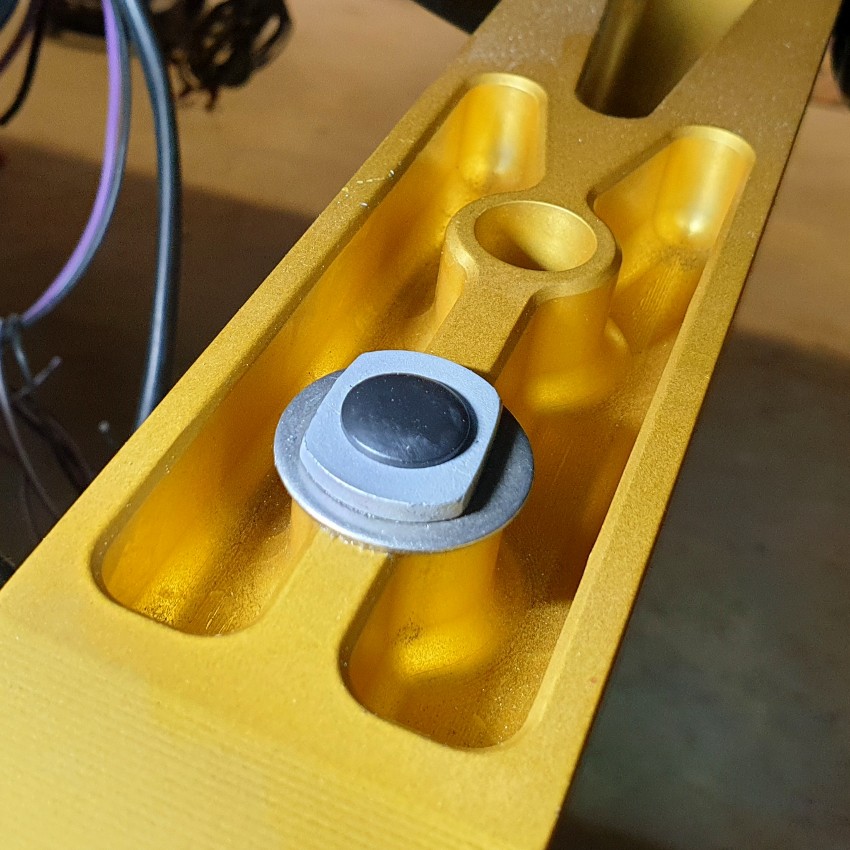
I had a small problem to solve for mounting the drop links: the standard Focus arms are pressed steel and approximately 5mm thick at the ARB drop link mounting point. In contrast the bespoke billet arms are 30mm thick, so the upper drop link stud was too short to pass through the arm.
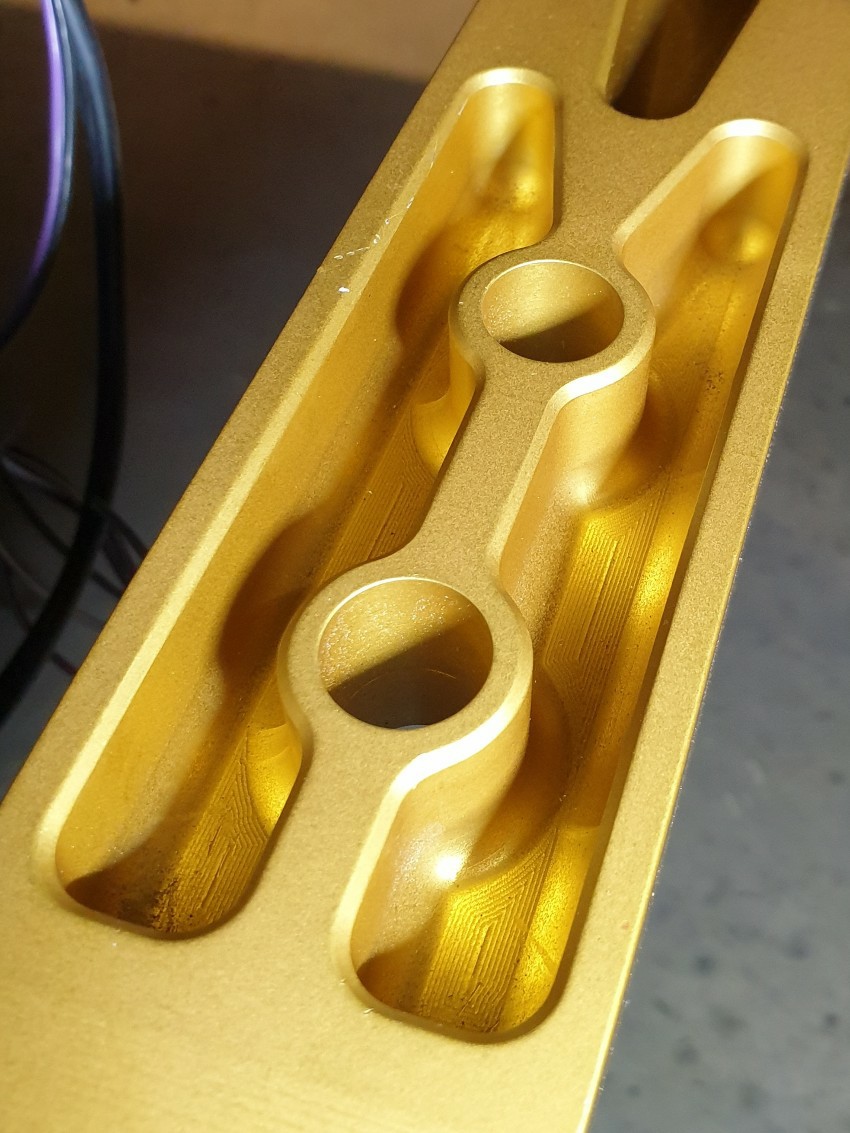
My solution was to adapt a pair of mild steel female weld-in bushes: 16mm diameter, 30mm deep, 25mm head, and M10x1.5 thread. The bore in the lower arms was 16.5mm so the .5mm clearance allows for paint and a bit of grease.
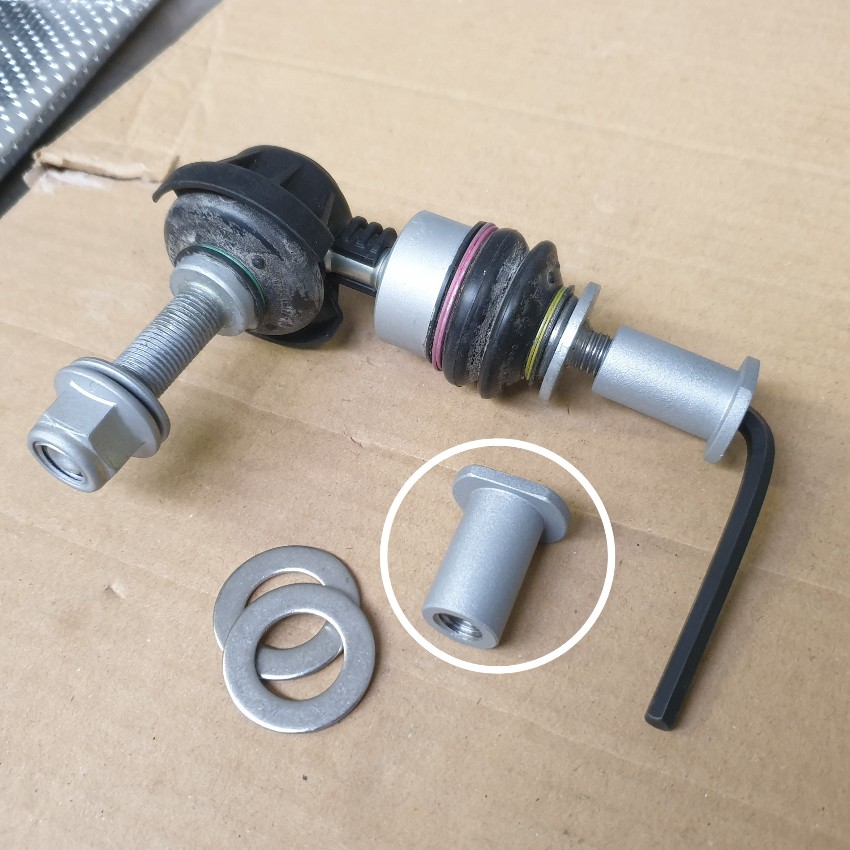
I filed flats on the bushes to accommodate a 20mm spanner, and being threaded all the way through the centre bore allows a 5mm Allen key to lock the ARB drop link whilst the bush is turned.
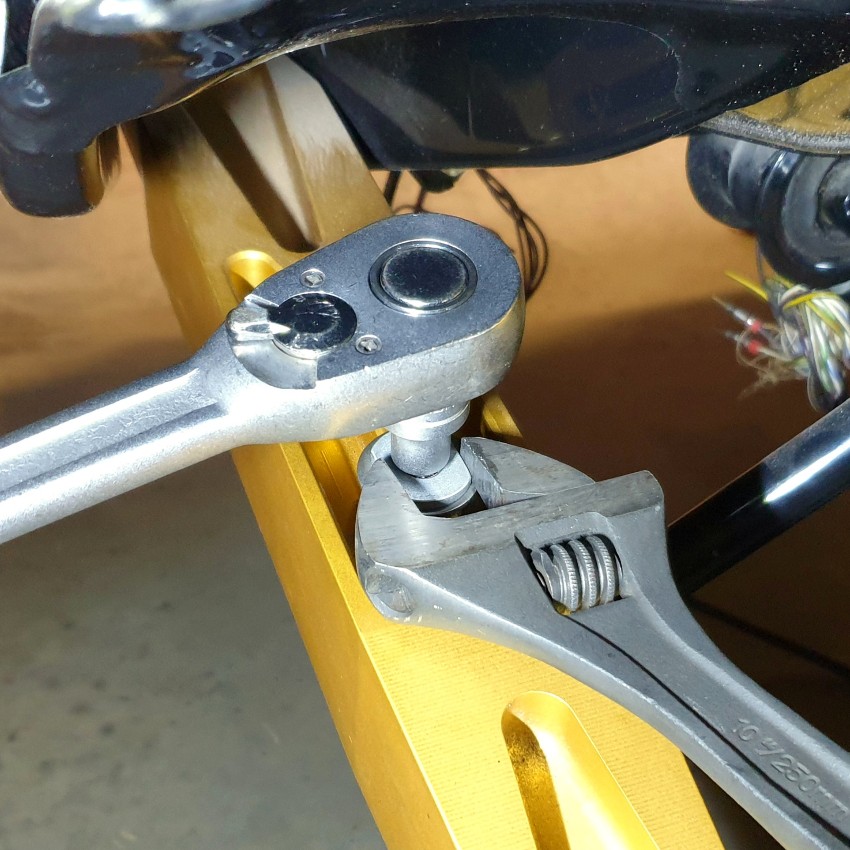
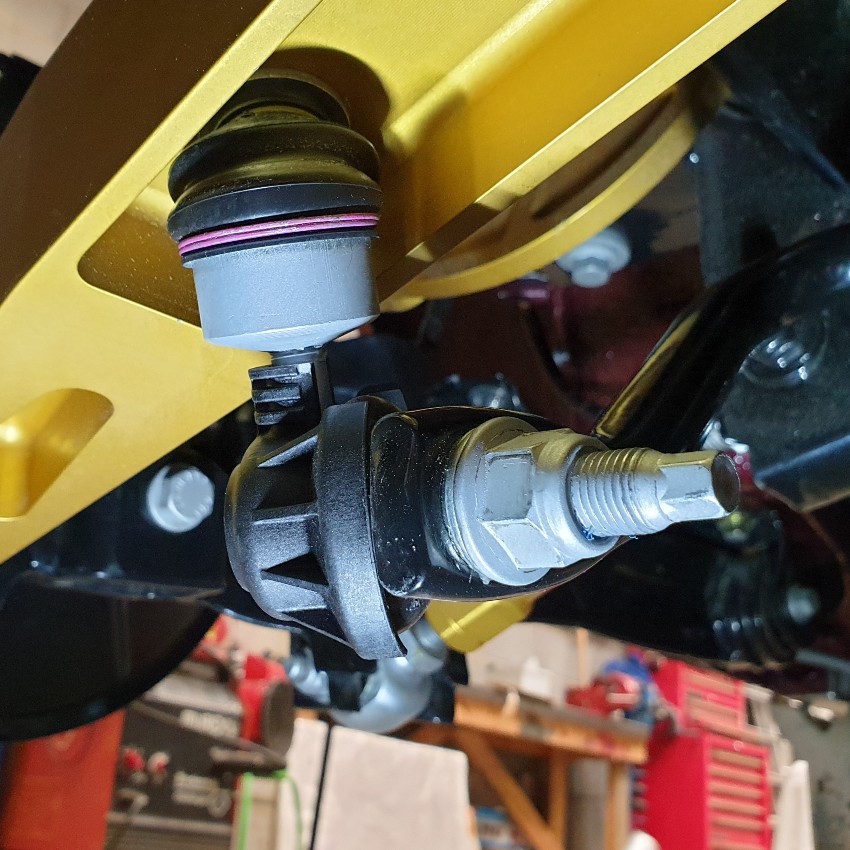
Job complete. I was pleased that I had correctly calculated the ARB positions for the shortened subframe. Photos show the suspension at full droop and the links at near max articulation.
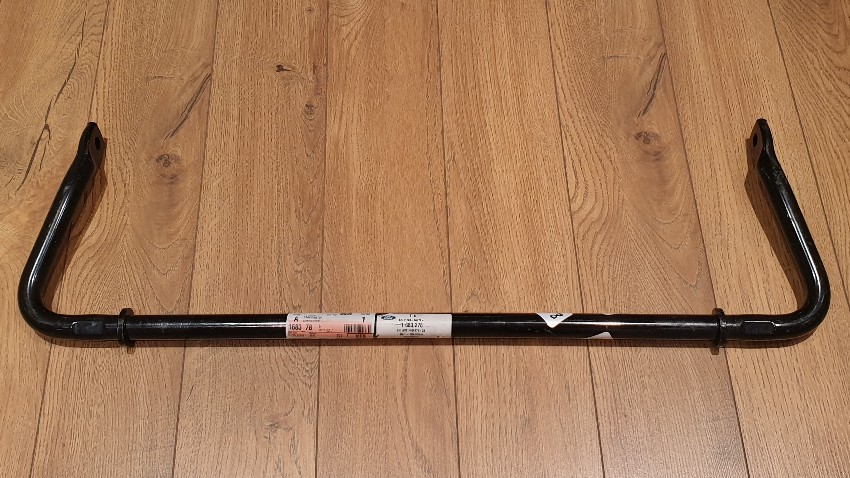
I've built the car a 19mm rear ARB, which is the smallest that Ford produced (there may be alternative sizes in use by Mazda or Volvo). This should be a benign option until I get a feel for the car and what the best setup is. In preparation for future suspension tuning I have picked up a new 21.5mm bar to suit ball joint drop links, which is the stiffest that Ford produced - part number 1683278. Ford themselves were selling them off on eBay for only £30 delivered.
Battery Brackets
The battery box wouldn't be complete without a battery mounting system. I've bought a ready-made copy of the original Fiesta clamp, remade in stainless. For the other end of the battery, which will be a fixed mount, I bent some 1.5mm stainless to suit the 'feet' on the battery.
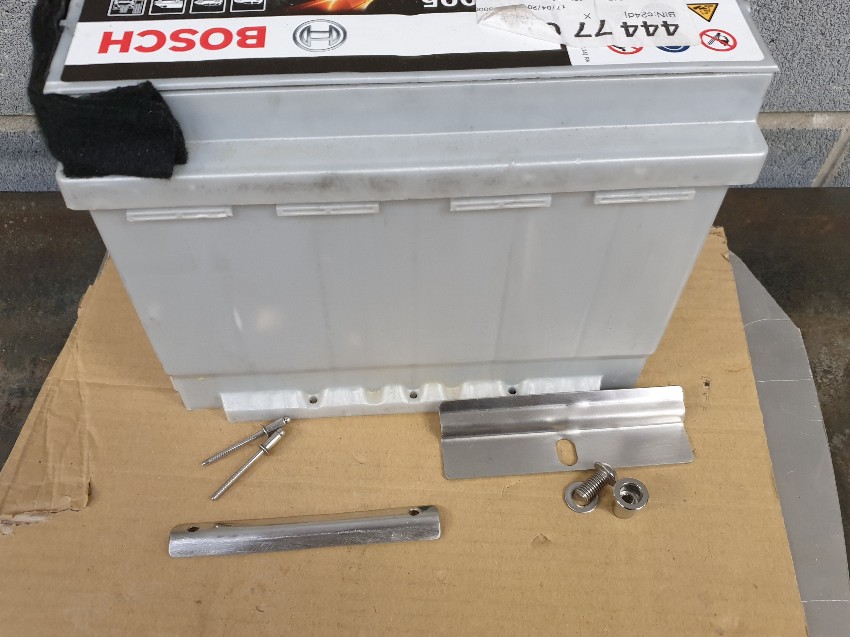
Fixed mount riveted to the end of the box. I will add a rivnut for the removable bracket once I settle on a battery type.
The exhaust will pass between the Focus subframe and the boot floor battery box that I had fabricated. Now the rear heat shield is finished I could pay attention to this area.
Space is tight in this particular area, so I chose 4mm thick adhesive foam back heat shield material designed for the inside of motorcycle fairings.
Job done. I used adhesive aluminium tape to seal joints and edges.
Looking to the rear of the car from in front of the subframe and battery box.
Rear ARB - Drop Links
For the Mk2 Focus onwards Ford upgraded from a rubber isolator design to a dual ball joint drop link. I've chosen the Mk3 Focus/C-Max version - part number 1856667 - which use an M12 lower stud.
As with all parts on the car, for increased corrosion resistance I bolster electro-plating with an additional coat of zinc based primer.
I had a small problem to solve for mounting the drop links: the standard Focus arms are pressed steel and approximately 5mm thick at the ARB drop link mounting point. In contrast the bespoke billet arms are 30mm thick, so the upper drop link stud was too short to pass through the arm.
My solution was to adapt a pair of mild steel female weld-in bushes: 16mm diameter, 30mm deep, 25mm head, and M10x1.5 thread. The bore in the lower arms was 16.5mm so the .5mm clearance allows for paint and a bit of grease.
I filed flats on the bushes to accommodate a 20mm spanner, and being threaded all the way through the centre bore allows a 5mm Allen key to lock the ARB drop link whilst the bush is turned.
Job complete. I was pleased that I had correctly calculated the ARB positions for the shortened subframe. Photos show the suspension at full droop and the links at near max articulation.
I've built the car a 19mm rear ARB, which is the smallest that Ford produced (there may be alternative sizes in use by Mazda or Volvo). This should be a benign option until I get a feel for the car and what the best setup is. In preparation for future suspension tuning I have picked up a new 21.5mm bar to suit ball joint drop links, which is the stiffest that Ford produced - part number 1683278. Ford themselves were selling them off on eBay for only £30 delivered.
Battery Brackets
The battery box wouldn't be complete without a battery mounting system. I've bought a ready-made copy of the original Fiesta clamp, remade in stainless. For the other end of the battery, which will be a fixed mount, I bent some 1.5mm stainless to suit the 'feet' on the battery.
Fixed mount riveted to the end of the box. I will add a rivnut for the removable bracket once I settle on a battery type.
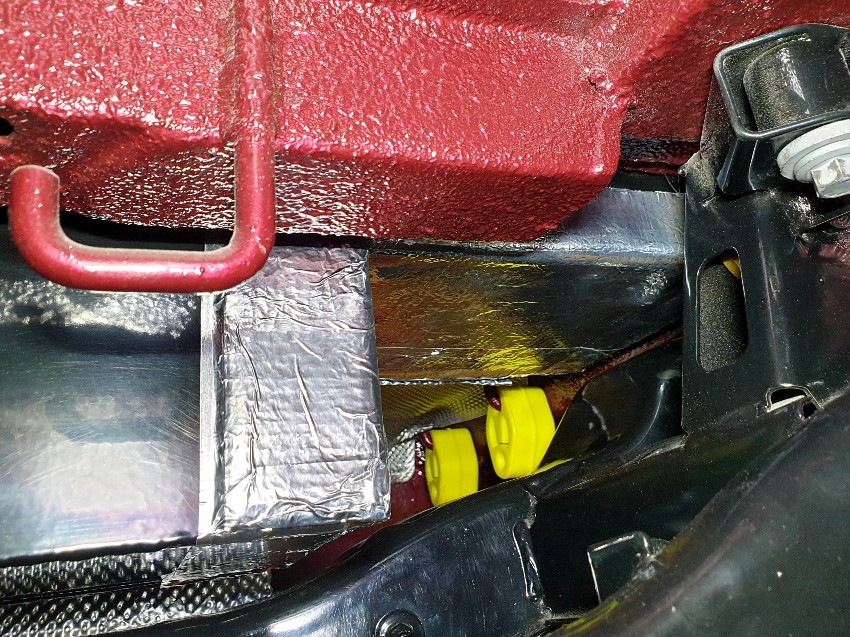
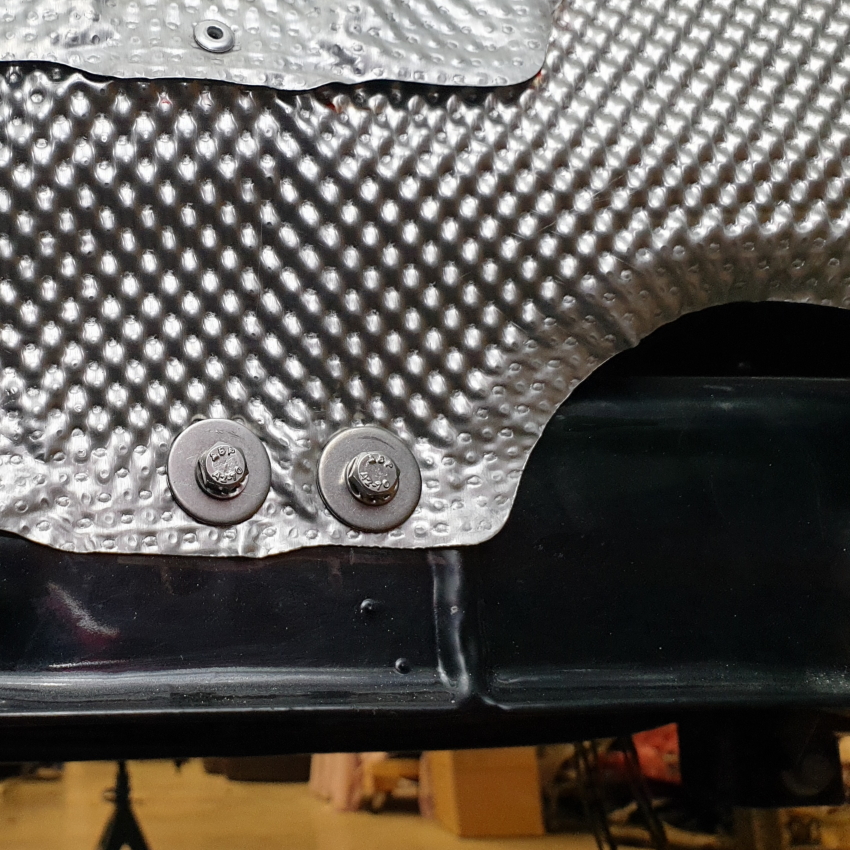
Exhaust Heat Shield - Rear Subframe
A very quick job completed. Moving forward from the rear of the car to some protection for the rear subframe and suspension bushes. The charcoal canister on the Mk2 Focus is mounted on top of the rear subframe and features a heat shield to protect it, which I kept after modifying the subframe my car. I have modified that shield to fit around the battery box to provide some additional protection to that and the suspension lower arm bush.
I added a captive stainless fitting to the side of the battery box, but there was only 170mm clearance available to for the drill when countersinking the reverse side. I've only used the right angle drill attachment a handful of times but given the price it has proved invaluable.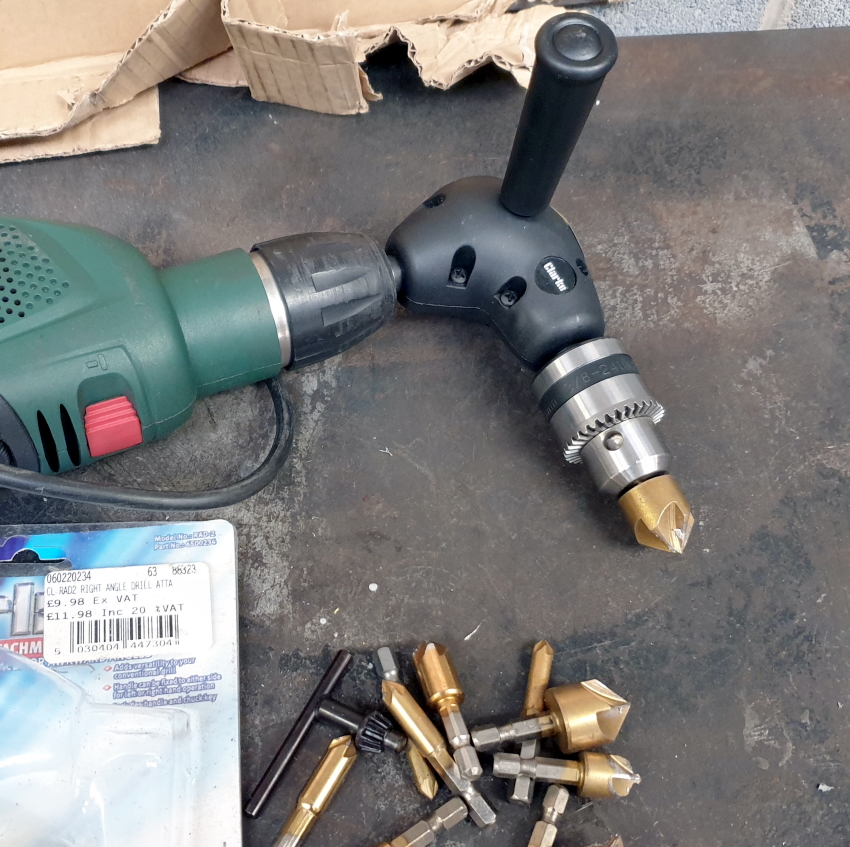
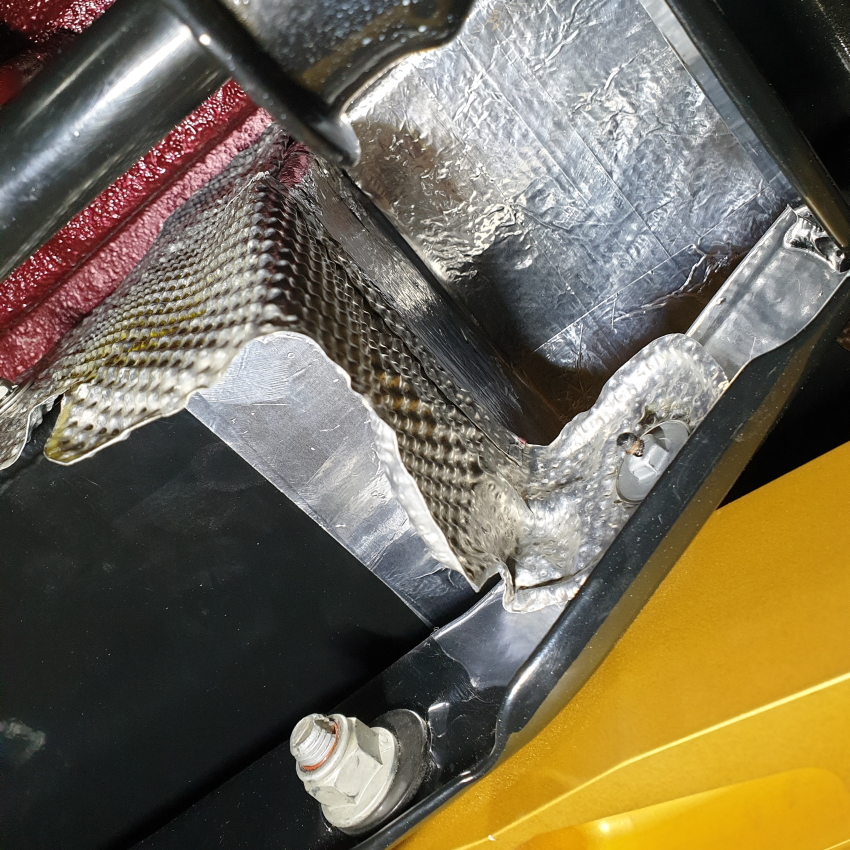
Shield in place, mounted to the original subframe fitting and the new captive fitting described above. Focus ST/RS exhaust mount added to another exhaust mount that I added back when fabrication work was taking place.
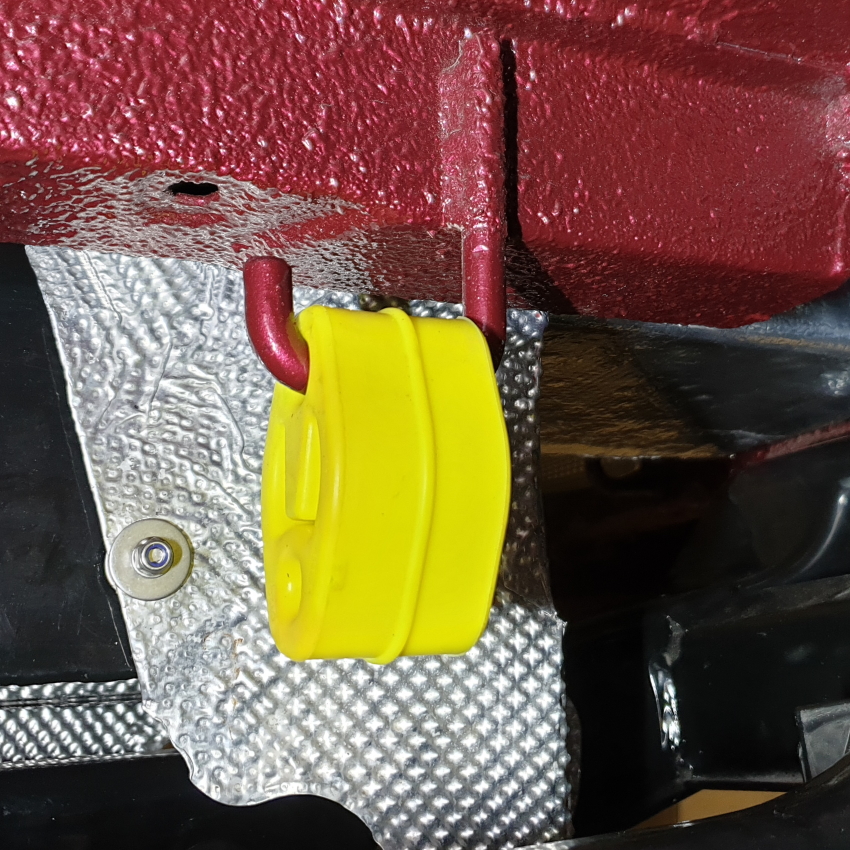
I've added a couple of stainless fixings to the rear silencer heat shield to keep it snug against the rear of the battery box.
A very quick job completed. Moving forward from the rear of the car to some protection for the rear subframe and suspension bushes. The charcoal canister on the Mk2 Focus is mounted on top of the rear subframe and features a heat shield to protect it, which I kept after modifying the subframe my car. I have modified that shield to fit around the battery box to provide some additional protection to that and the suspension lower arm bush.
I added a captive stainless fitting to the side of the battery box, but there was only 170mm clearance available to for the drill when countersinking the reverse side. I've only used the right angle drill attachment a handful of times but given the price it has proved invaluable.
Shield in place, mounted to the original subframe fitting and the new captive fitting described above. Focus ST/RS exhaust mount added to another exhaust mount that I added back when fabrication work was taking place.
I've added a couple of stainless fixings to the rear silencer heat shield to keep it snug against the rear of the battery box.
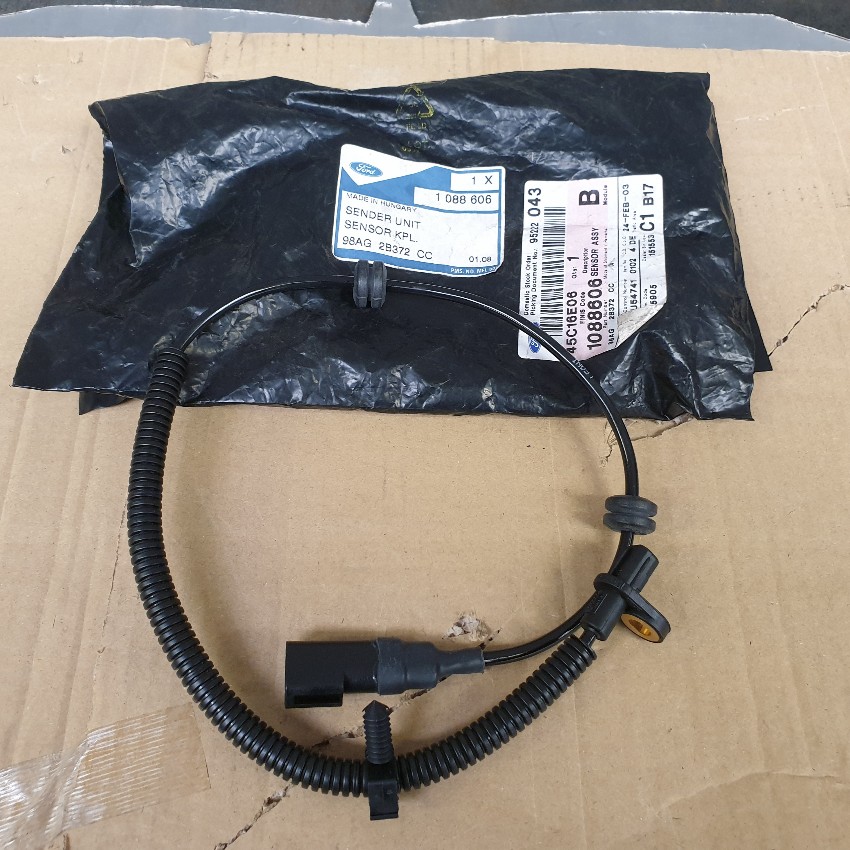
ABS Sensors - Rear
I'm using the Focus Mk1 rear ABS sensors to suit a disc brake equipped car - Ford part 1088606.
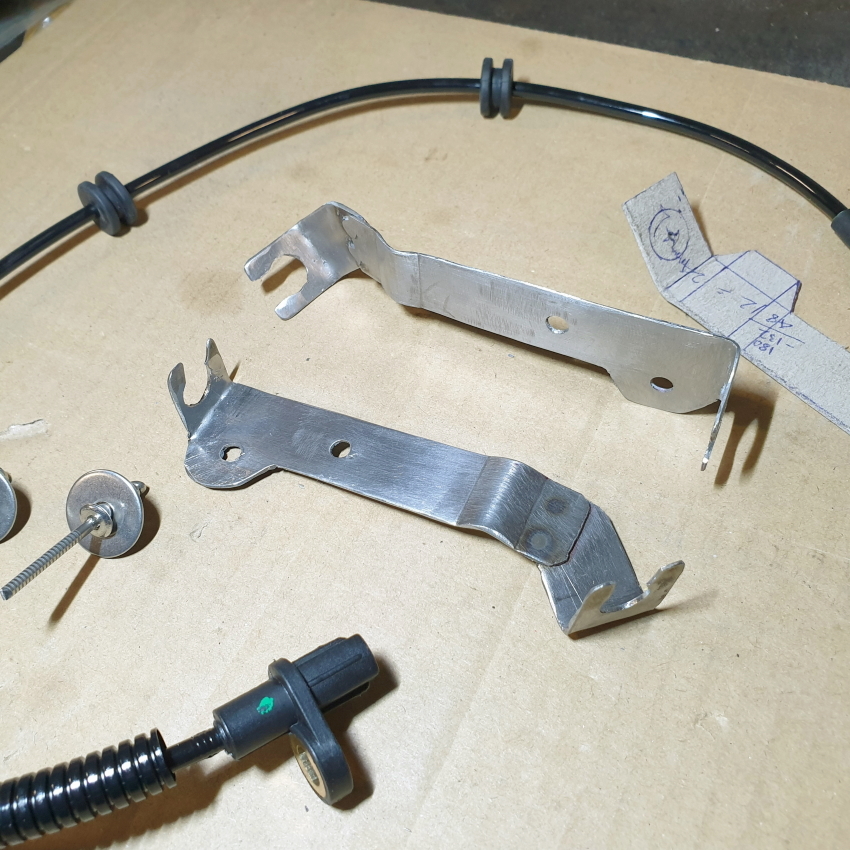
I fabricated a pair of brackets from to mount the sensor wires to the rear subframe; much like the brake lines the mounting is completely bespoke. The brackets are made from 1.5mm stainless and involved swaging, folding, and some welding.
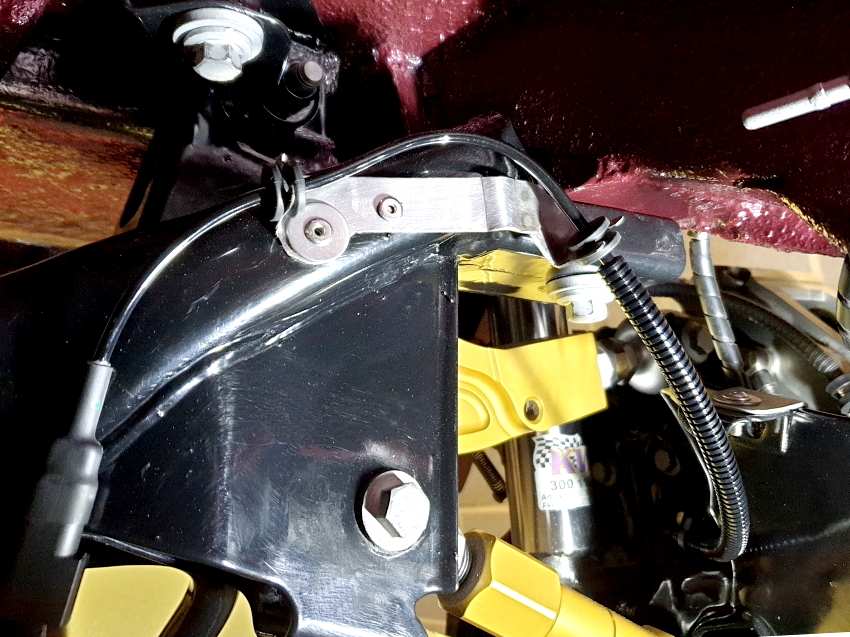
N/S/R in situ.
I'm using the Focus Mk1 rear ABS sensors to suit a disc brake equipped car - Ford part 1088606.
I fabricated a pair of brackets from to mount the sensor wires to the rear subframe; much like the brake lines the mounting is completely bespoke. The brackets are made from 1.5mm stainless and involved swaging, folding, and some welding.
N/S/R in situ.
Edited by mwstewart on Tuesday 25th October 10:18
Hereward said:
How do you prevent the threads becoming "clogged" with the hardened zinc primer? Just a very light coating? Cheers.
Essentially, yes - just a dust coat on the threads, but even so I find zinc primer less likely to clog than regular primer, and the zinc acts as a lubricant for mechanical fastenings too.Evap System: Charcoal Canister
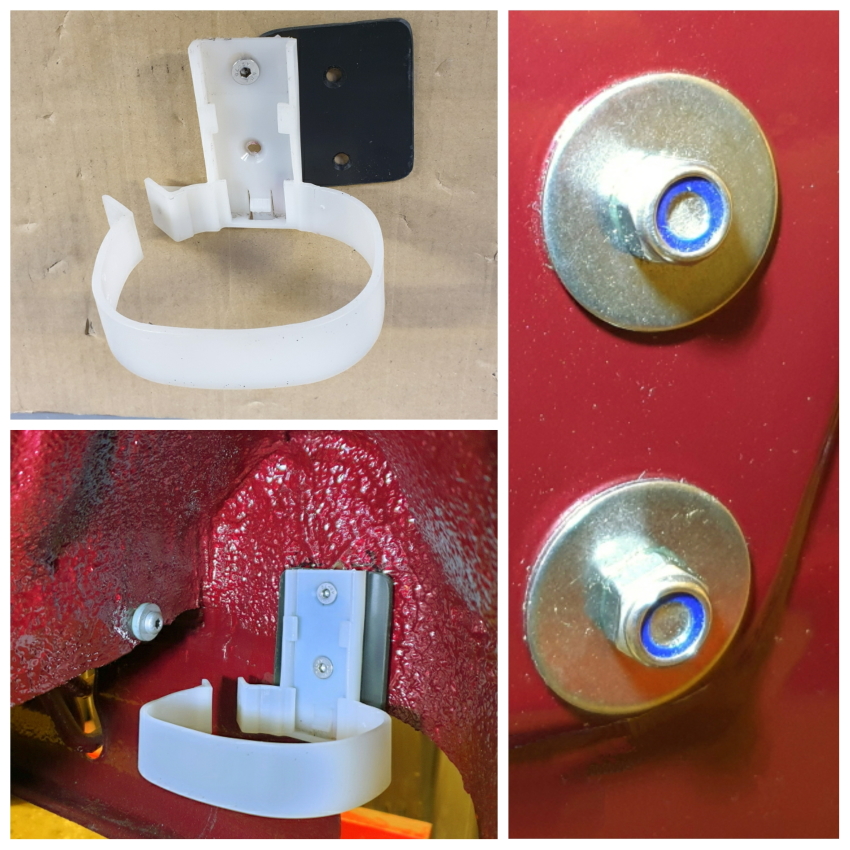
The Mk3 was launched with carburated engines and without evaporative emissions control. EFi, catalyst, and evap came along in 1992, with the charcoal canister mounted in front of the O/S front wheel. I need to liberate that space for an A/C dryer so I decided to relocate the canister to somewhere at the rear of the car. I found a lighter and more compact canister fitted to the fuel tank of a Mk7 Fiesta - Ford part AY11-9D653-AB.
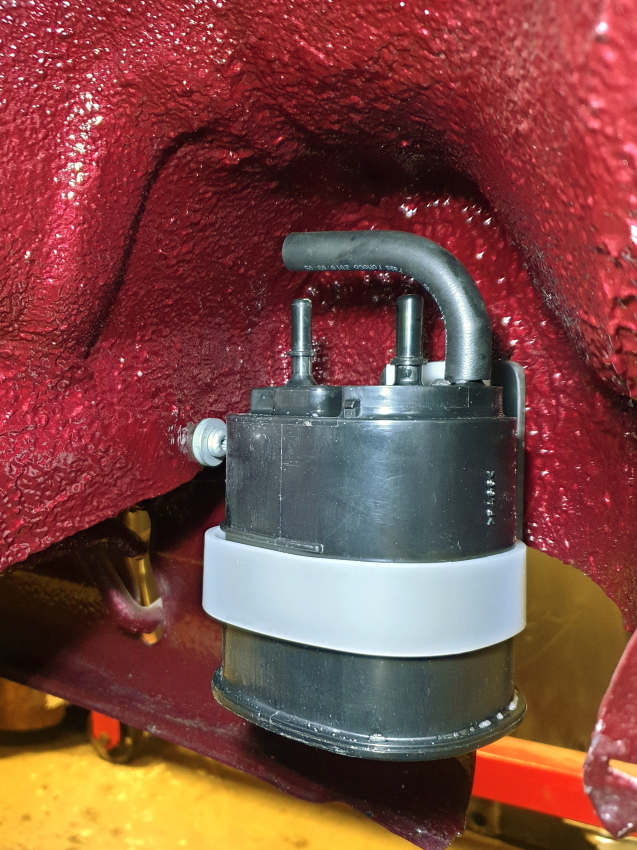
Its white securing bracket was plastic welded to the side of the fuel tank, so I cut that off, ground off the mounting tabs, and made a black plastic backing plate to stiffen it for mounting to my chosen location in the rear of the N/S/R wheelarch. Stainless fastenings were used and the outer nuts & washers are hidden behind the rear bumper.
I've modified the arches to accept some fabric Mk5 Fiesta liners, and the N/S/R liner will now require modification to clear the canister.
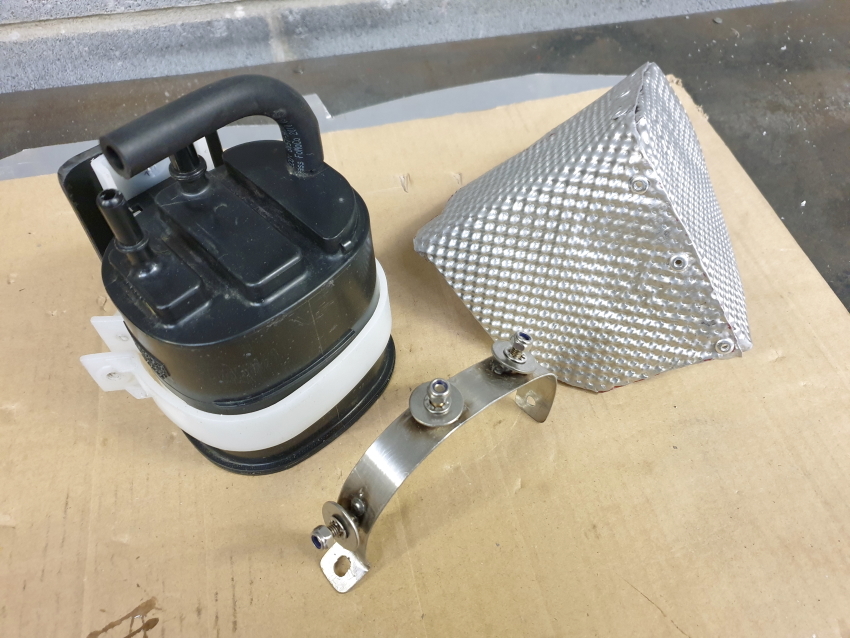
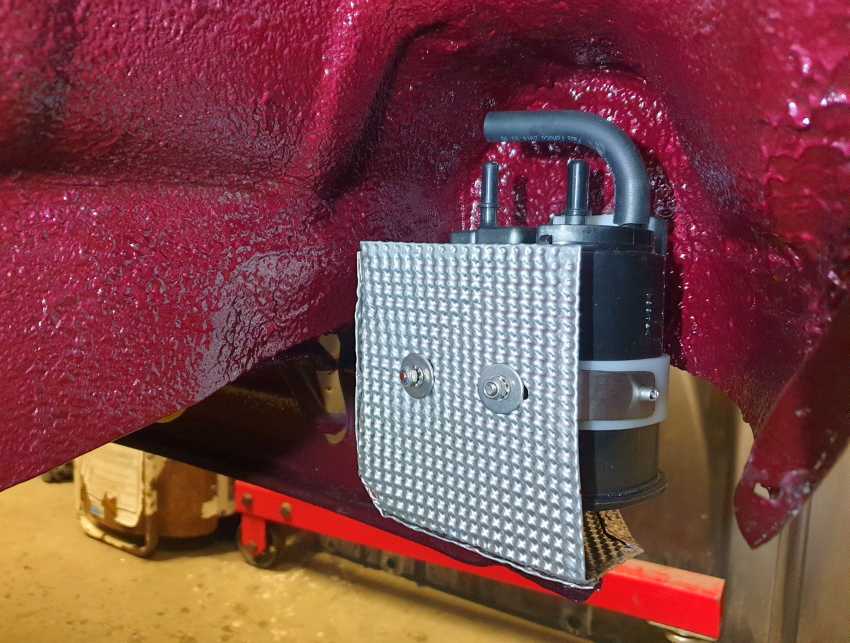
Being in proximity to the rear silencer location I thought it prudent to add a heat shield. I fabricated a stainless bracket and cut up what was left of the Mercedes CLA heat shield that I used as a prototype for the rear silencer shield. The canister shield was an odd shape owing to various angles in play around the wheearch.
Completed.
ABS: Rear Loom
I made the rear ABS loom and finished in black corrugated conduit. I had an original period correct Focus rear ABS loom decal lying around so I added that for an OEM look.
Rather than drill the subframe to secure the loom I used epoxy to bond on some Thomas & Betts cable tie mounts. They are very light, and very neat - no surprise that they are used in F1. I sprayed them black to match the subframe.

PAS System: Pump
I had planned to use an EHPAS system in the car and already had a new TRW pump for the theMk2 Focus. I'm not 100% focused on weight with this car - the aim is a GT hatchback - but I am quite interested in weight distribution, so the benefit of an electric pump in this case is to move weight that is otherwise mounted at the very front and top of the engine to somewhere behind - or close to - the front wheels.
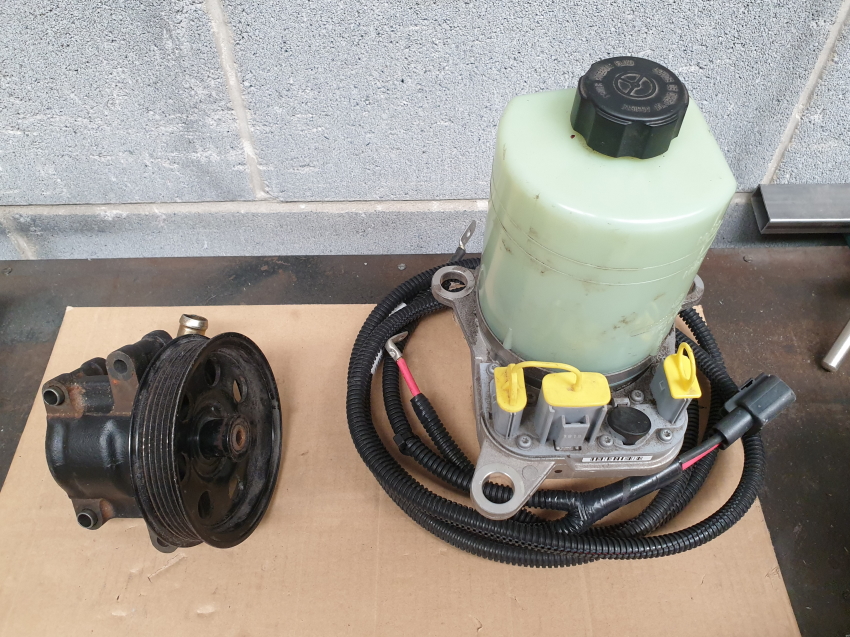
Whilst browsing one day a newer type alloy HPAS pump caught my eye - Ford part 1470514 - and, after some visual inspection I noticed that the mounting pattern was the same as the Mk1 Focus. I bought one to research further and results are as follows:
EPAS pump inc. additional fluid capacity: 5248g
Mk1 Focus pump: 3137g
Alloy pump: 2119g
Given the bulk of the EHPAS pump and the added wiring implications it just didn't seem worth it, so I shall proceed using the alloy pump.
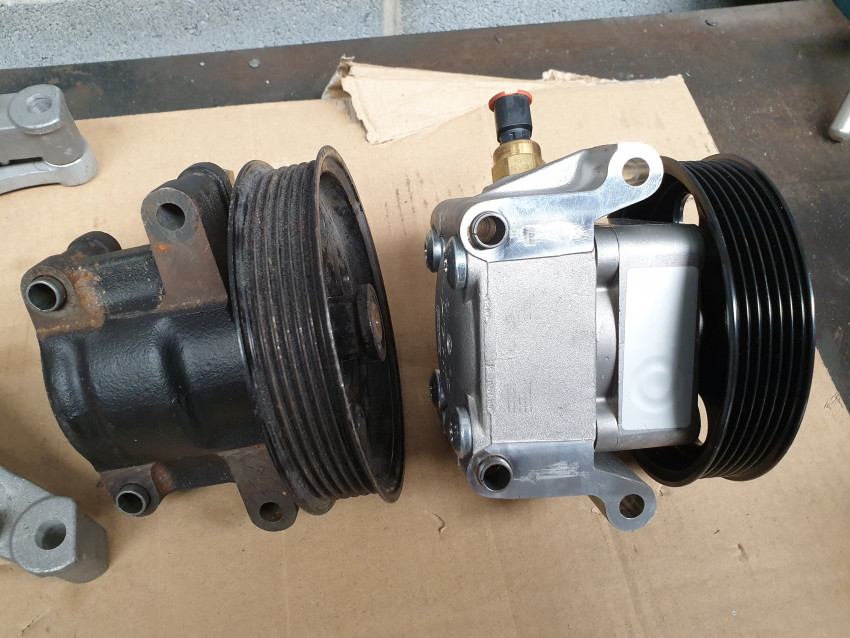
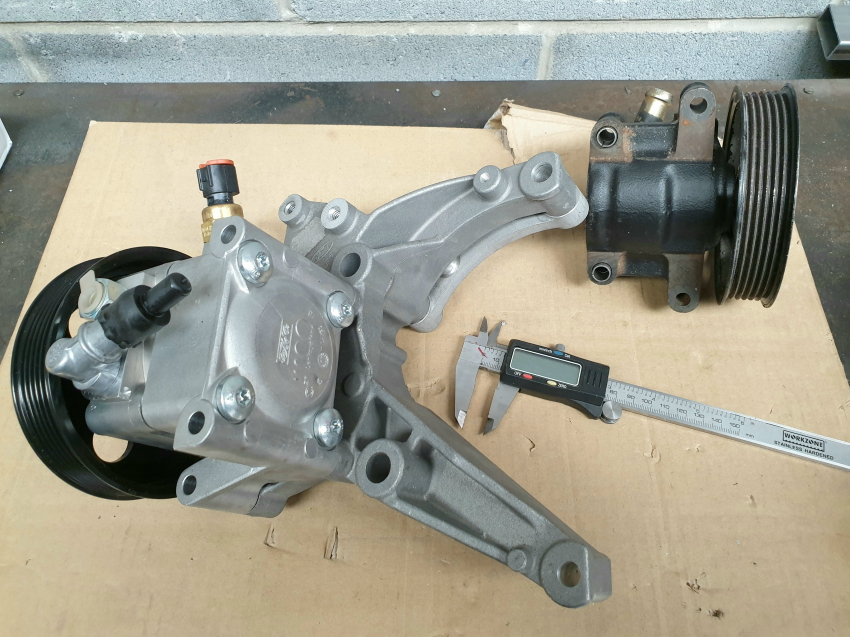
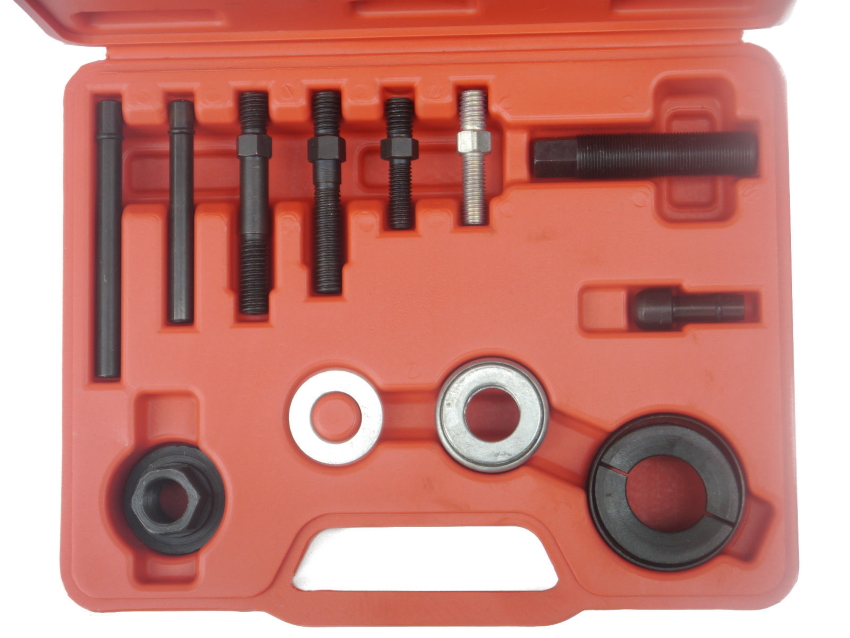
I compared the pulleys and the new pump is 11% smaller. I'm going to try it out and if required I can swap to the Mk1 Focus pulley using one of the cheap (£13) pulley extractor kits available on eBay:
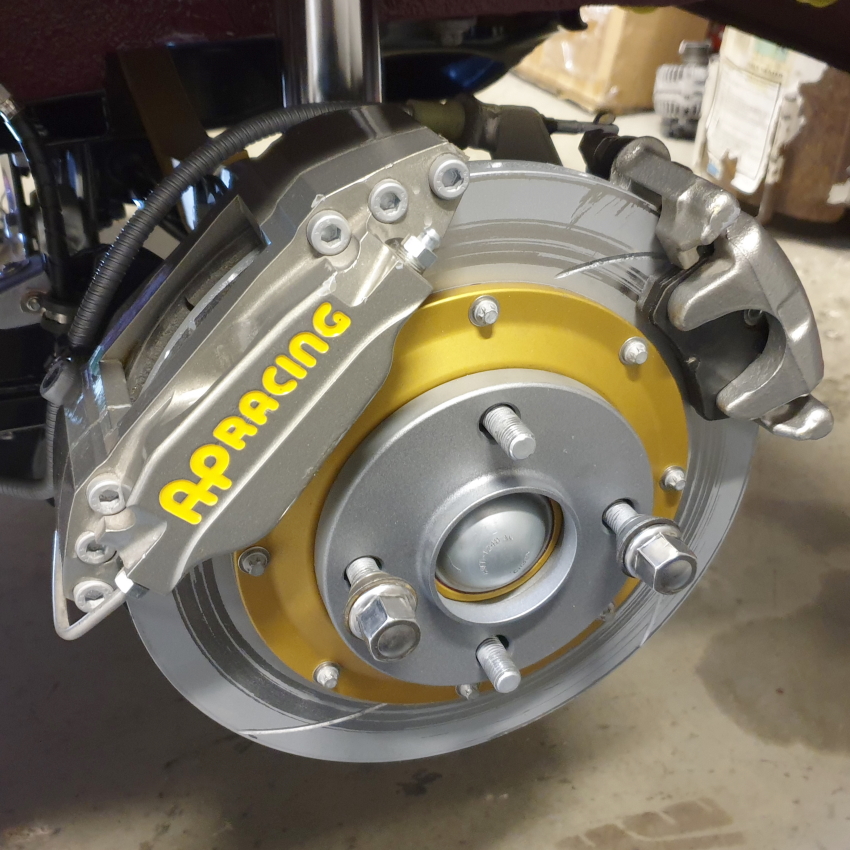
Brakes: O/S/R Disc and Handbrake Adjustment
I hadn't built up the O/S/R disc so I've now done that. I painted the disc in zinc to prevent rust around the edges.
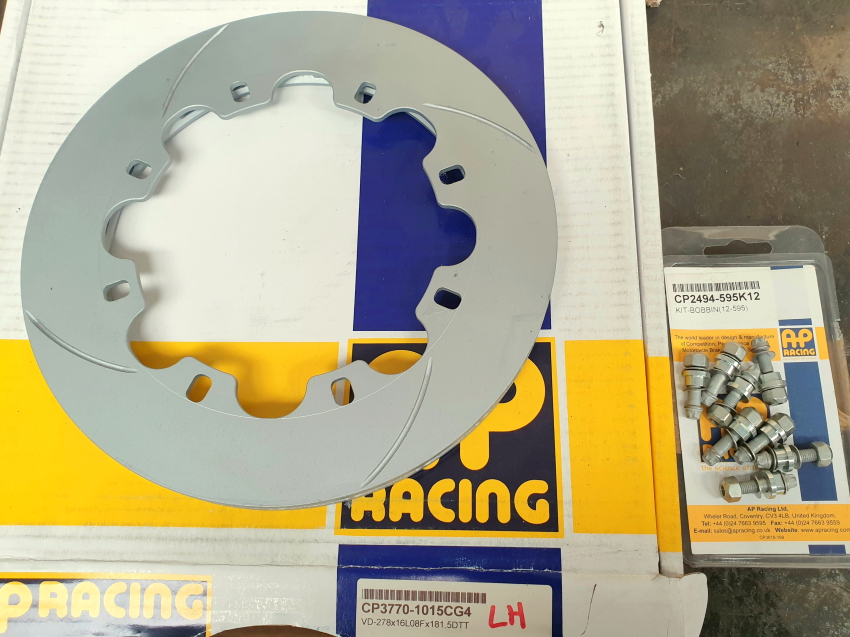
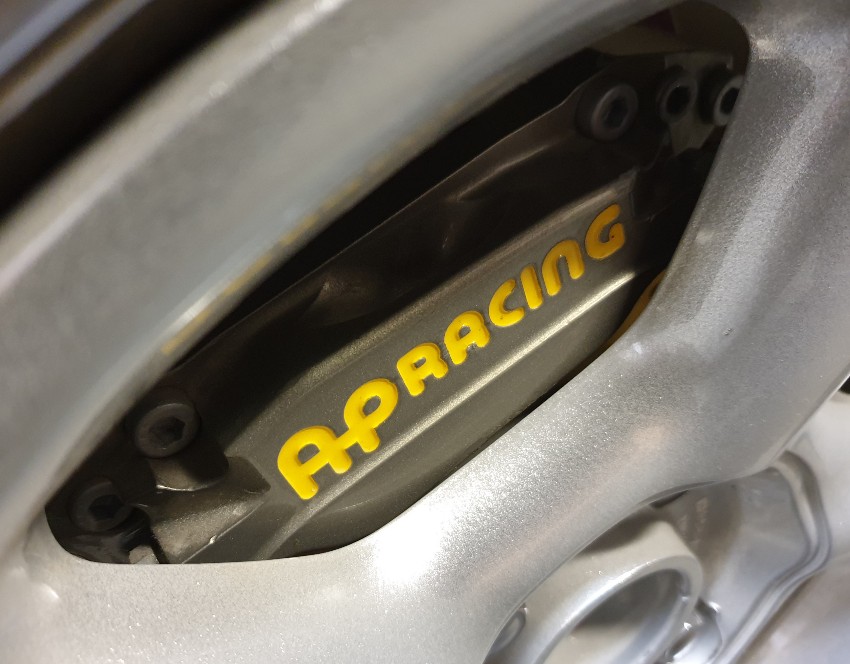
Bobbin fastening torque is 14Nm (10.5lb/ft). I've had course to use AP customer service a few times now and they are always very helpful.
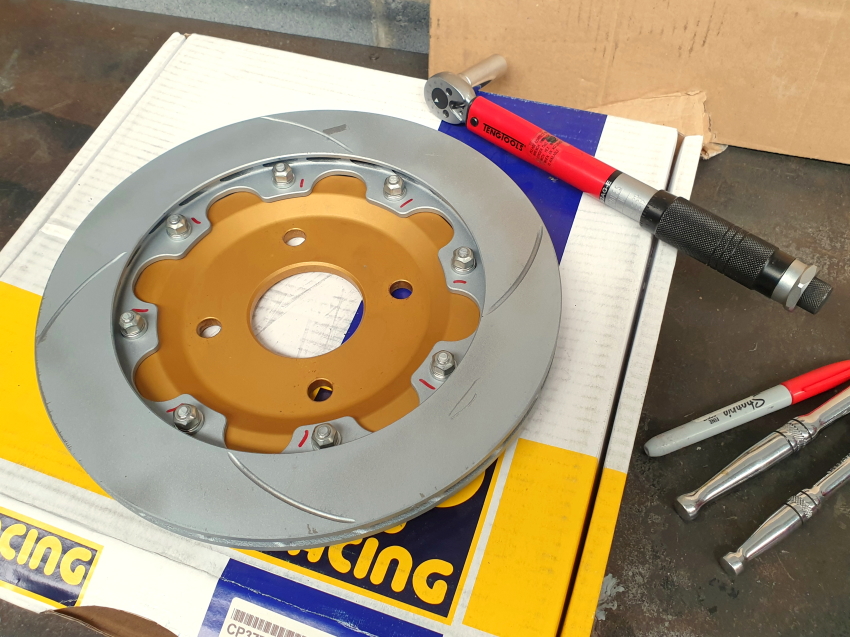
After mounting & torqueing a wheel to check all clearances I have noted that the handbrake caliper is not sitting perfectly central over the disc, so I've removed both brackets to have the caliper mounting bushes milled down by 2mm.
The Mk3 was launched with carburated engines and without evaporative emissions control. EFi, catalyst, and evap came along in 1992, with the charcoal canister mounted in front of the O/S front wheel. I need to liberate that space for an A/C dryer so I decided to relocate the canister to somewhere at the rear of the car. I found a lighter and more compact canister fitted to the fuel tank of a Mk7 Fiesta - Ford part AY11-9D653-AB.
Its white securing bracket was plastic welded to the side of the fuel tank, so I cut that off, ground off the mounting tabs, and made a black plastic backing plate to stiffen it for mounting to my chosen location in the rear of the N/S/R wheelarch. Stainless fastenings were used and the outer nuts & washers are hidden behind the rear bumper.
I've modified the arches to accept some fabric Mk5 Fiesta liners, and the N/S/R liner will now require modification to clear the canister.
Being in proximity to the rear silencer location I thought it prudent to add a heat shield. I fabricated a stainless bracket and cut up what was left of the Mercedes CLA heat shield that I used as a prototype for the rear silencer shield. The canister shield was an odd shape owing to various angles in play around the wheearch.
Completed.
ABS: Rear Loom
I made the rear ABS loom and finished in black corrugated conduit. I had an original period correct Focus rear ABS loom decal lying around so I added that for an OEM look.
Rather than drill the subframe to secure the loom I used epoxy to bond on some Thomas & Betts cable tie mounts. They are very light, and very neat - no surprise that they are used in F1. I sprayed them black to match the subframe.
PAS System: Pump
I had planned to use an EHPAS system in the car and already had a new TRW pump for the theMk2 Focus. I'm not 100% focused on weight with this car - the aim is a GT hatchback - but I am quite interested in weight distribution, so the benefit of an electric pump in this case is to move weight that is otherwise mounted at the very front and top of the engine to somewhere behind - or close to - the front wheels.
Whilst browsing one day a newer type alloy HPAS pump caught my eye - Ford part 1470514 - and, after some visual inspection I noticed that the mounting pattern was the same as the Mk1 Focus. I bought one to research further and results are as follows:
EPAS pump inc. additional fluid capacity: 5248g
Mk1 Focus pump: 3137g
Alloy pump: 2119g
Given the bulk of the EHPAS pump and the added wiring implications it just didn't seem worth it, so I shall proceed using the alloy pump.
I compared the pulleys and the new pump is 11% smaller. I'm going to try it out and if required I can swap to the Mk1 Focus pulley using one of the cheap (£13) pulley extractor kits available on eBay:
Brakes: O/S/R Disc and Handbrake Adjustment
I hadn't built up the O/S/R disc so I've now done that. I painted the disc in zinc to prevent rust around the edges.
Bobbin fastening torque is 14Nm (10.5lb/ft). I've had course to use AP customer service a few times now and they are always very helpful.
After mounting & torqueing a wheel to check all clearances I have noted that the handbrake caliper is not sitting perfectly central over the disc, so I've removed both brackets to have the caliper mounting bushes milled down by 2mm.

mwstewart said:
Thanks  How about a Mk5 rear beam and Mk1 Focus rear hubs & discs?
I need to keep it standard really, the only upgrade I would contemplate would probably be vented fronts but we shall see. I am tempted to fit a front anti-roll bar, cross-member and Mk5 beam though as it transformed my white one. How about a Mk5 rear beam and Mk1 Focus rear hubs & discs?Gassing Station | Readers' Cars | Top of Page | What's New | My Stuff