500+bhp Mk3 Fiesta Project
Discussion


Given how many extra bits you've bought (eg how little of the original car is left apart from the shell), would it have been any more expensive to start with an old E-type, 240Z, E30 M3, MkII Escort etc in the first place? I know Mk3 Fiestas are your "thing" and I'm not trying to knock that, but I guess that the cost of the base car is about 5% of the project budget!
aww999 said:
Given how many extra bits you've bought (eg how little of the original car is left apart from the shell), would it have been any more expensive to start with an old E-type, 240Z, E30 M3, MkII Escort etc in the first place? I know Mk3 Fiestas are your "thing" and I'm not trying to knock that, but I guess that the cost of the base car is about 5% of the project budget!
I just did a quick calculation, and the base car is 1.35% of the project cost to date 
Financially this project makes no sense, the whole thing is probably British eccentricity at its best, but I simply can't put a price on the amount of satisfaction it's giving me to build and undoubtedly will do to drive. I think I take more pleasure from transforming/improving/integrating, so starting with a Fiesta gives more scope than say an E-Type or E30, both of which I'd feel inclined to keep standard. The project isn't completely senseless however as I know there is great potential in there despite the models humble beginnings.
Ultimately I hope the car will be be a breath of fresh air, and almost a novelty compared to my daily cars. Whenever I finish it that is

mwstewart said:
I just did a quick calculation, and the base car is 1.35% of the project cost to date
Financially this project makes no sense, the whole thing is probably British eccentricity at its best, but I simply can't put a price on the amount of satisfaction it's giving me to build and undoubtedly will do to drive. I think I take more pleasure from transforming/improving/integrating, so starting with a Fiesta gives more scope than say an E-Type or E30, both of which I'd feel inclined to keep standard. The project isn't completely senseless however as I know there is great potential in there despite the models humble beginnings.
Ultimately I hope the car will be be a breath of fresh air, and almost a novelty compared to my daily cars. Whenever I finish it that is
With each update I love this project more & more Financially this project makes no sense, the whole thing is probably British eccentricity at its best, but I simply can't put a price on the amount of satisfaction it's giving me to build and undoubtedly will do to drive. I think I take more pleasure from transforming/improving/integrating, so starting with a Fiesta gives more scope than say an E-Type or E30, both of which I'd feel inclined to keep standard. The project isn't completely senseless however as I know there is great potential in there despite the models humble beginnings.
Ultimately I hope the car will be be a breath of fresh air, and almost a novelty compared to my daily cars. Whenever I finish it that is


 t compared to this. I look forward to the next update.
Thanks chaps. This will no longer be passed on to my girlfriend
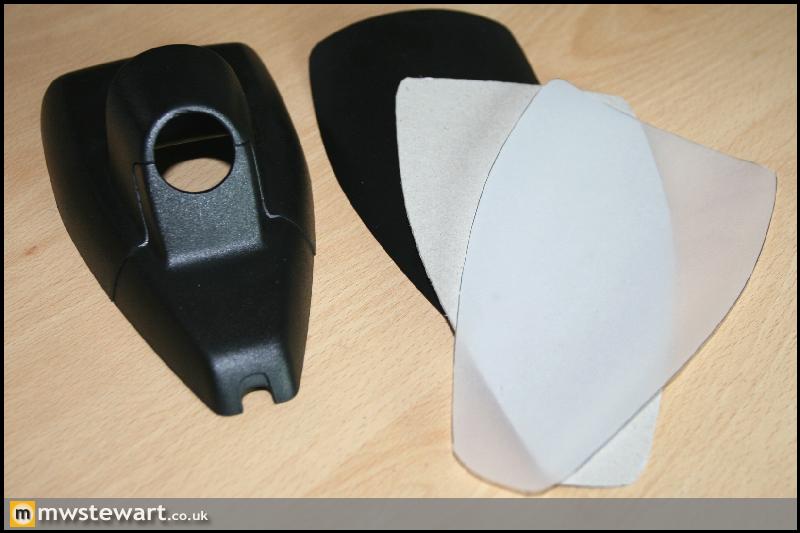
The sheet of Alcantara I ordered from Aldridge has arrived, so today I set about trimming the front interior light bezel. I used some heavy duty fabric adhesive adhesive from Dunelm and some Loctite 401 to secure the edges. It was a bit of a fiddly job to ensure there weren't any creases around the corners, but I achieved an acceptable result in time.
It's now obvious why I left a flat face at the front of the light: I've mounted the A4's 3rd sun visor.
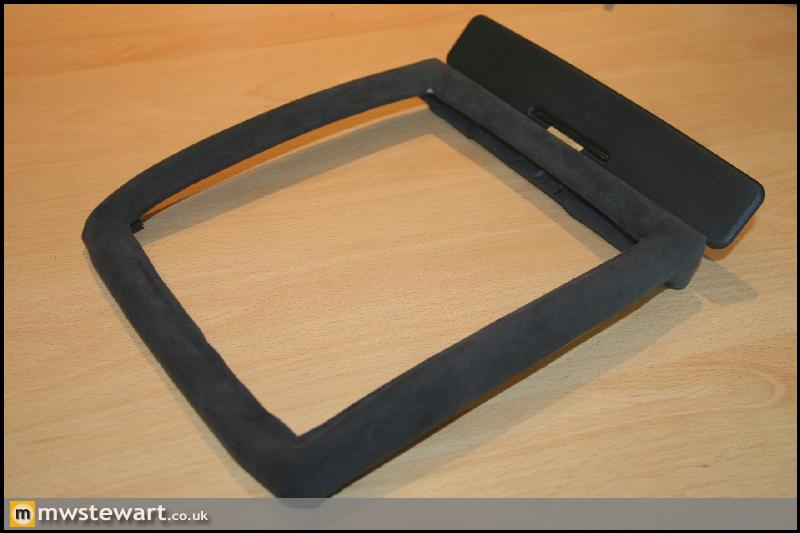
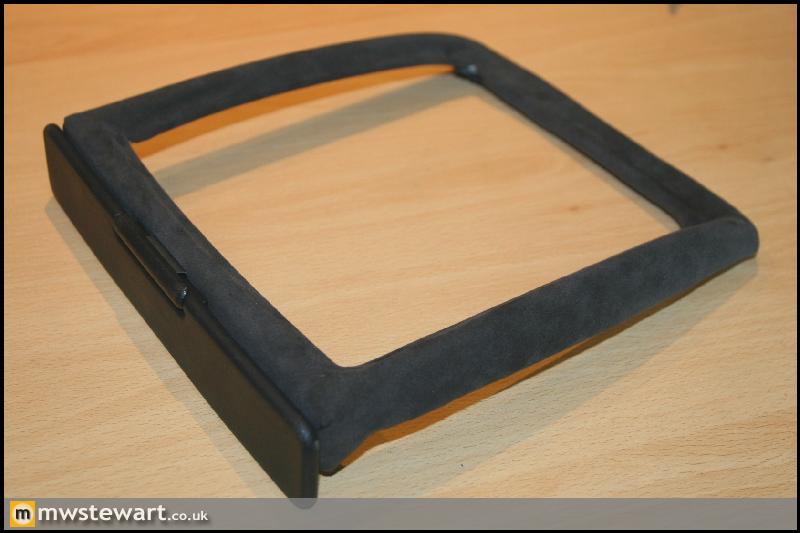
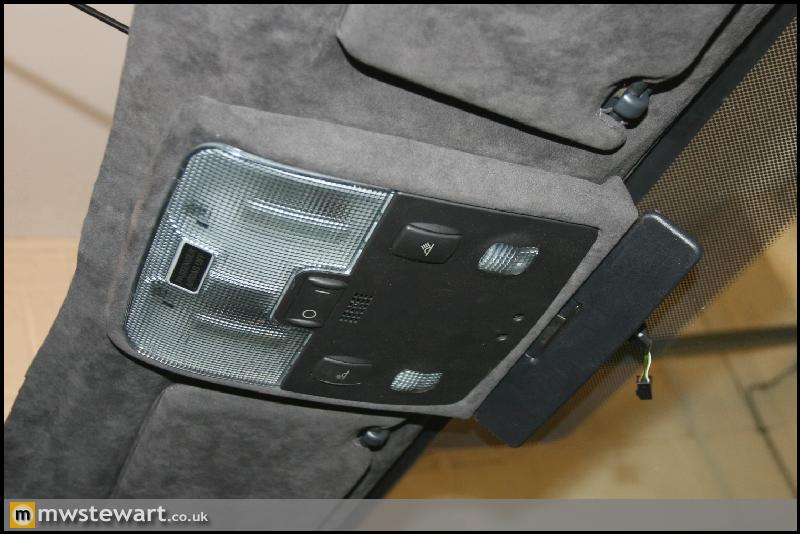
The light unit fits snugly.
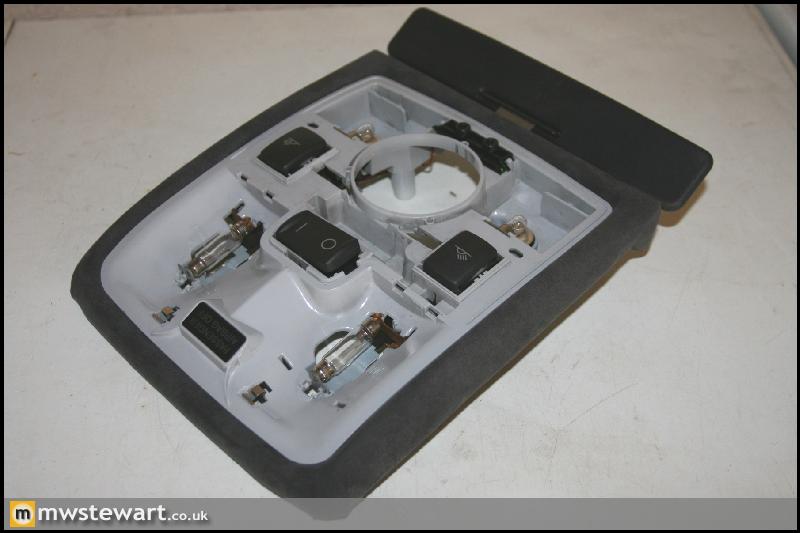
I'm really pleased with the result, it's definitely been one of the more satisfying jobs so far.

The sheet of Alcantara I ordered from Aldridge has arrived, so today I set about trimming the front interior light bezel. I used some heavy duty fabric adhesive adhesive from Dunelm and some Loctite 401 to secure the edges. It was a bit of a fiddly job to ensure there weren't any creases around the corners, but I achieved an acceptable result in time.
It's now obvious why I left a flat face at the front of the light: I've mounted the A4's 3rd sun visor.
The light unit fits snugly.
I'm really pleased with the result, it's definitely been one of the more satisfying jobs so far.
This really is a stunning project, attention to detail is way above what I have the time and money for!
Just a note about the Alcantara, I'm not sure how you have got in with the gluing aspect of it, but try to avoid gluing to vinyl/very bendy plastic without some sort of barrier layer on the vinyl. I had my dash Alcantara lined and was fine for a month or two, then bits started to sag. Apparently called 'plasticiser migration' and what keeps the vinyl/plastic bendy seeps into the glue making it wet again. Seems hot/cold cycles in the cabin accelerated this process.
I'm having mine redone FOC soon, but I thought it's a hassle you might well want to do without.
Keep up thegood work, it's just up my street this, old car with completely updated internals. Best of both worlds!


Ug_lee - Thank you. That's really interesting, I guess that's the compound that comes to the surface of some plastic trim when it gets really hot. I think I should be OK as the only place that would have bitten me was the softer vinyl type sun visors, but Aldridge made covers for those rather than gluing them on. Good luck with the retrim.
95 fiesta si - Cheers. Yours looks clean, I bet you got noticed in that.
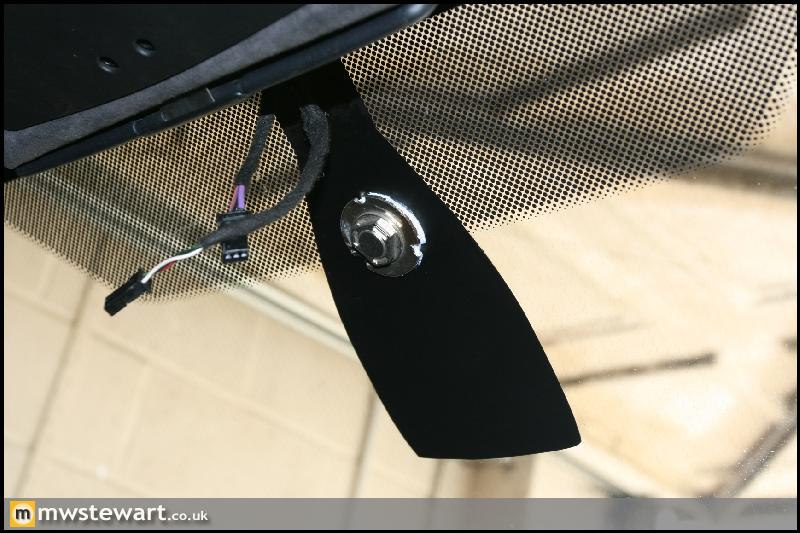
Time to fit the rear view mirror. The Mondeo mirror base surround has a large footprint in order to hide the rain/light sensor, my Fiesta obviously pre-dates any of that technology so lacks the corresponding area of black ceramic coating: it just has a small rectangle to hide a small self adhesive pad. I've mimicked the Mondeo windscreen by making a template from sign writers vinyl, which has strong adhesive and should be UV resistant for the life of the screen. I also made a card template to help accurately locate the mirror mounting button.
Vinyl applied and mirror button bonded on. The button is actually from an E46, but is the same as the Ford item which I didn't have.
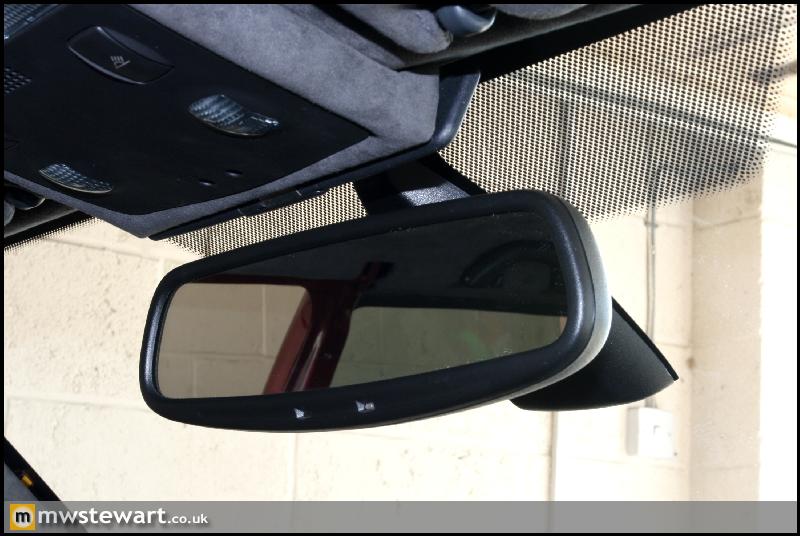
Mirror mounted.
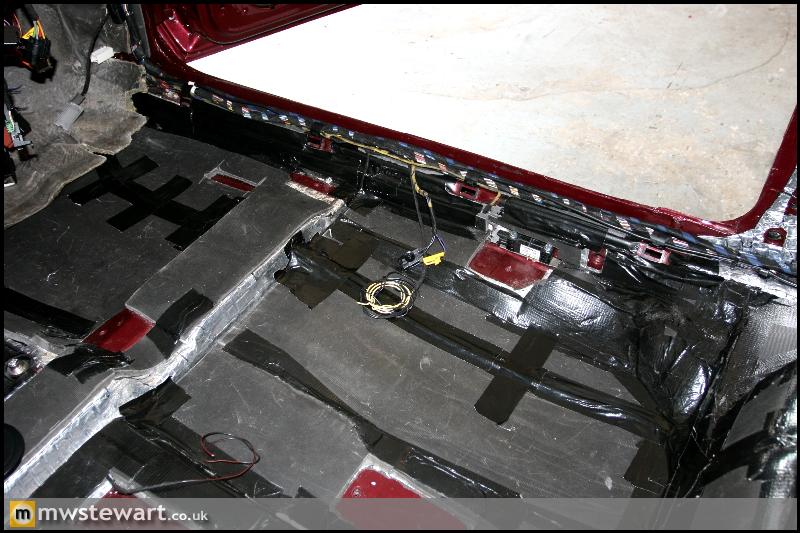
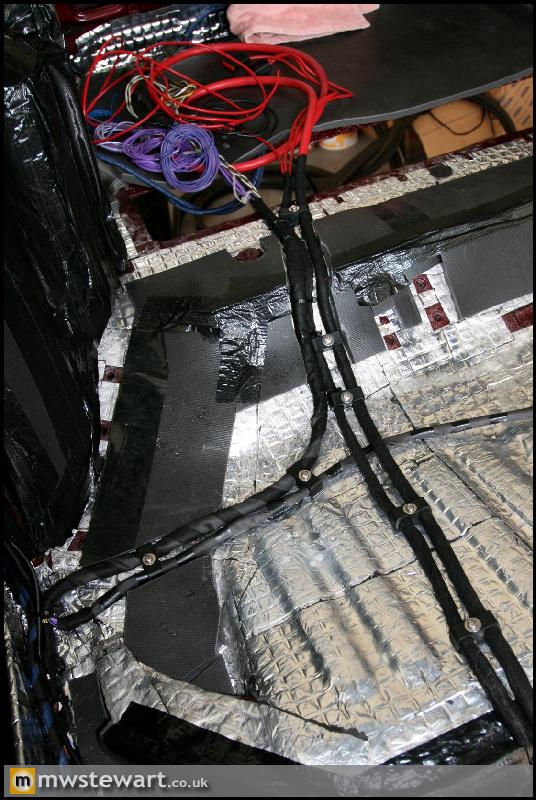
Next I turned to the wiring in preparation for fitting the carpet. It soon became obvious that the new power calbes would not fit in the standard cable management along the sills, so I re-routed them along the floor pan. I cut a channel in the new sound deadening so they sat flush.
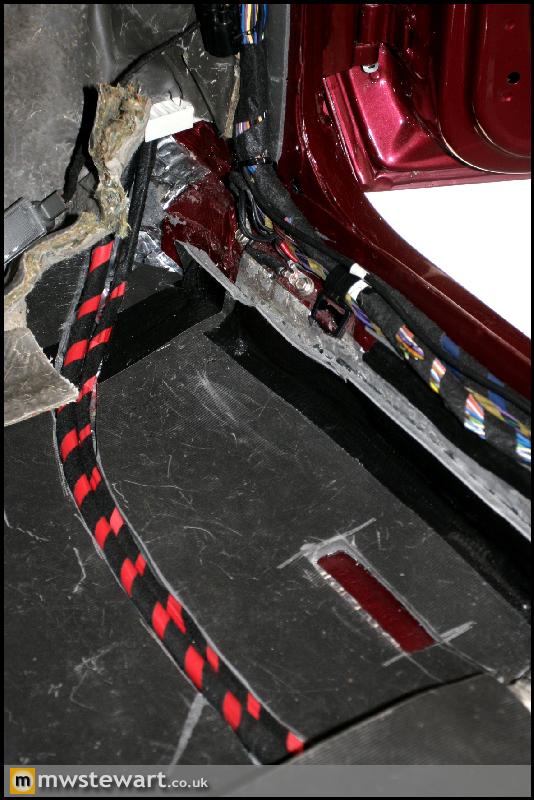
I re-taped the rest of the loom in fleece tape and fitted new cable clips everywhere.
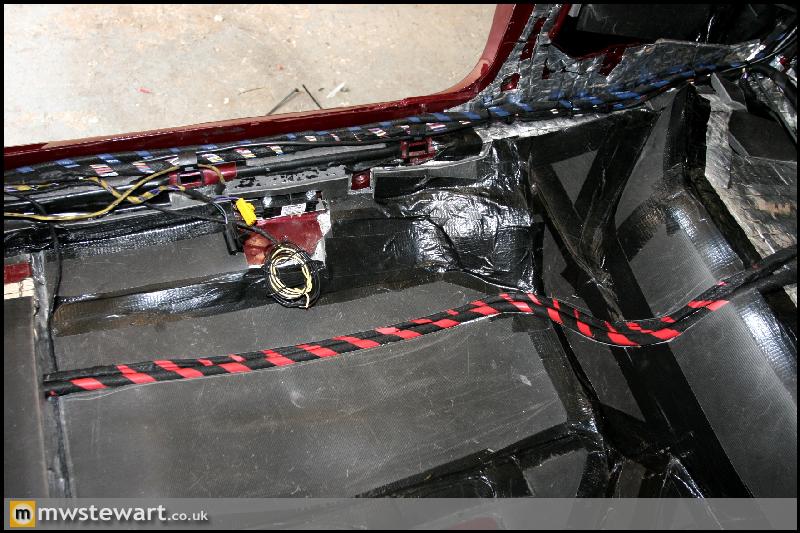
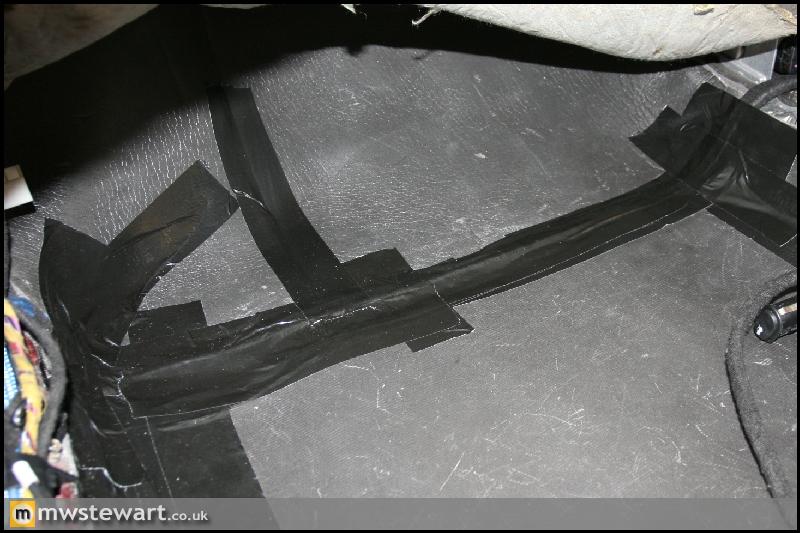
The Audison Sonus RCA cables run along the left hand sill and across the passenger foot well, and up the centre of the dashboard.
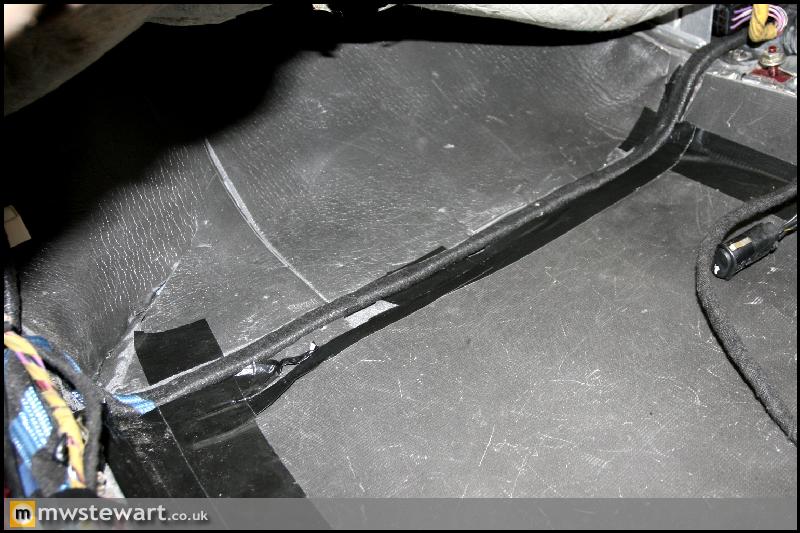
I covered the new floor pan cable runs with Duct Tape.
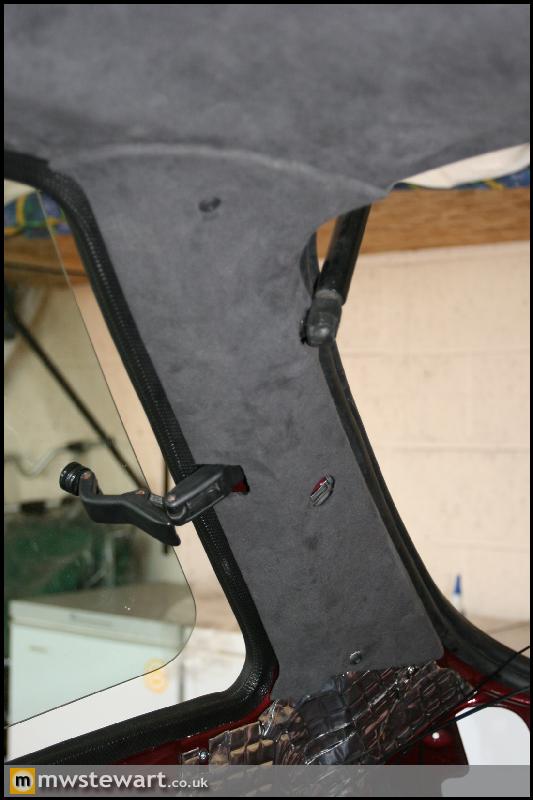
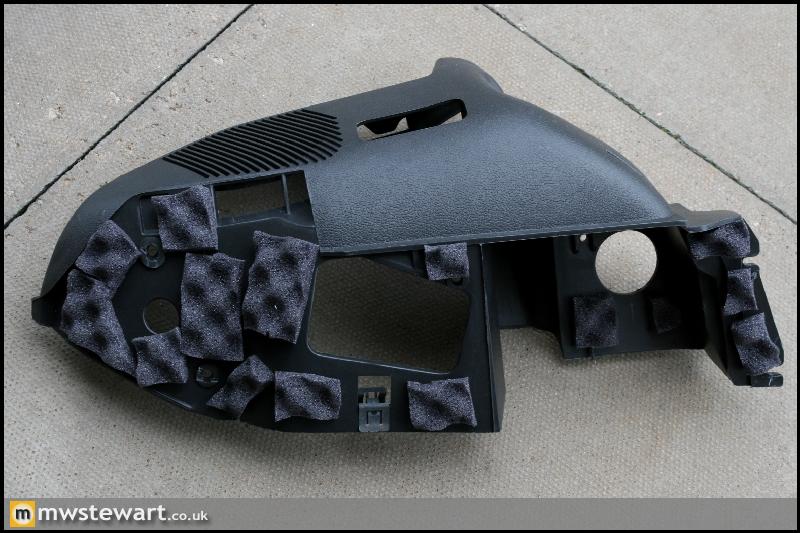
Again Sound Absorber 15 pads were added to the rear of new trim, this time the C Pillar trims.
C Pillar trims fitted.
95 fiesta si - Cheers. Yours looks clean, I bet you got noticed in that
.Time to fit the rear view mirror. The Mondeo mirror base surround has a large footprint in order to hide the rain/light sensor, my Fiesta obviously pre-dates any of that technology so lacks the corresponding area of black ceramic coating: it just has a small rectangle to hide a small self adhesive pad. I've mimicked the Mondeo windscreen by making a template from sign writers vinyl, which has strong adhesive and should be UV resistant for the life of the screen. I also made a card template to help accurately locate the mirror mounting button.
Vinyl applied and mirror button bonded on. The button is actually from an E46, but is the same as the Ford item which I didn't have.
Mirror mounted.
Next I turned to the wiring in preparation for fitting the carpet. It soon became obvious that the new power calbes would not fit in the standard cable management along the sills, so I re-routed them along the floor pan. I cut a channel in the new sound deadening so they sat flush.
I re-taped the rest of the loom in fleece tape and fitted new cable clips everywhere.
The Audison Sonus RCA cables run along the left hand sill and across the passenger foot well, and up the centre of the dashboard.
I covered the new floor pan cable runs with Duct Tape.
Again Sound Absorber 15 pads were added to the rear of new trim, this time the C Pillar trims.
C Pillar trims fitted.
BigTom85 said:
So the interior is nearly there, suspension and brakes won't take long...
When's the engine going in?
Rear suspension is next When's the engine going in?
I need to get some engine photos organised. Current status is that a CNC adapter plate is being machined for the WRC inlet manifold, and my engine builder is figuring out how to mount a dry sump pump and keep A/C - the two don't usually go together
The engine itself has been built since March, but I'm not really pushing for the engine because of the slow pace of the project, but it should be on the Dyno in August 
I have finished off the cable management under the rear seats, which ensures the new fuel pump and battery wiring is kept clear of any trim. I used 12mm cable clamps secured by stainless set screws into Stainless Rivnuts.
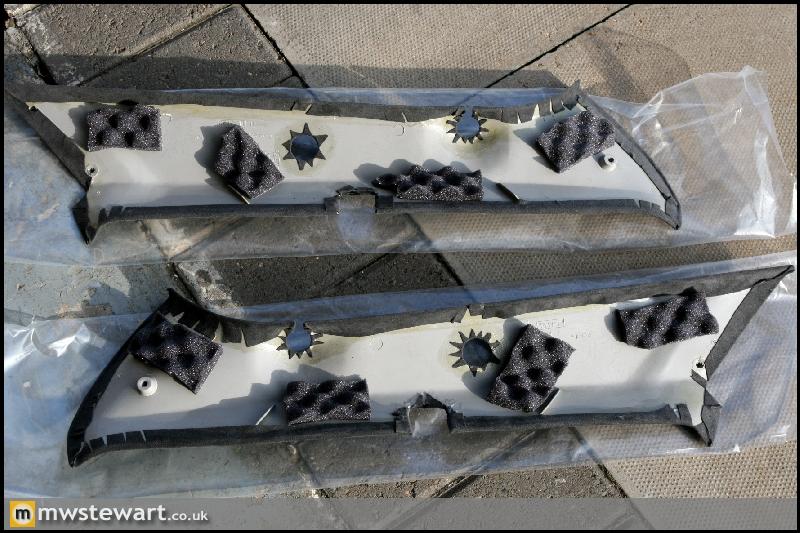
The parcel shelf support trims were fitted after Noise Isolator 15 pads were applied.
I found these Dashboard mounting bolt covers on the Ford parts system. I've not come across these on a UK car before so I assume that like the air conditioned glove box they were another part that suffered at the hands of bean counters during the models' life.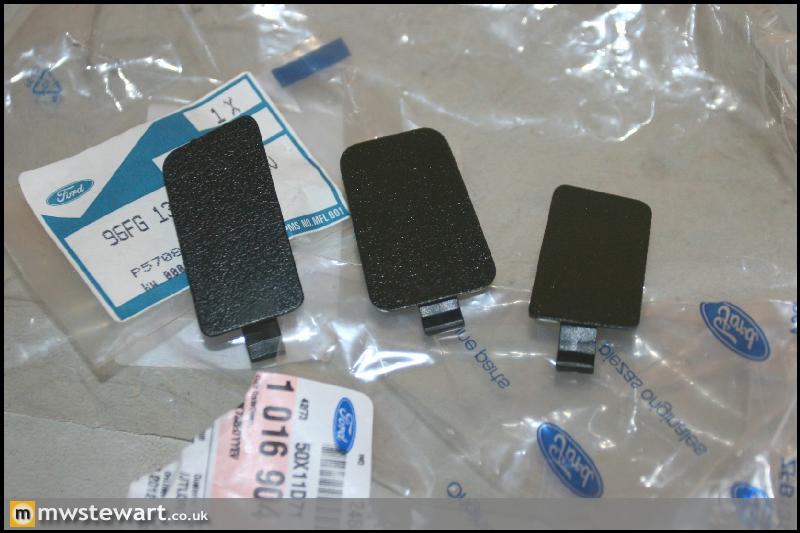
I found a set of seat belts from a very low mileage car, these were fully extended and shampooed before being fitted. I also stuck the original Ford sound deadening back on the rear quarters, though the difference it makes is probably negligible!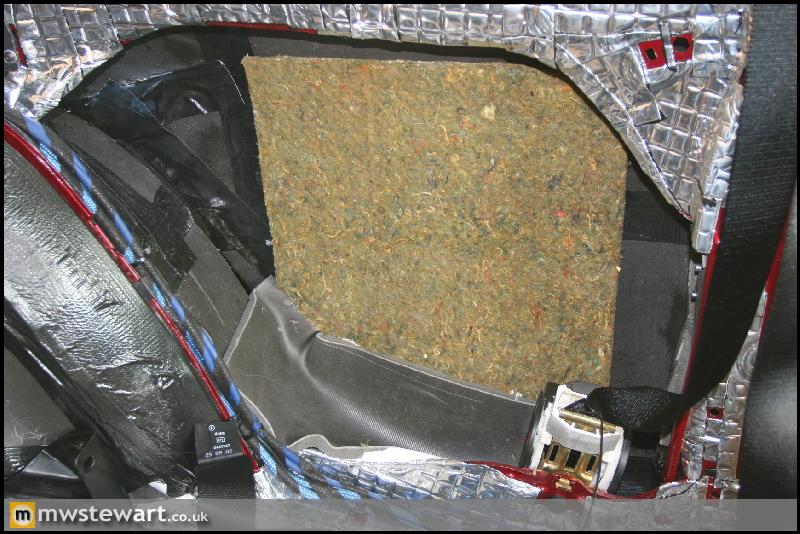
New Ford Underlay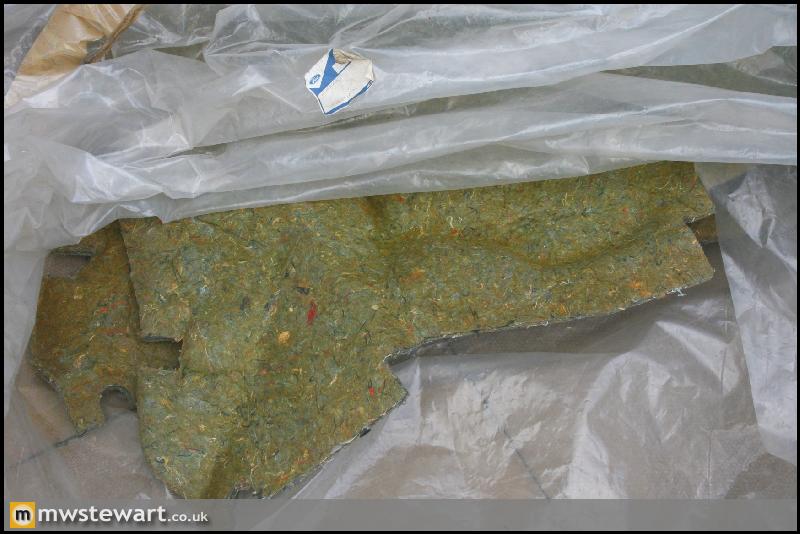

New Ford Carpet. I've gone for a dark charcoal colour as it's more in harmony with the Alcantara. I didn't want a matching grey as it would have been too much, and black was a bit severe against the grey.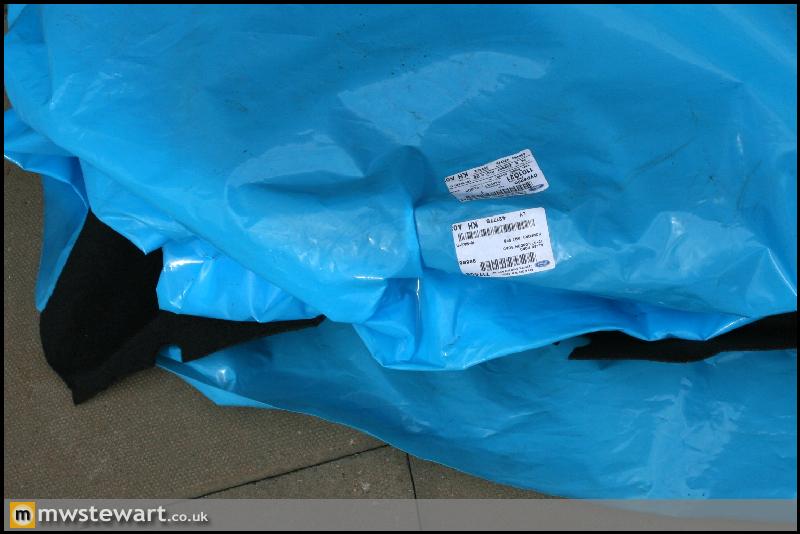

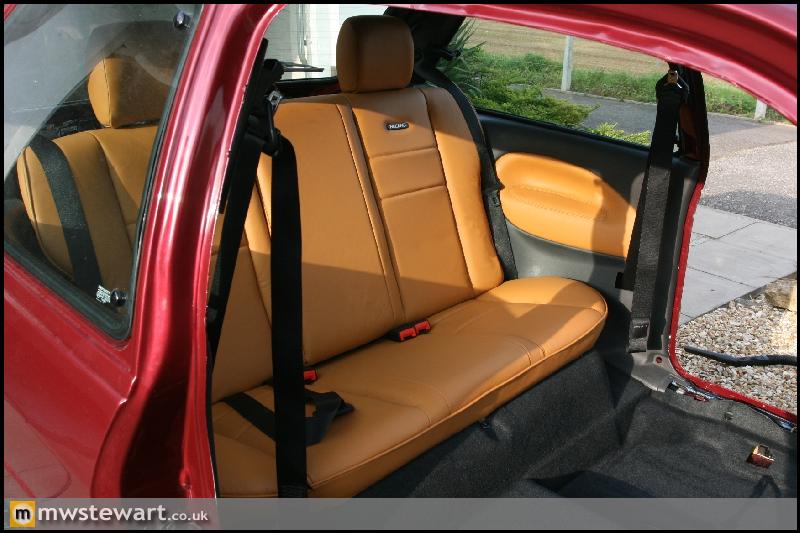
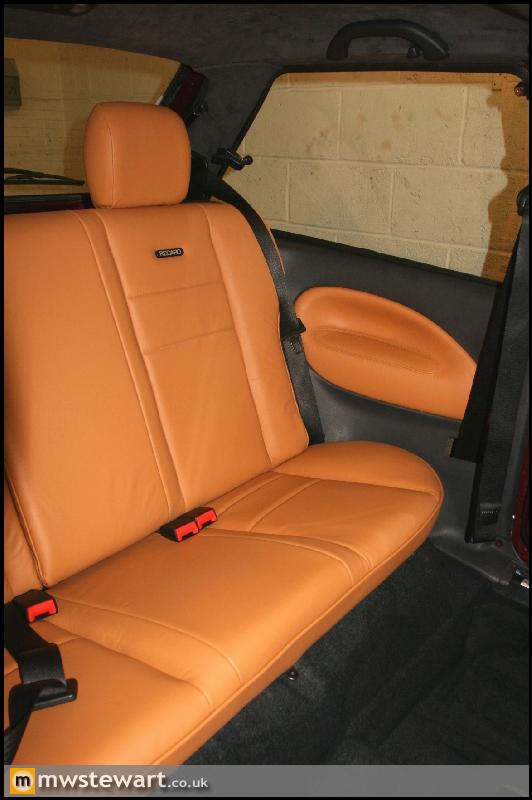
Rear Quarter Trims were fitted next, and again Noise Isolator 15 was applied to the rear. I also covered the edges in fleece tape to further prevent squeaks/rattles.

The rear seats in! I'm extremely pleased with the colour scheme as it's exactly what I wanted to achieve. The only thing I'd change would be to add rear seat heating, but given the seat covers are removable and the battery is in the boot it will be easy enough to achieve later on.
The parcel shelf support trims were fitted after Noise Isolator 15 pads were applied.
I found these Dashboard mounting bolt covers on the Ford parts system. I've not come across these on a UK car before so I assume that like the air conditioned glove box they were another part that suffered at the hands of bean counters during the models' life.
I found a set of seat belts from a very low mileage car, these were fully extended and shampooed before being fitted. I also stuck the original Ford sound deadening back on the rear quarters, though the difference it makes is probably negligible!
New Ford Underlay
New Ford Carpet. I've gone for a dark charcoal colour as it's more in harmony with the Alcantara. I didn't want a matching grey as it would have been too much, and black was a bit severe against the grey.
Rear Quarter Trims were fitted next, and again Noise Isolator 15 was applied to the rear. I also covered the edges in fleece tape to further prevent squeaks/rattles.
The rear seats in! I'm extremely pleased with the colour scheme as it's exactly what I wanted to achieve. The only thing I'd change would be to add rear seat heating, but given the seat covers are removable and the battery is in the boot it will be easy enough to achieve later on.
Gassing Station | Readers' Cars | Top of Page | What's New | My Stuff