Tuscan Mk2 S Refurb
Discussion


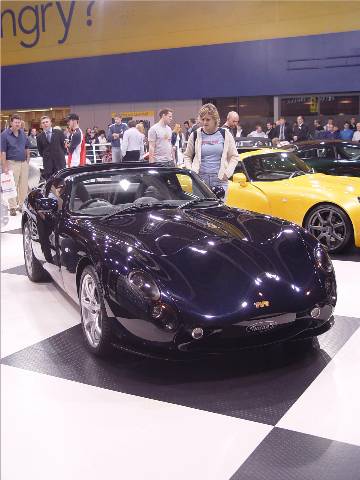
Hello all, I have a Mk2 Tuscan S, she was the factory development car working with Bilstein for suspension set up and was the British Motorshow car on the TVR stand. She has odds and sods from her factory life and was never fully finished to production car spec. Extra sensors, mounting brackets for equipment and holes in the body where cables ran through. Unfortunately I ran over what I think was a steel cable in the road and it whipped up and battered her rear end. Caused paintwork damage and smashed the offside rear light lens. Following this I made the decision to strip the car and finish what the factory started but to a higher standard. I am at the stage of reassembly, I have a terrible memory and always just crack on and forget to take progress photos, but I’ll show what I’ve got so far.
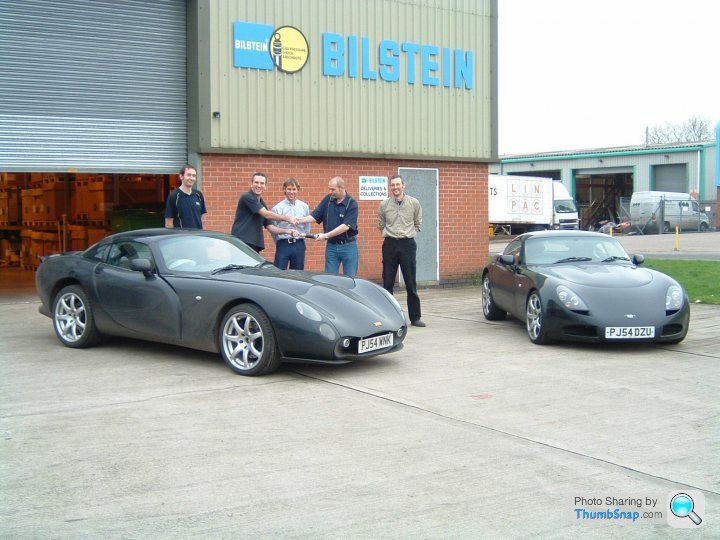
The car before the strip down on the show stand, with Bilstein and on a quick European jaunt at Reims.
[url]
 |https://thumbsnap.com/QVYvA2oZ[/url]
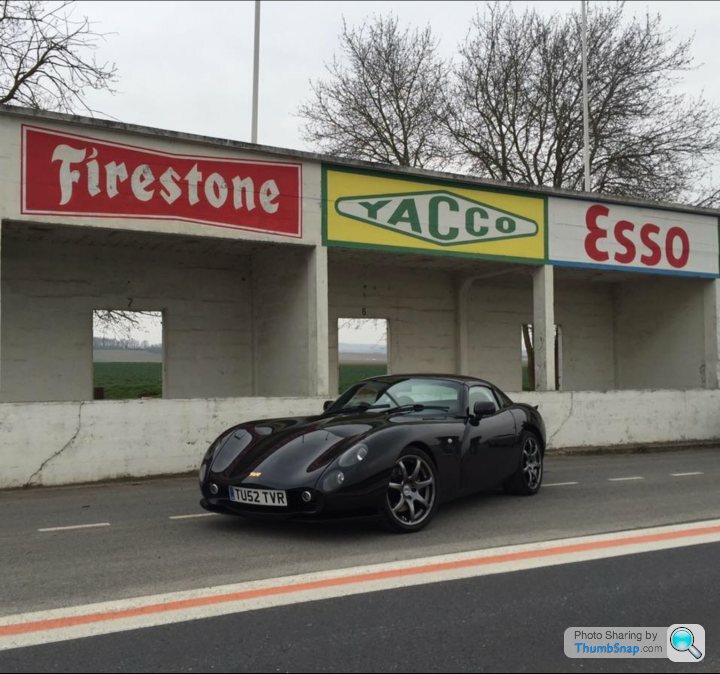
The car before the strip down on the show stand, with Bilstein and on a quick European jaunt at Reims.
[url]
|https://thumbsnap.com/QVYvA2oZ[/url]The strip down took around 50 hours, relatively simple getting the body to a stage where it could be lifted. I had two problem body bolts, one through the rear roll hoop and chassis, the nut removed easily but the bolt would not come out the housing. I had to dremel the head off and lift the body over it, hammering it out the chassis after much heat and penetrating oils. The second was behind the fuel tank, simply would not budge, snapped an easy out, cobalt drill bit until eventually resorted to the dremel, oddly once the head was off the threaded shank simply unwound. The usual Tuscan faff with the pedal box and the space around it, clutch feed line and one brake line had to be cut at the body manifold. The two bolts under the transmission tunnel I got bang on when pin pointing were to drill holes and these were barely hand tight.
It took 8 of us to lift body, little bit of wiggling to free it off the chassis, got caught on the near side top wishbone bolt and an abandoned attempt as it was heavier than first thought!
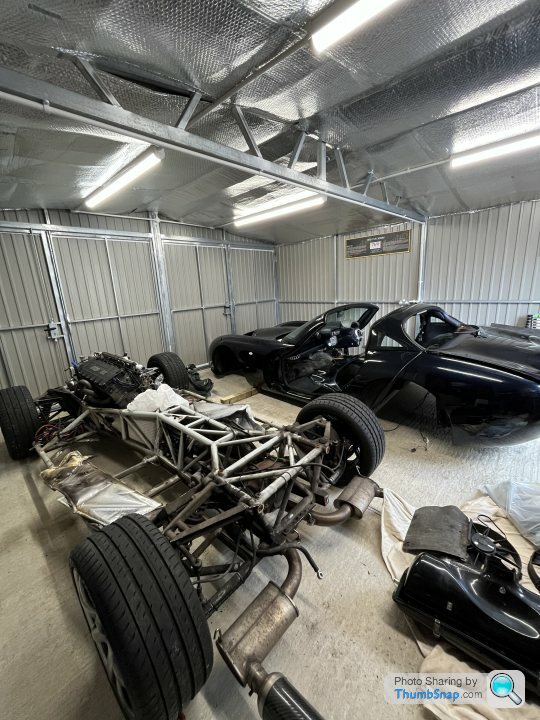
It took 8 of us to lift body, little bit of wiggling to free it off the chassis, got caught on the near side top wishbone bolt and an abandoned attempt as it was heavier than first thought!
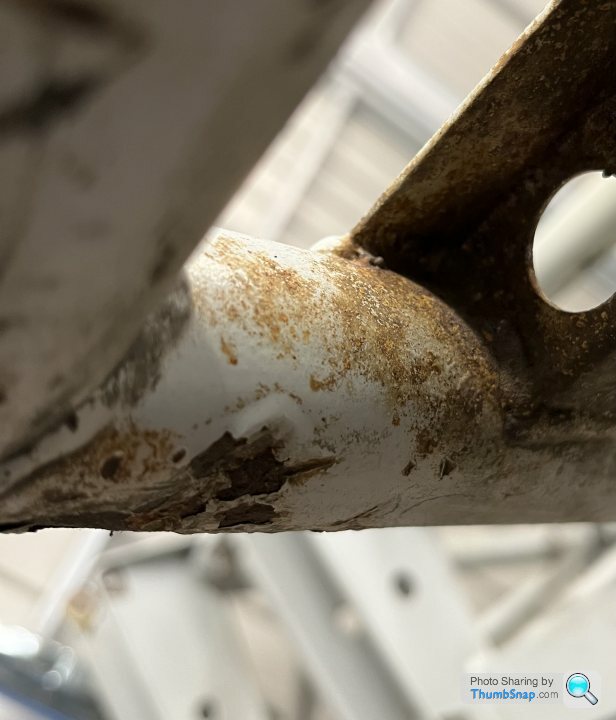
Then began the brake down of the chassis. Under trays, exhaust system, prop shaft, gearbox, diff all came out easy enough. Fuel lines, pump and filter next. ARB’s and any other brackets. I left the corners on as I needed to be able to move the chassis outside. I give it a good clean down to remove road grime and wax oil. I am not a fan of wax oil, but it had done its job very well. Used numerous green scotch pads and many bottles of degreaser to reveal a chassis in very good condition barring a few surface rust spots, mainly around the battery tray, pedal box mount and seat mounts. Everything round was good except for the front of the near side outrigger. I think a trolley jack has been used and there were minor indentations.
After initial inspection of the chassis, out came the steering rack, the engine and all four corners off. My initial plans were to take back the surface rust and then repair with POR15, but after a few weeks of deliberation I decided it would be best sent to a professional for a proper finish and repair to outrigger. Off to sportmotive who did an excellent job and quick turn around given the chassis didn’t require lots of work.


[url]
 |https://thumbsnap.com/571LKu1C[/url]
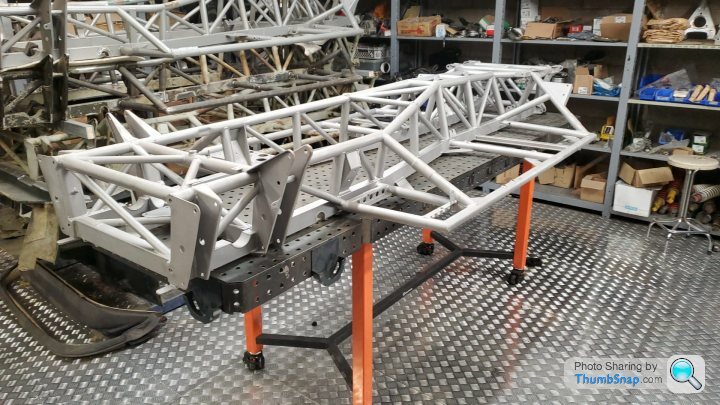
After initial inspection of the chassis, out came the steering rack, the engine and all four corners off. My initial plans were to take back the surface rust and then repair with POR15, but after a few weeks of deliberation I decided it would be best sent to a professional for a proper finish and repair to outrigger. Off to sportmotive who did an excellent job and quick turn around given the chassis didn’t require lots of work.
[url]
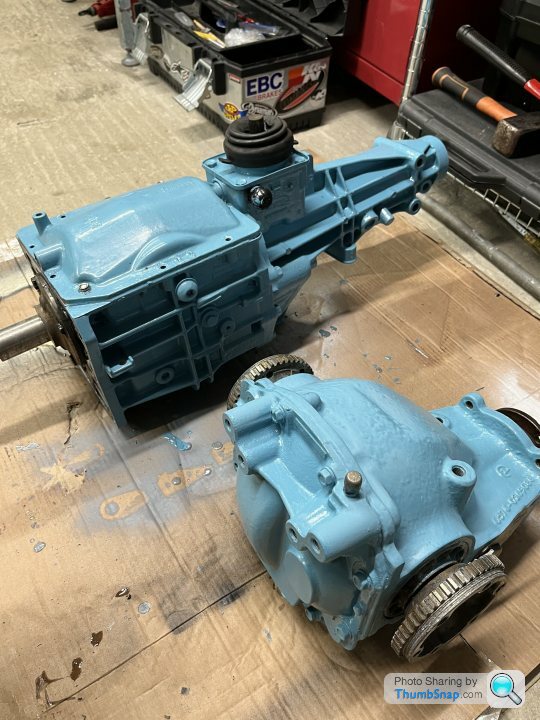
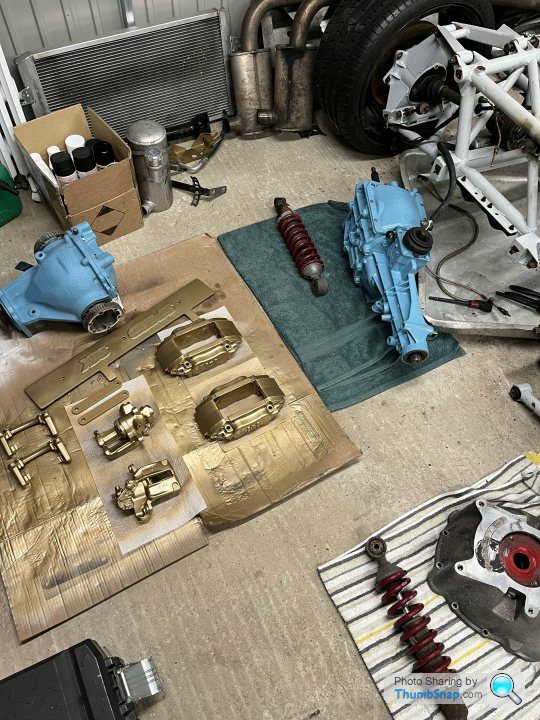
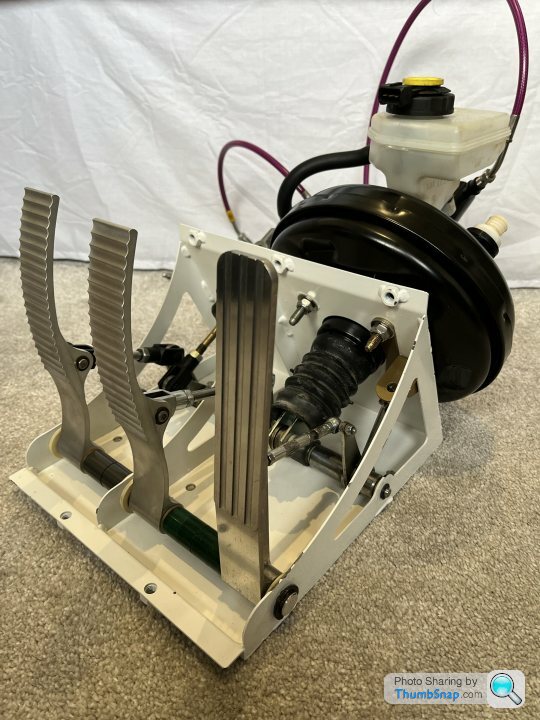
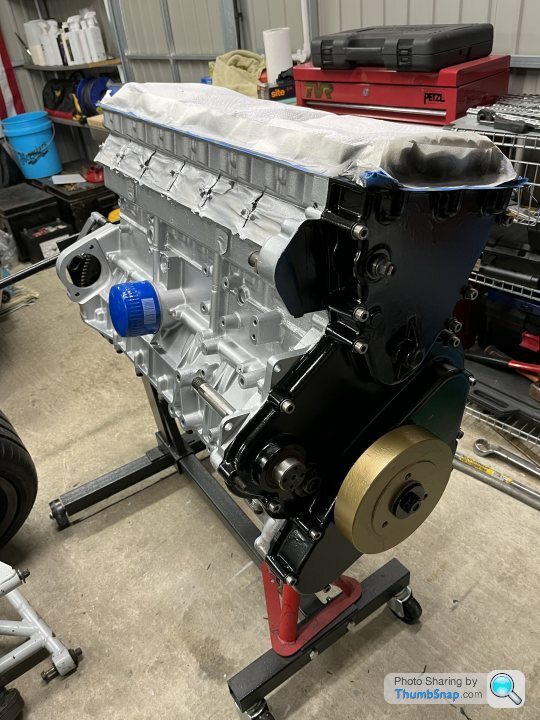
|https://thumbsnap.com/571LKu1C[/url]During deliberation on what to do with the chassis I spent some time cleaning and painting parts ready to go back on. I’ve used POR15 for the diff and gearbox in Pontiac blue, a few engine brackets have been done in this colour too. Any chassis brackets were done in POR15 white. Engine and accessories have been done using VHT paints, silver, black and gold. The brake callipers have been done in VHT gold. The pedal box had a total refurb, stripped back and re coated, fitted a set of the curved pedals and stainless shaft, ordered some custom flexi lines from HEL.
There is a lot of prep involved, cleaning, degreasing, priming and painting. I always feel this is the worst and most laborious part of a restoration but once the pieces start going back on and it all comes together, it’s those terrible times scrubbing, sanding and cleaning that make the finished car gleam.
There is a lot of prep involved, cleaning, degreasing, priming and painting. I always feel this is the worst and most laborious part of a restoration but once the pieces start going back on and it all comes together, it’s those terrible times scrubbing, sanding and cleaning that make the finished car gleam.
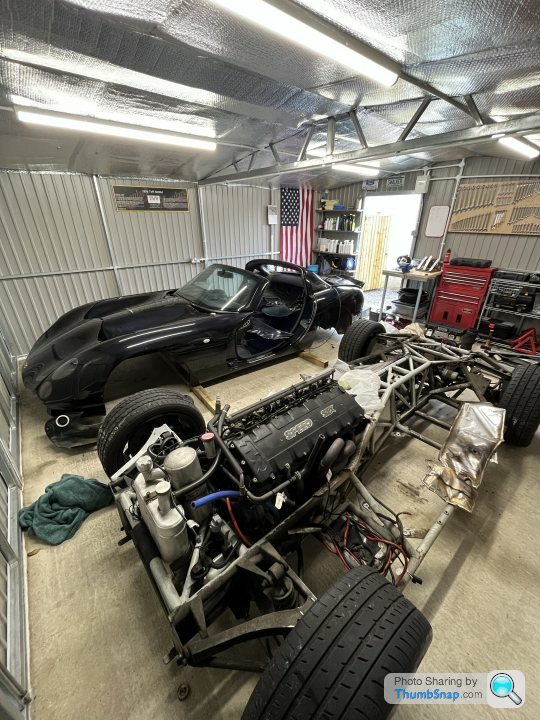
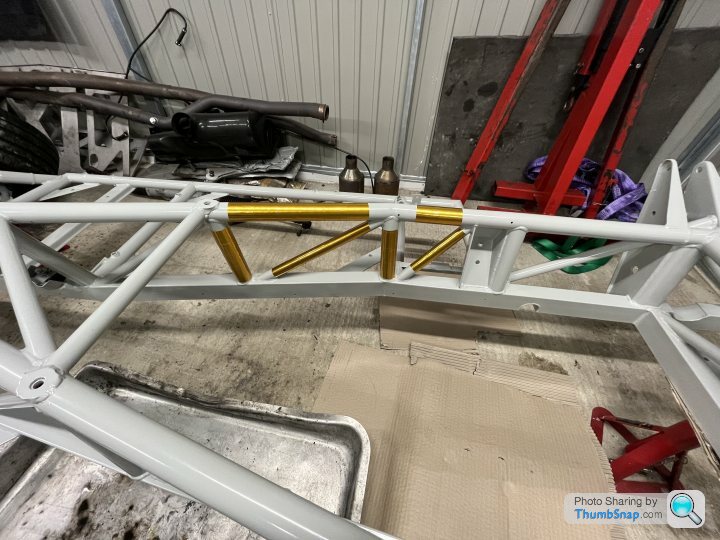
With the fresh chassis returned I’ve just started to build back onto it. Extra protection with some reflective wrap and then embossed aluminium heat shield down the full length of the transmission tunnel. This was a pain to shape, thumbs and brain were aching afterwards but a much better fit than leaving it flat.
Manifolds went off to Zircotec in an attempt to reduce heat absorption through the cabin.
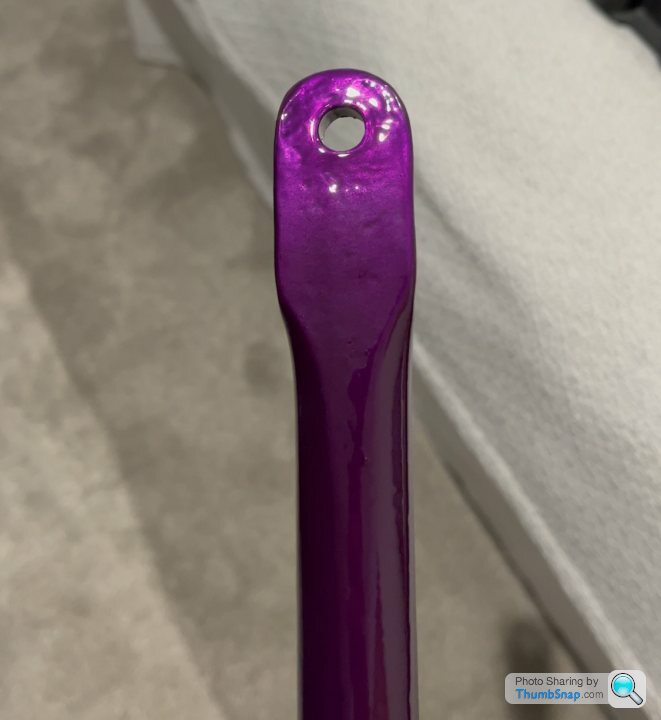
ARB’s were done in translucent purple to match the brake lines by camcoat, look absolutely amazing under the light in the bedroom, but flat purple under the car where they will never be seen! So that was likely a waste of money.
I’ve ran a new hand brake cable and fitted the fuel filter bracket and differential mounting brackets. Where possible everything is being replaced with stainless fasteners, I have stainless bolts nuts and washers overloading the garage, all bagged up matching the originals, ready to be fitted. I have mainly used Kay’s fasteners on eBay for these and they have never let me down.
For the engine to be fitted I am currently waiting on friends to help me lift chassis out of garage, move the crane to the front and then the chassis back in. So that’s where I am stuck at the moment. I can’t mount anything else on chassis as it will be too heavy to lift. I am mainly going through bagged parts deciding what can be saved or needs replacing. Finding lighter and easier oil hoses is my current musing.


Manifolds went off to Zircotec in an attempt to reduce heat absorption through the cabin.
ARB’s were done in translucent purple to match the brake lines by camcoat, look absolutely amazing under the light in the bedroom, but flat purple under the car where they will never be seen! So that was likely a waste of money.
I’ve ran a new hand brake cable and fitted the fuel filter bracket and differential mounting brackets. Where possible everything is being replaced with stainless fasteners, I have stainless bolts nuts and washers overloading the garage, all bagged up matching the originals, ready to be fitted. I have mainly used Kay’s fasteners on eBay for these and they have never let me down.
For the engine to be fitted I am currently waiting on friends to help me lift chassis out of garage, move the crane to the front and then the chassis back in. So that’s where I am stuck at the moment. I can’t mount anything else on chassis as it will be too heavy to lift. I am mainly going through bagged parts deciding what can be saved or needs replacing. Finding lighter and easier oil hoses is my current musing.
Great work sct-w4 and good to finally see you putting a build thread together. Your car has some nice history behind it. Loving the different colours for the components, was going to do the ARBs and other suspension components Cadbury's purple to match my brake calipers. Nice neat heat shielding as well. The headers look great, everything looking like new!
Is that your garage BTW?
Keep the pics coming
Is that your garage BTW?
Keep the pics coming

Granturadriver said:
Wow, looks great!
When did you start this project? And did you had the colour scheme already in mind when starting or was it an ongoing process?
Will you stay with the original body and interior colour scheme or will you go a different route?
Started October last year, doing quite well speed wise but could have gone quicker, lost a few weekends to the minus degrees weather, snow and my day job.When did you start this project? And did you had the colour scheme already in mind when starting or was it an ongoing process?
Will you stay with the original body and interior colour scheme or will you go a different route?
No I didn’t decide on colours until everything was stripped, few days indoors google searching. I had originally thought of going the usual black and silvers but then thought ‘let’s not be boring, no one will see it anyway’
Well, the paint all depends on the sale of my 3000M, currently at Selby TVR, so if someone would kindly buy that I’d be very grateful. If the funds come from the M the Tuscan will likely get a full respray and I’d like to add a drop of purple to the colour, similar to reflex charcoal but replace the green in that for the blue already on the car. If not then the rear end will receive a repair in the current black sapphire.
Dave85chim said:
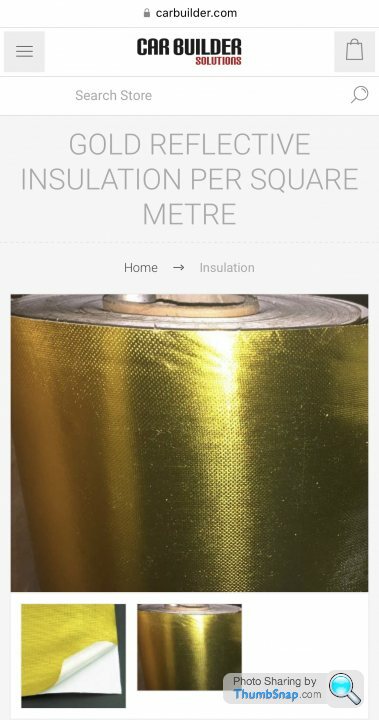
Where did you get your heat shield from?
The gold reflective tape was from a rally supply company online but I can’t remember their name. The aluminium embossed heat shield is from Car Builder Solutions, I tend to get all sheet material from there, they have been good in the past and continue to be. sct_w4 said:
The gold reflective tape was from a rally supply company online but I can’t remember their name. The aluminium embossed heat shield is from Car Builder Solutions, I tend to get all sheet material from there, they have been good in the past and continue to be.
Maybe from Car Builder Solutions as well?https://www.carbuilder.com/uk/gold-reflective-insu... [url]
Interesting how your car was the Tuscan S Bilstein development car, it looks like it has some none S springs on it looking at 2 of the coilover/springs sat on your garage floor, they look dark red/magenta, are these marked with C0959 part numbers? If so they are Sagaris front springs. What other springs do you have and how do you find them?
I believe the latest Eibach spring colours for the S are D0117 Dark Green front (same as non S) with S specific Bilstein damper and D0896 Dark Blue rear spring with S specific Bilstein damper...
I believe the latest Eibach spring colours for the S are D0117 Dark Green front (same as non S) with S specific Bilstein damper and D0896 Dark Blue rear spring with S specific Bilstein damper...
Modrich said:
Interesting how your car was the Tuscan S Bilstein development car, it looks like it has some none S springs on it looking at 2 of the coilover/springs sat on your garage floor, they look dark red/magenta, are these marked with C0959 part numbers? If so they are Sagaris front springs. What other springs do you have and how do you find them?
I believe the latest Eibach spring colours for the S are D0117 Dark Green front (same as non S) with S specific Bilstein damper and D0896 Dark Blue rear spring with S specific Bilstein damper...
I had a look today but no markings on them, the Bilstein stickers have faded and worn away unfortunately. They are dark green on the front and dark red on the rear. It was very crashy and hard over uneven surfaces. Potholes and speed bumps felt more like I drove into them than rode over them. This maybe due to the age of the shocks or the settings. I didn’t experience any of the usual Tuscan handling problems though. Slight tram lining every now and then but nothing jumpy. I believe the handling was lazier on the mk2.I believe the latest Eibach spring colours for the S are D0117 Dark Green front (same as non S) with S specific Bilstein damper and D0896 Dark Blue rear spring with S specific Bilstein damper...
A little slow with this but chassis is now moved and engine is at the front of garage so I can start building the chassis up properly. Fitted rear anti roll bar and positioned diff ready to be lifted in. Steering rack fitted also, trying to fit the awkward bits that need to be weaved between chassis rails.
Fully stripping each corner now, ball joints and uprights but a few of the cap heads are rust welded, along with the thread lock that’s already on them. Using a scaffold pole on a breaker bar to get enough leverage.
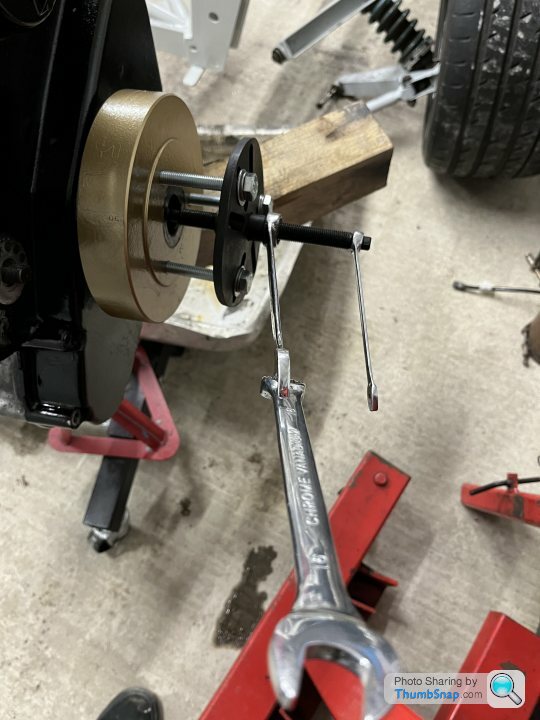
A step backwards on the engine as I painted the timing cover during the snow, needless to say it hasn’t stuck so the timing cover is coming off for paint to be removed and the surface keyed. The harmonic balancer is an effort. Broke the first cheap silverline puller, then bent the much more heavy duty US pro puller, which wasn’t great to use, but has done the job. Had to use the spanner linking trick to get the leverage, not entirely convinced I was using the tool correctly.
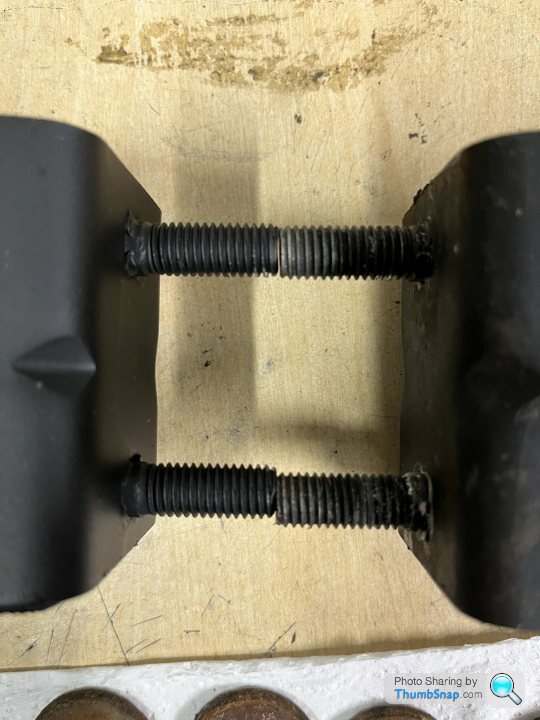
Unfortunately Racetech have been infuriating to buy from. Ordered engine mounts, paid and received confirmation, to get an email the following day to say they were out of stock. I had organised friends to come down and help fit the engine which had to be cancelled. Expected stock in a week, two weeks later I had to message them asking where they were to then receive them a few days later. Upon fitment, one has been manufactured with the studs too close together so won’t go through holes in chassis. Hit and miss with this supplier as some stuff has been brilliant, next day delivery, but other stuff has not been the best. Hopefully get some more parts fitted over Easter.
Fully stripping each corner now, ball joints and uprights but a few of the cap heads are rust welded, along with the thread lock that’s already on them. Using a scaffold pole on a breaker bar to get enough leverage.
A step backwards on the engine as I painted the timing cover during the snow, needless to say it hasn’t stuck so the timing cover is coming off for paint to be removed and the surface keyed. The harmonic balancer is an effort. Broke the first cheap silverline puller, then bent the much more heavy duty US pro puller, which wasn’t great to use, but has done the job. Had to use the spanner linking trick to get the leverage, not entirely convinced I was using the tool correctly.
Unfortunately Racetech have been infuriating to buy from. Ordered engine mounts, paid and received confirmation, to get an email the following day to say they were out of stock. I had organised friends to come down and help fit the engine which had to be cancelled. Expected stock in a week, two weeks later I had to message them asking where they were to then receive them a few days later. Upon fitment, one has been manufactured with the studs too close together so won’t go through holes in chassis. Hit and miss with this supplier as some stuff has been brilliant, next day delivery, but other stuff has not been the best. Hopefully get some more parts fitted over Easter.
Gassing Station | Tuscan | Top of Page | What's New | My Stuff