Tuscan Mk2 S Refurb
Discussion


Thanks for the updates, it's frustrating when tools fail and nuts just don't want to budge. Loads of penetrating oil and an impact wrench normally do the trick but cap screws are the worst and can be easily rounded. I have a cheap but very good angled 3/8" power ratchet and a DeWalt impact wrench that between them will remove anything, they are real time and labour savers. Shame about the engine mounts, how bad were the old ones?
Slowly working away with this, been busy and away with work so not many hours in the garage.
The daily driver blew the high pressure fuel pump and took the timing chain with it, the repair costs are eating the Tuscan budget so I’ve had to settle for cleaning the wishbones and uprights to be sorted at a later date when money allows.
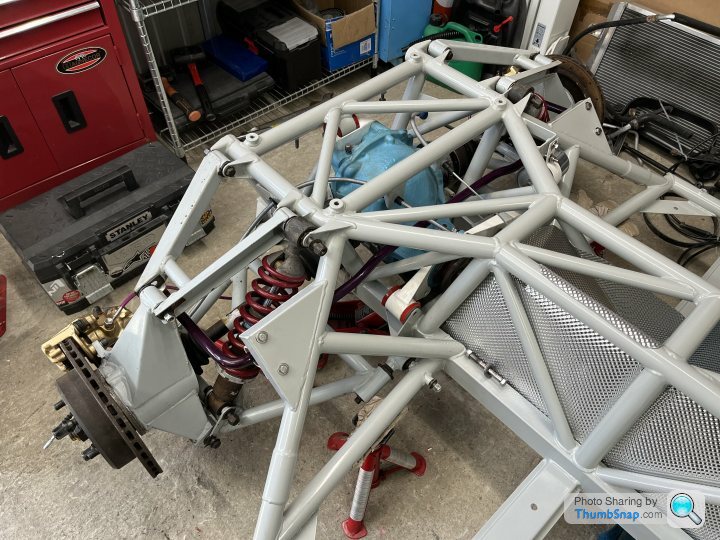
I have the rear corners dry assembled, still waiting to lift the diff in. Once the diff is in I’ll fully grease, lube, route and torque everything correctly.
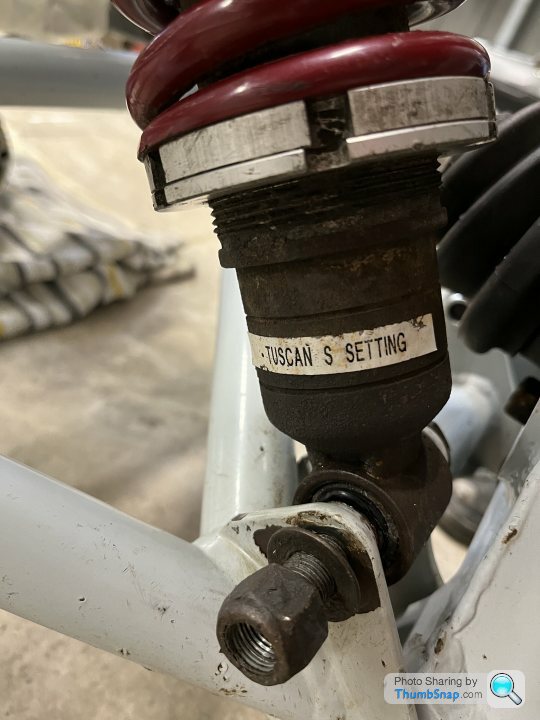
Upon cleaning the shocks and springs it revealed part numbers and codes, make of them what you will. I don’t know wether to go with Nitrons or Bilsteins when they get replaced. Pretty confident I’ll replace the metalistic bushes with poly.
Upper wishbones fitted to the front and I have begun to disassemble the uprights and steering arms. I can’t split the lower ball joint from the arm for love nor money so they will disappear to a TVR specialist to be done. Steering rack is in and I hope to get all four corners assembled and on its wheels before I drop the engine in.
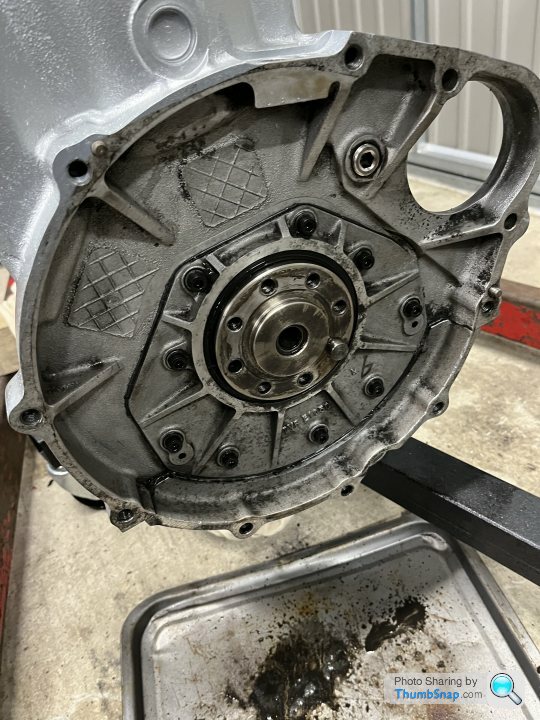
Continuing my backwards progress with the engine and a battle to remove the sump. With timing cover off I removed scavenge pump which is a thing of beauty, shame it’s hidden away. The rear crank seal was a pain, advice from Dom at powers was to ‘lean on it’ I did just that and it came free with no damage, that is until I dropped my impact wrench and it caught the inner casting for the seal housing and took off a half inch of aluminium, one of those days! The sump is now off but four of the alan head screws rounded off so I’ve had to drill those out.
That’s where I am at the moment, need to send things off for blasting and paint upon return, order some new bits I’ve broken and then march forward with the build.


The daily driver blew the high pressure fuel pump and took the timing chain with it, the repair costs are eating the Tuscan budget so I’ve had to settle for cleaning the wishbones and uprights to be sorted at a later date when money allows.
I have the rear corners dry assembled, still waiting to lift the diff in. Once the diff is in I’ll fully grease, lube, route and torque everything correctly.
Upon cleaning the shocks and springs it revealed part numbers and codes, make of them what you will. I don’t know wether to go with Nitrons or Bilsteins when they get replaced. Pretty confident I’ll replace the metalistic bushes with poly.
Upper wishbones fitted to the front and I have begun to disassemble the uprights and steering arms. I can’t split the lower ball joint from the arm for love nor money so they will disappear to a TVR specialist to be done. Steering rack is in and I hope to get all four corners assembled and on its wheels before I drop the engine in.
Continuing my backwards progress with the engine and a battle to remove the sump. With timing cover off I removed scavenge pump which is a thing of beauty, shame it’s hidden away. The rear crank seal was a pain, advice from Dom at powers was to ‘lean on it’ I did just that and it came free with no damage, that is until I dropped my impact wrench and it caught the inner casting for the seal housing and took off a half inch of aluminium, one of those days! The sump is now off but four of the alan head screws rounded off so I’ve had to drill those out.
That’s where I am at the moment, need to send things off for blasting and paint upon return, order some new bits I’ve broken and then march forward with the build.
Thanks for the update, any progress is good progress.
Looks like your rear EIBACH ERS 250-60-50 are off-the-shelf items, code relates to length 250 mm / Ø inside 60 mm / rate 50 N/mm, which if I'm correct is 450lbs which is firmer than Sagaris rate (400lbs) so a bit mismatched to the 200lbs fronts.
I'm probably going to go the Bilstein Tuscan S route for dampers/springs with Green 200lbs front springs and dark blue D0896 rears at 285lbs.
Modrich said:
Thanks for the update, any progress is good progress.
Looks like your rear EIBACH ERS 250-60-50 are off-the-shelf items, code relates to length 250 mm / Ø inside 60 mm / rate 50 N/mm, which if I'm correct is 450lbs which is firmer than Sagaris rate (400lbs) so a bit mismatched to the 200lbs fronts.
I'm probably going to go the Bilstein Tuscan S route for dampers/springs with Green 200lbs front springs and dark blue D0896 rears at 285lbs.
The springs rates (& Damper sticker) indicate that it was probably the early development Mk2 Tuscan S bilstien suspension spec, before they had customer part number spings made. That rear 50Nmm is the standard Mk2 Tuscan S rear spring rate and ditto the 35Nm front . Looks like your rear EIBACH ERS 250-60-50 are off-the-shelf items, code relates to length 250 mm / Ø inside 60 mm / rate 50 N/mm, which if I'm correct is 450lbs which is firmer than Sagaris rate (400lbs) so a bit mismatched to the 200lbs fronts.
I'm probably going to go the Bilstein Tuscan S route for dampers/springs with Green 200lbs front springs and dark blue D0896 rears at 285lbs.
Info extract below from the TVR Tuscan S billy upgrade chassis data sheet pdf (for retro fitting to Cerbs/Tams/T350C etc)
Front Spring Rate 35 N/mm (200 lb/in) D0117
Front Spring Open Length 302mm -
Front Spring Coil Bound Length -
Front Spring Fitted Length 222mm -
Front Spring Length at Ride Height 190mm -
Rear Spring Rate 50 N/mm D0896
Rear Spring Open Length -
Rear Spring Coil Bound Length -
Rear Spring Fitted Length 240mm -
& Sagaris springs are stiffer again ,info extract below from the TVR Sagaris chassis data sheet .
Front Spring Rate 456lb/in ( 80N/mm) C0959
Front Spring Free Length 250mm
Front Spring Coil Bound Length 121mm
Front Spring Length at Ride Height mm
Rear Spring Rate 400lb/in (70N/mm) D0884
Lang – TVR Design & Development
Rear Spring Free Length 250mm
Rear Spring Coil Bound Length 115mm
Edited by fredd1e on Thursday 27th April 17:08

More progress! A full Saturday and majority of the bank hol Monday on the Tuscan. Dropped into the British GT at Donington to aid my motivation on Sunday.
Engine back together, sump baffle and sump back on, rear crank cover and seal, flywheel and that was the back end done. Scavenge pump back in, sprocket attached and timing cover plus accessories all in place. A few dummy runs with the timing cover, it’s slightly awkward and an exact fit. Didn’t want to get it wrong when it was covered in sealant adhesive. Same with the manifolds, a few practice goes for positioning and what screws or nuts need to be fastened first. There’s a method to this and if you don’t get the correct order of nut and fasteners it’s then impossible to turn or access them.
Having problems with the harmonic balancer in that I can’t get it fully home on the shaft without turning engine. I think I’ve got about 5mm to go but will have to get inventive.
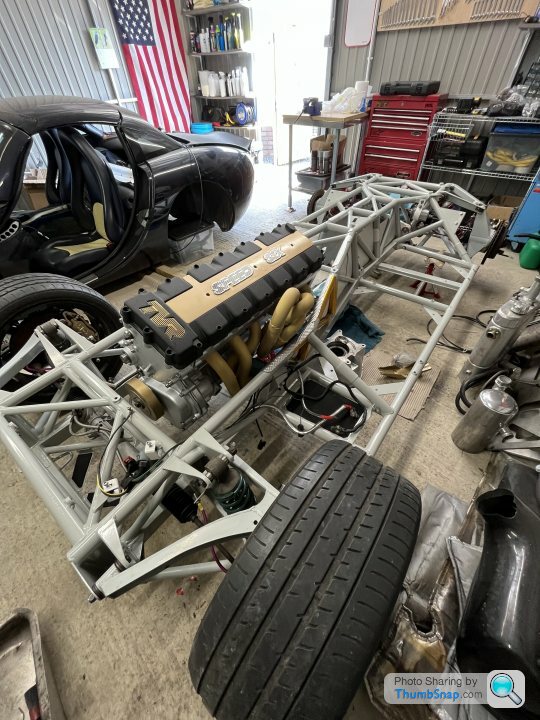
Three attempts at dropping the engine in. First one we were fighting the engine as the crane was dead centre down the chassis but engine twisting at rear. Repositioned for an easier fit and then once it was all aligned I noticed I had no access at all to fit lamba sensors. Back up the engine came. My manifolds have to ports for the lamba sensors on each bank. TVR had mullered two holes through the heat shield and then a single hole through the passenger footwell, that the wiring for the sensors passed through and could be connected to test equipment in car. What this meant for me was a direct feed of hot air into passenger footwell. The sensors were originally in the lower of the two ports with the wiring running through the heat shield. I’ve had to move them into the higher ports with no holes in heat shield but will have to better protect wiring with a thermal shield.
The diff put up an almighty fight and is still on going. I am about a quarter of a hole out on the offside mounting bracket. Hoping if I slacken all mounts back off that will give me enough play to jiggle the bolt through. Access was difficult and the first attempt was to lift the chassis higher and the diff onto a jack in the position that we believed would pass through chassis rails. This failed numerous times before we decided to go backwards and lean both rear hubs outwards, pulling the driveshafts away from area. Removing both shafts from diff and the forward mounting brackets. Diff now fit through chassis rails and could be moved forward to avoid rear mount. Once aligned with rear mount and Jack had the weight, in with the rear mount screws and the near side forward bracket. Back on with the diff shafts and both hubs tilted back into position.
That’s where I am at at the moment. Between this and the last post I’ve had stuff blasted, painted, seals removed, new ones fitted and lots of bits got polished before todays work.


Engine back together, sump baffle and sump back on, rear crank cover and seal, flywheel and that was the back end done. Scavenge pump back in, sprocket attached and timing cover plus accessories all in place. A few dummy runs with the timing cover, it’s slightly awkward and an exact fit. Didn’t want to get it wrong when it was covered in sealant adhesive. Same with the manifolds, a few practice goes for positioning and what screws or nuts need to be fastened first. There’s a method to this and if you don’t get the correct order of nut and fasteners it’s then impossible to turn or access them.
Having problems with the harmonic balancer in that I can’t get it fully home on the shaft without turning engine. I think I’ve got about 5mm to go but will have to get inventive.
Three attempts at dropping the engine in. First one we were fighting the engine as the crane was dead centre down the chassis but engine twisting at rear. Repositioned for an easier fit and then once it was all aligned I noticed I had no access at all to fit lamba sensors. Back up the engine came. My manifolds have to ports for the lamba sensors on each bank. TVR had mullered two holes through the heat shield and then a single hole through the passenger footwell, that the wiring for the sensors passed through and could be connected to test equipment in car. What this meant for me was a direct feed of hot air into passenger footwell. The sensors were originally in the lower of the two ports with the wiring running through the heat shield. I’ve had to move them into the higher ports with no holes in heat shield but will have to better protect wiring with a thermal shield.
The diff put up an almighty fight and is still on going. I am about a quarter of a hole out on the offside mounting bracket. Hoping if I slacken all mounts back off that will give me enough play to jiggle the bolt through. Access was difficult and the first attempt was to lift the chassis higher and the diff onto a jack in the position that we believed would pass through chassis rails. This failed numerous times before we decided to go backwards and lean both rear hubs outwards, pulling the driveshafts away from area. Removing both shafts from diff and the forward mounting brackets. Diff now fit through chassis rails and could be moved forward to avoid rear mount. Once aligned with rear mount and Jack had the weight, in with the rear mount screws and the near side forward bracket. Back on with the diff shafts and both hubs tilted back into position.
That’s where I am at at the moment. Between this and the last post I’ve had stuff blasted, painted, seals removed, new ones fitted and lots of bits got polished before todays work.
The cam cover was coated in textured black by camcoatpeormance, they have done a great job. The spark plug cover was blasted, masked, painted, sanded and polished by myself with VHT engine gold.
I haven’t stuck the cam cover down yet, there appears to be a National shortage of the Viton gaskets and I hear stories of them being hard to get a good seal. I seem to have mastered the loctite 598 sealant adhesive and at £30 a tube I’m going to make sure I use it all!
I haven’t stuck the cam cover down yet, there appears to be a National shortage of the Viton gaskets and I hear stories of them being hard to get a good seal. I seem to have mastered the loctite 598 sealant adhesive and at £30 a tube I’m going to make sure I use it all!
Before you go spoiling your nice sparkly spark plug cover with Loctite, silicone foam seems a good way to form a re-useable seal. This was my first attempt with 13.5x6.5mm strip. Will need some 30x10mm adding to the old spark plug lead channels and some added to the main channel to add support where the foam forms a bridge from one side to the other. Ideally when I'm happy and have had the valve cover re-finished, I'll use silicone to bond it in place and seal down the sides of the foam.


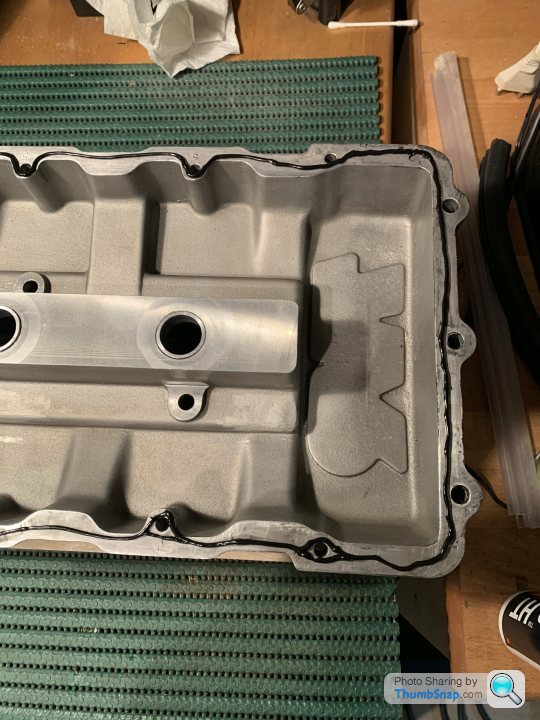
Oooo, that’s about 40-50% less of a bead than what I put on the sump and timing cover, I was informed to be generous with it but I suppose those areas are potentially more at risk of leaks due to some of the sealant being below the oil line.
Thinking about it that would make sense for the cam cover as it will only be subject to splashes of oil and not submerged or under any high pressure. As you say, it also needs to be removed for maintenance.
The spark plug cover I was toying with the idea of using adhesive backed ‘foams’. I seen someone previously using the neoprene type but the worry was the heat from engine may cause it to melt. I would prefer a compressed foam type simply for appearance and repeated use.
If the car never sees the rain and only I am washing it, if I am particularly careful, is there a need? As far as I am aware it’s simply to stop water ingress into spark plugs. Does it perform some secondary function of locating or vibration damping?
Really nice work so far BTW, is that a gel TVR sticker on the cam cover? Where did you get it?
If your Speed Six isn't a daily all year round, which, let's face it not many are then it seems to me to be a little OTT the extent that specialists go to seal the spark plug cover with silicone as it makes checking and cleaning the plugs a real chore. But I suppose to be on the safe side there should be a seal there and that's why I thought of using the Silicone foam which is safe up to 200-250 deg C whereas normal foams are not. Certain types of neoprene go higher but it would need to be a foam not solid as it needs to compress easily which is why I chose the silicone foam.
If your Speed Six isn't a daily all year round, which, let's face it not many are then it seems to me to be a little OTT the extent that specialists go to seal the spark plug cover with silicone as it makes checking and cleaning the plugs a real chore. But I suppose to be on the safe side there should be a seal there and that's why I thought of using the Silicone foam which is safe up to 200-250 deg C whereas normal foams are not. Certain types of neoprene go higher but it would need to be a foam not solid as it needs to compress easily which is why I chose the silicone foam.
It is a gel sticker yes, a chap on Facebook group ran an order, I asked for it in gold. This was probably a few years ago, it’s been sat waiting for its day of glory since.
Intended use for the car is European jaunts, shows and occasional track day. I am pretty confident it will never see the severity of water to get under the spark plug cover so I may just leave it unsealed for now and see how I get on. Can always seal it at a later date.
Intended use for the car is European jaunts, shows and occasional track day. I am pretty confident it will never see the severity of water to get under the spark plug cover so I may just leave it unsealed for now and see how I get on. Can always seal it at a later date.
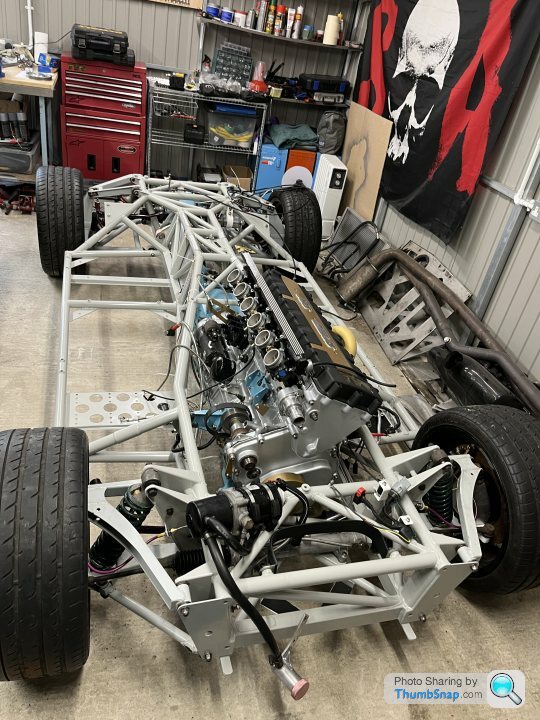
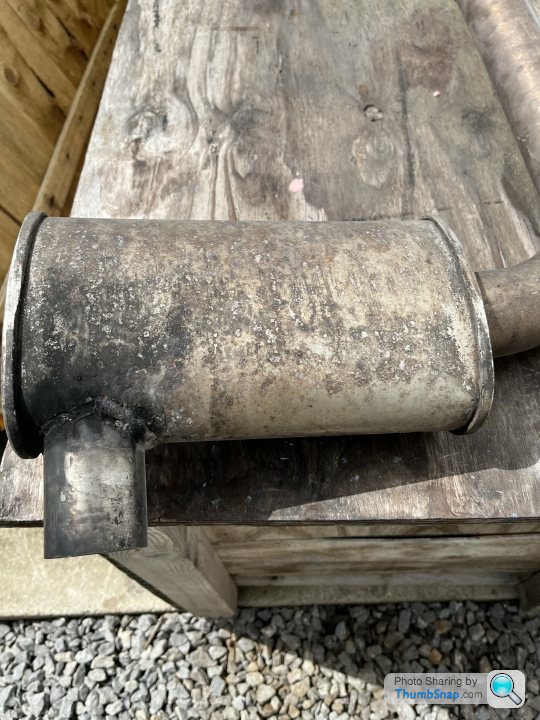
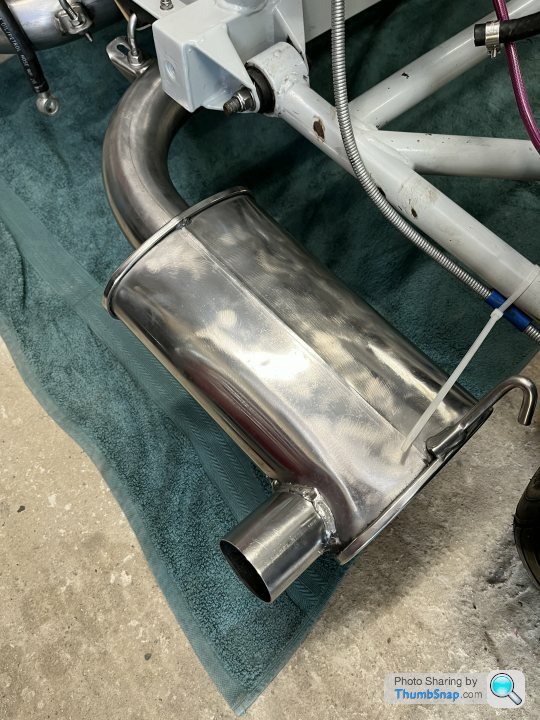
Much further with this now, you quickly forget all the little things and they soon add up. Chassis is pretty much finished. Hoping to clean up and mount exhaust system this weekend and that will be the last thing to go on.
Bought the brake line kit from Powers, good kit and easy enough to fit. The fuel lines were a nightmare, I had to buy new nylon fuel line and use the old banjos. Borrowed a heat gun from work but could never get the right heat, too hot and it melted the line, not hot enough and I couldn’t force the banjo in. Wasted lots of time and attempts, not fully confident they will hold once fuel running through but only one way to find out!
Gearbox was also a pain as it would never go fully home. Spent days trying to force it, taking the bell housing and clutch off and on, different methods leaving alignment tool in place. Alignment tool would go fully in with ease but then gearbox wouldn’t budge the last half inch. Had given up for the week and then one morning it just went in as it should with hardly any effort?! Diff was the same, loads of attempts and had it 95% fitted but couldn’t get the last bolt through, gave up and then all of a sudden it just slotted through.
I cleaned up and ran wiring harness which I was a little nervous about as I couldn’t remember where it all went. Thankfully it’s obvious once you have it laid in its rough position. Most things are labelled and they only reach to the point they connect.
Air compressor and alternator went on easy, again trying to reference photos of fastener directions and spacers was difficult, lesson learned to take better pictures and videos before stripping.
Still not happy with the finish on some items and they will be removed at a later date to be professionally coated. Oil and coolant tank were professionally polished, again not fully happy with them, they are much better than when I took them off, I’ve just seen others have polished to a deeper finish. I like to have stuff perfect.
Once exhaust is fitted I’ll fill the oils and fit undertrays, that will be chassis complete to accept body. They’re maybe a few backwards steps I have to take to get body on.
I’ve ripped the carpets out the body, still got to remove the underlay and I’ll fill in a few holes that shouldn’t be there and cut some that should. I’ll renew heat shield lining the body.
Hoping to get the body on in next few weeks so fingers crossed for good progress.
Little slow with this as my back gave in and a very skilled surgeon had to have a slice, grind and stitch.
Spent the down time ordering new parts and going through the bags and boxes of all the little bits I’d forgotten to send to powder coat.
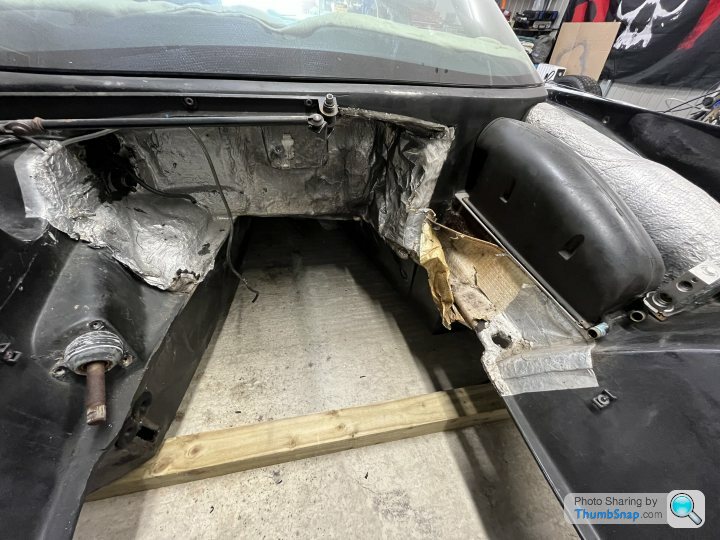
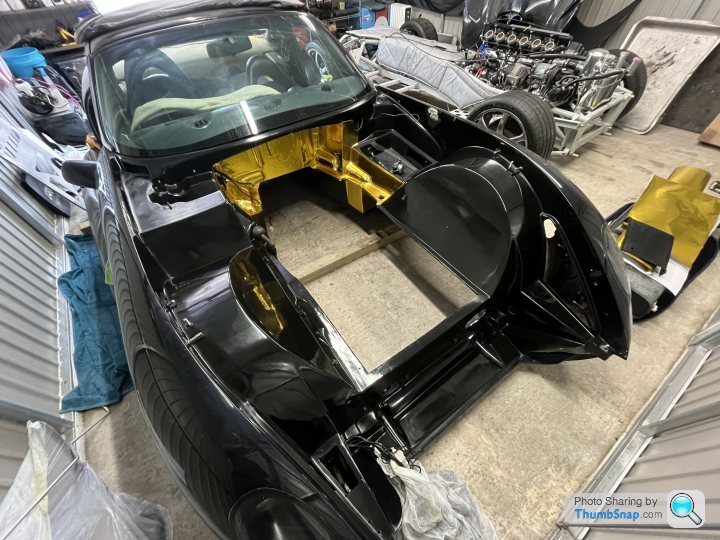
Sanded back the engine bay on the body and filled in every hole, scratch, oddity I could and then prepped it for paint. Very pleased with myself as before paint it looked like it was going to be a really good finish. Then I rattle can sprayed it Satin black, which revealed every uneven surface, as the paint dried over two weeks it started to reveal sanding swirls. Hoping polishing would maybe hide them I spent a few hours with the polisher and paint correction compound gradually getting finer. The paint came up really well but sadly revealed more sanding marks and uneven surfaces I’d so proudly thought I’d gotten rid of! I’ve had a few painters mention black shows up everything and if the car is black it will have spent longer in the body shop being perfected. Now I know what they mean. It’s a vast improvement over previous, but I thought I’d done a better job than the finished article alludes.
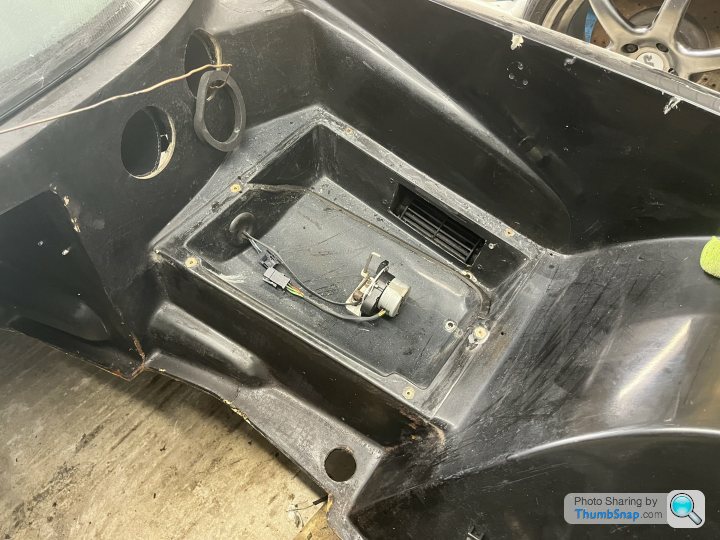
I had holes in the passenger footwell where sensors connected to engine from test equipment. Also in the transmission tunnel where two lambda sensors were fitted in the straight run of the exhaust and then fed back into cockpit. I filled in the holes with fibre glass filler. I’ve chose to fit a blanking plug into the extra lambda ports that are not needed after sanding back and polishing the stainless exhaust system.
My chassis heat blanket was a bit of a faff. Instead of the usual one piece blanket with folds and creases to form it around the chassis, mine was individual sections, shaped to fit the area they covered, holes poked through them and then cable tied together. Holes also where test equipment ran and it wasn’t really doing it’s job as burn marks on the body testify. I managed to source a new old stock one from Central TVR. It’s certainly not in new condition but it’s whole and covers exactly where it needed so should do a better job than the old one. I thought at one point I wasn’t going to source one so went another route and fitted a mixture of zircotec and gold mat heat reflective material. Now I have the blanket and the zircotec, hoping it will give a big improvement on heat transfer through the body.
I’ve removed heat exchangers for heater and aircon, to give the area a tidy up and see if I can improve the fit and appearance.
I’ve redone some wiring connectors, mainly the Trinary switch and changed a couple that had blanks for connectors with the correct amount of terminals for OCD reasons. I’ve wrapped the looms in new conduit or fabric tape. I think a few quick or roadside repairs have been made previously and never fully sorted so that was the main reason behind the wiring corrections.
I also disassembled front and rear brakes to have them powder coated professionally. My attempt at painting them over winter looked very good, but as soon as they were handled and reassembled the paint hadn’t adhered.
I’m nearly ready for body on, just got to sikaflex blower panel back on, check chassis work that everything is routed and tightened as it should be. I’ll have to undo power steering reservoir and flop it over inwards to let the body drop over the top, but all being good and if the manpower turns up we should lift it on next weekend.

Spent the down time ordering new parts and going through the bags and boxes of all the little bits I’d forgotten to send to powder coat.
Sanded back the engine bay on the body and filled in every hole, scratch, oddity I could and then prepped it for paint. Very pleased with myself as before paint it looked like it was going to be a really good finish. Then I rattle can sprayed it Satin black, which revealed every uneven surface, as the paint dried over two weeks it started to reveal sanding swirls. Hoping polishing would maybe hide them I spent a few hours with the polisher and paint correction compound gradually getting finer. The paint came up really well but sadly revealed more sanding marks and uneven surfaces I’d so proudly thought I’d gotten rid of! I’ve had a few painters mention black shows up everything and if the car is black it will have spent longer in the body shop being perfected. Now I know what they mean. It’s a vast improvement over previous, but I thought I’d done a better job than the finished article alludes.
I had holes in the passenger footwell where sensors connected to engine from test equipment. Also in the transmission tunnel where two lambda sensors were fitted in the straight run of the exhaust and then fed back into cockpit. I filled in the holes with fibre glass filler. I’ve chose to fit a blanking plug into the extra lambda ports that are not needed after sanding back and polishing the stainless exhaust system.
My chassis heat blanket was a bit of a faff. Instead of the usual one piece blanket with folds and creases to form it around the chassis, mine was individual sections, shaped to fit the area they covered, holes poked through them and then cable tied together. Holes also where test equipment ran and it wasn’t really doing it’s job as burn marks on the body testify. I managed to source a new old stock one from Central TVR. It’s certainly not in new condition but it’s whole and covers exactly where it needed so should do a better job than the old one. I thought at one point I wasn’t going to source one so went another route and fitted a mixture of zircotec and gold mat heat reflective material. Now I have the blanket and the zircotec, hoping it will give a big improvement on heat transfer through the body.
I’ve removed heat exchangers for heater and aircon, to give the area a tidy up and see if I can improve the fit and appearance.
I’ve redone some wiring connectors, mainly the Trinary switch and changed a couple that had blanks for connectors with the correct amount of terminals for OCD reasons. I’ve wrapped the looms in new conduit or fabric tape. I think a few quick or roadside repairs have been made previously and never fully sorted so that was the main reason behind the wiring corrections.
I also disassembled front and rear brakes to have them powder coated professionally. My attempt at painting them over winter looked very good, but as soon as they were handled and reassembled the paint hadn’t adhered.
I’m nearly ready for body on, just got to sikaflex blower panel back on, check chassis work that everything is routed and tightened as it should be. I’ll have to undo power steering reservoir and flop it over inwards to let the body drop over the top, but all being good and if the manpower turns up we should lift it on next weekend.
Gassing Station | Tuscan | Top of Page | What's New | My Stuff