Removing Back Seats
Discussion


Hello all,
I want to remove both back seats for repairs and cleaning etc.
I have located the 2 bolts/nuts at the back of the car where they attach to the chassis bars.
Are there any other bolts to undo, as they seem to be resisting coming out.
Can't initially see any, but presume they are somewhere inaccesible as usual.
Cheers
MB
i never had these bolts on the outside of the car, for the top sections, each seat has 2x10mm bolts going through some bars under the rear shelf.
there were also 3 self tappers behind the perforated centres. see the picture as i put the self tappers back in, they are around the velcro strips
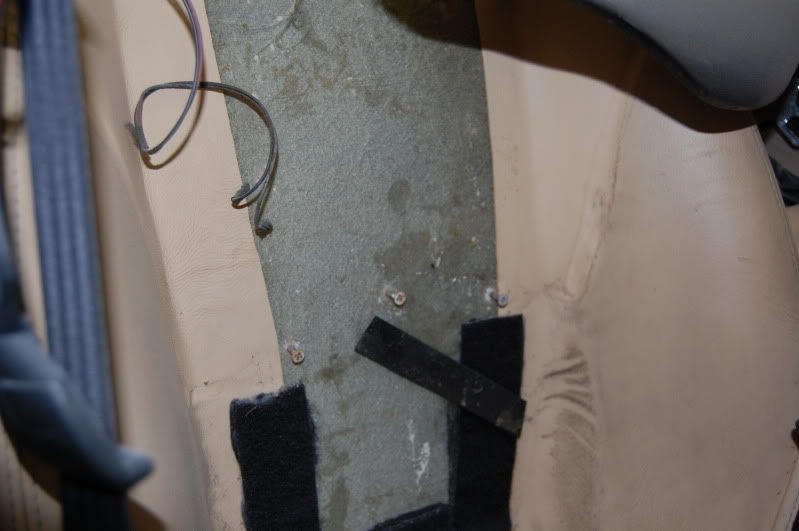
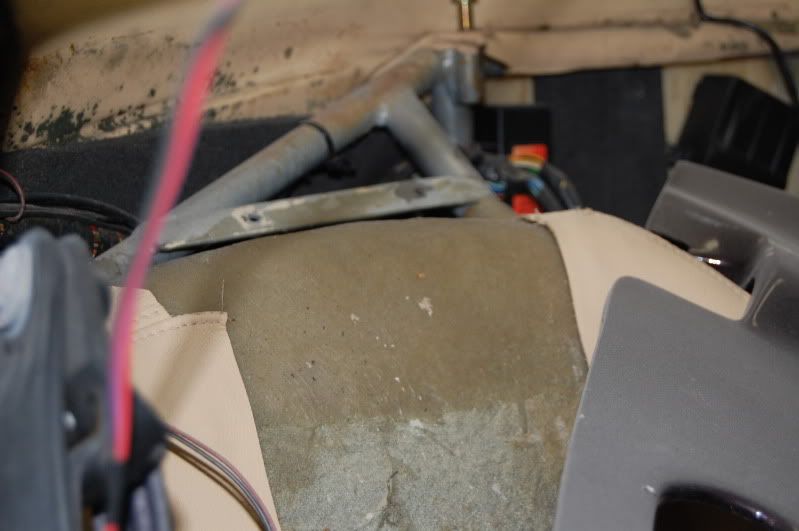
here are the bars that the 2x100mm bolts go through
there were also 3 self tappers behind the perforated centres. see the picture as i put the self tappers back in, they are around the velcro strips
here are the bars that the 2x100mm bolts go through
plumAJP said:
i never had these bolts on the outside of the car, for the top sections, each seat has 2x10mm bolts going through some bars under the rear shelf.
there were also 3 self tappers behind the perforated centres. see the picture as i put the self tappers back in, they are around the velcro strips
Yours is certainly different to mine which has 3 bolts with nuts under the wheel arch on each side - no velcro or self tappers.there were also 3 self tappers behind the perforated centres. see the picture as i put the self tappers back in, they are around the velcro strips

mines a 1997 p plater 4.2. theres not even any holes in the fibrglass to suggest this was how the seats used to be secured in so i think mine has allways been velcro'd and self tappered in. may change this now though and glass some bolt to the seat backs.
one question though.... when you guys have removed the bum parts of the back seats, are they literally glued down to the fibreglass or are they on a fibregalss mould that sits on top of the chassis/firbreglass?
ive tried to lift mine off but as i lift them some sponge is being torn off the seat so i havent risked it.
Mine is a 98 4.2
I know I upholsetered my back seats but I really can't remember which bits had a fibreglass shell and unfortunately it seeom to be the one part of the process that I didn't photograph. (the rest of the photos are here if its any help:- www.tvr-cerbera.co.uk/refurb_index.html
However I do know that both parts of the back seats came out cleanly without having to unglue any foam, so I guess they may have both been in shells. Sorry not to be more help.
Edited by Tanguero on Sunday 7th June 22:43
Gazzab said:
schimg said:
I guess this depends on year of the car...mines a 1999 on a T ...want to whip the carpet out and replace as part of my winter work....think the body is the GT2 version?
What years are the cars in the images?
Whats a GT2 version?What years are the cars in the images?
GT1 earlier cars
GT2 Ones like mine with small windscreen - no fiesta rear lights
GT3 The last version larger windscreen and other stuff limited cerbera knowledge at the mo..
schimg said:
Gazzab said:
schimg said:
I guess this depends on year of the car...mines a 1999 on a T ...want to whip the carpet out and replace as part of my winter work....think the body is the GT2 version?
What years are the cars in the images?
Whats a GT2 version?What years are the cars in the images?
GT1 earlier cars
GT2 Ones like mine with small windscreen - no fiesta rear lights
GT3 The last version larger windscreen and other stuff limited cerbera knowledge at the mo..
The early 4.5s were called GTs back in late 97 ish?
The second generation was introduced in 2000 ish - larger screen, colour coded windscreen surrounds, different front lights (depending on model though) etc
If yours is a 99 without Fiesta lights then I would suggest it probably came with Fiesta lights but they have been swapped out later. The 'tank' lights were introduced after 99.
Gazzab said:
schimg said:
Gazzab said:
schimg said:
I guess this depends on year of the car...mines a 1999 on a T ...want to whip the carpet out and replace as part of my winter work....think the body is the GT2 version?
What years are the cars in the images?
Whats a GT2 version?What years are the cars in the images?
GT1 earlier cars
GT2 Ones like mine with small windscreen - no fiesta rear lights
GT3 The last version larger windscreen and other stuff limited cerbera knowledge at the mo..
The early 4.5s were called GTs back in late 97 ish?
The second generation was introduced in 2000 ish - larger screen, colour coded windscreen surrounds, different front lights (depending on model though) etc
If yours is a 99 without Fiesta lights then I would suggest it probably came with Fiesta lights but they have been swapped out later. The 'tank' lights were introduced after 99.
The raers do appear to be original...car registered on 01/06/99...has a small windscreen and the carbon finshers...the air vents are the little "O" shaped ones...wonder if it came with the spiders it has now then?
Got no paperwork with it came from cambridge way...had 5 owners in total be good to learn more about her...
instead of opening a new forum-thread i jump onto this one:
if i have understood correctly, i need to remove my passenger back-seat, for replacement of my door-solenoid. if i´m wrong please correct me.
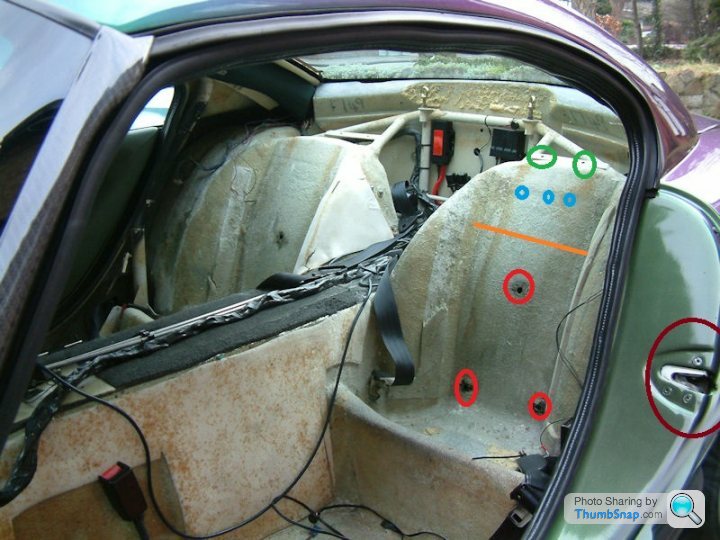
i have loosen the M6 nuts of the back-bolster (marked red) and removed the upper two M6 bolts (makred green)
than i have found three M5 nuts with studs passing the fibreglass in the area marked blue. i also removed the nuts.
the back becomes free (only with force) up to the orange line...i´m really scared to damage something as its a totally original,low mileage car, unmolested.
as said, the main object at the end is to replace the door solenoid..
if i have understood correctly, i need to remove my passenger back-seat, for replacement of my door-solenoid. if i´m wrong please correct me.
i have loosen the M6 nuts of the back-bolster (marked red) and removed the upper two M6 bolts (makred green)
than i have found three M5 nuts with studs passing the fibreglass in the area marked blue. i also removed the nuts.
the back becomes free (only with force) up to the orange line...i´m really scared to damage something as its a totally original,low mileage car, unmolested.
as said, the main object at the end is to replace the door solenoid..
When I replaced the driver side solenoid, I also wasn’t able to remove the top part of the back seat. It was my very first Cerbera DIY, so I was being extra careful.
In the end, by removing the base and the lower part of the backrest (red bolts), I was able to pull the trim panel off enough to access the door lock. I removed the whole assembly, replaced the solenoid and then reinstalled.
Be careful to secure the trim panel around the seatbelt aperture, as it a weak point and feels like it could break easily - I think I used a large bulldog clip.
Good luck!
LLantrisant said:
if i have understood correctly, i need to remove my passenger back-seat, for replacement of my door-solenoid. if i´m wrong please correct me.
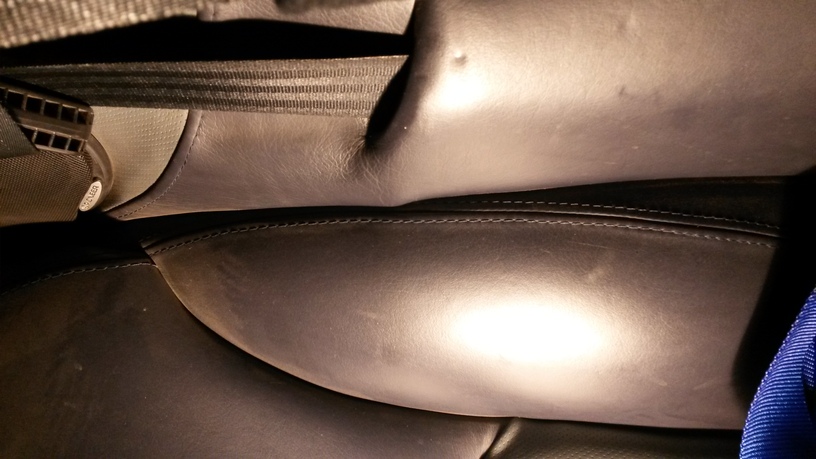
Not really necessaryThere is a cutout in the trim where the seatbelt goes behind, and there is enough flex in the trim to move it out of the way
The leather will be slightly stressed, so be gentle
You need to remove the solenoid from the steel bracket in situ, not too difficult, and you also have to undo the safety cable clamp
Take pics as you go because the whole assembly is not that intuitive
I did this just a couple of weeks ago, so it's quite fresh in my mind
Imran999 said:
When I replaced the driver side solenoid, I also wasn’t able to remove the top part of the back seat. It was my very first Cerbera DIY, so I was being extra careful.
In the end, by removing the base and the lower part of the backrest (red bolts), I was able to pull the trim panel off enough to access the door lock. I removed the whole assembly, replaced the solenoid and then reinstalled.
Be careful to secure the trim panel around the seatbelt aperture, as it a weak point and feels like it could break easily - I think I used a large bulldog clip.
Good luck!
i also need to say: the base bolster sticks as well...so at the moemnt i have loosen all nuts and bolts, but neither the seat-back, nor the seat base wants to come off.In the end, by removing the base and the lower part of the backrest (red bolts), I was able to pull the trim panel off enough to access the door lock. I removed the whole assembly, replaced the solenoid and then reinstalled.
Be careful to secure the trim panel around the seatbelt aperture, as it a weak point and feels like it could break easily - I think I used a large bulldog clip.
Good luck!
ukkid35 said:
Not really necessary
There is a cutout in the trim where the seatbelt goes behind, and there is enough flex in the trim to move it out of the way
The leather will be slightly stressed, so be gentle
You need to remove the solenoid from the steel bracket in situ, not too difficult, and you also have to undo the safety cable clamp
Take pics as you go because the whole assembly is not that intuitive
I did this just a couple of weeks ago, so it's quite fresh in my mind
this means i can leave seat back and seat base in place? the b-pillar trim can be bent/removed without touching the seat?There is a cutout in the trim where the seatbelt goes behind, and there is enough flex in the trim to move it out of the way
The leather will be slightly stressed, so be gentle
You need to remove the solenoid from the steel bracket in situ, not too difficult, and you also have to undo the safety cable clamp
Take pics as you go because the whole assembly is not that intuitive
I did this just a couple of weeks ago, so it's quite fresh in my mind
managed to remove the solenoid:
seat-back could be left in place, but seatbase removed, door gasket removed around b-pillar area.
the b-pillar trim could then be bent (with reasonably low impact on the trim) to gain (just) enough access to get the solenoid and the lock removed.

this said, i have no idea how the solenoid was attached to the lock...i will therefore open a new Thread:
https://www.pistonheads.com/gassing/topic.asp?h=0&...
seat-back could be left in place, but seatbase removed, door gasket removed around b-pillar area.
the b-pillar trim could then be bent (with reasonably low impact on the trim) to gain (just) enough access to get the solenoid and the lock removed.
this said, i have no idea how the solenoid was attached to the lock...i will therefore open a new Thread:
https://www.pistonheads.com/gassing/topic.asp?h=0&...
Edited by LLantrisant on Sunday 24th April 13:26
Gassing Station | Cerbera | Top of Page | What's New | My Stuff