New guy Just bought a CV8
Discussion


fred bloggs said:
Yea, I dont think you need worry about rust.
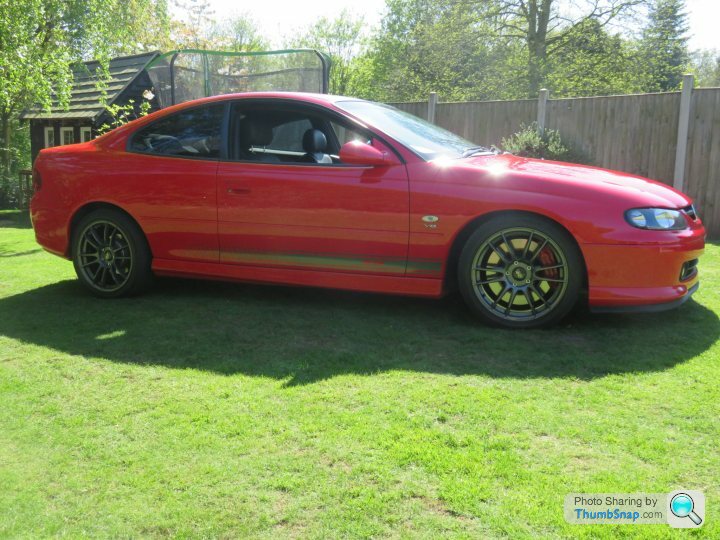
The wheels look nice. I went 8.5 x 18 and 9.5 x 18,with no rubbing at all, and I was conservative. It'd easily fit 9j and 10j
18x8 is stock size,no ?
Yes stock size but offset is now 13mm further out which makes it fill the arch a bit better. I just couldn’t get the definitive answers on wheels to be confident in ordering a larger set. The wheels look nice. I went 8.5 x 18 and 9.5 x 18,with no rubbing at all, and I was conservative. It'd easily fit 9j and 10j
18x8 is stock size,no ?
What offset are you running on yours Fred?
91964 said:
Thanks Ade, I’m a little apprehensive of the new mot rules but as the cut outs are built into the cats (high flowing sort) I can just bolt in standard cats if I have to.
If the rusty area is the bit with the three round holes in, disappearing off to the top of the pic? That is just the brake pipe channel so not structural. If not then please feel free to point it out and I will get right on it!! That said, undersealing treatment is definitely on the cards, there are a few areas where the original paint is going flakey now on inner sills and around rear subframe etc so want to get it treated before it gets worse
That was the area I was looking at. If you take that cover off, check the brake pipes for corrosion, you may get the shock of your life when checking the pipes under the rubber mountings.If the rusty area is the bit with the three round holes in, disappearing off to the top of the pic? That is just the brake pipe channel so not structural. If not then please feel free to point it out and I will get right on it!! That said, undersealing treatment is definitely on the cards, there are a few areas where the original paint is going flakey now on inner sills and around rear subframe etc so want to get it treated before it gets worse

I did and the rust was that bad that when pipe was removed it snapped in two, how lucky I was not to have brake failure. I had all brake pipes renewed for none rust ones.
Ade

THUNDER STORM said:
That was the area I was looking at. If you take that cover off, check the brake pipes for corrosion, you may get the shock of your life when checking the pipes under the rubber mountings.
I did and the rust was that bad that when pipe was removed it snapped in two, how lucky I was not to have brake failure. I had all brake pipes renewed for none rust ones.
Ade
Hello Ade,I did and the rust was that bad that when pipe was removed it snapped in two, how lucky I was not to have brake failure. I had all brake pipes renewed for none rust ones.
Ade
I've tried a couple of times to remove that cover, and each time it ended in failure, what's the secret? In the end I just used a spray can of rust proofer and did the best I could.
John
THUNDER STORM said:
That was the area I was looking at. If you take that cover off, check the brake pipes for corrosion, you may get the shock of your life when checking the pipes under the rubber mountings.
I did and the rust was that bad that when pipe was removed it snapped in two, how lucky I was not to have brake failure. I had all brake pipes renewed for none rust ones.
Ade
Ahh, gotcha! Will give it a lookI did and the rust was that bad that when pipe was removed it snapped in two, how lucky I was not to have brake failure. I had all brake pipes renewed for none rust ones.
Ade
91964 said:
Ahh, gotcha! Will give it a look
All looks ok from what I can see. The cover is a bit crispy but the pipes look fine through the little round holes. They all look like they’ve been sprayed in oil of some sort? I have now sprayed some motorcycle chain lube in there as an added measure. I guess there is no way to tell for sure without the cover coming offYou will have to remove cover, my pipes looked ok, thats the problem you think they are OK, but its the rubber mounting for the pipes that are the problem. Prise back the rubber and the rust is inside that section of rubber.
If you want to check other mounting at other points along pipe run towards the wheels and prise backthe rubber on them to check for rust to get a idea what I am saying.
Regarding getting cover off, the fixings came off OK on mine.
Hope this info helps.
Ade
If you want to check other mounting at other points along pipe run towards the wheels and prise backthe rubber on them to check for rust to get a idea what I am saying.
Regarding getting cover off, the fixings came off OK on mine.
Hope this info helps.
Ade
Just a slightly smug post to say I’ve spent this lovely spring evening changing the oils in the Monaro. It was booked in to be done yesterday but the oil filter ordered two weeks ago only arrived today so had to cancel it.
Anyway it’s Quite a nice job! Oil drains and filter in good locations. Diff easy to fill with 1L bottles. Even the gearbox wasn’t too bad.
Quick test drive on Norwich’s newly completed northern bypass (now we’re like a real city!) reveals a much slicker gear change, diff clonk seems to have gone (hard to say until it’s done a long trip) and engine Seems happy on the new oil.
Just the plugs to change tomorrow and I will then send it to Clive Atthowe for a rolling road to make sure all is well.
jelevents said:
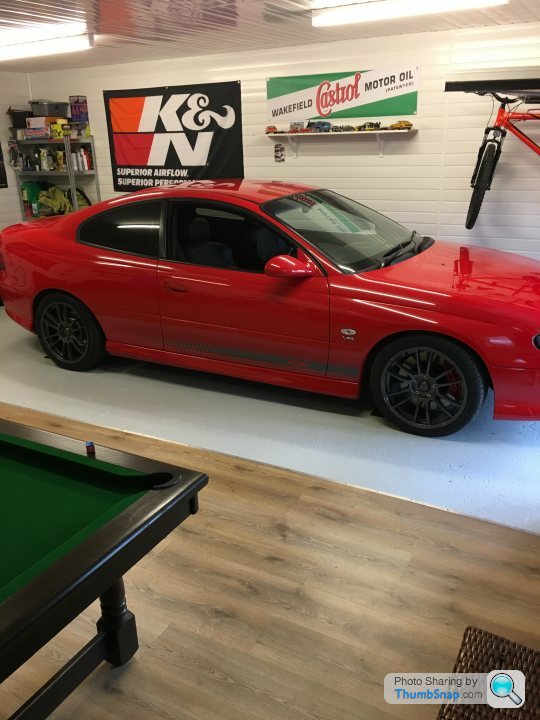
Nice car + best colour  I have so much garage envy
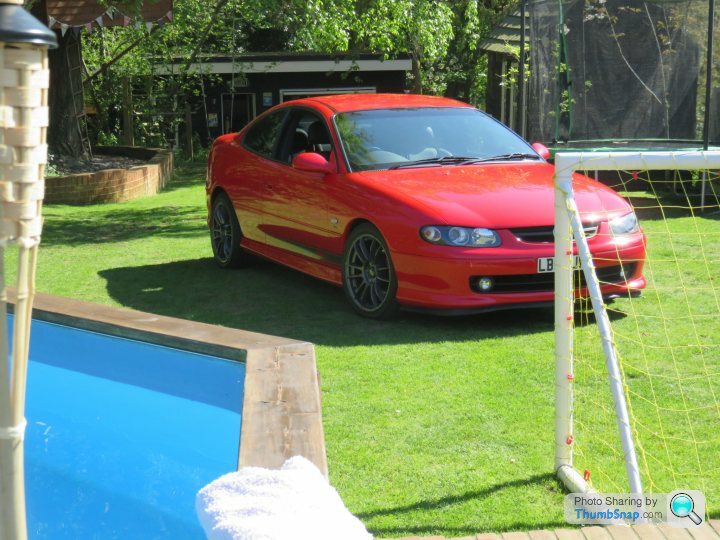
Same here. I have so much garage envy Red monaros look fantastic, the HSV side stripes are a nice addition as is the LS boot badge but like the owner, I am also not keen on the factory V8 badges under the side repeaters - id remove those asap. Do you have an original Monaro or CV8 logo badge?
aka_kerrly said:
Same here.
Red monaros look fantastic, the HSV side stripes are a nice addition as is the LS boot badge but like the owner, I am also not keen on the factory V8 badges under the side repeaters - id remove those asap. Do you have an original Monaro or CV8 logo badge?
No, the back end was de-badged when I got it. I think you have a point about the wing badges. They are nasty!Red monaros look fantastic, the HSV side stripes are a nice addition as is the LS boot badge but like the owner, I am also not keen on the factory V8 badges under the side repeaters - id remove those asap. Do you have an original Monaro or CV8 logo badge?
91964 said:
Just a slightly smug post to say I’ve spent this lovely spring evening changing the oils in the Monaro. It was booked in to be done yesterday but the oil filter ordered two weeks ago only arrived today so had to cancel it.
Anyway it’s Quite a nice job! Oil drains and filter in good locations. Diff easy to fill with 1L bottles. Even the gearbox wasn’t too bad.
Quick test drive on Norwich’s newly completed northern bypass (now we’re like a real city!) reveals a much slicker gear change, diff clonk seems to have gone (hard to say until it’s done a long trip) and engine Seems happy on the new oil.
Just the plugs to change tomorrow and I will then send it to Clive Atthowe for a rolling road to make sure all is well.
Diff oil change is my next to do, glad you found it easy! My gearchange is a little notchy too so I'll probably do that also.Anyway it’s Quite a nice job! Oil drains and filter in good locations. Diff easy to fill with 1L bottles. Even the gearbox wasn’t too bad.
Quick test drive on Norwich’s newly completed northern bypass (now we’re like a real city!) reveals a much slicker gear change, diff clonk seems to have gone (hard to say until it’s done a long trip) and engine Seems happy on the new oil.
Just the plugs to change tomorrow and I will then send it to Clive Atthowe for a rolling road to make sure all is well.
My gearbox oil tip is.... I use a length of hosepipe on a fuel can spout, this then screws directly to the gearbox oil bottle. The hose is quite a snug fit in the filler hole and the bottle fits nicely in the front wheel arch. I then squeeze the bottle to the point of over filling the box as required. A few drips come out into the pan but I then take the hose out and quickly screw the bung in. 15 minute job.
You just need to allow the bottle to breathe back every now and then.
The diff is no problem
You just need to allow the bottle to breathe back every now and then.
The diff is no problem
91964 said:
My gearbox oil tip is.... I use a length of hosepipe on a fuel can spout, this then screws directly to the gearbox oil bottle. The hose is quite a snug fit in the filler hole and the bottle fits nicely in the front wheel arch. I then squeeze the bottle to the point of over filling the box as required. A few drips come out into the pan but I then take the hose out and quickly screw the bung in. 15 minute job.
You just need to allow the bottle to breathe back every now and then.
The diff is no problem
Thanks for that; I've sussed the diff job but not even looked at the gearbox yet. You just need to allow the bottle to breathe back every now and then.
The diff is no problem
selym said:
Thanks for that; I've sussed the diff job but not even looked at the gearbox yet.
Don't forget, on a Monaro, you top up the gearbox oil via the reversing switch, not the filler hole. Count the turns when you remove it. Do not keep turning the switch when you put it back in.John
Edited by mfp4073 on Wednesday 18th April 11:08
mfp4073 said:
Don't forget, on a Monaro, you top up the gearbox oil via the reversing switch, not the filler hole. Count the turns when you remove it. Do not keep turning the switch when you put it back in.
John
This is to get the extra 0.5L in isn’t it? I found by filling with the hose I got the extra in and got the bung in before it ran out. Either way I measured the correct quantity and got it in. Unless there is another reason to fill it via the reverse switch?John
Edited by mfp4073 on Wednesday 18th April 11:08


Gassing Station | HSV & Monaro | Top of Page | What's New | My Stuff