Ducati custom build thread
Discussion


 t thats blown my mind, thats crazy talent you have to make something so hideous (in my opinion!) into something so cool. Will definitely be checking out the blog


crofty1984 said:
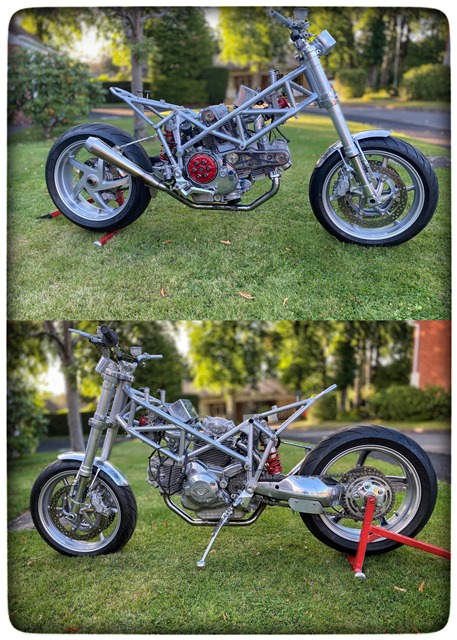
Can I ask - What is the width of the frame?
I have a race fairing that is quite narrow and was thinking of getting a monster to put it on.
the width of the frame is 11"I have a race fairing that is quite narrow and was thinking of getting a monster to put it on.
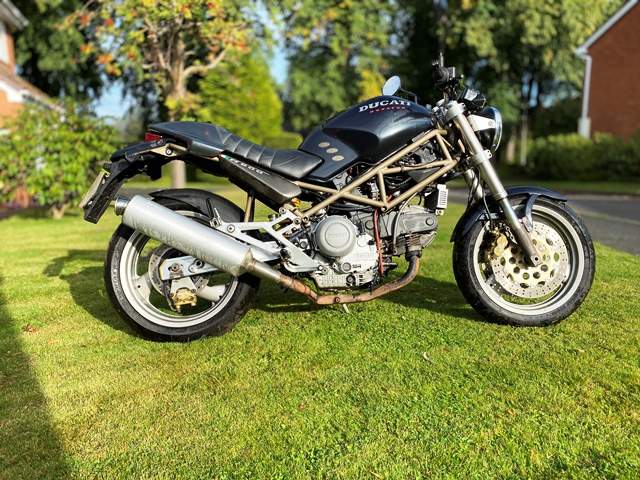
Still in the middle of a build of a multistrada special when a bike i have always wanted came up at a bargain price… an early Ducati Monster. With the prospect of limited going out and no holidays due to Corvid, and the fact the current build will be finished before winter, I decided to buy it! here it is… It's a bit tatty, but it runs well and sounds sweet. Ripe for restoration its going to the back of the garage for a while… this will be a straight restoration though, probably red as I like red monsters!

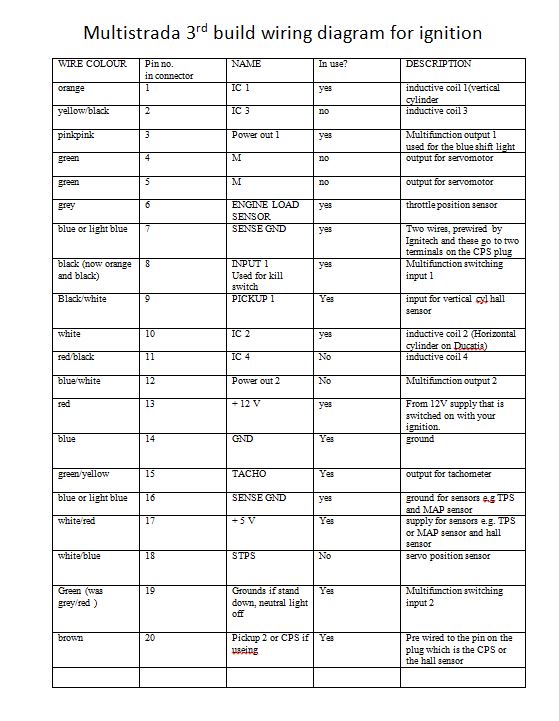
On the last couple of builds where I have converted from EFI to carbs I have used an Ignitech ignition unit that utilised the original induction sensor. While the bikes ran OK, I had to make adjustments in the software to compensate for the fact that the values in the software differed from what was actually happening on the bike, plus the tick over was not as steady as I would have liked… This irritated me, and Ignitech themselves refused to answer emails for advice… so I investigated a hall effect setup.
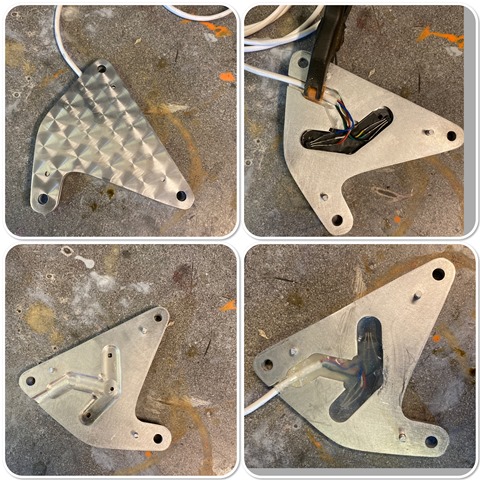
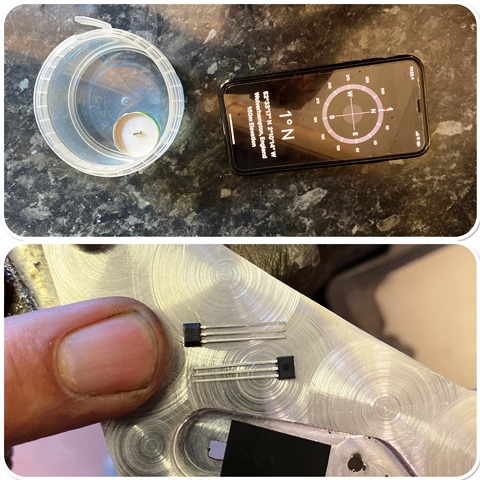
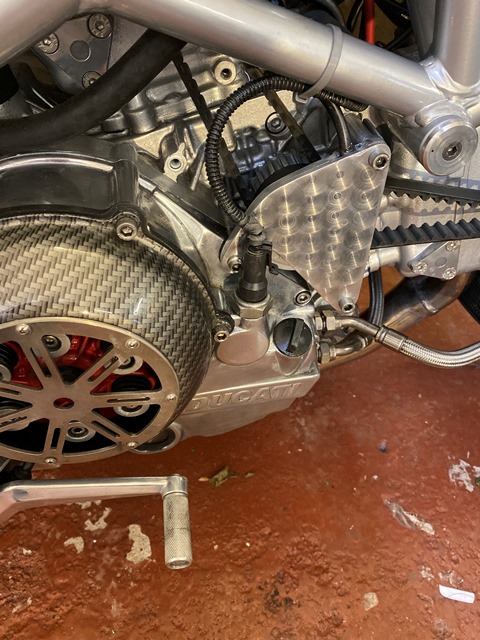
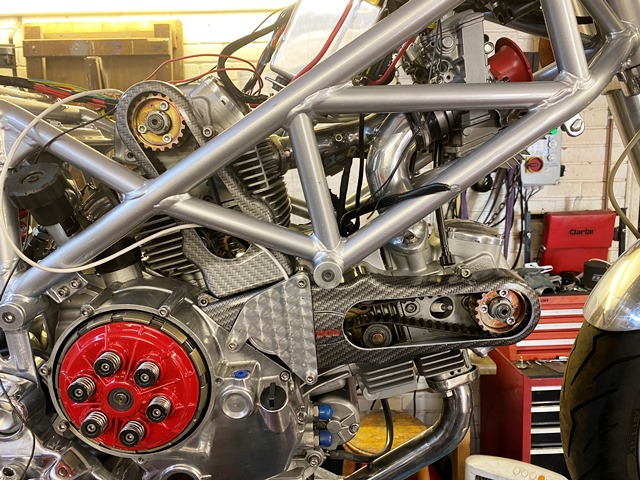
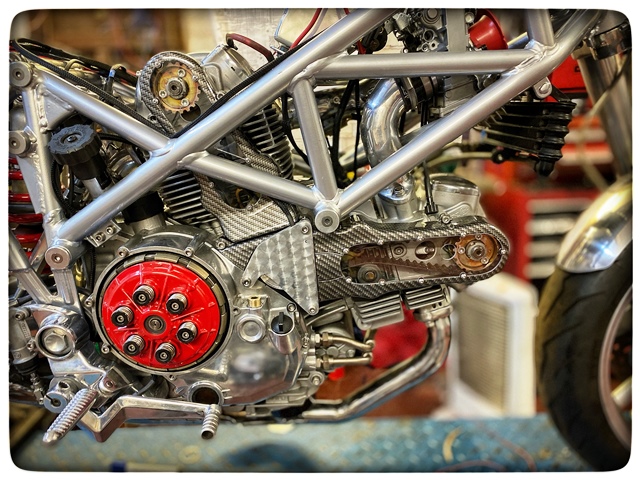
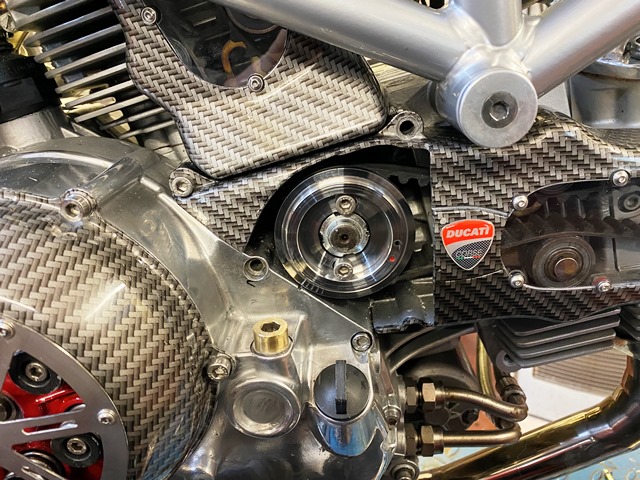
I read about it on the fastbikegear website (Liam has been VERY helpful) and decided to give it a go… The sensors are tiny, and sense two small magnets in the cam wheel through a couple of 3mm holes in the alloy plate. South Pole switches it on, north off, so it’s important to get them the right way round, hence the magnet and phone! Here is how I made it, took a while! The values in the software now match the actual advance when checked with a strobe, and the tick over is rock solid! I have shown it here on the 996 engine as that bike is on the road…
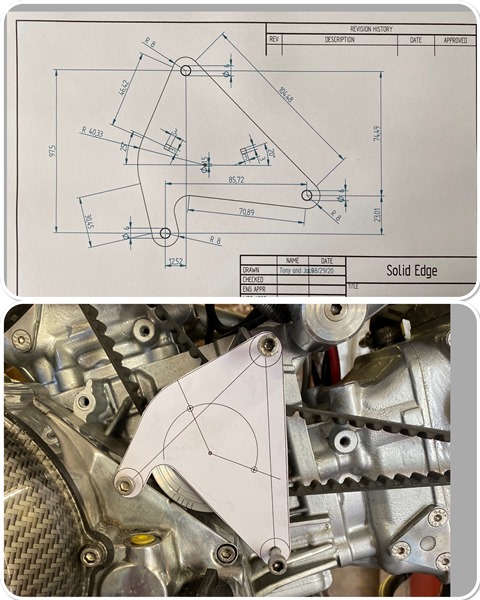
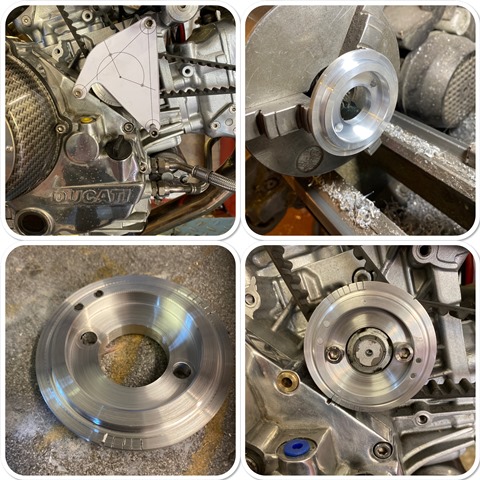
I read about it on the fastbikegear website (Liam has been VERY helpful) and decided to give it a go… The sensors are tiny, and sense two small magnets in the cam wheel through a couple of 3mm holes in the alloy plate. South Pole switches it on, north off, so it’s important to get them the right way round, hence the magnet and phone! Here is how I made it, took a while! The values in the software now match the actual advance when checked with a strobe, and the tick over is rock solid! I have shown it here on the 996 engine as that bike is on the road…
well its running really well now, and its got a very stable tickover... dry clutch always sounds like a bag of spanners through!
here is a short video...
https://youtu.be/M_b45UEcvsA
here is a short video...
https://youtu.be/M_b45UEcvsA

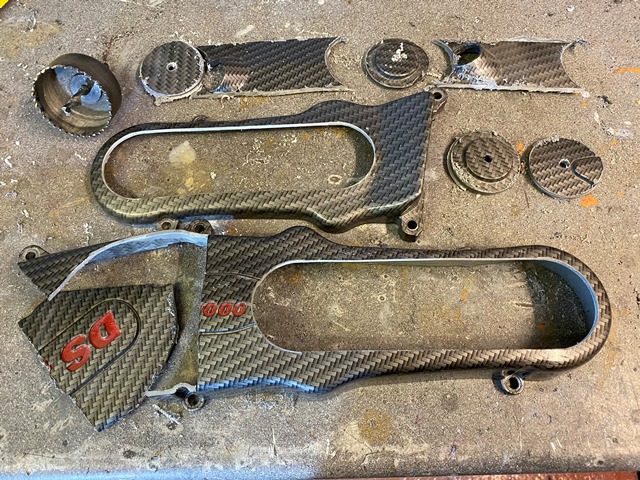
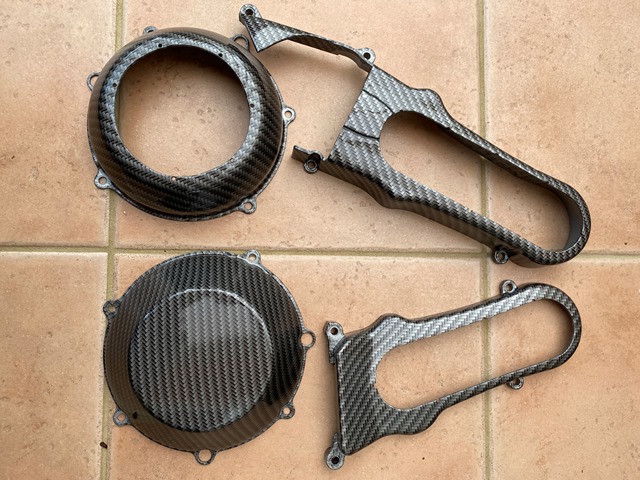
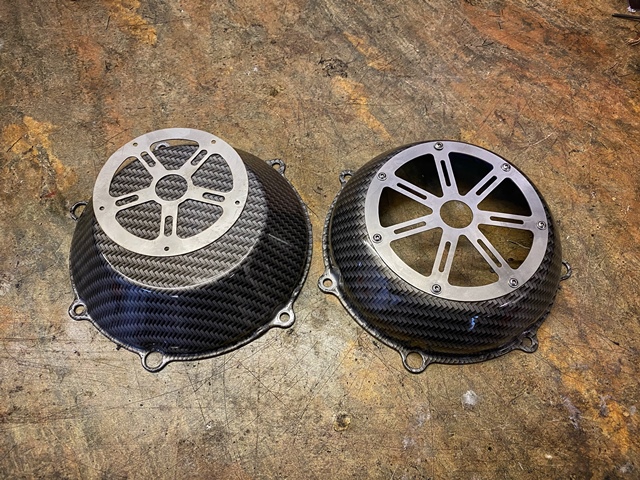
Run out of a few wire connectors so moved onto the cam belt covers till they come… I made some of these a few years ago and they worked well… but this time I have made the holes oval and I think they look better. used a hole saw to cut the circles, and a saw in the dremel to cut the straight bits. just got to carbon dip them now and make the polycarbonate windows…
Also mounted the plate that holds the hall sensors
Also mounted the plate that holds the hall sensors
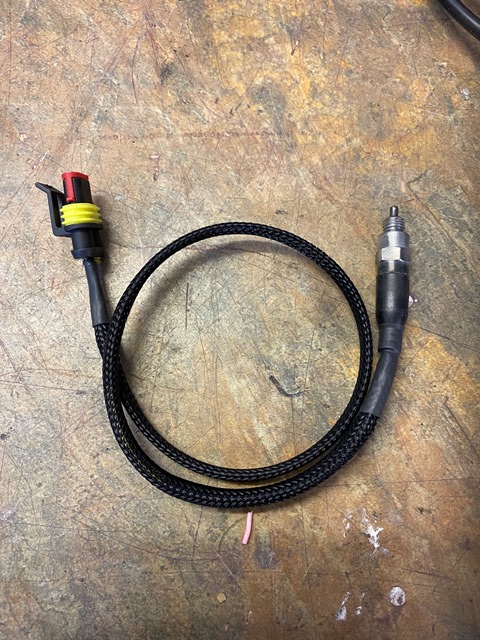
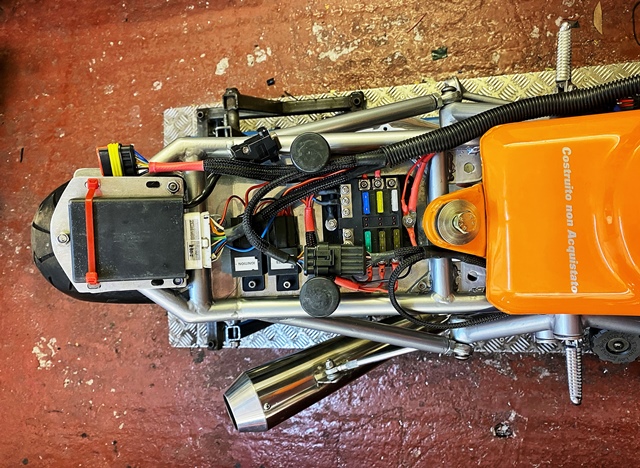
for some parts of the loom I have used this braided sheathing... its a bit fiddly to do but the results are good. I notice a lot of cars use this now on the loom.
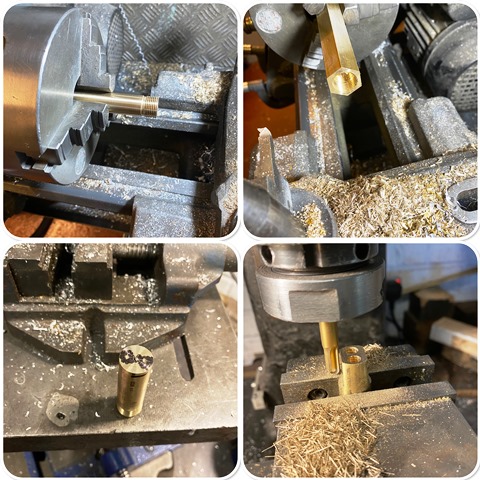
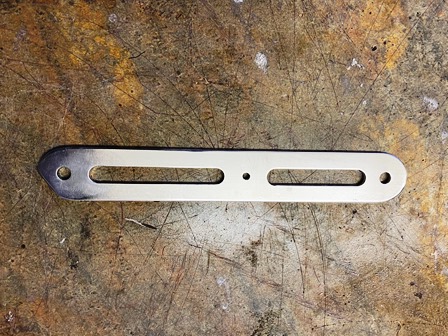
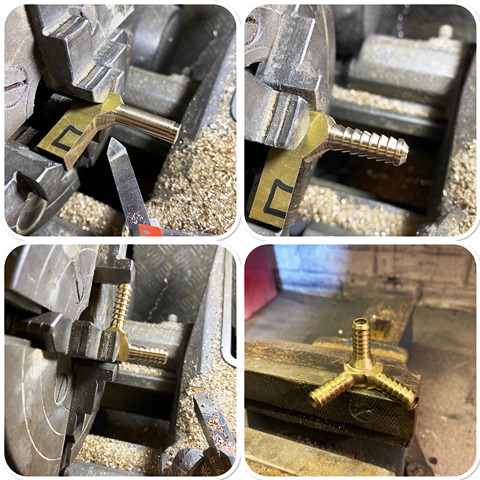
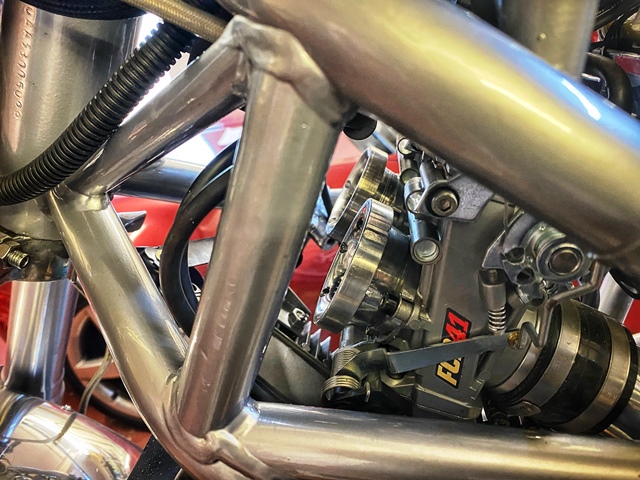
Another job I have been meaning to get around to... The FCR carbs need a one into two cable setup. I was going to use a junction box off an old British bike, but all the ones I could see were either too short on the pull distance, or terrible quality, so I decided to make one. I was going to make it out of aluminum but had difficulty getting nice threads, probably due to the grade of alloy bar I had. so brass it is. It also allowed me to put longer holes to retain the cables, all the ones I looked at only had short holes.
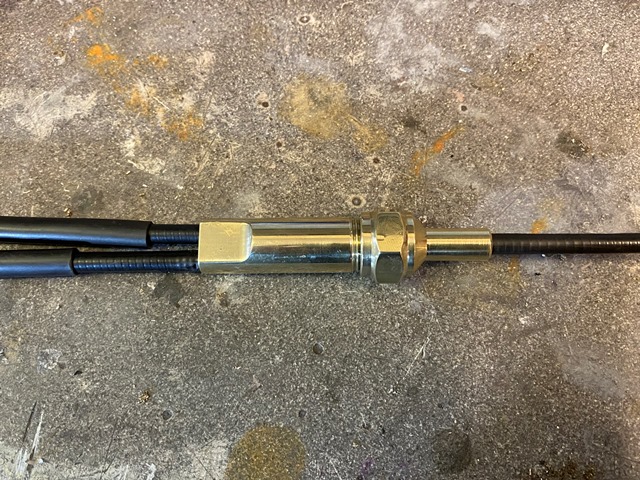
Another job I have been meaning to get around to... The FCR carbs need a one into two cable setup. I was going to use a junction box off an old British bike, but all the ones I could see were either too short on the pull distance, or terrible quality, so I decided to make one. I was going to make it out of aluminum but had difficulty getting nice threads, probably due to the grade of alloy bar I had. so brass it is. It also allowed me to put longer holes to retain the cables, all the ones I looked at only had short holes.
I like this hydrographics, I may do my helmet soon, there are some nice films out there! here is a link to a 2 min video of how its done in the back garden with an Ikea box! if you don't like fake carbon... don't click the link!
https://www.youtube.com/watch?v=jh6Hh1F0-Yg
https://www.youtube.com/watch?v=jh6Hh1F0-Yg
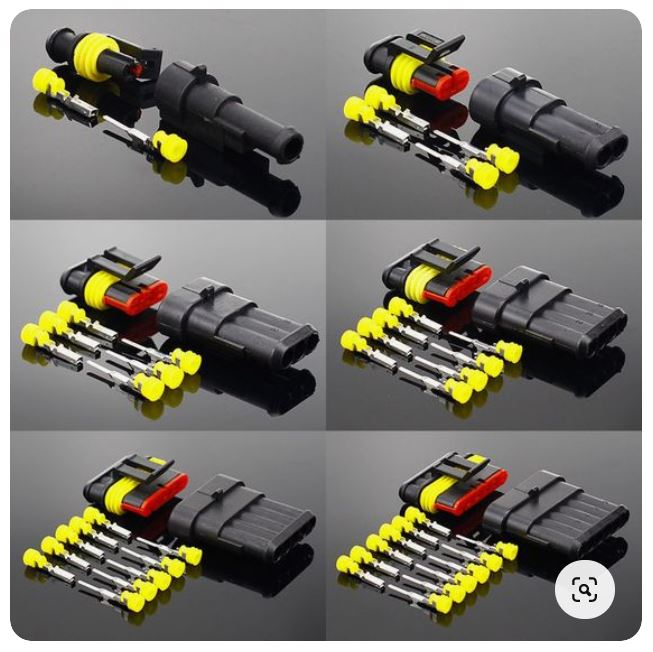
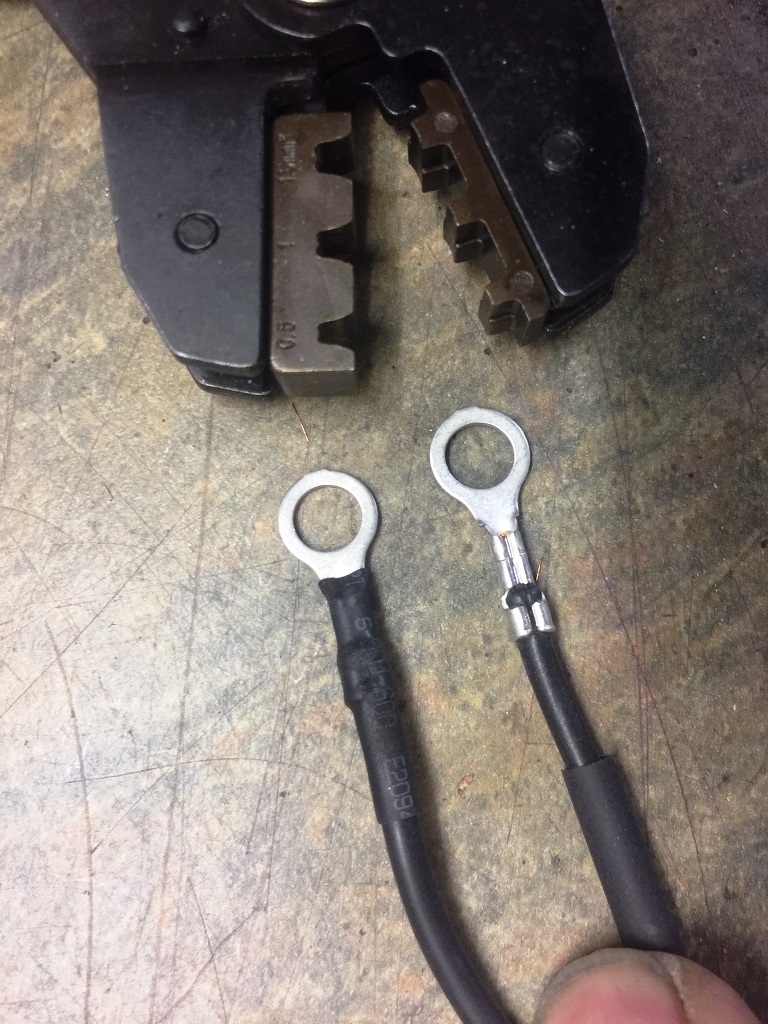
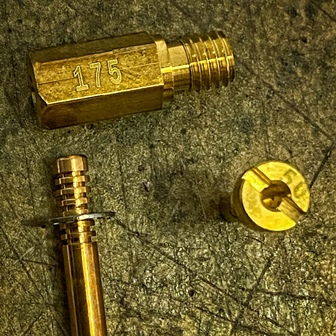
Done a few jobs in preparation for the start… put the jets in the carbs, started with what I think will be rich to be on the safe side… made a stay for the oil cooler, and made the ignition leads. I have had that crimp tool since I was 20… so its 45 years old! it does make nice crimps on the leads though. I have used copper core leads, and resistor plugs to keep the neighbours happy! *The hydro dipping came out quite good...

buzzer said:
well its running really well now, and its got a very stable tickover... dry clutch always sounds like a bag of spanners through!
here is a short video...
https://youtu.be/M_b45UEcvsA
that sounds better than one straight out the showroom here is a short video...
https://youtu.be/M_b45UEcvsA
 nice job, that was always going to get on your nerves even though it did the job adequately.
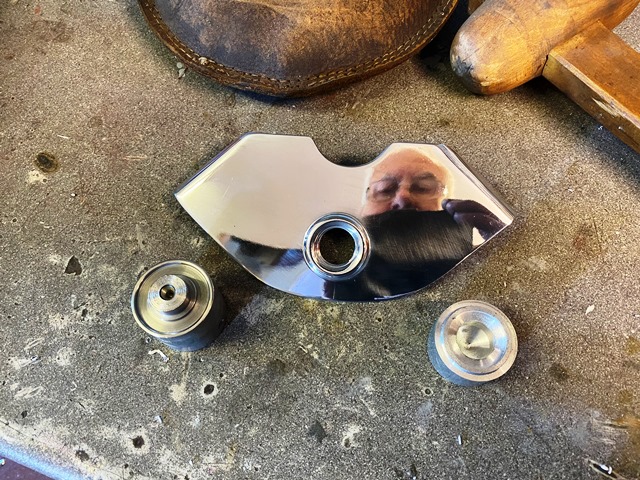
My clutch covers plates are back from the laser cutters… he turned it around in a day... he said he has hardly any work as all his customers are having a hard time... its tough out there... Over the last couple of years I have been learning CAD… Its not an intuitive package and I get frustrated, but get there in the end!

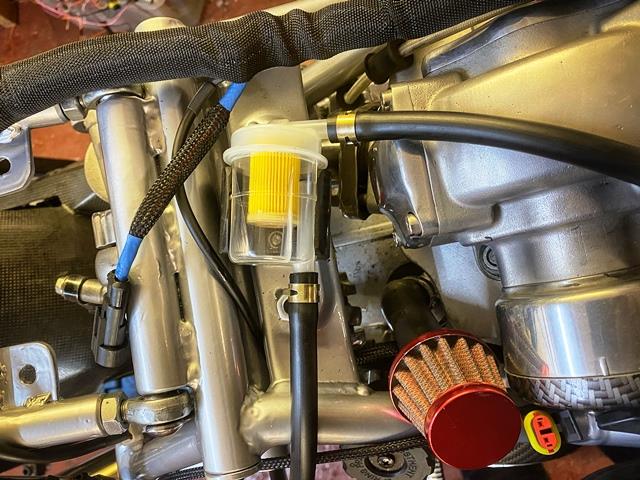
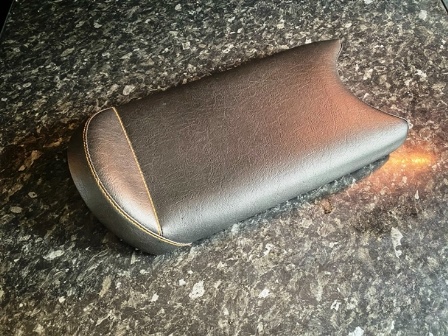
The seat pad came back from Aldridge trimming and as usual Karen did a fantastic job… she said she was not asked for orange stitching very often! next job was to make the fuel filter holder… this took some thinking about due to the position, and the fact I wanted it to be secure… In the end I machined a clip out of nylon. there is an annular grove which stops the filter moving, its very secure
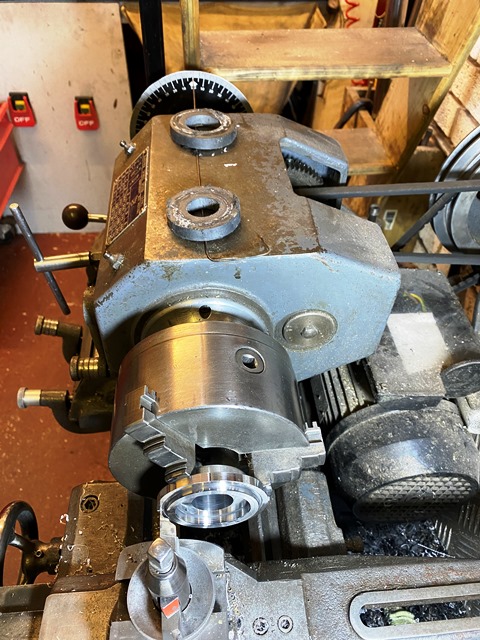
started it up yesterday… it actually started first time!… but it didn’t run well… A quick check on the timing revealed it was significantly out. Looks like I made a calculation error in placing the magnets. rather than re-make the timing wheel, I slotted the mounting holes on the miller. A simple job, but it took ages to set it up! This of course meant that I had to turn off the original timing marks and scribe some new ones. I used a pointer and timing disc in the lathe to do this. the marks were scribed using a sharp tool, drawn across the surface with the cross slide. I think that way they are pretty accurate! here is a short video of it running.

https://www.youtube.com/watch?v=iy-3sPlFi-A
started it up yesterday… it actually started first time!… but it didn’t run well… A quick check on the timing revealed it was significantly out. Looks like I made a calculation error in placing the magnets. rather than re-make the timing wheel, I slotted the mounting holes on the miller. A simple job, but it took ages to set it up! This of course meant that I had to turn off the original timing marks and scribe some new ones. I used a pointer and timing disc in the lathe to do this. the marks were scribed using a sharp tool, drawn across the surface with the cross slide. I think that way they are pretty accurate! here is a short video of it running.
https://www.youtube.com/watch?v=iy-3sPlFi-A
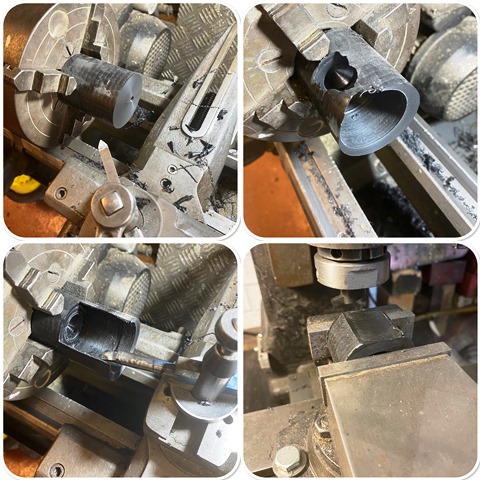
yesterday’s job was to make some velocity stacks for the FCR’s… first time in many years I have done some free hand turning (just like wood turning) to get the shape of the curved entry right. took ages to bet both to match the plastic one… the new ones will enable me to use filters as its important on the road in particular as the carbs face forward…
last update for a little while as its my 65th birthday tomorrow and I am having a week off apparently :lol

last update for a little while as its my 65th birthday tomorrow and I am having a week off apparently :lol
Gassing Station | Biker Banter | Top of Page | What's New | My Stuff