MX graphics - apply wet or not
Discussion
One for the muddy ones here....
I've a graphics set arriving for my KTM today. It'll be going on to new plastics.
I am seeing contradictory advice - some saying to apply wet (water, alcohol, soap mix) and others saying not.
Applying dry and with just heat is going to be a total mare, especially on a KTM where the side panels and tail piece are just one single curved panel, hence one massive sticker.
What's the consensus?
Sea Demon said:
I've always applied graphics wet, mix up a tiny drop of fairy liquid/water in a spray bottle - lightly spray the area the vinyls going, lay it on & get it placed where you want it and then squeegee/cloth the water/bubbles out.
Not done MX graphics but I have done other similar bits, this was always the way. Plenty of soapy water, maybe a bit of masking tape on to help with edge alignment/straightness if it doesn't totally cover a panel.
Squeegee it when you're happy it's in the right spot.
 Never go in dry, got to be at least damp
Not done MX graphics but I have done other similar bits, this was always the way. Plenty of soapy water, maybe a bit of masking tape on to help with edge alignment/straightness if it doesn't totally cover a panel.
Squeegee it when you're happy it's in the right spot.
Sea Demon said:
As always, going in dry ends in tears 

 Never go in dry, got to be at least damp
Applying wet gives you a margin of error so with my hamfisted ways I always apply vinyl graphics wet. Doing so means that you can adjust them slightly if they're not lined up as you'd like. However, you NEED to give them time to dry out completely otherwise it'll be a mess. Hairdryer (not heat gun) helps this process along nicely.
Woe! So no consensus whatsoever then. 
I've done them dry in the past and always ended up with the odd bubble or - and this is the real pisser - a radial crease on the edge which there is no way of smoothing out (hard to explain).
I very first tried applying (very thin) graphics wet a few months ago when I built an RC car and it was brilliant.
I'll try the easiest bits first and see how I go - the rear fender and side panels single piece is giving me nightmares - if I'm lucky it'll be three.
Best not to panic is my advice,. they're only Graphics, no one is going to give to a world championship for fitting them.
For the tail piece (fender is American slang) hold the graphic over the tail with the backing on to give you an idea where you need to start, then remove the whole backing and lightly rest it onto the tail.
Once you're happy it looks square and you have equal edges on both sides start at the middle and smooth over from the middle outwards using a soft cloth. If you have and deep crevasses then use a hairdryer or heat-gun.
Now repeat that process on the rest.
Use a pin to prick any air bubbles.
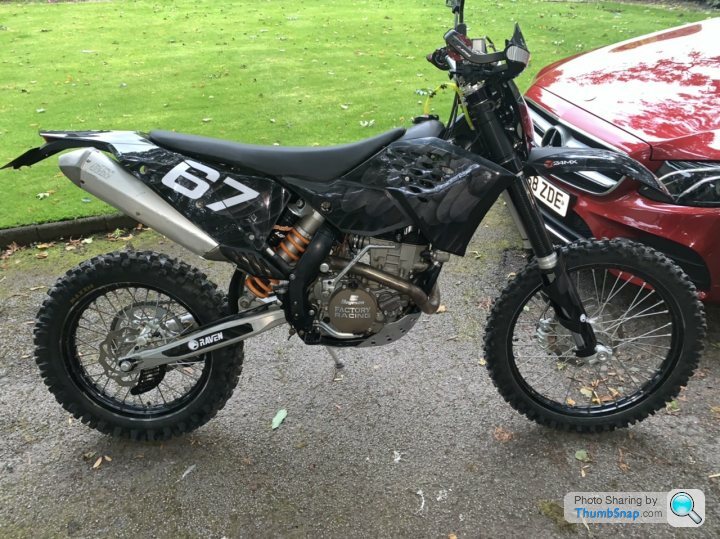
Update - thanks for the suggestions. It became apparent to me in around three nanoseconds that doing these dry was not possible - the shrouds would have bee problematic as they’ve got loads of holes in too.
Anyway it was quite enjoyable and it’s pretty well flawless. Only thing that is bothering me a bit is that it might be a bit too subdued.
Oh, and I am going to have to bite the bullet and get some spangly new wheels.

Anyway it was quite enjoyable and it’s pretty well flawless. Only thing that is bothering me a bit is that it might be a bit too subdued.
Oh, and I am going to have to bite the bullet and get some spangly new wheels.

Gassing Station | Biker Banter | Top of Page | What's New | My Stuff


