Ducati Monster M900 restoration project
Discussion
Thought I would start a new thread... It's been a very strange year... I normally build something over winter, but this year I have been busy on my last build all spring and summer, and that is finished and at the back of the garage ready for spring.
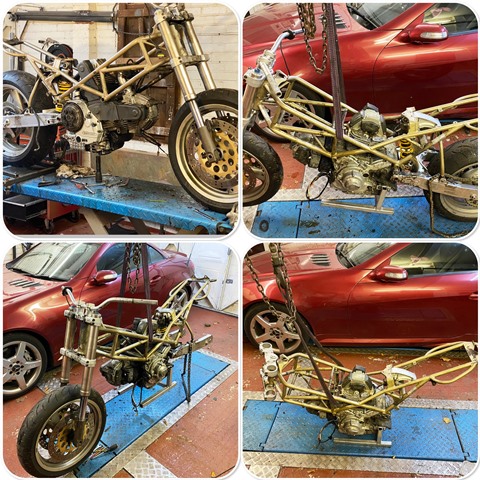
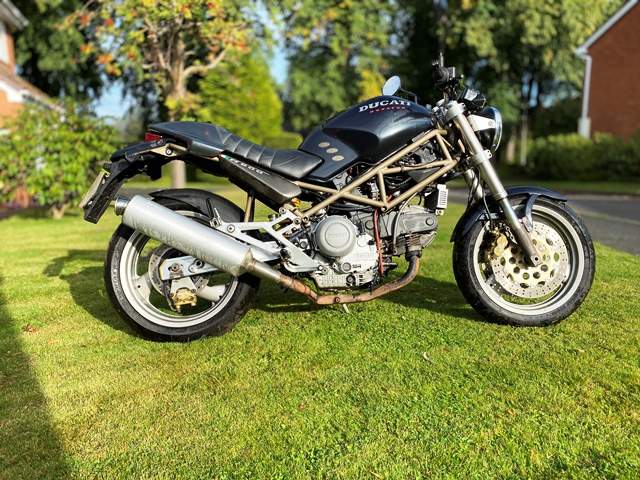
So I have started a rebuild on a 1998 Monster 900, a bike I have always wanted to own. I like the looks, and simplicity of them, and they handle great! this will be a straight restoration and I will be keeping it looking the same save for it being red and probably gold frame and wheels. I started the stripdown yeasterday...
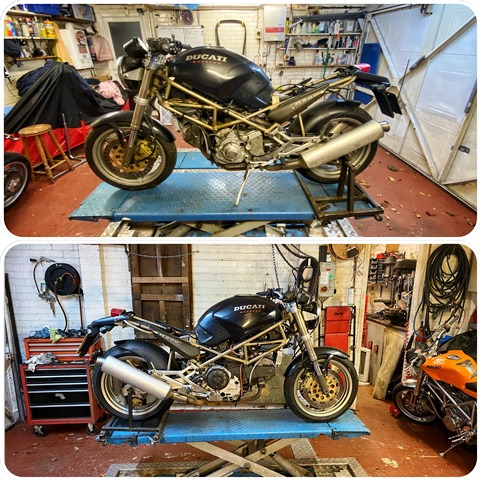
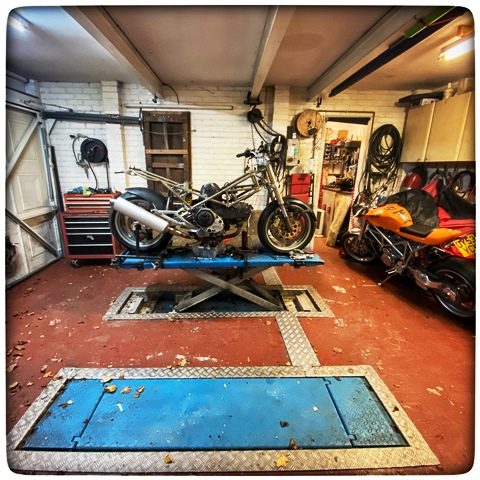
So I have started a rebuild on a 1998 Monster 900, a bike I have always wanted to own. I like the looks, and simplicity of them, and they handle great! this will be a straight restoration and I will be keeping it looking the same save for it being red and probably gold frame and wheels. I started the stripdown yeasterday...


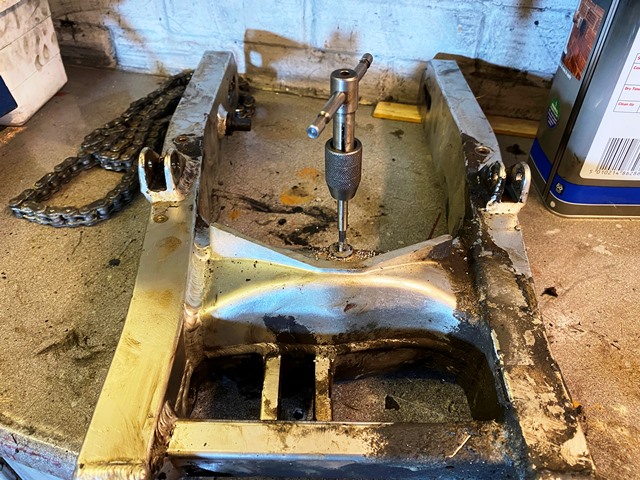
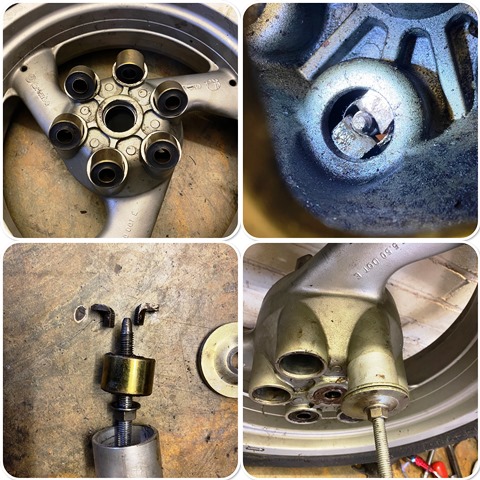
Tried to remove the cush rubbers today as I am going to have the wheels powder coated... the rubbers were good, so I didn't want to destroy them. You can't knock them out as the drift just bounces off the rubber, and there is no way to get to the outer sleeve... So I made this puller, that has a split threaded cotter. its a bit fiddly, but they came out a treat, and I can re use them now

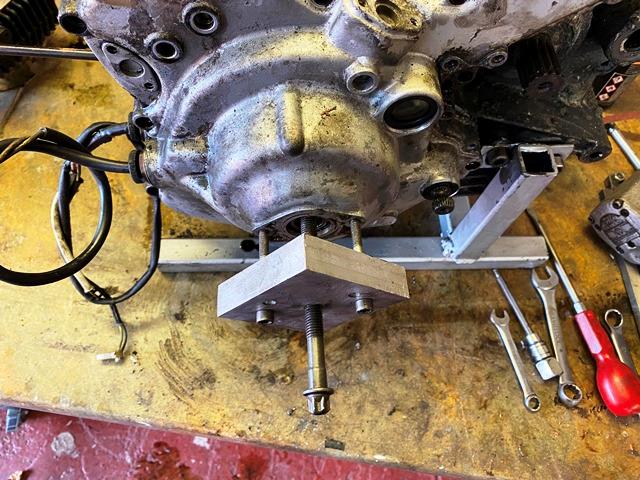
Looks like the engine has never been worked on, apart from someone has removed the alternator cover and put it back on sith what could best be described as glue! normally they come off with a tap, but in this case I had to resort to a puller…
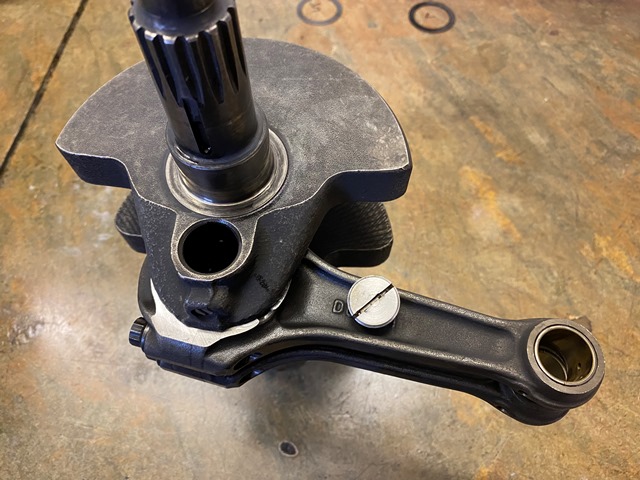
the engine is all apart, and I am pleased with its condition... no bore wear, and everything look good. the main reason to take it apart is to bead blast the cases... which of course means a complete strip. I am glad I did it anyway as people on the ducati forums have pointed out the crank plugs come loose which damages the cases. While this one was not loose, it was not tight either can came out with a gentle twist of the screw driver... disaster waiting to happen! its locktited in place now...
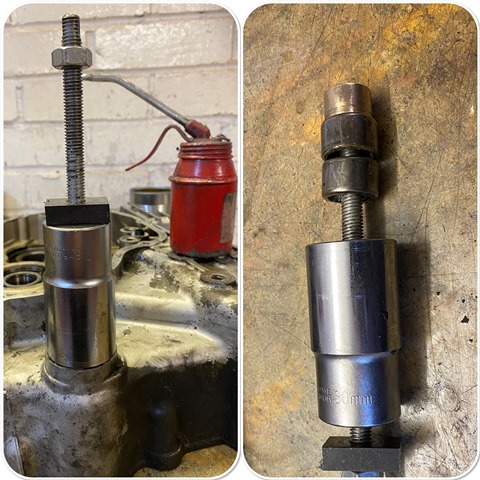
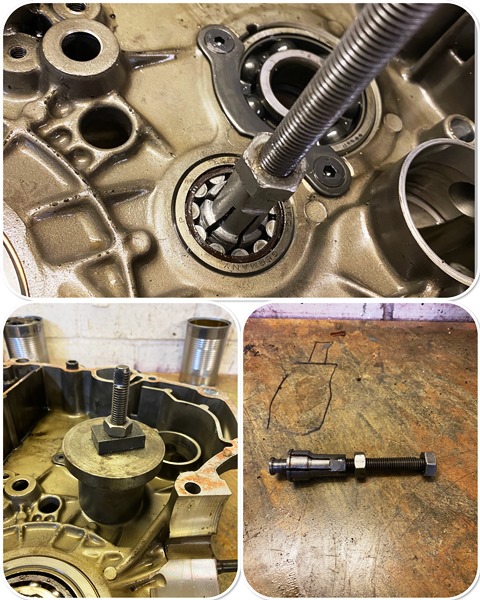
I hate bashing bearings out,and where possible try to make a puller of some sort… in the case of the swinging arm bearings it’s easy, just a stepped bush (it does destroy the inner seal..) and out they come. the step needs to clear the circlip though… some of the engine bearings are more difficult as you can’t get to the back… for this I made an expandable stepped puller, that expands into the bearing as a bolt rides up an internal taper. with this they come out easy…
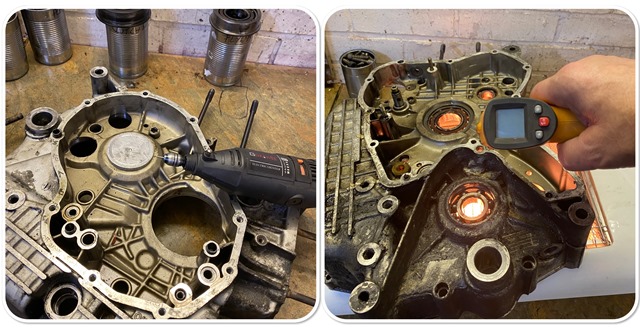
To get the bearings out I also heat the cases… I would like to use the oven as its a more even heat… but I can’t for two reasons.. the first is the cases are too big… and secondly she gets upset, particularly as its a new oven! So over the halogen heater it is… keeping an eye on the temperature… I also like to mark EVERYTHING, so it can go back where it came from, and in the same position. I am not keen on centre pops, instead I use a little diamond burr in the dremel… this will even mark bearings and means you can number stuff as well, and it does not cause stress raisers…
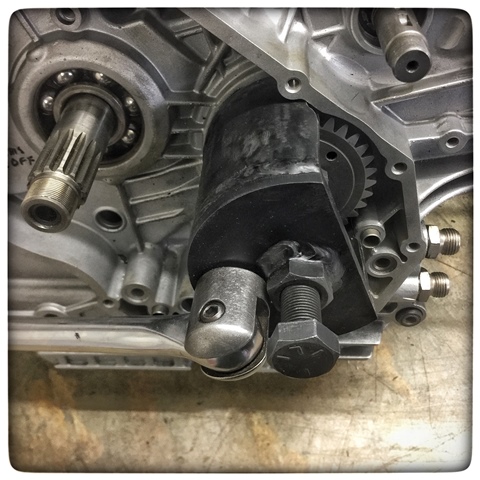
Of course parting the cases means the primary gear has to come off… and they are VERY tight… you can forget anything but a really robust puller. here is one I mad a few years ago. with this it came off easily.
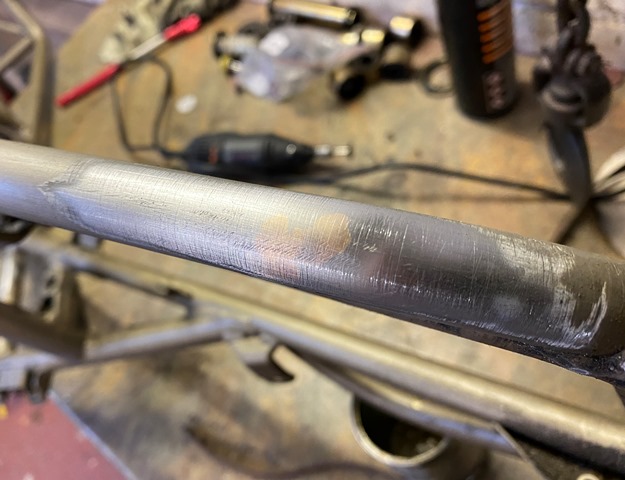
Just preparing the frame and parts to take to the powder coaters... On the grab handle there were two small dents that I just know that if I left them they would bug me forever, so I TIG brazed them up and filed them down. there is something really satisfying about TIG brazing!

the engine is all apart, and I am pleased with its condition... no bore wear, and everything look good. the main reason to take it apart is to bead blast the cases... which of course means a complete strip. I am glad I did it anyway as people on the ducati forums have pointed out the crank plugs come loose which damages the cases. While this one was not loose, it was not tight either can came out with a gentle twist of the screw driver... disaster waiting to happen! its locktited in place now...

I hate bashing bearings out,and where possible try to make a puller of some sort… in the case of the swinging arm bearings it’s easy, just a stepped bush (it does destroy the inner seal..) and out they come. the step needs to clear the circlip though… some of the engine bearings are more difficult as you can’t get to the back… for this I made an expandable stepped puller, that expands into the bearing as a bolt rides up an internal taper. with this they come out easy…


To get the bearings out I also heat the cases… I would like to use the oven as its a more even heat… but I can’t for two reasons.. the first is the cases are too big… and secondly she gets upset, particularly as its a new oven! So over the halogen heater it is… keeping an eye on the temperature… I also like to mark EVERYTHING, so it can go back where it came from, and in the same position. I am not keen on centre pops, instead I use a little diamond burr in the dremel… this will even mark bearings and means you can number stuff as well, and it does not cause stress raisers…

Of course parting the cases means the primary gear has to come off… and they are VERY tight… you can forget anything but a really robust puller. here is one I mad a few years ago. with this it came off easily.

Just preparing the frame and parts to take to the powder coaters... On the grab handle there were two small dents that I just know that if I left them they would bug me forever, so I TIG brazed them up and filed them down. there is something really satisfying about TIG brazing!

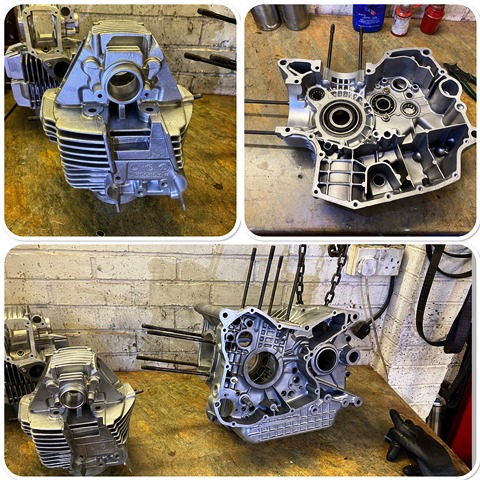
the engine cases are back from the vapour blasters… what a superb job! attention to detail is what its all about and they came back prefect… I will definitly use this guy again… the finish is as good as I have ever seen… https://spvapourblasting.co.uk/ I know these cases are painted from original but the pain always flakes off, so I have decided to leave them bear, and use ACF 50 on them to keep them looking nice… this will probably be a low miles, fair weather bike for me…
the engine build begins… I got the cases nice and hot and pressed the bearings in, and then checked the crank and gearbox shafts end float as I wont be using a gasket as Ducati have now discontinued them and use Threebond in place … I had already ordered a few shims by measuring the old gasket (14 thou) and taking that off the shims that are in there… when the shims come in a few days I will build it properly…
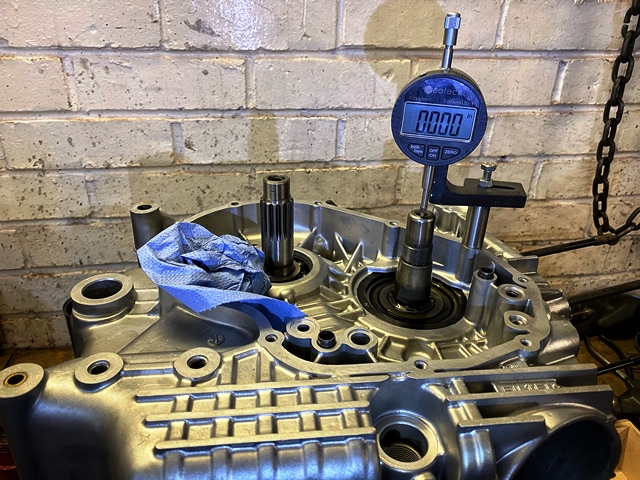
the engine build begins… I got the cases nice and hot and pressed the bearings in, and then checked the crank and gearbox shafts end float as I wont be using a gasket as Ducati have now discontinued them and use Threebond in place … I had already ordered a few shims by measuring the old gasket (14 thou) and taking that off the shims that are in there… when the shims come in a few days I will build it properly…


todays job has been cleaning out the oilways in the barrels after being vapour blasted... To do this properly and get every last bead of media out I removed and replaced the core plugs... they are cheap to buy. There was a surprising amount of crud behind them... Made a couple of stepped punches so I could drift them in nice and square.
Checked the bores for wear, there simply isn't any! Ground the valves in with some fine paste (how old is that tin of grinding paste 😅) and checked I had a continuous seal with a sharpie pen. Gave the guides a quick clean with the burnishing hone which just removes carbon,
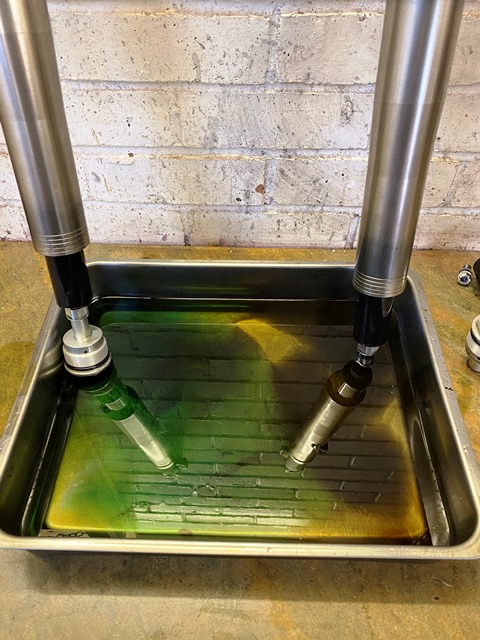
Finally, a good wash in petrol the tray and a check in the bottom for any blasting media. My mate who builds automatic gearboxes gave me the tip on the stainless steel trays... you really can see any debris in the bottom!

Great work, where did you get those stainless tests? They look useful if they're not silly money.
One useful trick for checking valve seal once you've lapped them in is turn the head upside down and fill the combustion chamber with water+anti freeze mix, if it's still there 24h later you're good, otherwise it'll dribble past the valve and up the port.
One useful trick for checking valve seal once you've lapped them in is turn the head upside down and fill the combustion chamber with water+anti freeze mix, if it's still there 24h later you're good, otherwise it'll dribble past the valve and up the port.
Edited by Krikkit on Saturday 28th November 18:55
Krikkit said:
Great work, where did you get those stainless tests? They look useful if they're not silly money.
One useful trick for checking valve seal once you've lapped them in is turn the head upside down and fill the combustion chamber with water+anti freeze mix, if it's still there 24h later you're good, otherwise it'll dribble past the valve and up the port.
the trays are Ikea!One useful trick for checking valve seal once you've lapped them in is turn the head upside down and fill the combustion chamber with water+anti freeze mix, if it's still there 24h later you're good, otherwise it'll dribble past the valve and up the port.
Edited by Krikkit on Saturday 28th November 18:55
buzzer said:
todays job has been cleaning out the oilways in the barrels after being vapour blasted... To do this properly and get every last bead of media out I removed and replaced the core plugs... they are cheap to buy. There was a surprising amount of crud behind them... Made a couple of stepped punches so I could drift them in nice and square.
Checked the bores for wear, there simply isn't any! Ground the valves in with some fine paste (how old is that tin of grinding paste ??) and checked I had a continuous seal with a sharpie pen. Gave the guides a quick clean with the burnishing hone which just removes carbon,
Finally, a good wash in petrol the tray and a check in the bottom for any blasting media. My mate who builds automatic gearboxes gave me the tip on the stainless steel trays... you really can see any debris in the bottom!

Man I haven’t seen suckers and grinding paste for years.Checked the bores for wear, there simply isn't any! Ground the valves in with some fine paste (how old is that tin of grinding paste ??) and checked I had a continuous seal with a sharpie pen. Gave the guides a quick clean with the burnishing hone which just removes carbon,
Finally, a good wash in petrol the tray and a check in the bottom for any blasting media. My mate who builds automatic gearboxes gave me the tip on the stainless steel trays... you really can see any debris in the bottom!

buzzer said:
/ I know these cases are painted from original but the pain always flakes off, so I have decided to leave them bear, and use ACF 50 on them to keep them looking nice… this will probably be a low miles, fair weather bike for me…
Have you looked at any of the ceramic coating places, I've been really impressed with some of those. ddom said:
Have you looked at any of the ceramic coating places, I've been really impressed with some of those.
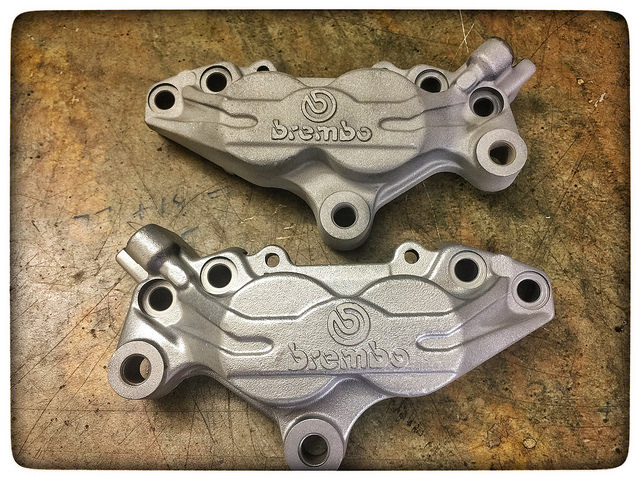
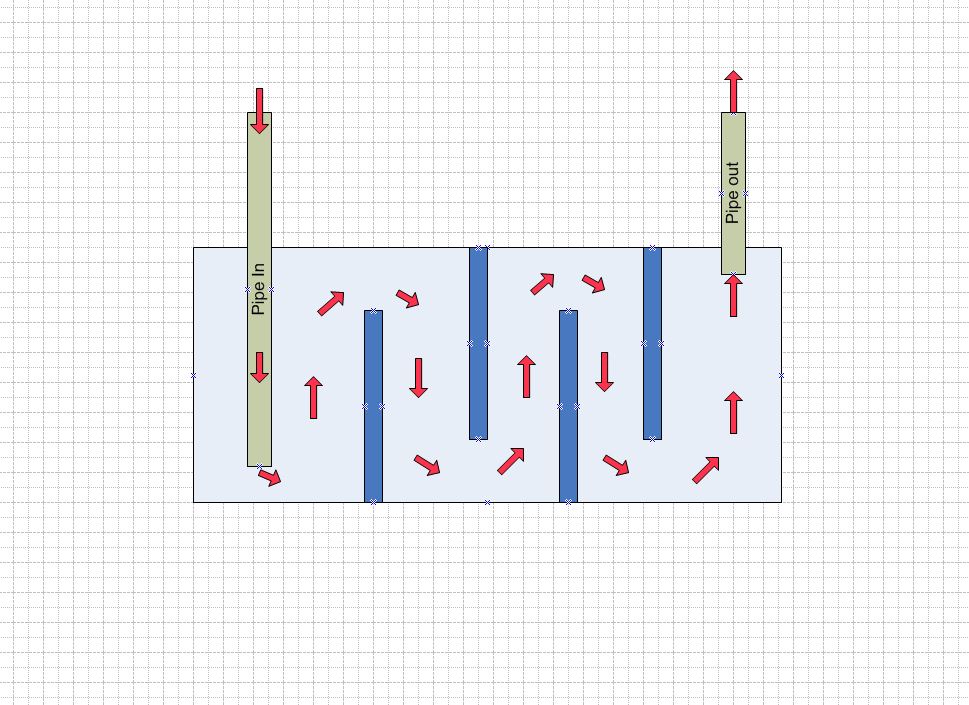
I have! and as you say its very impressive... I have been considering it but to be honest I do love the look of the bare cases, and providing you spray them with ACF 50 now and then they stay niceWaiting for the engine spares at the moment, so filled some time doing some bead blasting on bits and pieces… one of the best bits of kit I have is a blast cabinet… It used to live outside at the back of the garage because I could never seal it from escaping media as obviously the air tries to inflate the cabinet… with machines about abrasive dust is a no no… Then I hit on the idea of a centrifugal type filter, which offers no resistance to the air going through it. I made the filter out of an Ikea plastic box and some sink drain pipe, it vents outside…. the principle is as the air is made to twist and turn, the partials of dust and media centrifuge out and drop to the bottom of the chambers… so the first chamber gets the most, the second less and so on. there is hardly anything on the drive and nothing in the workshop. its difficult to get this level of restoration to a part without it… Bead also gives that nice sheen to alloy parts and they don’t pick up dirty finger prints. its very good at resisting oxidation as well, particularly with a coat of ACF-50… here is the fuel tap.
I used to make a BIG mistake with bead blasting… I could never get a really nice finish except with brand new media… I moaned at the supplier once and he asked me what pressure I blasted at… high as I can I told him.. there is your problem then! you are shattering the glass beads and turning them into sharp dust, hence you get a dull surface! So I went home, filled my cabinet with new bead and got my wife to turn up the pressure as I cleaned a part… soon as it went shiny, that was the best pressure!
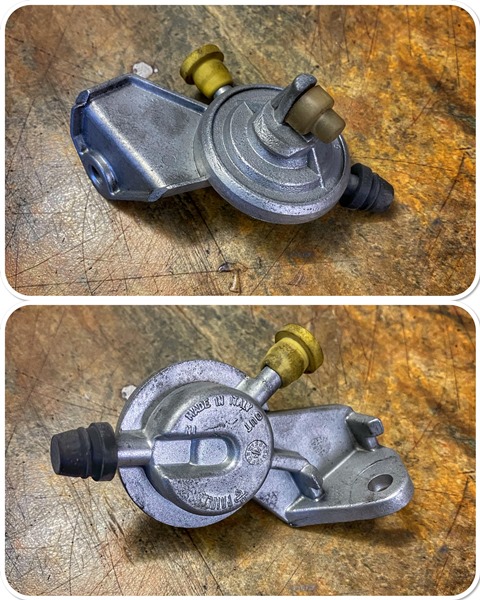
here is the difference old bead high pressure, new bead low pressure!
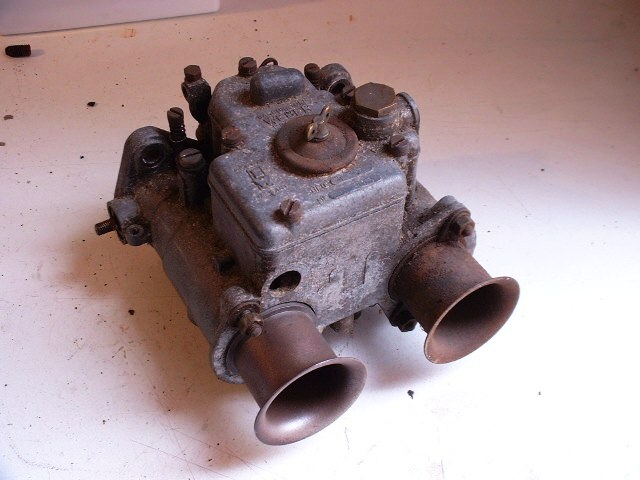
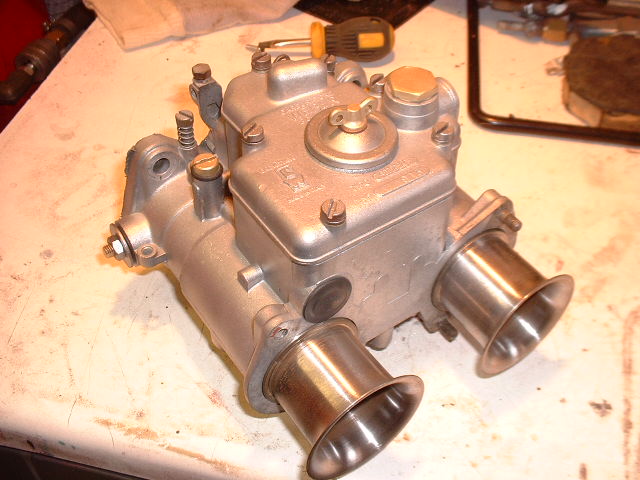
here is a before and after on some weber carbs I rebuilt...
here is how the filter works
I used to make a BIG mistake with bead blasting… I could never get a really nice finish except with brand new media… I moaned at the supplier once and he asked me what pressure I blasted at… high as I can I told him.. there is your problem then! you are shattering the glass beads and turning them into sharp dust, hence you get a dull surface! So I went home, filled my cabinet with new bead and got my wife to turn up the pressure as I cleaned a part… soon as it went shiny, that was the best pressure!

here is the difference old bead high pressure, new bead low pressure!

here is a before and after on some weber carbs I rebuilt...


here is how the filter works

Gassing Station | Biker Banter | Top of Page | What's New | My Stuff


