
Honda NC30 Restoration Project
Discussion


Made a start on cleaning up the frame rather than the engine at the weekend. This is what it now looks like after a few of hours work.
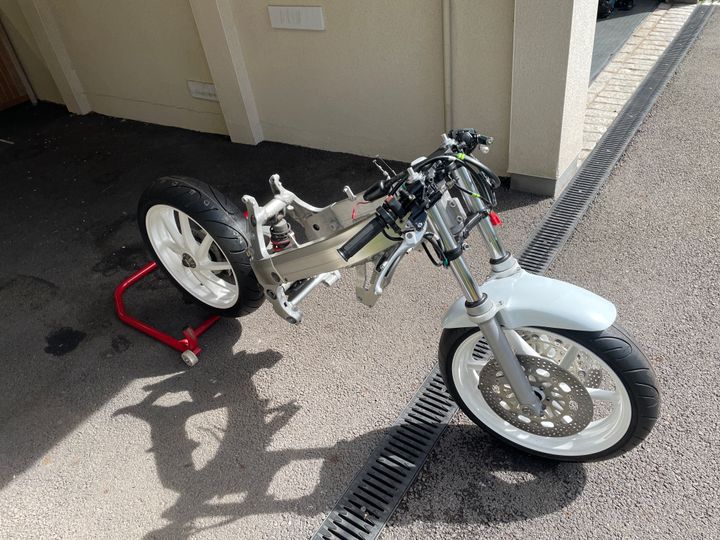
It mostly came up ok with a lot of degreaser and scrubbing followed by scotchbrite heads on the dremel to get into all the hard to reach areas. The cast parts now look fine and the main frame rails, which are brushed finish anodised, just needed a gentle clean. The problem areas are the anodised cast sections at the ends of the rails, which are fairly badly scratched through the anodising.
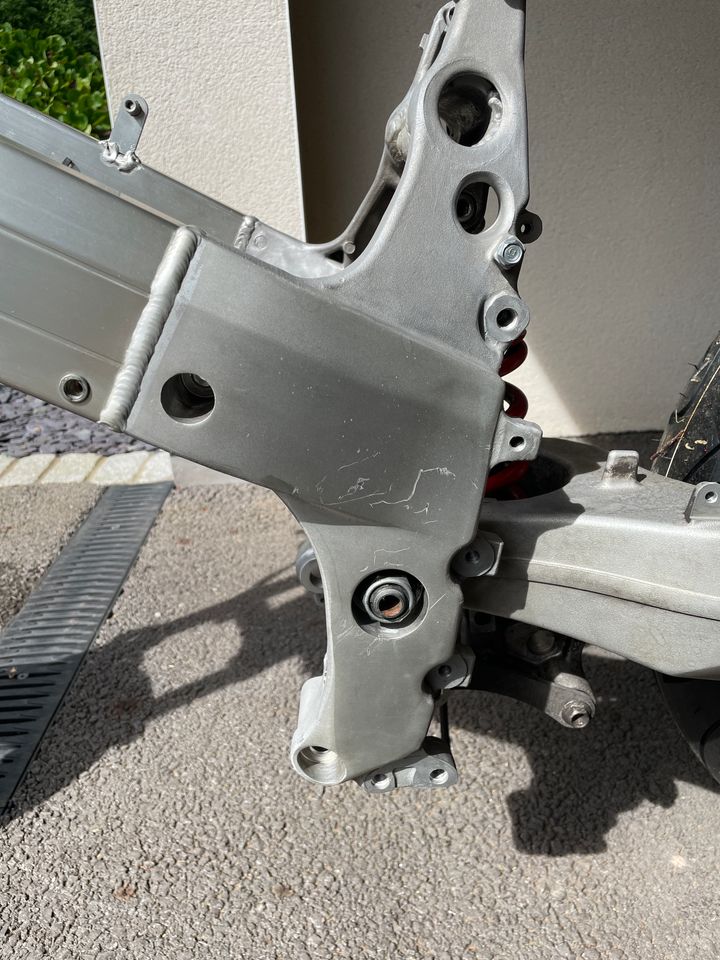
Not quite sure how to handle these. Can either sand off the anodised finish and remove the scratches, re-finish the bare aluminium using various grades of wet & dry, then drag scotchbrite over the surface to replicate the OEM brushed finish, or vapor blast just these sections with glass bead media and an attachment for the pressure washer to try and get more of a fine cast finish?
It mostly came up ok with a lot of degreaser and scrubbing followed by scotchbrite heads on the dremel to get into all the hard to reach areas. The cast parts now look fine and the main frame rails, which are brushed finish anodised, just needed a gentle clean. The problem areas are the anodised cast sections at the ends of the rails, which are fairly badly scratched through the anodising.
Not quite sure how to handle these. Can either sand off the anodised finish and remove the scratches, re-finish the bare aluminium using various grades of wet & dry, then drag scotchbrite over the surface to replicate the OEM brushed finish, or vapor blast just these sections with glass bead media and an attachment for the pressure washer to try and get more of a fine cast finish?
Nearly done with restoration of all of the parts (apart from engine and rear suspension, which are both still to do) that have come off the bike.
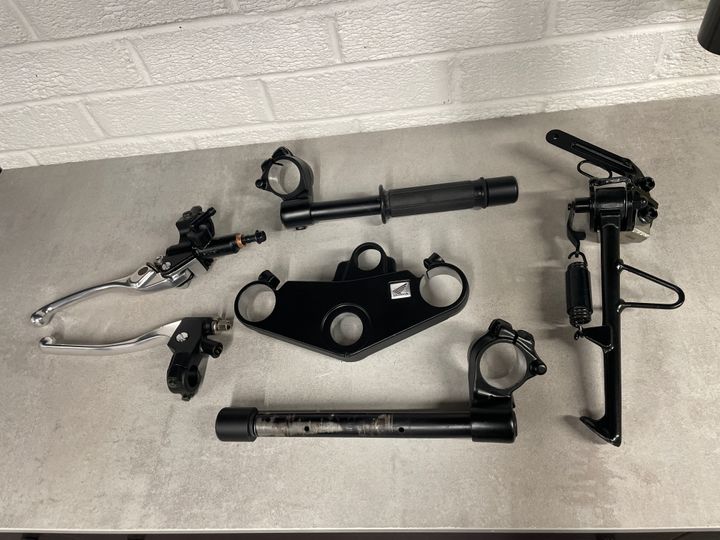
This week, it's been the controls. All removed, cleaned and re-painted ready to go back on. Top yoke was seized on, but managed to free it eventually with a lot of WD40 and some gentle persuasion with a hammer and wooden wedge. Front brake master cylinder thoroughly cleaned up inside and out and fitted with new seals, new levers on both sides, various new bolts and nuts and everything else cleaned up and re-painted matt black. I removed the tiny Honda badge on the top yoke, sanded back to bare metal and re-painted the logo and text in black, just because I think it looks nicer than all plain black as it was originally - and I obviously have way too much time on my hands...
I also did the side stand a few weeks ago. Angle grinder to remove off the bracket for the annoying rubber flappy thing on the end, filed back and all re-painted with a new spring. Have also been cold-blueing various bolts and brackets (like the side stand spring pivot bracket) that aren't suitable to paint with varying degrees of success. Think I've got the system worked out now to get good results.
Some bodywork also arrived this week, but it was all damaged in transit, so probably another long wait until the replacements arrive.
This week, it's been the controls. All removed, cleaned and re-painted ready to go back on. Top yoke was seized on, but managed to free it eventually with a lot of WD40 and some gentle persuasion with a hammer and wooden wedge. Front brake master cylinder thoroughly cleaned up inside and out and fitted with new seals, new levers on both sides, various new bolts and nuts and everything else cleaned up and re-painted matt black. I removed the tiny Honda badge on the top yoke, sanded back to bare metal and re-painted the logo and text in black, just because I think it looks nicer than all plain black as it was originally - and I obviously have way too much time on my hands...
I also did the side stand a few weeks ago. Angle grinder to remove off the bracket for the annoying rubber flappy thing on the end, filed back and all re-painted with a new spring. Have also been cold-blueing various bolts and brackets (like the side stand spring pivot bracket) that aren't suitable to paint with varying degrees of success. Think I've got the system worked out now to get good results.
Some bodywork also arrived this week, but it was all damaged in transit, so probably another long wait until the replacements arrive.
" I removed the tiny Honda badge on the top yoke, sanded back to bare metal and re-painted the logo and text in black, just because I think it looks nicer than all plain black as it was originally - and I obviously have way too much time on my hands..."
Looks like a nice standard looking finish on those parts. The Honda badge definitely does look a lot better the way you've done it. Top job!
Sorry to read about the damaged cosmetics, it's sooo annoying when that happens.
Looks like a nice standard looking finish on those parts. The Honda badge definitely does look a lot better the way you've done it. Top job!
Sorry to read about the damaged cosmetics, it's sooo annoying when that happens.
GameOverMan! said:
Sorry to read about the damaged cosmetics, it's sooo annoying when that happens.
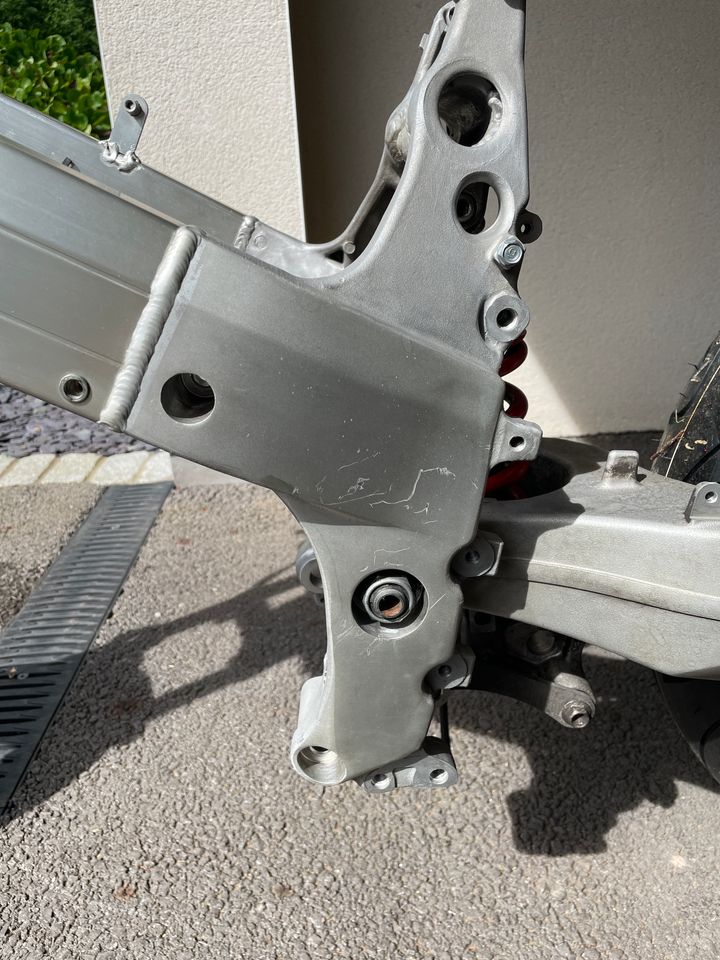
Yes, really frustrating... Can't understand why companies don't want to package things properly, knowing how poorly cartons get treated by the courier companies. I've had two tool chests turn up damaged and both sent back, all for the sake of some decent corner protection inside the cartons and now the fairings. To be fair, these were fairly well packed inside the carton with plenty of polystyrene, but the outer carton itself was really basic, thin cardboard - so any kind of knock was going to go through this way to easily and onto the parts inside.Made a start on the frame lower cast sections today. Moved the car out of the garage and bike inside as it was filthy weather outside. Just did the one side for now to see how it looks.
Process was as below...
Removed the anodised finish and all the deep scratches with 100grit on a small rotary sander
Rough sanded by hand with 120grit to remove the swirl marks and set the grain direction
Repeated above process with 240grit
Dragged scotchbrite pads in the grain direction, working from 320 through 600 and finally 800
Cleaned off, then protected the surface with ACF50
Before
After
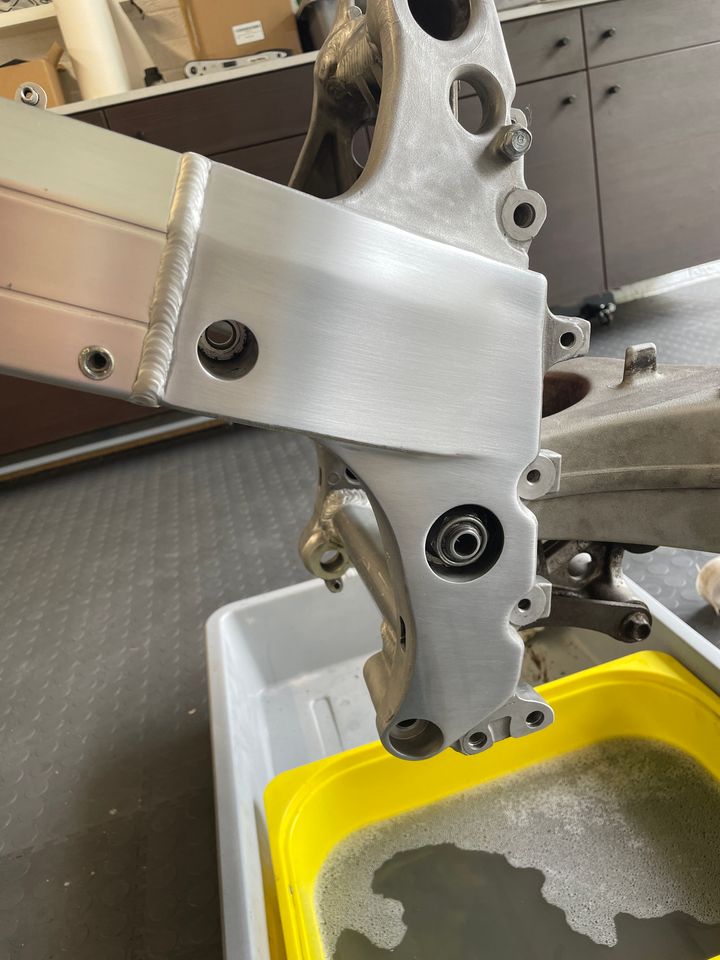
New finish looks a lot better without the scratches. But do I like it? Not sure to be honest. Main reservation is that this section is now more of a silver colour than the old anodised frame rails, which look quite yellow in comparison (although this is hard to see in the pictures). Not sure if the frame rails have a clear coat that has yellowed over time or if they were always like this. Will have to investigate further...
An alternative option would be to try and peen it somehow (maybe very gently with a needle scaler) to try and match the rough cast finish on the less visible parts of the frame - which is how the race spec RC30's were I think. Have a feeling this could go horribly wrong though, given how soft aluminium is as a material, so might try it out on some test pieces of aluminium first to see what kind of finish I can get.
Process was as below...
Removed the anodised finish and all the deep scratches with 100grit on a small rotary sander
Rough sanded by hand with 120grit to remove the swirl marks and set the grain direction
Repeated above process with 240grit
Dragged scotchbrite pads in the grain direction, working from 320 through 600 and finally 800
Cleaned off, then protected the surface with ACF50
Before
After
New finish looks a lot better without the scratches. But do I like it? Not sure to be honest. Main reservation is that this section is now more of a silver colour than the old anodised frame rails, which look quite yellow in comparison (although this is hard to see in the pictures). Not sure if the frame rails have a clear coat that has yellowed over time or if they were always like this. Will have to investigate further...
An alternative option would be to try and peen it somehow (maybe very gently with a needle scaler) to try and match the rough cast finish on the less visible parts of the frame - which is how the race spec RC30's were I think. Have a feeling this could go horribly wrong though, given how soft aluminium is as a material, so might try it out on some test pieces of aluminium first to see what kind of finish I can get.
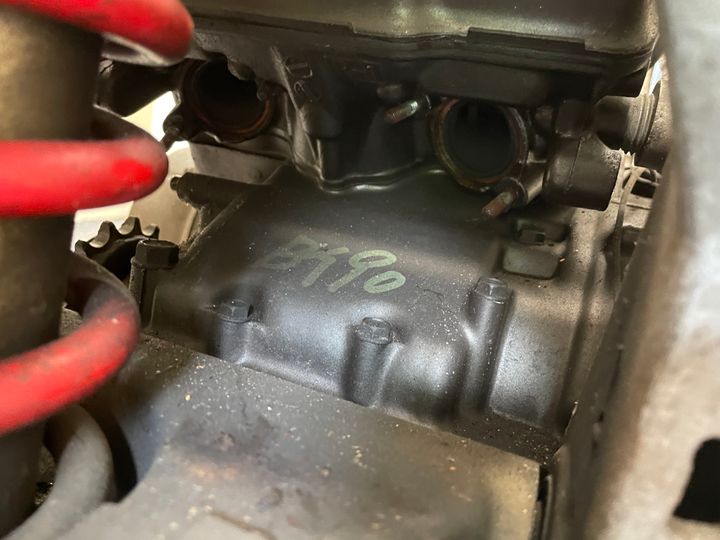
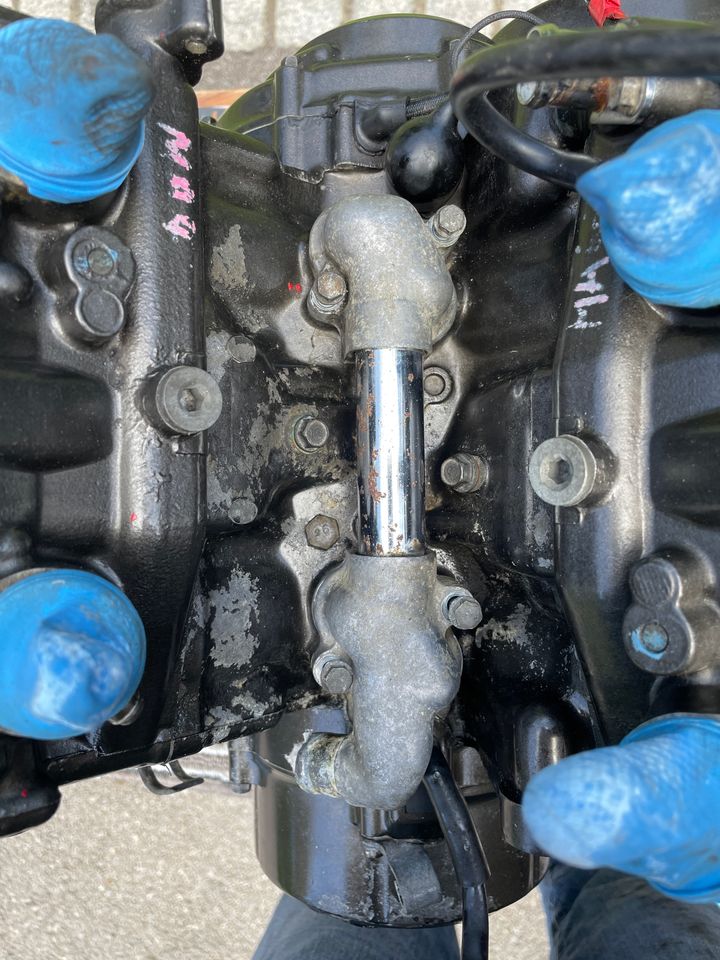
Done the initial clean of the engine to get it ready for paint. Block still has the original factory markings, so I'm tempted to just do a sympathetic touch up of the engine paint as opposed to a complete re-paint to preserve these. Most of the paint is in decent condition, but a few areas and the the valley especially are in need of some work where the old paint has flaked off. Will take both side covers off and re-paint these fully as these are the most visible parts and both sides are quite badly scratched.
Factory Block Markings
Valley Paint Condition
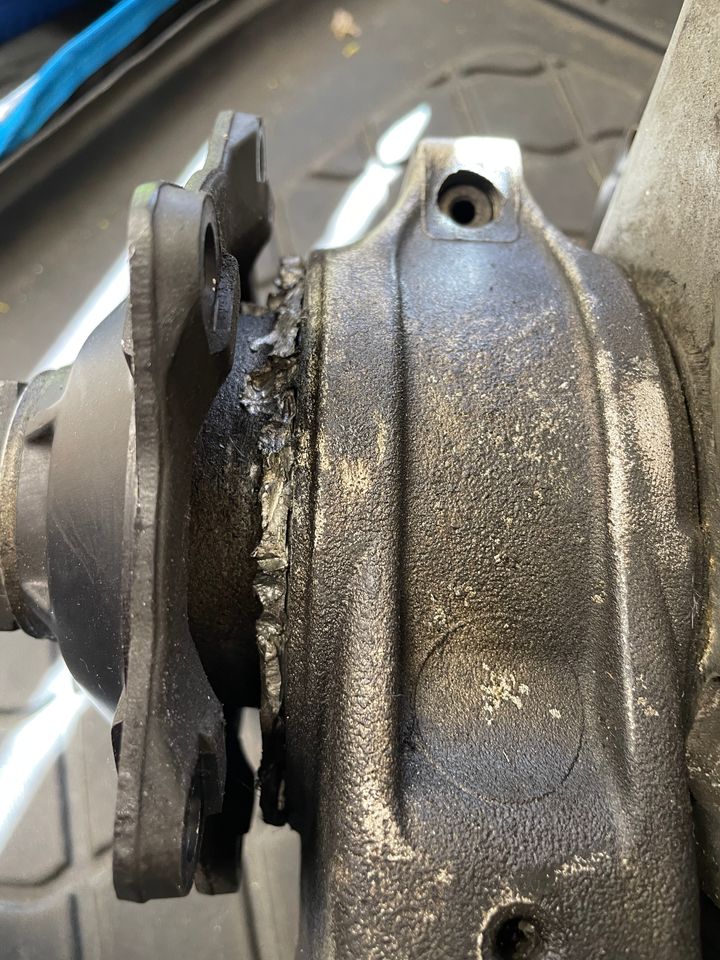
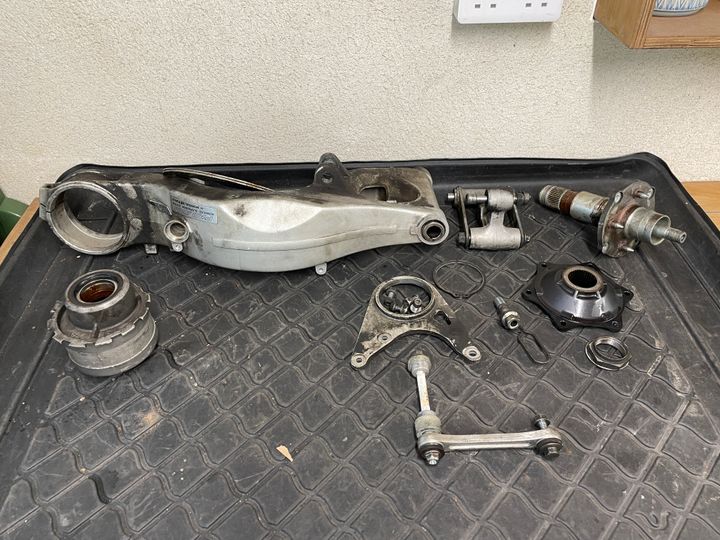
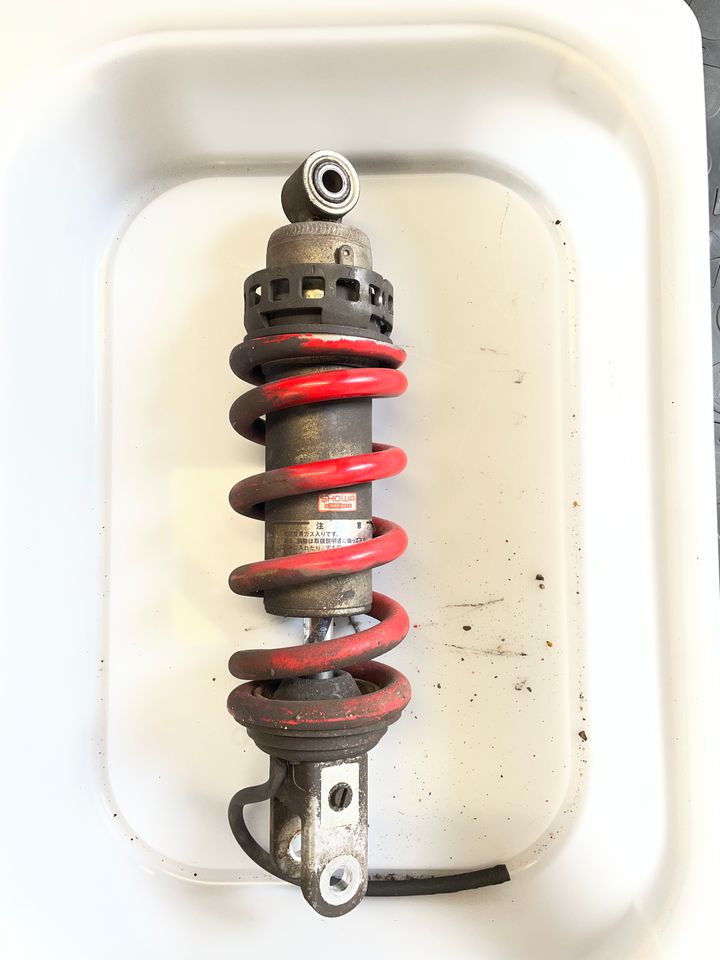
Last item to take off was the rear suspension, which as of last weekend, is now fully removed and disassembled. I only spotted it when I took everything apart, but the adjusting teeth on the underside of the eccentric hub were completely mangled (apparently it's a common issue when the hub has not been adjusted with the correct tool), so I have sourced a better used one to re-use. New bearings purchased from Rick Oliver to be fitted in the swing arm pivot, eccentric hub and the shock pivot - just need to find a local workshop who can press the old ones out and fit the new ones. Rear shock has also been sent off to TWS for a full rebuild.
A Very Mangled Eccentric Hub
Swing Arm Components Ready for Restoration
Rear Shock
Been thinking a bit more about the final livery (thanks for all the comments, which have really helped) and narrowed it down to two options.
Option 1 is a full replica of the original Commonwealth race livery, complete with gold wheels, race number, sponsors logos etc.
Option 2 is the OEM interpretation of the Commonwealth livery with no race number, white wheels and original style NC30 graphics.
I'm heavily leaning towards Option 2, as I think this just looks classier.
Factory Block Markings
Valley Paint Condition
Last item to take off was the rear suspension, which as of last weekend, is now fully removed and disassembled. I only spotted it when I took everything apart, but the adjusting teeth on the underside of the eccentric hub were completely mangled (apparently it's a common issue when the hub has not been adjusted with the correct tool), so I have sourced a better used one to re-use. New bearings purchased from Rick Oliver to be fitted in the swing arm pivot, eccentric hub and the shock pivot - just need to find a local workshop who can press the old ones out and fit the new ones. Rear shock has also been sent off to TWS for a full rebuild.
A Very Mangled Eccentric Hub
Swing Arm Components Ready for Restoration
Rear Shock
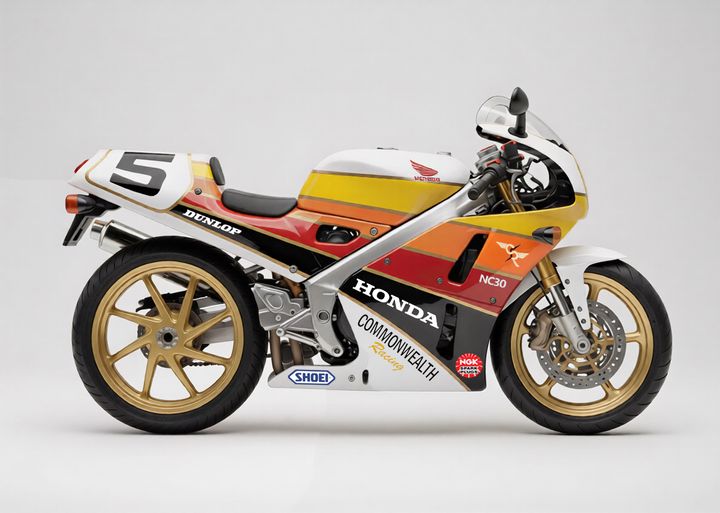
Been thinking a bit more about the final livery (thanks for all the comments, which have really helped) and narrowed it down to two options.
Option 1 is a full replica of the original Commonwealth race livery, complete with gold wheels, race number, sponsors logos etc.
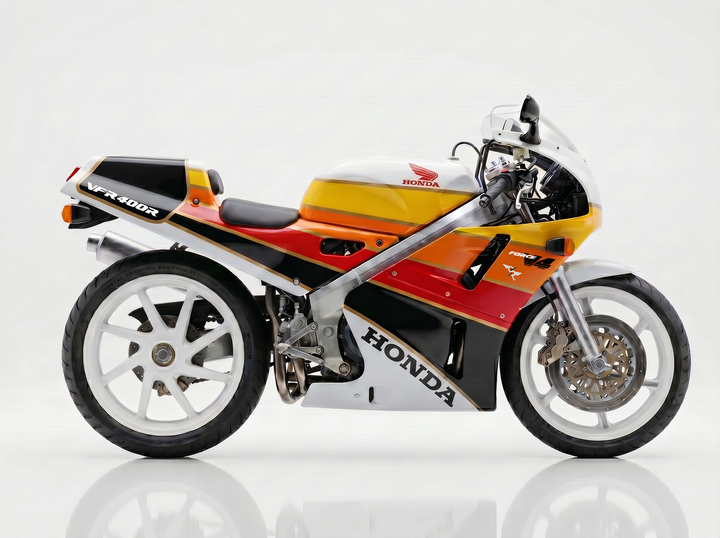
Option 2 is the OEM interpretation of the Commonwealth livery with no race number, white wheels and original style NC30 graphics.
I'm heavily leaning towards Option 2, as I think this just looks classier.
blade runner said:
It really does break up the large amount of white on the other picture - wheels & fairing lower. Plus it's a fairly easy/cheap fix if you decide to change to white or another colour in the future.I must admit as an owner of two VFRs in RC30 style colour schemes, I really like yours - never seen another one like it.
If you're looking for a shock refurb, I used this guy to rebuild and ceracoat some EXE-TC dampers.
Did a good job.
https://www.reactivesuspension.com/
Did a good job.
https://www.reactivesuspension.com/
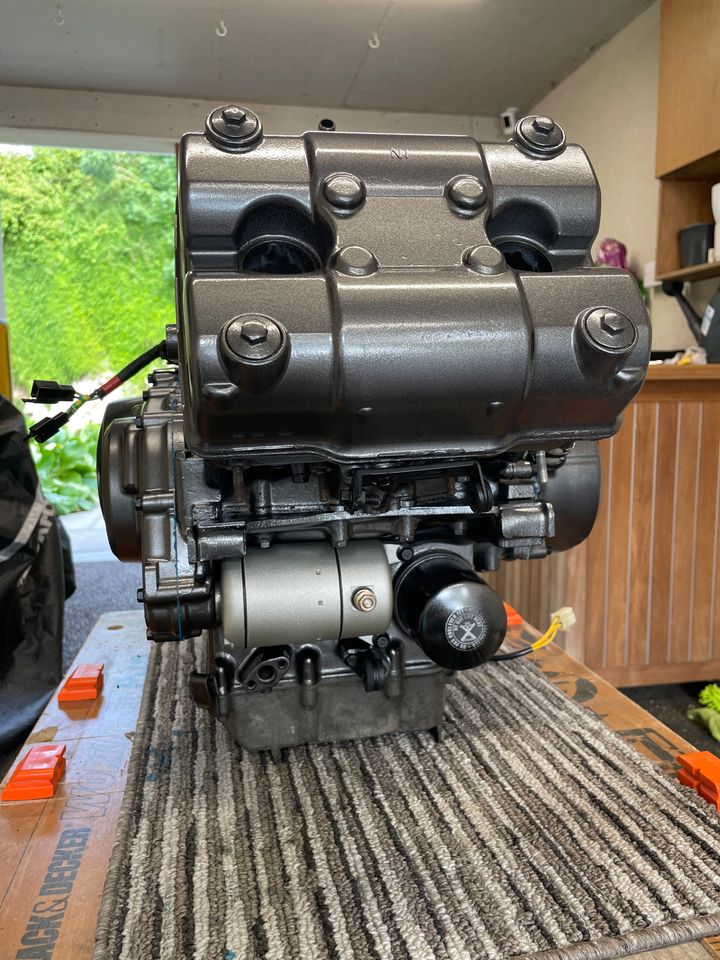
Flurry of activity over past few weeks, has meant that all of the parts (apart from swing arm assembly and rear shock, which are both away for rebuild) are now off the bike and fully restored.
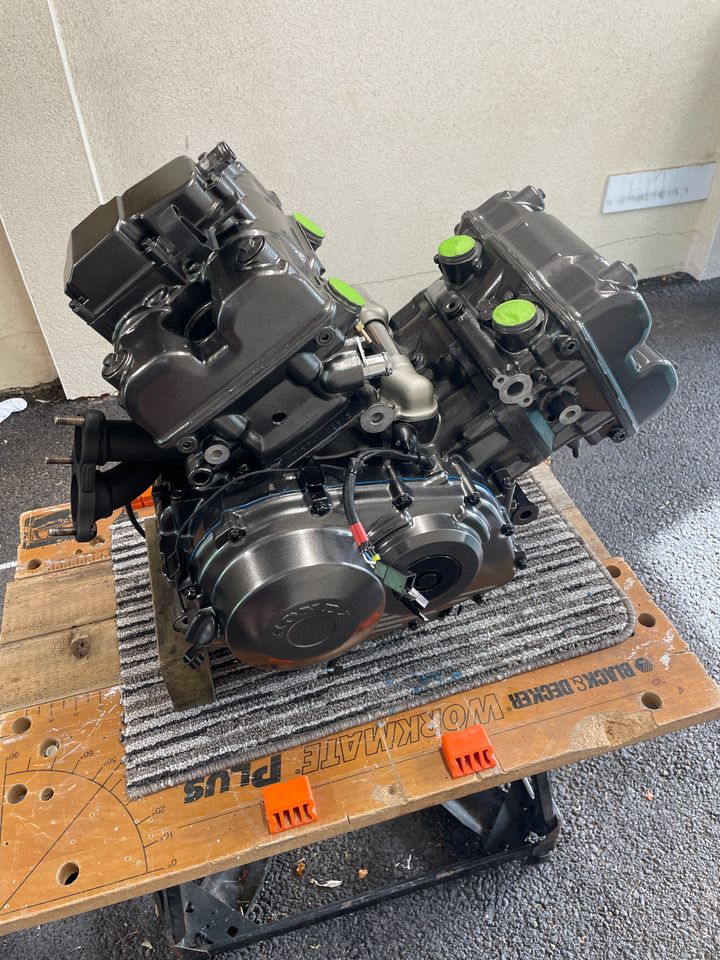
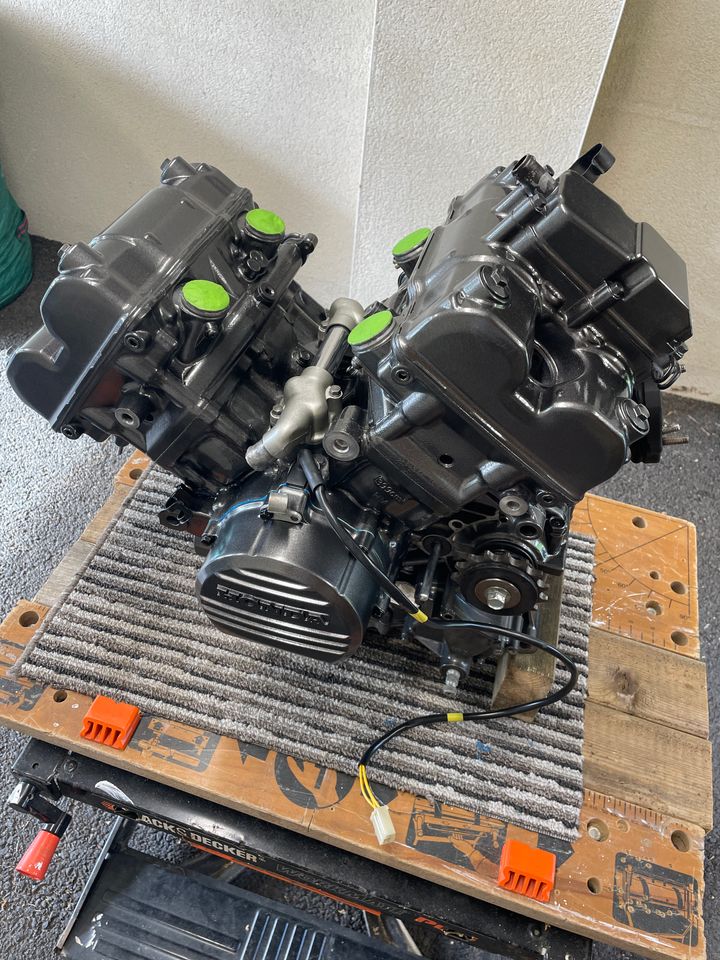
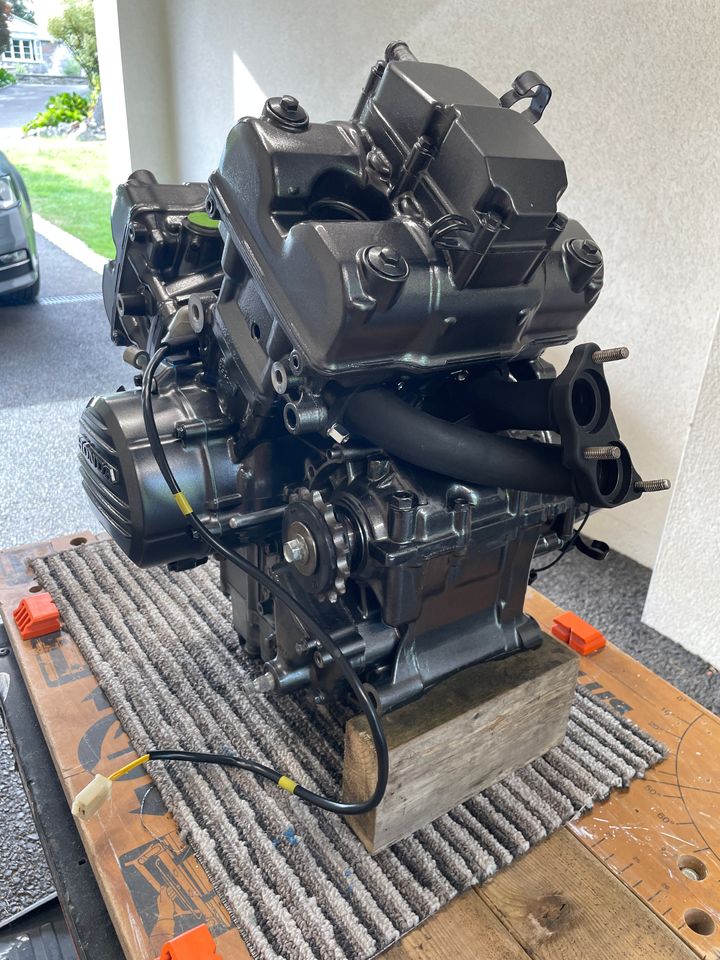
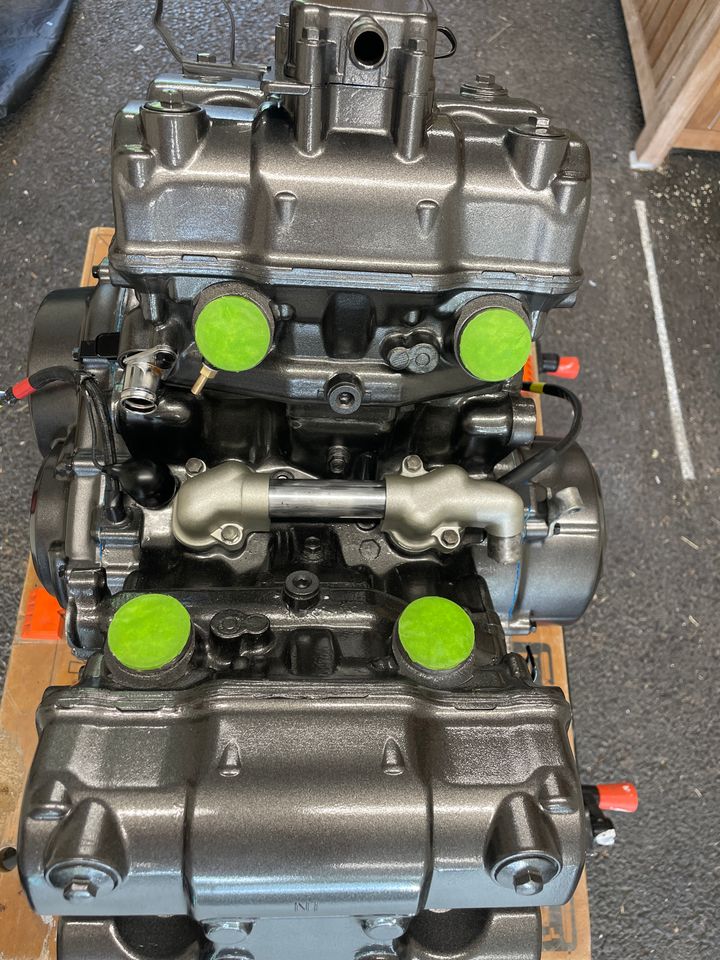
Engine is now re-painted and ready to re-fit to the frame.
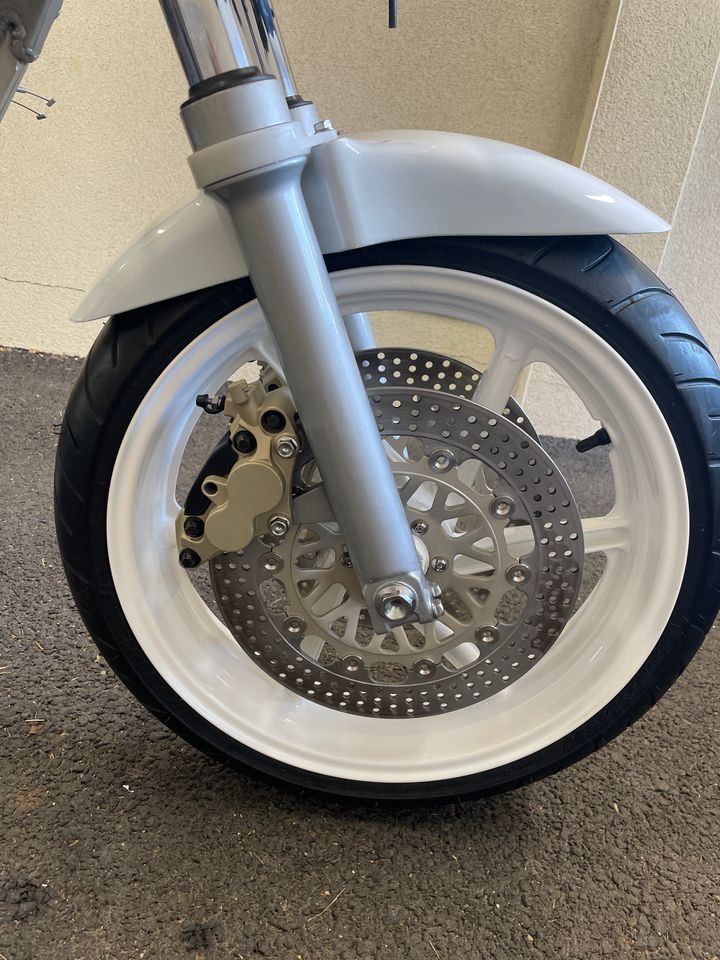
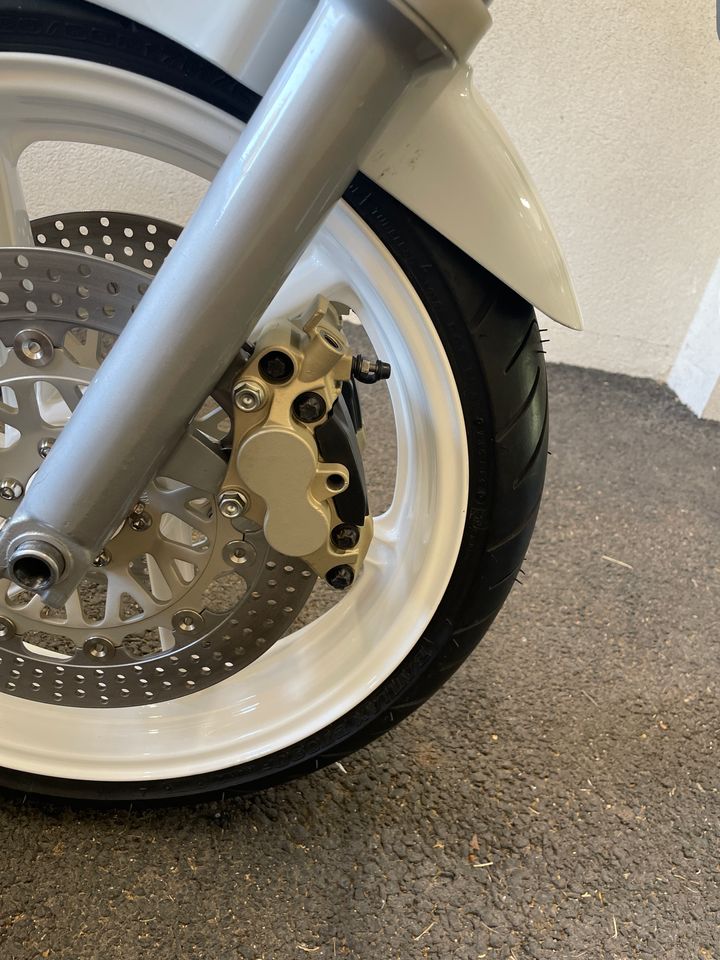
Front discs fitted to wheel and calipers installed to forks.
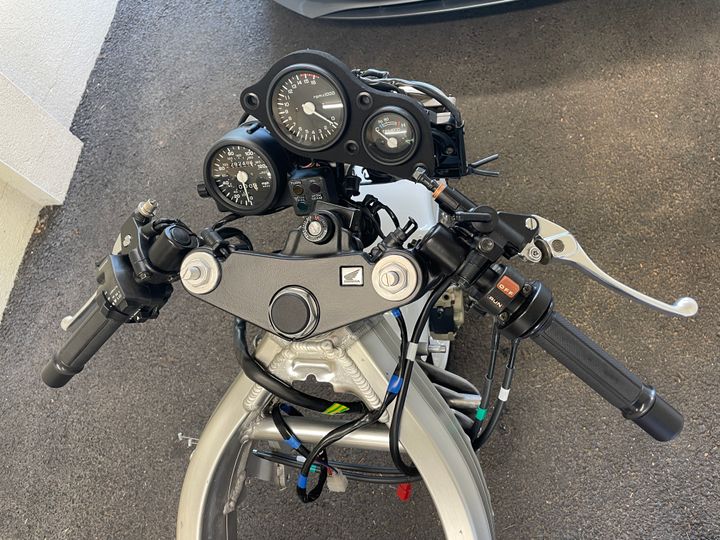
Clocks and headlights fitted to frame.
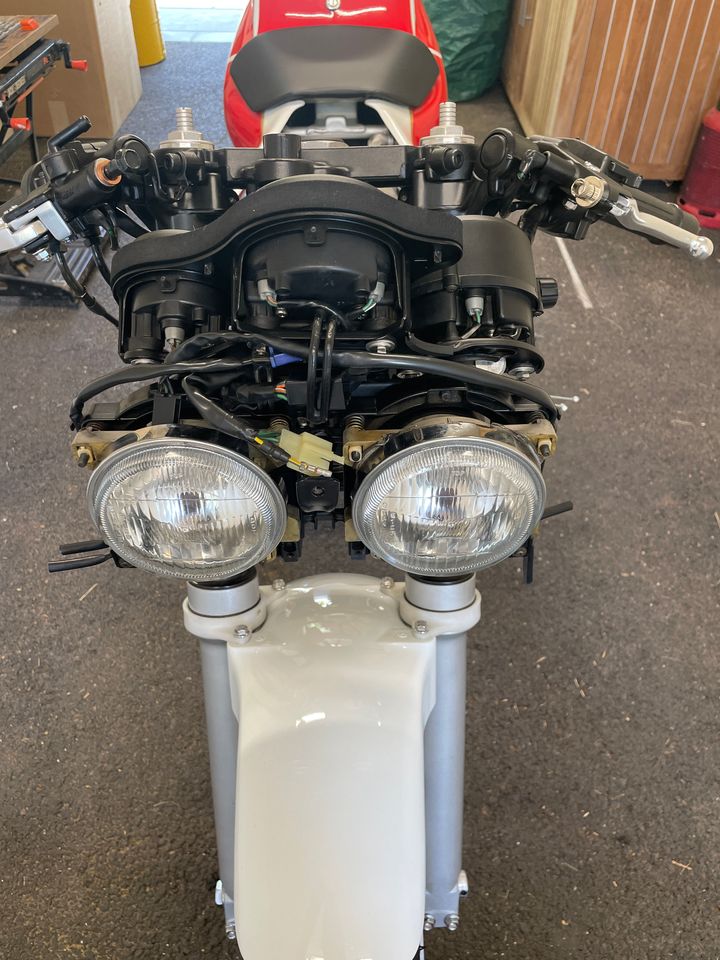
More to follow, as I have been test fitting the OEM bodywork as this will be fitted to the bike when finished, as I'm still way off getting the Tyga GRP fairings even delivered to me undamaged, let alone prepped and painted.
Engine is now re-painted and ready to re-fit to the frame.
Front discs fitted to wheel and calipers installed to forks.
Clocks and headlights fitted to frame.
More to follow, as I have been test fitting the OEM bodywork as this will be fitted to the bike when finished, as I'm still way off getting the Tyga GRP fairings even delivered to me undamaged, let alone prepped and painted.
Gassing Station | Biker Banter | Top of Page | What's New | My Stuff