Rear brake calliper rebuild
Discussion


Paulprior said:
m4tti - sorry, I mixed up the tasks, I have done the inside of the pistons, it's the spring, cover and circling inside the calipers that goes over the hand brake adjuster screw that im struggling with, unfortunately the write up in the link made that sound rather easy "24 Refit the washer, spring and spring cover.
Compress the spring and refit the circlip, then release the spring compressor."
Not sure what this spring compressor looks like so I am thinking of just making a metal bar with a threaded hole in it and then while supporting this inside the outer calipers fingers I could screw the bolt in to push on a socket and hopefully still have space for my circling pliers, if not I will buy one of those long 99 deg ones.
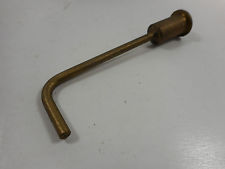
Before that section it mentions you can use the adjuster nut from the piston to compress the internal caliper spring. As I understand the original tool looks like this:Compress the spring and refit the circlip, then release the spring compressor."
Not sure what this spring compressor looks like so I am thinking of just making a metal bar with a threaded hole in it and then while supporting this inside the outer calipers fingers I could screw the bolt in to push on a socket and hopefully still have space for my circling pliers, if not I will buy one of those long 99 deg ones.
Paulprior said:
Thanks Todts, the mole grips did the trick, much easier, amazing what difference an experienced view makes to what appears a simple operation
This reminds me of my mums words when I'd come flying out the garage as a kid cos some bike part wouldn't go together,,, " Sit back , take a rest and have a cool head, you'll soon work it out son" it seemed to work most times, stress is a blinding emotion.

The positive thing is when you've learnt " the nack" it's in the bank, another task you can do yourself in the future.
The theory is the longer you own the car the more mechanical you become and eventually can maintain it well yourself and so save money on ownership costs... 5 years in im still a beginner though
m4tti said:
Before that section it mentions you can use the adjuster nut from the piston to compress the internal caliper spring. As I understand the original tool looks like this:
That tool would be good, i have tried local ford garages but they dont have such a thing and cannot sell me one, i will try with the piston nut, otherwise maybe make something like this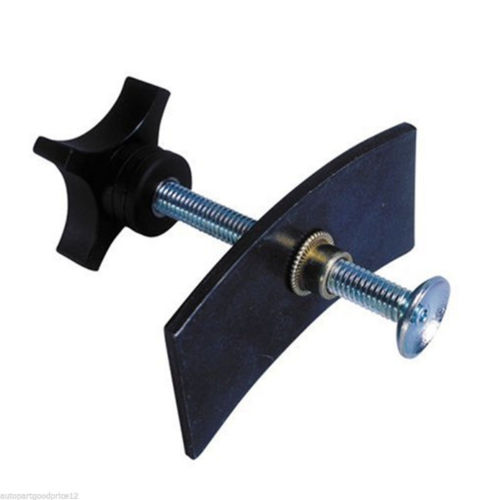
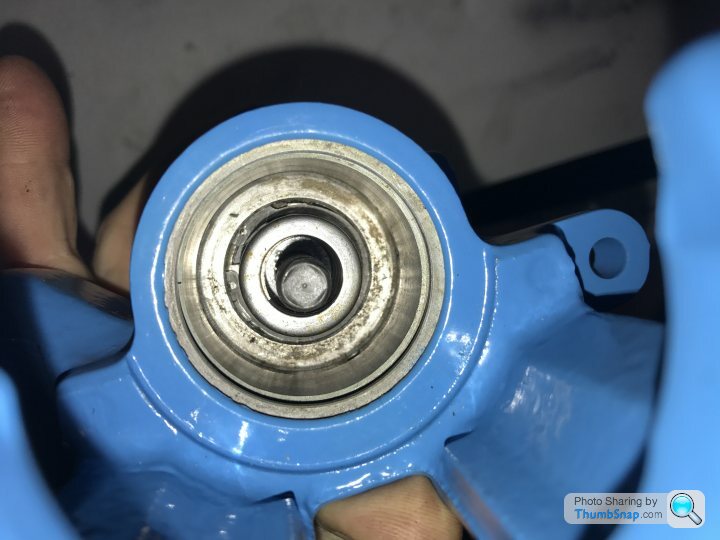
Has anyone actually managed to rebuild the rear caliper and get the circlip back on over the spring and cage that goes over the hand brake adjuster screw?, i tried using the nut from the piston but its not easy to screw that down and it seemed to bottom out too early, i tried the Ford garages to but they only stock tools for cars less than 10 years old now and i cant buy the tool either, i spoke with brake specialists but they only offered a full rebuild or buy a reconditioned set, they suggested that i have no chance of doing it myself, does anyone know any better?
Paulprior said:
Has anyone actually managed to rebuild the rear caliper and get the circlip back on over the spring and cage that goes over the hand brake adjuster screw?, i tried using the nut from the piston but its not easy to screw that down and it seemed to bottom out too early, i tried the Ford garages to but they only stock tools for cars less than 10 years old now and i cant buy the tool either, i spoke with brake specialists but they only offered a full rebuild or buy a reconditioned set, they suggested that i have no chance of doing it myself, does anyone know any better?
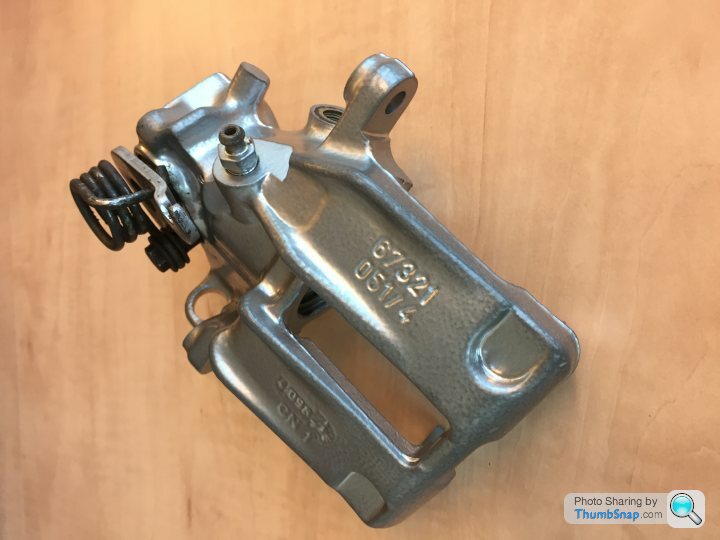
I Rebuild these calipers all the time, with no real special tools. I have a set to do for a griffith and I will get some photos at some point.You won't do it on your own, unless you have a vertical press, a vice MIGHT do but it would be tough as your working against gravity.
Get a BOD. Sit the calliper so the piston side in facing down on the bench, get a second person to lever under the pad arms against a 3/8 drive long reach socket (15mm is about right, but depends on how thick your socket walls are) upside down so it fits over the thread, you will need a set of slightly bent circlip pliers. to get the clip in.
I do it with a press, but pretty much in the same fashion, although I made a tool from an old socket with a thin shaft to facilitate access. Watch out as if you bend the fingers on the bottom of the cage it wont fit, and it needs to be nearly perfectly flat and straight as clearance is tight. Also, make sure you put the washer at the bottom, not the top if you didn't notice!
If you struggle, and your local nip down to the workshop and I can do it for you.
Also, glad my pervious info helped somebody out!
Edited by tofts on Sunday 19th March 13:59

Hi tofts. Thanks for the tips, unfortunately I don't live anywhere near you otherwise I would take you up on your kind offer of assistance..
I will be traveling this week and should get access to a small workshop, I was thinking of making something like the pic below to help centralise everything and then use a tool as in the above thread to act on the calipers fingers and compress the spring, what do you think?
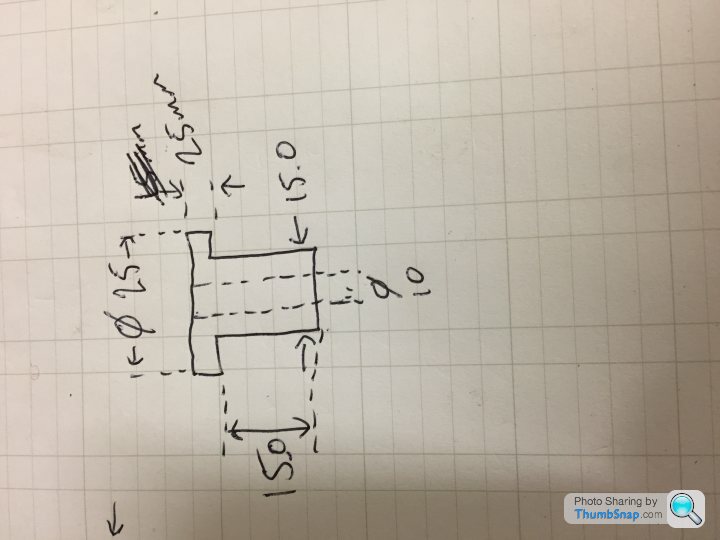
Sorry about the rubbish drawing, and the scale is terrible, but maybe it will help, probably need to get some of those long noses pliers as well though.
One other thing, how do you get the depth right without bending the fingers at the end of the cup?, I did bend mine on removal, but I have straightened them up and the fit ok with a circling without the spring.
Paul
I will be traveling this week and should get access to a small workshop, I was thinking of making something like the pic below to help centralise everything and then use a tool as in the above thread to act on the calipers fingers and compress the spring, what do you think?
Sorry about the rubbish drawing, and the scale is terrible, but maybe it will help, probably need to get some of those long noses pliers as well though.
One other thing, how do you get the depth right without bending the fingers at the end of the cup?, I did bend mine on removal, but I have straightened them up and the fit ok with a circling without the spring.
Paul
Hi, no I haven't, I found a specialist brake company not far away and a guy said he would do it off the record as they only offer a full strip and rebuild, but now he changed his mind and won't do it, so I will try and get them back tomorrow and will have to try again unless anyone has any other suggestions?
Have a look at the instructions on this thread. Calipers are for a Ford Mustang, but it's the same principle.
http://forums.corral.net/forums#/topics/1296074?pa...
http://forums.corral.net/forums#/topics/1296074?pa...
Hi Paul,
for some reason pasting that link on my phone messed the link up.
http://forums.corral.net/forums/general-mustang-te...
for some reason pasting that link on my phone messed the link up.
http://forums.corral.net/forums/general-mustang-te...
Thanks m4tti
I just had a good long read, I have ended up with almost identical way as the first guy, the other 2 methods also have some interesting ideas though, I got so close tonight after several modification to my spring compressor, I just needed a good torch and a long thin screwdriver to locate the circling, my only concern is compressing it too much and damaging the spring cover, but not enough and the circling wont go in, there is not much tolerance there, hopefully tomorrow night I will finally crack it, I must admit that this is by far the hardest task I have had yet doing a body partial lift and full suspension arm, shocks, brake rebuild, so far anyway😀
Thank you.
Paul


I remember night shifts, I was electrically based so I had other challenges brought in for me to keep me occupied😀
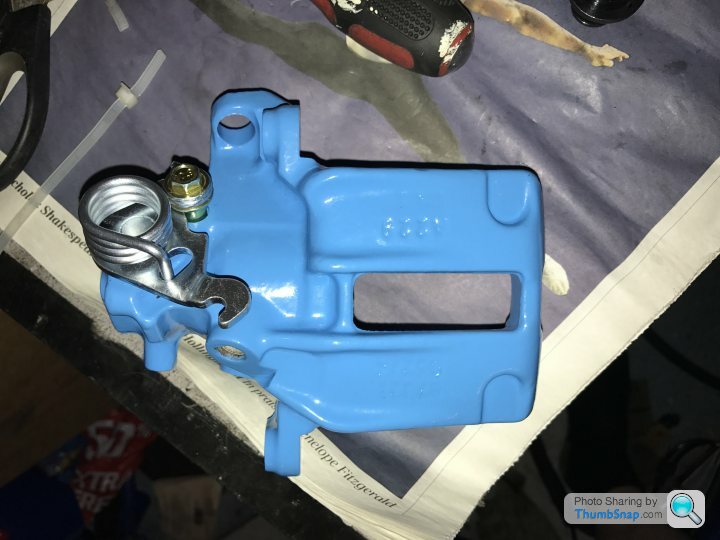
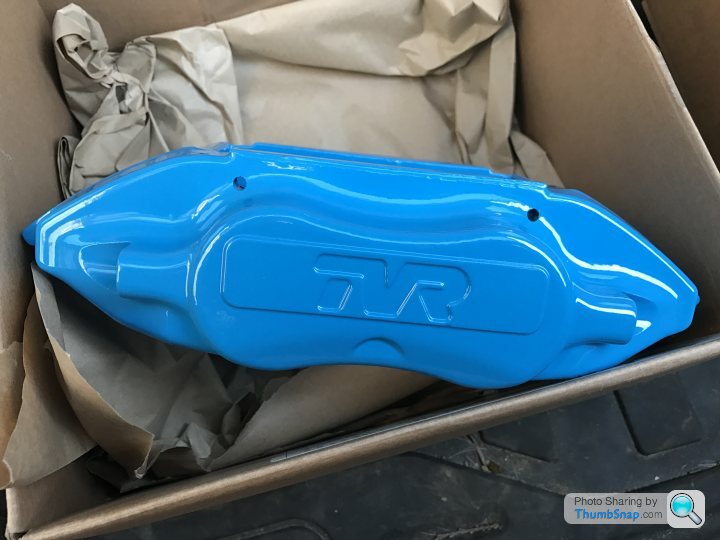
But no, the calipers were working fine, but after painting all the chassis, new shocks and powder coated suspension arms the calipers just looked shabby so I had them coated, not realising what a pain that would be, the fronts were very easy, £40 the lot including sand blasting, no flashy colour, but I think they look good
But no, the calipers were working fine, but after painting all the chassis, new shocks and powder coated suspension arms the calipers just looked shabby so I had them coated, not realising what a pain that would be, the fronts were very easy, £40 the lot including sand blasting, no flashy colour, but I think they look good

Paulprior said:
Thanks m4tti
I just had a good long read, I have ended up with almost identical way as the first guy, the other 2 methods also have some interesting ideas though, I got so close tonight after several modification to my spring compressor, I just needed a good torch and a long thin screwdriver to locate the circling, my only concern is compressing it too much and damaging the spring cover, but not enough and the circling wont go in, there is not much tolerance there, hopefully tomorrow night I will finally crack it, I must admit that this is by far the hardest task I have had yet doing a body partial lift and full suspension arm, shocks, brake rebuild, so far anyway??
Thank you.
Paul
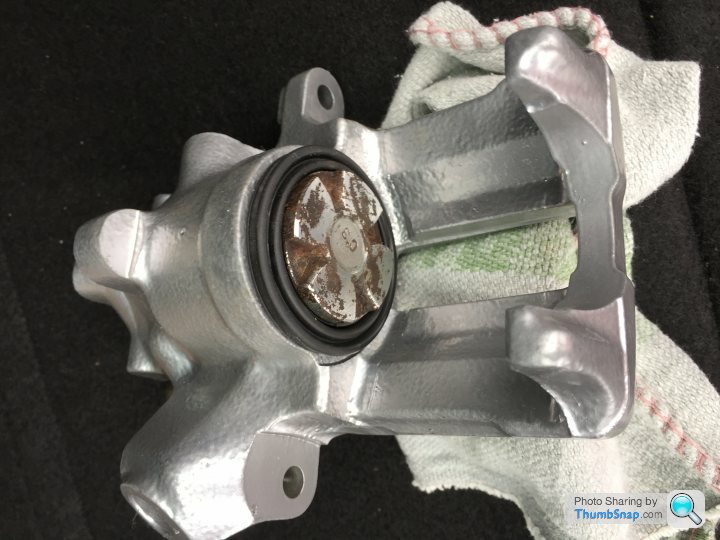
Ok I got my caliper back from the powder coaters and have re-assembled one to see how difficult it was and no word of a lie have done it all by hand.I just had a good long read, I have ended up with almost identical way as the first guy, the other 2 methods also have some interesting ideas though, I got so close tonight after several modification to my spring compressor, I just needed a good torch and a long thin screwdriver to locate the circling, my only concern is compressing it too much and damaging the spring cover, but not enough and the circling wont go in, there is not much tolerance there, hopefully tomorrow night I will finally crack it, I must admit that this is by far the hardest task I have had yet doing a body partial lift and full suspension arm, shocks, brake rebuild, so far anyway??
Thank you.
Paul
Here's how:
1. Take the adjuster nut from one of the pistons.
2. Build the caliper up to the point that you are ready to fit the spring basket and circlip.
3. Put the spring in followed by the basket
4. Put a 2 - 3 mm thick washer of a similar diameter to the top of the basket, on top of the basket with the threaded shaft protruding through the centre. The washer stops the adjuster nut shaft threading in below the level of the basket top.
5. Take the adjuster nut and wind in a couple of turns.
6. Stop and check the basket is still centrally located, it it isn't gently move with a screwdriver.
7. Now push in and turn hard using the wide area of the adjuster nut avoiding disturbance to the rubber seal at the tip of the adjuster nut
8. Wriggle the circlip over the adjuster nut. Sit the circlip eyes at 3 o'clock and the rear at 9
9. Using a bent pick hold the rear of the circlip in place and use long nose bent circlip pliers to push the circlip home
10. Once the circlip is home take a small tipped screwdriver and tap around the circlip to double check that it is full seated
11. Make a pint of vodka lime and soda, admire the caliper with mechanism in place and ponder how the hell you will get the piston past the dust sleeve.
Edited by m4tti on Thursday 6th April 23:40
Hi m4tti
Glad yours went together easily, mine did after I found the right tools, I tried with the nut on the central screw and even tried to find an old one that I could weld an Allen key onto just like the original tool pic you posted, but anyway there are done now.
I found fitting the boot the easy part, I lubricated everything, put the boot onto the piston at the back end, make sure it doesn't twist inside out, push it as far back as you can without it coming off the piston, locate the boot into the calipers lip then just push the piston in by hand and start to rotate when you feel it touch the screw, now just screw it in and when you go in far enough the boot will just pop in to the piston groove, obviously the calipers seal needs to go in before this 😀
So everything is installed, now I need to bleed, I read on another post about bleeding a single line to just crack open the bleed screw, top up the reservoir and have a cup of tea, so as I have the system completely drained is it just 4 cups of tea and starting with the furthest away?, if so do I need to bleed in the normal way for each corner afterwards or will gravity do that for me?
Also, how oil would you recommend I need assuming my system is completely empty?
Thanks
Paul
Also, how oil would you recommend I need assuming my system is completely empty?
Thanks
Paul
Gassing Station | Chimaera | Top of Page | What's New | My Stuff