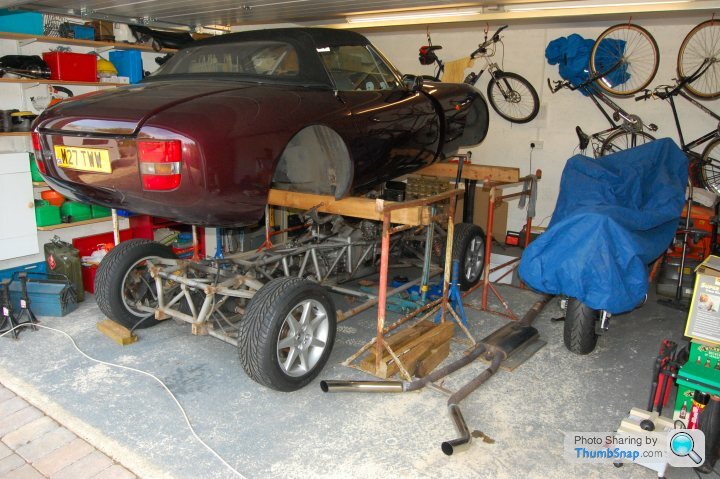
Another body off thread.
Discussion


Hi Alun,
Great thread and no doubt will end up the biggest pistonheads has ever seen
I have a few bits and pieces knocking about from my Chim restoration a few years back. If you need anything give me a shout and I’ll see if I have it tucked away in a box somewhere. All FOC of course.
Great thread and no doubt will end up the biggest pistonheads has ever seen
I have a few bits and pieces knocking about from my Chim restoration a few years back. If you need anything give me a shout and I’ll see if I have it tucked away in a box somewhere. All FOC of course.

It would be if I could download pics and thanks Steve. Will do if needs must, by my reckoning the front half is nigh on all new just about so just a few brake and fuel lines a quick touch up and its a good un.
Full chassis restore I suppose. Shouldn’t take me to long to find our but I’m not rushing either, I enjoy doing it.
Classic Chim said:
Steve_D said:
That's normal factory fit.
Steve
I’ll put it back then Steve

Very industrious if you have no materials to work with I suppose.
When I took the 500 tank out there was a ball of sealant the size of your fist. At least half a tube...can't afford to do that.
Steve
Steve_D said:
When I put them back I cut a patch of rubber sheet and bond that in place with PU sealant.
When I took the 500 tank out there was a ball of sealant the size of your fist. At least half a tube...can't afford to do that.
Steve
Thanks for the tip. If it’s good enough for you mate When I took the 500 tank out there was a ball of sealant the size of your fist. At least half a tube...can't afford to do that.
Steve
 I actually think the car will be far better than when originally built.
 Classic Chim said:
Thanks for the tip. If it’s good enough for you mate I actually think the car will be far better than when originally built.
Here's one i made earlier. I actually think the car will be far better than when originally built. 

Didn't get round to fitting it and it went with the Chim for the new owner to do.
Bit larger than needed to also cover the redundant hole for the disused canister pipe and as the tank and pipes had been installed to check the fuel flow etc I didn't want to disturb them hense the split so the gasket could be set in place then split and pipe sealed over later.

Today's tips.
- The front anti-roll bar clamps will foul the body as it lifts. Remove the clamps onto the chassis and the rubbers. Leave the bar in place but just cable tie it back against the chassis then it will clear. You will do the reverse of this when you rebuild the chassis.
- You have to disconnect and untangle all the engine bay wiring. When you have done this you can pull the whole lot (including the starter positive cable) over towards the nearside where it is just one branch coming out of the bulkhead. Get a strong poly bag and stuff the whole loom into it and finally tape or cable tie the bag shut around the loom branch as close the the bulkhead as practical. Reason for this is that all that wiring will try and snag on the engine as you lift the body. With it in the bag you can just lay it on the engine and it will come clear as the body comes off. Second reason it that if you have it taped/tied right close the the bulkhead then you know you cant have missed any (engine bay) wires apart from those that come backwards under the car from the loom under the rad.
Steve_D said:
Today's tips.
Will do re roll bar. Keep forgetting about that. - The front anti-roll bar clamps will foul the body as it lifts. Remove the clamps onto the chassis and the rubbers. Leave the bar in place but just cable tie it back against the chassis then it will clear. You will do the reverse of this when you rebuild the chassis.
- You have to disconnect and untangle all the engine bay wiring. When you have done this you can pull the whole lot (including the starter positive cable) over towards the nearside where it is just one branch coming out of the bulkhead. Get a strong poly bag and stuff the whole loom into it and finally tape or cable tie the bag shut around the loom branch as close the the bulkhead as practical. Reason for this is that all that wiring will try and snag on the engine as you lift the body. With it in the bag you can just lay it on the engine and it will come clear as the body comes off. Second reason it that if you have it taped/tied right close the the bulkhead then you know you cant have missed any (engine bay) wires apart from those that come backwards under the car from the loom under the rad.
Funnily enough I had Frank with me today so we concentrated on removing cable ties and freeing up all the wiring on both sides of the block, crank sensor and gearbox etc
Removed plenum and unplugged injector/ temp wiring etc on both banks.
Franks knowledge helped me along nicely so thanks Frank
Only a few hours really as it was rather chilly today.
Still it progresses along, being my first and only time I’ll be doing this I want to saviour it and remember what I’m doing so taking time over it allows my mind to cement it all to memory.
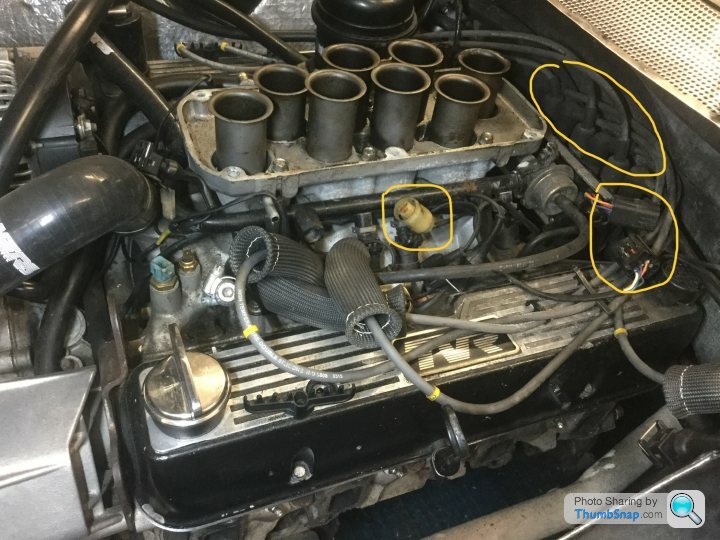
Taking pics of my wiring loom as it’s an MBE one won’t help others that much I’d have thought
Here’s one anyway showing n/s lambda connector, the other end which goes on down side of chassis to another connected then onto lambda simply pulls out to the left.
Top right circle are my coilpacks
Bottom right ( can't remember what this one does ) so if someone can enlighten me.
I’m going to remove plenum base just to make pulling wiring through easier and easier to take a pic of it’s orientation.
I remember setting out my CUX wiring loom on the floor one time which in itself has been useful as really there’s not that much to remove and much of it self explanatory, I’ll label up which side is which but again it becomes fairly obvious what goes where. I have been all around the engine bay on both mine and Franks car which also helps as I feel familiar with it.
I will make a check list of the order I’ve done the job when I’m finished removing body.
I’ve used a couple of past threads to make notes and a basic abc and pretty much followed it so I’m doing it in the usual order.
Tomorrow tie up some loose ends and finish off chassis bolt removal if all goes well. Not long now and I’ll be in a position to lift body off.
Oh and Lance / Steve this is all very valuable info. Thanks.
PS this engine has done 25,000 miles or there abouts since Dom refreshed the engine, can you notice how clean the trumpet base still is. Still tight as a drum

Edited by Classic Chim on Monday 2nd December 19:40
Edited by Classic Chim on Monday 2nd December 19:53

Back on it today.
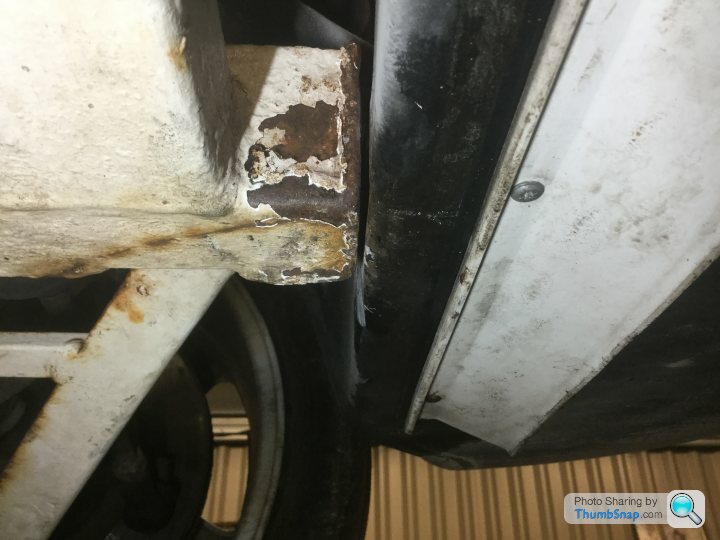
Finished grinding off floor chassis bolts and knocked them out, including two chassis bolts that sheared off, one front chassis n/s so below rad and both o/s seat belt into chassis and rigger, using cutting disc. I might have enough on the bolts to ease them out when body is off or I’ll just drill them out.
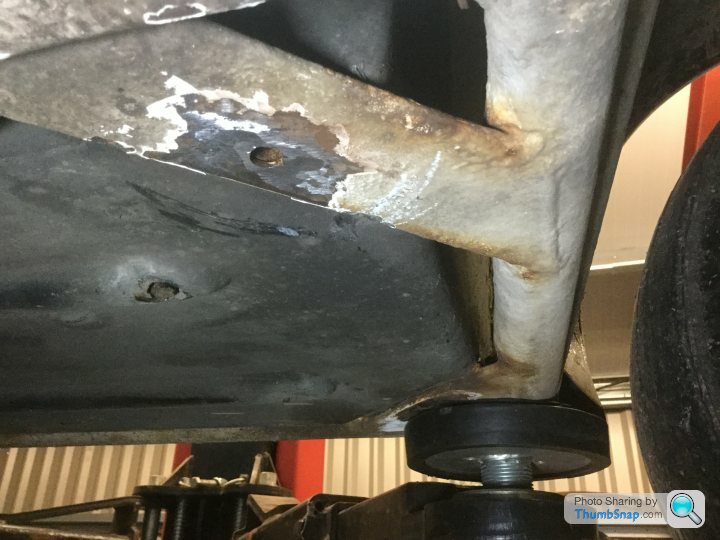
N/s front chassis below rad
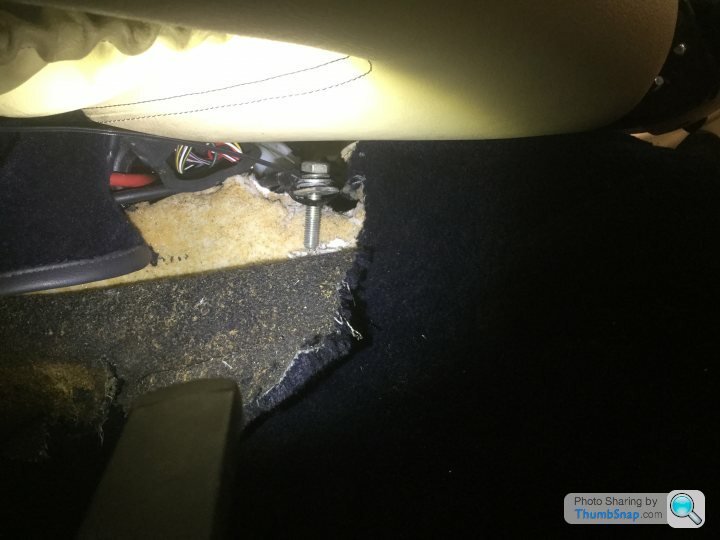
Removed centre console and both transmission tunnel chassis bolts ( both have 2 earthing cables attached )
N/S
O/S still attached
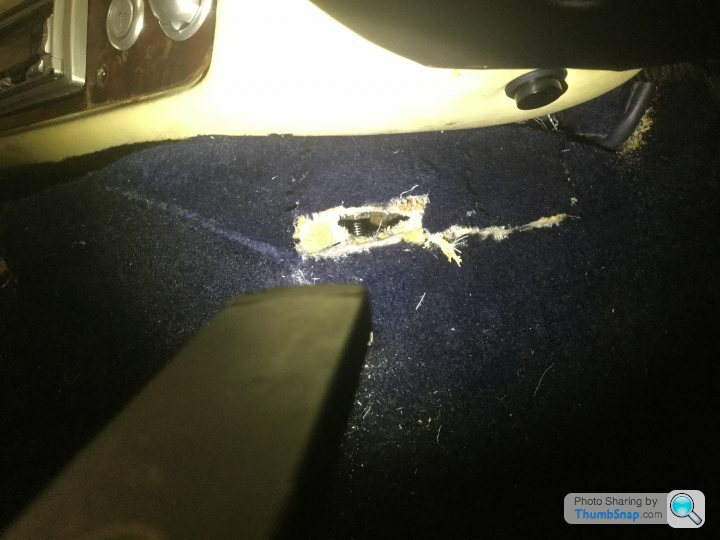
So that’s all chassis bolts removed,,, I think
Finished grinding off floor chassis bolts and knocked them out, including two chassis bolts that sheared off, one front chassis n/s so below rad and both o/s seat belt into chassis and rigger, using cutting disc. I might have enough on the bolts to ease them out when body is off or I’ll just drill them out.
N/s front chassis below rad
Removed centre console and both transmission tunnel chassis bolts ( both have 2 earthing cables attached )
N/S
O/S still attached
So that’s all chassis bolts removed,,, I think
Classic Chim said:
Back on it today.
Finished grinding off floor chassis bolts and knocked them out, including two chassis bolts that sheared off, one front chassis n/s so below rad and both o/s seat belt into chassis and rigger, using cutting disc. I might have enough on the bolts to ease them out when body is off or I’ll just drill them out.
So that’s all chassis bolts removed,,, I think
This could be very useful, also page 35 has a diagram of all the chassis bolt locations.Finished grinding off floor chassis bolts and knocked them out, including two chassis bolts that sheared off, one front chassis n/s so below rad and both o/s seat belt into chassis and rigger, using cutting disc. I might have enough on the bolts to ease them out when body is off or I’ll just drill them out.
So that’s all chassis bolts removed,,, I think
https://tvrcarclub.de/wp-content/uploads/2016/12/T...

Gassing Station | Chimaera | Top of Page | What's New | My Stuff