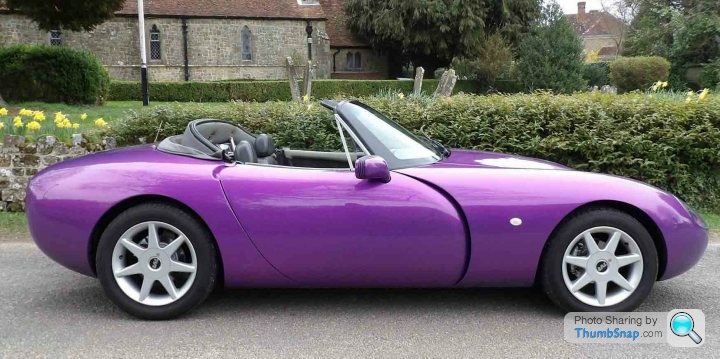
K666GRF - 4.3 pre-cat Griff (obvs)
Discussion


So, where were we?
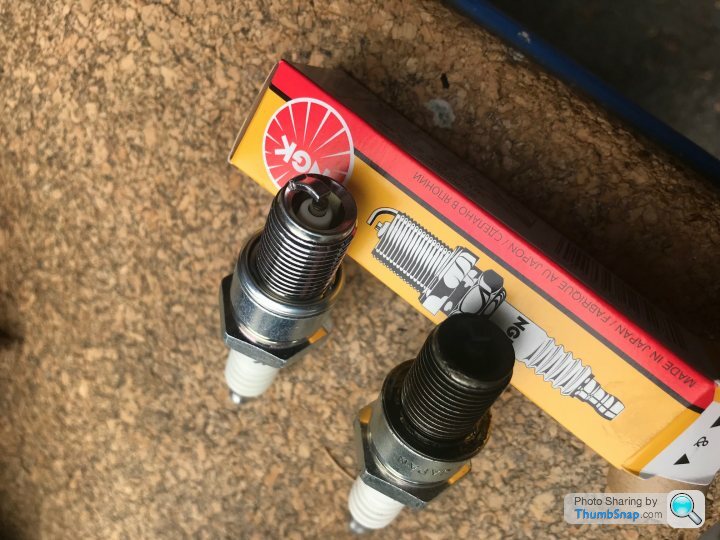
So a month ago we had got as far as leads. Went for a good blast but improved but not perfect. Having spoken to the oracle, Colin at TVRS SW, I decided to work back up the ignition system from the plugs. Interestingly he believes that once the plugs are fouled, they never really recover even if cleaned, thus the only way forwards is new plugs.
So out they came and weren't pretty compared with factory fresh:
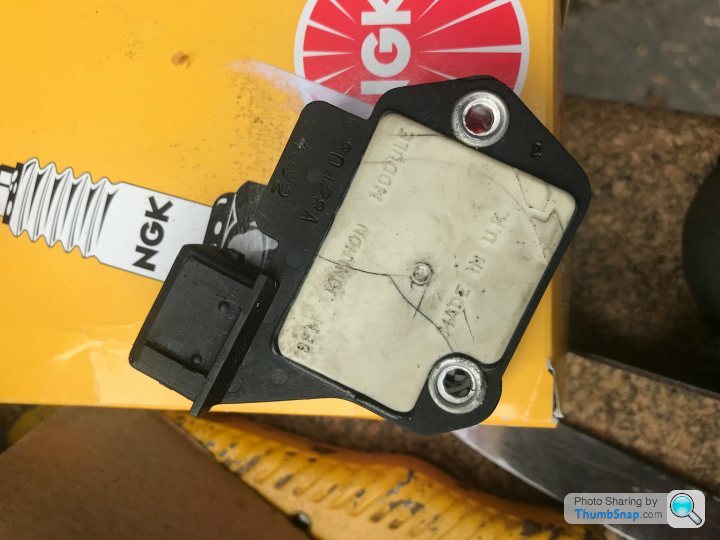
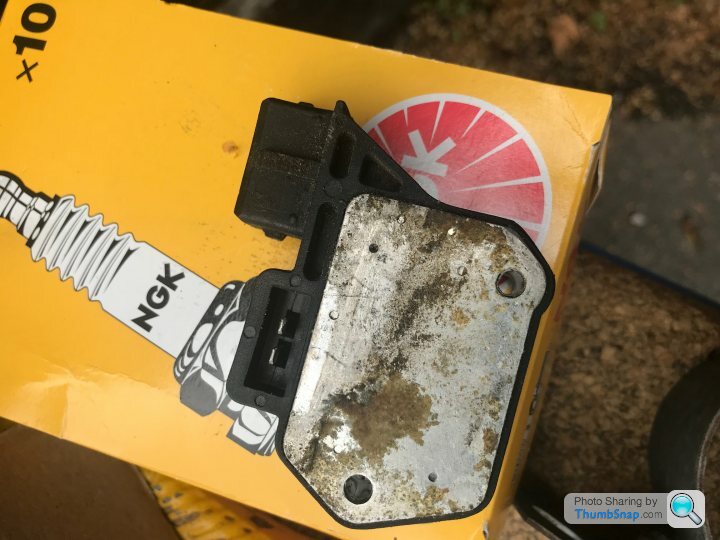
We (he) also decided both ignition amp and coil were possibly not helping, his money on the amp. Once it was removed 2 problems were visible. Firstly a crack or 2 in the outside face and secondly no thermal paste on the inner face. He said this was often an issue as the part was never origionally supplied with the paste, he had to buy separately. However no paste meant that many just installed without, through ignorance or laziness.
The coil was Lucas and possibly origional, the stickers had long since departed so also replaced. However the good news was the rotor arm, also often the main culprit, was a OEM Lucan item. He showed me some of the pattern ones he collected from owners cars. Awful with loose or bendy contacts etc. He said if it is hollow underneath, he just bins without looking!
So now back to full strength and I need to get using it. If I was half glass empty, I'd say that it was the amp all along and the extra expense was wasted. However I will keep the old coil as a spare. Being half glass full, I think the amp was the main culprit but the corroded terminals, coil, plugs, leads etc all further slightly degraded an already failing system.
The latest issue is the perennial one I suffer from. And infuriates me. Work done and running, my eye starts to wander. I seem to get increasing satisfaction from adding to a car's history folder and making it well again rather than actually using them. So its time may be up as I have an eye on some other stuff, thus if anyone interested in taking up the batton.....................
So a month ago we had got as far as leads. Went for a good blast but improved but not perfect. Having spoken to the oracle, Colin at TVRS SW, I decided to work back up the ignition system from the plugs. Interestingly he believes that once the plugs are fouled, they never really recover even if cleaned, thus the only way forwards is new plugs.
So out they came and weren't pretty compared with factory fresh:
We (he) also decided both ignition amp and coil were possibly not helping, his money on the amp. Once it was removed 2 problems were visible. Firstly a crack or 2 in the outside face and secondly no thermal paste on the inner face. He said this was often an issue as the part was never origionally supplied with the paste, he had to buy separately. However no paste meant that many just installed without, through ignorance or laziness.
The coil was Lucas and possibly origional, the stickers had long since departed so also replaced. However the good news was the rotor arm, also often the main culprit, was a OEM Lucan item. He showed me some of the pattern ones he collected from owners cars. Awful with loose or bendy contacts etc. He said if it is hollow underneath, he just bins without looking!
So now back to full strength and I need to get using it. If I was half glass empty, I'd say that it was the amp all along and the extra expense was wasted. However I will keep the old coil as a spare. Being half glass full, I think the amp was the main culprit but the corroded terminals, coil, plugs, leads etc all further slightly degraded an already failing system.
The latest issue is the perennial one I suffer from. And infuriates me. Work done and running, my eye starts to wander. I seem to get increasing satisfaction from adding to a car's history folder and making it well again rather than actually using them. So its time may be up as I have an eye on some other stuff, thus if anyone interested in taking up the batton.....................


Zener said:
The so called thermal paste supplied with those modules genuine or otherwise is s te purchase some PC CPU/processor thermal paste do it once do it right
  read instructions on tube
I did think that. With my son having built several PCs so we have a fair amount of the stuff lying aroundte purchase some PC CPU/processor thermal paste do it once do it right read instructions on tube I then wondered if one could cut a piece of thermally insulating material to fit between as barrier. Surely more effective than paste.
Maybe some cut from a block of PTFE, which is resistant above 200 deg.
Well those 5 months rattled past. New Year’s resolution, use the TVR more!
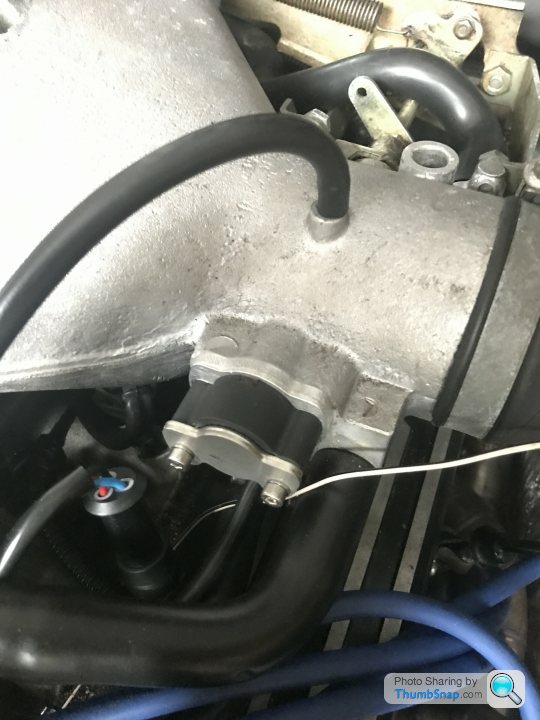
A quick update. Working further through the ignition system in the autumn, this happened in removing the distributor:

Old age and heat degradation to the plastic. Can’t have helped the running.
Also the throttle pot sensor was faulty and the OEM Lucas ones are NLA. However TVRS SW have a substitute mod. So back to full health.
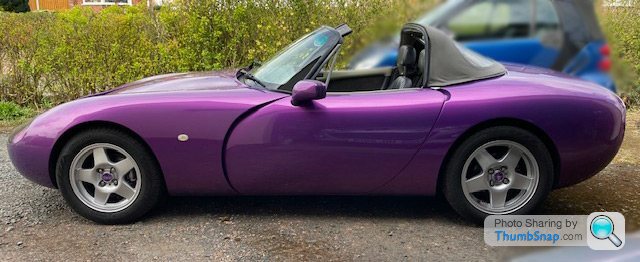
This year I’d like to replace the wheels with some original TVR ones. I like the pre-cat 5 spokes (Camille Gotti axia?) so will start looking for a set. Believe they were 15” front, 16” rear for the non pas early cars. Then flog the current 16/17” ones. They look great but I don’t think they help the ride, tram-line and make the steering too heavy for a non-pas car. And I think they are more in keeping with the age / look of the car.
HNY all.
A quick update. Working further through the ignition system in the autumn, this happened in removing the distributor:
Old age and heat degradation to the plastic. Can’t have helped the running.
Also the throttle pot sensor was faulty and the OEM Lucas ones are NLA. However TVRS SW have a substitute mod. So back to full health.
This year I’d like to replace the wheels with some original TVR ones. I like the pre-cat 5 spokes (Camille Gotti axia?) so will start looking for a set. Believe they were 15” front, 16” rear for the non pas early cars. Then flog the current 16/17” ones. They look great but I don’t think they help the ride, tram-line and make the steering too heavy for a non-pas car. And I think they are more in keeping with the age / look of the car.
HNY all.
I was lucky and spotted them with a saved search on ebay from James Agger TVR. They needed a refurb and I just had them powder coated without the diamond cut finish, which I think they were originally.
There are two very similar Amils, which came first, I never found out....
From this photo you will see the top left Amil TVR is missing the small hole between the bolt holes and I'm told there is a small difference in the radius of the spoke edges.
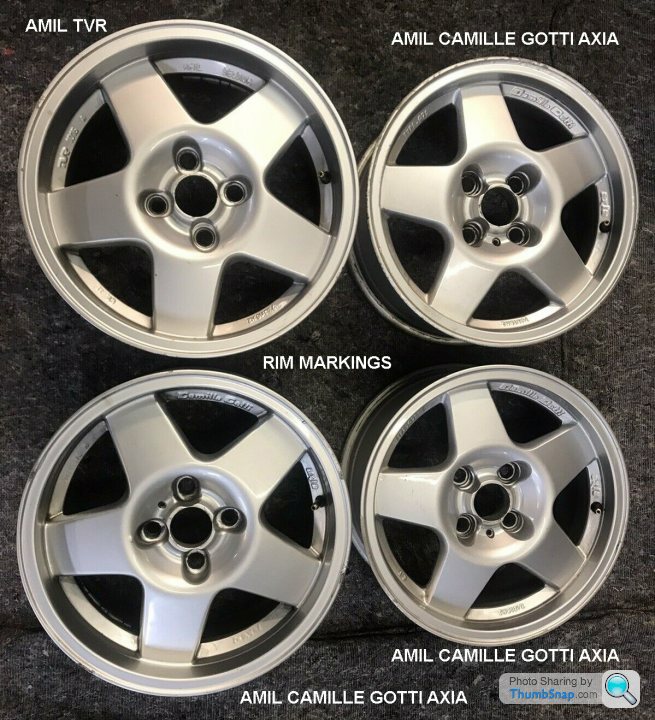
I swapped the odd one with phillpot if I recall, he may have a stash.

There are two very similar Amils, which came first, I never found out....
From this photo you will see the top left Amil TVR is missing the small hole between the bolt holes and I'm told there is a small difference in the radius of the spoke edges.
I swapped the odd one with phillpot if I recall, he may have a stash.

Now this is a bit tiresome.
Brake fluid was a little low so had a dig around and there is a drip from the master cylinder. I can see that it will be a pig of a job but hopefully it will come out of the reservoir hole. I’m guessing that TVR put the whole pedal box in as one. But not sure I fancy that.
I guess it will come down to access to the pipe connections.
Probably need to get that tidied away befor my wife gets home. Not sure she’ll be best pleased to see the hoover used to suck out the old brake fluid.
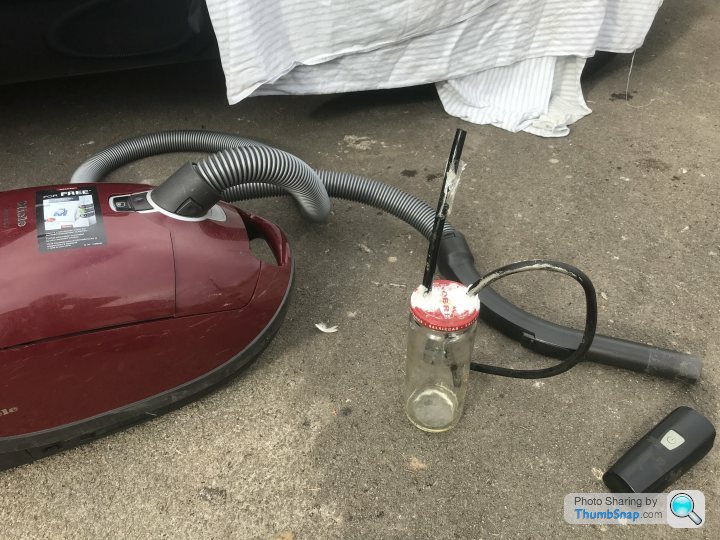
A couple of hours to get to this point. But should be able to get the master cylinder out. Bottom securing nut gets about a 1/16th of a turn at a time so a bit of a slow game. I can see why TVRS SW give it as a 6 hr evolution.
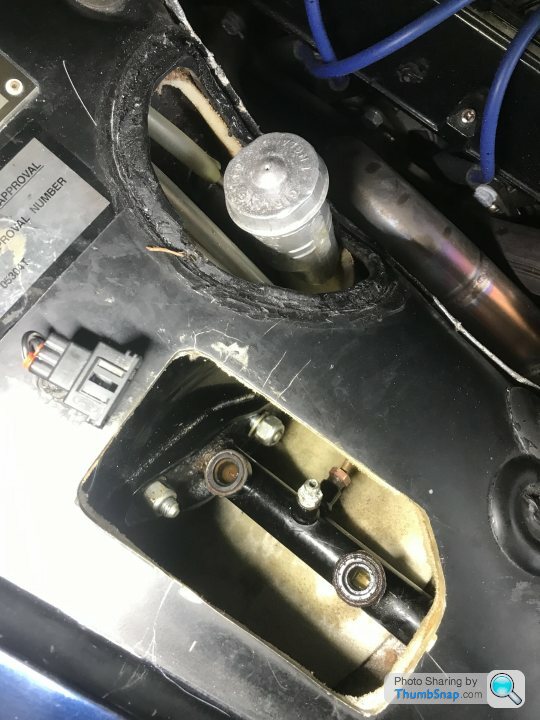
A couple of hours to get to this point. But should be able to get the master cylinder out. Bottom securing nut gets about a 1/16th of a turn at a time so a bit of a slow game. I can see why TVRS SW give it as a 6 hr evolution.
Success. About an hour to undo and remove.
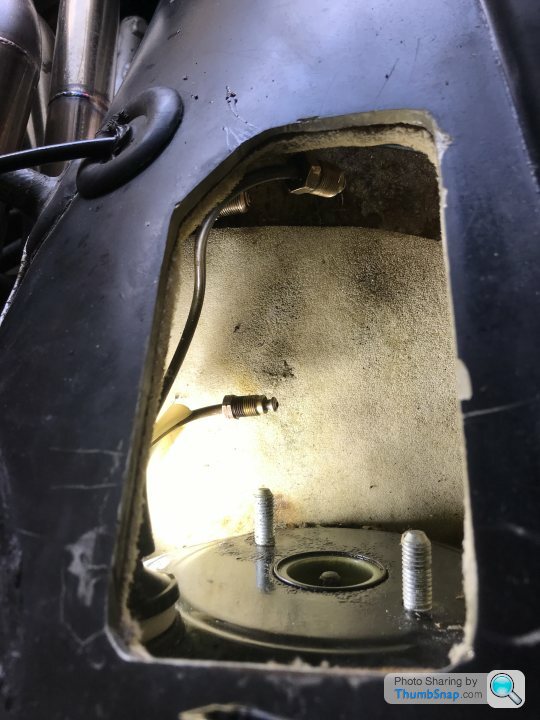
Worked best undoing the 2 securing bolts holding it to the vacuum servo. This allows a bit more manipulation to undo the pipes. Rear 2 were 7/16“ and front two 1/2” AF. brake pipe spanner. But an 11 and 13mm would work. Access is a bit of a pain. I know it went in from the footwell as one but an access panel for both clutch and brake cylinders of 8” top 12” would make the maintenance sooo much easier. A career in keyhole surgery beckons.
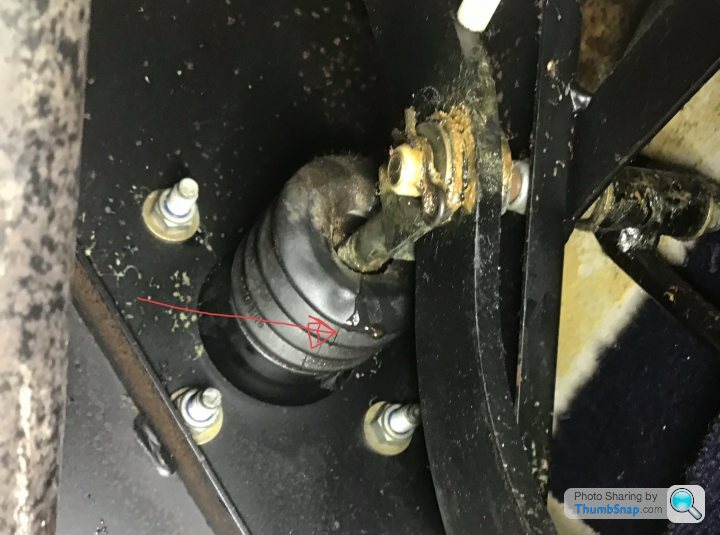
However think I’ve found the leak.
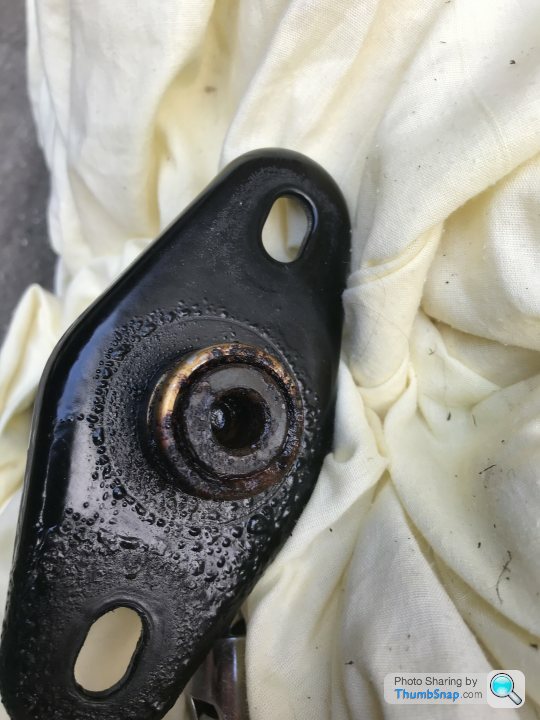
Nasty. Hopefully get a replacement later this week from TVRS SW as they’ve got them on the shelf.
Worked best undoing the 2 securing bolts holding it to the vacuum servo. This allows a bit more manipulation to undo the pipes. Rear 2 were 7/16“ and front two 1/2” AF. brake pipe spanner. But an 11 and 13mm would work. Access is a bit of a pain. I know it went in from the footwell as one but an access panel for both clutch and brake cylinders of 8” top 12” would make the maintenance sooo much easier. A career in keyhole surgery beckons.
However think I’ve found the leak.
Nasty. Hopefully get a replacement later this week from TVRS SW as they’ve got them on the shelf.
In with the new. Not difficult but a bit fiddly.
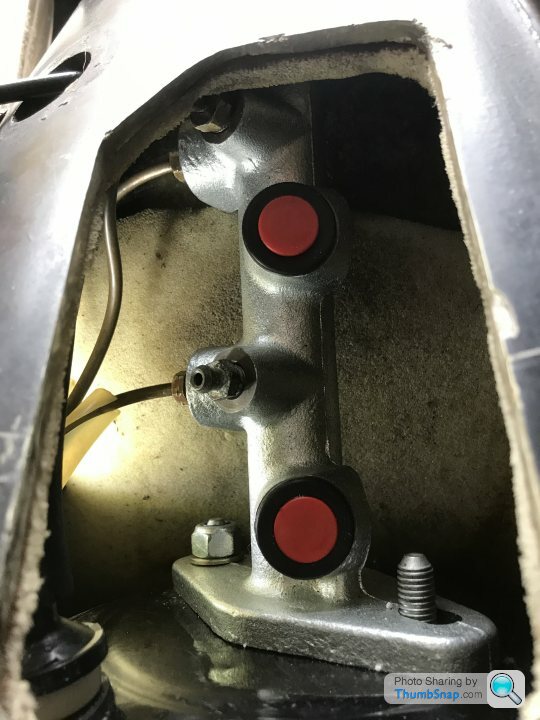
Definitely need to loosely attach the forward lower pipe then upper before the rear ones. And removing the grommet that the accelerator cable runs through helps access and lining up the threads. However notably the new item is a casting with significantly more metal. This means the clearances especially underneath are v tight. I removes a few mm off the front underneath of the casting. This allows a few extra mm to insert the top pipe.
It also helps not to sit the master cylinder on the 2 bolts on the vacuum servo until all 3 pipes are loosely in as it allows a bit more access and manoeuvrability. Then locate it. The rest is easy. About 2 hours max to refit.
Thus the 6 hr estimate from TVRS SW is about right. Bit I think having done it once, I could get it to 4 hours next time! (Please no!)
Gassing Station | Griffith | Top of Page | What's New | My Stuff