1995 Griffith 500 restoration
Discussion


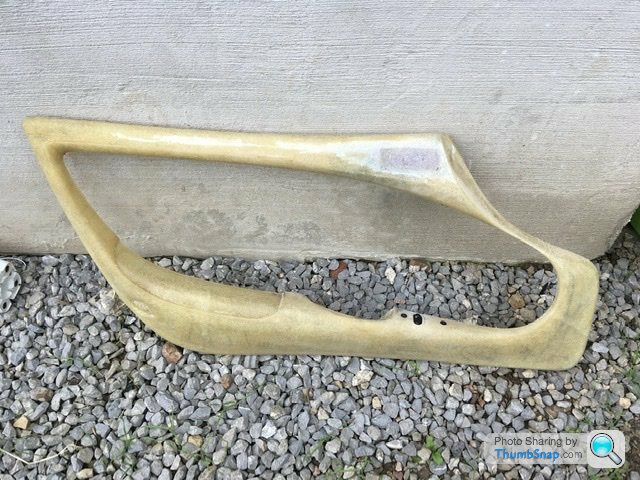
So I’m back to the heated seat buttons which will be fitted into the door trim surround armrests.
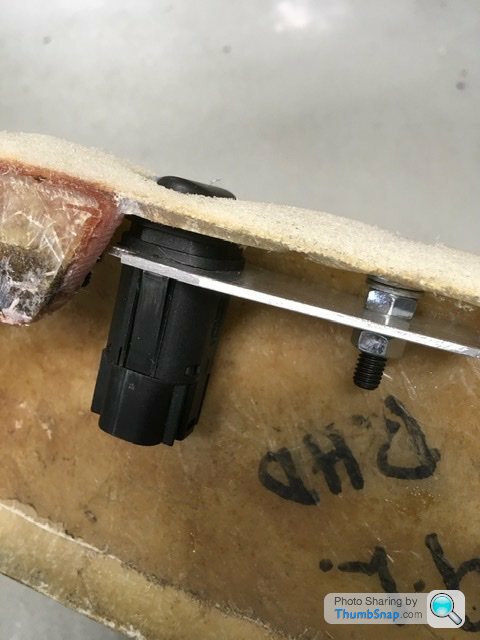
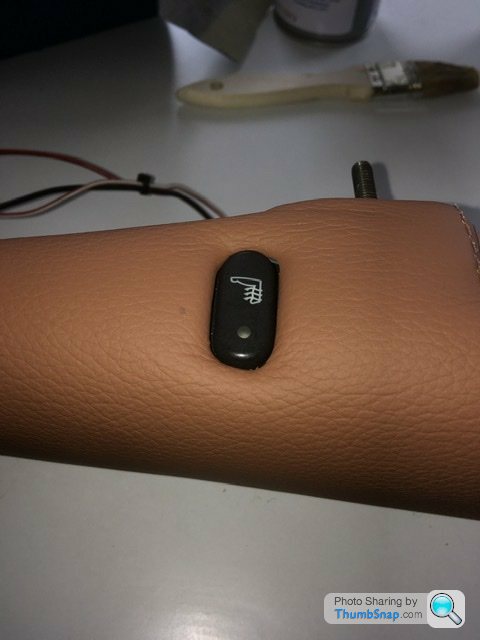
A while back I machined square holes into an aluminium plate to hold a Jaguar S type pre-facelift heated seat switch. This plate is then spaced and fitted underneath the armrest so I can have the switch top virtually flush with the armrest trim once it’s covered again.
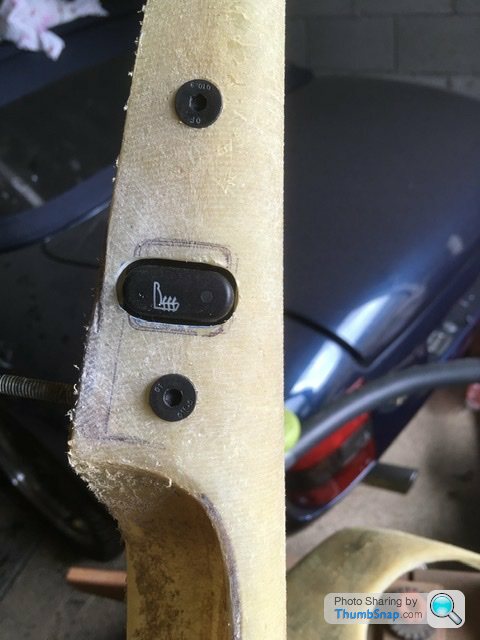
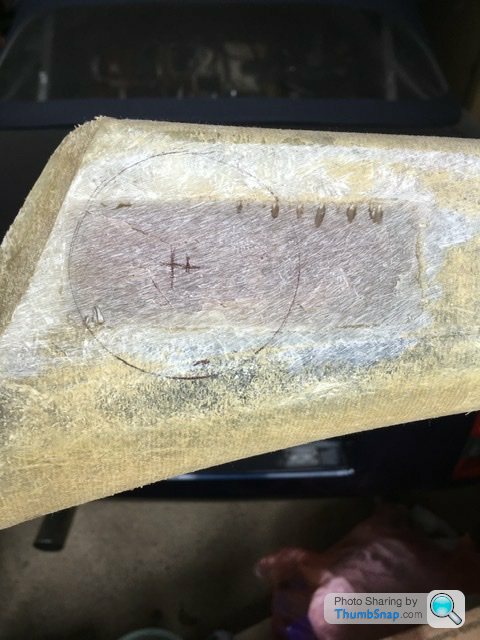
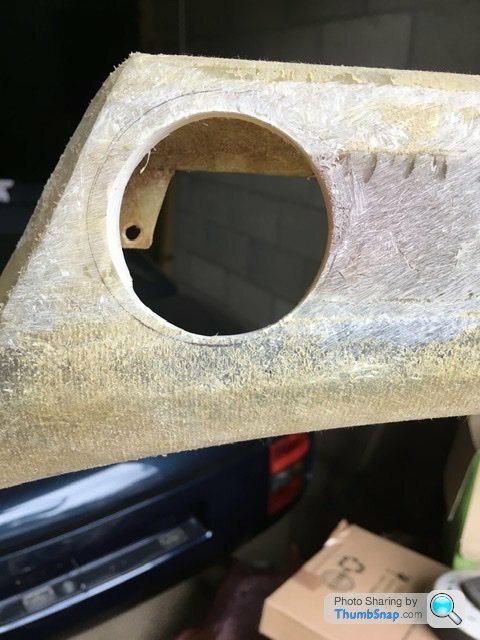
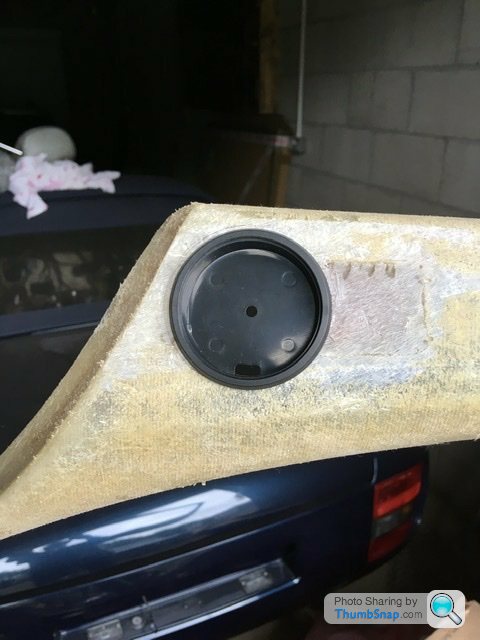
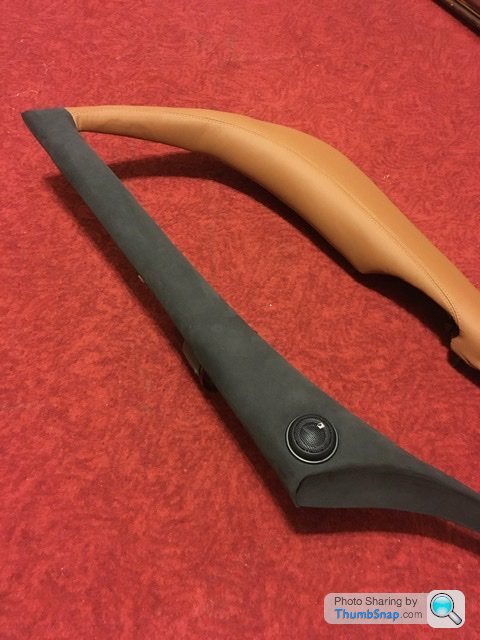
Pictures below show the shaped bracket and bolted up into the door trim surround. The rather large hole currently showing all of the switch will be repaired with a fibreglass patch and then worked back to just show the oval top of the button. The reason the hole is so big is that was the cigar lighter position. Far easier to make the hole bigger then position the bracket underneath accordingly. When I fit the passenger bracket I’ll know the position it needs to be.
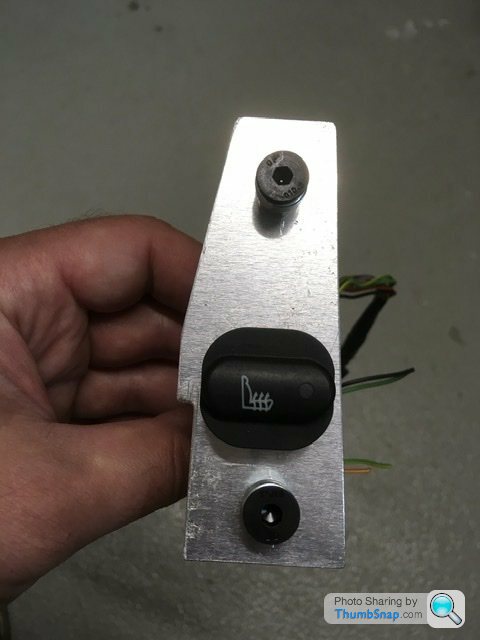

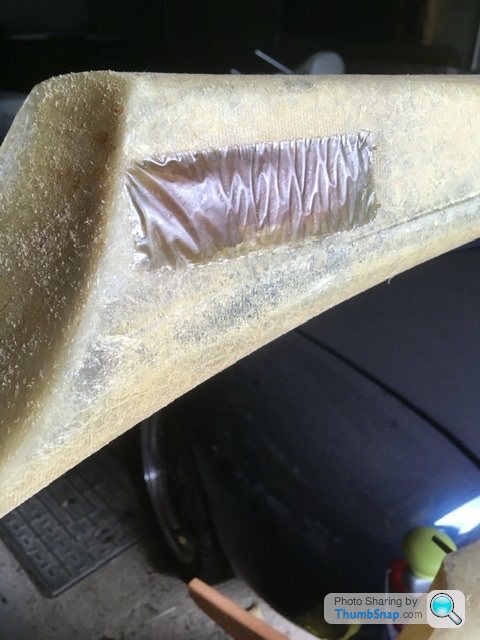
So now I have a positive position for the button I’ll remove the bracket, fibreglass the hole over and then carefully file back the clearance for just the oval part of the button to be on show. It’s a bit of a faff for a button but there isn’t a nice position on the centre console I don’t think.
A while back I machined square holes into an aluminium plate to hold a Jaguar S type pre-facelift heated seat switch. This plate is then spaced and fitted underneath the armrest so I can have the switch top virtually flush with the armrest trim once it’s covered again.
Pictures below show the shaped bracket and bolted up into the door trim surround. The rather large hole currently showing all of the switch will be repaired with a fibreglass patch and then worked back to just show the oval top of the button. The reason the hole is so big is that was the cigar lighter position. Far easier to make the hole bigger then position the bracket underneath accordingly. When I fit the passenger bracket I’ll know the position it needs to be.
So now I have a positive position for the button I’ll remove the bracket, fibreglass the hole over and then carefully file back the clearance for just the oval part of the button to be on show. It’s a bit of a faff for a button but there isn’t a nice position on the centre console I don’t think.
RichB said:
RobXjcoupe said:
<clip> It’s a bit of a faff for a button but there isn’t a nice position on the centre console I don’t think.
I assume you didn't like the idea of it being switched by the heated wing mirror knob, one of the four clustered with the heater controls?Now it’s not standard I’d rather have 2 separate switches rather than a single switch for both seats.

Been a while, had a spare weekend and finally finished the fit of the heated seat buttons within the door trim surround. The countersunk bolts will be flushed off soon ready to retrim.
Below shows the ashtray holes filled ready to cut out new holes for the small tweeter speakers

Fingers crossed I can start cutting the new trim pattern over the bank holiday weekend.
Granturadriver said:
This looks very good!
How are you going to do it with the edges around the button? Just cut it out or should the leather be folded over?
Not shown in the pictures are the holes fully fettled, chamfered with clearance for the leather thickness to wrap into the button holes. The button only moves 4 mm so it took some work getting a working space under the glassfibre as well as around it. I’ll also have to delete the hard foam padding originally fitted under the leather in that area, otherwise the switch will be within a padded divot.How are you going to do it with the edges around the button? Just cut it out or should the leather be folded over?
Hope that makes sense?

The weekend I managed to get the drivers door trim on. I modified it a little so the top matches the dash and the lower portion the same as the seat colour. Not the easiest to fit. 5hrs to get it wrinkle free.
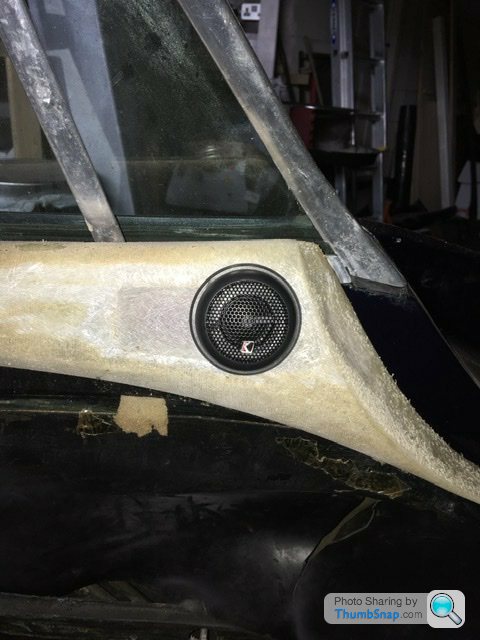
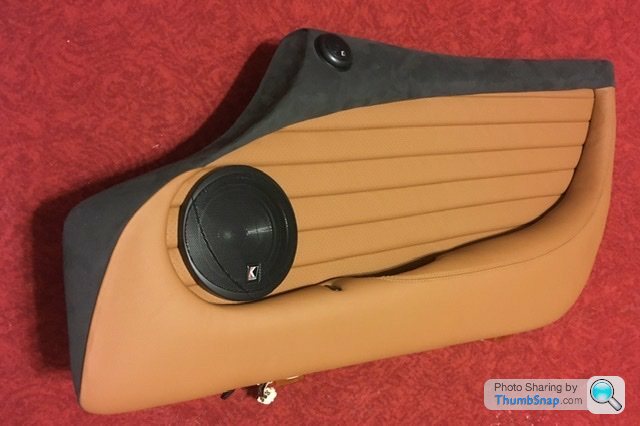
Pictures below just to show the heated seat button. Still in a bit of a divot but acceptable I think. Also the tweeter pushed into the upper trim.

I don’t have much of the dash colour alcantara so might have to change the inside of the door trim design to just the pleated perforated leather.
Pictures below just to show the heated seat button. Still in a bit of a divot but acceptable I think. Also the tweeter pushed into the upper trim.
I don’t have much of the dash colour alcantara so might have to change the inside of the door trim design to just the pleated perforated leather.
PabloGee said:
Looks brilliant. The button looks intended, the divot in the padding is not an issue to my mind.
Intrigued to know if the tweeters make a difference in such a noisy car…
Hmmm….whilst driving I wouldn’t bother with the stereo. When parked up looking inside, I think it finishes a nice cabin interior seeing component speakers fitted.Intrigued to know if the tweeters make a difference in such a noisy car…
The original fit ashtray gives access to a securing point for the door trim to the door so swapping the ashtray for a small speaker seemed to be a better way of plugging an access hole.
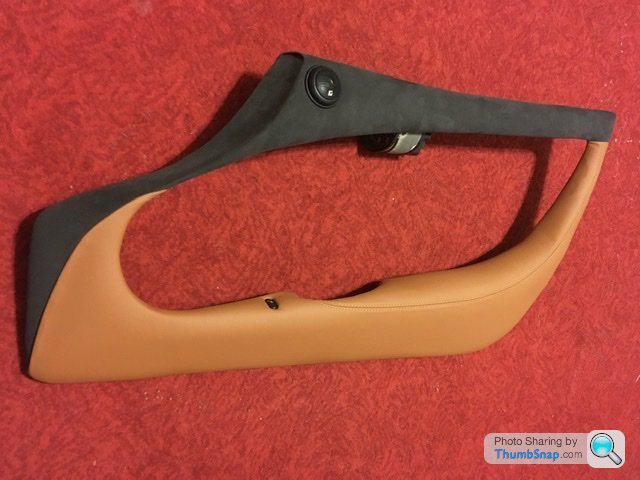
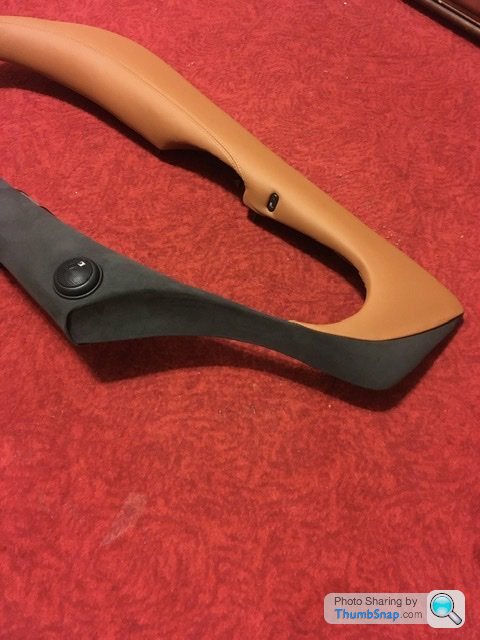
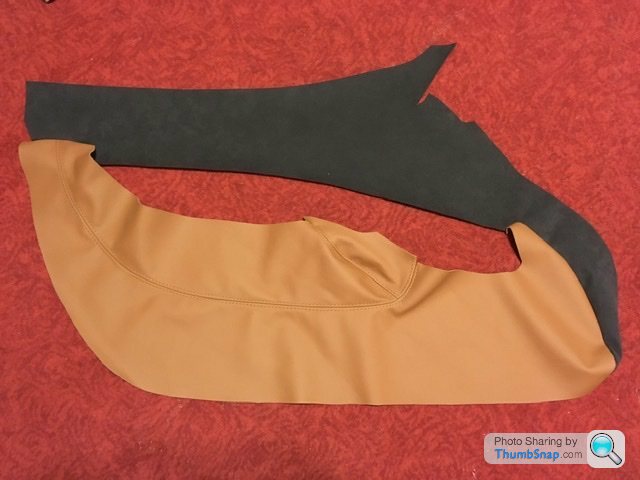
The finished door trim back panel. Just propped up in the picture but it gives an idea how it looks. The panel is classic tuck and roll using two layers of 6mm scrim the same as the seats so gives a lovely soft feel using perforated leather. This design will also appear at the rear of the interior which is usually covered in carpet. Will give a bit of continuity I think.
RichB said:
It looks very good, has a kind of speedboat feel to it! I see you have lost the cigarette lighter have you relocated it? I find mine very useful as it's here I plug in the Accumate.
The cigar lighter position has currently been deleted from the door trim for the heated seat switch. I’ve been wondering whether to fit dedicated usb inputs instead within the glove box as all electrics are there now. The space above the battery is also free to make a bracket/shelf to fit additional electric sockets or a version of the accumate. The one I had was wired directly to the battery with the mains plugs to power it in the boot. I need to have a look for a suitable exterior space for a mains connection so I can properly lock the car whilst it’s battery is trickle charged in the garage.8Speed said:
RobXjcoupe said:
The finished door trim back panel. Just propped up in the picture but it gives an idea how it looks. The panel is classic tuck and roll using two layers of 6mm scrim the same as the seats so gives a lovely soft feel using perforated leather. This design will also appear at the rear of the interior which is usually covered in carpet. Will give a bit of continuity I think.

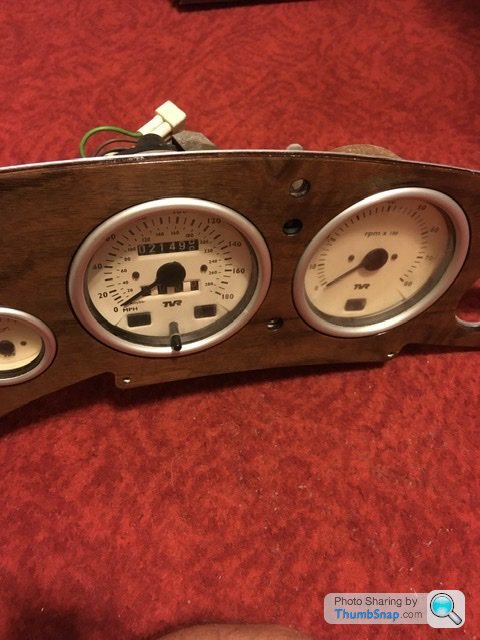
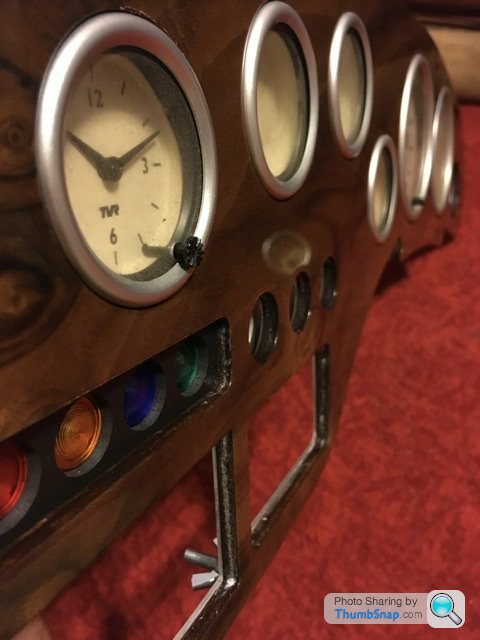
New dash arrived. A couple of pictures showing with the dials fitted. Just wanted to see how it looked with the subtle mod. I’m liking it. As there is no flex in this I need to make sure I trial fit this within the surround before it’s all bolted to the car. I’m assured it fits but it doesn’t flex into place like the original.
The dials all need a clean, so will dismantle again, get the dial faces polished up then back together for final fit.
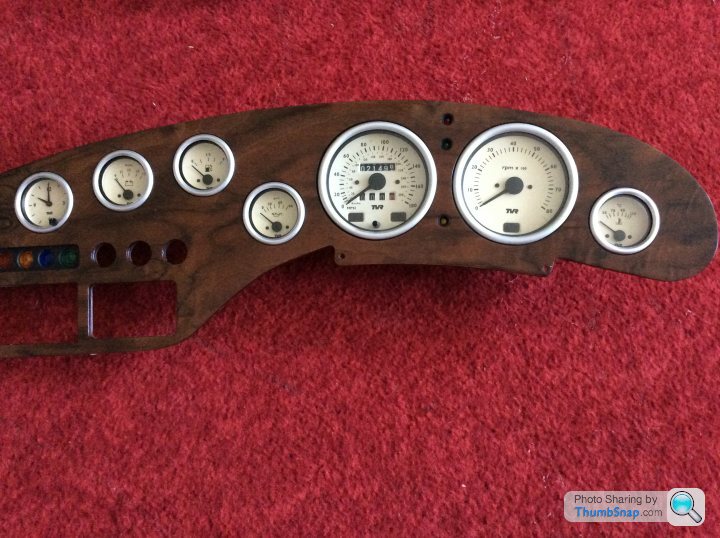
Dials have had a polish, the temp gauge with the new body also fitted and blends in with the rest of the dials. You can’t tell it’s been repaired looking at the front.
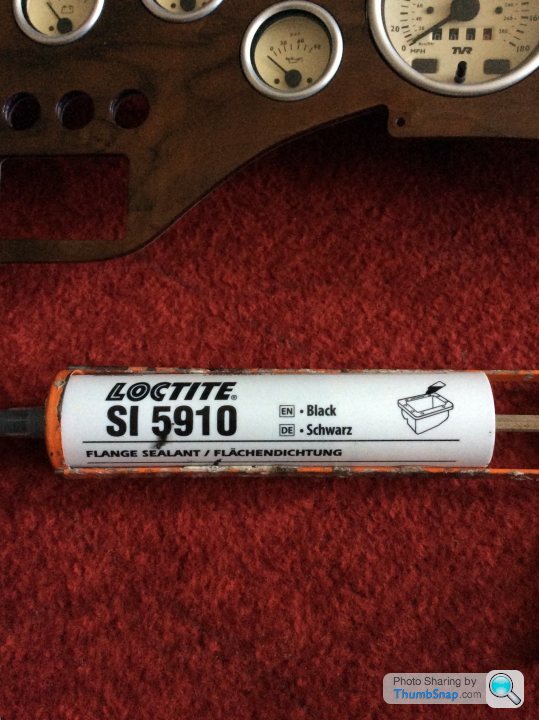
The four auxiliary gauges I’ve used a rubberised gasket sealer to hold in place rather than tighten the clamps on the rear. Reason being is due to the plastic bodies getting old now. I don’t want to pull the fronts off the gauges and have to make another 3 new bodies. The metal clamps are just tweaked rather than over tightened.
Below is the sealant I use. Very messy stuff but does the job. Stuff from my Ford employment days “,)
Whilst I’m showing the dash and dials I thought I’d show you the picture below.
The back of 2 electronic speedometers, one is TVR the other Jaguar. The wired connection plug is exactly the same with wires in exactly the same position within the plug. There was a high amount of TVR versions that seemed to stop working when the cars weren’t that old. Looking at the older jag unit, the motor that moves the speedo needle is exactly the same as the TVR version.
So trying to say, don’t buy a replacement TVR speedo if you can repair it with parts from the older Jaguar version.
Caerbont doesn’t make the analogue version anymore so more reason to repair if possible.
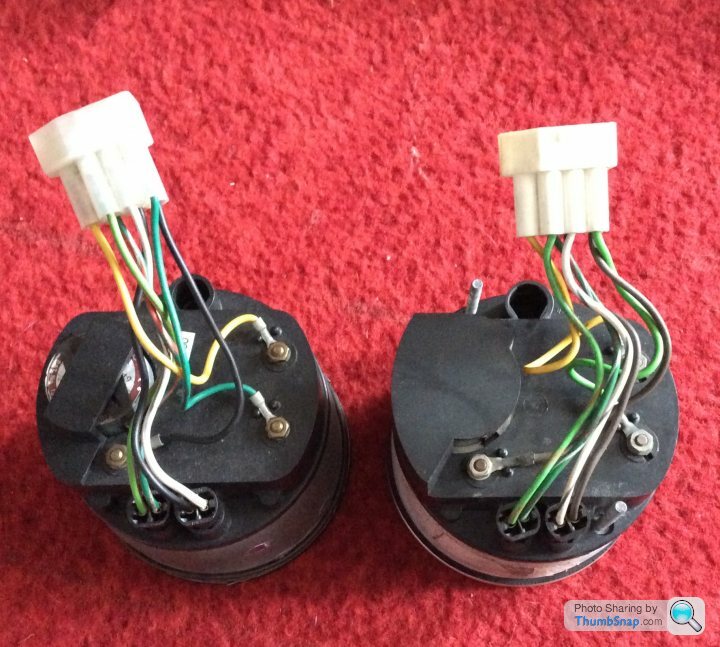

TVR version is on the right hand side
The back of 2 electronic speedometers, one is TVR the other Jaguar. The wired connection plug is exactly the same with wires in exactly the same position within the plug. There was a high amount of TVR versions that seemed to stop working when the cars weren’t that old. Looking at the older jag unit, the motor that moves the speedo needle is exactly the same as the TVR version.
So trying to say, don’t buy a replacement TVR speedo if you can repair it with parts from the older Jaguar version.
Caerbont doesn’t make the analogue version anymore so more reason to repair if possible.
TVR version is on the right hand side
Polly Grigora said:
I apologise for the earlier post of mine while under the influence of much booze, post has now been deleted
This journey of yours that you share with the world here at PH is a cracker
Well impressed with your findings regarding possible speedo fixes
Sorry
No need to apologise, we all have our moments. Just glad you like the read, that’s the main thing. The possible speedo fix I thought more people knew about tbh. I’ve had Jag parts laying around just as long as the TVR bits so took it for granted the speedometers looking virtually identical.This journey of yours that you share with the world here at PH is a cracker
Well impressed with your findings regarding possible speedo fixes
Sorry
Said Jag is pictured below. I’ve got a fairly long read on that also. In the readers cars though. Straight 6, manual gearbox, triple carbs. Lots of modified bits. Jaguar XJC 4.2 if interested.


Polly Grigora said:
Jaguar XJC 4.2 if interested
Yes I'm more than interested and thank you for giving some space, please post a Link
I was there when the chaps in the know were questioning why should Jaguar be building Fords
I was broken after several months when hearing the news that the veneer shop was about to close
To think that all those people that had a skill like no others all of a sudden got a goodbye and forgotten
I was on the Ford side regarding the tooling. Our engineers had watched the Jaguar process’s and did thorough strip downs of the new cars current at the time which if I remember were xjs and xj40. Panel fit was out of spec, finished panel thickness tolerance were all out of spec. Jaguar panel finishing was spot on. Ford not wanting to waste money on refinishing had the tooling shipped to Dagenham tooling operations to bring back to spec, so all new cars could be built with minimal finishing. I remember it well. The tooling was simply bodged rather than repaired properly, everything literally was worn out. We had Jaguar stamped XJS panels that we could pierce with a biro they were that much out of spec. That began the Ford era of Jaguar to bring them bang up to date with production processes in an effort to eventually make a profit. I’ve got plenty of experience working on and with Jaguar tooling as a Ford employee, also with Land Rover who were in a similar position to Jaguar profit wise although there tooling was better being from BMW. One particular shift in Solihull getting ready for job 1 on the new Range Rover sport, the engineers were saying they had broken a build record for a days production with the new production line process......50 cars in an 8 hour shift! I stood there and just raised my eyebrows with another Ford toolmaker and said Dagenham were building 40 cars an hour on a slow line and up to 60 cars an hour on a fast line with 20 year old production equipment.Yes I'm more than interested and thank you for giving some space, please post a Link
I was there when the chaps in the know were questioning why should Jaguar be building Fords
I was broken after several months when hearing the news that the veneer shop was about to close
To think that all those people that had a skill like no others all of a sudden got a goodbye and forgotten
Don’t forget all those jag and Land Rover supercharged v8’s built in Ford Bridgend South Wales. That’s were I honed my machining skills getting many a breakdown repaired to carry on production
Gassing Station | Griffith | Top of Page | What's New | My Stuff