The 3D Printer Thread
Discussion


Not specifically a 3D print question I guess, but involves printed parts. I am build a throttle quadrant for Flightsim. I have a lever attached to a point with a half moon gear on the end of it, the gear then turns a gear on a potentiometer. No issues there. But there is no resistance in the lever, it freely moves back and forth. What is the best way to introduce some resistance? Also, how best to mount the level to the casing? Should it use a bearing, or just be mounted on the a rod directly or a 3d printed pin?
I’m a massive noob at this so forgive the daft questions - my wife makes cakes and spends probably £8 a time on these stamps that you emboss icing with. Man maths says I could recoup the cost of a printer quite quickly and get a new toy to play with.
Would the Ender 3 be the best option for that?
And is there any software I could use to make the moulds?

Would the Ender 3 be the best option for that?
And is there any software I could use to make the moulds?
Edited by matt666 on Wednesday 17th March 17:19
this guy used a bearing by the looks of it https://www.thingiverse.com/thing:4542331
for some resistance could you just put some material on the lever and the side of the housing to create a bit of friction ? or if you got some fibre washers and bolted through them at the pivot they would crush together and provide the resistance maybe ?
for some resistance could you just put some material on the lever and the side of the housing to create a bit of friction ? or if you got some fibre washers and bolted through them at the pivot they would crush together and provide the resistance maybe ?
Crafty_ said:
this guy used a bearing by the looks of it https://www.thingiverse.com/thing:4542331
for some resistance could you just put some material on the lever and the side of the housing to create a bit of friction ? or if you got some fibre washers and bolted through them at the pivot they would crush together and provide the resistance maybe ?
Yes I thought about a friction plate, seemed a bit of a bodge to me. Like the idea of the fibre washers and to crush it against the bearing tighter. Will try that and see how it feelsfor some resistance could you just put some material on the lever and the side of the housing to create a bit of friction ? or if you got some fibre washers and bolted through them at the pivot they would crush together and provide the resistance maybe ?
matt666 said:
I’m a massive noob at this so forgive the daft questions - my wife makes cakes and spends probably £8 a time on these stamps that you emboss icing with. Man maths says I could recoup the cost of a printer quite quickly and get a new toy to play with.
Would the Ender 3 be the best option for that?
And is there any software I could use to make the moulds?
A CNC machine would work on those, but 3d printing could achieve it also. Software wise there is plenty out there. For that sort of thing you will need to create the as a vector graphic in Illustrator or similar. Then add it to a CAD programme. For CAD I have found Fusion 360 is best and its free for the hobbyist.Would the Ender 3 be the best option for that?
And is there any software I could use to make the moulds?
Edited by matt666 on Wednesday 17th March 17:19
The Ender 3 V2 is what I have. Its a good entry level printer, sure there are better ones but as far as value for money goes, its about the best.
Scabutz said:
matt666 said:
I’m a massive noob at this so forgive the daft questions - my wife makes cakes and spends probably £8 a time on these stamps that you emboss icing with. Man maths says I could recoup the cost of a printer quite quickly and get a new toy to play with.
Would the Ender 3 be the best option for that?
And is there any software I could use to make the moulds?
A CNC machine would work on those, but 3d printing could achieve it also. Software wise there is plenty out there. For that sort of thing you will need to create the as a vector graphic in Illustrator or similar. Then add it to a CAD programme. For CAD I have found Fusion 360 is best and its free for the hobbyist.Would the Ender 3 be the best option for that?
And is there any software I could use to make the moulds?
Edited by matt666 on Wednesday 17th March 17:19
The Ender 3 V2 is what I have. Its a good entry level printer, sure there are better ones but as far as value for money goes, its about the best.
Don't do what that person has done and forget to mirror the print though!
Since I started experimenting with PC with my Prusa mk3S I've had a few issues.
It's in a lack enclosure and ambient is presently hovering around 44°C.
Bed temp 115, nozzle temp 280.
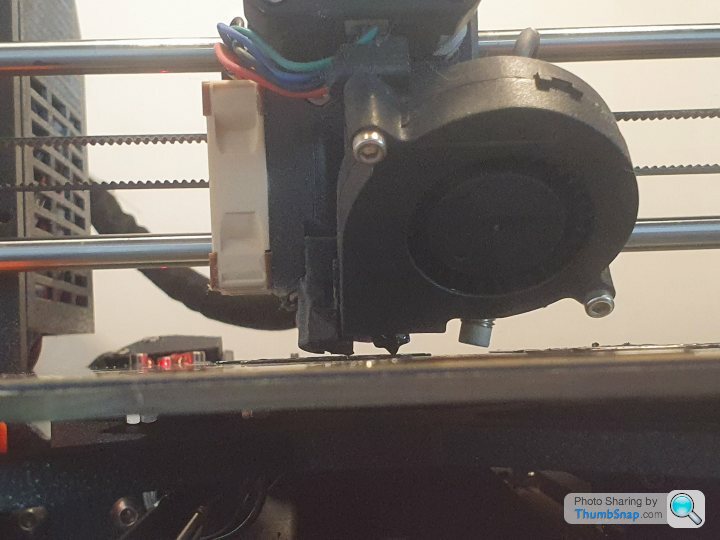
First problem was the cooling shroud. I think the mk3S shipped with PETG components. At these temperatures it didn't last long before melting into the part and the head becoming a molten mess
Next I noticed that my PINDA sensor had started to sag and droop.
Before the s t hits the fan again I've decided to print a bunch of upgrades. Basically all the printed parts around the extruder are going to annealed PC.
Here you can see the extent of the PINDA droop (should be vertical) and also the remains of another cooling shroud....
It's in a lack enclosure and ambient is presently hovering around 44°C.
Bed temp 115, nozzle temp 280.
First problem was the cooling shroud. I think the mk3S shipped with PETG components. At these temperatures it didn't last long before melting into the part and the head becoming a molten mess
Next I noticed that my PINDA sensor had started to sag and droop.
Before the s
t hits the fan again I've decided to print a bunch of upgrades. Basically all the printed parts around the extruder are going to annealed PC. Here you can see the extent of the PINDA droop (should be vertical) and also the remains of another cooling shroud....
Ambleton said:
It's in a lack enclosure and ambient is presently hovering around 44°C.
Bed temp 115, nozzle temp 280.
... melting into the part and the head becoming a molten mess ...
Next I noticed that my PINDA sensor had started to sag and droop.
I would say those temps are way over if you're printing PETG - you should be in the region of about 80 bed, 240 for nozzle. They are being compounded by the enclosure and I think you're going to risk overheating/failure issues with the PSU if that's still inside the enclosure - I've extended all of the cables and mounted mine outside, with connectors, and put a brace where the PSU was to support the frame. Could be wrong but I don't think the prusa warranty covers PSUs inside enclosures because of the additional heat and risk.Bed temp 115, nozzle temp 280.
... melting into the part and the head becoming a molten mess ...
Next I noticed that my PINDA sensor had started to sag and droop.
PINDA's doing a good job of it's still working properly, quite surprised you're getting prints with it at that angle!
ReverendCounter said:
Ambleton said:
It's in a lack enclosure and ambient is presently hovering around 44°C.
Bed temp 115, nozzle temp 280.
... melting into the part and the head becoming a molten mess ...
Next I noticed that my PINDA sensor had started to sag and droop.
I would say those temps are way over if you're printing PETG - you should be in the region of about 80 bed, 240 for nozzle. They are being compounded by the enclosure and I think you're going to risk overheating/failure issues with the PSU if that's still inside the enclosure - I've extended all of the cables and mounted mine outside, with connectors, and put a brace where the PSU was to support the frame. Could be wrong but I don't think the prusa warranty covers PSUs inside enclosures because of the additional heat and risk.Bed temp 115, nozzle temp 280.
... melting into the part and the head becoming a molten mess ...
Next I noticed that my PINDA sensor had started to sag and droop.
PINDA's doing a good job of it's still working properly, quite surprised you're getting prints with it at that angle!
Had trouble with under extrusion on the second layer, but that was remedied by a new nozzle. Several months of carbon reinforced material wears even an E3D hardened steel nozzle.
PSU is outside the enclosure, like yours, with the brace.
I'm printing all the plastics around the extruder in PC so that it doesnt melt again in the future
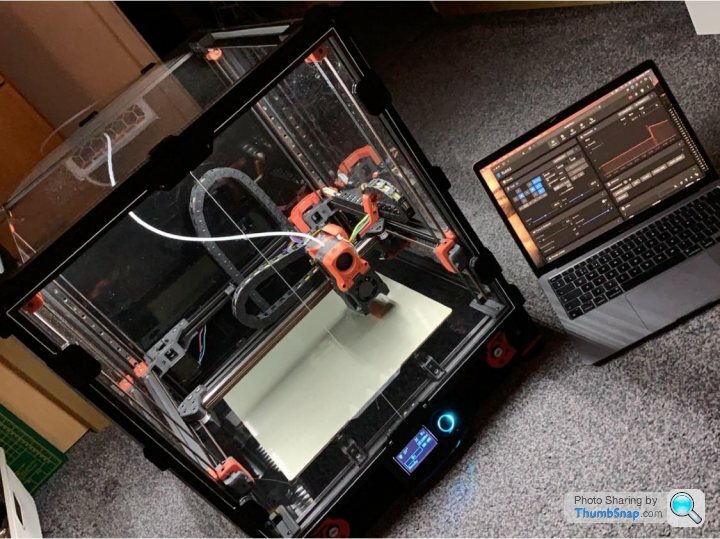
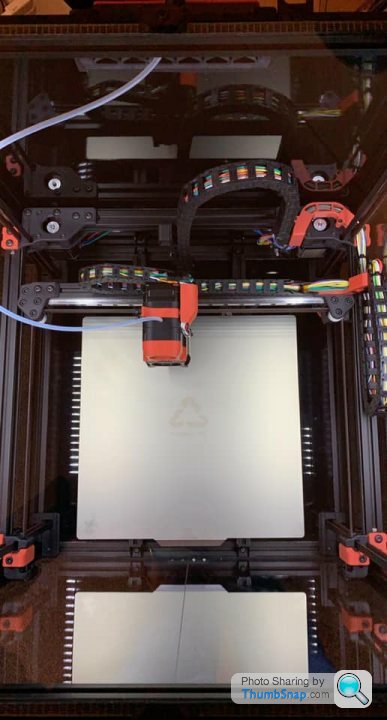
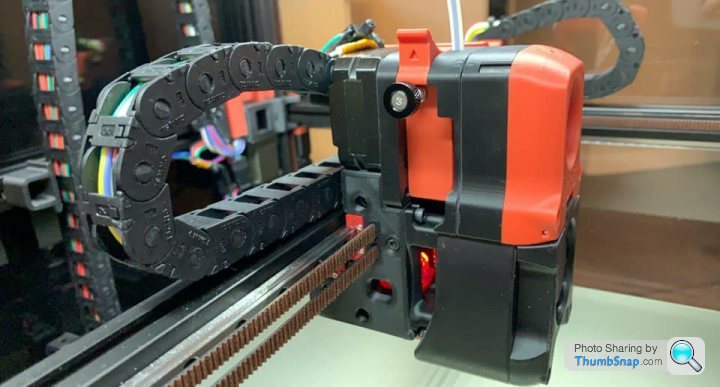
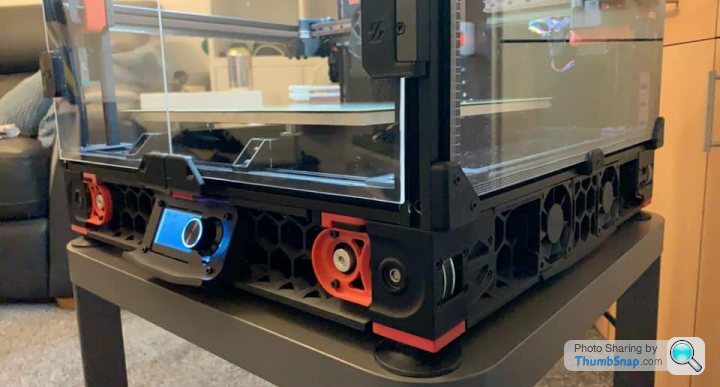
Asked a while ago whether anyone has built themselves a Voron printer.
Well, I decided to just go for it with a 300mm v2.4.
Now alive and should get the final remaining part this week (bed heater) and bit more wiring for it and can go about getting it printing.
Been pretty fun, but a lot of work and time, plus having to source all the stuff and have a printer first capable of printing ABS properly took up a good deal of it! You're taking two solid weeks, 24/7 printing at a minimum to get the parts needed for it never mind the rest.
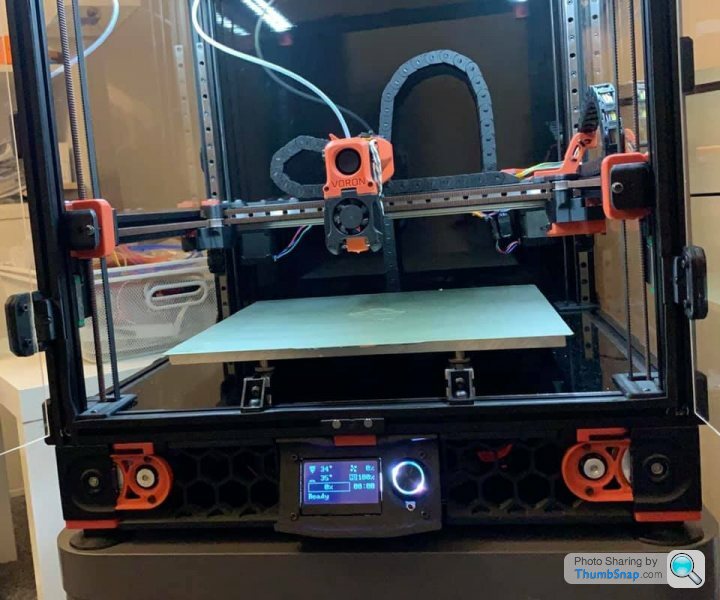
Having reprinted my X carriage and fan shroud in PC and re assembled its all now running OK and the PINDA is now vertical.
I tried printing some inlet stubs in PC but have been suffering with layer adhesion and the parts breaking.
The Prusament PC blend says print temps of 275°+/-10° head and bed of 110°C +/-10°C. I've been printing in my Lack chamber with ambient internal temps hovering around 49°C on a long print.
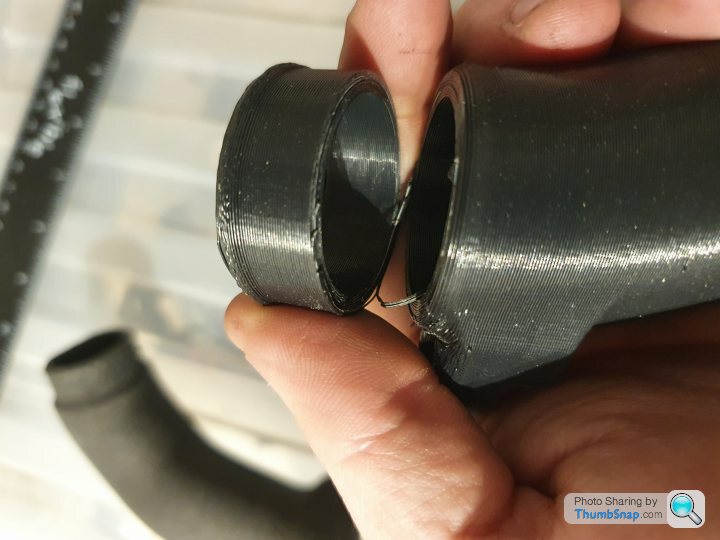

I have contacted PRUSA directly to understand of any of the "blend" materials are likely to have been damaged by the exposure to gasoline. In theory PC is fine, but not sure about anything else they may "blend" with it. ABS for example dissolves in gasoline.
In the meantime I dried ot out thoroughly for about 8hrs yesterday and trying the prints again at 295°C. Looks like better layer adhesion already but let's see how it turns out.
I tried printing some inlet stubs in PC but have been suffering with layer adhesion and the parts breaking.
The Prusament PC blend says print temps of 275°+/-10° head and bed of 110°C +/-10°C. I've been printing in my Lack chamber with ambient internal temps hovering around 49°C on a long print.
I have contacted PRUSA directly to understand of any of the "blend" materials are likely to have been damaged by the exposure to gasoline. In theory PC is fine, but not sure about anything else they may "blend" with it. ABS for example dissolves in gasoline.
In the meantime I dried ot out thoroughly for about 8hrs yesterday and trying the prints again at 295°C. Looks like better layer adhesion already but let's see how it turns out.
Bullett said:
I like the large build area on that.
Can I ask how much did you spend on bits to build it?
Sorry for the late reply.Can I ask how much did you spend on bits to build it?
It depends on the size and your choices as to where you source the parts - that's 300x300x280 so the middle size, the bigger one will be dearer again, as the cost of rails, build plate, frame etc all scales with size.
Cost wise, I didn't count but a guess I'd say somewhere around £1500.
As it's the first I got, there's lots of 'extra' stuff I needed, including a bit more on top upgrading the Anycubic to actually print the parts. It could be done cheaper or dearer depending on your choices. They are certainly not budget printers and aren't designed or intended to be. If you can't print the parts, you can pay something like £200 and they have a group of guys who have 'certified' quality parts who can supply them, but there's a decent queue (look for Voron PIF).
It does make most other printers you can buy seem like toys as well. Will post some other photos.
Here's a video of it I made - https://youtu.be/Uv_cUlxoy5k
And close up printing a test cube- https://youtu.be/hIbhUvcLIcI
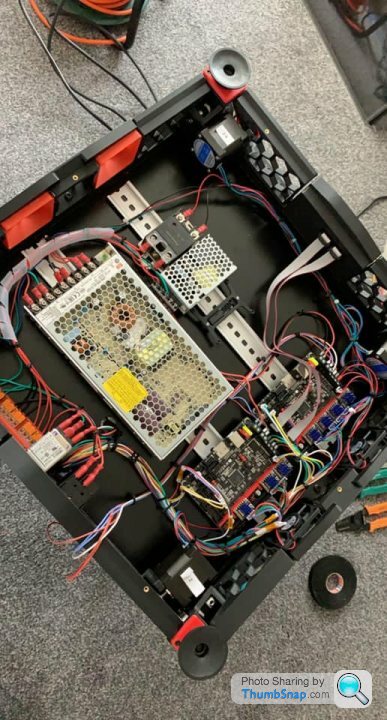
And some photos, inc one of the frame next to a lack cube enclosure (for a 300x300 it's incredibly compact) and the electronics (unfinished there).

And close up printing a test cube- https://youtu.be/hIbhUvcLIcI
And some photos, inc one of the frame next to a lack cube enclosure (for a 300x300 it's incredibly compact) and the electronics (unfinished there).
Edited by S13_Alan on Sunday 23 May 19:20
Gassing Station | Computers, Gadgets & Stuff | Top of Page | What's New | My Stuff