1/24 Revell Golf Mk2 GTI, with a personal touch
Discussion


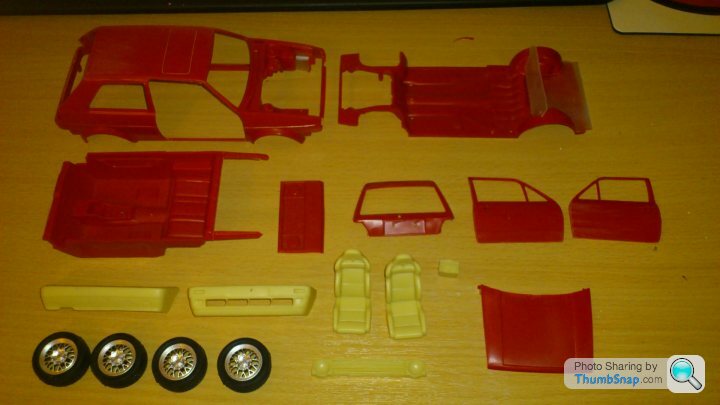
Time for me to start my first special build. I have built standard kits so far, following the instructions. Now I want to build something special, with modifications and scratchbuilt parts.
I'm a big fan of VWs, early Golfs in particular. I have a Revell Mk2 kit, which will be the base for my project. I want to use different wheels, make small body modifications, and get the car to sit lower on its suspension (be prepared for requests for advice on this! ). I will also make many parts look more real than the moulded ones (eg brake and fuel pipes).
If I find a good example picture of what I want to achieve, I will post it. For now though, planning:
Where is a good place to find aftermarket parts, without "stealing" them from another kit? I am thinking wheels and tyres, engine, and maybe seats.
What filler / raw materials do you recommend for body mods?
TIA
I'm a big fan of VWs, early Golfs in particular. I have a Revell Mk2 kit, which will be the base for my project. I want to use different wheels, make small body modifications, and get the car to sit lower on its suspension (be prepared for requests for advice on this!
). I will also make many parts look more real than the moulded ones (eg brake and fuel pipes).If I find a good example picture of what I want to achieve, I will post it. For now though, planning:
Where is a good place to find aftermarket parts, without "stealing" them from another kit? I am thinking wheels and tyres, engine, and maybe seats.
What filler / raw materials do you recommend for body mods?
TIA
http://www.scaleproduction.de/
hey bud, quite expensive but good stuff is always worth paying for. They do a big bumper conversion for the Revell one and plenty of wheels, for the engine though you're probably looking at a die cats of an Audi TT or something similar, there isn't much VW stuff around unfortunately
Evergreen styrene shapes is best but whatever old credit cards, gift cards and stuff you have lying around works just as well, if you want to make more complicated shapes and are prepared for a lot of sanding then some Milliput super fine white epoxy putty is great for sculpting arches and spoilers
I haven't got around to building my mkII yet, I'm looking forward to seeing yours
Edited by Big Fat Fatty on Wednesday 23 November 21:45
aoshima do wheel kits , but theyre as expensive as a bargain kit so worth cheking ebay etc
this one has the aoshima wheels...its a fujimi kit which is more accurate
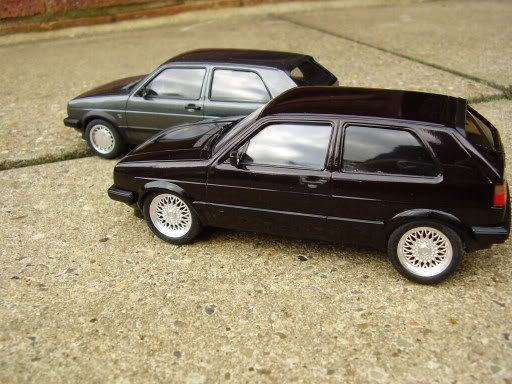
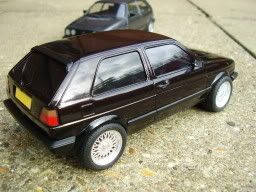
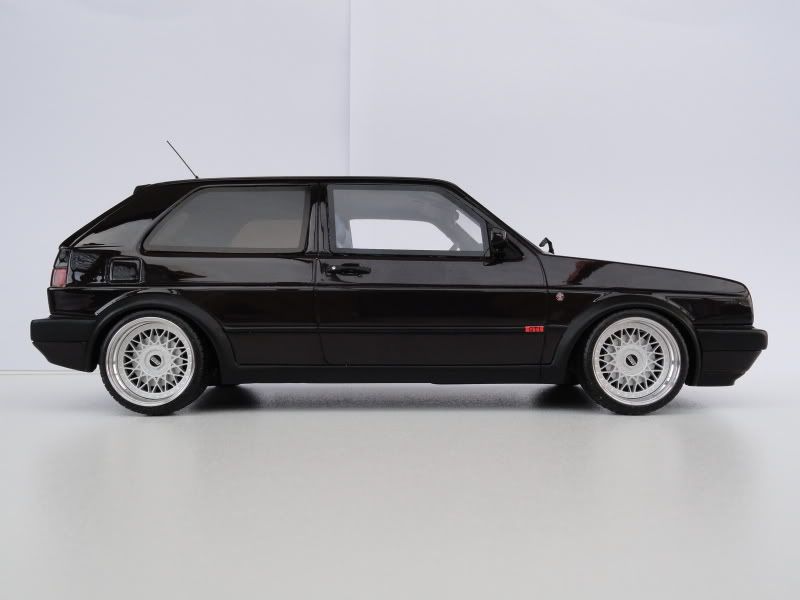
then i have this 1/18 otto...id reccomend this one if you like golfs but its 1/18, but almost all the details are correct unlike the others..i have these wheels i got from germany theyre real alloy on the lips
http://www.modellcarfactory.de/shop/index.php?cPat...
this one has the aoshima wheels...its a fujimi kit which is more accurate
then i have this 1/18 otto...id reccomend this one if you like golfs but its 1/18, but almost all the details are correct unlike the others..i have these wheels i got from germany theyre real alloy on the lips
http://www.modellcarfactory.de/shop/index.php?cPat...
I think you are the first person I have ever heard say the Fujimi is more acuurate than the Revell kit. I can't really disagree because I've never put them side by side but I'll try anyway, Fujimis mkII Golf and E30 Beemer kits all look like they have had a 2" roof chop and 14" scale wheels never seem to look right.
That die cats is wrong as well, the height isn't correct and all the swage lines are too close together.
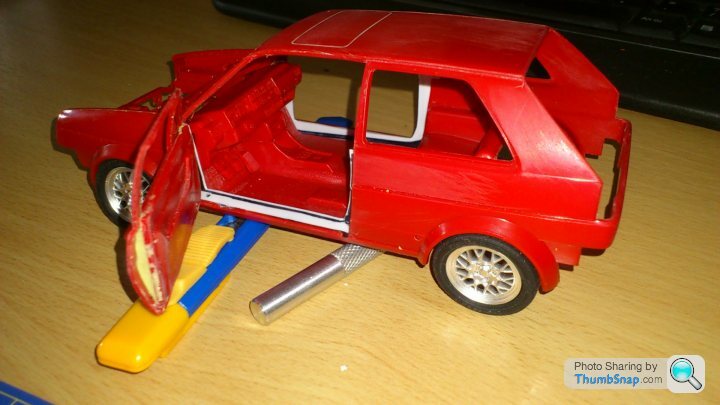
A Revell mkII by a friend of mine


That die cats is wrong as well, the height isn't correct and all the swage lines are too close together.
A Revell mkII by a friend of mine
Edited by Big Fat Fatty on Thursday 24th November 10:24
each to thier own n all that
i dont like the grille on the revel , just looks a bit poor imo
i dont think my photos help much, the pic with 2 cars in are both the same kit yet the grey ones roof looks taller? ..the 1/18 is very nice in person its better than i could do , only slight grumble is the windows are flush like a new car
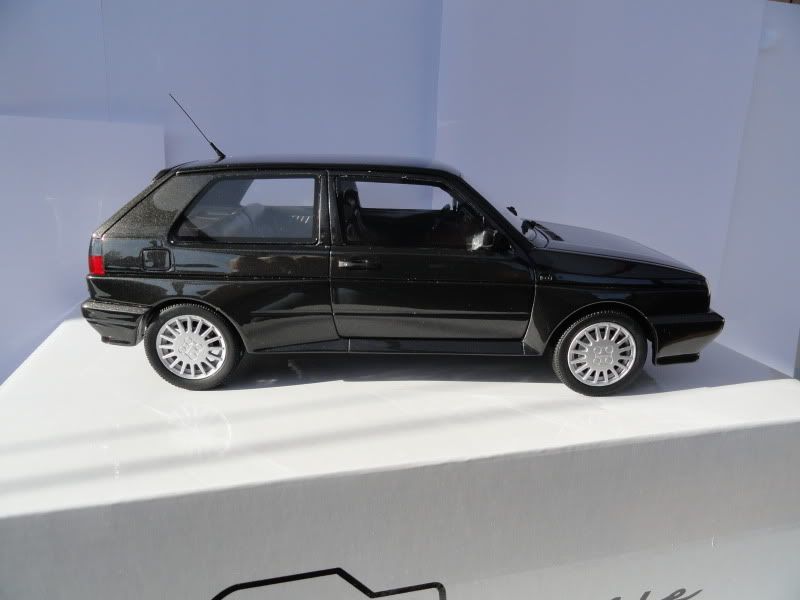
also got a rallye golf too
i dont like the grille on the revel , just looks a bit poor imo
i dont think my photos help much, the pic with 2 cars in are both the same kit yet the grey ones roof looks taller? ..the 1/18 is very nice in person its better than i could do , only slight grumble is the windows are flush like a new car
also got a rallye golf too
 You guys have given me a lot to think about. I like that scale productions website, but I wasn't too impressed at having twice the cost of the kit in the shopping cart within 10 minutes!
I'm looking at 18" BBS wheels, brakes to fill them, and bits for the engine. Still undecided on seats.
I will keep the standard engine, but make the engine bay look better than VW made it (not difficult), and also add a turbo and intercooler to it. What kind of wire do you guys recommend for brake and fuel pipes?
What I would suggest you do before actually starting to modify it is get some masking tape and some blu tak and dry fit the whole kit together so you can see what you can and can't do to it, it's all in the planning and figuring out what will fit. I personally wouldn't go any bigger than 16s on a Golf but then I like the Euro look on them, 18s will mean cutting out the inner arches to fit them and you may not be able to lower it as much as you want to. What style will you be going for?
I tried the wheels from another model, I think they are 19" and found them just too big. I would like 17", but I can't seem to find any! It seems to jump from classic 15" to chavtastic or racing 18", to 22". Either that or 15" banded steelies 
Good advice on dry fitting, I will give that a go.
Good advice on dry fitting, I will give that a go.
I was about to post something actually... I dry fitted everything and decided on big bumpers, bought some wheels. I haven't bought the bumpers yet as the only place I can find them want 15 euros for shipping... That will have to wait. I'm waiting to have everything together before I start it so I am building a formula 1 at the moment.
Right then, everything is bought, so expect some progress soon.
I bought parts from scaleproduction.de, and received an email from Michael asking me to transfer the money to his account. Is this common practice? Sounds as dodgy as a nigerian prince to me, but I may be overthinking it...
As an aside, I really need to stay off ebay. A few cheeky low bids last week when I was bored, I now have another 4 models in the waiting pile!
Mike will accept Paypal if you ask him but otherwise it is standard for most people as Paypal charge a 25% fee for transfering money from your Paypal account to a bank, I've bought a lot of stuff from him in the past and never had any problems transferring money.
Looking forward to seeing your progress, I need to get back to my Merc now it's warmed up slightly.
Looking forward to seeing your progress, I need to get back to my Merc now it's warmed up slightly.
Big Fat Fatty said:
Mike will accept Paypal if you ask him but otherwise it is standard for most people as Paypal charge a 25% fee for transfering money from your Paypal account to a bank, I've bought a lot of stuff from him in the past and never had any problems transferring money.
Looking forward to seeing your progress, I need to get back to my Merc now it's warmed up slightly.
25% Looking forward to seeing your progress, I need to get back to my Merc now it's warmed up slightly.

I can't blame him, I didn't realise it went up that much! Thanks for confirming.
 Got all the bits I need finally, I'll change the engine if I can find one in time.
No pics yet as there isn't a lot to see that's hasn't been posted by someone else, but I have started the engine, currently doing the wiring for it. I have also done a few body mods, mostly cut the doors and boot lid, and filled the sunroof.
One thing which worries me is how I'm going to paint it: I will need to scratch build door jambs and sills, to link between the interior and body. How can I paint the inside before it is covered in filler, and after it is fitted inside the body?
One thing which worries me is how I'm going to paint it: I will need to scratch build door jambs and sills, to link between the interior and body. How can I paint the inside before it is covered in filler, and after it is fitted inside the body?

Some good progress. The door jams are going to be a bit of work and are one of those things that can be as detailed or as simple as takes your fancy. At the very least, the way I would initially approach the task would be to make up some shapes with thin plasticard to represent the body reveals and also depth of the door. Building them now allows you to see how they match up with the interior mouldings and if there are any modifications there that you need to do. It can all be painted at once, then.
Once you have the basic shapes, you can then add as much detail as you desire. The hard bit is done for you already, which is the parameters you need to work within, as in the shape and curvature of the body openings. Looking forward to seeing the progress.
ETA:
Here's a build thread of someone doing something similar of a 458;
http://www.automotiveforums.com/vbulletin/showthre...
Edited by Red Firecracker on Sunday 15th April 07:26
I can't believe it's nearly a year since I started this thread!
I've not made much progress through mostly lack of motivation, the fact that I wasn't sure how to progress with the build, and also "real life" getting in the way
I've jumped back in, and I will update when I have some progress to show. So far I've done most of the doors, they jsut need finishing then painting, and I'm now working on the door openings.
Right, update time!
I've been creating the door jambs with plasticard and blu-tac, first the basic shape:
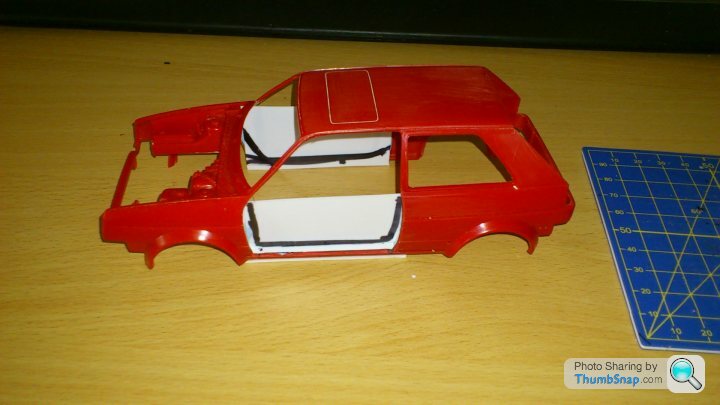
I marked up the correct dimensions and cut them to size:
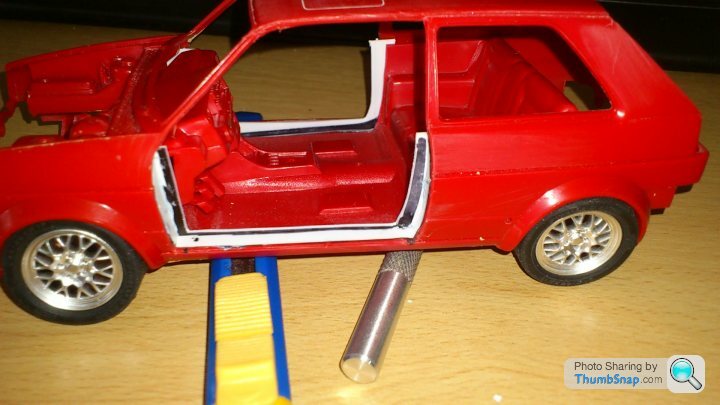
I will fill and trim then down later, but for now, a look at how it fits together:
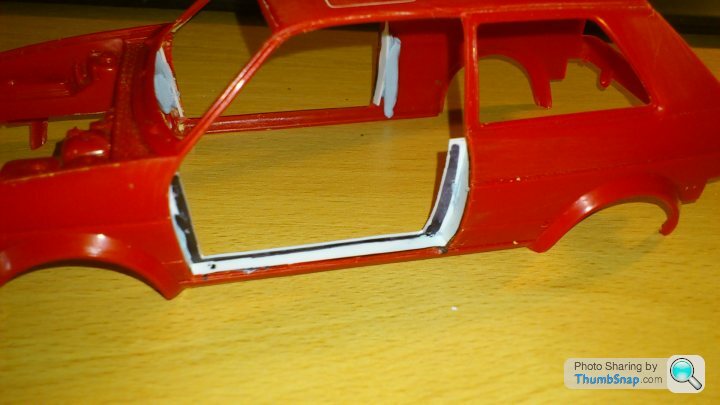
Getting there I'd say! Next I glued the plasticard together, removed the blu-tac and replaced it with 2 part epoxy putty:

Once it's cured it will give me a nice solid shape to work on, I'll be able to trim them down perfect, then glue to the body and start the filing and sanding!
I've also started making the required shapes for the boot:

These are a good solution to hide the wheel arches, and will be dressed up as subwoofer boxes. I thought it would give the car a nice touch.
I've been creating the door jambs with plasticard and blu-tac, first the basic shape:
I marked up the correct dimensions and cut them to size:
I will fill and trim then down later, but for now, a look at how it fits together:
Getting there I'd say! Next I glued the plasticard together, removed the blu-tac and replaced it with 2 part epoxy putty:
Once it's cured it will give me a nice solid shape to work on, I'll be able to trim them down perfect, then glue to the body and start the filing and sanding!
I've also started making the required shapes for the boot:
These are a good solution to hide the wheel arches, and will be dressed up as subwoofer boxes. I thought it would give the car a nice touch.
Gassing Station | Scale Models | Top of Page | What's New | My Stuff