Rear brakes pads on DB9/Vantage - how to.
Discussion


In response to another thread here is how to change rear brake pads on a DB9 / Vantage.
It is a fairly quick and easy DIY job.
Removal of wheels, jacking points and wheel torque settings have been covered elsewhere so I won't go into it.
Lift bonnet and loosen the brake fluid reservoir cap - note if it is full you might want to wrap an old towel or something underneath as the level will rise when you push back the old pads and you really dont want brake fluid on your paint.
Place blocks either side of front wheels (even if it's on the flat) as once you jack the rear of car it will no longer have the benefit of a handbrake.
Ensure you use the correct jacking point to support the car and jack with doors shut, remove wheel (yes I know it's obvious but...)
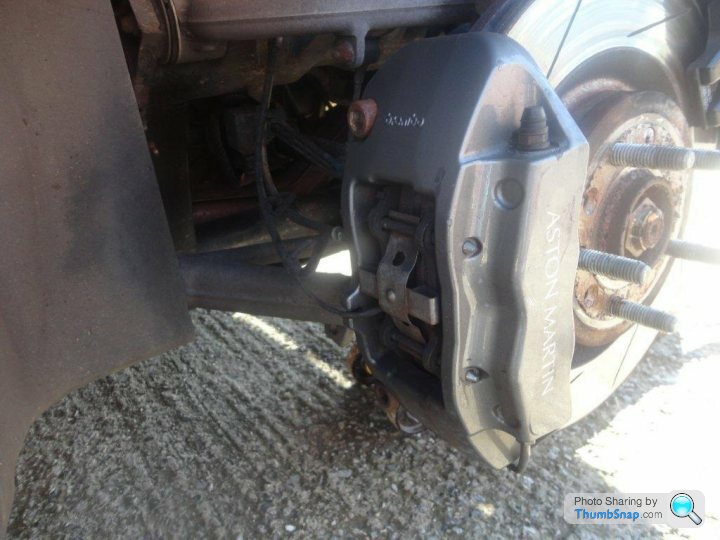
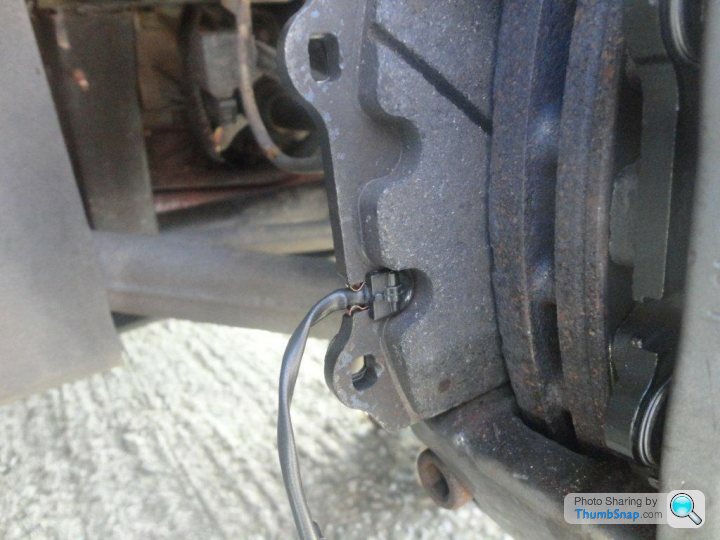
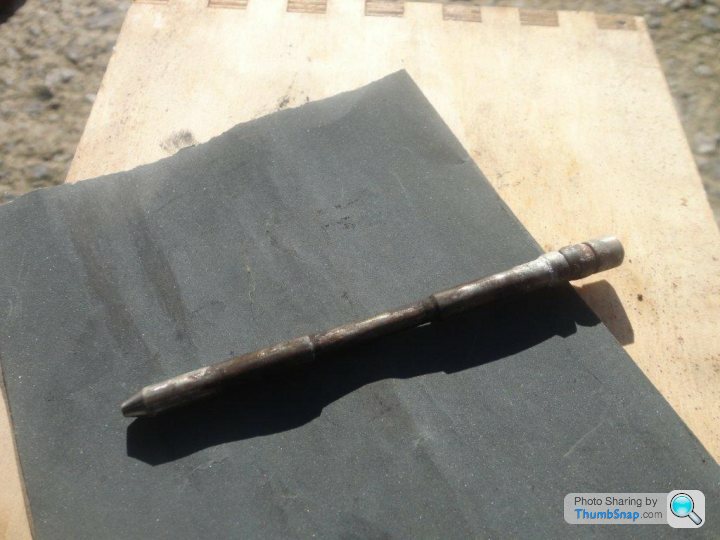
the pads are held in by a pair of parallel pins and a spring clip.
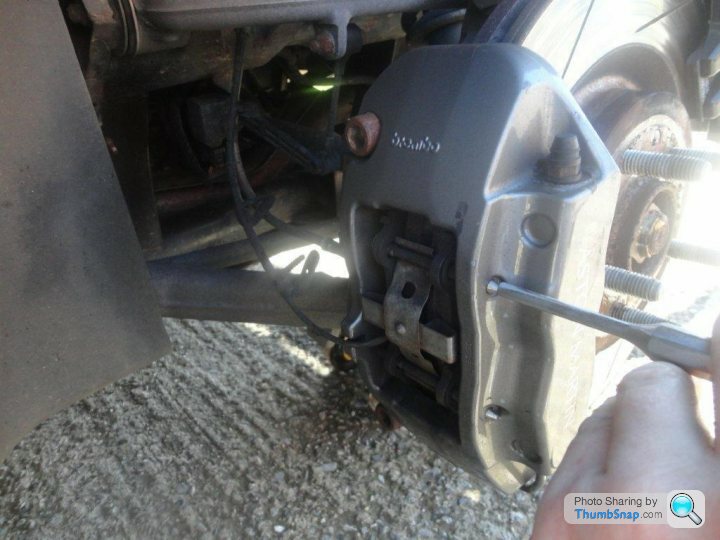
Using a drift, tap out the pins. They may be corroded and rather tight so don't be frightend to give them a tap. Some of the more eagle eyed may notice I sliped and chipped the paint, i found a BMW silver touch up which was exactly the same colour.
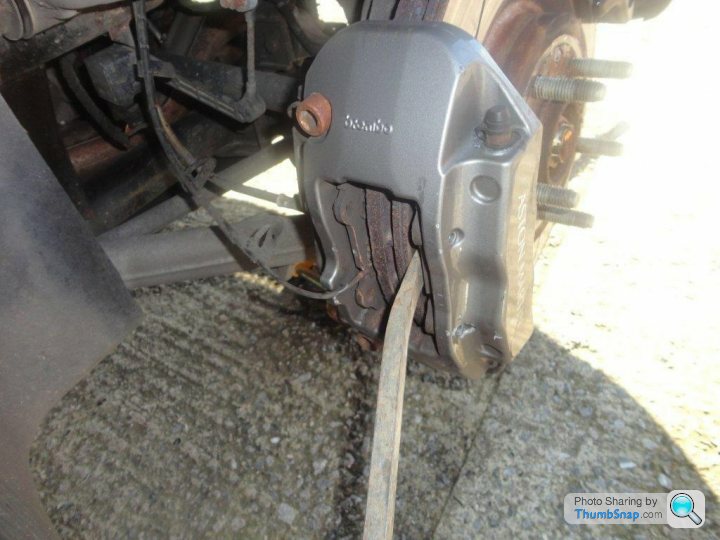
you then need to lever back the piston on the calliper. The best way to do this is between the pad and disc, it should go fairly easily, if not you may have a seized piston.
Note the wear sensor cable on the rearmost pad. It will pull out of the U shaped channel..... but be careful it snaps the clip quite easily!
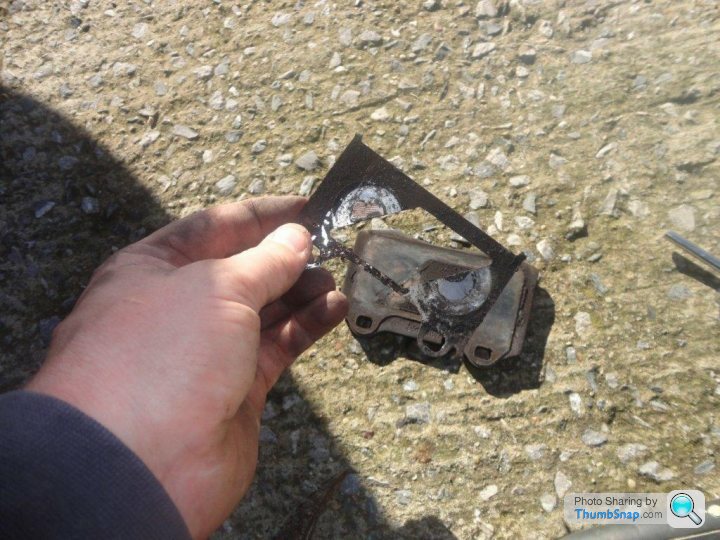
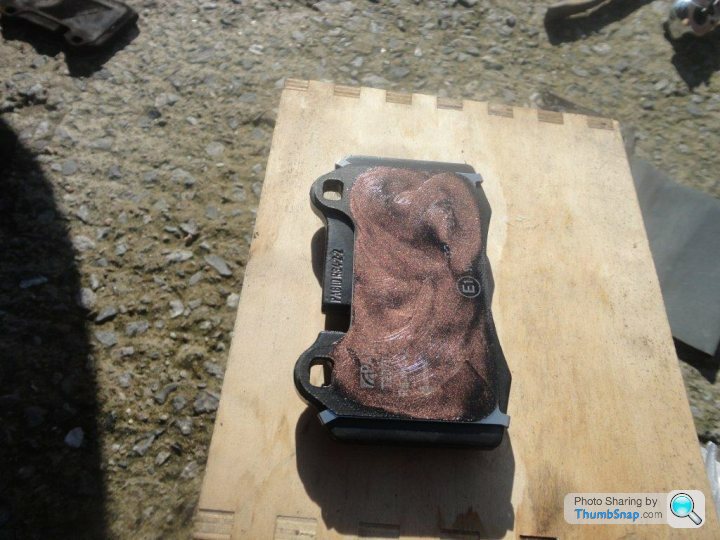
You will notice when you remove the pads that they have a separate anti-squeal shim. The new one I bought didn't as it was attached to the pad.
I would reccomend a little copper slip grease on the back of the new pads. No need to overdo it though.
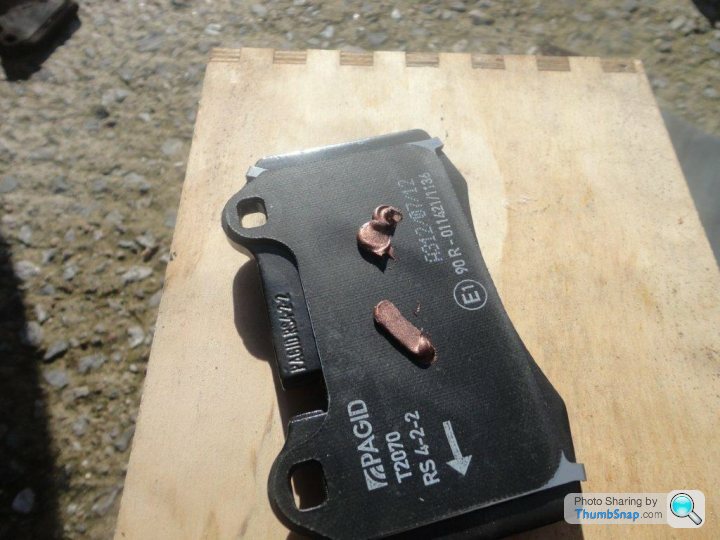
IMPORTANT: the pads are directional - there are arrows showing direction of rotation. They should be installed with the arrows pointing with direction of rotation, ie. downwards.

Fitting is an exact reverse of removal.
If you haven't replaced the pins then give a good clean with wire wool or some very fine emery/carborundum paper. Give them a very light coat of copper grease too.
Before moving on to other side pump brake pedal a few times to ensure that the pistons are fully pushing the pads onto the disc. DO THIS AGAIN WHEN YOU HAVE DONE BOTH SIDES BEFORE DRIVING ANYWHERE.
Dont forget to re-tighten the lid on the brake master cylinder!!
Be aware that your brakes may take a little while to bed in 20-100 miles depending how you drive.
I have a few more pics somewhere so I'll post them over the next few days
It is a fairly quick and easy DIY job.
Removal of wheels, jacking points and wheel torque settings have been covered elsewhere so I won't go into it.
Lift bonnet and loosen the brake fluid reservoir cap - note if it is full you might want to wrap an old towel or something underneath as the level will rise when you push back the old pads and you really dont want brake fluid on your paint.
Place blocks either side of front wheels (even if it's on the flat) as once you jack the rear of car it will no longer have the benefit of a handbrake.
Ensure you use the correct jacking point to support the car and jack with doors shut, remove wheel (yes I know it's obvious but...)
the pads are held in by a pair of parallel pins and a spring clip.
Using a drift, tap out the pins. They may be corroded and rather tight so don't be frightend to give them a tap. Some of the more eagle eyed may notice I sliped and chipped the paint, i found a BMW silver touch up which was exactly the same colour.
you then need to lever back the piston on the calliper. The best way to do this is between the pad and disc, it should go fairly easily, if not you may have a seized piston.
Note the wear sensor cable on the rearmost pad. It will pull out of the U shaped channel..... but be careful it snaps the clip quite easily!
You will notice when you remove the pads that they have a separate anti-squeal shim. The new one I bought didn't as it was attached to the pad.
I would reccomend a little copper slip grease on the back of the new pads. No need to overdo it though.
IMPORTANT: the pads are directional - there are arrows showing direction of rotation. They should be installed with the arrows pointing with direction of rotation, ie. downwards.
Fitting is an exact reverse of removal.
If you haven't replaced the pins then give a good clean with wire wool or some very fine emery/carborundum paper. Give them a very light coat of copper grease too.
Before moving on to other side pump brake pedal a few times to ensure that the pistons are fully pushing the pads onto the disc. DO THIS AGAIN WHEN YOU HAVE DONE BOTH SIDES BEFORE DRIVING ANYWHERE.
Dont forget to re-tighten the lid on the brake master cylinder!!
Be aware that your brakes may take a little while to bed in 20-100 miles depending how you drive.
I have a few more pics somewhere so I'll post them over the next few days
Edited by 897sma on Friday 5th October 21:32


Good tutorial. I love these Brembo calipers, they are easier to work on than inferior cars with their floating calipers.
I would just add that you need to follow a procedure to bed the brakes in. There are lots of different opinions on how best to do this. This is what I have found to work the best:
1. Warm up the brakes with some gentle to medium braking.
2. Do a big stop from 60mph to 5mph. Brake as hard as you can without causing the ABS to come on. Do not come to a complete stop.
3. Repeat step 2 ten times.
Your disks are going to get really hot. If they start to smoke excessively, or you experience significant brake fade then don't continue with the big stops. Don't think it'll likely in the Vantage - not sure about the DB9.
They /will\ smell hot (read: stink). This is normal.
Once your big stops have been completed, drive gently for a while to let the brakes cool down.
Don't at any point stop dead with your foot on the brake pedal or you will weld your pads to the disks. Similarly, don't use the handbrake.
Bearing in mind all of the above, choose the location where you will do your bedding in carefully. The last thing you need is traffic.
/EDIT: I don't bother bedding in if I'm just changing the rears. I would only do the above for the fronts.
Edited by BingoBob on Saturday 6th October 10:32


 t?
t? 


Very impressed with all this technical know how - to be honest the photos could be of a Soyuz space craft docking for all the good it would do someone as 'handless' as me .I'll resort to my usual strategy - work harder earn more money and pay somebody who knows what they are doing to sort it out !!!
Gassing Station | Aston Martin | Top of Page | What's New | My Stuff