Airfix 1:72 Hawker Hurricane Mk.1 (fabric wing)
Discussion


 especially as I've nearly finished the Typhoon mentioned earlier and started the Spitfire(but daren't show here )
dr_gn said:
The finish on this one will be more important thaqnusual: I wanted a clean looking early spec. machine, and apart from roundels there are hardly any topside markings to draw the eye from any painting flaws.
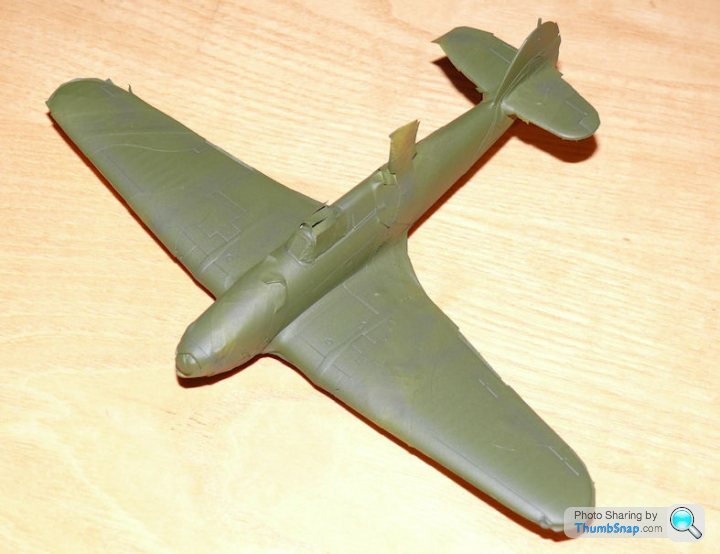
Started by masking:
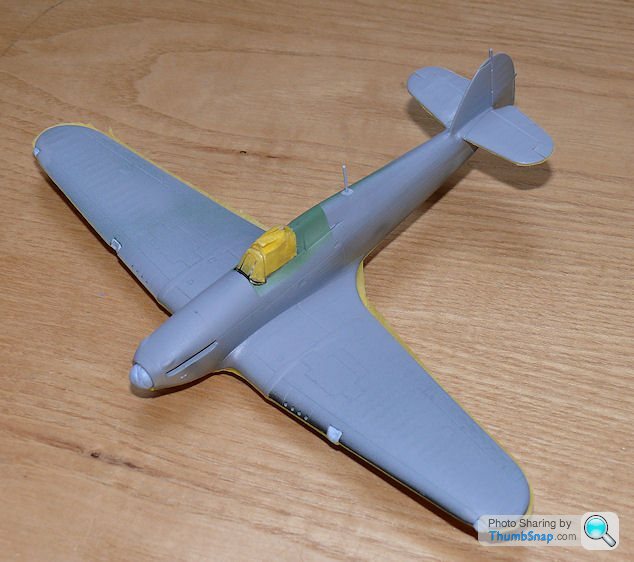
followed by a coat of Earth preshaded with German Grey:
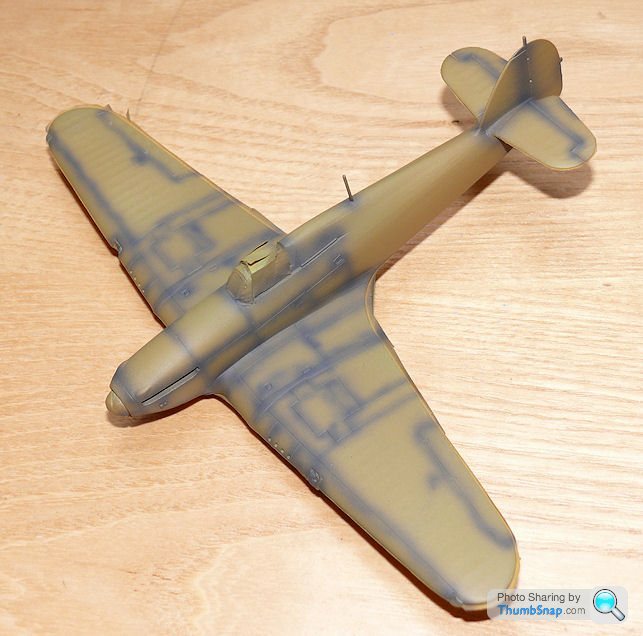
Then overcoated to leave just a hint of shading along the panel lines and control breaks:

Hopefully get the Reflective Green on this evening.
This keeps getting more and more "doc" which as we know is excellent. NiceStarted by masking:
followed by a coat of Earth preshaded with German Grey:
Then overcoated to leave just a hint of shading along the panel lines and control breaks:
Hopefully get the Reflective Green on this evening.
As you will know I'm not much of a one for shading pre or post but the technique does interest me
You have preshaded the upper surfaces before the green goes on, will you be repeating the undershade on the green camo areas or do you rely on the first coat under the earth colour?
I'm beginning to find the whole bag of 'wrigglies' very interesting.
Have you had a a 'go' at the aftermarket wheels to redefine the outlines, I wonder?
I'm sure you would soon sort them out if you did.
Perdu, no you can't rely on the preshading to show through after applying a new colour, it all has to be repeated. I've not decided what to do with the wheels yet, I'll see how it turns out.
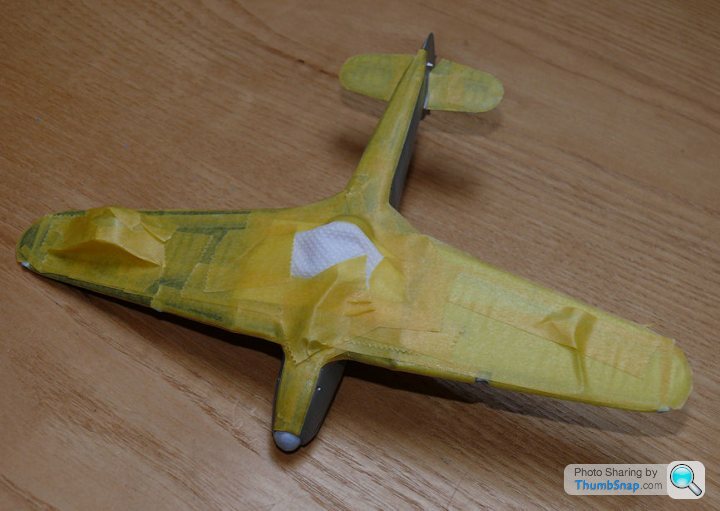
Masked my interpretation of an early "A" type camo pattern:
Green coat, preshade, green coat:
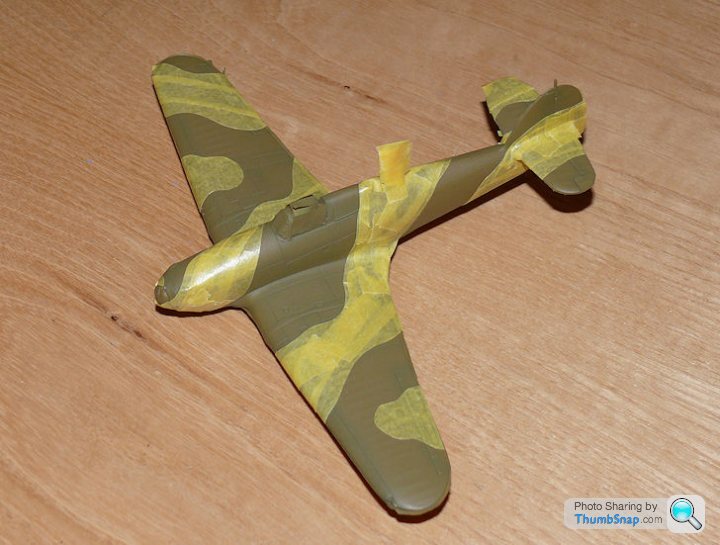
And my favourite part of modelling - removing masking on an early RAF scheme (flash has had a strange effect on the green - it's all one shade in reality):
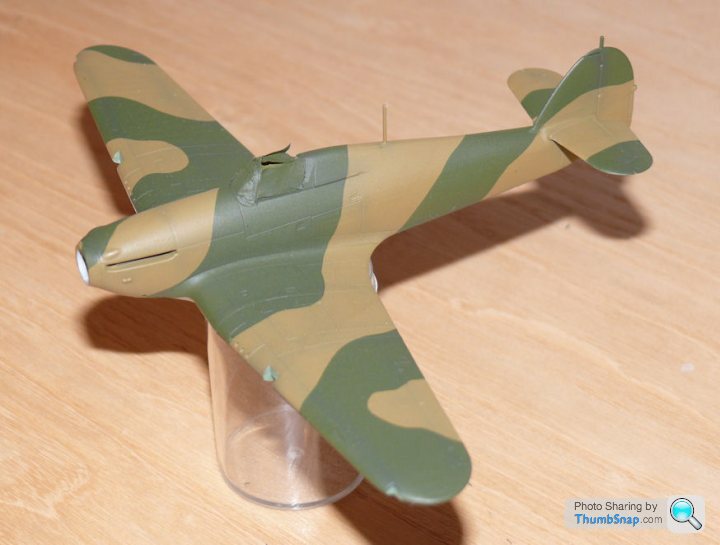
...course there's an error - I forgot to mask the top part of the stbd. side of the fin/rudder, so it has a straight line, and is green. Should be a simple matter to overspray with earth:
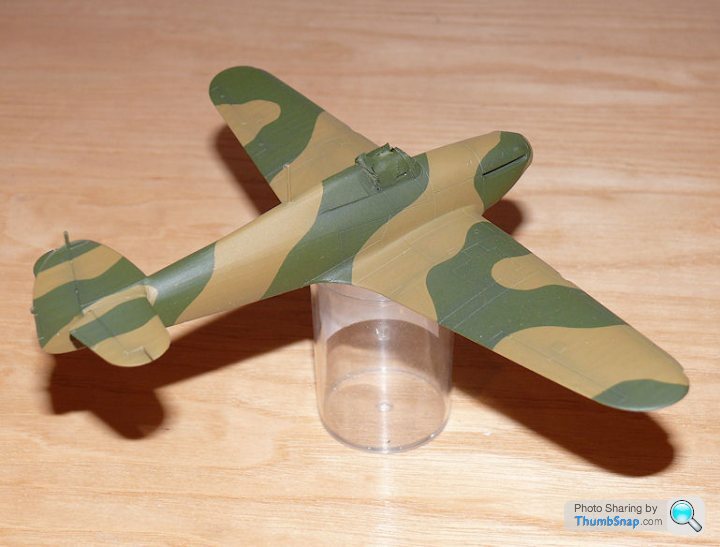
I'm happy with how the top/bottom side demarcations turned out. The white is a bit sudden, maybe I should have used white grey, but a coat of Tamiya smoke will soon tone it down:
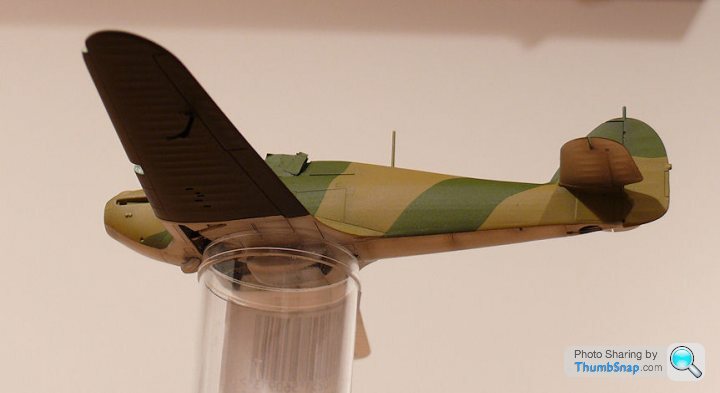
You can see I drilled out the gun ports. I'll make a red decal for the canvas covers, and Microsol will hopefully make it sag into the holes.
Masked my interpretation of an early "A" type camo pattern:
Green coat, preshade, green coat:
And my favourite part of modelling - removing masking on an early RAF scheme (flash has had a strange effect on the green - it's all one shade in reality):
...course there's an error - I forgot to mask the top part of the stbd. side of the fin/rudder, so it has a straight line, and is green. Should be a simple matter to overspray with earth:
I'm happy with how the top/bottom side demarcations turned out. The white is a bit sudden, maybe I should have used white grey, but a coat of Tamiya smoke will soon tone it down:
You can see I drilled out the gun ports. I'll make a red decal for the canvas covers, and Microsol will hopefully make it sag into the holes.
After soem more masking for the walkway strip and a bit of camo fettling in light of some new reference material, I got the decals on:

They need an ovecoat of smoke to tone them down a bit, but apart from that that's all the markings there are on the topsides. Pure and simple.
The underside decals are still settling with some Microsol.
They need an ovecoat of smoke to tone them down a bit, but apart from that that's all the markings there are on the topsides. Pure and simple.
The underside decals are still settling with some Microsol.
dr_gn said:
...Masked my interpretation of an early "A" type camo pattern...
I have seen use of the blue-tac sausage to get a softer edge between the colours, which you have not done. Is that because in 1:72 a sharper edge is fine or was it because this aircraft was actually painted with sharp edges to the camouflage? RichB said:
dr_gn said:
...Masked my interpretation of an early "A" type camo pattern...
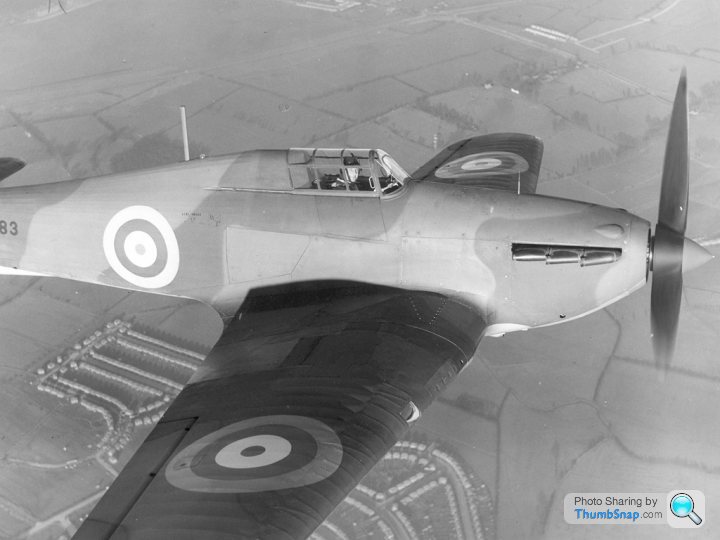
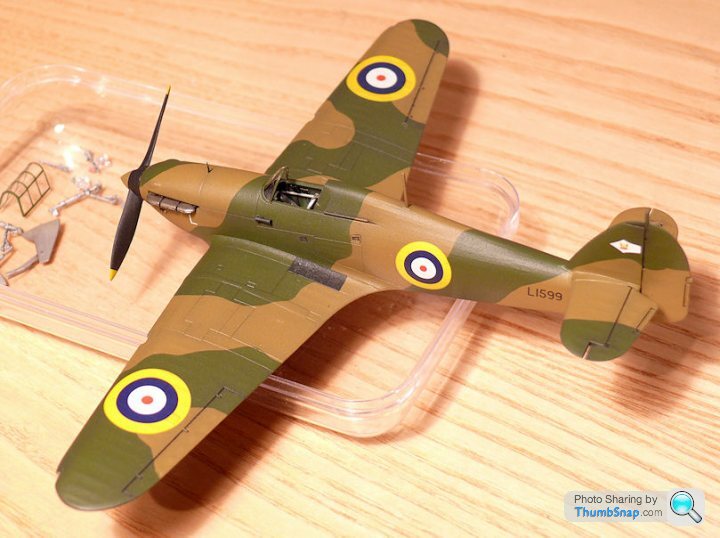
I have seen use of the blue-tac sausage to get a softer edge between the colours, which you have not done. Is that because in 1:72 a sharper edge is fine or was it because this aircraft was actually painted with sharp edges to the camouflage? In the end, I decided that it would be nice if all three of my BoB models had similar paint, so that's why I went for hard edges. Here is a Mk1 Hurricane (although slightly later than mine):
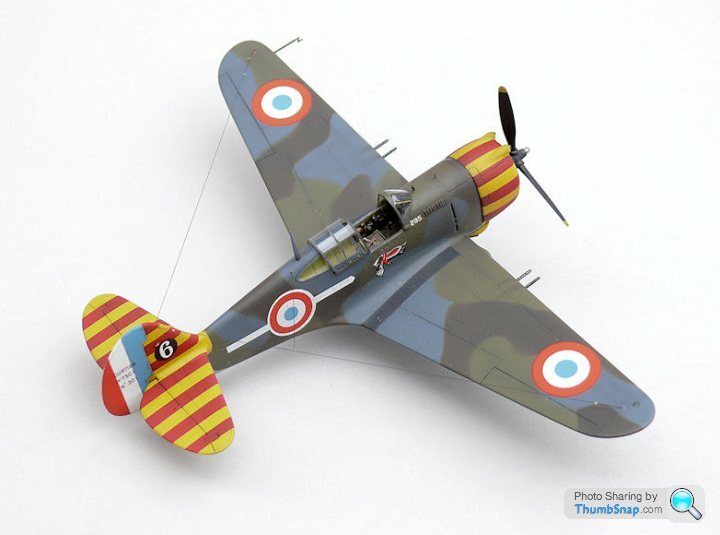
I used the Blu-Tac sausage method on teh 1:72 Curtiss Hawk, since they were hand sprayed in the field, and had a noticable feather edge to the camo:
Strangely enough, this evenings job is to add a bit more wavyness to the camo lines, they look a bit straight to me. I did do this before applying the decals on the port nose and fin areas, but it needs a bit more I think. I like to make things difficult for myself.
Ayahuasca said:
RichB said:
IroningMan said:
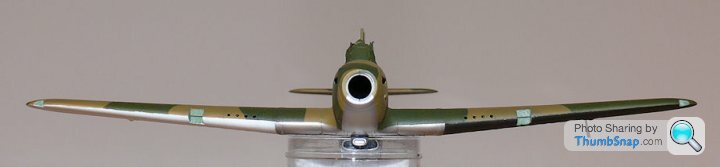
Is it me, or is there a big gap between spinner and cowling in that photo?
Indeed, certainly more than there would ever be on a well made model 

Sometimes you just have to go with what you think looks right. Even if you find an image of the aircraft you are building, the exact appearance and spec. could change anlmost day-to-day; old exhaust stubs replaced by newer ones, anti-slip paint on one side, then both sides, covers over the gun ports, yellow propeller tips, brown spinner etc, etc.
Ayahuasca said:
The spinner also looks pointier than usual. Some weirdness there.
Its the Watts two bladed fixed pitch prop. Being fixed pitch, unlike the later De Havilland twin pitch and Rotol constant speed props, there is no pitch change mechanism inside the spinner so it is shorter and pointier.Eric Mc said:
Without wishing to derail the thread, it is interesting to see that the use of the two bladed Watts propeller on the very early MkI Spitfires did not result in a small spinner -
-747929.jpg)
i'd suggest that the front of the propeller was removable and the Hurricane had a pointed nose piece, while the Spitfire (and Gladiator?) had more rounded versions?The camo on the Spitfires looks like it is pretty hard-edged too, but the patterns do vary on the A and B types, suggesting freehand painting.
Edited by dr_gn on Wednesday 22 October 13:20
dr_gn said:
Eric Mc said:
Without wishing to derail the thread, it is interesting to see that the use of the two bladed Watts propeller on the very early MkI Spitfires did not result in a small spinner -
i'd suggest that the front of the propeller was removable and the Hurricane had a pointed nose piece, while the Spitfire (and Gladiator?) had more rounded versions?The camo on the Spitfires looks like it is pretty hard-edges too.
Mutley said:
And, the camo looks like it's been applied by hand, rather than using any form of template
And interesting that it shows the A and B Day Fighter camouflage schemes in the alternate machines and as Mutley points out some of the demarcation lines are very different between similar scheme aircraftI think Doc's model is A scheme Day Fighters and as you can see the first Spit has the other scheme
The schemes were mirror image to each other
And by the unforgiving law of SOD I am bound to have misnamed the scheme as A not B
I love the way that number four and five have contrived to make themselves like like one aeroplane
They look just a tad like a Fulmar in that picture
Well whatever scheme it is, it's too late now! I've added some extra wavyness to a few of the lines and it looks better for it. Also made a better stepped bead sight out of brass tube.
Very, very light weathering i.e. a dark wash for the control surface breaks, oil stain powder on the underside and a light brushing all over with a mixture of darker powders. With exhaust stains, sometimes they work fine (Mustang) other time (like this one) it just doesn't work out. So I left it at extremely lightly stained:
Here are the undersides nicely showing RedFirecrackers pretty much perfect new codes to replace the incorrect Xtradecal ones. I also made some radiator flap actuators & fairing stiffeners out of stretched sprue, just visible inside the rear of the fairing. I'm glad I found the Vallejo Air silvers...witha coat of matt the grain is almost invisible::
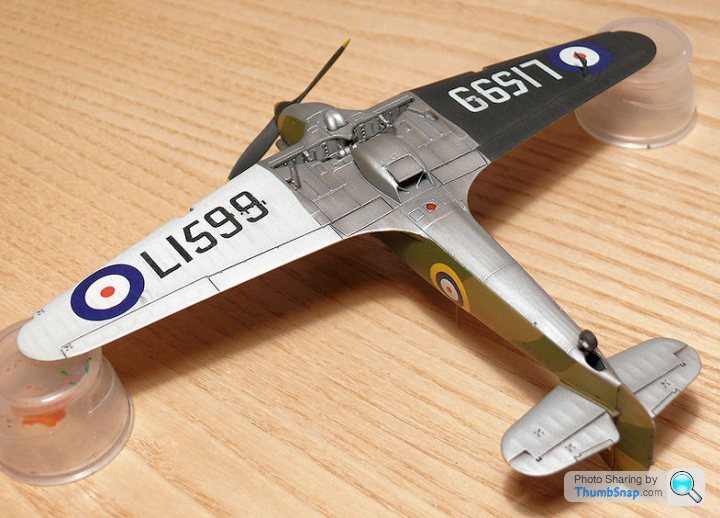
Still needs the lights, undercarriage, control & aerial wires and canopy fitting and that'll do. Still not decided whether to use the new wheels, or turn the originals in the lathe to remove the blobs. I'd live with the missing spoke...
Very, very light weathering i.e. a dark wash for the control surface breaks, oil stain powder on the underside and a light brushing all over with a mixture of darker powders. With exhaust stains, sometimes they work fine (Mustang) other time (like this one) it just doesn't work out. So I left it at extremely lightly stained:
Here are the undersides nicely showing RedFirecrackers pretty much perfect new codes to replace the incorrect Xtradecal ones. I also made some radiator flap actuators & fairing stiffeners out of stretched sprue, just visible inside the rear of the fairing. I'm glad I found the Vallejo Air silvers...witha coat of matt the grain is almost invisible::
Still needs the lights, undercarriage, control & aerial wires and canopy fitting and that'll do. Still not decided whether to use the new wheels, or turn the originals in the lathe to remove the blobs. I'd live with the missing spoke...
Edited by dr_gn on Wednesday 22 October 22:27
perdu said:
Yeah whether I'm talking blah or not the Hurri now looks the caninez nutz.
Love the underneath silver, it really comes across as 'right'.
Soon be done now.
Ta! It looks OK.Love the underneath silver, it really comes across as 'right'.
Soon be done now.
Strange thing about preshading on Silver is that it looks totally different under different lighting conditions. I noticed it with the Gladiator too. You really need accurate airbrushed lines about 2mm wide (if that). Mine are probably double that on this model.
Gassing Station | Scale Models | Top of Page | What's New | My Stuff