Lurk mode off - suspension refurb....
Discussion


So, I have decided to keep my Chim after an agonising period of deciding whether I should sell or not.
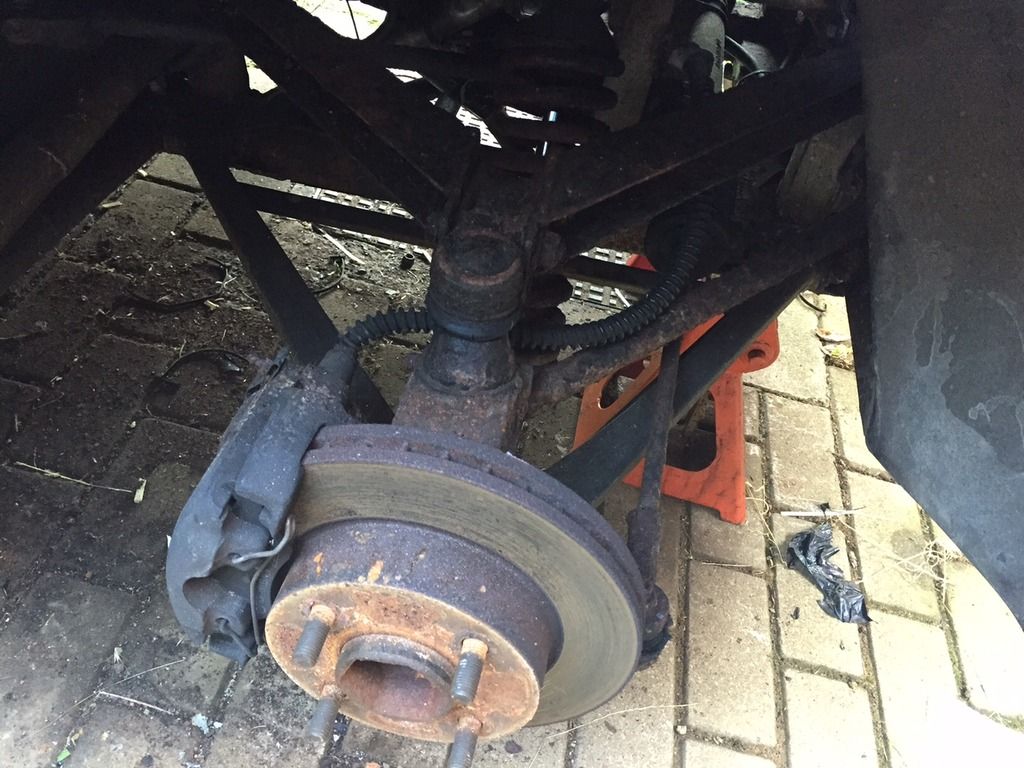
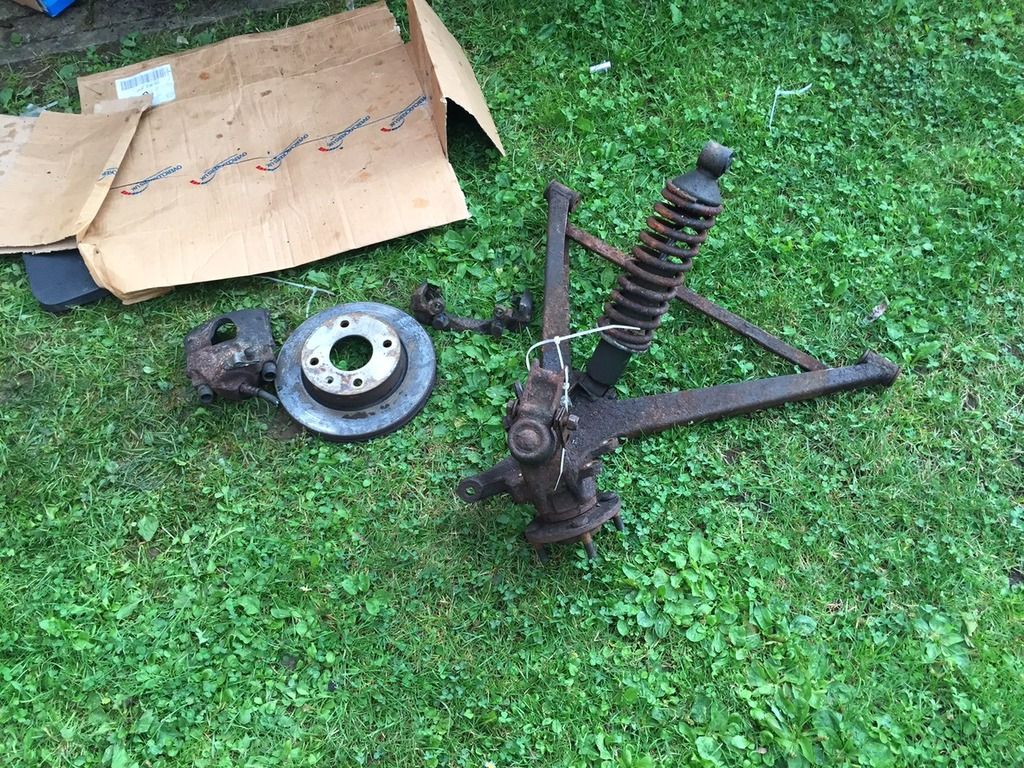
The rear shocker is leaking and the wishbones look mange - so, have looked into refurbishing each corner and would like some advice / thoughts about the following.....
Buying brand new wishbones, front and rear which includes all of the bushes (fitted), bolts and nuts. Cost is £899. OK, so a lot of money, but when you look at the hassle of cleaning the old ones, removing the bushes etc - I am wondering if it is worth refurbing the old?
I intend to replace the ARB bushes (they come with the deal above) and also replace the ball joints and drop links.....(it all looks tired - like 85k miles the 23 year old car has completed thus far)
Shock absorbers - again, one needs replacing, but it is wise to simply buy new ones? And which ones? (the springs look like crap as well)
Whilst I am at it, should I replace the wheel bearings? As it is all dismantled, it seems foolish not to do it.
The wheels are also being refurbed as they look bl00dy terrible...
....what looked like a small-ish job (replace one shocker) has turned into something bigger...
....ahh, the joys of TVR ownership!!
Cheers in advance
Nosh.
QBee said:
Top man! Ta.ch427 said:
Depends on what sort of condition your existing stuff is in and how much time you have on your hands.
If the corrosion is only surface then blasting and painting yourself will save you a fair amount, fitting the bushes isnt hard but requires a decent press.
Thanks for the response - I just dropped off the smaller rear wishbones to a local blaster to see how they come out....If the corrosion is only surface then blasting and painting yourself will save you a fair amount, fitting the bushes isnt hard but requires a decent press.
And then take it from there.
Cheers
Nosh.
Edited by Nosh on Monday 6th July 13:45

So, just dropped the upper and lower rear wishbones off at the powder coaters....cost 60 quid - and that's with the bushing holes and threads masked off  Hopefully get these back before the weekend so will report on the job done....
Other prep and work done:-
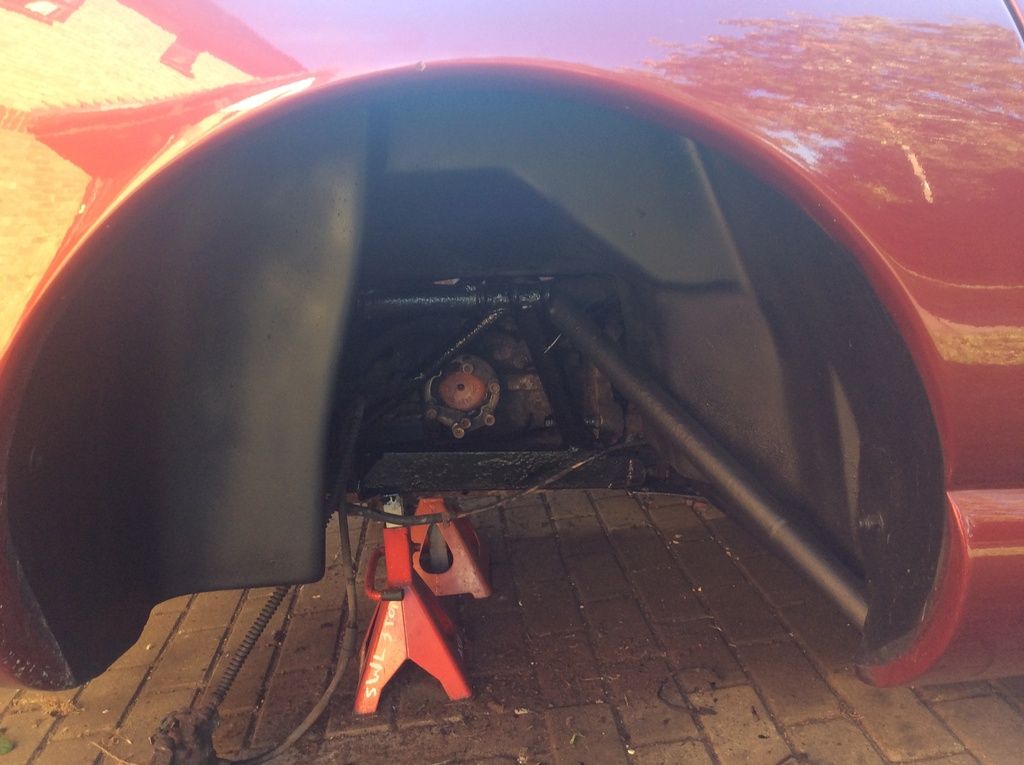
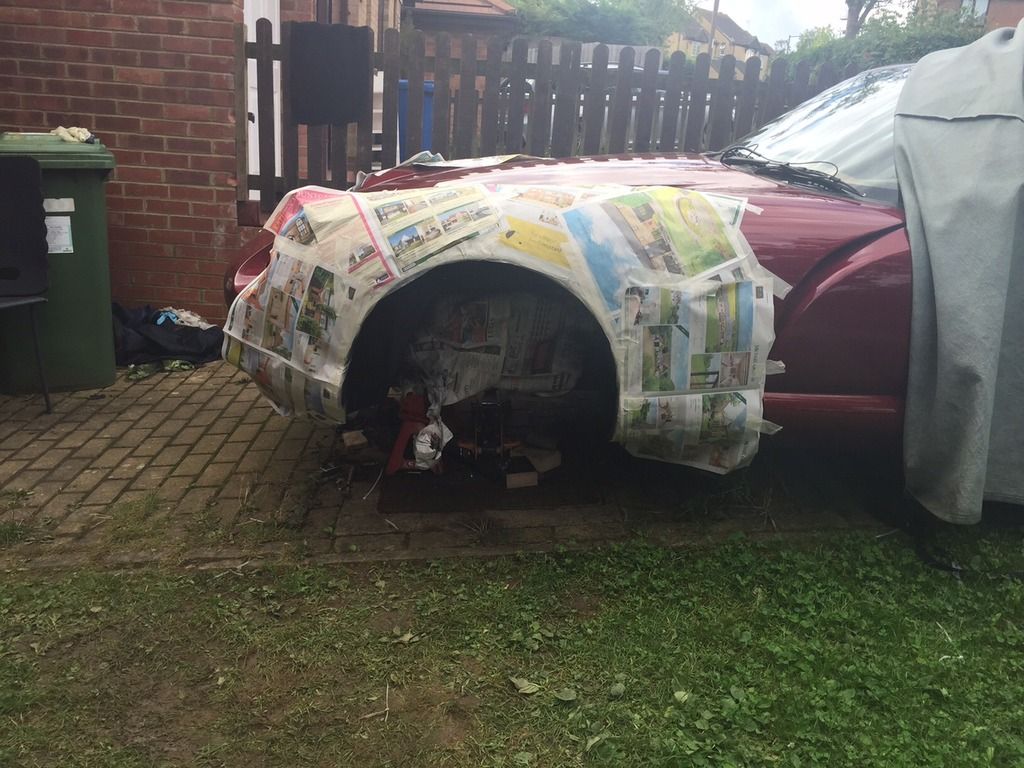
Cleaned up and painted both rear wheel arches - hammerite black for the chassis and stone chip for the wheel arch...
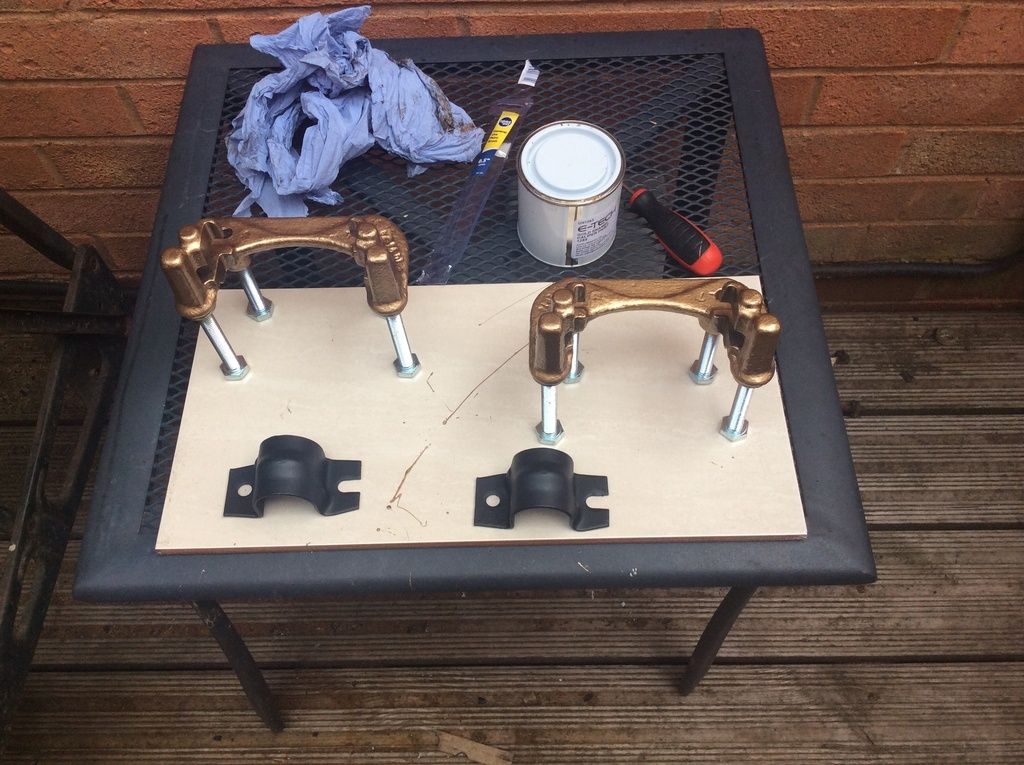
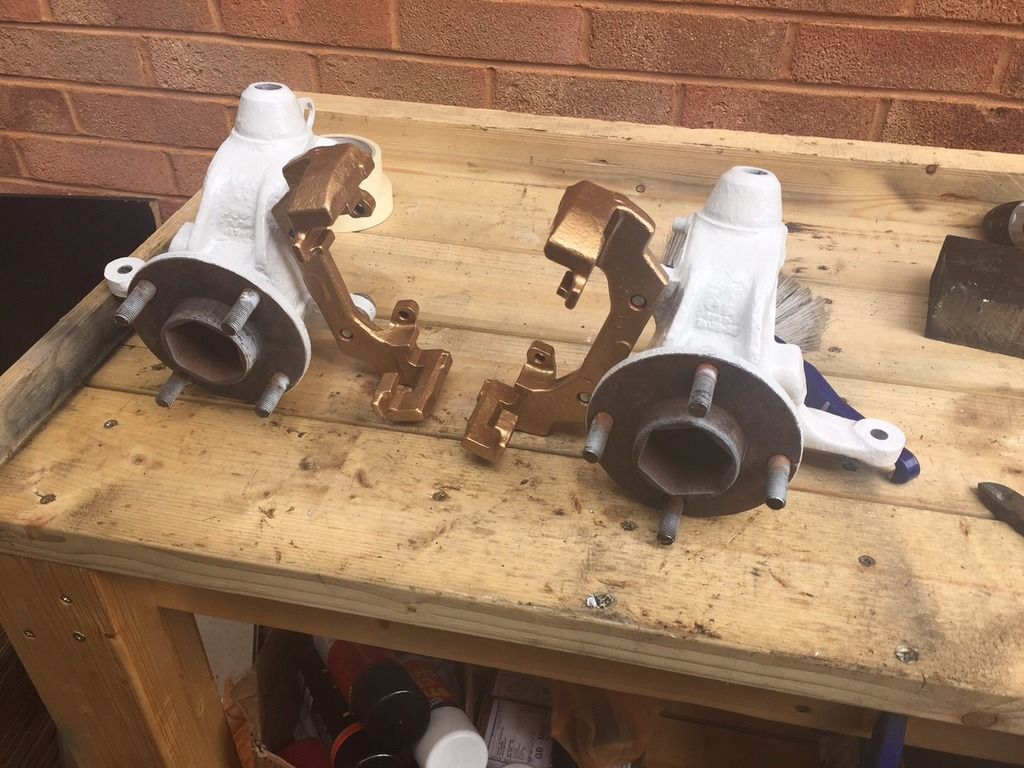
Carriers for the rear calipers cleaned up and painted....
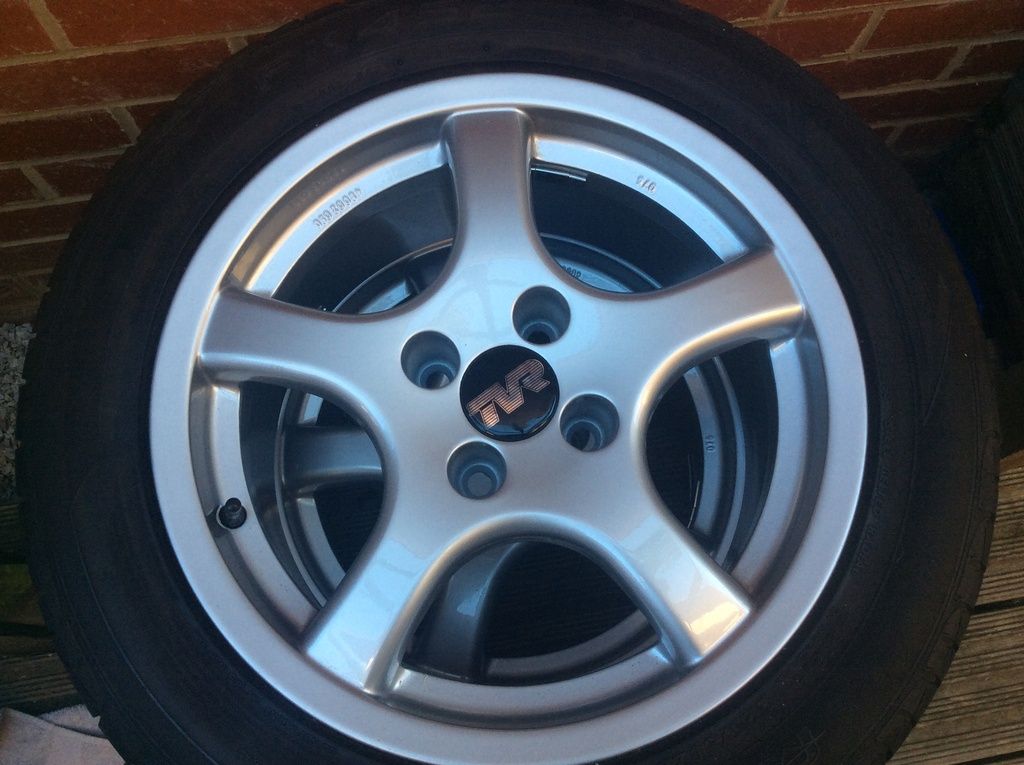
Rear wheels refurbed and powder coated...
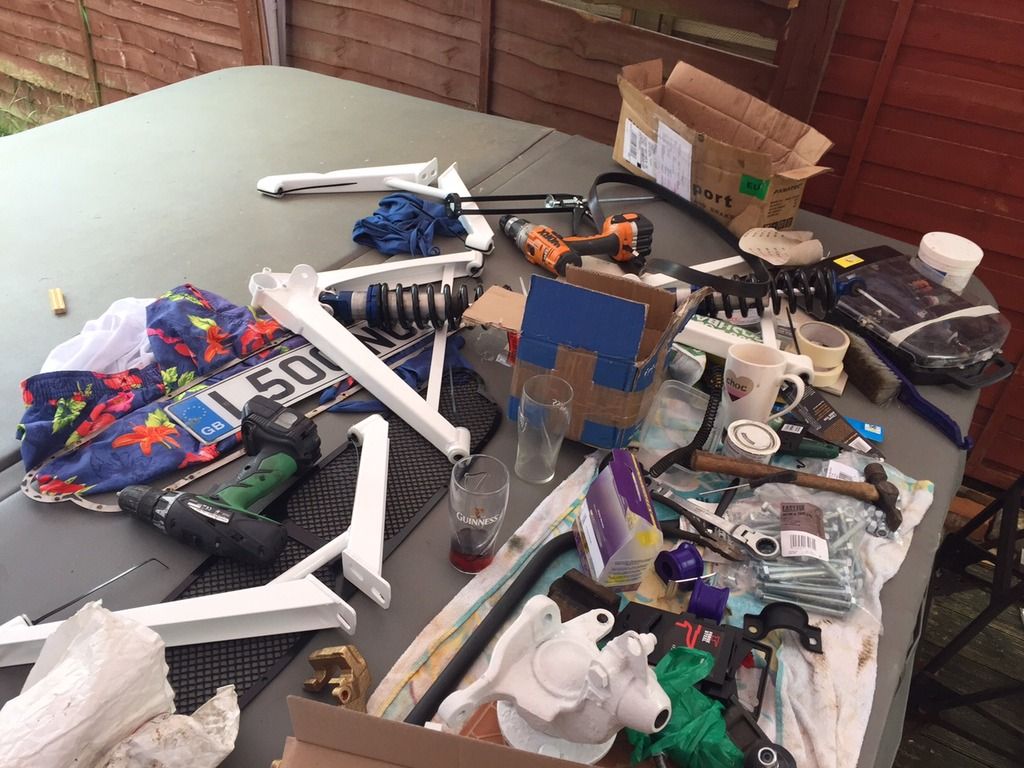
New drop links, rear ARB (and U brackets) cleaned and painted with stone chip, new coil springs from Absolute Shockers, Gaz Gold Pros ready to go in, bolt kit ready, new bushes ready to be pressed in (still unsure how I will pull THAT one off)....
Noticed over the weekend a nick in one of the CV boots - so will be ordering a new one tonight to be fitted....
Really looking forward to the weekend! And remembering this all started with a 'weeping' damper.... Mmmmmmm!
Nosh.
Hopefully get these back before the weekend so will report on the job done....Other prep and work done:-
Cleaned up and painted both rear wheel arches - hammerite black for the chassis and stone chip for the wheel arch...

Carriers for the rear calipers cleaned up and painted....

Rear wheels refurbed and powder coated...

New drop links, rear ARB (and U brackets) cleaned and painted with stone chip, new coil springs from Absolute Shockers, Gaz Gold Pros ready to go in, bolt kit ready, new bushes ready to be pressed in (still unsure how I will pull THAT one off)....
Noticed over the weekend a nick in one of the CV boots - so will be ordering a new one tonight to be fitted....
Really looking forward to the weekend!
And remembering this all started with a 'weeping' damper.... Mmmmmmm!Nosh.
Edited by Nosh on Tuesday 11th August 21:26
Quick update - rear done (being a hardened southerner, rain don't stop me!) - you can certainly see the difference between the rear wheels (refurbed) and the fronts!

So, car jacked up this AM and front wheels off to Pristine in Woburn. And looks like I have my work cut out for me....
And finally a shout out to some of the community that has offered help / advice (you know who you are!) - really REALLY appreciated guys!
Nosh

So, car jacked up this AM and front wheels off to Pristine in Woburn. And looks like I have my work cut out for me....


And finally a shout out to some of the community that has offered help / advice (you know who you are!) - really REALLY appreciated guys!
Nosh
phazed said:
Wow, that certainly needs your magic wand!
You're not wrong Peter.... I hope things have not gone too far - sprayed a shed load of Plus Gas on all bolts last night - will let that work it's magic and ordered some goodies today.....
...just need to start the dis-assembly...which I am not looking forward to.

Nosh
Edited by Nosh on Tuesday 25th August 19:07
Edited by Nosh on Wednesday 26th August 18:19
Today's update....
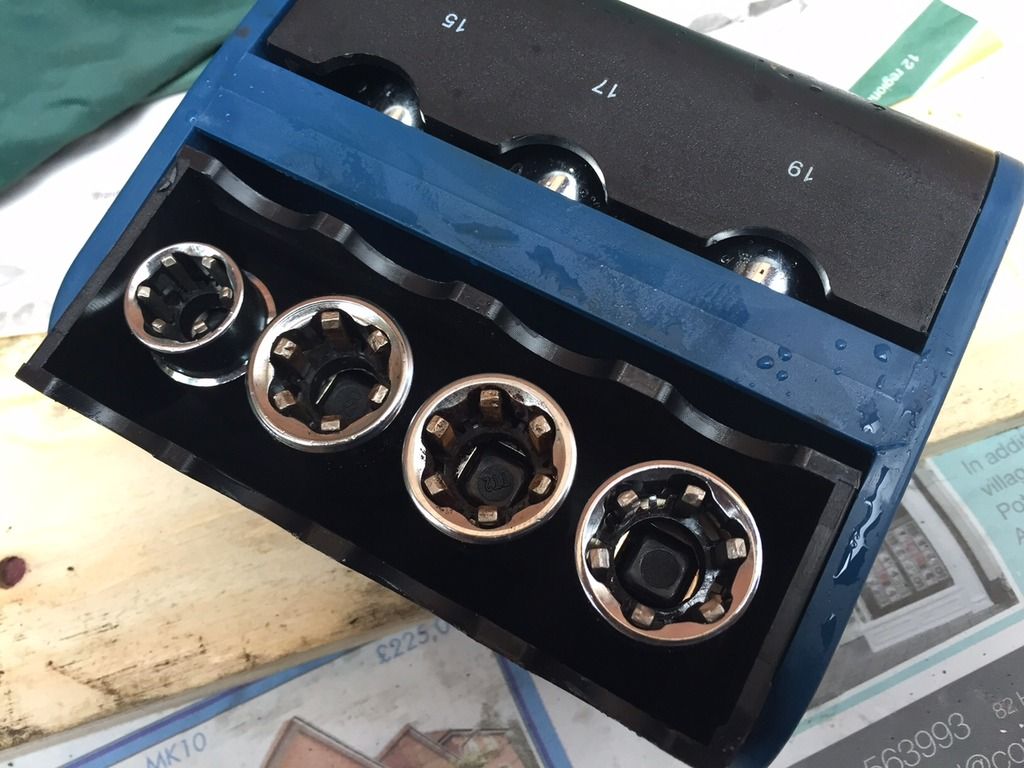
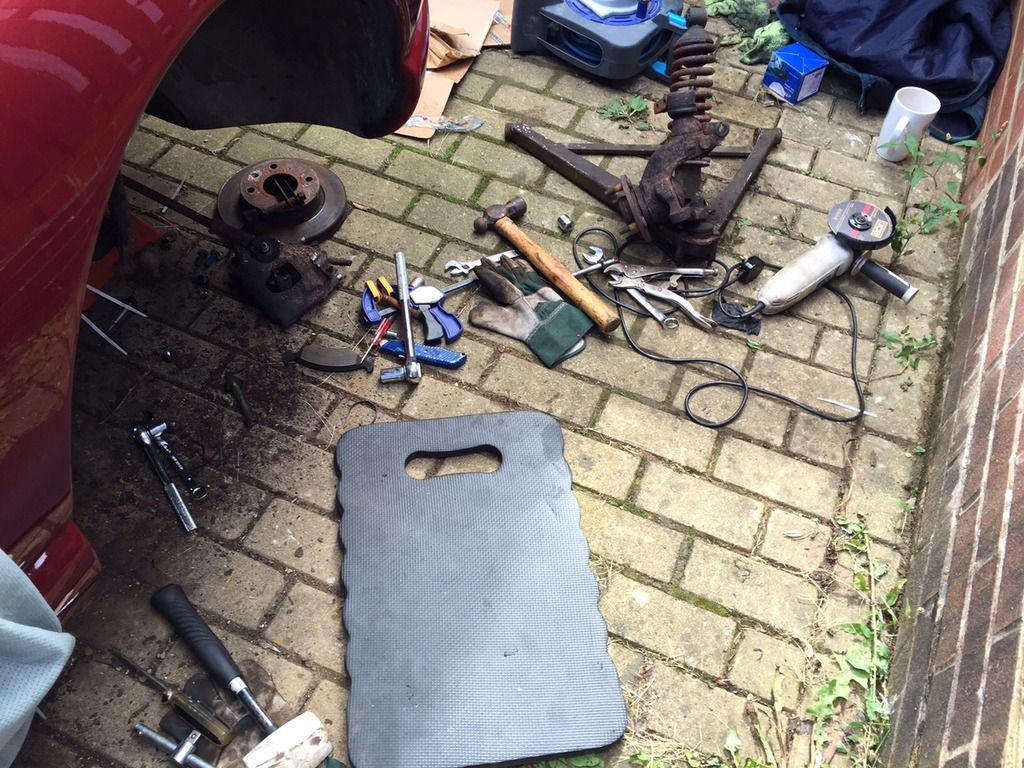
First off, let me introduce you to a new friend - this tool is superb and dealt with the rusty rounded bolts, no problem. A very useful addition to the growing number of tool-age in the Nosh Shed.
Only the top wishbone and drop link to remove (I cut the brake hoses as I have new braided hoses and a new Cossie brake upgrade to go on.
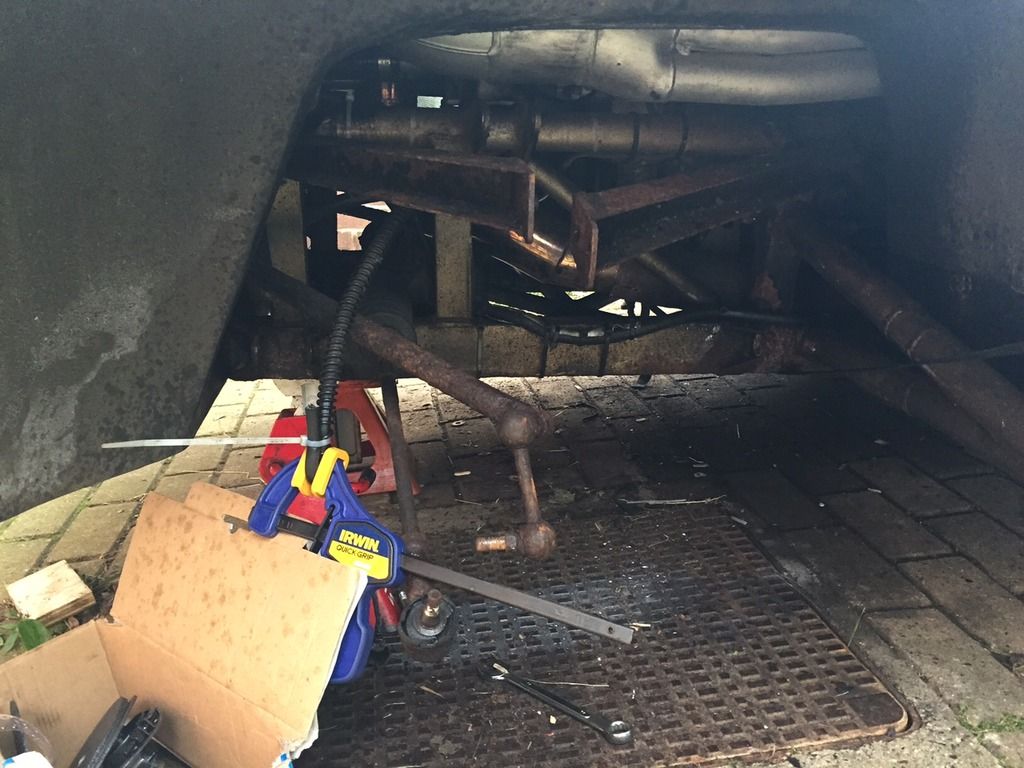
And the spoils of war today - will be a lot easier to complete the breakdown on the workbench with the vice.
Nosh
First off, let me introduce you to a new friend - this tool is superb and dealt with the rusty rounded bolts, no problem. A very useful addition to the growing number of tool-age in the Nosh Shed.

Only the top wishbone and drop link to remove (I cut the brake hoses as I have new braided hoses and a new Cossie brake upgrade to go on.

And the spoils of war today - will be a lot easier to complete the breakdown on the workbench with the vice.

Nosh
phazed said:
If your wishbones are shot, I have a front set from my 99 car that require a blast and paint but are very sound.
Only available as I fitted tubular wishbones.
Thanks Peter, I may take you up on that - lets see what happens after blasting....Only available as I fitted tubular wishbones.
Feels like a lot of surface rust - and they feel solid...
Nosh

Another day off work on holiday and another day clambering under the car, getting nicks, cuts and grazes - and a bit of an anti climax, really.....
There - the other git is off!
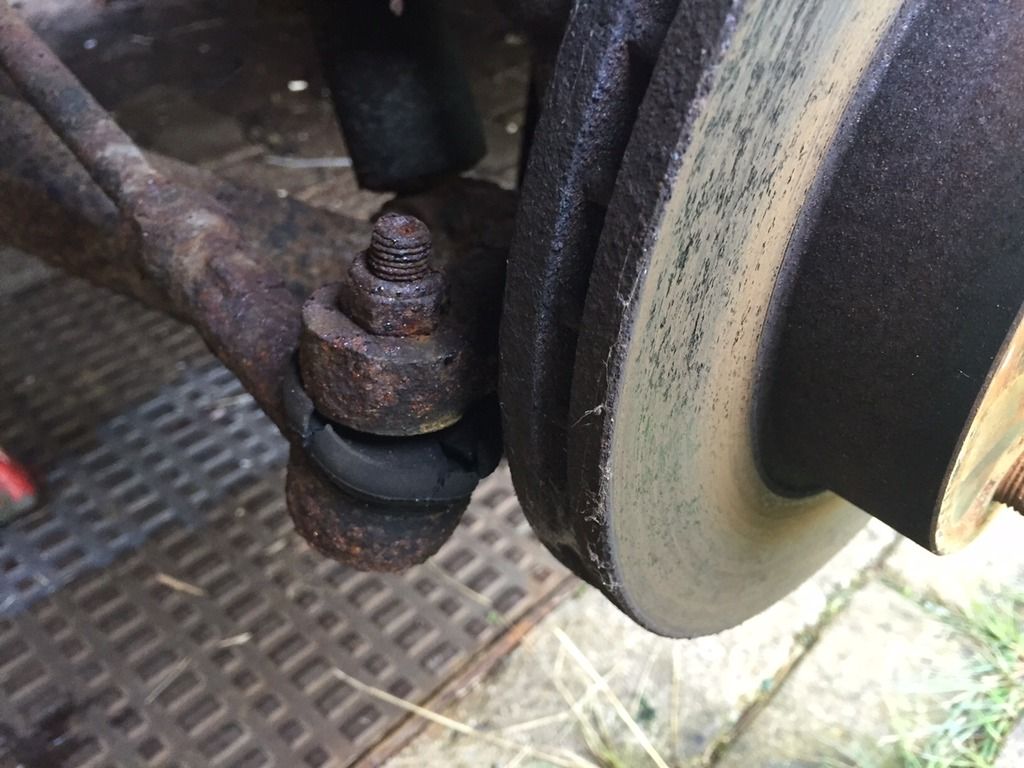
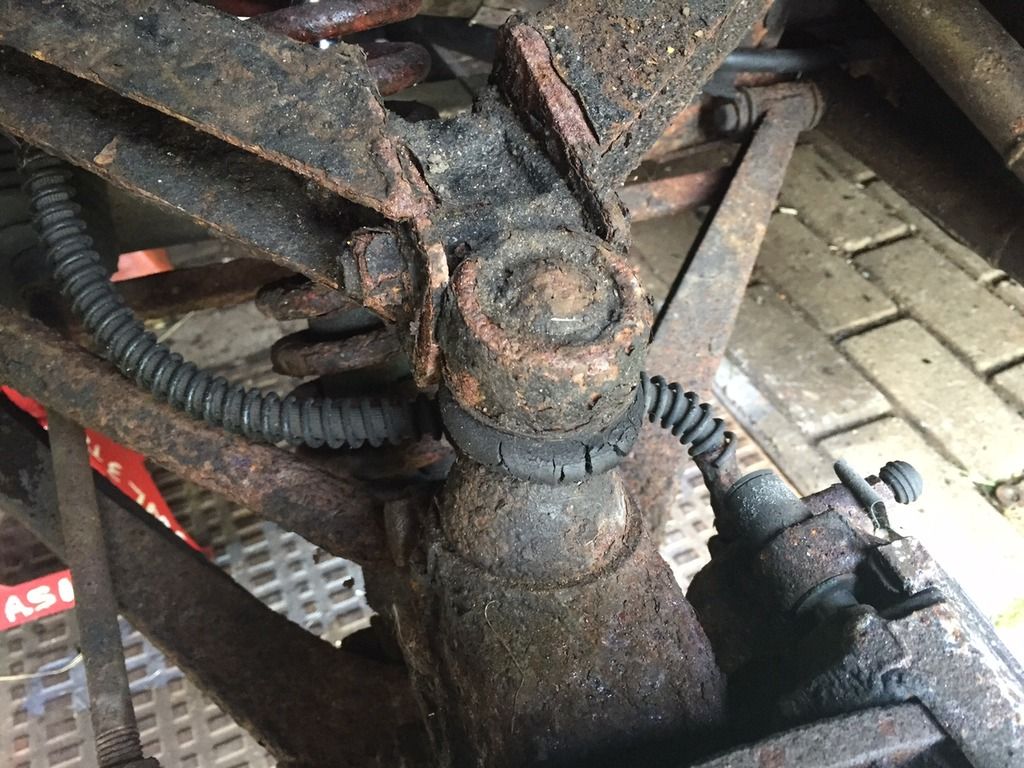
The wishbones are not in good shape - the metal is thin once you get the surface rust brushed off, as are some of the welds - and I also found a rather worrying crack,....
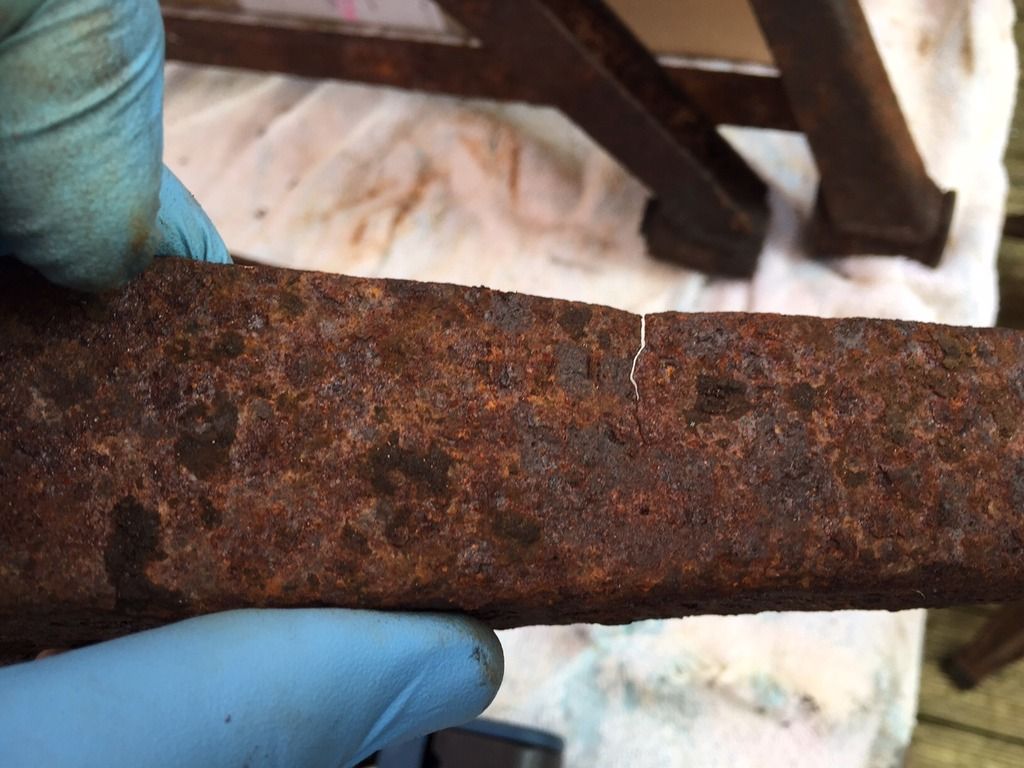
So, I have decided to buy new front wishbones as I fear the arms will not survive sandblasting - and not turn into sand / dust themselves! It also saves me arsing around with bushes etc....which were a complete git.
Tried the hammerite stuff on the old vice I re-conditioned (which now looks new) to remove rust......and treated myself to the first bit of black nectar of the day...

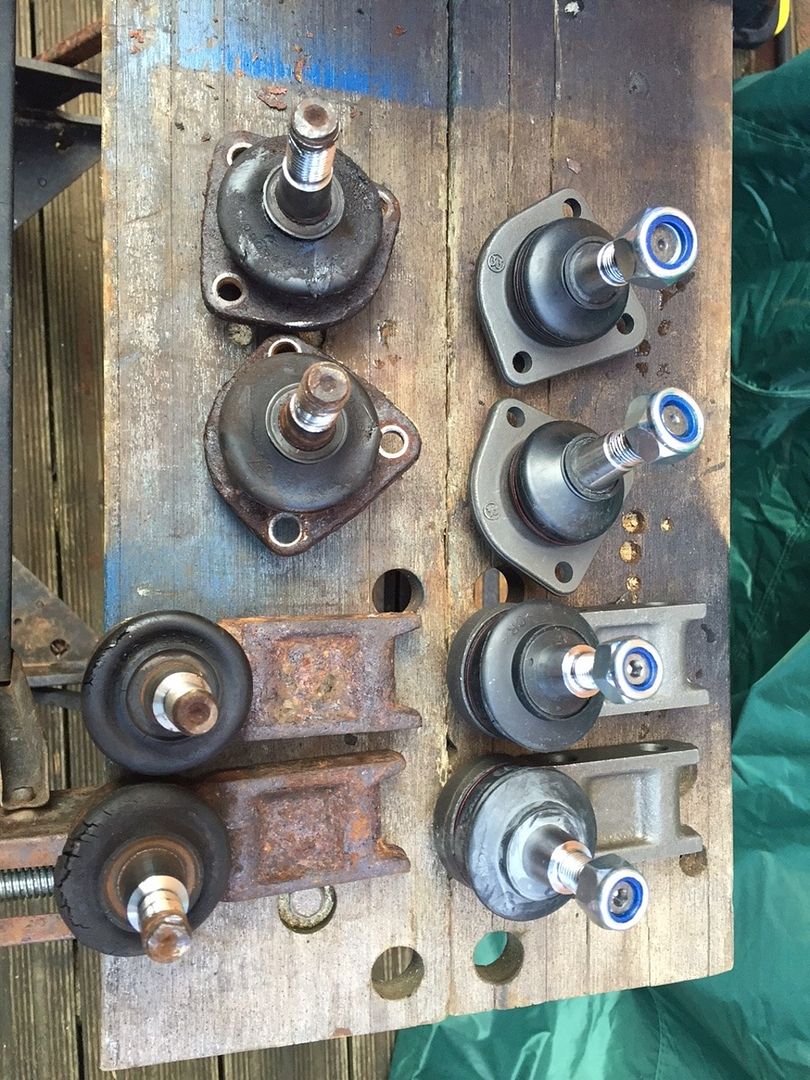
And the parcel man come - old and new - and the old ones really needed replacing - loose and clunky with perished rubbers as well!
Nosh
There - the other git is off!

The wishbones are not in good shape - the metal is thin once you get the surface rust brushed off, as are some of the welds - and I also found a rather worrying crack,....

So, I have decided to buy new front wishbones as I fear the arms will not survive sandblasting - and not turn into sand / dust themselves! It also saves me arsing around with bushes etc....which were a complete git.
Tried the hammerite stuff on the old vice I re-conditioned (which now looks new) to remove rust......and treated myself to the first bit of black nectar of the day...

And the parcel man come - old and new - and the old ones really needed replacing - loose and clunky with perished rubbers as well!

Nosh
J400GED said:
Nosh, I could be wrong here but measure and compare the width of the upper ball joint casting at the balljoint end - across the round bit - if it is too wide you won't be able to get the required range of camber adjustment on your front suspension.
Another way to check is to use a rule straight edge along the machined face to measure how far outboard of the outer hole it will go before it contacts the curved part of the casting - if you see what I mean.
Ged
I have been told this by Alex as well - thing is, they look identical measurement wise - I will check again tomorrow; worrying that a TVR parts dealer may be selling something that does not fit..... Another way to check is to use a rule straight edge along the machined face to measure how far outboard of the outer hole it will go before it contacts the curved part of the casting - if you see what I mean.
Ged
Cheers Ged
Nosh
Alexdaredevils said:
I dont think you have much choice, but the caster spacer that fits on one side can be replaced with 2 smaller ones to go either side to central things up a bit to give it that little bit extra camber
Im going to have to do the same myself or come up with another solution
Cheers Alex - I have the old shims that came out - I am presuming these will do or are they too thin? There were 1 on each side of the caster, so 4 in total....Im going to have to do the same myself or come up with another solution

Front ARB coming off today for clean up and stone chipping - and will attempt the rusty reflector on the headlight......oh dear...
Nosh
phazed said:
That's strange.
I'm sure that I have just one large spacer that goes on the front of the ball joint.
Mine is an early 93 Peter - not sure what to do now as the the head is bigger (and only when you put the straight edge up against it, that you can see I will lose the required range of camber adjustment on my front suspension)...see below:-I'm sure that I have just one large spacer that goes on the front of the ball joint.

The marks in pencil are where the original holes were....
What on earth.....? I am flummoxed now.
Do I just order the SAAB 900 ones HERE and send the others back?
And why is a TVR parts dealer selling something like this that restricts suspension set ups?
Nosh
Edited by Nosh on Friday 28th August 08:29
carsy said:
Phil, dont worry just yet.....
Thanks, Ian - lots of bits are coming on Tuesday - so, prepping for that over the weekend.Front ARB off - and need to prep that...
And the rest of the day I spent trying to change the headlight reflector - what a balls aching job that is!

One bolt holding the cowl on - and mastick did the rest! Awful really....
Also, took the plunge and ordered the Steve Edwards headlight / cowl surround on Wednesday - lucky really, as the cowl almost disintegrated in my hands! And I was being gentile! It is now in 6 or so pieces and made of the strangest material.
Nosh


In between the showers, managed to do some stuff today....
Drilled the 12mm holes to mount the cossie carrier on the knuckle - was really worried I would cock it up, but it came out good in the end......
Prepped both front wheelarches in prep for the cleaning / stone chip of the arches and on the front of the outriggers..
Quite happy with the result....
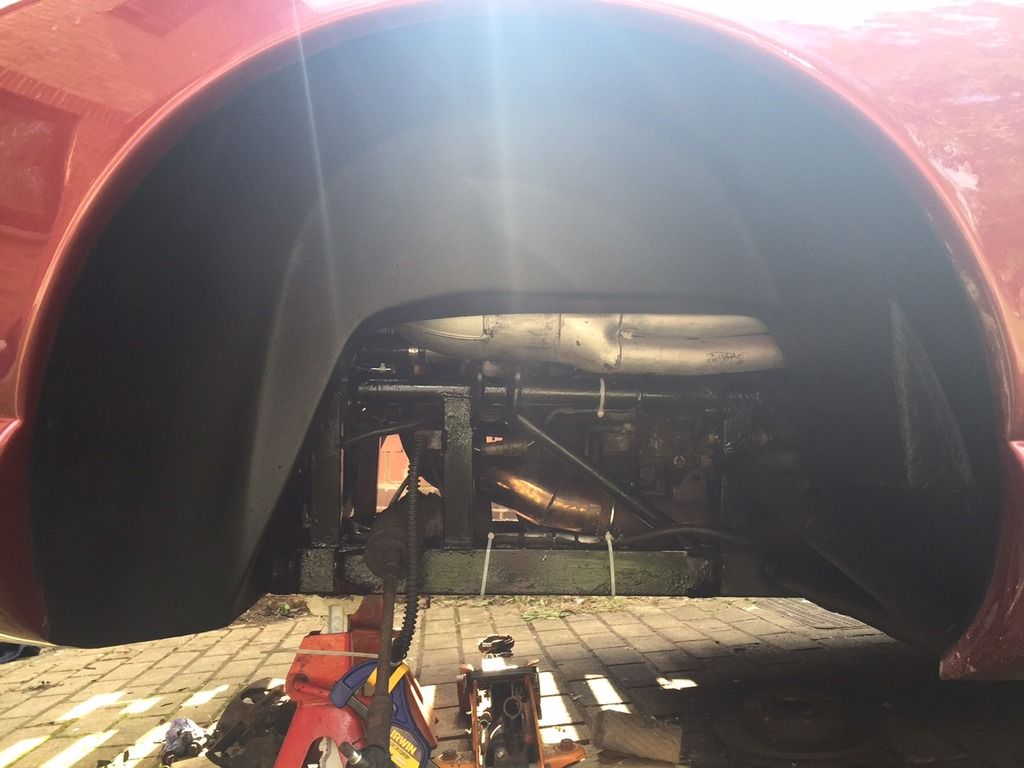
Managed to mount the shocks on the lower wishbones - a ball aching job - difficult to get the bolts through; had to remove some powder coat and then jiggled my two 19mm spanners to tigthen the bugger up!
And I need to clean up!
I have two horrible jobs left - remove the rubber brake hoses and replace with braided ones - nuts are rusty and seemingly welded on!
And I need to remove the track rod ends - again, looks like they will be sods - rusty and tight.
Nosh.
Drilled the 12mm holes to mount the cossie carrier on the knuckle - was really worried I would cock it up, but it came out good in the end......

Prepped both front wheelarches in prep for the cleaning / stone chip of the arches and on the front of the outriggers..

Quite happy with the result....

Managed to mount the shocks on the lower wishbones - a ball aching job - difficult to get the bolts through; had to remove some powder coat and then jiggled my two 19mm spanners to tigthen the bugger up!
And I need to clean up!

I have two horrible jobs left - remove the rubber brake hoses and replace with braided ones - nuts are rusty and seemingly welded on!
And I need to remove the track rod ends - again, looks like they will be sods - rusty and tight.
Nosh.
Gassing Station | Chimaera | Top of Page | What's New | My Stuff