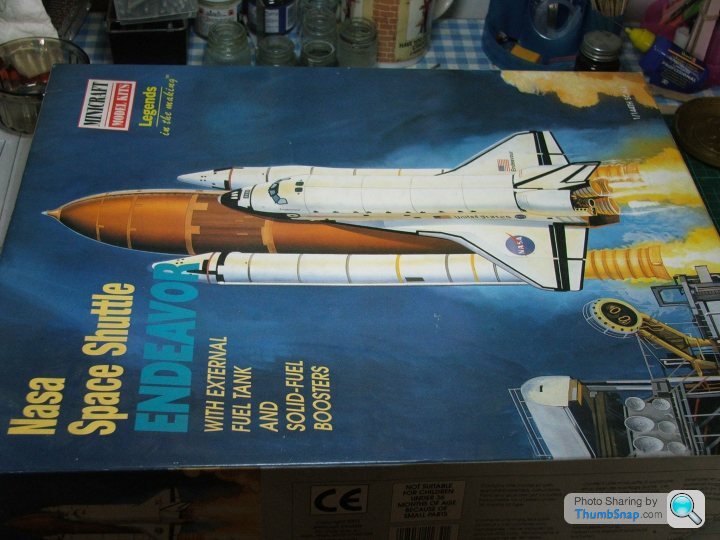
Space Shuttle - Minicraft 1/144
Discussion


Following the end of the Space Shuttle programme, I decided I would make my own tribute to the men and women who flew on these dodgy vehicles.
The kit is by Minicraft and has its issues (the best 1/144 Shuttle around is reckoned to be the Airfix one - which wasn't available when I bought this one about 5 years ago). However, this one is good enopugh - with a little bit of work, to make a nice rendition. The most glaring omission is the lack of ribbing detail on the External Tank. This ribbing is a stengthener on tbat part of the tank which covers the intertank section between the Liquid Oxygen tank and the Liquid Hydrogen tank.
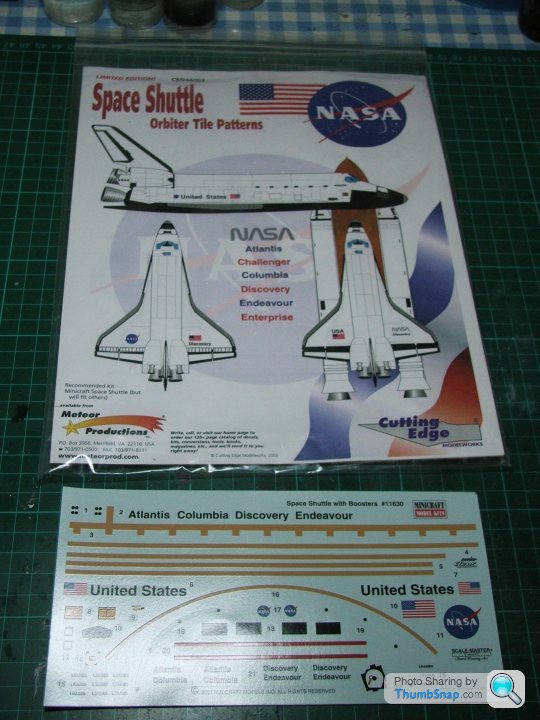
I will be using the Cutting Edge Shuttle tiling decals which will be a bit of a challenge to apply. It is very difficult (especially in 1/144 scale) to depict the 24,000 tiles that cover the Orbiter using normal painting techniques. Cutting Edge (sadly no longer in production) produced this set about 8 years ago.


The kit is by Minicraft and has its issues (the best 1/144 Shuttle around is reckoned to be the Airfix one - which wasn't available when I bought this one about 5 years ago). However, this one is good enopugh - with a little bit of work, to make a nice rendition. The most glaring omission is the lack of ribbing detail on the External Tank. This ribbing is a stengthener on tbat part of the tank which covers the intertank section between the Liquid Oxygen tank and the Liquid Hydrogen tank.
I will be using the Cutting Edge Shuttle tiling decals which will be a bit of a challenge to apply. It is very difficult (especially in 1/144 scale) to depict the 24,000 tiles that cover the Orbiter using normal painting techniques. Cutting Edge (sadly no longer in production) produced this set about 8 years ago.
Edited by Eric Mc on Monday 1st August 08:44
Haven't made my mind up as to which one to go for. The decals that come with the kit are based on the later era NASA markings so the model will have to be one post the Columbia accident.
I may go for Discovery as I'm reading "Riding Rockets" by Mike Mullane (again) and his first mission was on STS-41D which was Discover's first flight and which famously had a pad abort at about T-4 seconds - just before the solid rocket boosters had ignited.
I may go for Discovery as I'm reading "Riding Rockets" by Mike Mullane (again) and his first mission was on STS-41D which was Discover's first flight and which famously had a pad abort at about T-4 seconds - just before the solid rocket boosters had ignited.
Don't envy you with those decals. What I found with the carbon stuff is that if there is any significant raised or embossed detail on the surface you're covering, it won't conform without wrinkling - even with gallons of MicroSol. I'd advise removing the lager surface details and sticking it back on afterwards. With embossed detail, leave the decal overhanging and scalpel it off later, preferably paint it beforehand in a appropriate colour.
Eric Mc said:
Thanks for the tips.
I might cut the decals into more managable sized panels as well - especially the underwing tiling
That's what I'm planning to do with the carbon stuff I'm using. It is surpisingly easy to line up the patterns, but if you overlap the edges it does form an unsightly step. If you look at the dashboard on my Jaguar XJR-9 thread you'll see what I mean.I might cut the decals into more managable sized panels as well - especially the underwing tiling
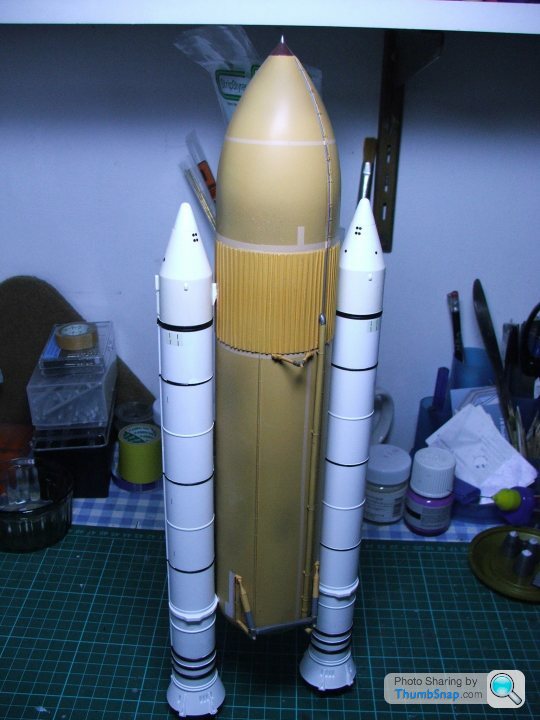
Currently adding some rib strengtheners to the ET. You can see from the unmodified tank what it originally looked like. It is a tedious and mind numbing task which I've spread over a couple of ten minute sessions.
I will tidy up the ribbing and sand it back a bit once it is all complete and I've allowed the glue to cure for a couple of days.

I will tidy up the ribbing and sand it back a bit once it is all complete and I've allowed the glue to cure for a couple of days.
Some progress on the Orbiter. As is normal with Space Shuttle kits, there is a gap where the payload bay doors meet. I have filled this gap with shims of plasticard which I will then cut down and sand smooth. Any remaining gaps will be filled with model putty.

Edited by Eric Mc on Thursday 11th August 14:04
perdu said:
Good idea to close the payload doors properly 
I don't understand why any kit with similar body breaks gets huge gaps we need to fill, just so a choice of "wrong-closed" or "wrong-open" can be made…
Looking good there Eric
The potential problem is having to accurately re-scribe the shut line along bits of plastic and filler. I find that filler tends to crumble rather than score, and that laminated plastic can cause the scriber to move off line.I don't understand why any kit with similar body breaks gets huge gaps we need to fill, just so a choice of "wrong-closed" or "wrong-open" can be made…
Looking good there Eric
Anyway I'm sure it will look good in the end.
I'm pretty sure that the shut line of the payload bay doors is all but invisible when they are closed. I'll see how I get on with a VERY lightly re-scribed line of some sort.
What's really striking is how BIG the Orbiter is. I placed it next to an unfinished 1/144 Boeing 737 and it is quite a bit bulkier than the airliner. Given its size, you then realise how huge those cockpit windows are as well. They must have given the crews a truly magnificent view of the earth below.
Apart from the "pagoda" module on the ISS, I doubt it will be a very long time before any future spacecraft will give their crews such a fantastic view.
Latest progress report.
The ET is essentially complete now.

[
I tried to get that patchy look which is so typical of the unpainted ETs. Apparently the patchiness is caused by the insulation fading in sunlight over time. No two ETs ever looked the same so I based mine as best I could on the STS114 tank.
The browns and oranges come from two Halfords spray cans - Rover Sand Glow and and Vauxhall Mustard Yellow. The patches fcome from Tamiya Smoke.
Just to put the ET into some sort of perspective, the fuel feed line you can see on the side of the tank is, on the real tank, 17 inches in diameter.
I will next turn my attention to the Solid Rocket Boosters which have received their basic gloss white coat but need all their black and orange stripes and some subtle shades applied to them.
I'll leave the orbiter to last.
The ET is essentially complete now.
[
I tried to get that patchy look which is so typical of the unpainted ETs. Apparently the patchiness is caused by the insulation fading in sunlight over time. No two ETs ever looked the same so I based mine as best I could on the STS114 tank.
The browns and oranges come from two Halfords spray cans - Rover Sand Glow and and Vauxhall Mustard Yellow. The patches fcome from Tamiya Smoke.
Just to put the ET into some sort of perspective, the fuel feed line you can see on the side of the tank is, on the real tank, 17 inches in diameter.
I will next turn my attention to the Solid Rocket Boosters which have received their basic gloss white coat but need all their black and orange stripes and some subtle shades applied to them.
I'll leave the orbiter to last.
Boosters now completed and attached to the ET.
The markings on the booster are more in line with those on the final few missions. They are quite a bit different to the SRB markings used in the 80s.
The Orbiter is essentially complete and painted - ready for the application of the Meteor Production tile decals - which is going to be interesting.

The markings on the booster are more in line with those on the final few missions. They are quite a bit different to the SRB markings used in the 80s.
The Orbiter is essentially complete and painted - ready for the application of the Meteor Production tile decals - which is going to be interesting.
Orbiter decalling in progress. It is a very slow process. Because so much of the vehicle is being covered in decals, you can only do small segments at a time in order to ensure that those decals have bedded down and adhered properly to the surface. So far so good - but I reckon it will take about a fortnight at least to finish the model.
Did anyone see The Sky at Night on BBC over the past few days. It was on BBC 4 last night and will be on the iPlayer for a few weeks. It was about the end of the Shuttle programme and the future of NASA's involvement in manned spaceflight. One of the guests was British astronaut Piers Sellers.
From a modelling point of view, in the background was an array of Space Shuttle and other launcher models - all provided by ace modeller Mat Irvine.
Eric Mc said:
Orbiter decalling in progress. It is a very slow process. Because so much of the vehicle is being covered in decals, you can only do small segments at a time in order to ensure that those decals have bedded down and adhered properly to the surface. So far so good - but I reckon it will take about a fortnight at least to finish the model.
Did anyone see The Sky at Night on BBC over the past few days. It was on BBC 4 last night and will be on the iPlayer for a few weeks. It was about the end of the Shuttle programme and the future of NASA's involvement in manned spaceflight. One of the guests was British astronaut Piers Sellers.
From a modelling point of view, in the background was an array of Space Shuttle and other launcher models - all provided by ace modeller Mat Irvine.
I thought you'd enjoy the decals. The carbon ones on the XJR9 took weeks of evenings and failed attempts.Did anyone see The Sky at Night on BBC over the past few days. It was on BBC 4 last night and will be on the iPlayer for a few weeks. It was about the end of the Shuttle programme and the future of NASA's involvement in manned spaceflight. One of the guests was British astronaut Piers Sellers.
From a modelling point of view, in the background was an array of Space Shuttle and other launcher models - all provided by ace modeller Mat Irvine.
Eric Mc said:
I can't afford to screw these up. I only have the one sheet and Cutting Edge, the company that produced them, closed down three or four years ago.
I wouldn't like to know how much carbon decal I wasted. I did however make the mistake of buying a 'templated' set specifically for my model which of course didn't fit at all once I'd cut the bits out.So far, I have been imnpressed with the way the Cutting Edge decals do actually match the underlying model. They were specifically tailored to the Minicraft kit so might not work so well on the Airfix or Revell Shuttles - even though they are probably better models overall.
There are plenty of spare tile strips and patches on the sheet to enable the modeller to fill any of the gaps that inevitably appear when trying to align the different pieces of decal with panel lines etc.
It's more like wall papering than decal applying.
There are plenty of spare tile strips and patches on the sheet to enable the modeller to fill any of the gaps that inevitably appear when trying to align the different pieces of decal with panel lines etc.
It's more like wall papering than decal applying.
Forum | Scale Models | Top of Page | What's New | My Stuff