Italeri 1/48 Hawk Build Log
Discussion


I'm just starting a new model, and it's fairly basic so it shouldn't take too long, I thought I would have a go at posting a build log.
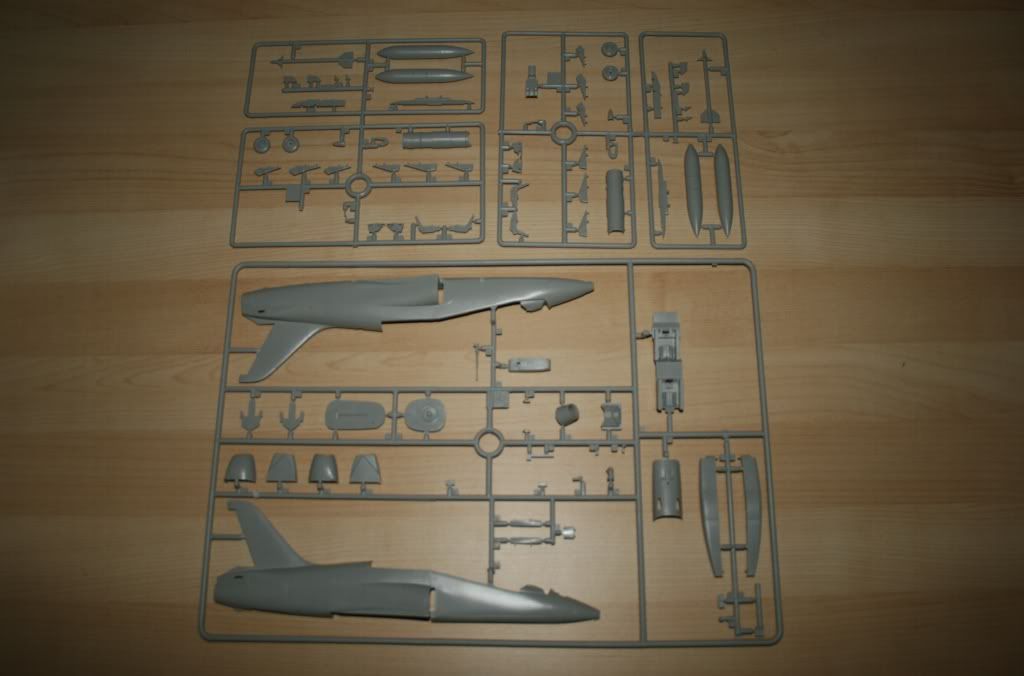
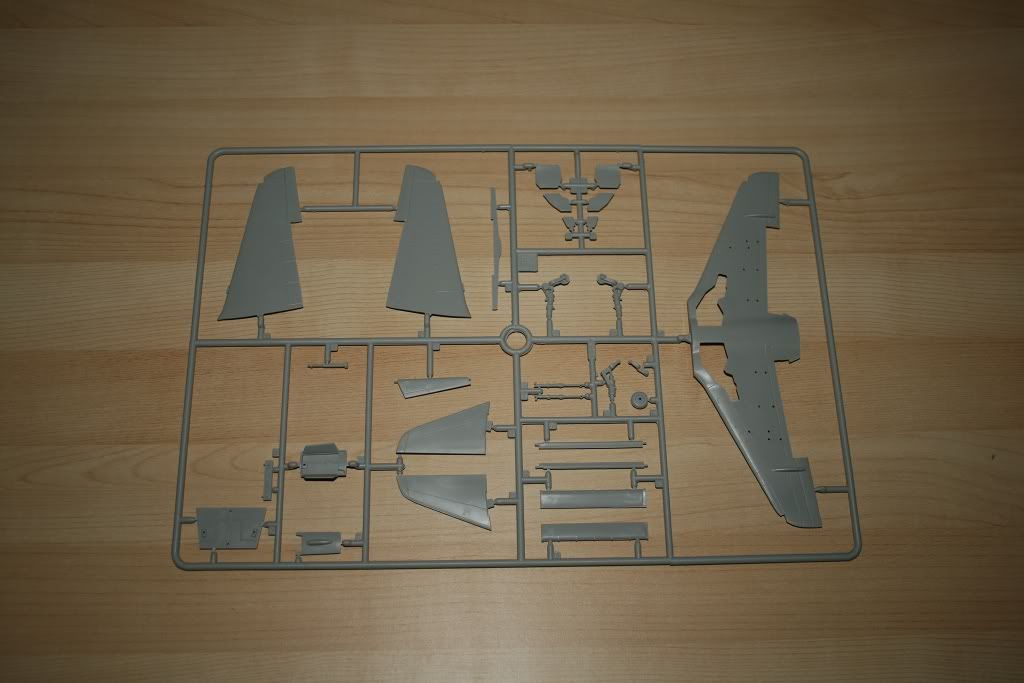
Here are the first few shots showing the kit before I start.
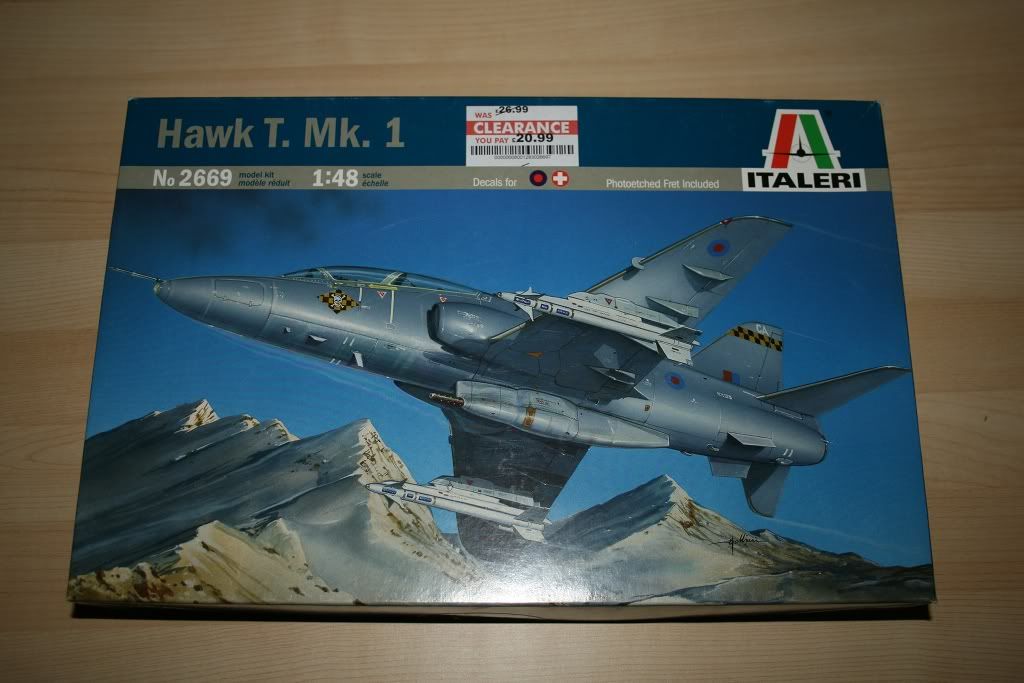
Some rather nice box art I thought.
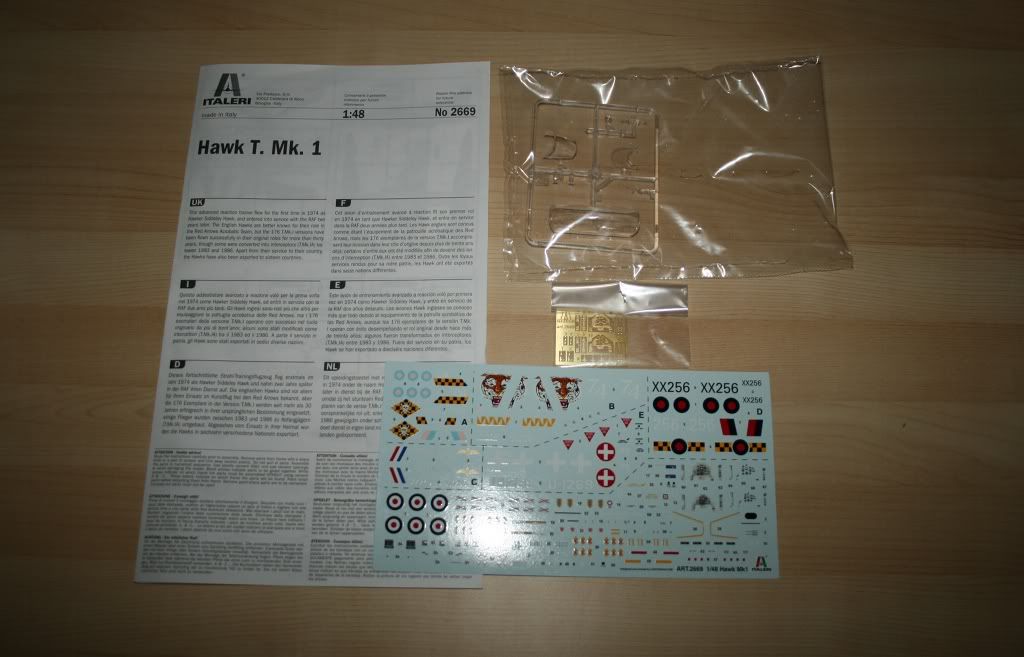
There's some photo etch included, it's the first time I've used any.
The included decals are by Cartograf, really excellent quality.
I'm intending to depict one of the grey/green camo. RAF T. Mk1A versions based at Chivenor in '81.
Similar to this one.
http://www.abpic.co.uk/photo/1318508/
Edited to get the a/c version right.
Here are the first few shots showing the kit before I start.
Some rather nice box art I thought.
There's some photo etch included, it's the first time I've used any.
The included decals are by Cartograf, really excellent quality.
I'm intending to depict one of the grey/green camo. RAF T. Mk1A versions based at Chivenor in '81.
Similar to this one.
http://www.abpic.co.uk/photo/1318508/
Edited to get the a/c version right.
Edited by SlipStream77 on Friday 13th January 22:58

Ian Lancs said:
As a spotter - the picture on the box is a T. Mk1A.
Thanks 
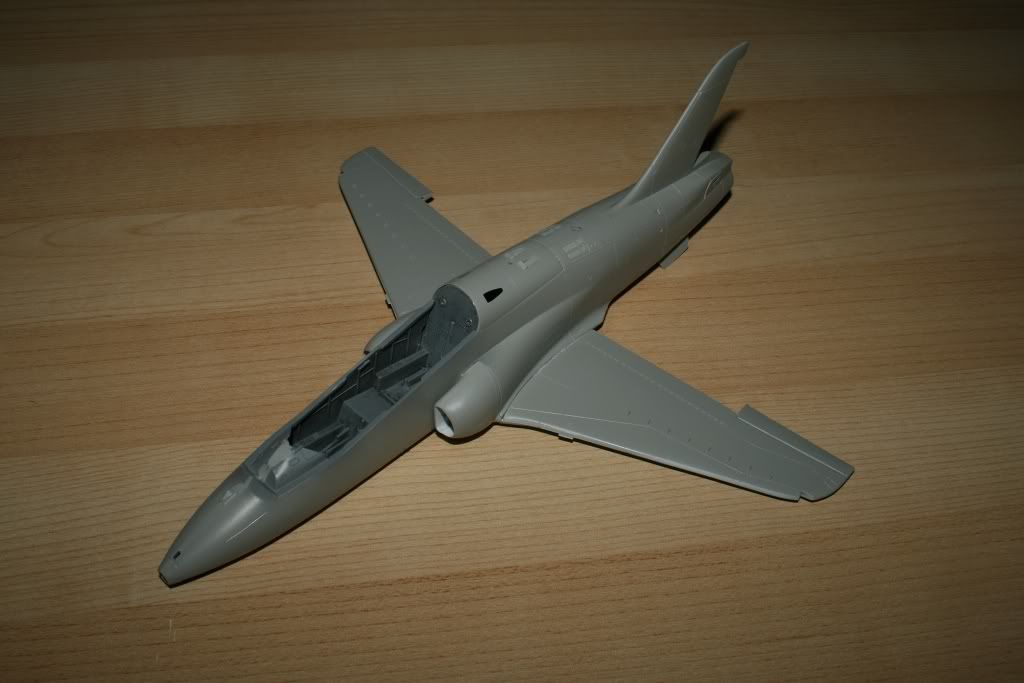
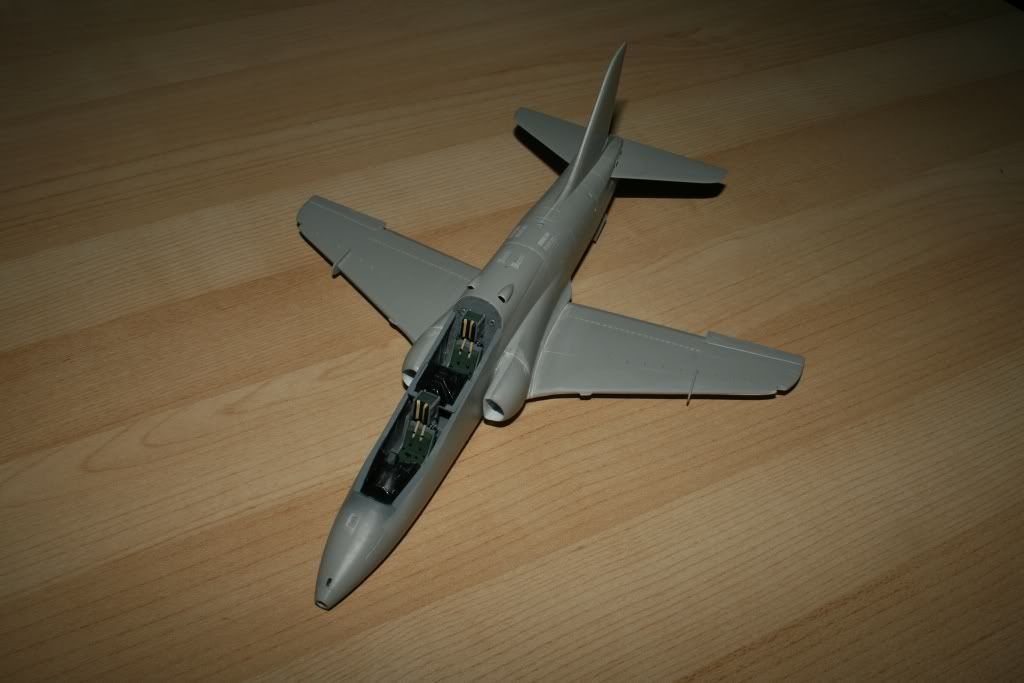
I've made a bit of progress, here are the photos so far...
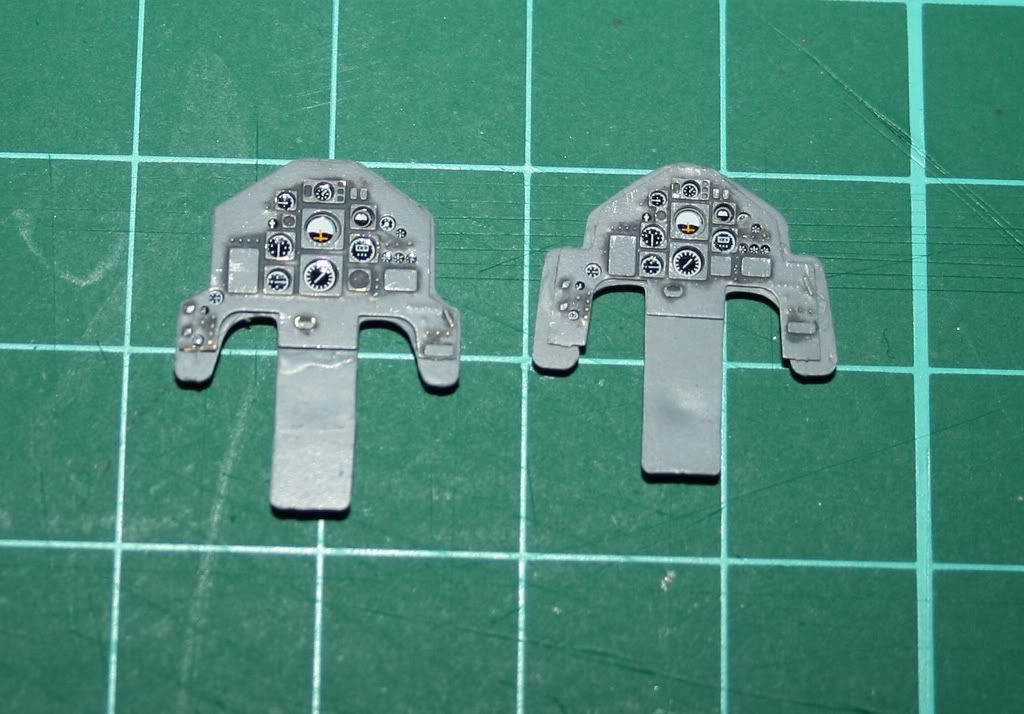
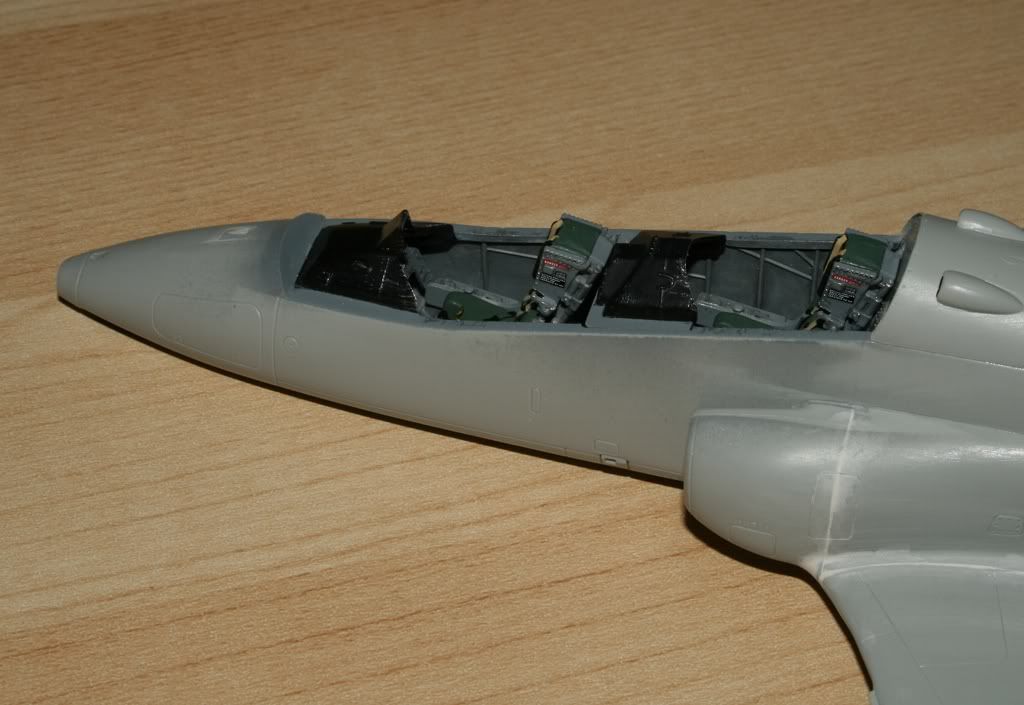
Here are the completed panels, they had some basic weathering of aluminium dry brushing and Promodeller's dark wash.
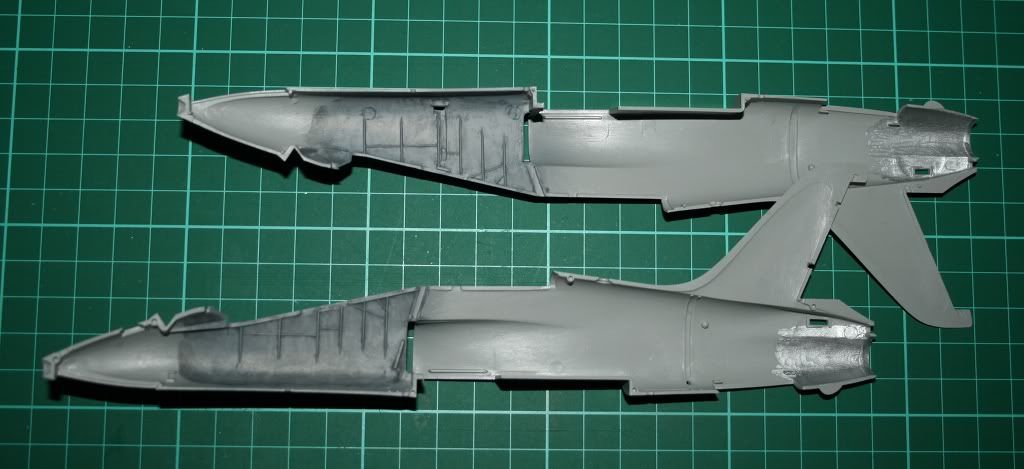
The fuselage sides have been sprayed on the inner surfaces and weathered.
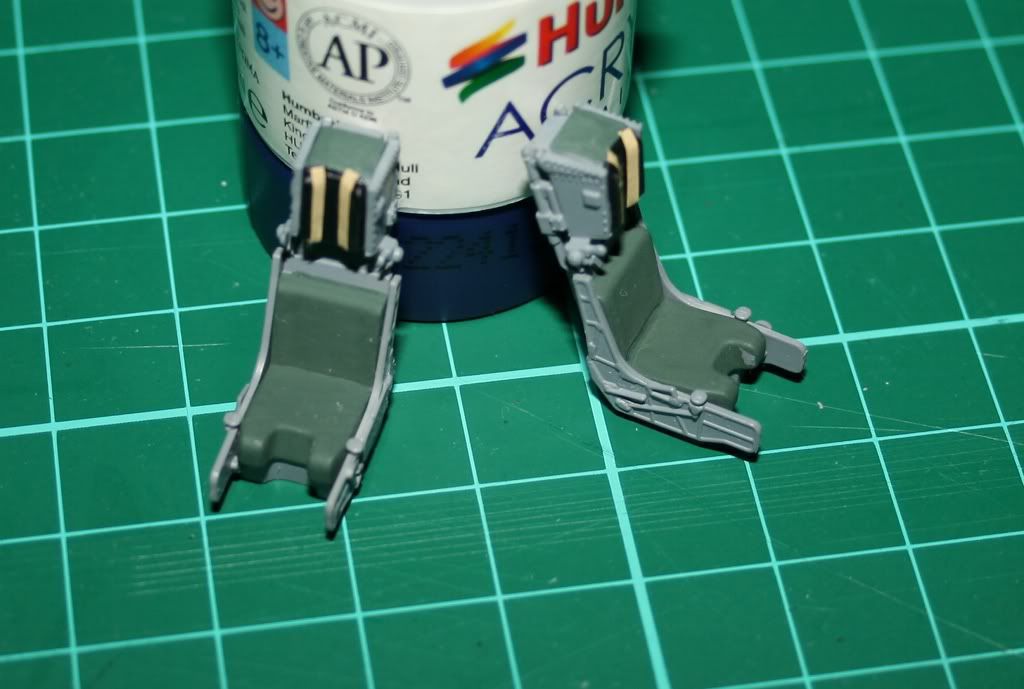
The seats are not yet completed, they have yet to have the PE belts added and they need weathering.
The beige belts on the head restraint are painted Tamiya tape.
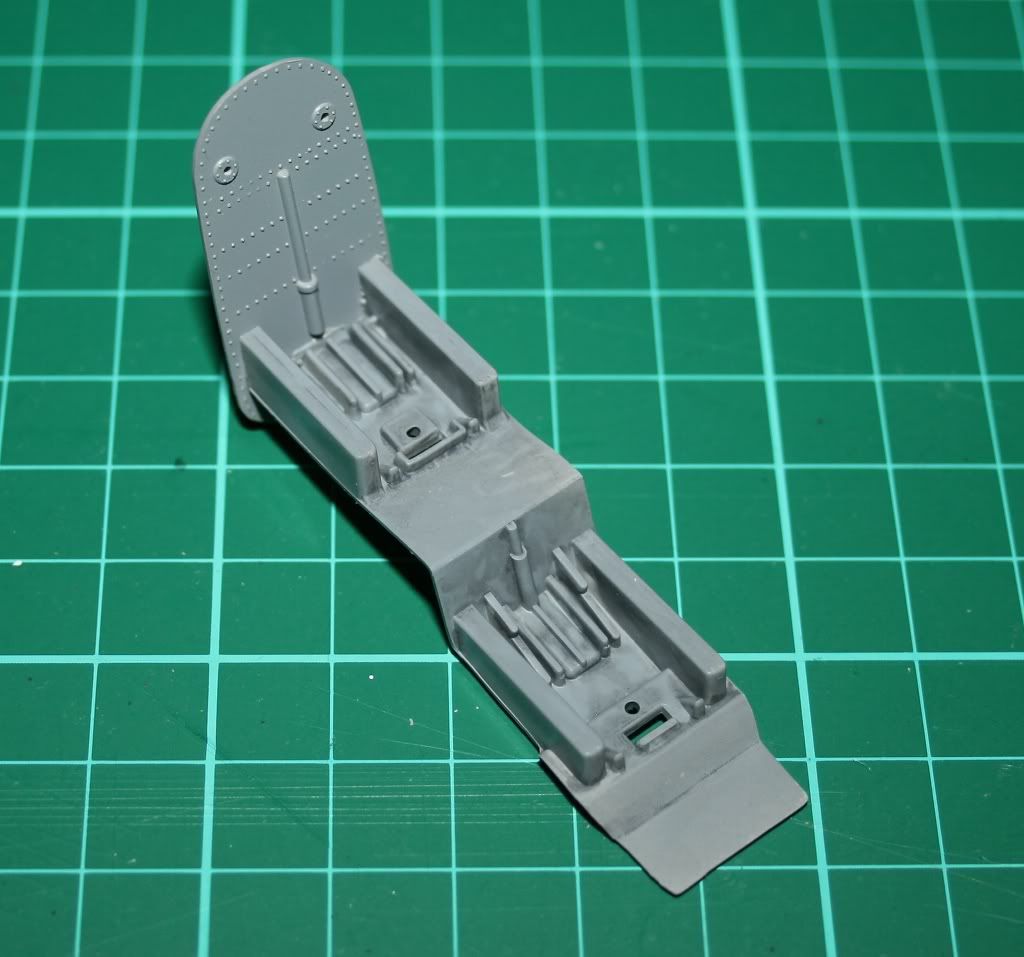
This is the cockpit floor, it's been partially weathered but there are four PE panels to go either side of the pilot/nav.
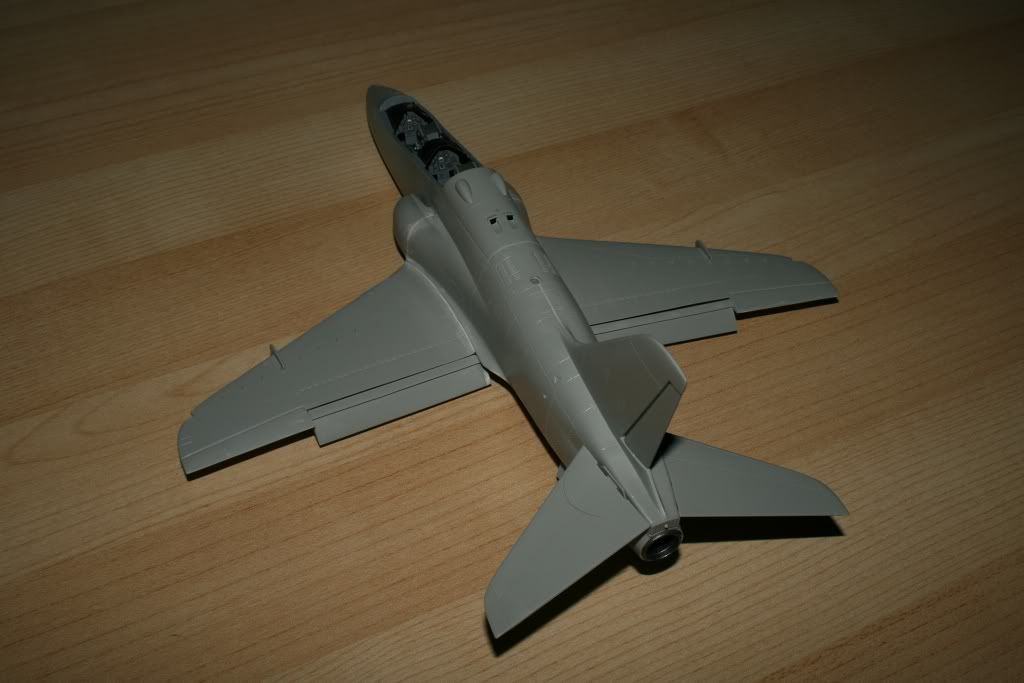
I should have the fuselage sides joined soon, and I have some other parts to build such as wing tanks. I also have a long list of parts to be sprayed white, one of my least favourite stages as white paint never seem to go on well. Plus I need to have a window open and it's -2 outside!
dr_gn said:
Great start - looks like a nice kit too. The instruments are excellent.
Have you considered using Tamiya Weathering Master powders after the wash? You can get very subtle raised detail enhancement with it and it's partially removable (before varnishing) too if you make a mistake.
Thanks, I was pleased with the way the panels came out.Have you considered using Tamiya Weathering Master powders after the wash? You can get very subtle raised detail enhancement with it and it's partially removable (before varnishing) too if you make a mistake.
I have looked at the Tamiya weathering powder on a few occasions but they seem rather expensive, I might try them sometime.
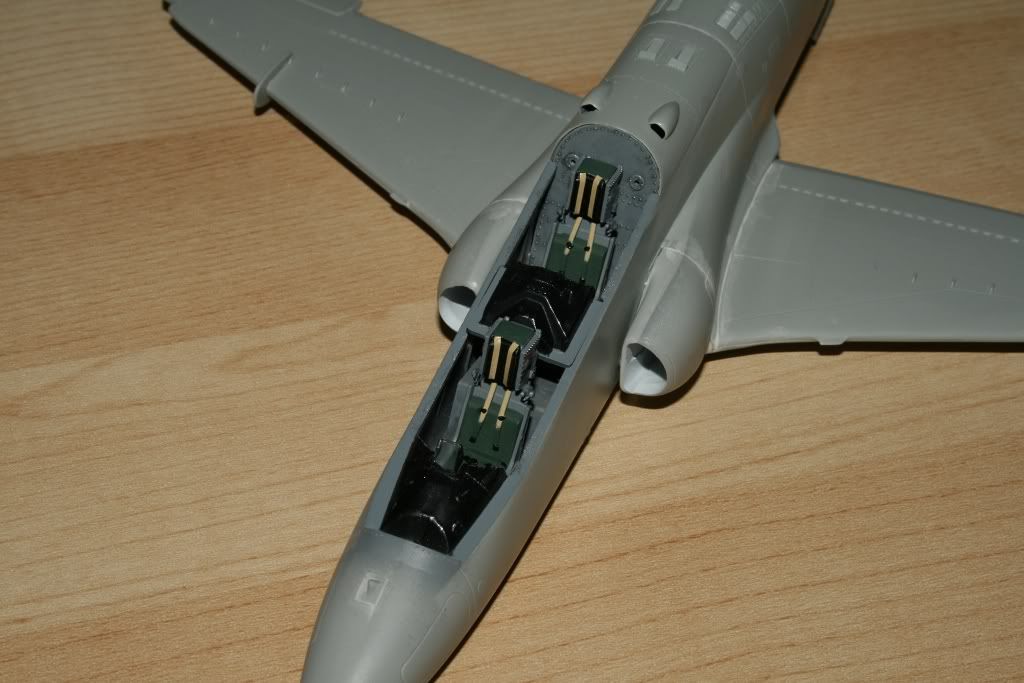
The undercarriage is almost complete, the seats are finished and the the white components are done.
The fuselage is nearly ready to be closed and the wings joined so the next photos should be more interesting.
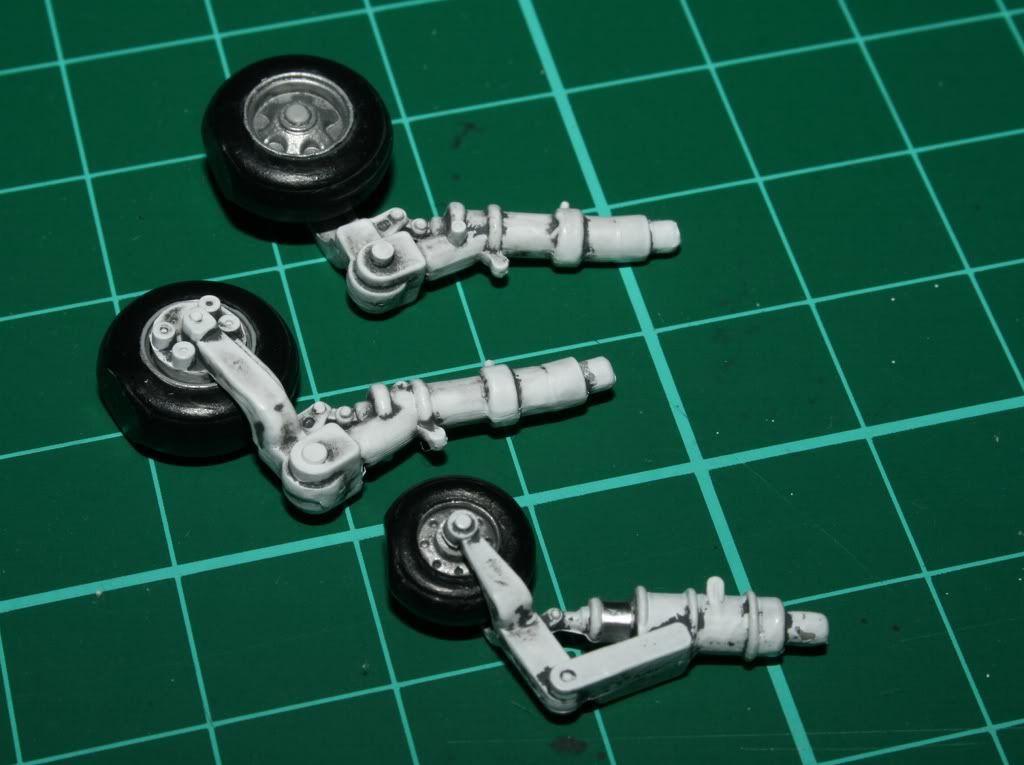
The tyres look a bit too shiny so I wll give them a coat of satin varnish at some point.
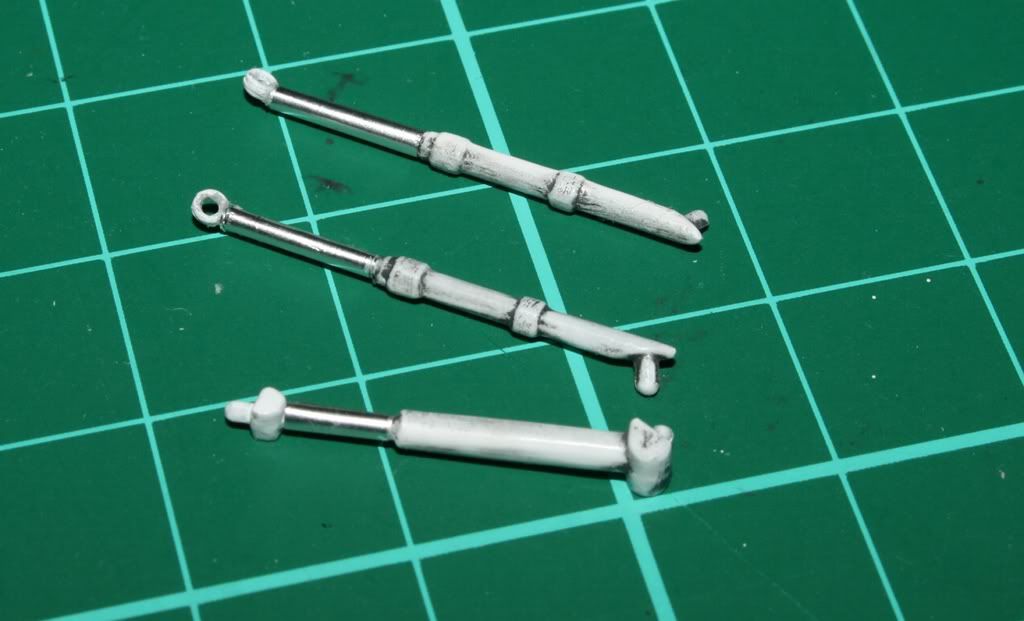
Airbrake and main wheel struts, the silver is done using KitKat wrapper foil flattened out, cut to size and then glued with PVA.
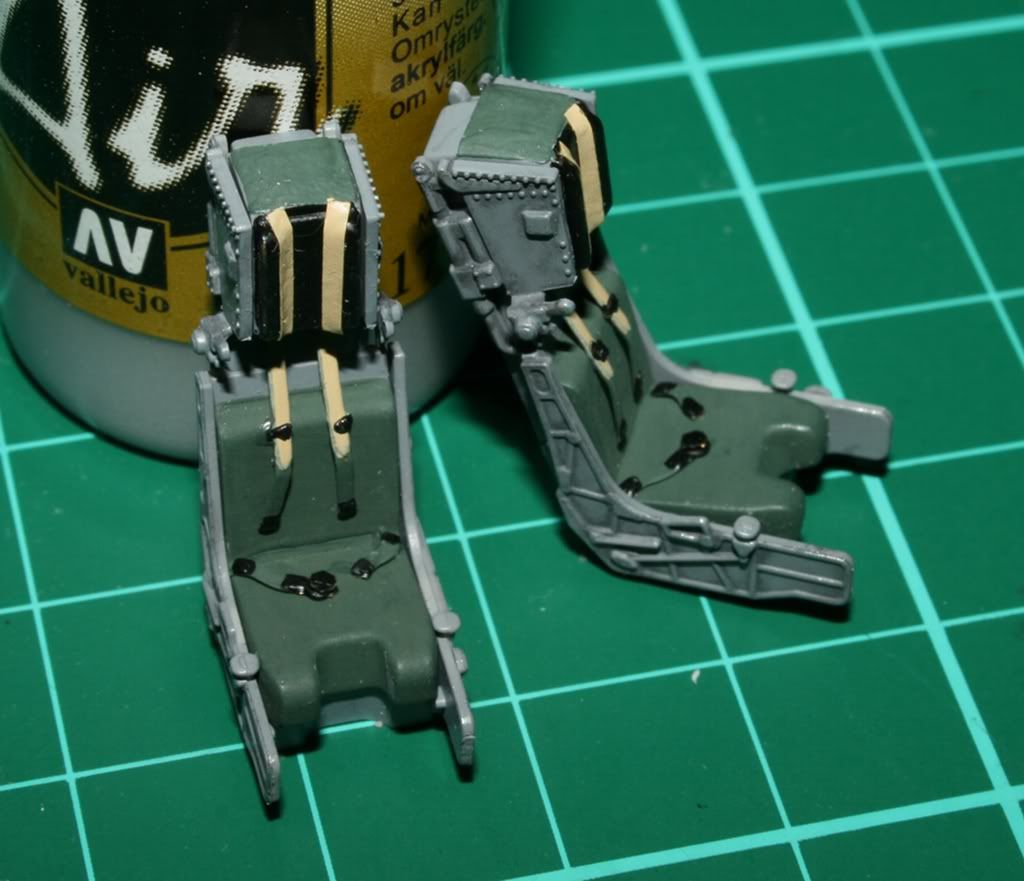
The completed seats look ok but I'm not convinced about using PE for belts, I think the tape looks better. Although that may be just that this PE is quite simple or maybe they could have been constructed and painted a little better.
The ejection seat handle should be at the front of the seat pad on the Mk10 but it wasn't included in the kit, I may add a scratchbuilt one.
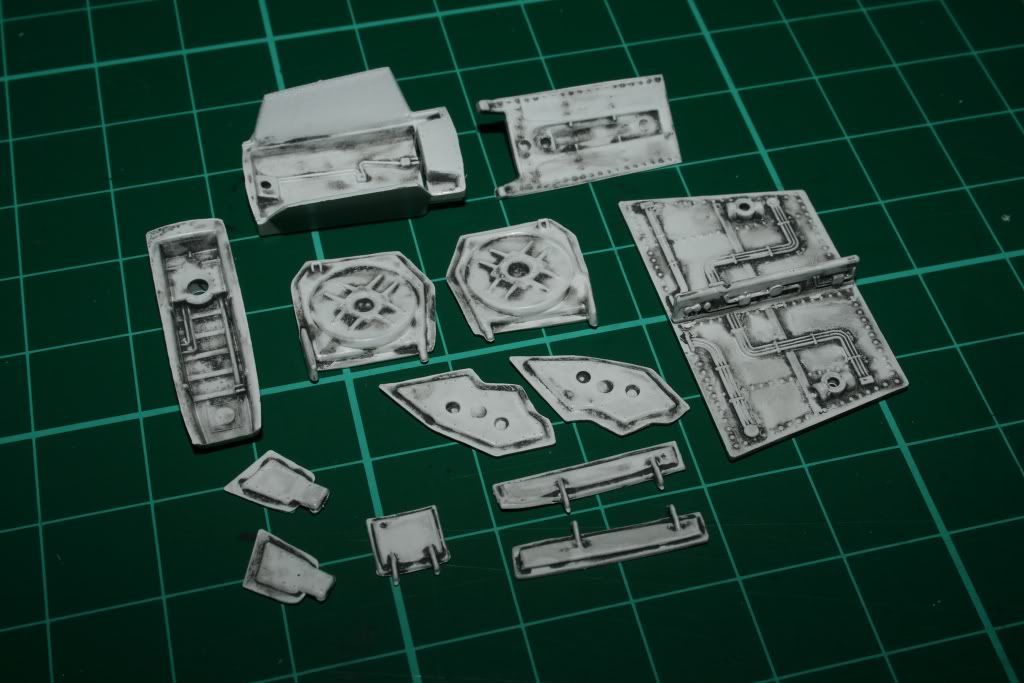
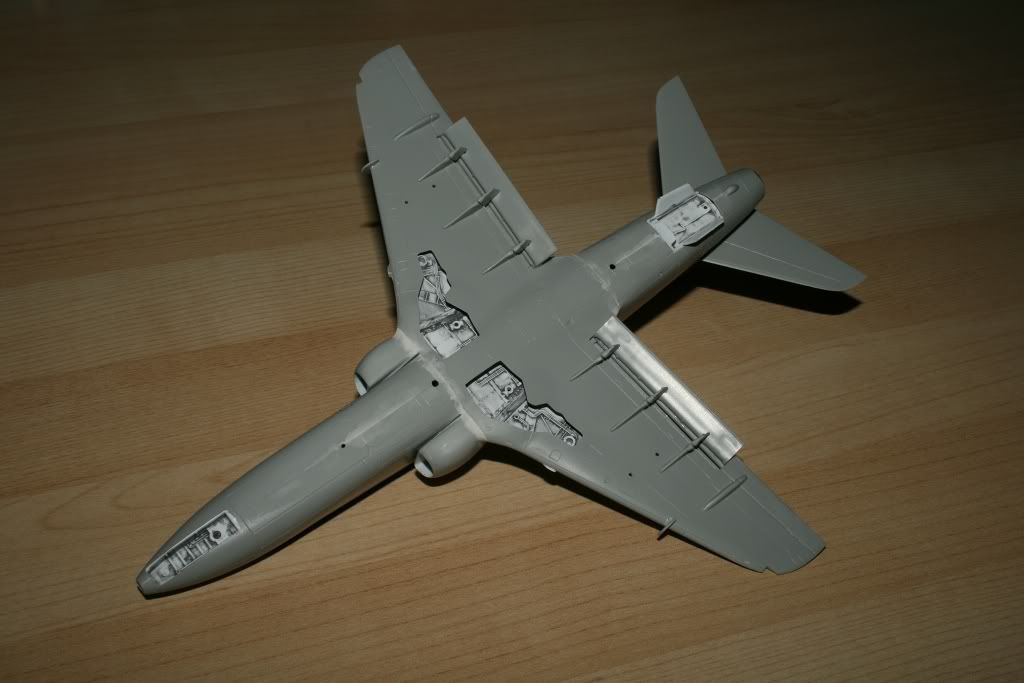
Various undercarriage bays and doors, the airbrake bay and the airbrake itself are at the top.


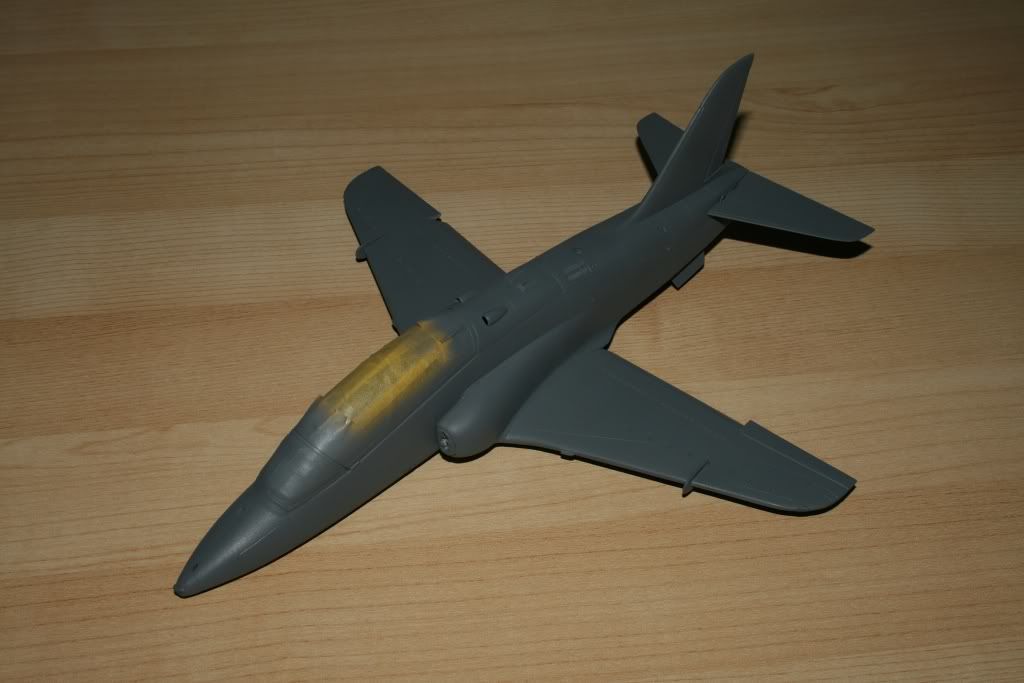
More progress, the panel gaps have been filled and the panel lines rescribed where necessary. It's quite a time consuming phase, even on a small model.

Flaps modelled in the down position.
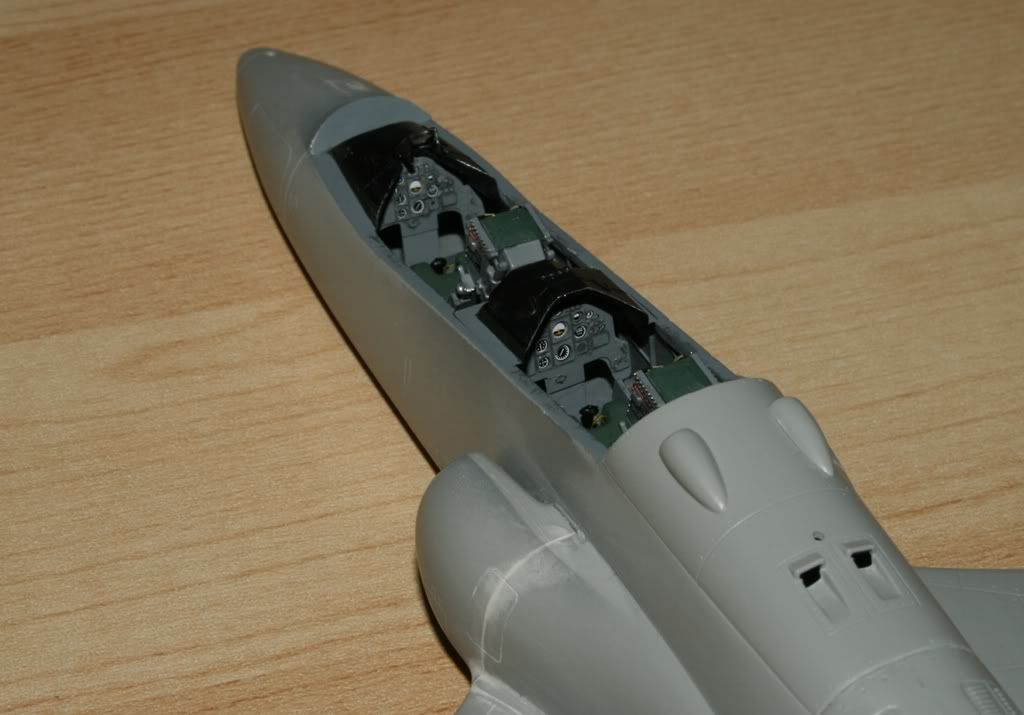
The cockpit is complete although I'm not going to fix the seats in place until later.
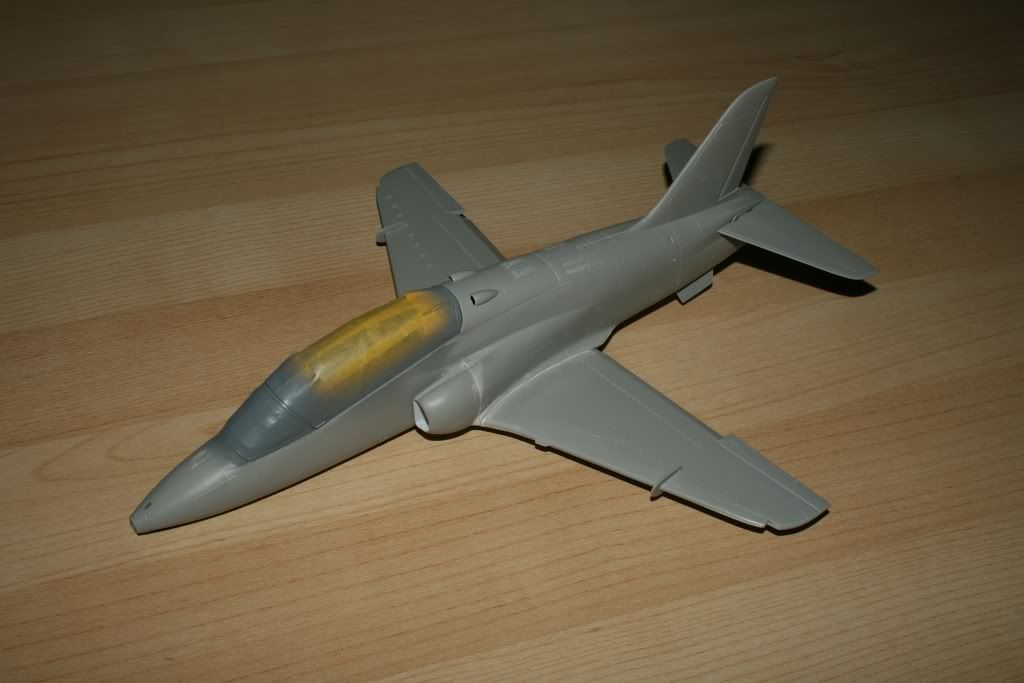
Canopy in place and masked, the canopy is a bit problematic in that the middle support is white inside and out and some of the frames have a thin white strip. I have decided to use decals to solve this problem hence I have masked over the central support for now. The rest has been sprayed with the internal cockpit colour.
I still have to mask the undercarriage bays, airbrake bay, the intake and exhaust. I'm not sure whether to fit the nav lights on the wings and the nose light before spraying. I've read they don't fit well and need sanding.
The first coat of paint will have been applied in the next update.
Flaps modelled in the down position.
The cockpit is complete although I'm not going to fix the seats in place until later.
Canopy in place and masked, the canopy is a bit problematic in that the middle support is white inside and out and some of the frames have a thin white strip. I have decided to use decals to solve this problem hence I have masked over the central support for now. The rest has been sprayed with the internal cockpit colour.
I still have to mask the undercarriage bays, airbrake bay, the intake and exhaust. I'm not sure whether to fit the nav lights on the wings and the nose light before spraying. I've read they don't fit well and need sanding.
The first coat of paint will have been applied in the next update.
The lights were too large so they needed sanding, and I wasn't sure PVA was going to hold them firmly enough. The night before I tested some poly cement on some of the clear sprue and it didn't seem to fog much at all.
I went ahead and fixed the lights with poly and sanded them, then used Autosol to polish. They have been painted with liquid mask and because I'm using acrylic paint any overspray can be easily removed with a cocktail stick. I will paint them with a mix of food colouring/klear when the mask has been removed.

Before polishing.
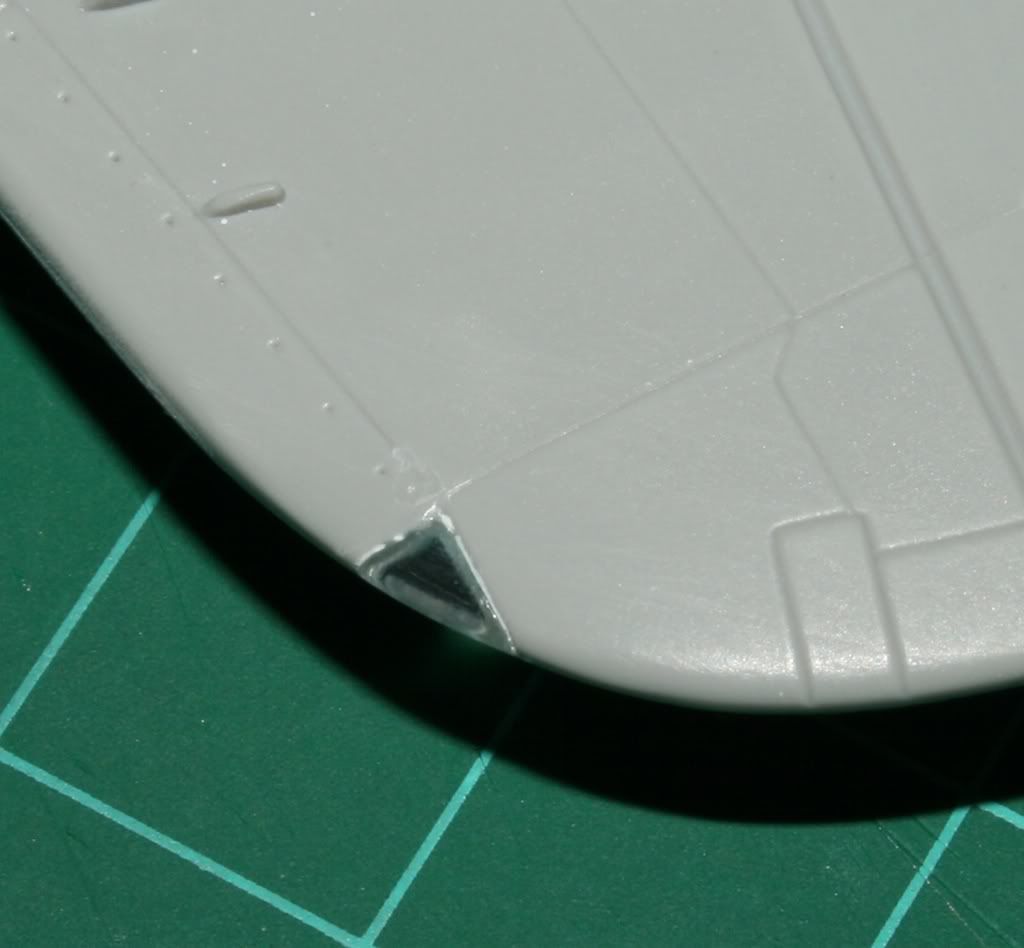
After polishing.
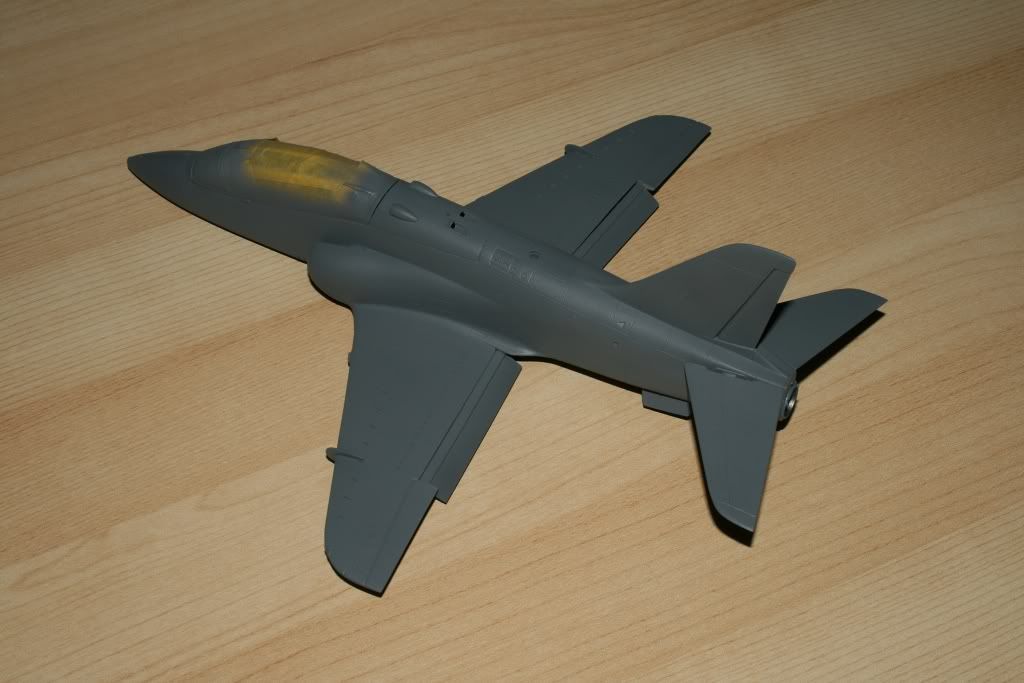
The first coat of paint is on the top and sides and the bottom has a light coat to act as a primer. The paint is a little tricky to use as it separates on the surface sometimes leading to light and dark patches. One or two more coats of well mixed paint and it should cover ok, then I can mask the camo ready for the green.
I went ahead and fixed the lights with poly and sanded them, then used Autosol to polish. They have been painted with liquid mask and because I'm using acrylic paint any overspray can be easily removed with a cocktail stick. I will paint them with a mix of food colouring/klear when the mask has been removed.
Before polishing.
After polishing.
The first coat of paint is on the top and sides and the bottom has a light coat to act as a primer. The paint is a little tricky to use as it separates on the surface sometimes leading to light and dark patches. One or two more coats of well mixed paint and it should cover ok, then I can mask the camo ready for the green.
dr_gn said:
I wouldn't use food colour/Klear. I used it on my 1:32 Spitfire, and it's faded to clear again after 2 years. It's not particularly easy to apply consistently either.
FWIW I'd just use Tamiya Clear Red and Tamiya Clear Green/Blue and be done with it.
Thanks for the advice, I wonder if I could tint some klear with acrylic paint? I might do some experiments tomorrow and see how it looks. I will report back with photos if successful.FWIW I'd just use Tamiya Clear Red and Tamiya Clear Green/Blue and be done with it.
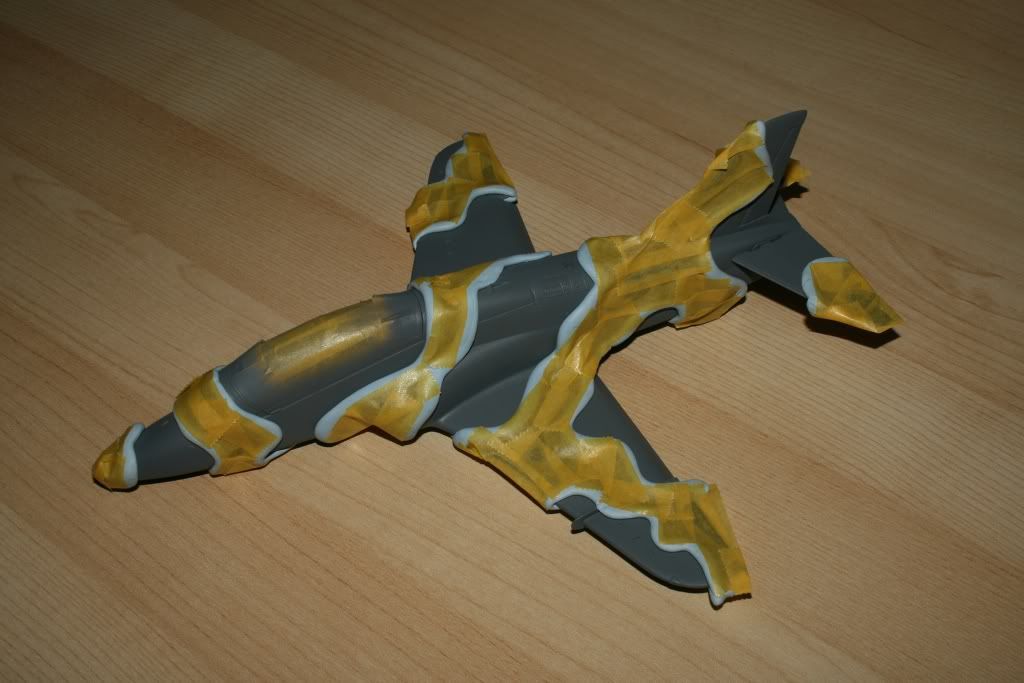
The painting of the Hawk is now pretty much complete, here it is masked with blu-tack and Tamiya tape ready for spraying.
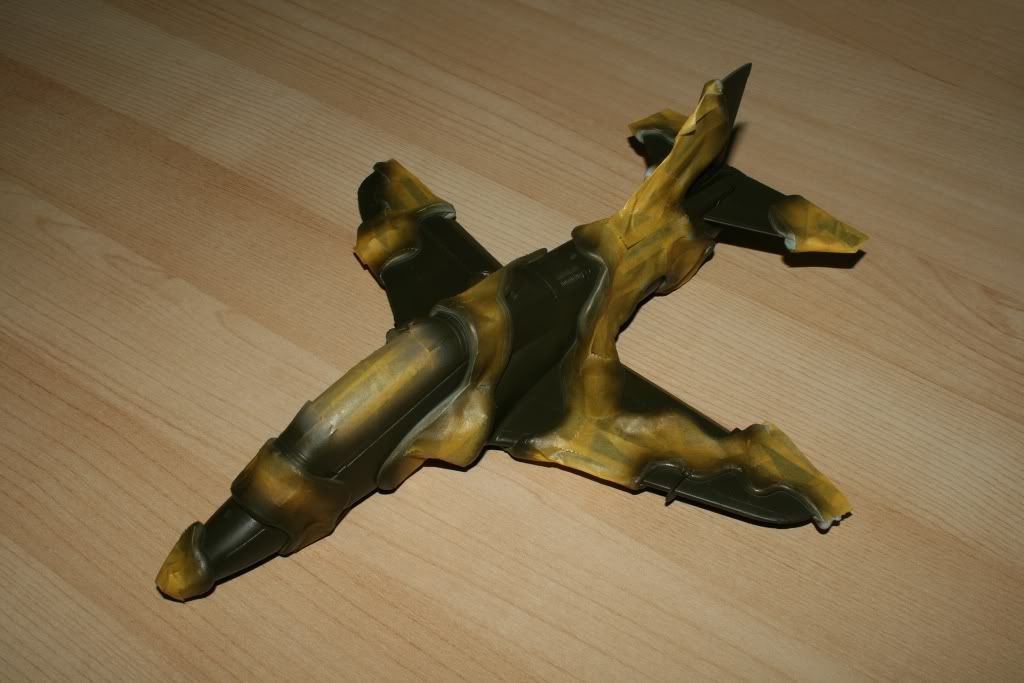
Green paint applied.
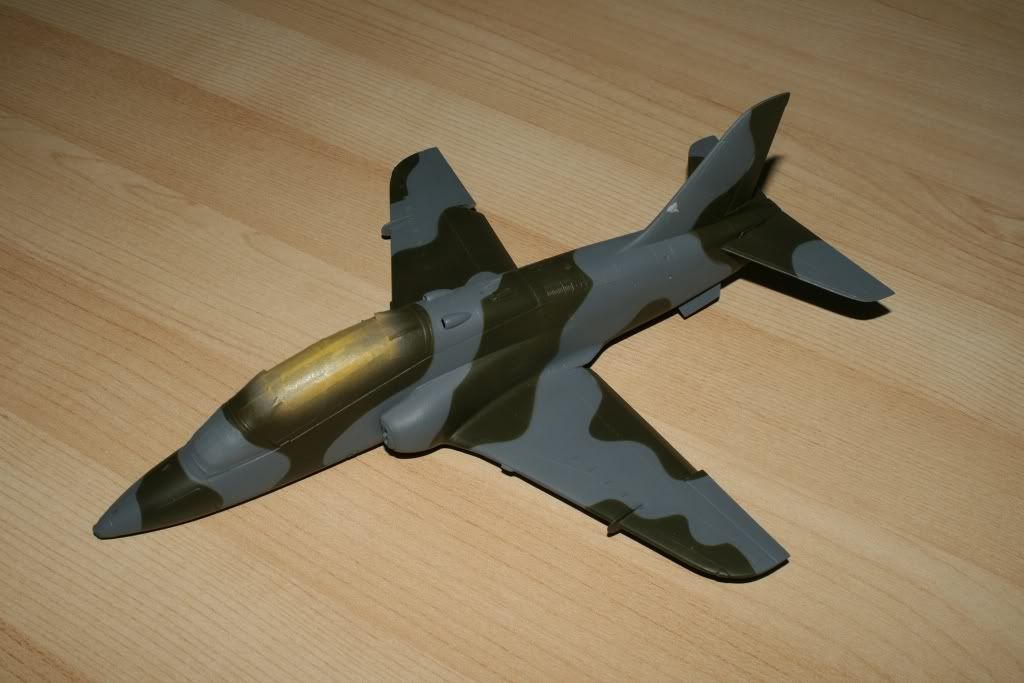
Masking removed. There were a few areas where paint was removed by the tape as can be seen on the fin.
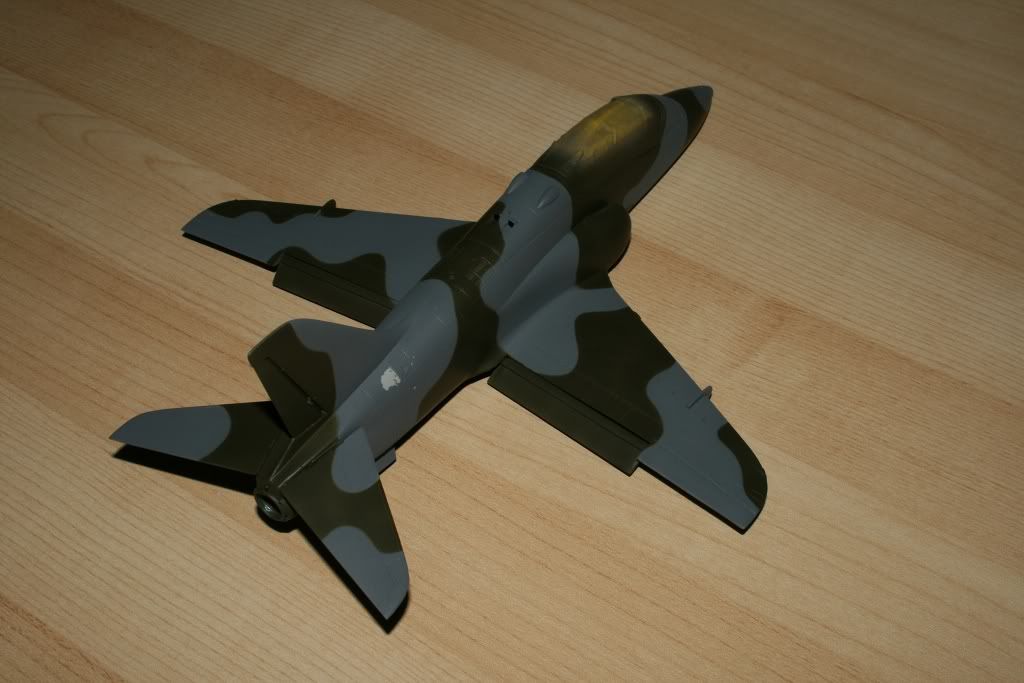
Rear of the fuselage lost a small patch of paint.
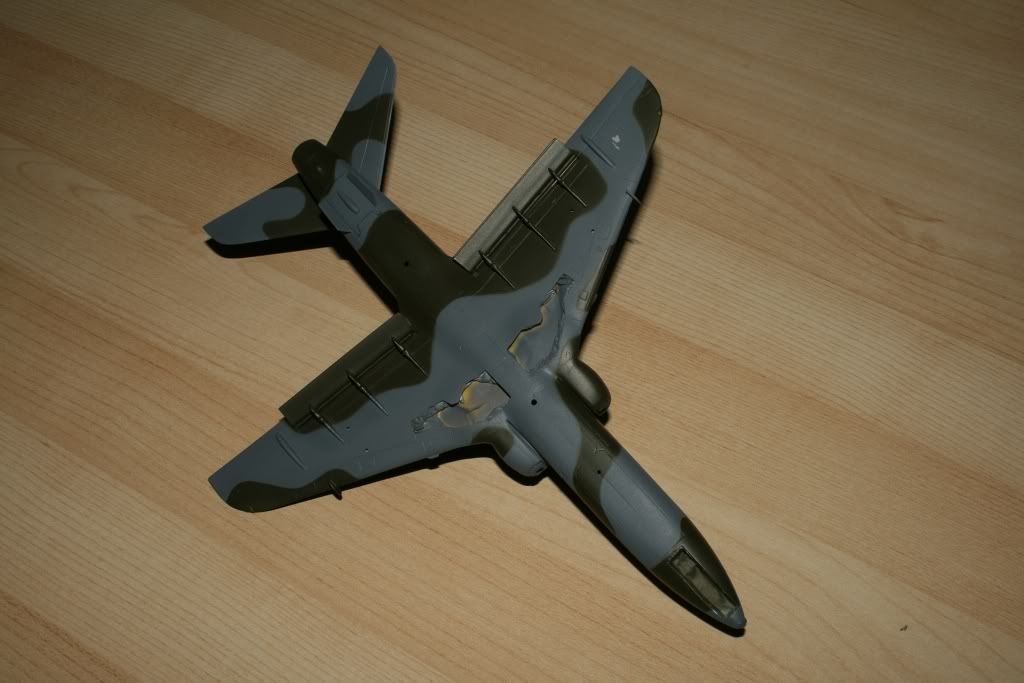
Under the starboard wing another small patch of paint came off.
I suspect if I had primed or pre-sanded the paint would have adhered better but it's not a lot of extra work to just repray some small areas.
When the patches are resprayed, it will need a coat of satin varnish and then I will be applying decals.
In case anyone was wondering about the colours, the grey is Humbrol 164 and the green is Vallejo Model Air 71015 'olive grey'.
Looks beautiful - the grey areas will spray in no problem, but make sure you mask any green within range!
On paint of that standard I'd honestly just go and buy the correct Tamiya clear paints. They are quite useful: if you're into cars I discovered that if you spray them over silver they give an excellent anodised effect.
On paint of that standard I'd honestly just go and buy the correct Tamiya clear paints. They are quite useful: if you're into cars I discovered that if you spray them over silver they give an excellent anodised effect.
dr_gn said:
Looks beautiful - the grey areas will spray in no problem, but make sure you mask any green within range!
On paint of that standard I'd honestly just go and buy the correct Tamiya clear paints. They are quite useful: if you're into cars I discovered that if you spray them over silver they give an excellent anodised effect.
Thanks, the patches have resprayed now and it worked fine.On paint of that standard I'd honestly just go and buy the correct Tamiya clear paints. They are quite useful: if you're into cars I discovered that if you spray them over silver they give an excellent anodised effect.
I did some experiments on some old clear sprue, mixing acrylic paints with klear, the results were not great. I will take your advice and buy the Tamiya paints, the problem is that when I buy supplies from online model shops, I usually end up with another model.
SlipStream77 said:
dr_gn said:
Looks beautiful - the grey areas will spray in no problem, but make sure you mask any green within range!
On paint of that standard I'd honestly just go and buy the correct Tamiya clear paints. They are quite useful: if you're into cars I discovered that if you spray them over silver they give an excellent anodised effect.
Thanks, the patches have resprayed now and it worked fine.On paint of that standard I'd honestly just go and buy the correct Tamiya clear paints. They are quite useful: if you're into cars I discovered that if you spray them over silver they give an excellent anodised effect.
I did some experiments on some old clear sprue, mixing acrylic paints with klear, the results were not great. I will take your advice and buy the Tamiya paints, the problem is that when I buy supplies from online model shops, I usually end up with another model.
Ian Lancs said:
SlipStream77 said:
dr_gn said:
Looks beautiful - the grey areas will spray in no problem, but make sure you mask any green within range!
On paint of that standard I'd honestly just go and buy the correct Tamiya clear paints. They are quite useful: if you're into cars I discovered that if you spray them over silver they give an excellent anodised effect.
Thanks, the patches have resprayed now and it worked fine.On paint of that standard I'd honestly just go and buy the correct Tamiya clear paints. They are quite useful: if you're into cars I discovered that if you spray them over silver they give an excellent anodised effect.
I did some experiments on some old clear sprue, mixing acrylic paints with klear, the results were not great. I will take your advice and buy the Tamiya paints, the problem is that when I buy supplies from online model shops, I usually end up with another model.

It's all dr gn's fault
 , I have the Tamiya paints on order, together with an SU-30MK.
 http://www.academy.co.kr/eng/1p/1p_plaview.asp?pVi...
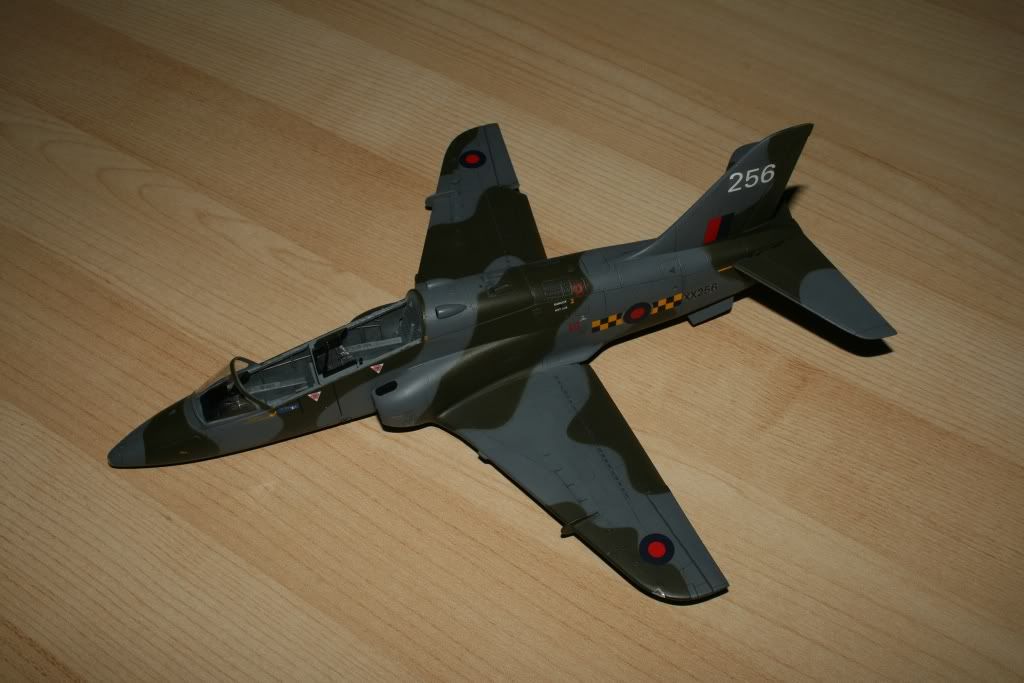
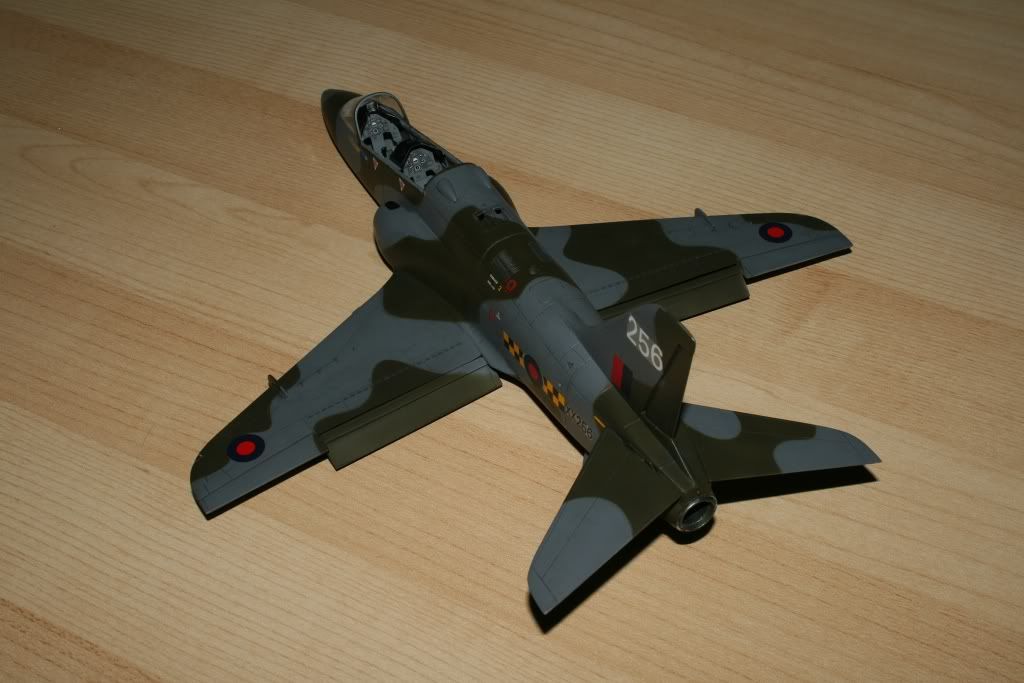
The Hawk's getting closer to completion, all the (kit) decals are on, it has been weathered with Promodeller's and had its last satin coat applied. All masking has now been removed.
I've noticed that where the decals have a lot of clear film, they have silvered, despite having applied a satin varnish coat. In future (no pun intended!) I'm going to use a gloss coat on which to apply decals and I might use some decalfix/microset as well. I had hoped that the final satin coat would reduce the overall sheen and reduce the silvering as well, but it didn't.
Other than fitting the remaining parts, I still have to create some white decals for the canopy frames. Most of them are straight but the central one is curved. I'm going to draw several profiles in Inkscape and print them on paper, then cut them out and see if they fit. Once I get the right shape I will print the outline on white decal paper then carefully cut it out and apply it.
The white canopy outline can be seen here.
http://www.airliners.net/photo/UK---Air/British-Ae...
The nav lights need to be painted but they will have to wait until the paint is delivered.
There are a few tiny areas where paint has been removed by the masking that will need fixing and the Aden gun pod doesn't fit quite flush with the fuselage yet. I should have fixed that before I painted it but I'm hoping a little sanding will solve the problem.

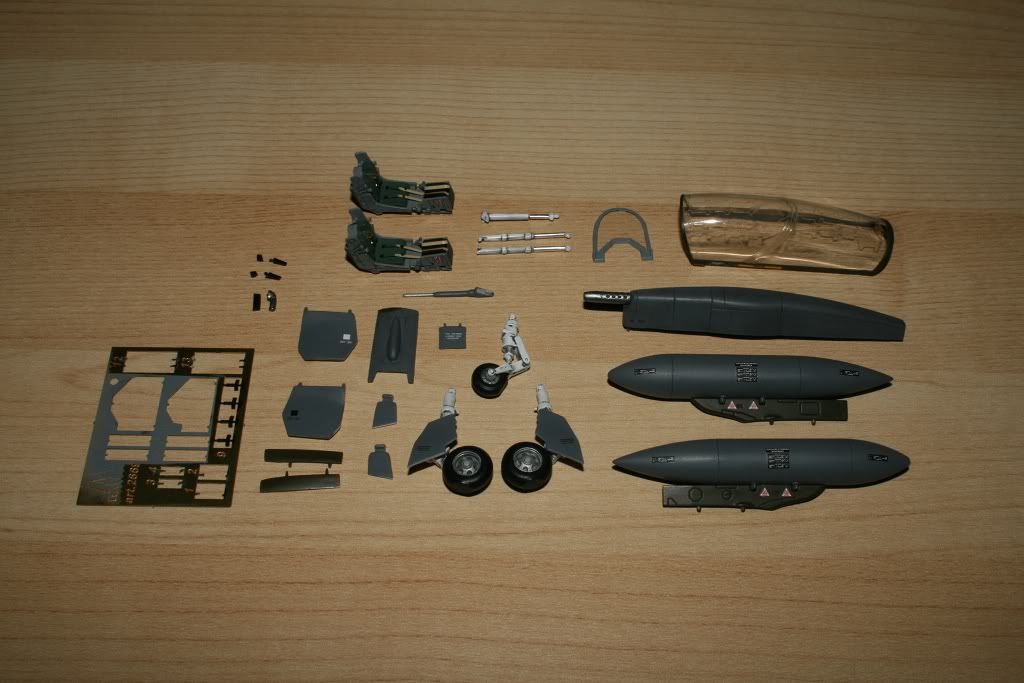
Parts yet to be fitted.
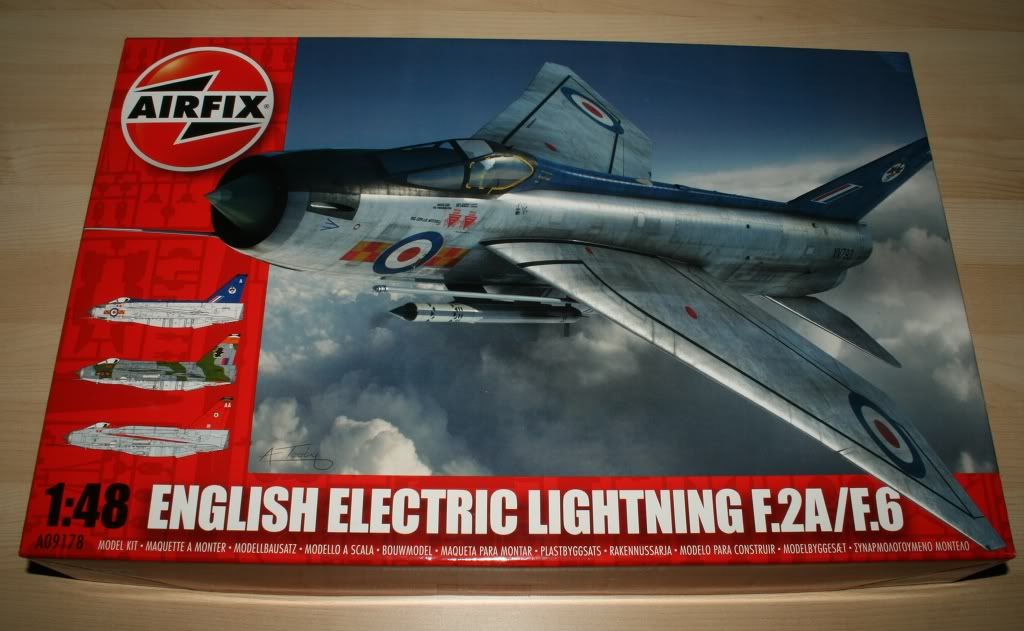
This is the next on the list, to be portrayed as an F6 of 11 Sqn. Binbrook. (In camo of course
)ETA, I have just noticed that I have forgotton to apply the 'No Step' markings! Luckily I won't have to do any remasking, and I will use some decalfix this time and see if it helps.
Very well done, it's looking beautiful.
As you said. you really want to apply decals over gloss rather than satin, and treat the silvering as and when it happens by lifting the decal and brushing Klear underneath. It's caused by air trapped between teh rough satin or matt paint and the decal. What you can try is slicing the film with a scalpel and brushing Klear into the cuts. I tried it on a previous model and it worked OK. It *might* capillary under the film and remove the silvering. On the other hand it *might* end up looking like a dogs cock.
TBH it doesn't spoil the model - probably one of the best model Hawks I've seen, and I love that camo scheme.
Edited by dr_gn on Monday 13th February 00:41
Forum | Scale Models | Top of Page | What's New | My Stuff