advanced scribing help ?
Discussion


steveo3002 said:
ive had to heavily modify a part with car body filler , now when i try to scribe into it i no longer get a crisp edge because chunks on the very edge
any ideas how to tidy it up ? a rounded edge would be acceptable
or roar out the filler and use something else?
I had exactly the problem on my Spitfire rebuild. I gave up and drew the panel lines on after painting.any ideas how to tidy it up ? a rounded edge would be acceptable
or roar out the filler and use something else?
With my Bf109 model, I had no choice but to re-scribe over a large area of hard filler. The only way I found of doing this without crumbling was to use a "Bare Metal Foil" scribing tool, guided by Dymo tape, and using very, very light strokes until the right depth was reached. The guide is just as important as the scribing technique/tool, becasue filler seems to draw the tool away from any given guide.

I was using Milliput BTW. Re-riveting the filler was no problem either provided light pressure was used.
I prefer to use the back of a modelling knife blade to scribe with. The cut is done lightly and with the blade vertical to the scribed surface, marking away from the knife blade cutting edge.
Make sure the scribing is done along a firmly fixed line guide, a thin steel rule is good if there's room to get it on and hopefully tape at least one end down to give you a true guide line.
With practise (50+ years for me) you can get a very precise scribed mark.
Car filler should be OK to get an edge on, probably much like the effect of using Milliput I'd have thought.


Gotcha :yesyes:
if you have the right sized hole to hand why not cut it out of plasticard or even stiff cardboard, locate it where you need it with tape and scribe around within the shape you need?
For a job like that I would probably risk using a round section scriber to allow the rotating motion that will let you go smoothly round the corners. Maybe the spike of a drawing set compass, gently (always scribe gently to remain in control) until deep enough for the look you are after.
As the holes would have a definite 'curved in' look I might even chamfer the finished scribes with a sharp pointed tip of a number 1 Swann Morton blade to give it rounded depth.
Any help to you?
Hope so, I see what you are after, will be nice when done too.
perdu said:
Gotcha :yesyes:
if you have the right sized hole to hand why not cut it out of plasticard or even stiff cardboard, locate it where you need it with tape and scribe around within the shape you need?
For a job like that I would probably risk using a round section scriber to allow the rotating motion that will let you go smoothly round the corners. Maybe the spike of a drawing set compass, gently (always scribe gently to remain in control) until deep enough for the look you are after.
As the holes would have a definite 'curved in' look I might even chamfer the finished scribes with a sharp pointed tip of a number 1 Swann Morton blade to give it rounded depth.
Any help to you?
Hope so, I see what you are after, will be nice when done too.
I don't think he wants to scribe the hole outline - he's filled it up. It's the lines he wants to scribe over the filled hole to blend it to the rest of the panel.if you have the right sized hole to hand why not cut it out of plasticard or even stiff cardboard, locate it where you need it with tape and scribe around within the shape you need?
For a job like that I would probably risk using a round section scriber to allow the rotating motion that will let you go smoothly round the corners. Maybe the spike of a drawing set compass, gently (always scribe gently to remain in control) until deep enough for the look you are after.
As the holes would have a definite 'curved in' look I might even chamfer the finished scribes with a sharp pointed tip of a number 1 Swann Morton blade to give it rounded depth.
Any help to you?
Hope so, I see what you are after, will be nice when done too.
At least that's how I read it.
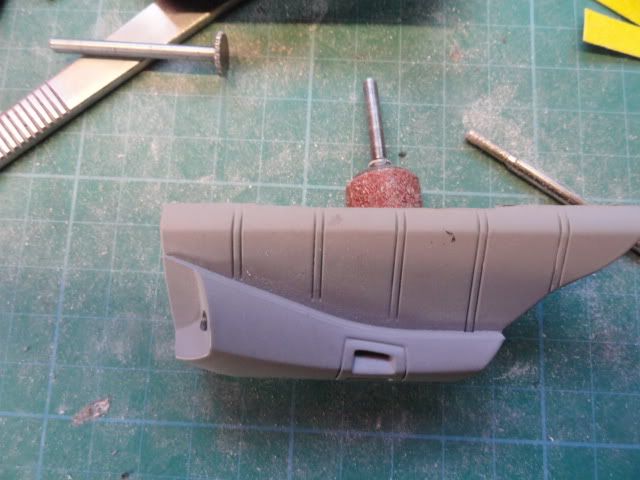
the "handle" part was in the wrong place ...i hacked it out crudley and moved it along to where it looked right, glued it in place then made the surface all flush with body filler
so i have a smooth filler door panel that i need to scribe that square shape with the rounded corners ..edit heres a pic

so i have a smooth filler door panel that i need to scribe that square shape with the rounded corners ..edit heres a pic
Edited by steveo3002 on Monday 16th January 17:07
It's too easy to misdescribe on t'internet when you are a bear of little brain like meself
I mean that as he has the shape he can rescribe it where he wants it by making a template of the hole, sticking it over the filled section and the good section, then scribing inside the template to make the new "cut out" section
I could have done it whilst telling you what I mean
Not rocket science just a small detailing issue
so;
Cut out shape
stick the piece of wotever you cut the shape out of (not the shape you cut out, that's for the bin) on where you need to rescribe, work around the edges of the hole to rescribe what you need. Then remove blanking panel and finish redetailing the interior "leather and plastic handle parts" with gentle work with your modelling knife
looks like quite a fun job, nice motor mate
perdu said:
It's too easy to misdescribe on t'internet when you are a bear of little brain like meself
I mean that as he has the shape he can rescribe it where he wants it by making a template of the hole, sticking it over the filled section and the good section, then scribing inside the template to make the new "cut out" section
I could have done it whilst telling you what I mean
Not rocket science just a small detailing issue
so;
Cut out shape
stick the piece of wotever you cut the shape out of (not the shape you cut out, that's for the bin) on where you need to rescribe, work around the edges of the hole to rescribe what you need. Then remove blanking panel and finish redetailing the interior "leather and plastic handle parts" with gentle work with your modelling knife
looks like quite a fun job, nice motor mate
I think I misunderstood it all. Ah well.I mean that as he has the shape he can rescribe it where he wants it by making a template of the hole, sticking it over the filled section and the good section, then scribing inside the template to make the new "cut out" section
I could have done it whilst telling you what I mean
Not rocket science just a small detailing issue
so;
Cut out shape
stick the piece of wotever you cut the shape out of (not the shape you cut out, that's for the bin) on where you need to rescribe, work around the edges of the hole to rescribe what you need. Then remove blanking panel and finish redetailing the interior "leather and plastic handle parts" with gentle work with your modelling knife
looks like quite a fun job, nice motor mate
heres what i was struggling with
hacked this handle out and moved it
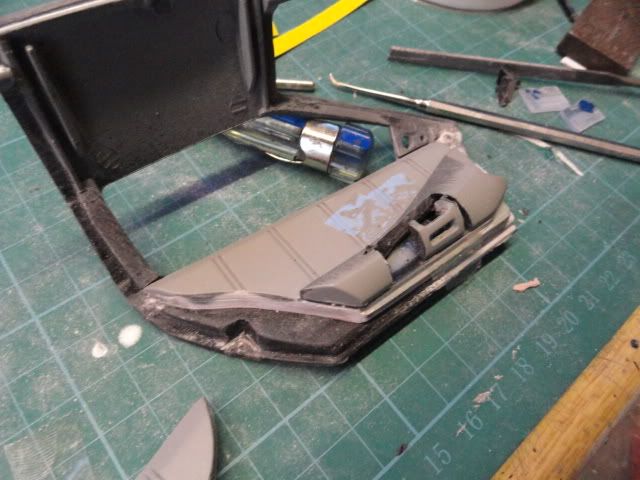
heres the result after rescribing the outline, not 100% pleased with it close up but its okay
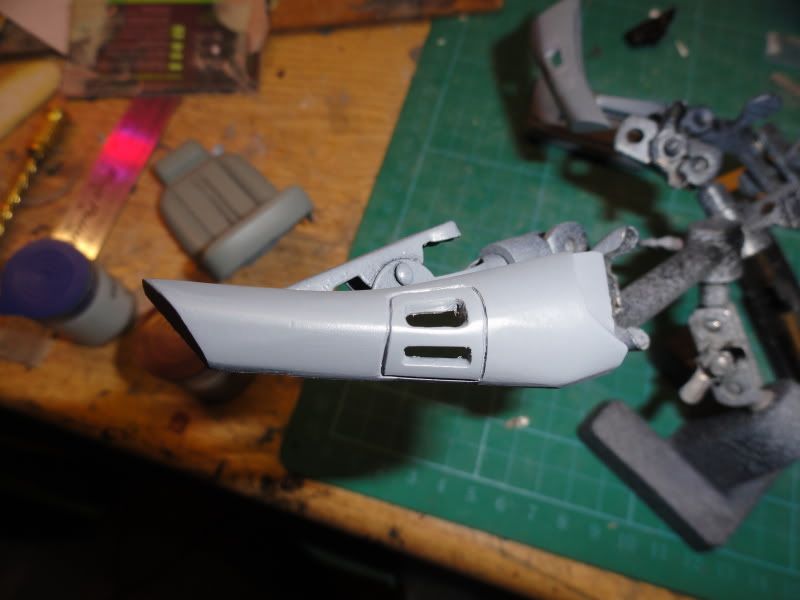
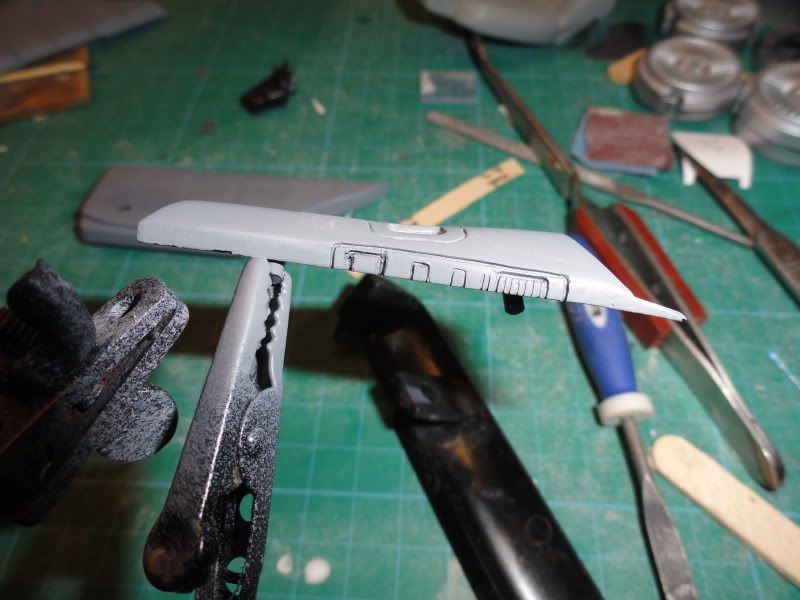
this area was dead smooth yet the real car has switches and a vent along there
, so scribed some detail in , again not thrilled but better than nowt

hacked this handle out and moved it
heres the result after rescribing the outline, not 100% pleased with it close up but its okay
this area was dead smooth yet the real car has switches and a vent along there
, so scribed some detail in , again not thrilled but better than nowt

Forum | Scale Models | Top of Page | What's New | My Stuff