Academy 1:32 Sopwith Camel
Discussion


Inspired in part by Dr_gn's Wingnut Wings SE5a build, I have started a biplane of my own.
This is the Academy 1:32 Camel
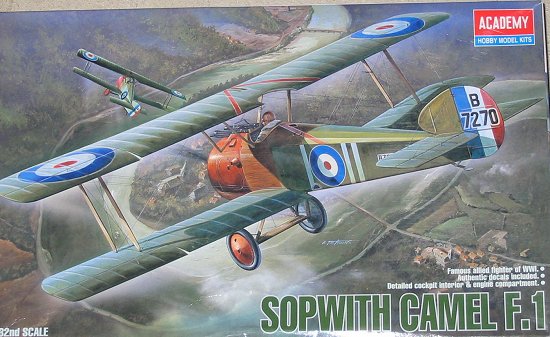
It's a whole different ball game from the SE5a (I imagine) as the kit only cost me £11 and the breakdown of parts looks much simpler than the SE5.
Before I get started, there are a few things to say to anyone expecting this to rival Dr_gn's build.
This is my progress so far (very early stages)

I'm just slapping the first coat of paint on. There's a lot of wood and I want to get the woodgraining right, so tips and tricks please!
I'm pretty pleased with my engine so far (still needs a wash to highlight the detail)

The cockpit will need some attention to differentiate between what I assume is a wooden floor and a wicker seat. At the moment, I am considering different colour washes (darker for wood, lighter for wicker) unless someone else has a better idea.

This is the Academy 1:32 Camel
It's a whole different ball game from the SE5a (I imagine) as the kit only cost me £11 and the breakdown of parts looks much simpler than the SE5.
Before I get started, there are a few things to say to anyone expecting this to rival Dr_gn's build.
- This is my first biplane build ever, so expect a lot of bad language when it comes to the rigging
- It will be totally OOB (unless someone can suggest some very simple, basic scratch-building additions)
- It will be brush painted with Humbrol enamels, unscientifically thinned
==============================
This is my progress so far (very early stages)
I'm just slapping the first coat of paint on. There's a lot of wood and I want to get the woodgraining right, so tips and tricks please!
I'm pretty pleased with my engine so far (still needs a wash to highlight the detail)
The cockpit will need some attention to differentiate between what I assume is a wooden floor and a wicker seat. At the moment, I am considering different colour washes (darker for wood, lighter for wicker) unless someone else has a better idea.
Wingnut Wings have set a whole new level of standards for 1/32 WW1 aircraft so anybody else's models are going to compare unfavourably with them. Having said that, I am sure the Academy kit is the basis for a decent rendition of the Camel in 1/32.
Look forward to seeing progress on this.
Look forward to seeing progress on this.
Marshdweller said:
Inspired in part by Dr_gn's Wingnut Wings SE5a build, I have started a biplane of my own.
This is the Academy 1:32 Camel
It's a whole different ball game from the SE5a (I imagine) as the kit only cost me £11 and the breakdown of parts looks much simpler than the SE5.
Before I get started, there are a few things to say to anyone expecting this to rival Dr_gn's build.
This is my progress so far (very early stages)
I'm just slapping the first coat of paint on. There's a lot of wood and I want to get the woodgraining right, so tips and tricks please!
I'm pretty pleased with my engine so far (still needs a wash to highlight the detail)
The cockpit will need some attention to differentiate between what I assume is a wooden floor and a wicker seat. At the moment, I am considering different colour washes (darker for wood, lighter for wicker) unless someone else has a better idea.
Excellent! (and thanks for the kind words).This is the Academy 1:32 Camel
It's a whole different ball game from the SE5a (I imagine) as the kit only cost me £11 and the breakdown of parts looks much simpler than the SE5.
Before I get started, there are a few things to say to anyone expecting this to rival Dr_gn's build.
- This is my first biplane build ever, so expect a lot of bad language when it comes to the rigging
- It will be totally OOB (unless someone can suggest some very simple, basic scratch-building additions)
- It will be brush painted with Humbrol enamels, unscientifically thinned
==============================
This is my progress so far (very early stages)
I'm just slapping the first coat of paint on. There's a lot of wood and I want to get the woodgraining right, so tips and tricks please!
I'm pretty pleased with my engine so far (still needs a wash to highlight the detail)
The cockpit will need some attention to differentiate between what I assume is a wooden floor and a wicker seat. At the moment, I am considering different colour washes (darker for wood, lighter for wicker) unless someone else has a better idea.
I'm not sure what level of experience you're at, but good work so far. Re, the wicker: personally I'd now add a dark wash, seal it with Klear and then use some weathering powders to bring out the definition a bit more before a final coat of satin varnish. Having said that, the cockpit opening looks to be so small that much of your work will be invisible. Same with the engine - good work so far. Again, a dark wash & powders etc, as for the wicker.
How are you going to rig it? Well worth thinking about it at this stage. I went with eyelets, ferrules and elastic thread, and found it pretty easy. It does need forward planning, and patience:
http://www.ww1aircraftmodels.com/page6.html
This website is very good for WW1 techniques:
http://www.ww1aircraftmodels.com/page22.html
Keep up the progress!
Marshdweller said:
My Camel cost me the grand total of £10.99. It seems that Hannants are one of the few places to sell WNW kits over here, and they seem to be taking a 1:1 approach to the exchange rate.
Yes, it was Hannants who had them for sale at Cosford, and yes it is almost 1:1 USD (as listed): GBP at those prices. I think it works out at about £45 is you buy direct - assuming no taxes to pay.As to the rigging, the instructions give quite clear steps to rigging the model. They even provide some black thread for the purpose (which pleased and impressed me!).
The general technique is to tie the thread around a toggle (made of stretched sprue according to their suggestion, though I will probably use small sections of metal wire) to anchor it inside the fuselage before superglueing the other end in a hole at the other end of the rigging. The instructions make it look deceptively simple, though one part of their plan is for you to glue the thread to the point of a small 'spur' on the control surfaces (I'll try to post pics to illustrate this when I reach this stage). There almost certainly won't be any microscopic turnbuckles on this build!
Proceedings have halted temporarily. I am awaiting a delivery of detail brushes to help with my painting of the interior (my previous fine brush died a little while ago) and also plucking up the courage for the rigging.
As for my level of ability experience, I'd put myself down as a novice really. I'm familiar with washes and dry-brushing, sanding, filling, scribing etc. but I don't really try anything more adventurous than that. I'm also working on a budget and with pretty basic tools, so no spray booth for me (for the time being at least).
Marshdweller said:
As to the rigging, the instructions give quite clear steps to rigging the model. They even provide some black thread for the purpose (which pleased and impressed me!).
The general technique is to tie the thread around a toggle (made of stretched sprue according to their suggestion, though I will probably use small sections of metal wire) to anchor it inside the fuselage before superglueing the other end in a hole at the other end of the rigging. The instructions make it look deceptively simple, though one part of their plan is for you to glue the thread to the point of a small 'spur' on the control surfaces (I'll try to post pics to illustrate this when I reach this stage). There almost certainly won't be any microscopic turnbuckles on this build!
Proceedings have halted temporarily. I am awaiting a delivery of detail brushes to help with my painting of the interior (my previous fine brush died a little while ago) and also plucking up the courage for the rigging.
As for my level of ability experience, I'd put myself down as a novice really. I'm familiar with washes and dry-brushing, sanding, filling, scribing etc. but I don't really try anything more adventurous than that. I'm also working on a budget and with pretty basic tools, so no spray booth for me (for the time being at least).
I think I understand the rigging concept, although I'm not sure how it applies to the wing-wing rigging? Do you drill small holes in the wing and superglue the thread into them?The general technique is to tie the thread around a toggle (made of stretched sprue according to their suggestion, though I will probably use small sections of metal wire) to anchor it inside the fuselage before superglueing the other end in a hole at the other end of the rigging. The instructions make it look deceptively simple, though one part of their plan is for you to glue the thread to the point of a small 'spur' on the control surfaces (I'll try to post pics to illustrate this when I reach this stage). There almost certainly won't be any microscopic turnbuckles on this build!
Proceedings have halted temporarily. I am awaiting a delivery of detail brushes to help with my painting of the interior (my previous fine brush died a little while ago) and also plucking up the courage for the rigging.
As for my level of ability experience, I'd put myself down as a novice really. I'm familiar with washes and dry-brushing, sanding, filling, scribing etc. but I don't really try anything more adventurous than that. I'm also working on a budget and with pretty basic tools, so no spray booth for me (for the time being at least).
I would think it will be extremely difficult to rig it this way without getting sags in the thread. As I said before, elasticated thread seems the best way forward (although many WW1 modellers sucessfully use normal thread). If you are on a tight budget, I can send you some spare to try? It's called Ez Line.
I'd also consider getting some ultra-fine flat tweezers. Without these, it's no exaggeration to say that I could not have rigged the SE.5a.
dr_gn said:
I think I understand the rigging concept, although I'm not sure how it applies to the wing-wing rigging? Do you drill small holes in the wing and superglue the thread into them?
I would think it will be extremely difficult to rig it this way without getting sags in the thread. As I said before, elasticated thread seems the best way forward (although many WW1 modellers sucessfully use normal thread). If you are on a tight budget, I can send you some spare to try? It's called Ez Line.
I'd also consider getting some ultra-fine flat tweezers. Without these, it's no exaggeration to say that I could not have rigged the SE.5a.
The wings are pre-drilled (you might be able to see it in one of the photos in the original post, and the rigging is done with only a small number of individual threads, so you are effectively stitching the wings loosely together. (This may be how all model biplanes are done....)I would think it will be extremely difficult to rig it this way without getting sags in the thread. As I said before, elasticated thread seems the best way forward (although many WW1 modellers sucessfully use normal thread). If you are on a tight budget, I can send you some spare to try? It's called Ez Line.
I'd also consider getting some ultra-fine flat tweezers. Without these, it's no exaggeration to say that I could not have rigged the SE.5a.
Your offer is extremely generous, I'm quite touched. However I should clarify my "working on a budget" comment - the budget is self-imposed. I'm astonished when I see people spending large amounts of money on tools, materials, aftermarket accessories and reference material. Of course, it's their money and if they can afford it it's up to them how they spend it. However, something like some EZ line is well within my wallet's capacity and since I intend to make more biplanes in future, it's probably a wise investment, especially as the kit supplied thread isn't elastic and once the fuselage is together there's no going back so I have to get the right thread first time.
I see that Little Cars do EZ line, but is there anywhere else you know of?
As for the model itself, I hope to make some progress this week. I was a little sceptical of the colours suggested in the instructions for the cockpit, until I saw this photo posted on Facebook by Kermit Weeks:

Admittedly, it's a Sopwith Snipe cockpit, but the colours match the instructions.
However, The Vintage Aviator put this photo online, of a Camel cockpit:

Interior green?!
The kit also seems to be lacking anything behind the instrument panel until about halfway under the guns. Does anyone know if this is realistic?
That cockpit photo doesn't look right to me (not that I'm an expert on Sopwith Camels!).
I got my EzLine from Little Cars, just do a Google search for it.
I understand the budget thing - it is very easy to get carried away with things that aren't essential. I'm guilty of getting bogged down in details that aren't always that apparent when the model is finished. Still, I enjoy it.
I got my EzLine from Little Cars, just do a Google search for it.
I understand the budget thing - it is very easy to get carried away with things that aren't essential. I'm guilty of getting bogged down in details that aren't always that apparent when the model is finished. Still, I enjoy it.
A little more progress today. I popped to Hobbycraft and invested in a small tube of Burnt Sienna oil paint, with the intention of having a go at the woodgrain technique, with little hope that it would actually work. However, first time ever, hey presto! It seems a practically idiot-proof technique (though I do have to wait for it to dry....)


Excellent woodgrain detail.
Beware, it can take a *long* time to dry (as in weeks), so it might be worth painting a few test pieces that you can try from time to time to see how it's drying. I was using "Winton" oil paint BTW.
I ended up repainting mine several times becasue the oils weren;t fully dry, and they just lifted off after overcoating with varnish (when masking).
It's looking a little mahogany-esque to me. Maybe this was built for a very rich pilot? 
I would probably go for a slightly lighter shade of oil paint next time, but I'm very pleased with how easy the effect was to recreate. However, I now have to wait for it to dry, which I think is the key part of the process from what I've read on other builds.
I would probably go for a slightly lighter shade of oil paint next time, but I'm very pleased with how easy the effect was to recreate. However, I now have to wait for it to dry, which I think is the key part of the process from what I've read on other builds.
If you haven't already found it this gives some useful pics of various Camels.
http://www.wwi-models.org/Photos/Bri/SopCamel/
http://www.wwi-models.org/Photos/Bri/SopCamel/
Forum | Scale Models | Top of Page | What's New | My Stuff