Felting shed roof - confused!
Discussion


Hi all
Really appreciate any thoughts.
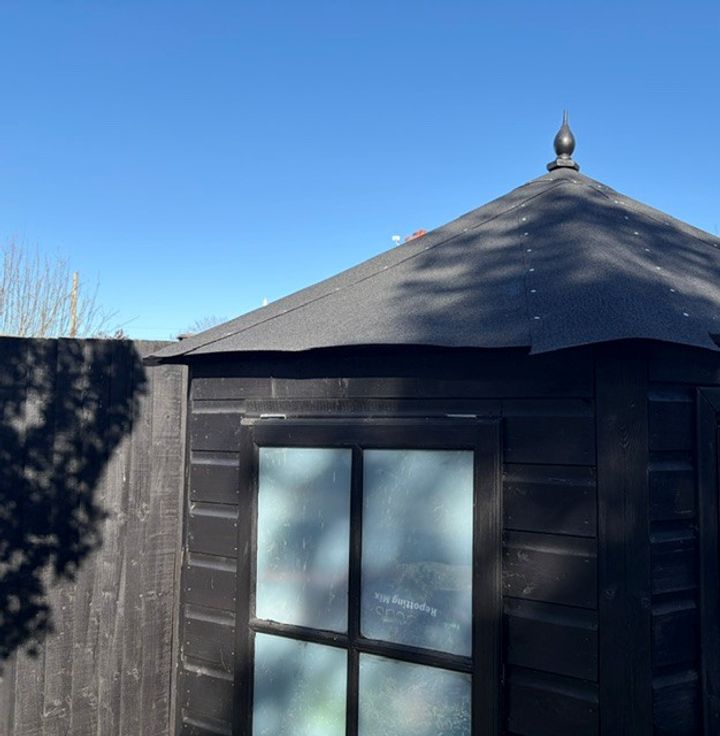
So I have a hexagon shed and have replaced the roof felt. However, I'm struggling for a method of fixing the felt back under the overhang if that makes sense?
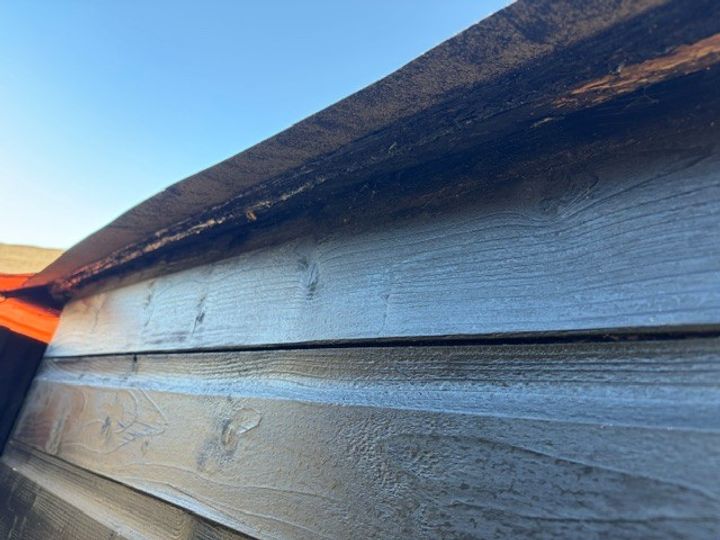
I went to tuck the felt under and nail, but given the angle/no space I cannot get any nails in!
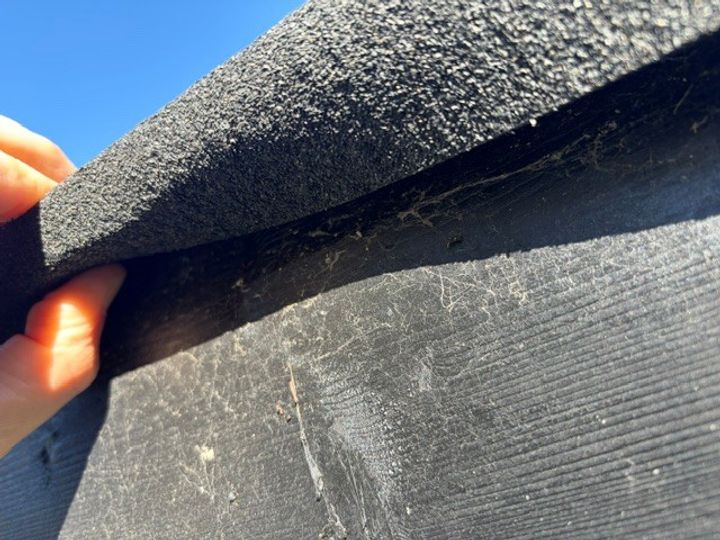
Thought of using no nails or similar, but again, given space, I could not easily clamp while setting and also the underside of the felt has some normal felt adhesive on it which might stop this from working.
I tried a staple gun, but no access and probably wouldn't last I guess anyway!
Really appreciated!
Really appreciate any thoughts.
So I have a hexagon shed and have replaced the roof felt. However, I'm struggling for a method of fixing the felt back under the overhang if that makes sense?
I went to tuck the felt under and nail, but given the angle/no space I cannot get any nails in!
Thought of using no nails or similar, but again, given space, I could not easily clamp while setting and also the underside of the felt has some normal felt adhesive on it which might stop this from working.
I tried a staple gun, but no access and probably wouldn't last I guess anyway!
Really appreciated!
You're not meant to tuck it under, that leads drips to run back to the wall.
Roofing nail goes into the end grain, between your thumb and finger where you are pinching the felt in the last photo.
The raw edge then hangs down to form a drip edge.
You can trim it carefully to neaten, but not too far.
Roofing nail goes into the end grain, between your thumb and finger where you are pinching the felt in the last photo.
The raw edge then hangs down to form a drip edge.
You can trim it carefully to neaten, but not too far.
M11rph said:
You're not meant to tuck it under, that leads drips to run back to the wall.
Roofing nail goes into the end grain, between your thumb and finger where you are pinching the felt in the last photo.
The raw edge then hangs down to form a drip edge.
You can trim it carefully to neaten, but not too far.
This, or use a batten along that edge to secure the felt if you're feeling fancy.Roofing nail goes into the end grain, between your thumb and finger where you are pinching the felt in the last photo.
The raw edge then hangs down to form a drip edge.
You can trim it carefully to neaten, but not too far.
Just for a shed, some galvanised clout nails like you used on the hips, making sure the felt hangs below the timber batten as said above, or as mentioned a length of timber screwed to the face of the felt, it won’t last forever there but easy enough to replace.
A bit late now but if you don’t want to see nails on the bottom edge, a welted drip detail was the way to go, nail the felt then fold it back over itself, hiding the nails. Bit OTT for a shed though!
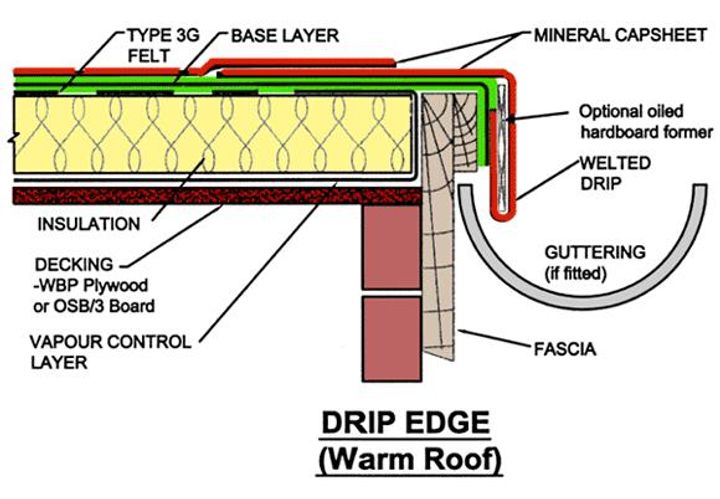
A bit late now but if you don’t want to see nails on the bottom edge, a welted drip detail was the way to go, nail the felt then fold it back over itself, hiding the nails. Bit OTT for a shed though!
Forum | Homes, Gardens and DIY | Top of Page | What's New | My Stuff