
Renault Trafic III 1.6 115 dci Day Van
Discussion


Recently bought this with a view of eventually turning it into a day van.
Previous carpenters van, few marks and scrapes.


First job was a service
7ltr Comma Eco-R 5w30
Mann Fuel Filter
Mann Oil Filer
Corteco Air Filter
Sump plug and washer
Pollen filter (wasn't used as no pollen filter in my van)


Previous carpenters van, few marks and scrapes.
First job was a service
7ltr Comma Eco-R 5w30
Mann Fuel Filter
Mann Oil Filer
Corteco Air Filter
Sump plug and washer
Pollen filter (wasn't used as no pollen filter in my van)
From using the van i have noted the following issues;
I noticed the van struggles with the first start of the day, subsequent starts of the day are on the button.
Reading the codes i could see
'DTC038096 Preheating unit diagnostic connection. Fault alerted via the control unit.'
Following a bit of research, glow plugs were the likely issue.
Only successfully removed 3 of the 4
glow plugs, however testing the resistance of the cylinder 3 glow plug it seemed fine. This did not resolve my DTC error.
The next port of call was the glow plug relay as it was relatively inexpensive at £25.
Further investigations confirmed that all glow plugs were getting 2.6v via using my TopDon code reader which correlates with what i had been told on the owners club, that each glow plug should receive a small voltage for a few seconds.
Also cleaned up the battery connections to rule this out.


Investigations into this are ongoing, i will endeavour to get cylinder 3 glow plug out for completeness.
Given the time of year with higher ambient temps, the glow plug error could not be causing the poor start. I will investigate the poor first start outside of this DTC.
- poor first start
- diesel fumes in the cabin
I noticed the van struggles with the first start of the day, subsequent starts of the day are on the button.
Reading the codes i could see
'DTC038096 Preheating unit diagnostic connection. Fault alerted via the control unit.'
Following a bit of research, glow plugs were the likely issue.
Only successfully removed 3 of the 4
glow plugs, however testing the resistance of the cylinder 3 glow plug it seemed fine. This did not resolve my DTC error.
The next port of call was the glow plug relay as it was relatively inexpensive at £25.
Further investigations confirmed that all glow plugs were getting 2.6v via using my TopDon code reader which correlates with what i had been told on the owners club, that each glow plug should receive a small voltage for a few seconds.
Also cleaned up the battery connections to rule this out.
Investigations into this are ongoing, i will endeavour to get cylinder 3 glow plug out for completeness.
Given the time of year with higher ambient temps, the glow plug error could not be causing the poor start. I will investigate the poor first start outside of this DTC.
I also have a smell of fumes in the cabin when driving.
Initial research online sees the EGR cooler being suggested as the fault.
However i dont think this is the case, as with a bit of video investigation I can see a visible puff of smoke on the first startup of the day (with extended cranking)
between the turbo/DPF join.
This could be a potential PITA as i understand to remove the DPF the subframe needs dropping.
I have also noticed some oil residue down the back of the block originating from the intercooler hose, combined with a turbo whistle (which initially led me to the EGR cooler as this is a symptom of that). I hope the turbo is not at fault.
The van is booked into a local specialist for investigation/diagnosis around this smell of fumes.
Initial research online sees the EGR cooler being suggested as the fault.
However i dont think this is the case, as with a bit of video investigation I can see a visible puff of smoke on the first startup of the day (with extended cranking)
between the turbo/DPF join.
This could be a potential PITA as i understand to remove the DPF the subframe needs dropping.
I have also noticed some oil residue down the back of the block originating from the intercooler hose, combined with a turbo whistle (which initially led me to the EGR cooler as this is a symptom of that). I hope the turbo is not at fault.
The van is booked into a local specialist for investigation/diagnosis around this smell of fumes.
Fast forward a little,
I had the Trafic in my local specialist who diagnosed a turbo oil leak and an exhaust leak between the turbo and DPF.
Whilst in, i had him look at the poor first start, the decision was made to replace the glow plugs with NGK items (he also got cylinder 3 out) which dramatically improved the poor first start!
The turbo and oil feed along with oil and filter was replaced to fix the turbo oil leak.
So after spending a few ££, the poor first start issue is resolved and no more exhaust gas leak.
The van runs great, i use it as a car for daily transport, pulls well and returns 40+ mpg
I had the Trafic in my local specialist who diagnosed a turbo oil leak and an exhaust leak between the turbo and DPF.
Whilst in, i had him look at the poor first start, the decision was made to replace the glow plugs with NGK items (he also got cylinder 3 out) which dramatically improved the poor first start!
The turbo and oil feed along with oil and filter was replaced to fix the turbo oil leak.
So after spending a few ££, the poor first start issue is resolved and no more exhaust gas leak.
The van runs great, i use it as a car for daily transport, pulls well and returns 40+ mpg
With the mechanicals sorted, it was time to look at making some load area changes
At this stage I am planning to have
Unscrewed wood from rear of van side and floor, came across some rounded bolts as-well as some surface rust on the floor.
Leak evident which had caused some of the plywood floor edges to deteriorate. The flooring will be replaced


At this stage I am planning to have
- Bed/seating
- Toilet
- Basic cooking surface
- Power source
- Laptop Table
- Fridge
- Diesel heater
Unscrewed wood from rear of van side and floor, came across some rounded bolts as-well as some surface rust on the floor.
Leak evident which had caused some of the plywood floor edges to deteriorate. The flooring will be replaced
4.Fit reversing camera
The van has non-working reversing sensors, so reversing really was guesswork - a reversing camera was desperately needed.
The reversing camera was hastily fitted and the wiring will be tidied later, this was powered from the cigarette lighter with a push button switch which allows me to easily toggle the camera on/off.


The van has non-working reversing sensors, so reversing really was guesswork - a reversing camera was desperately needed.
The reversing camera was hastily fitted and the wiring will be tidied later, this was powered from the cigarette lighter with a push button switch which allows me to easily toggle the camera on/off.
redandwhite said:
3. Locate load area leaks/seal
These were evident around a welded plate close to the rear roof bars, sealed these up from inside the load area, also removed the roof bars and sealed them from the outside too.
So have you now trapped some water between the two points you resealed?These were evident around a welded plate close to the rear roof bars, sealed these up from inside the load area, also removed the roof bars and sealed them from the outside too.

12/11/26 update
Document the rest of the changes to bring up to current day
6.Insulation
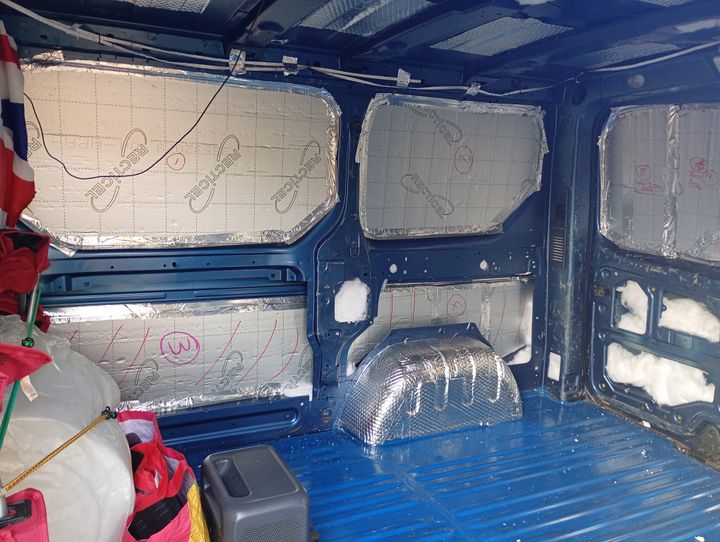
25mm PIR board supplemented with recycled plastic bottle insulation was my approach.
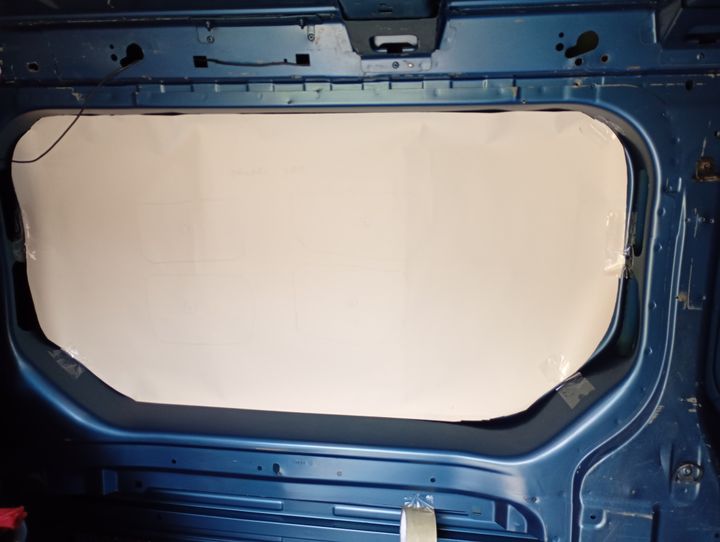
I made some insulation board templates using an old roll of wallpaper cut to shape.
once the templates were complete, these were transferred to the PIR board, traced round and the sections cut out.
The PIR board was applied to the load area cut outs using sikaflex ebt+ with silver foil tape around the circumference.
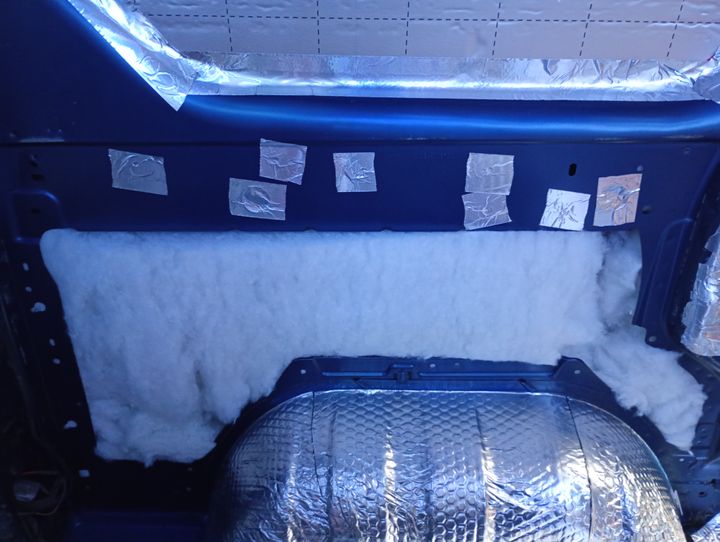
Recycled plastic bottle insulation was pushed into all gaps.
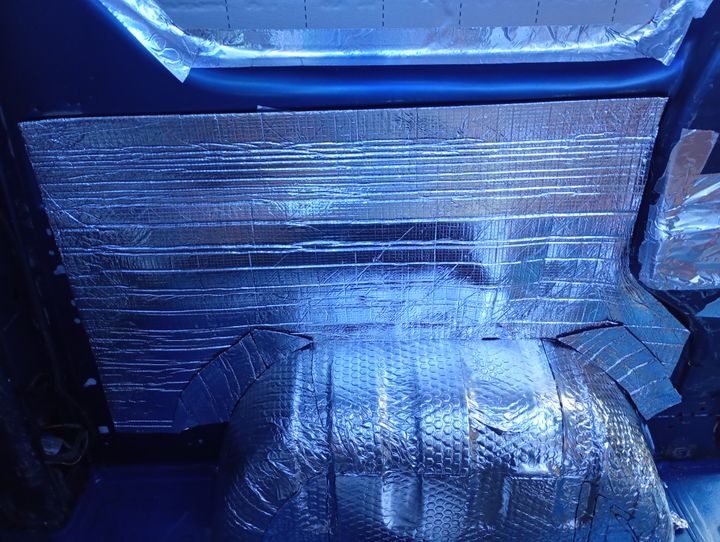
Dodo Thermoliner was then applied to the roof and over the plastic bottle insulation in the side cavities
Document the rest of the changes to bring up to current day
6.Insulation
25mm PIR board supplemented with recycled plastic bottle insulation was my approach.
I made some insulation board templates using an old roll of wallpaper cut to shape.
once the templates were complete, these were transferred to the PIR board, traced round and the sections cut out.
The PIR board was applied to the load area cut outs using sikaflex ebt+ with silver foil tape around the circumference.
Recycled plastic bottle insulation was pushed into all gaps.
Dodo Thermoliner was then applied to the roof and over the plastic bottle insulation in the side cavities
7. Carpeting
I went for black carpet on the metal and grey on the plywood, I took the approach of fully carpeting the metal in the areas that would not be seen when the plywood was refitted, feeling this would give a cleaner finish.
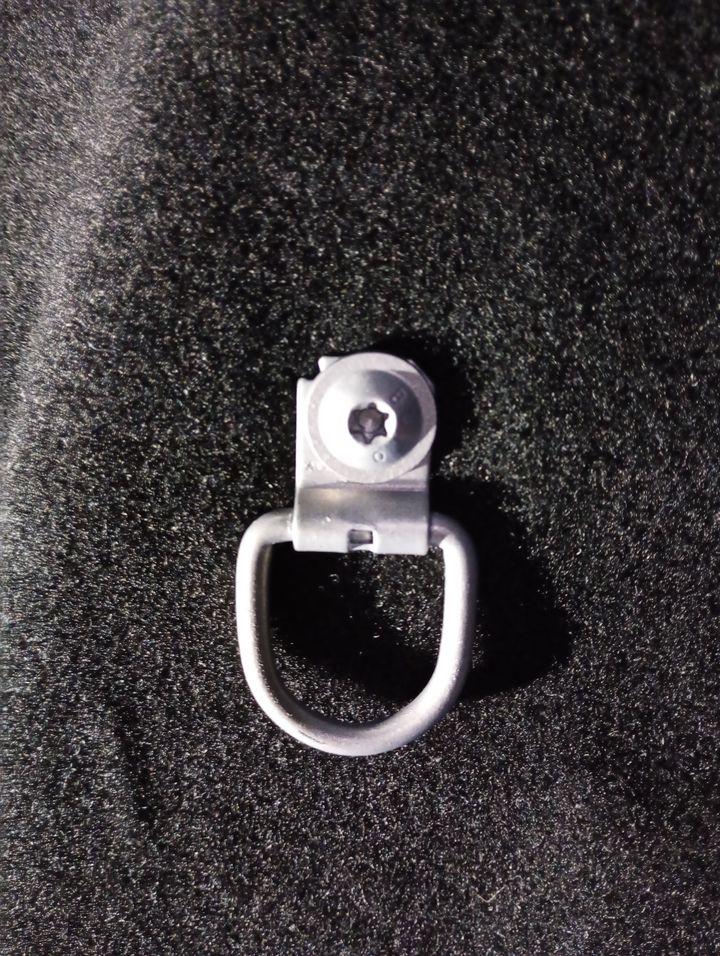
I took the opportunity of repainting the tie hooks in some volvo silver i had lying around.
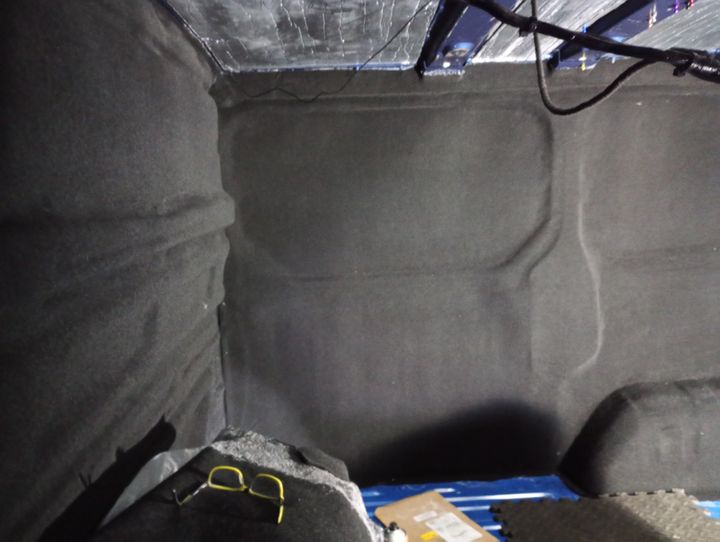
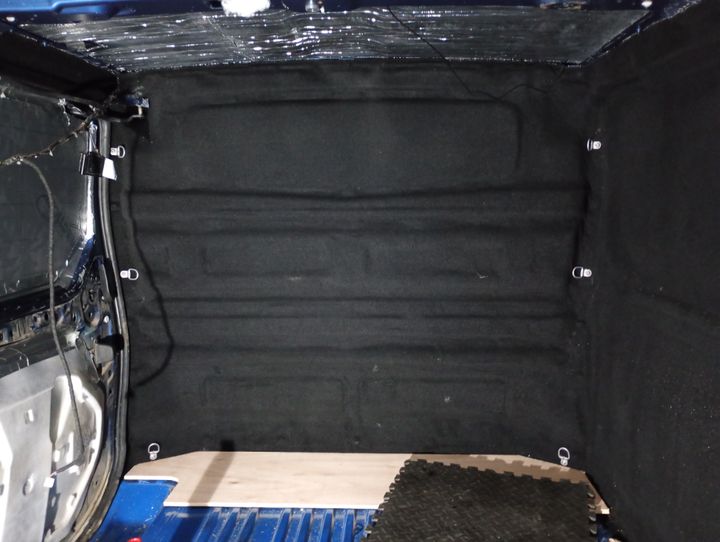
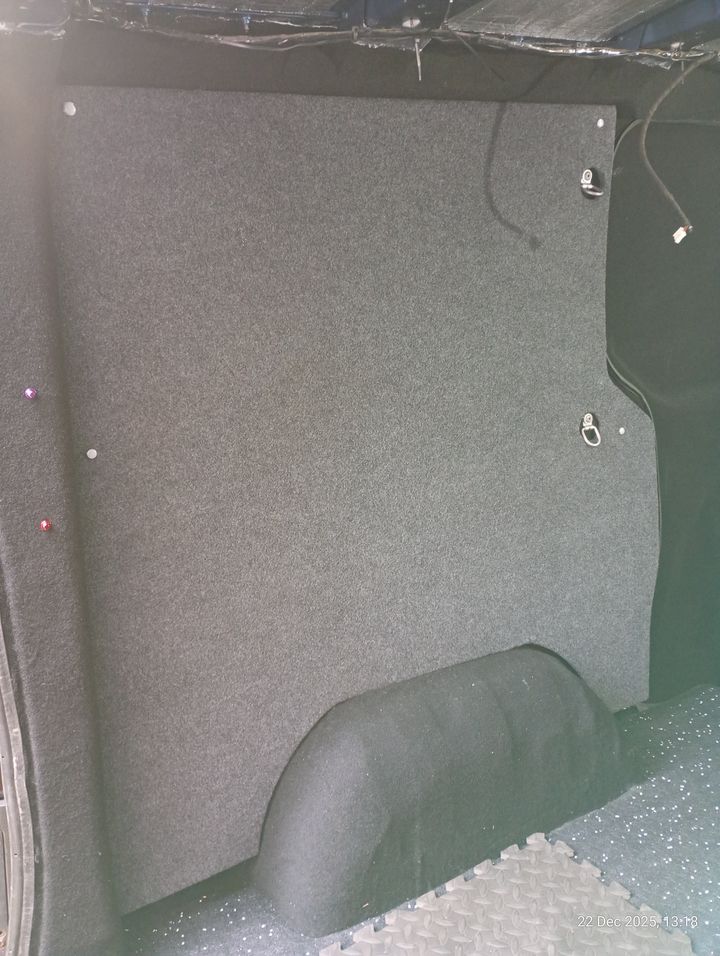
I went for black carpet on the metal and grey on the plywood, I took the approach of fully carpeting the metal in the areas that would not be seen when the plywood was refitted, feeling this would give a cleaner finish.
I took the opportunity of repainting the tie hooks in some volvo silver i had lying around.
8. New ply floor
I opted to replace the 9mm ply with 12mm ply for more robustness, the 9mm ply had some water damage around the rear edges where there had been water ingress previously.
Annoyingly the floor would be made up of 3 pieces, cutting with a jigsaw took some practice. Once the templates were cut out, they fit nice and snug.
Before laying the ply, the next step was to panel wipe the floor, fill any screw holes from previous floor fitting and insulate the floor using 7mm insulation.
Floor was bonded down (no screws!), with additional 9mm support ply for around the sliding door area. Lots of weighty items were placed on it overnight.
Floor was finished with some hardwearing vinyl floorcovering in black with silver flecks
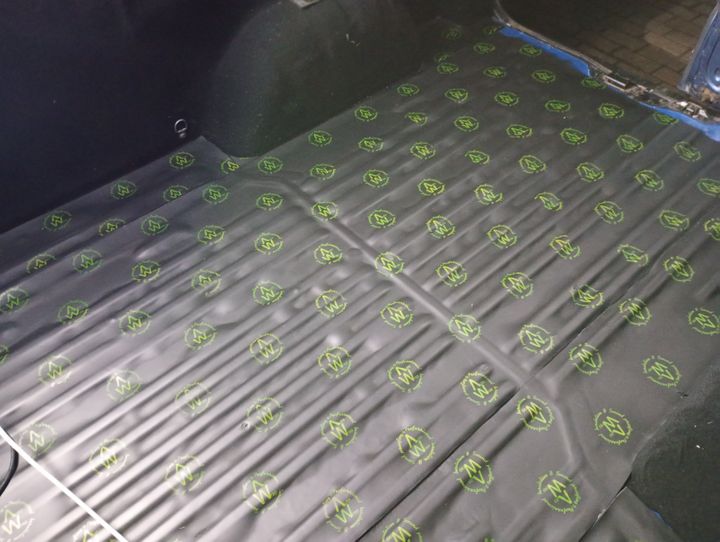
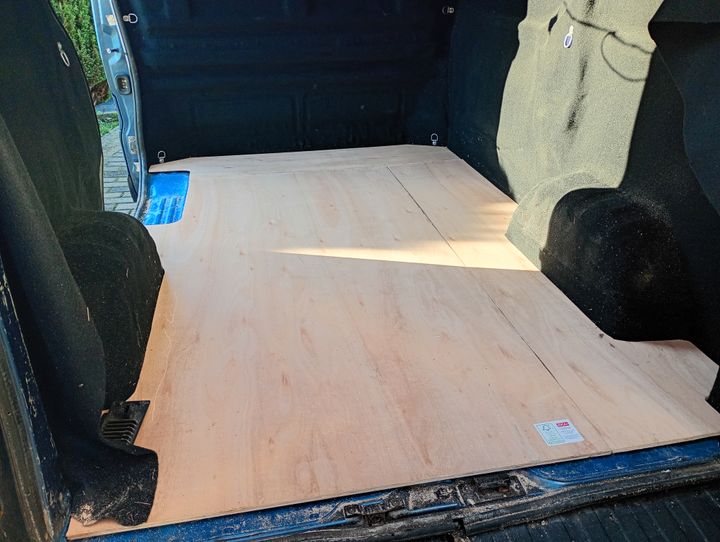
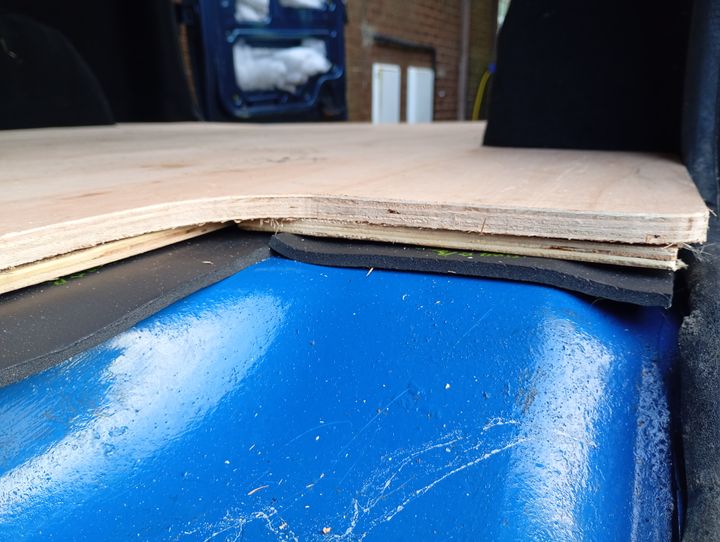
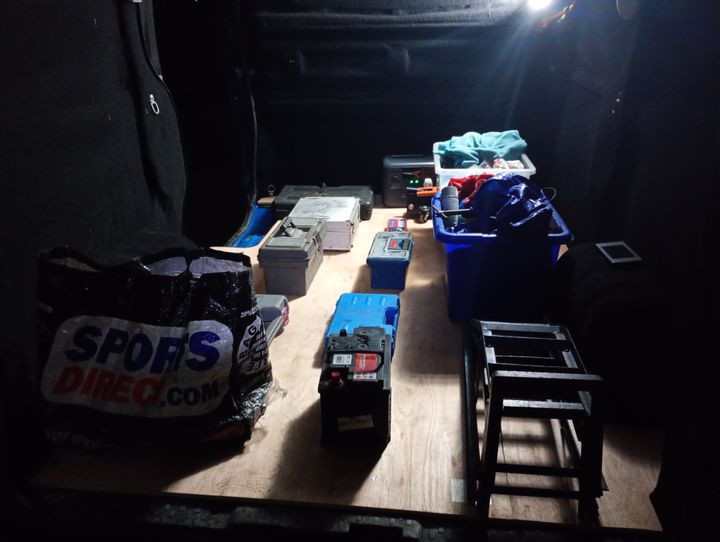
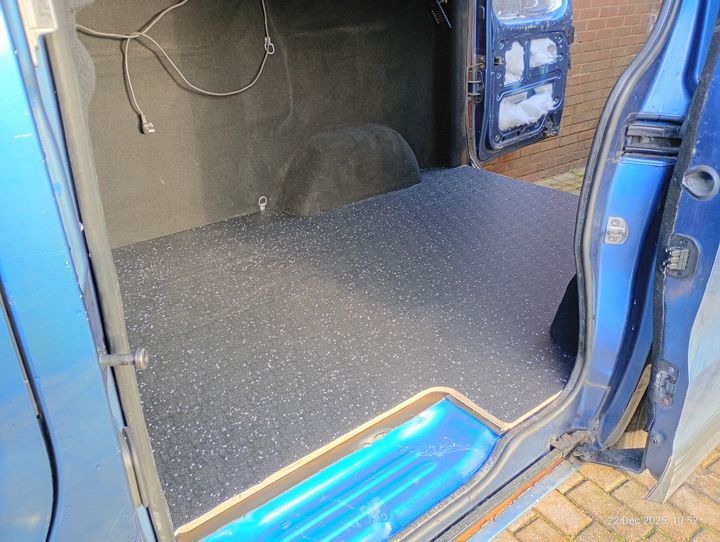
I opted to replace the 9mm ply with 12mm ply for more robustness, the 9mm ply had some water damage around the rear edges where there had been water ingress previously.
Annoyingly the floor would be made up of 3 pieces, cutting with a jigsaw took some practice. Once the templates were cut out, they fit nice and snug.
Before laying the ply, the next step was to panel wipe the floor, fill any screw holes from previous floor fitting and insulate the floor using 7mm insulation.
Floor was bonded down (no screws!), with additional 9mm support ply for around the sliding door area. Lots of weighty items were placed on it overnight.
Floor was finished with some hardwearing vinyl floorcovering in black with silver flecks
9. Kitchen
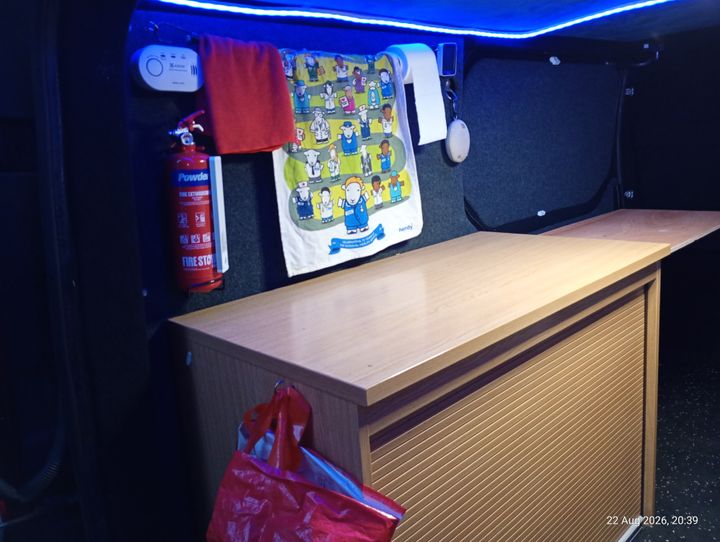
I found this tambor unit for free on FB marketplace with a view of trimming the height down to fit inside the load area. The unit is very sturdy and seems of good quality.
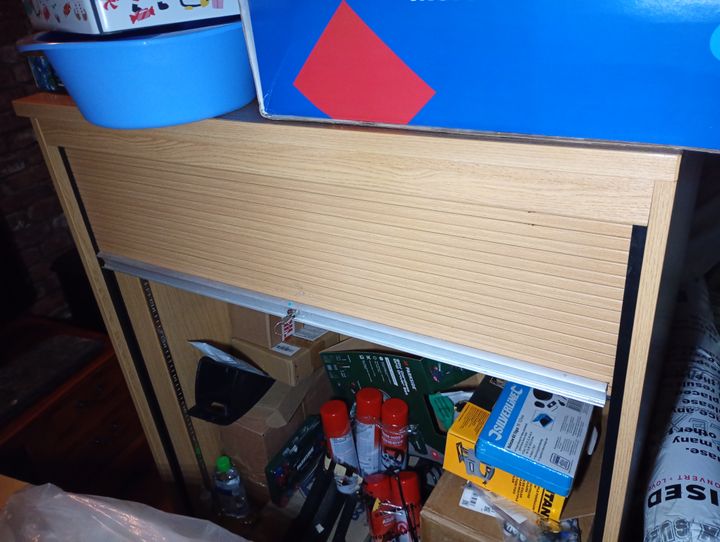
Cutting it down to size was a messy affair, as i didn't yet have the bed in place to compare against - i mirrored the height of my dining room table for height (the bed will be the same height as the dining room chairs).
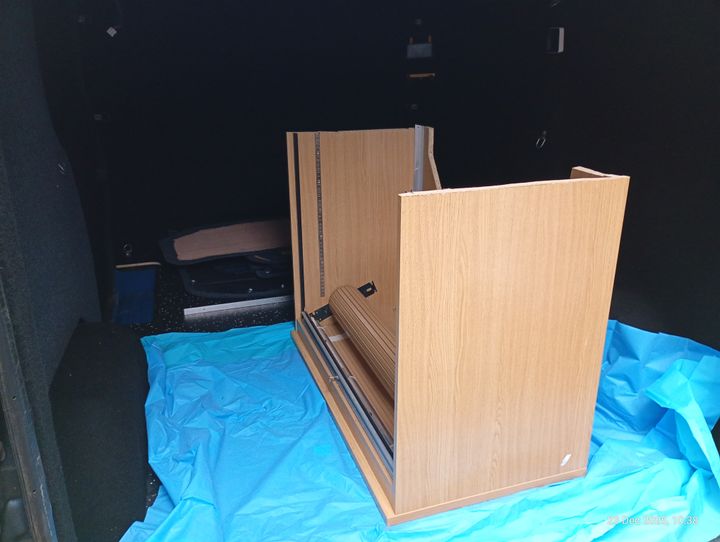
Fitted and looking great
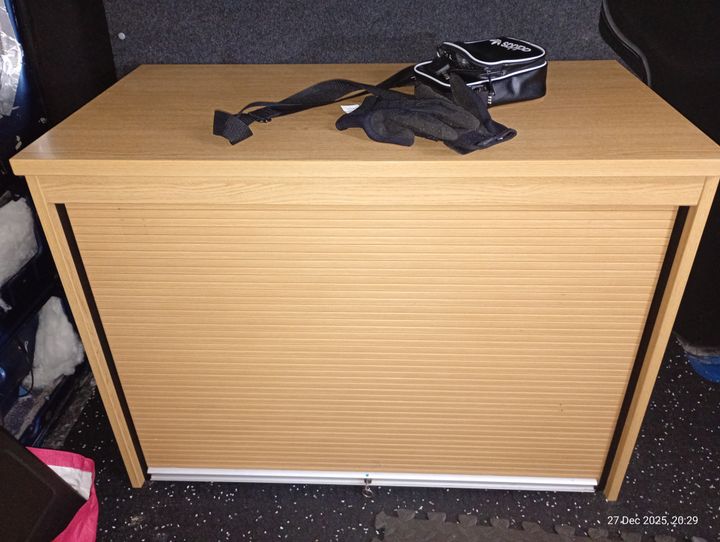
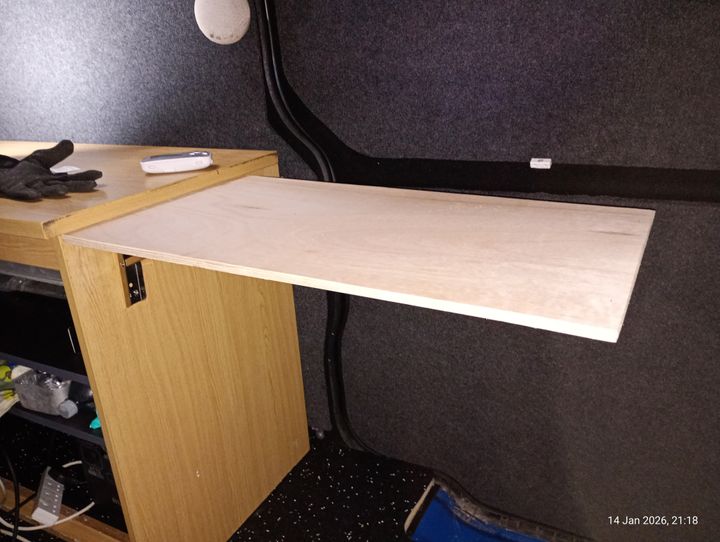
I added a folding shelf to the sliding door side
I found this tambor unit for free on FB marketplace with a view of trimming the height down to fit inside the load area. The unit is very sturdy and seems of good quality.
Cutting it down to size was a messy affair, as i didn't yet have the bed in place to compare against - i mirrored the height of my dining room table for height (the bed will be the same height as the dining room chairs).
Fitted and looking great
I added a folding shelf to the sliding door side
10. Seating/bed
With the kitchen fitted, I needed somewhere to sit and liked the idea of a single bed that can slide out to a double.
After watching a few youtube vids, I had a plan
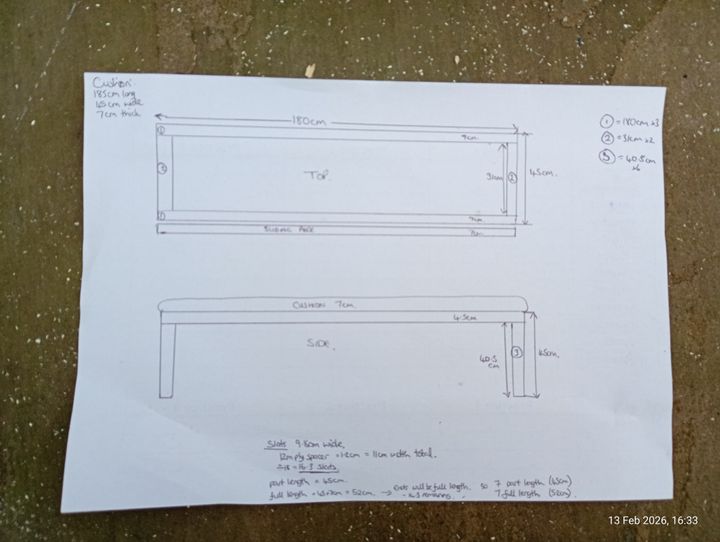
This was built and painted grey, it worked a treat - the height mirroring my dining room chairs to allow for comfy laptop work using the kitchen as a desk
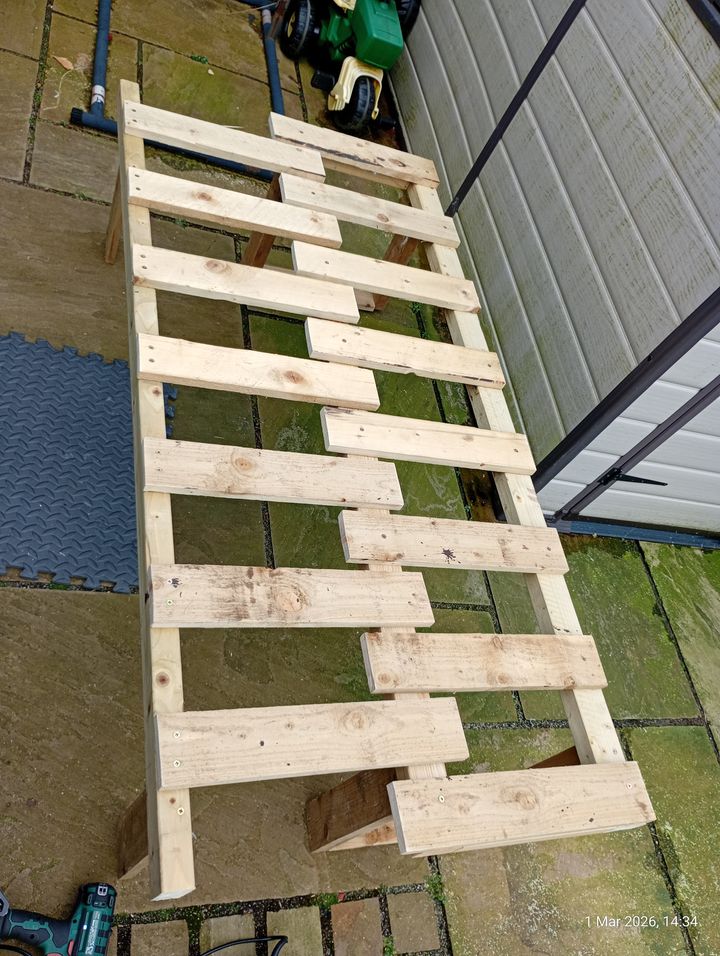
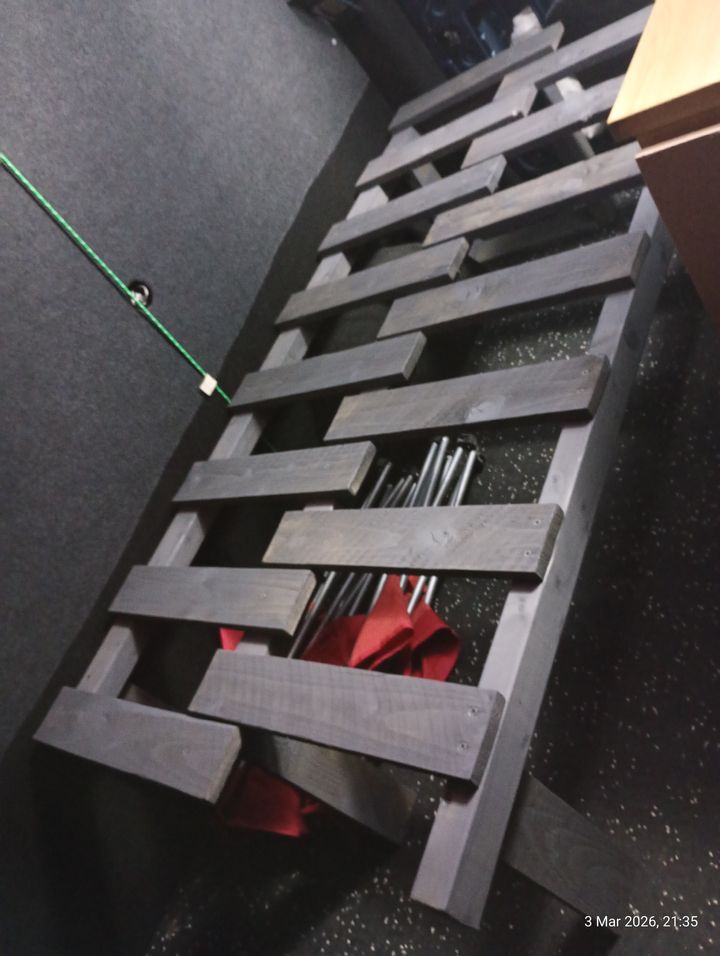
I bought some cushions from FB marketplace which fitted a treat
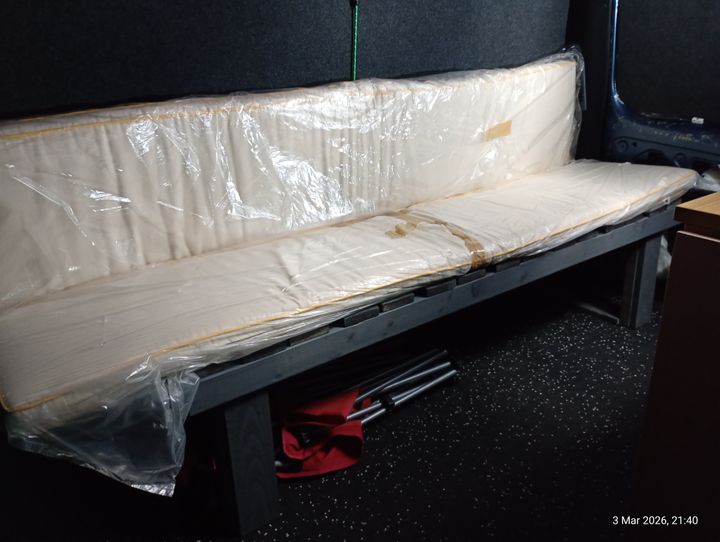
With the kitchen fitted, I needed somewhere to sit and liked the idea of a single bed that can slide out to a double.
After watching a few youtube vids, I had a plan
This was built and painted grey, it worked a treat - the height mirroring my dining room chairs to allow for comfy laptop work using the kitchen as a desk
I bought some cushions from FB marketplace which fitted a treat
11. Diesel heater
Next up was a job I wasn't looking forward to as it involved cutting into the floor!
I started the job with my trusty corded drill, however this quickly died when faced with the job of cutting steel.
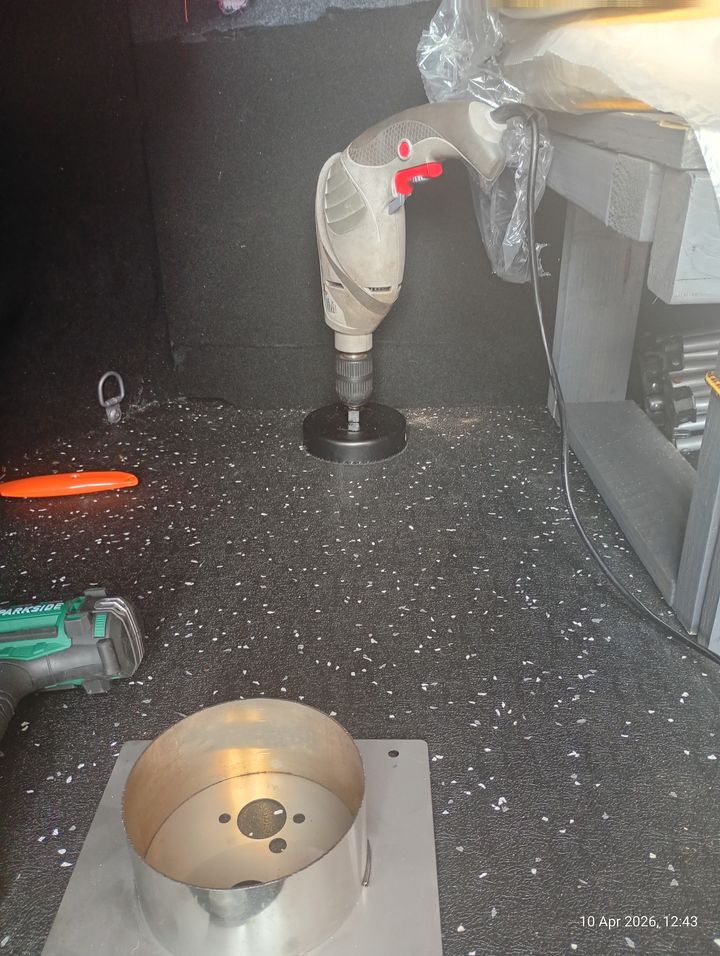
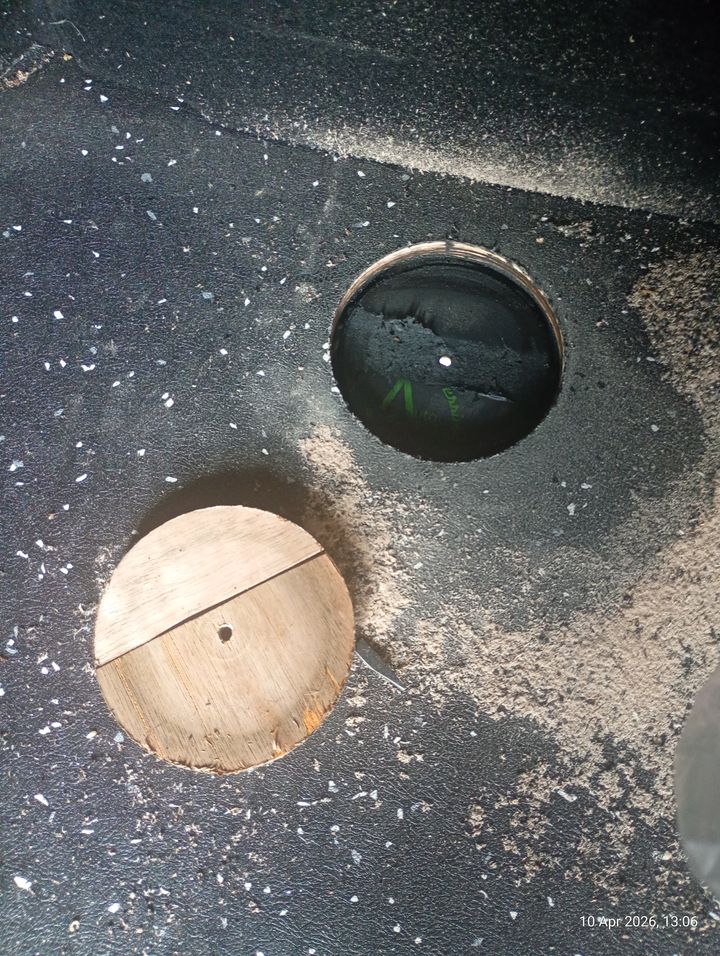
I ordered a new drill and more robust hole saw and got the job done.
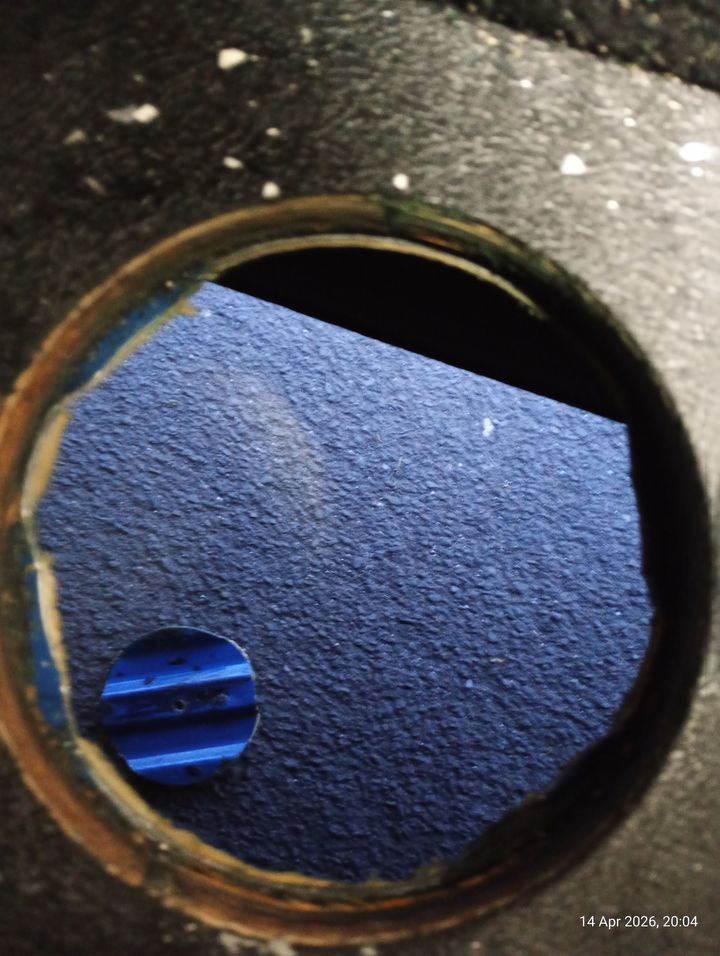
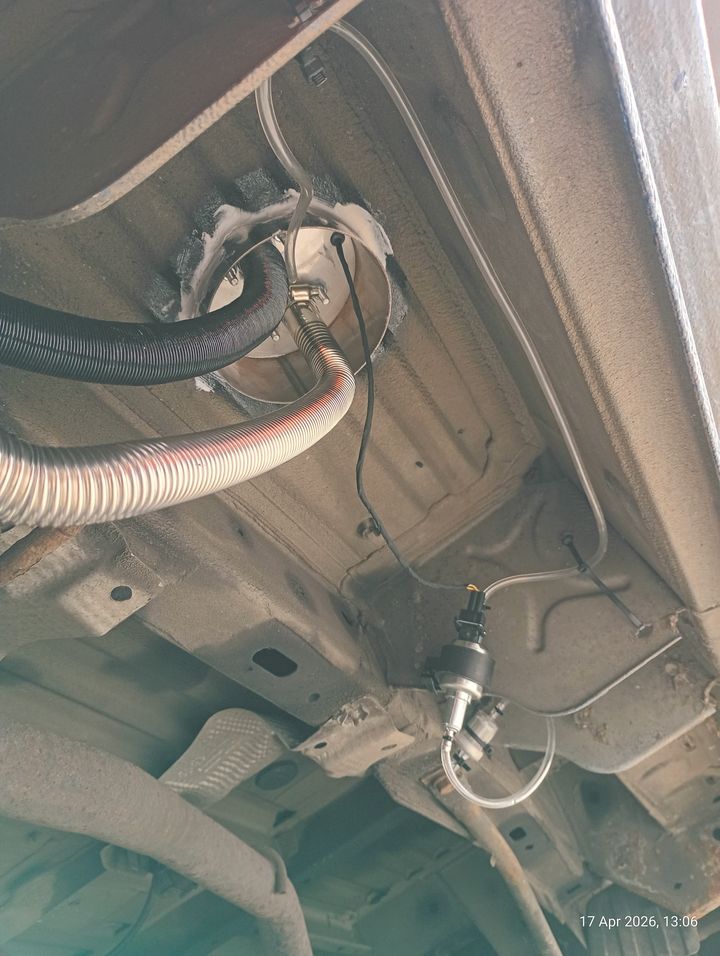
Some time was spent assembling the diesel heater before fitting it to the van. Fire retardant sealant and threadlock were used, along with a little exhaust sealant for the exhaust pipe.
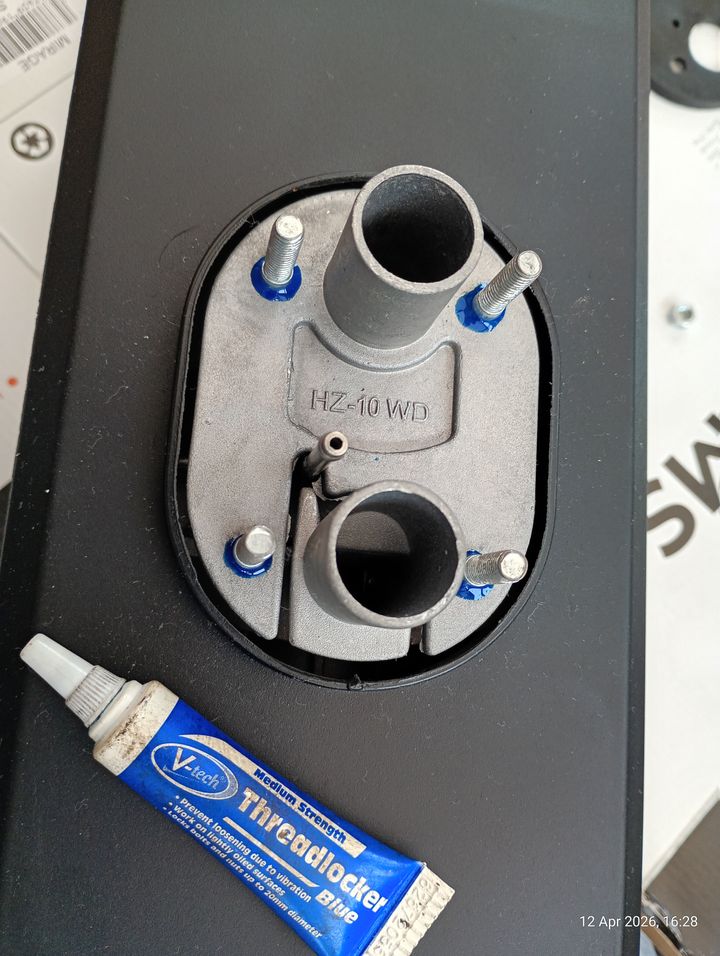
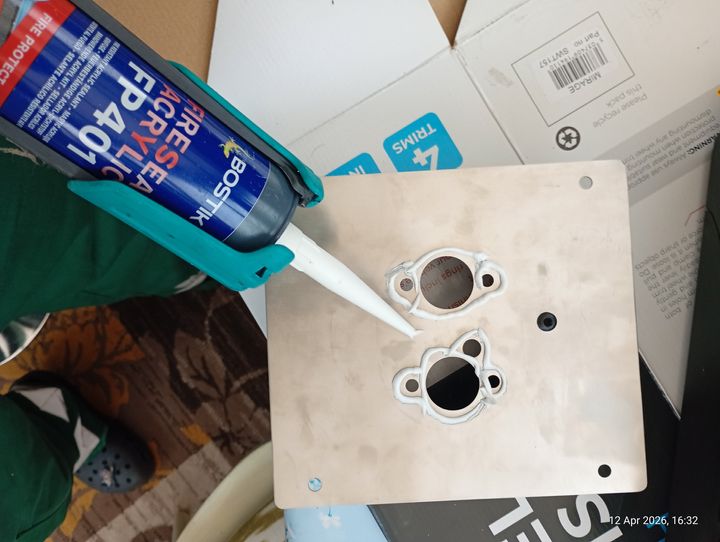
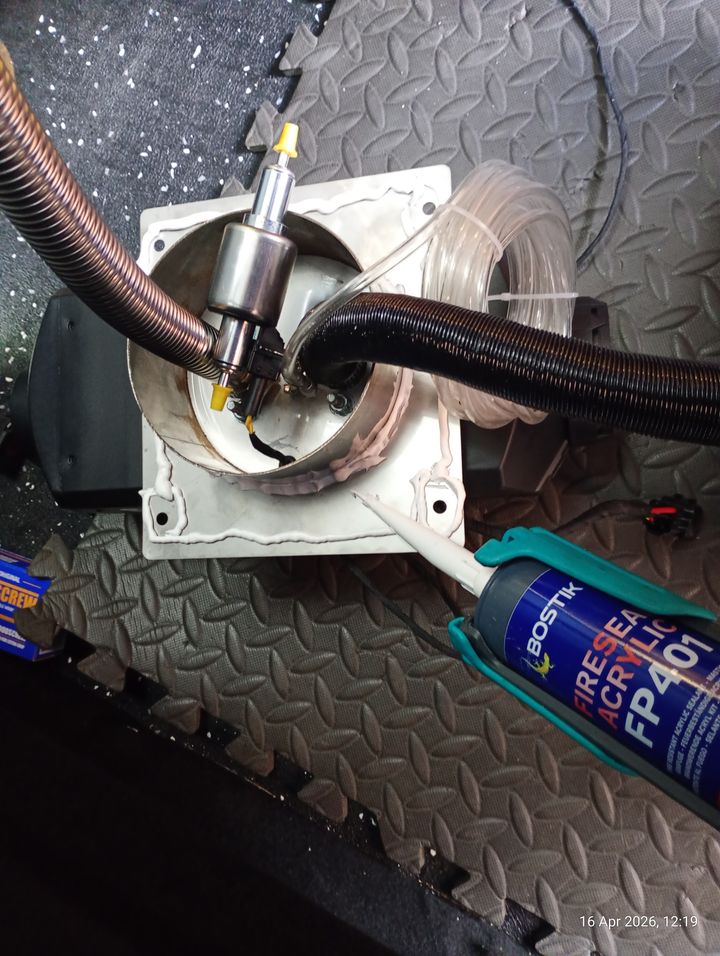
Heater fitted and plumbed in to the Trafic fuel tank, for power it was hooked up to a Bluetti AC70 - first run of the heater and it was warm!
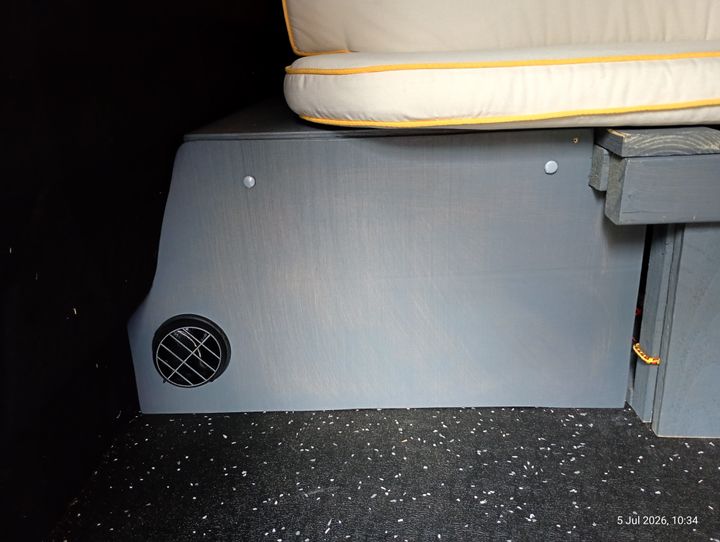
I made a little box to house the heater in, which also extended the bed to make full use of the cushion length. The top comes off for access.
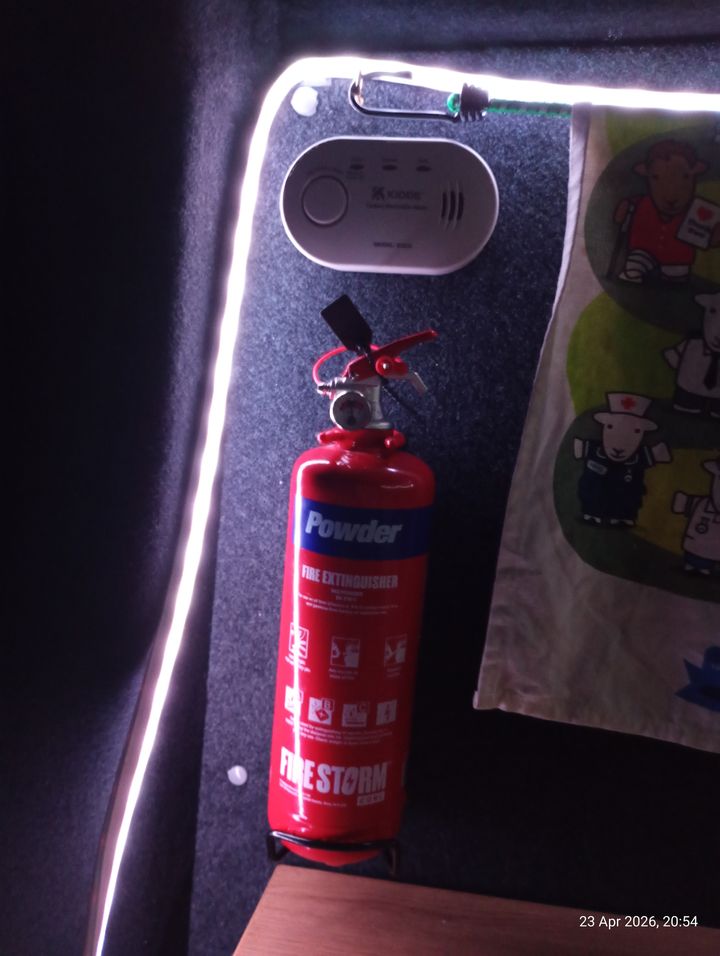
Fitted 2x carbon monoxide detectors and a fire extinguisher
Next up was a job I wasn't looking forward to as it involved cutting into the floor!
I started the job with my trusty corded drill, however this quickly died when faced with the job of cutting steel.
I ordered a new drill and more robust hole saw and got the job done.
Some time was spent assembling the diesel heater before fitting it to the van. Fire retardant sealant and threadlock were used, along with a little exhaust sealant for the exhaust pipe.
Heater fitted and plumbed in to the Trafic fuel tank, for power it was hooked up to a Bluetti AC70 - first run of the heater and it was warm!
I made a little box to house the heater in, which also extended the bed to make full use of the cushion length. The top comes off for access.
Fitted 2x carbon monoxide detectors and a fire extinguisher
12. Roof vent
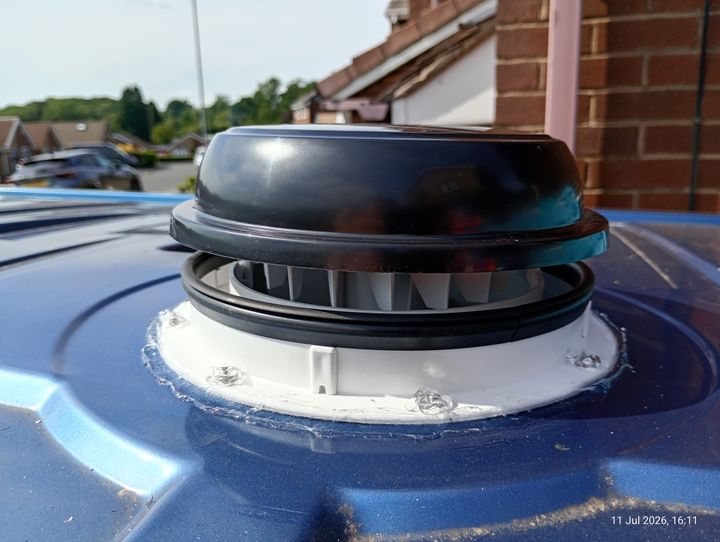
Roof vent was next, I wanted something small and discrete so went for a MaxxFan Dome with the inbuilt LED as I purposely dont have windows in the van.
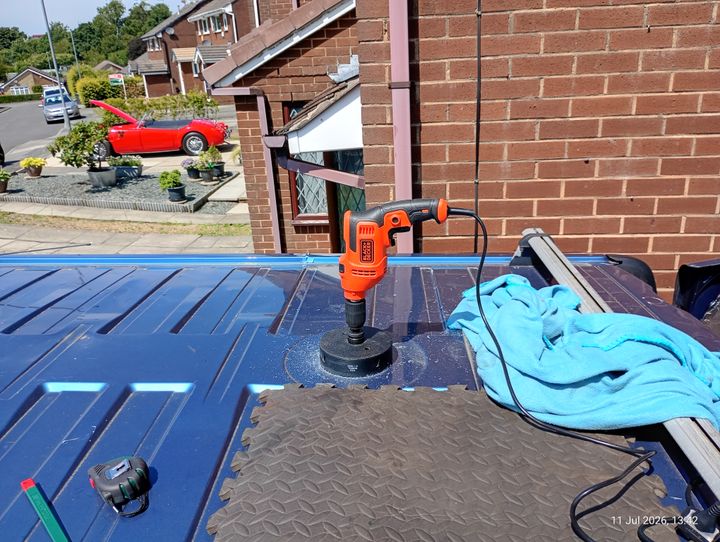
I fitted the roof ply prior to cutting the roof hole, so that I could cut through both at the same time, giving an accurate fit.
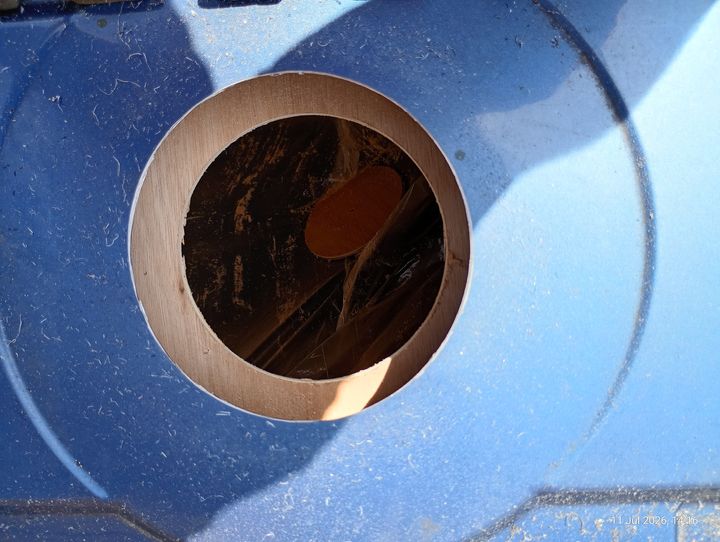
Inside the van I bonded a circular plywood piece to the roof to give the fan surround something to fix into (from outside and inside)
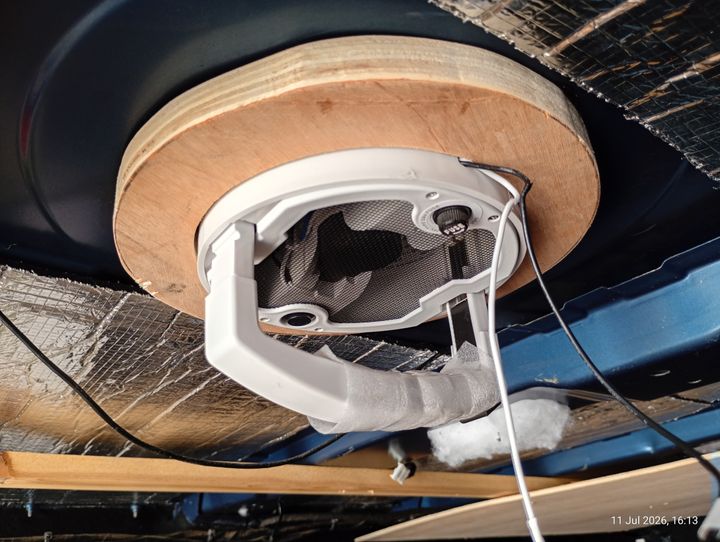
Roof vent was next, I wanted something small and discrete so went for a MaxxFan Dome with the inbuilt LED as I purposely dont have windows in the van.
I fitted the roof ply prior to cutting the roof hole, so that I could cut through both at the same time, giving an accurate fit.
Inside the van I bonded a circular plywood piece to the roof to give the fan surround something to fix into (from outside and inside)
13. Roof carpeting
I previously cut and temporarily fitting the roof ply before fitting the vent, it was then removed ready for carpeting.
I went for the suede effect carpet in blue, I think it looks great
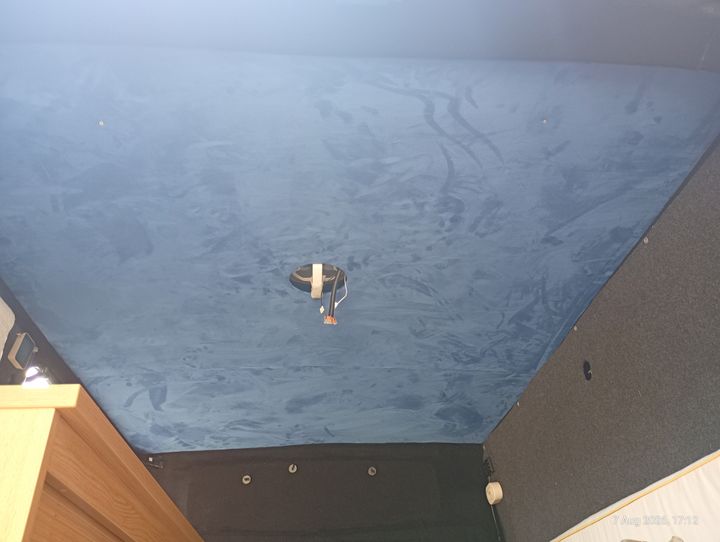
Roof vent surround fitted
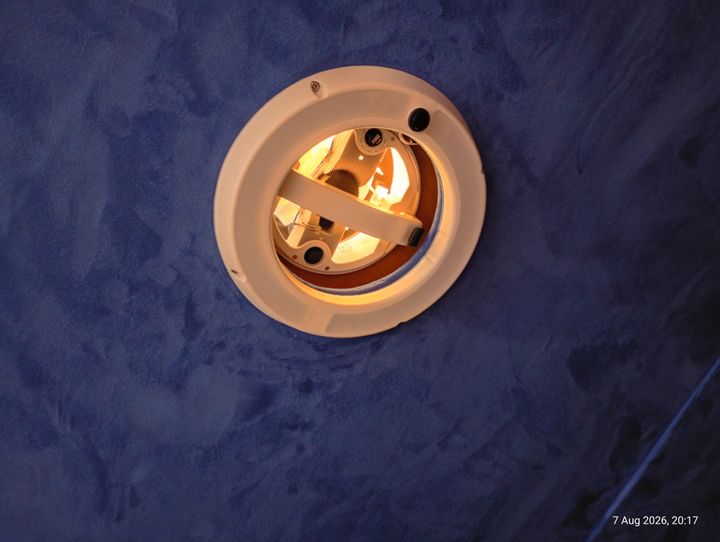
As I had pieced two bit of ply together for the roof, I used an LED strip along this join to cover, although it wasn't that noticeable without.
The LED combined with the roof vent halo light are enough to light the back up perfectly.
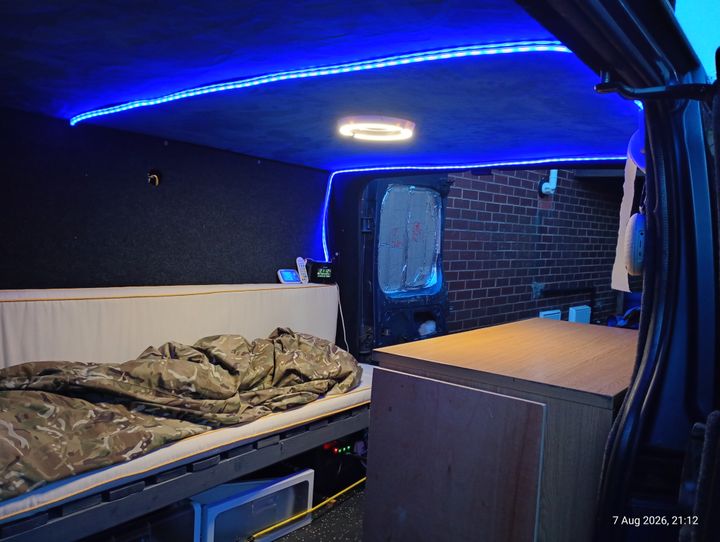
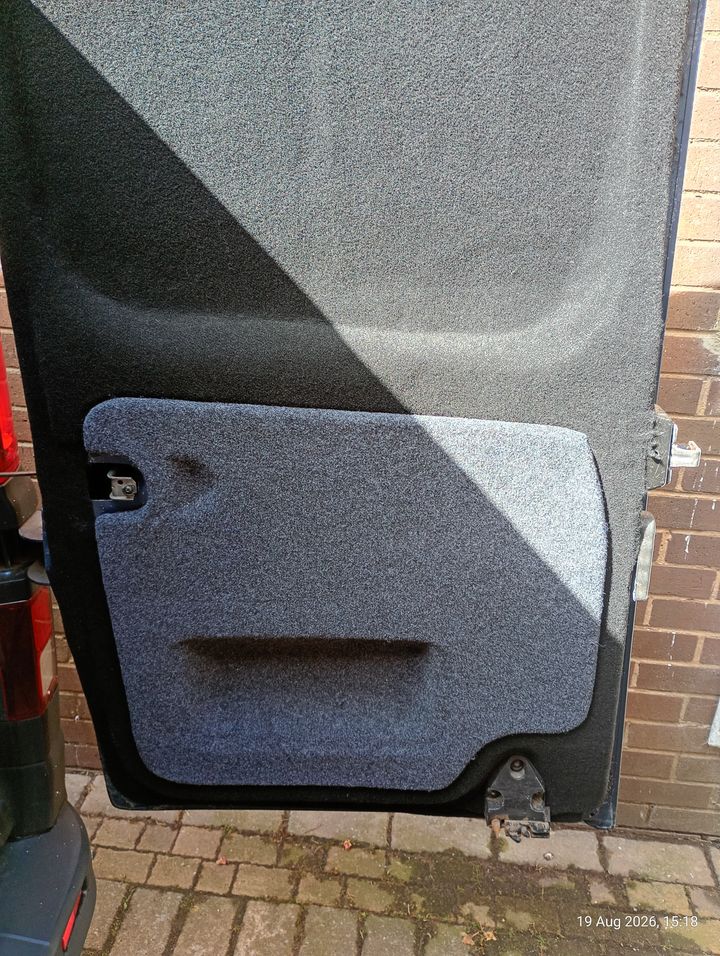
The last job remaining was to carpet the back doors in the contrasting black/grey
I previously cut and temporarily fitting the roof ply before fitting the vent, it was then removed ready for carpeting.
I went for the suede effect carpet in blue, I think it looks great
Roof vent surround fitted
As I had pieced two bit of ply together for the roof, I used an LED strip along this join to cover, although it wasn't that noticeable without.
The LED combined with the roof vent halo light are enough to light the back up perfectly.
The last job remaining was to carpet the back doors in the contrasting black/grey
14. Day van complete!
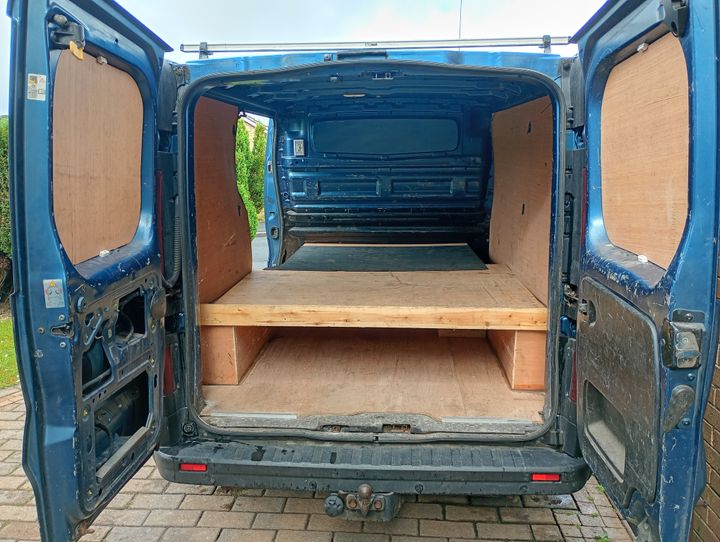
From this
To this
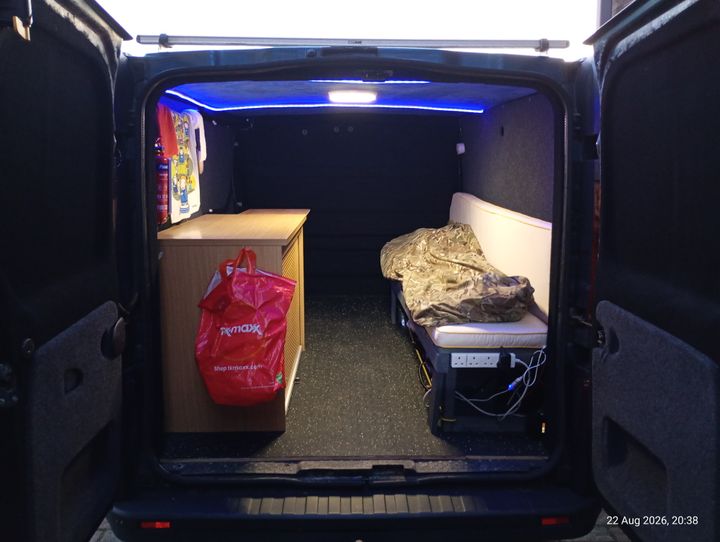
I have a conversion log which tells me it took me 101 hours over the span of about 10 months to complete (evenings and weekend).
I have never done anything like this before but very happy with the results, bring on the cold weather so I can fire up the diesel heater!
From this
To this
I have a conversion log which tells me it took me 101 hours over the span of about 10 months to complete (evenings and weekend).
I have never done anything like this before but very happy with the results, bring on the cold weather so I can fire up the diesel heater!
Gassing Station | Readers' Cars | Top of Page | What's New | My Stuff