Discussion


I've lurked around Readers Cars for a while now umming and arring whether or not to do a post, I've not seen many cars of the kit variety in this section so thought I would help raise the profile of them.
My original love for wanting one started back in the early noughties when Fifth Gear had the Tiger Racing Z100 on trying to get the 0-60 record, seeing a twin-engine home built car do daft things was right up my alley!
Skip 20 odd years and I was finally in a fortunate position to have enough space and funds to crack on with a build, during the covid era I managed to get some money down on a GBS Zero.
I'd had my eye on a GBS for a while, they're local to me and they were really welcoming when I'd gone over to have a look years prior. I preferred the overall proportions of the car and look of it compared to other kits on offer too.
Many people will always say 'why didn't you just get a Caterham' but for me I wanted to do the full build from chassis up, plus its not something I envisage getting rid of any time soon so the depreciation was less critical for me. Also price wise, a similar spec Caterham at the time was a fair old chunk of cash more than the GBS offering.
Anyways, to the kit...
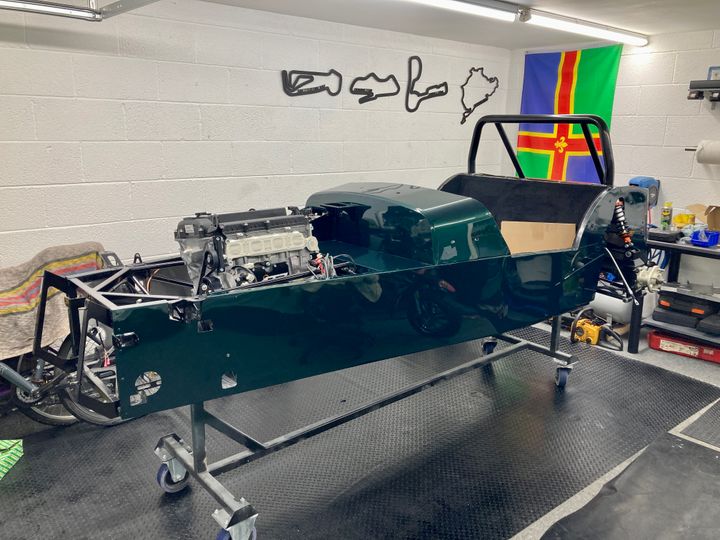
GBS offer what they call the Ultimate Zero Kit which is basically a new car with the 2.5 Duratec IL4 engine, you can spec lots of other options and recently I've seen that they offer a sequential box which sounds interesting. The extra bits I went for was.
- Plated Sierra LSD
- ATR (their own in house company) dampers
- ATR front brakes
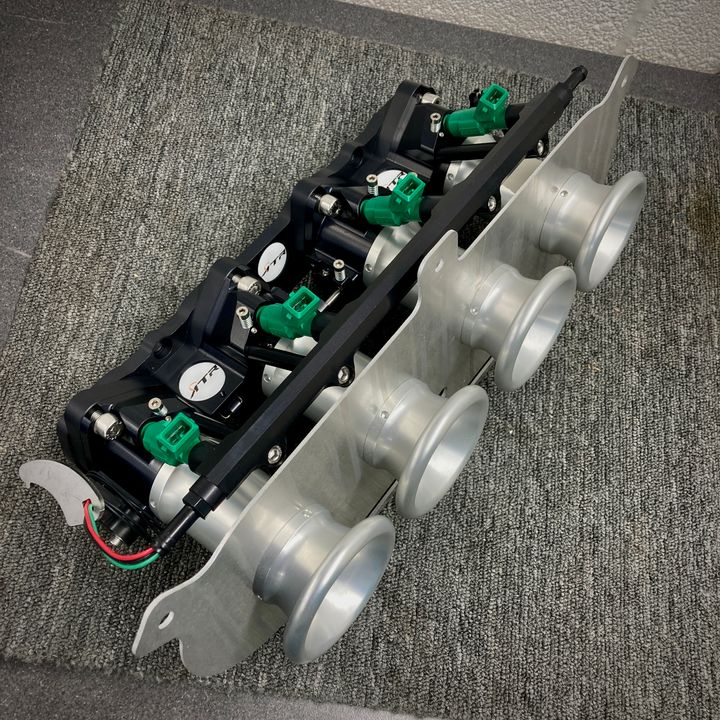
- ATR ITBs
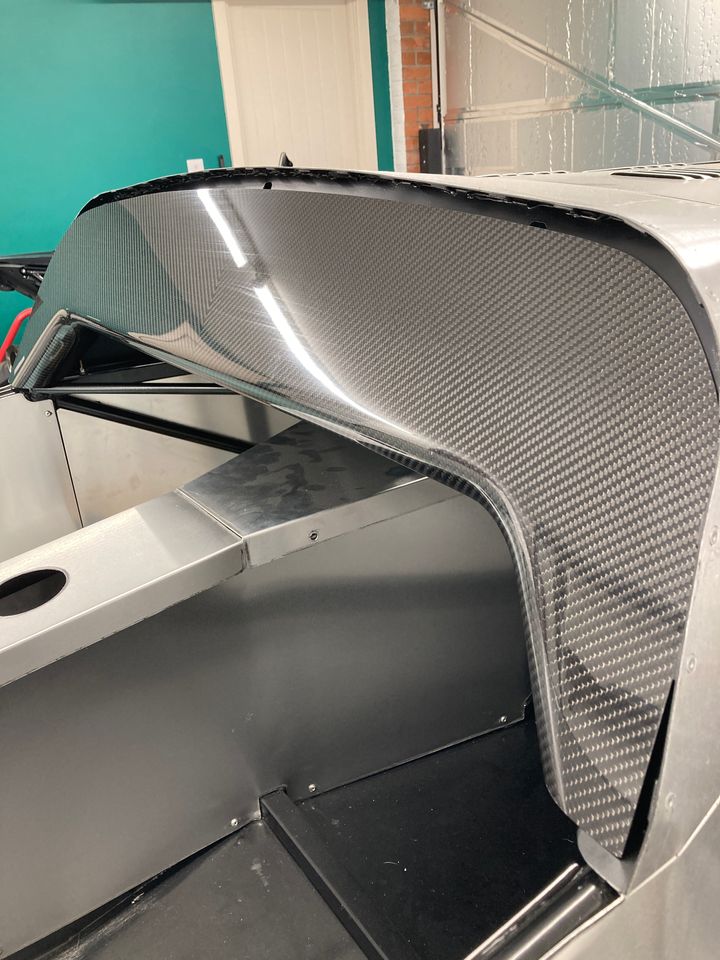
- Carbon dash
- Composite bucket seats
- Lightened flywheel and clutch
You can buy the kit in 5 stages which is what I opted for. GBS normally offer the car fully panelled with brake and fuel lines fitted, I'd asked for the bare chassis to start from.
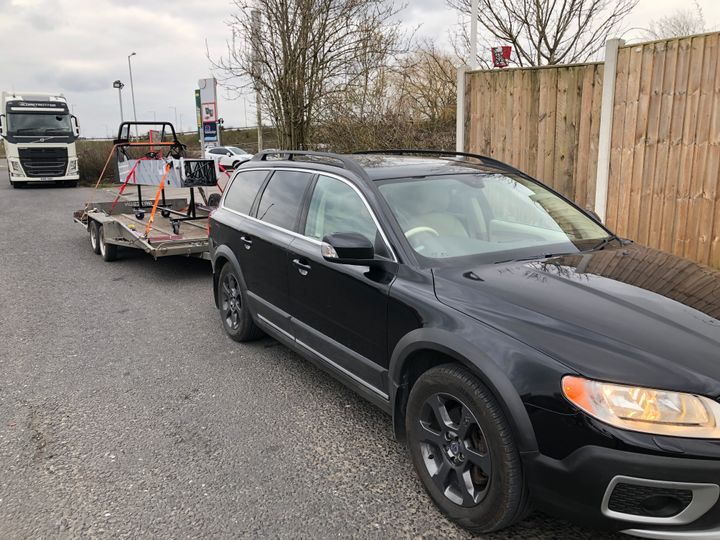
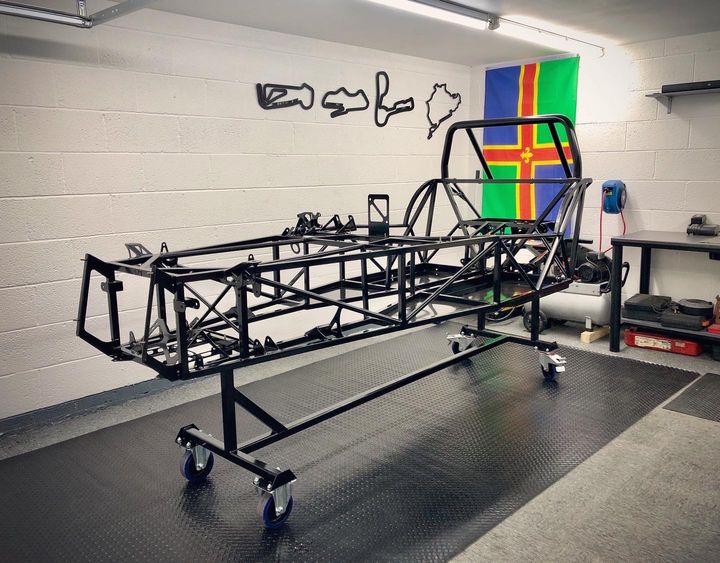
I got the first 2 stages home and got busy cracking on.

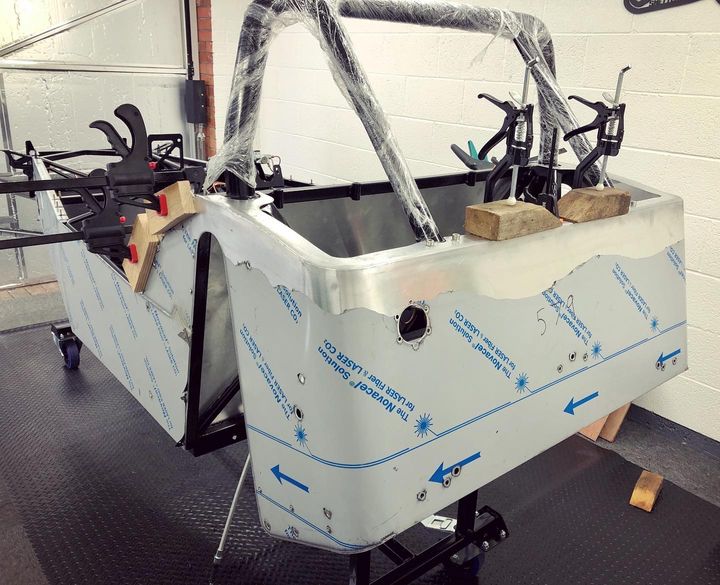
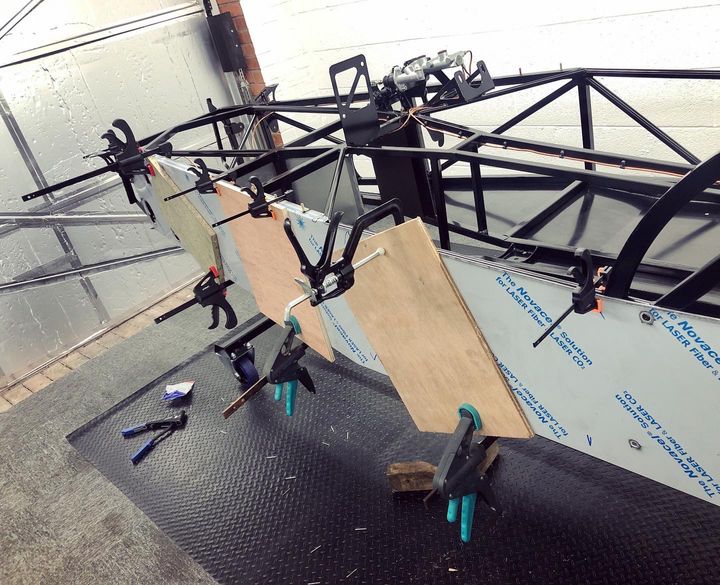
All the panels they provide are machine cut so everything goes together quite well, there's plenty of fettling needed to get things just right though. They are riveted on in some places but they're mostly bonded to the chassis which helped quite a bit.
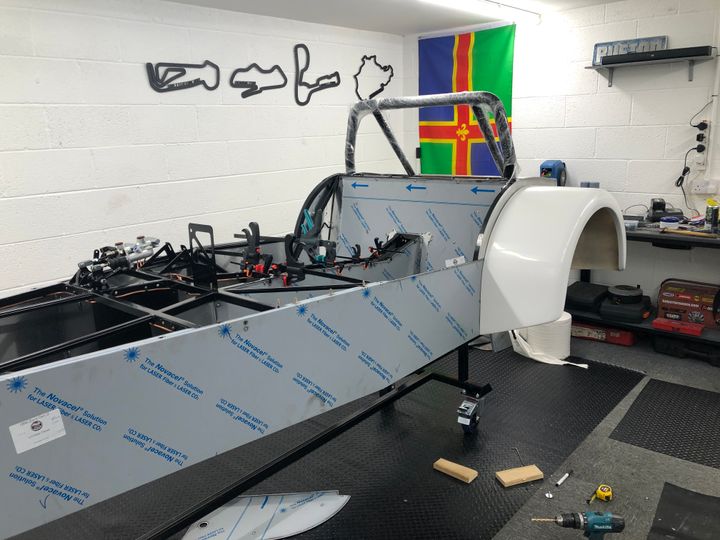
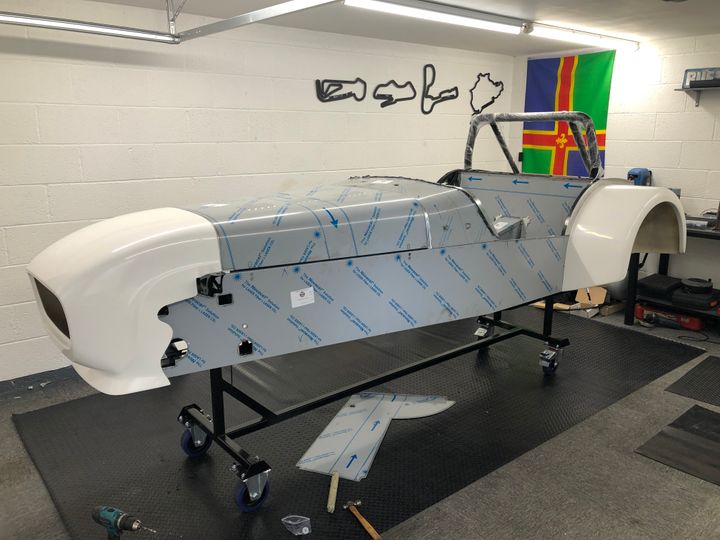
By this point the car was mostly waiting for paint, I'd used my own local guy instead of taking it back to the factory but I needed to wait a few months for a slot (it turned into a big slot....).
My original love for wanting one started back in the early noughties when Fifth Gear had the Tiger Racing Z100 on trying to get the 0-60 record, seeing a twin-engine home built car do daft things was right up my alley!
Skip 20 odd years and I was finally in a fortunate position to have enough space and funds to crack on with a build, during the covid era I managed to get some money down on a GBS Zero.
I'd had my eye on a GBS for a while, they're local to me and they were really welcoming when I'd gone over to have a look years prior. I preferred the overall proportions of the car and look of it compared to other kits on offer too.
Many people will always say 'why didn't you just get a Caterham' but for me I wanted to do the full build from chassis up, plus its not something I envisage getting rid of any time soon so the depreciation was less critical for me. Also price wise, a similar spec Caterham at the time was a fair old chunk of cash more than the GBS offering.
Anyways, to the kit...
GBS offer what they call the Ultimate Zero Kit which is basically a new car with the 2.5 Duratec IL4 engine, you can spec lots of other options and recently I've seen that they offer a sequential box which sounds interesting. The extra bits I went for was.
- Plated Sierra LSD
- ATR (their own in house company) dampers
- ATR front brakes
- ATR ITBs
- Carbon dash
- Composite bucket seats
- Lightened flywheel and clutch
You can buy the kit in 5 stages which is what I opted for. GBS normally offer the car fully panelled with brake and fuel lines fitted, I'd asked for the bare chassis to start from.
I got the first 2 stages home and got busy cracking on.
All the panels they provide are machine cut so everything goes together quite well, there's plenty of fettling needed to get things just right though. They are riveted on in some places but they're mostly bonded to the chassis which helped quite a bit.
By this point the car was mostly waiting for paint, I'd used my own local guy instead of taking it back to the factory but I needed to wait a few months for a slot (it turned into a big slot....).
Edited by CasaBianco on Thursday 28th May 22:33
Excellent. Been a fan of these for some time now and they are also localish to me. I had the same experience as you when visiting the factory, nothing is too much trouble and everyone there was really friendly. There open evenings are well attended and highly recommended.
I'll be following the build with interest. Look forward to the next update.
I'll be following the build with interest. Look forward to the next update.
After some waiting, more parts arrived.
This meant i could crack on with a few bits until I had to cart it off to get sprayed.
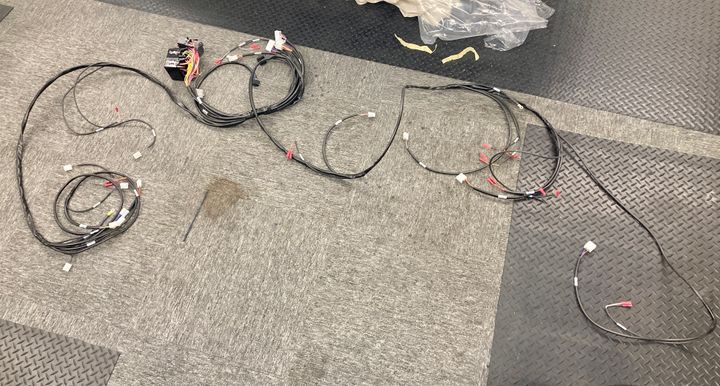
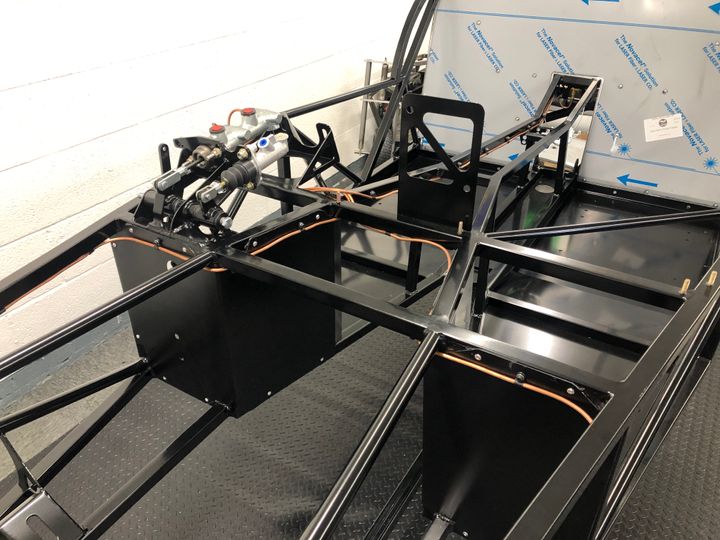
GBS make their own looms for the car which helps massively, I did want to look at doing my own to get my skills up but it would have taken me ages and it probably would have needed modifications along the way.

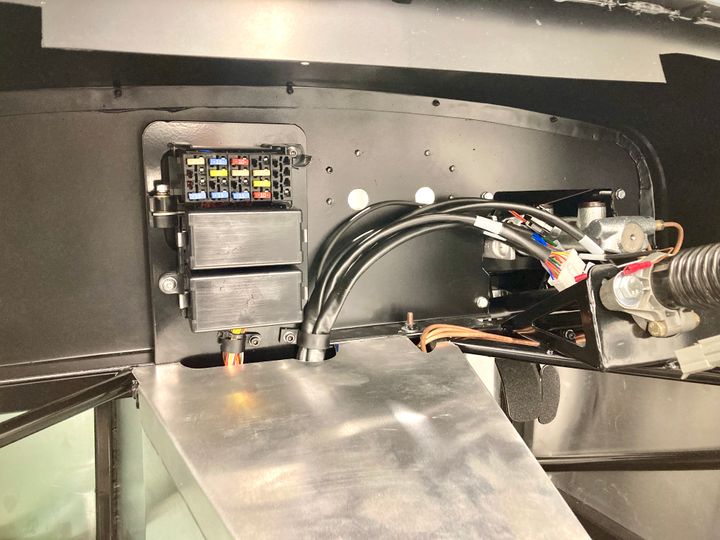
It was routed in along with mounting the fuse/relay box.
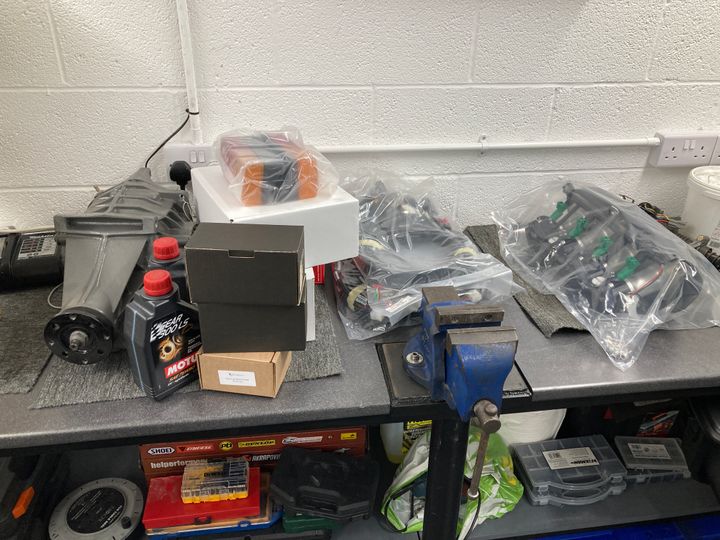
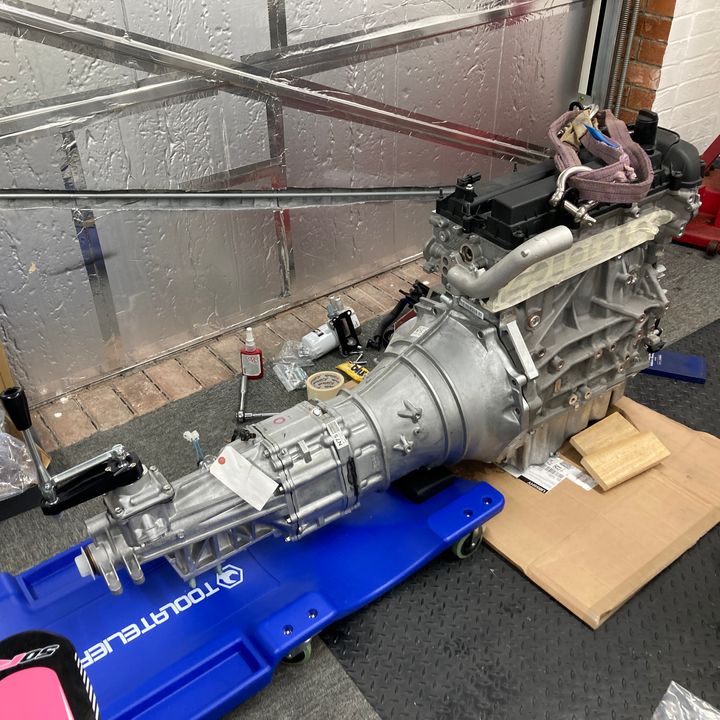
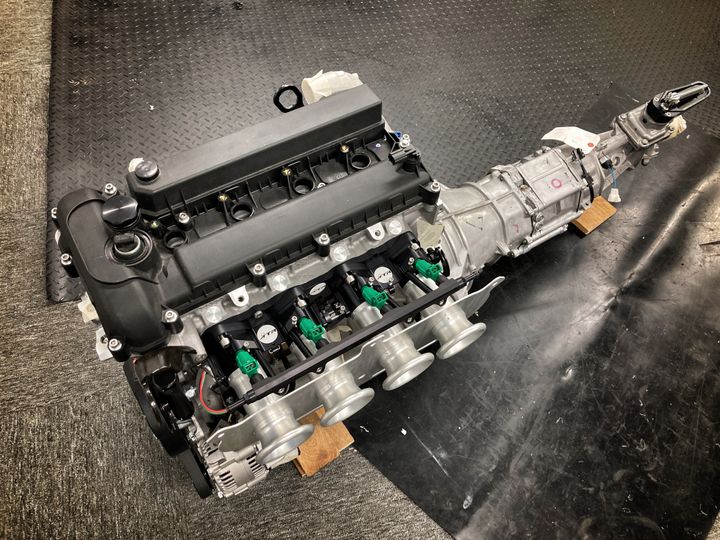
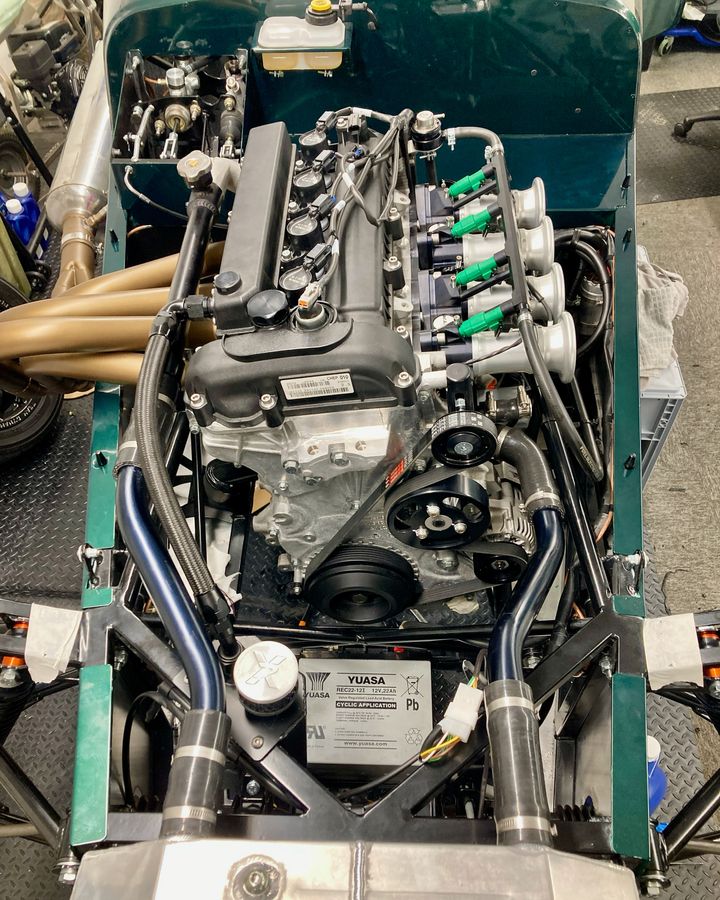
It was at this point I went and got the really important bits! GBS import the engines from Mexico as we never had the 2.5 IL4 over here, they have become more popular here with people though as they are fairly torquey and can be easily swapped in place of the 2.0.
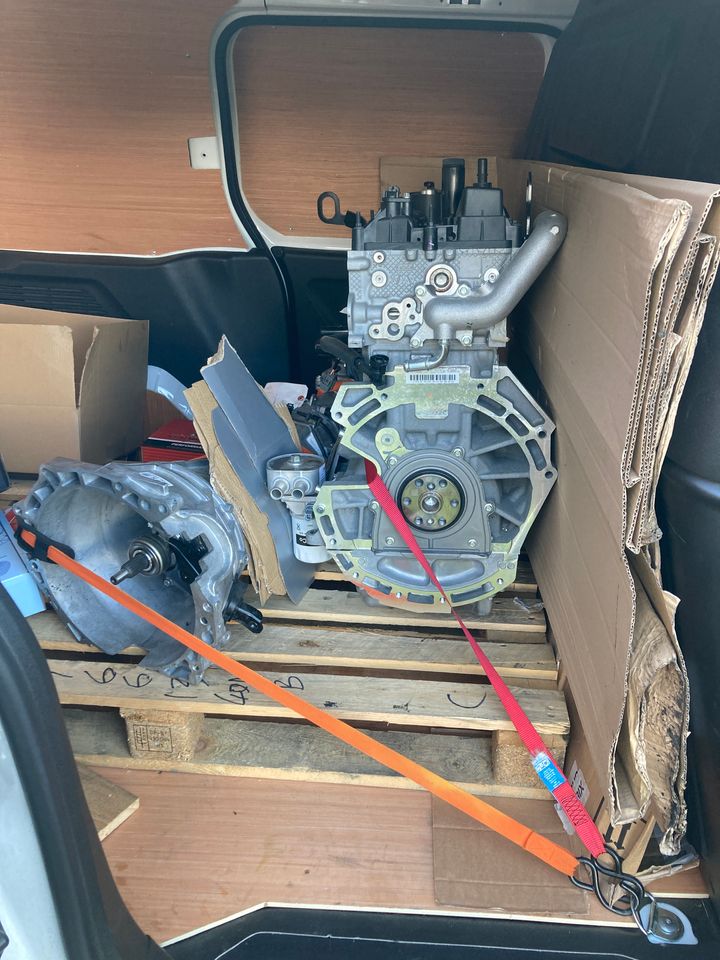
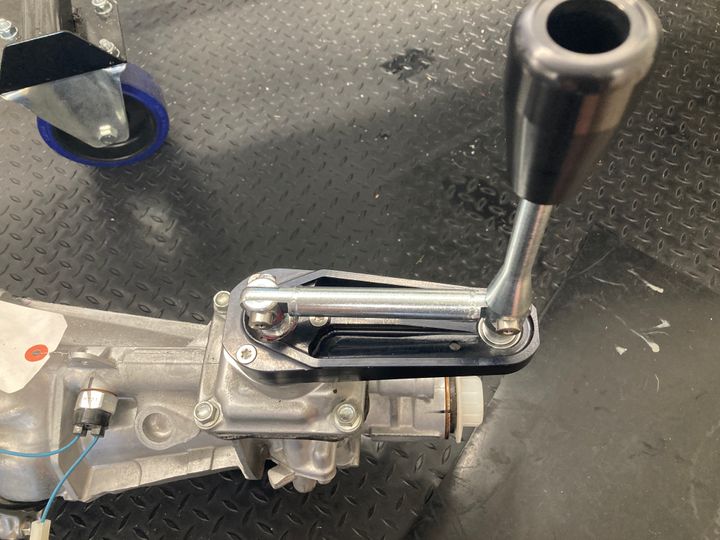
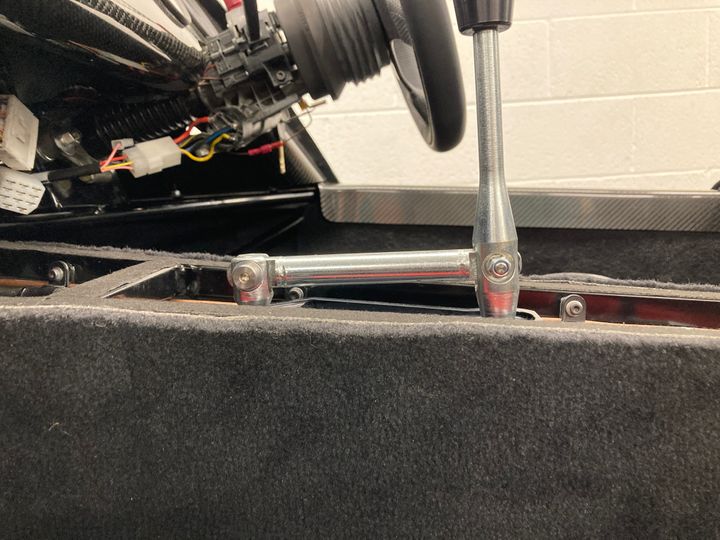
The gearbox used is the Mazda 5 speed from the MX-5, GBS offer this shifter assembly to move the shift point further back, looks pretty cool too.
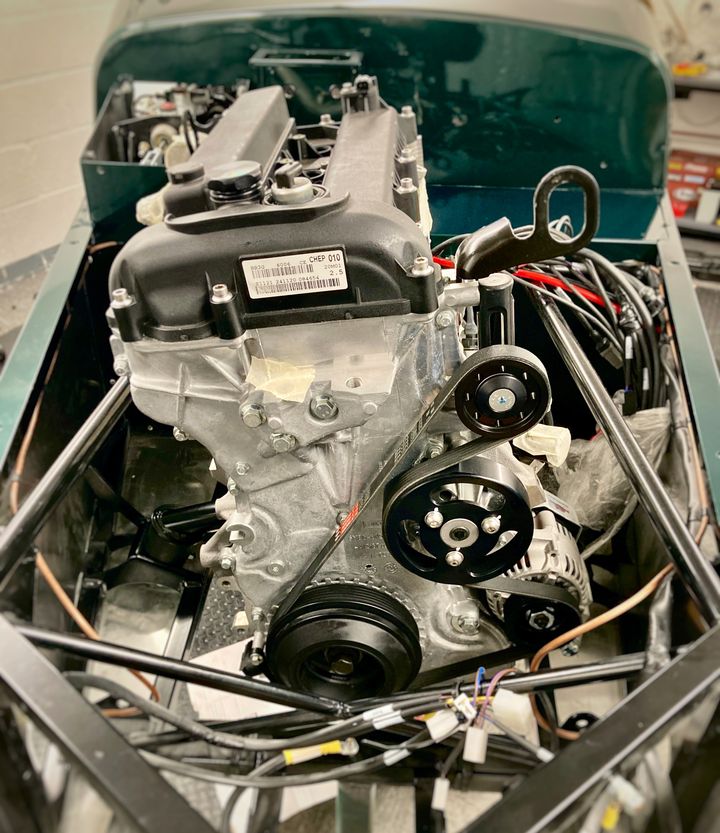
I started dressing the engine with bits, again GBS offer the alternator mount and pulleys along with the blanking plate.

The flywheel, clutch and gearbox were built up ready for installation.
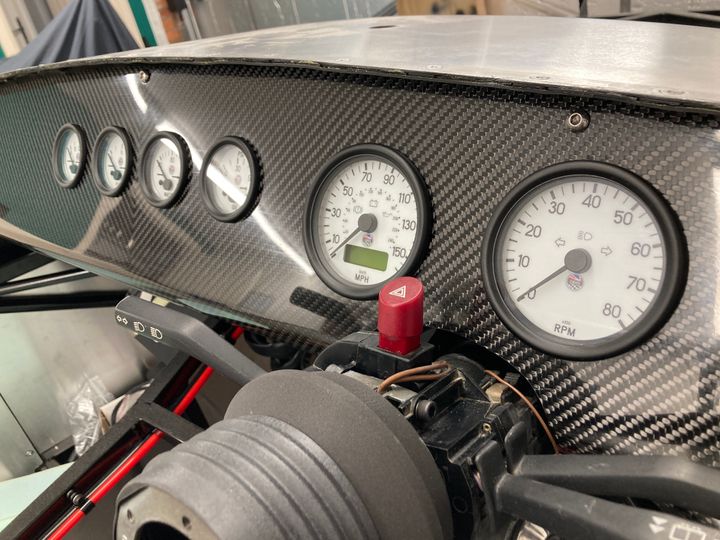
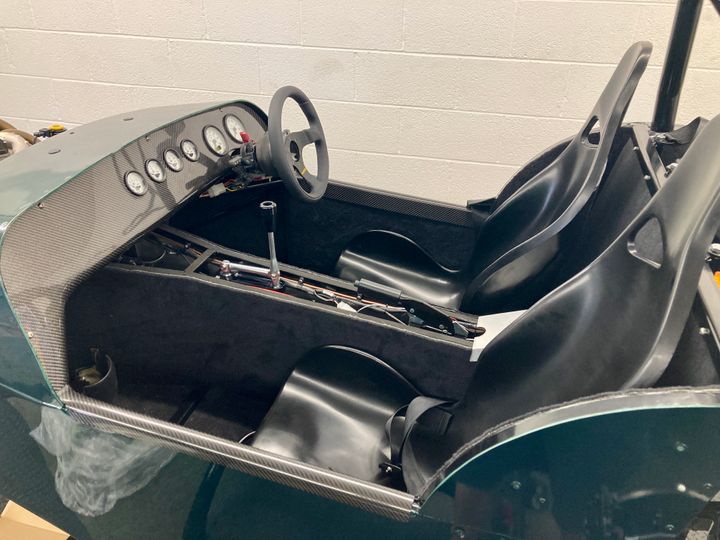
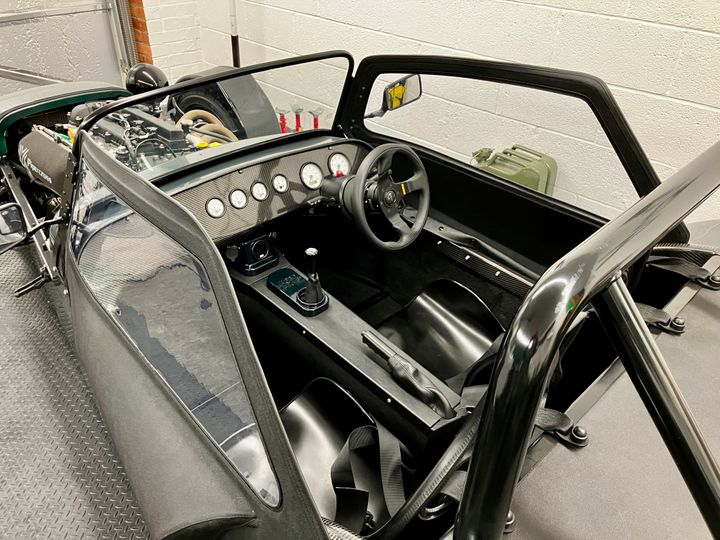
The next job was sorting the dash out, I'm ok with cutting into stuff normally but as it was a nice fancy piece of carbon I was doubly sure to take my time. I'd found during the build that it was trying to get a balance of speed versus quality, I wanted to get it all done as soon as I could but I didn't want to cut corners.
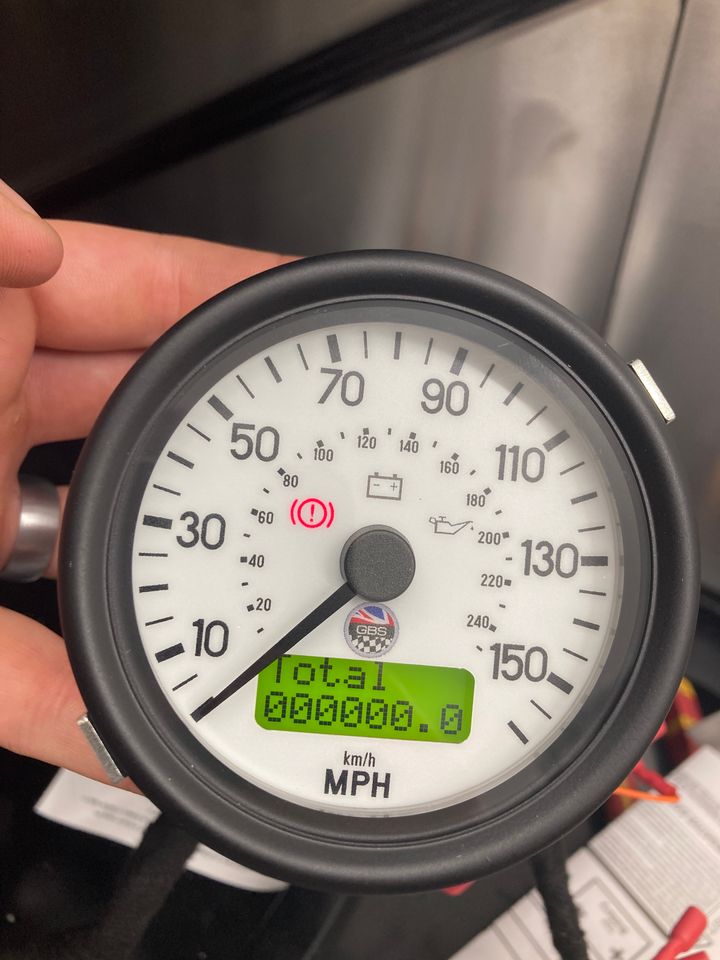
GBS offer these nice dials made by ETB, they had used Smiths for their gauges but during covid I think there was supply and quality issues so they moved to ETB. They're quite smart with in built 0-60 time and max speed menus.
I decided to use cardboard aided design for the placement as I hadn't even got the steering rack mounted properly yet.
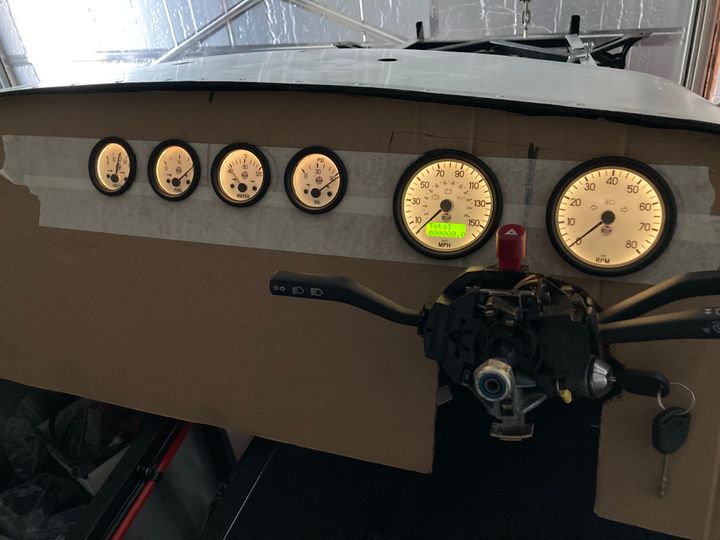
I trial fitted the wheel to check I could see them and went in with the power tools. As you can see the controls are Sierra hand-me-downs, the kit is mostly brand new parts but some items like the steering rack, controls and rear diff are used items.
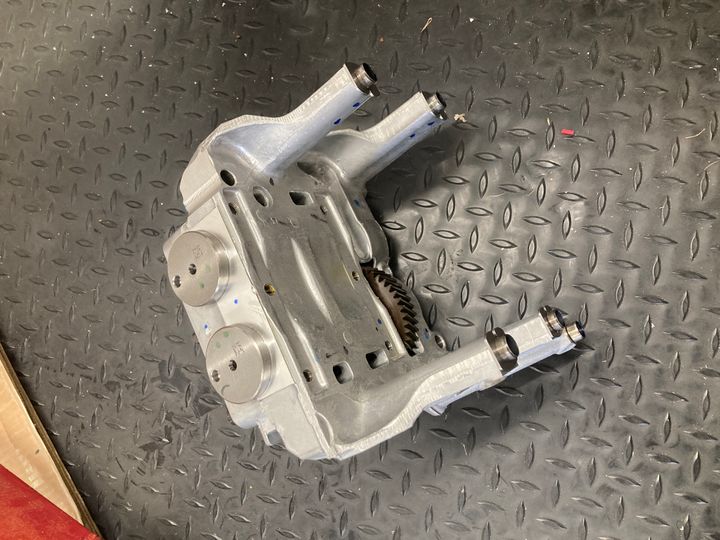
Next job was the balancer delete, its surprising how much weight this thing was! There's an oilway to block off then you're done.
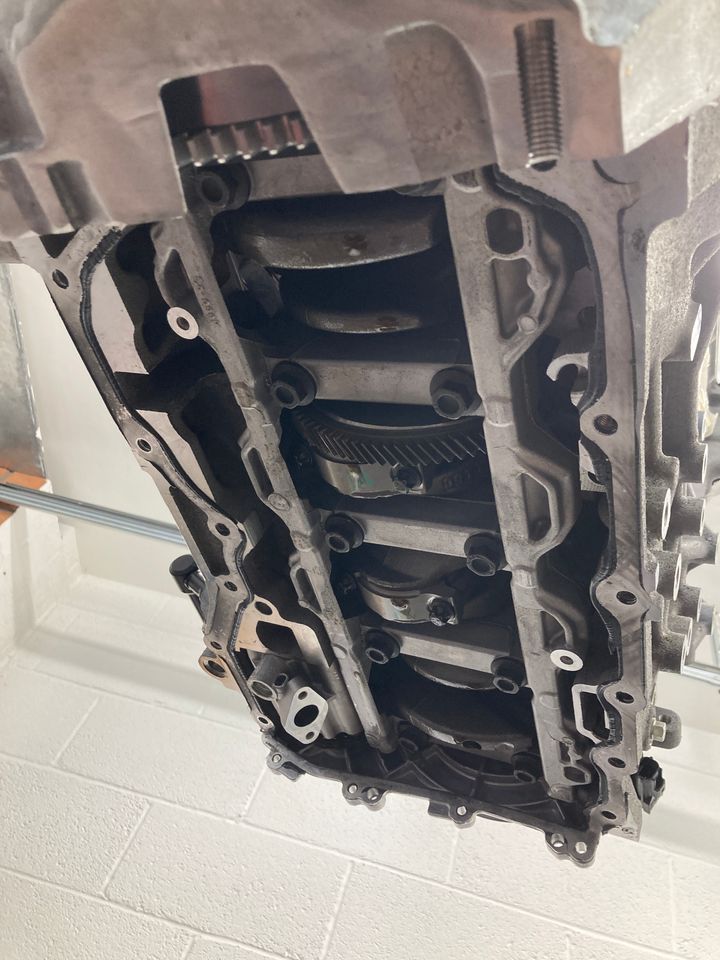
The engine had to stay like this for a while, GBS were normally obtaining their sumps from Raceline but again due to supply issues they were going their own way and making them in house so I had to wait until their prototype was done testing.
I got the ECU mounted up with a homemade bracket, the ECU they use is a Life Racing F88 which is plenty for a car like this. There's quite a lot of features on it and luckily, as its mostly identical to Syvecs, I could find a lot of the info online.
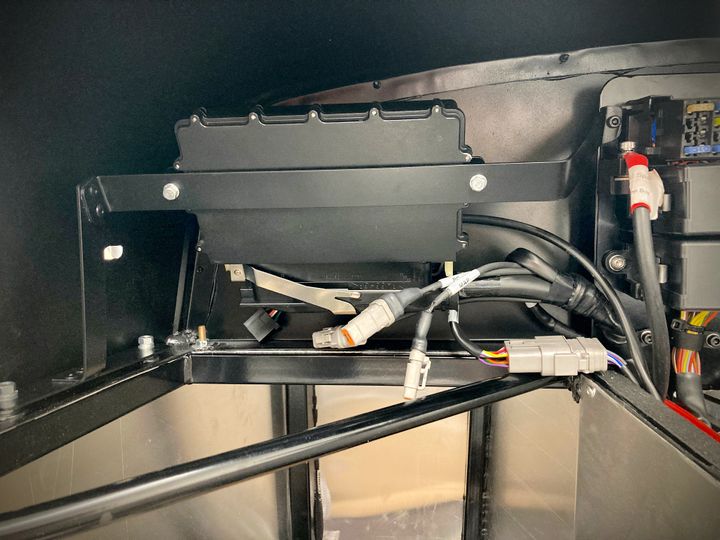
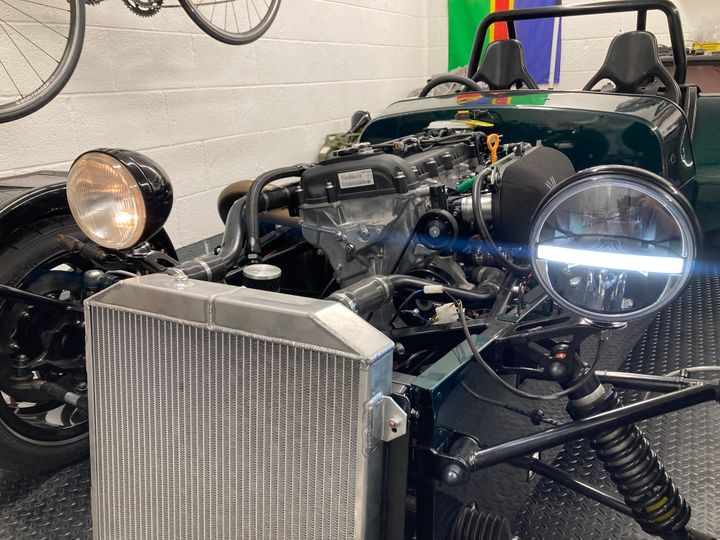
I had to then get a cool pic of the engine with the ITBs fitted, was itching to hear what it would sound like.
This meant i could crack on with a few bits until I had to cart it off to get sprayed.
GBS make their own looms for the car which helps massively, I did want to look at doing my own to get my skills up but it would have taken me ages and it probably would have needed modifications along the way.
It was routed in along with mounting the fuse/relay box.
It was at this point I went and got the really important bits! GBS import the engines from Mexico as we never had the 2.5 IL4 over here, they have become more popular here with people though as they are fairly torquey and can be easily swapped in place of the 2.0.
The gearbox used is the Mazda 5 speed from the MX-5, GBS offer this shifter assembly to move the shift point further back, looks pretty cool too.
I started dressing the engine with bits, again GBS offer the alternator mount and pulleys along with the blanking plate.
The flywheel, clutch and gearbox were built up ready for installation.
The next job was sorting the dash out, I'm ok with cutting into stuff normally but as it was a nice fancy piece of carbon I was doubly sure to take my time. I'd found during the build that it was trying to get a balance of speed versus quality, I wanted to get it all done as soon as I could but I didn't want to cut corners.
GBS offer these nice dials made by ETB, they had used Smiths for their gauges but during covid I think there was supply and quality issues so they moved to ETB. They're quite smart with in built 0-60 time and max speed menus.
I decided to use cardboard aided design for the placement as I hadn't even got the steering rack mounted properly yet.
I trial fitted the wheel to check I could see them and went in with the power tools. As you can see the controls are Sierra hand-me-downs, the kit is mostly brand new parts but some items like the steering rack, controls and rear diff are used items.
Next job was the balancer delete, its surprising how much weight this thing was! There's an oilway to block off then you're done.
The engine had to stay like this for a while, GBS were normally obtaining their sumps from Raceline but again due to supply issues they were going their own way and making them in house so I had to wait until their prototype was done testing.
I got the ECU mounted up with a homemade bracket, the ECU they use is a Life Racing F88 which is plenty for a car like this. There's quite a lot of features on it and luckily, as its mostly identical to Syvecs, I could find a lot of the info online.
I had to then get a cool pic of the engine with the ITBs fitted, was itching to hear what it would sound like.

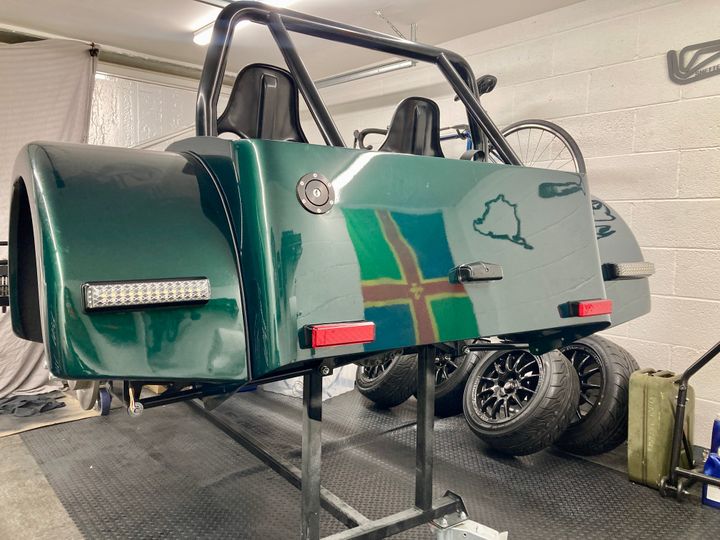
So the next big step for the car was paint, I originally planned on a blue as its been a colour I've always loved but after seeing a certain photo online I went a different route.
I'd arranged it all with my local painter and left it with him but made the big mistake of saying 'there's no rush as I'm waiting for the next stages of build'.
Time went on and I'd collected the next stages of the build but no painted car, I kept visiting but it sat there in the corner with very slow progress.
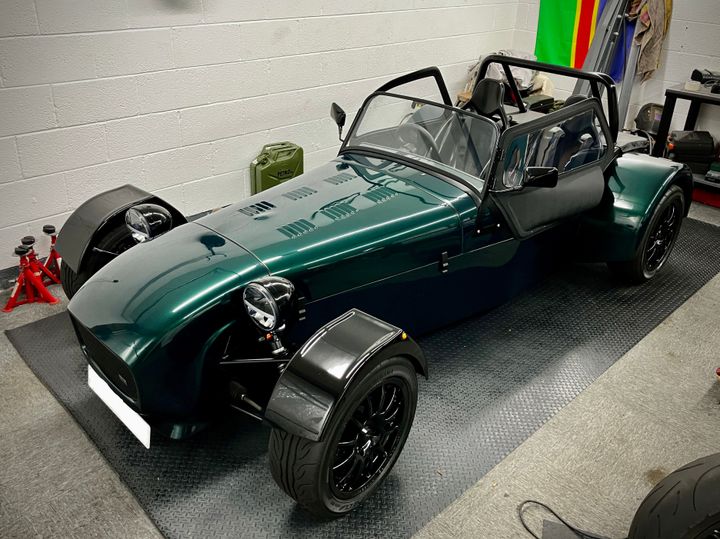
Luckily my work had kept me busy most of the time and eventually I got the message with a snapshot that he'd starting painting it! Roll on a few more weeks and it was ready to pick up!
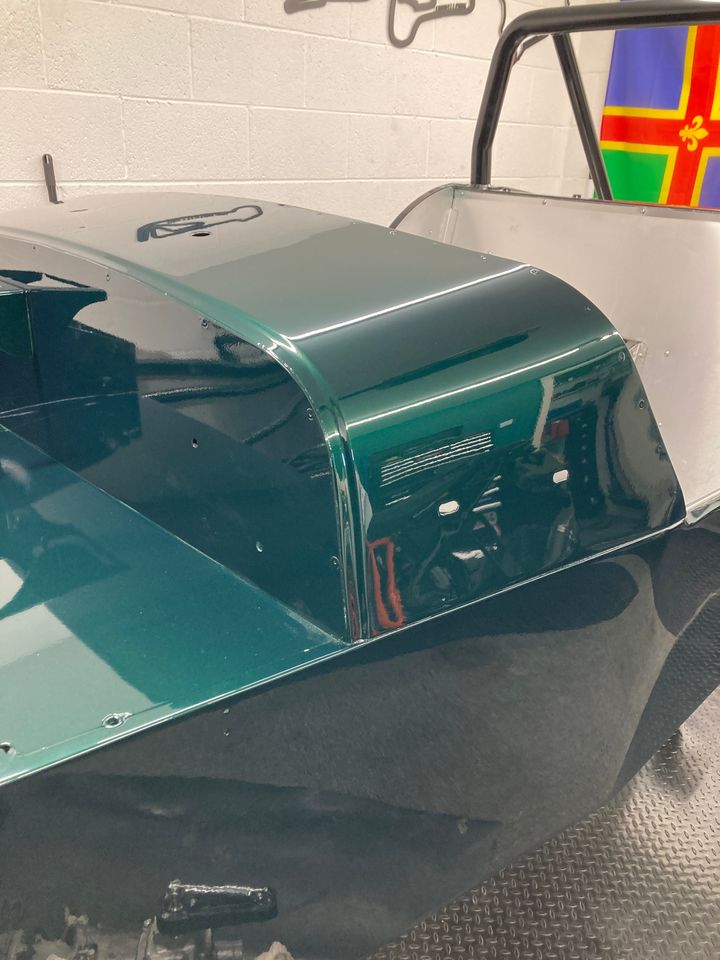

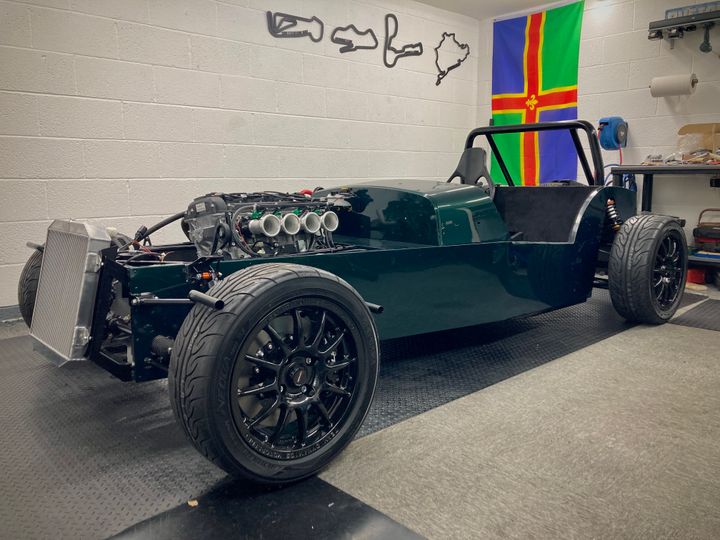
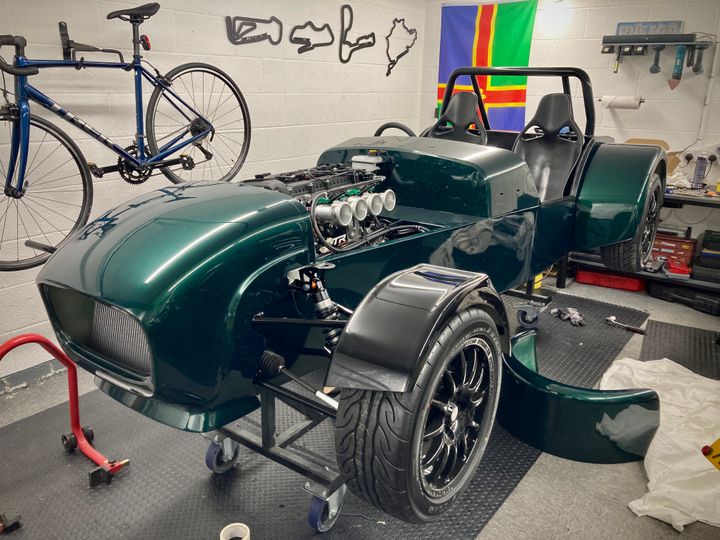
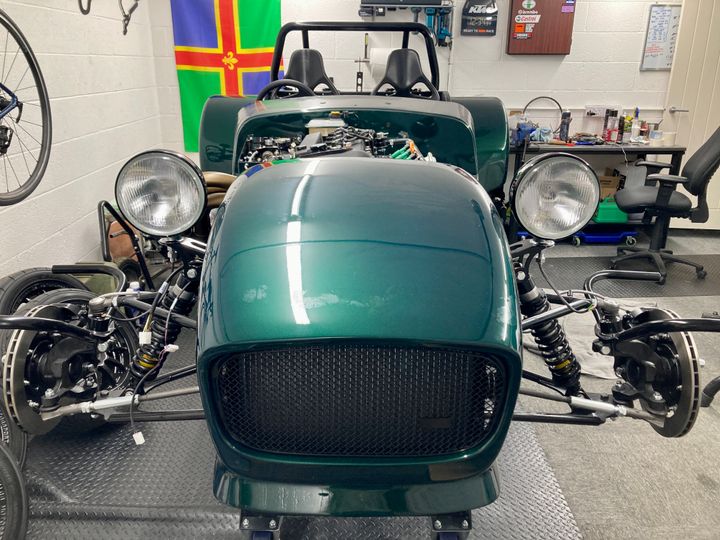
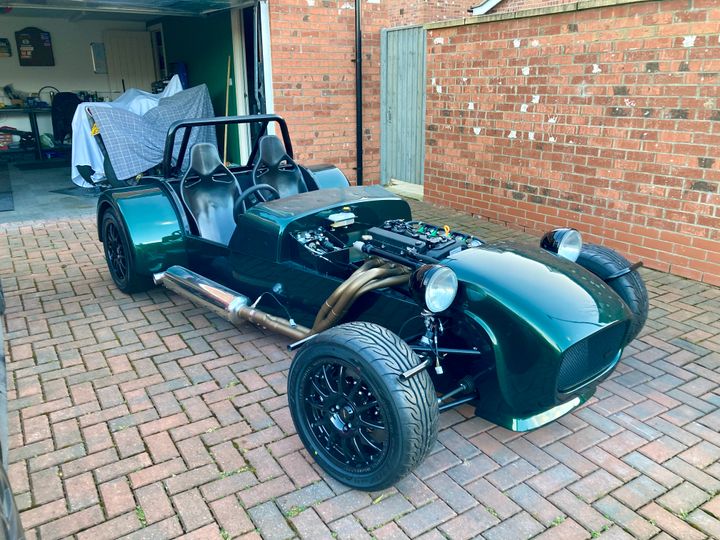
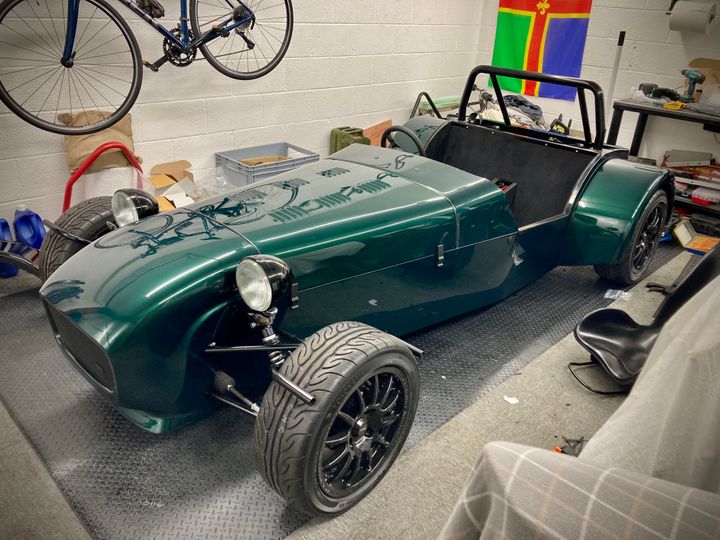
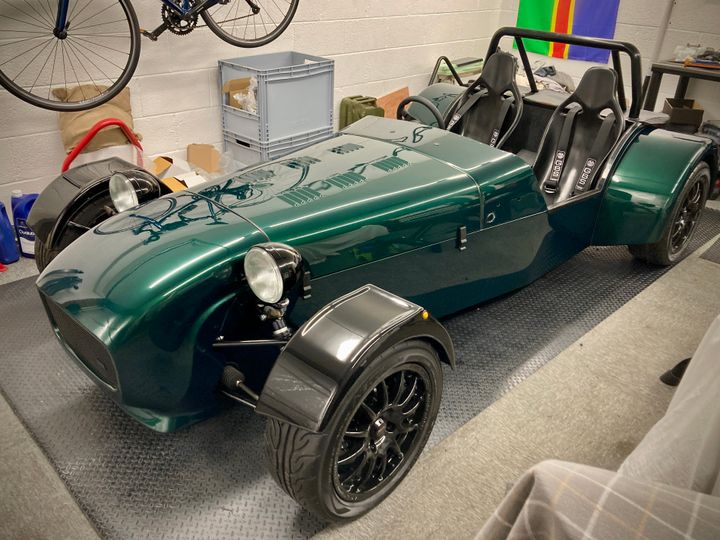
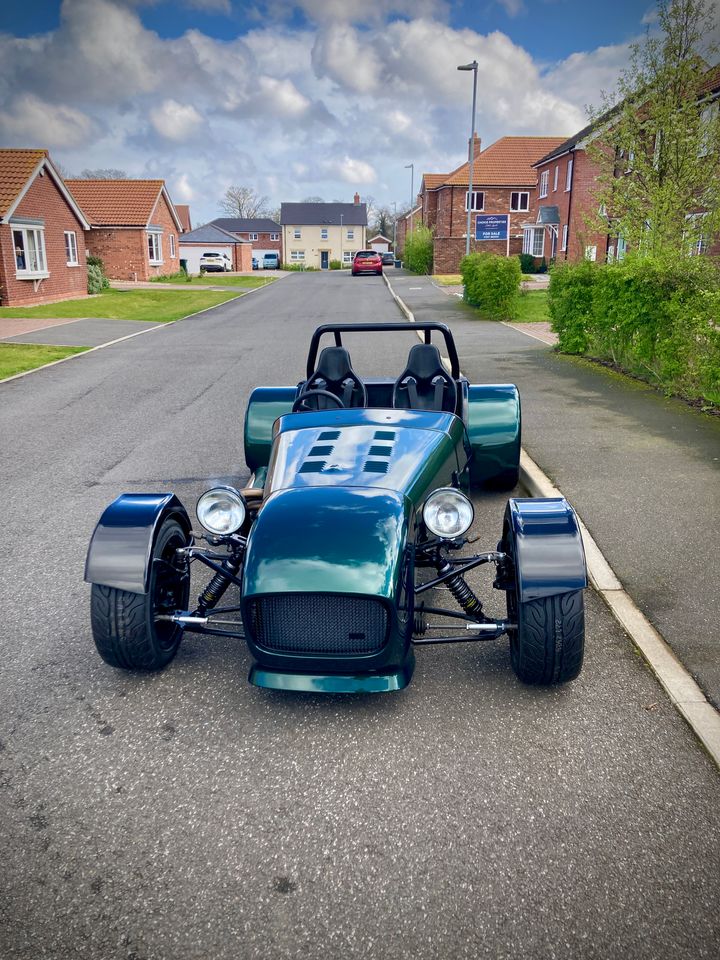
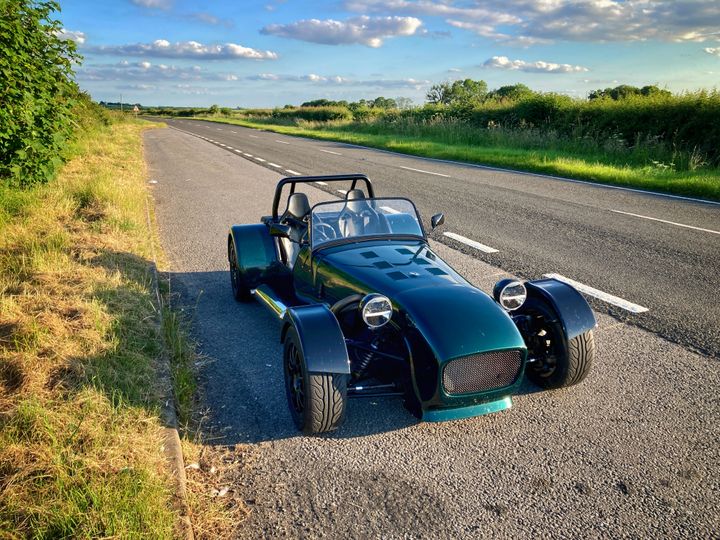
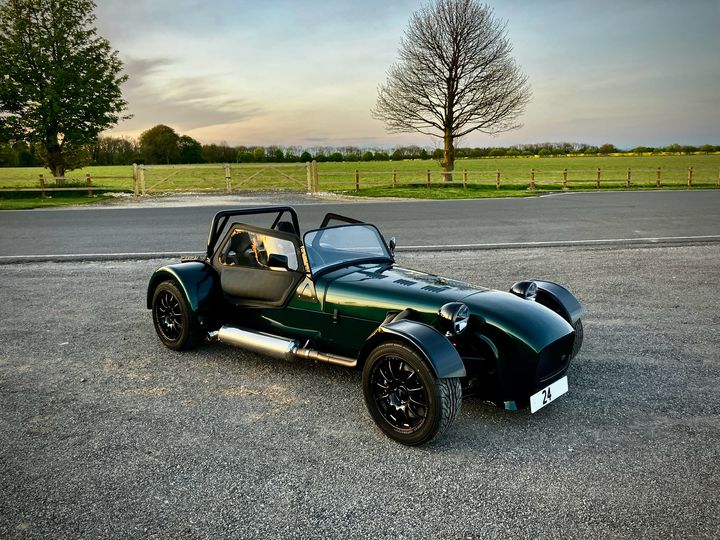
The colour is Jet Green Metallic (Z6H) which is a Porsche colour I'd seen, in some lights it looks quite dark and unassuming but in others it really pops. In the end the wait was worth it, he left the bonnet for now as he discussed its probably best I get the cuts made for the exhuast before he paints it.
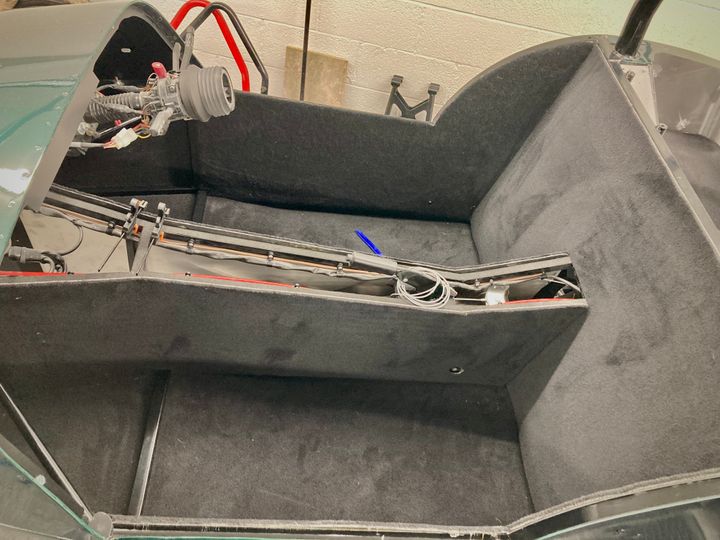
Now I could plough on with getting it finished, I got the carpets in.
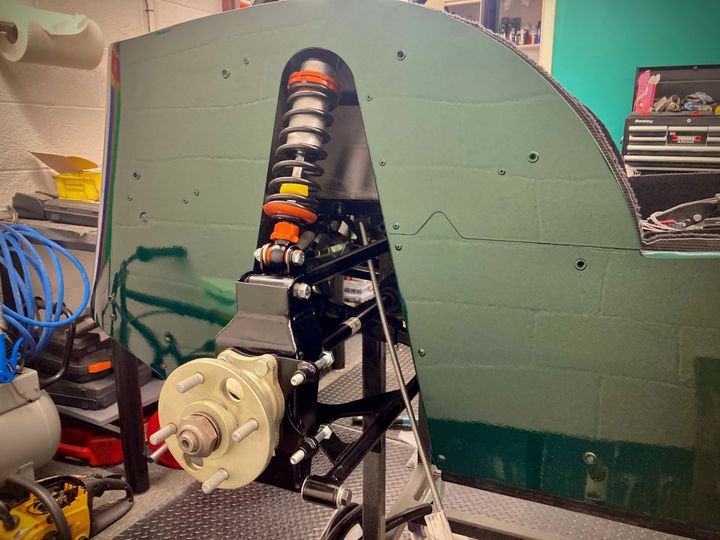
I got the rear suspension built up - it uses Sierra bits for the rear axle (driveshafts, hubs, calipers). The ATR shocks are quite nice items, they are height adjustable and have an adjuster for hard/soft (I'm not sure if its just compression or compression + rebound?).
When I started to build the kit GBS didn't offer a build manual as such, I used mostly other build diaries to double check things but when I got to the end of the build they released their manual typical! They were really good with talking through the steps they take on their own builds so I tried to follow what they do. The manual they have now is pretty good as I spotted a couple of bits in it that I missed before finishing it off.
At this point I decided to get the engine/gearbox installed as I wanted to get big bits bolted on!
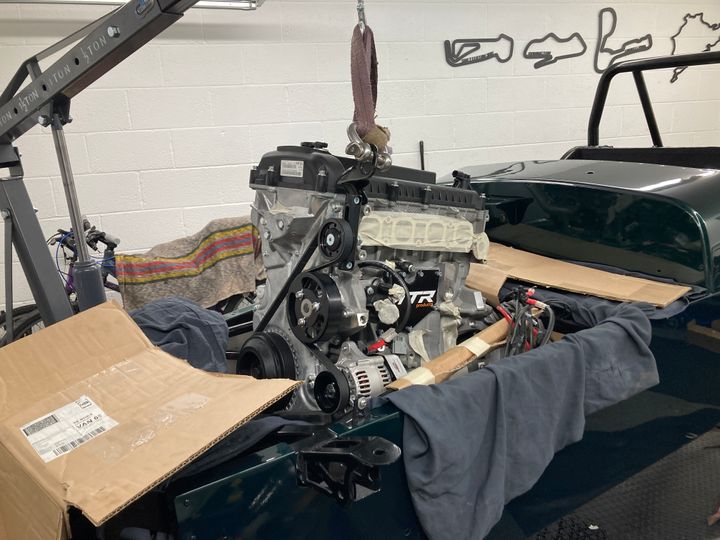
Its a bit of an unwieldy beast as you have to tilt it to first get it in the bay then gradually lower and untilt, plenty of protection needed! In the end it went quite well and got it sat on its mounts.
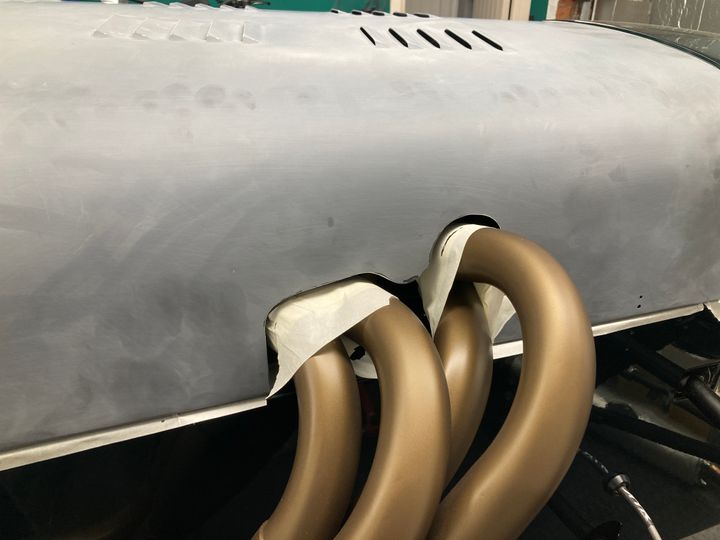
Now the engine was sat roughly where it needed to be I could get the exhaust bolted up. I opted to get it coated with Cerakote in burnt bronze, for some reason the pictures make it look like gold. Eventually I had to take the silencer off again as it turns out the way the lambda bungs were meant the sensor would be at the bottom which isn't ideal. I got the silencer off and asked a local exhaust place to weld a bung on, fortunately its just after the collector in the manifold but right before the cat in the silencer.
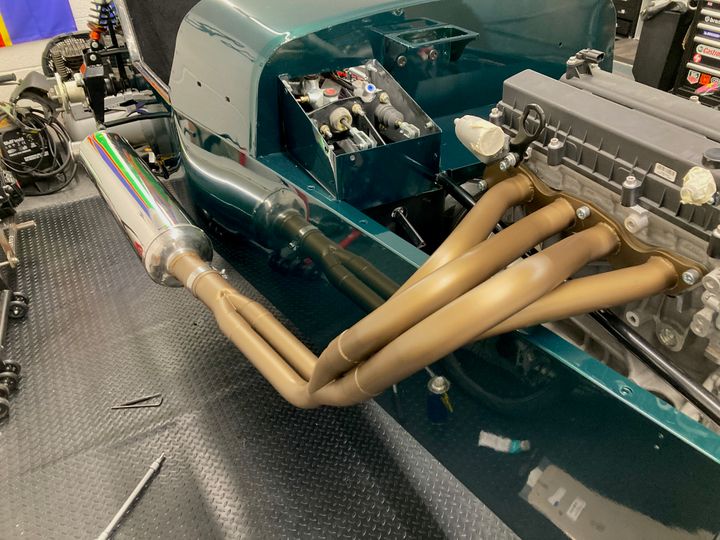
Now the engine was in place I was itching to get the ITBs fitted, there's just something cool about machined trumpets.

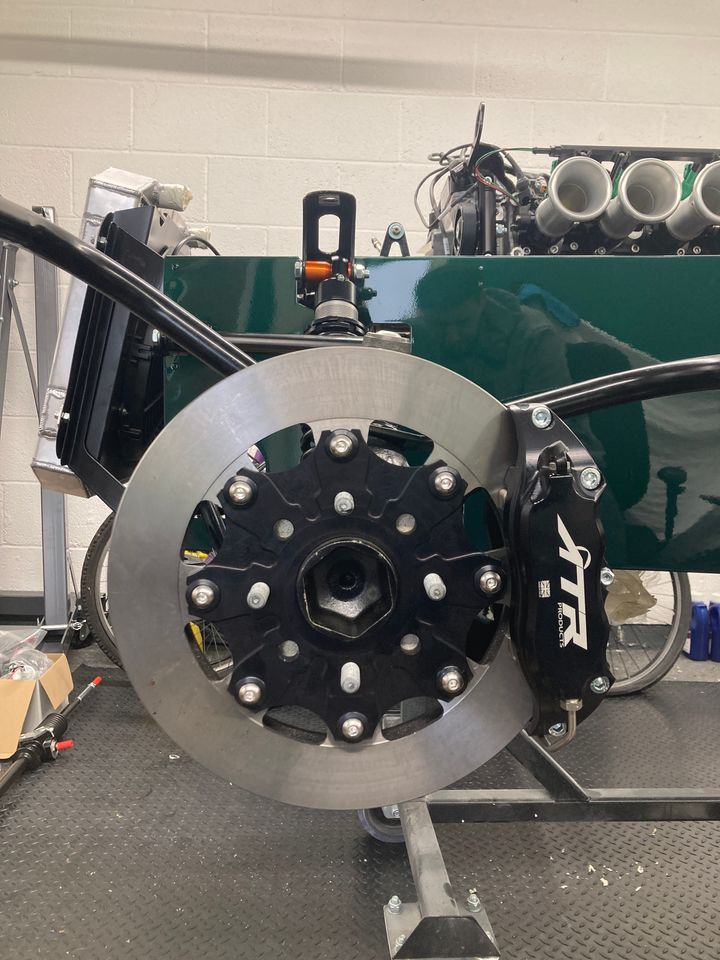
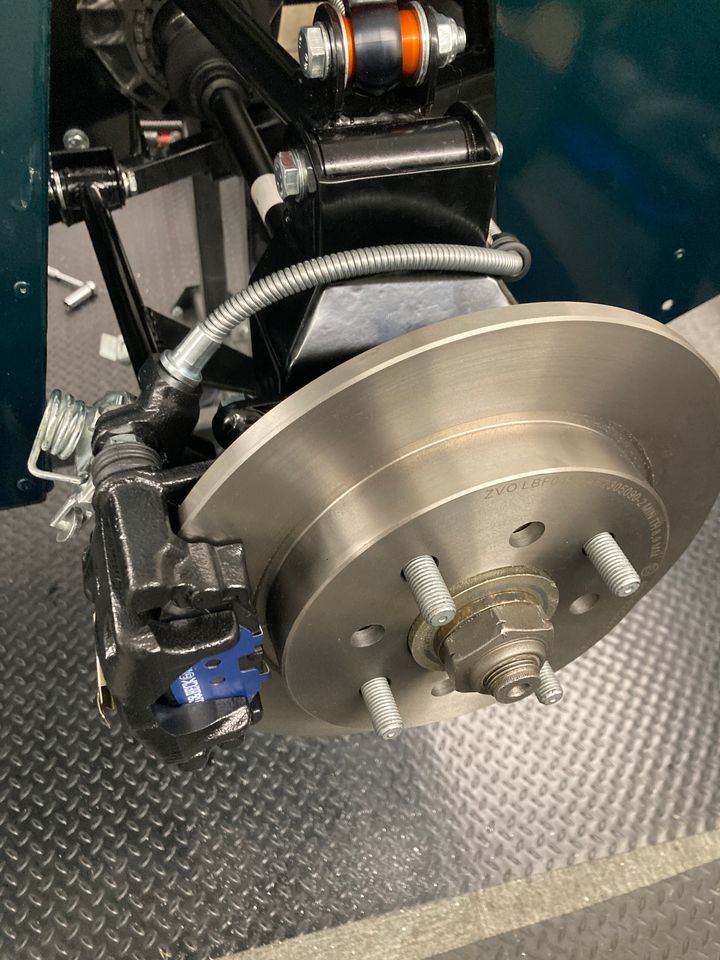
The front axles were built up, the ATR brake upgrade is pretty substantial and is most likely overkill for this weight of car but the weight saving over the Sierra calipers and disk is pretty big. They do offer a lightweight hub upgrade but they aren't the cheapest so opted for the Sierra hubs, I may retrofit them at a later date.
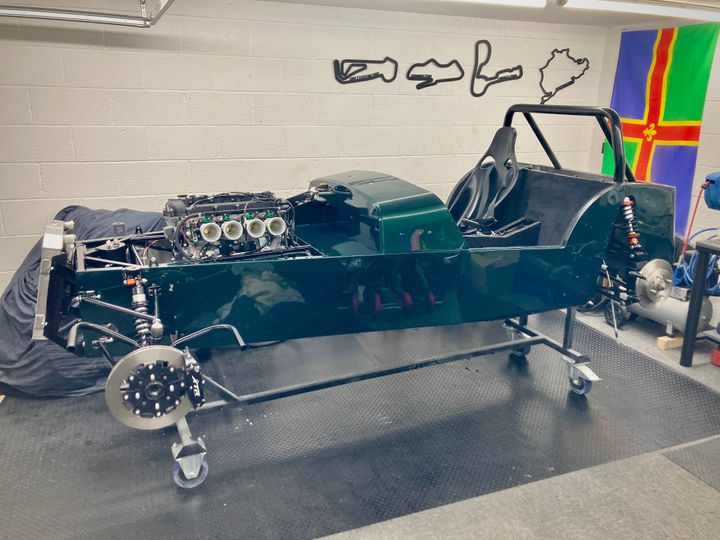
It's now starting to look like a car! I'd got the radiator mounted but that turned into a pain later down the line, I needed to redo the mount on the chassis as it didn't seem to fit under the nose cone. The issue with that was the fan was on the engine side of the radiator so there was limited room to squeeze it all in, I never did find out if it was an issue with the mounts or if I'd made a mistake in mounting it originally.
I'd arranged it all with my local painter and left it with him but made the big mistake of saying 'there's no rush as I'm waiting for the next stages of build'.
Time went on and I'd collected the next stages of the build but no painted car, I kept visiting but it sat there in the corner with very slow progress.
Luckily my work had kept me busy most of the time and eventually I got the message with a snapshot that he'd starting painting it! Roll on a few more weeks and it was ready to pick up!
The colour is Jet Green Metallic (Z6H) which is a Porsche colour I'd seen, in some lights it looks quite dark and unassuming but in others it really pops. In the end the wait was worth it, he left the bonnet for now as he discussed its probably best I get the cuts made for the exhuast before he paints it.
Now I could plough on with getting it finished, I got the carpets in.
I got the rear suspension built up - it uses Sierra bits for the rear axle (driveshafts, hubs, calipers). The ATR shocks are quite nice items, they are height adjustable and have an adjuster for hard/soft (I'm not sure if its just compression or compression + rebound?).
When I started to build the kit GBS didn't offer a build manual as such, I used mostly other build diaries to double check things but when I got to the end of the build they released their manual
typical! They were really good with talking through the steps they take on their own builds so I tried to follow what they do. The manual they have now is pretty good as I spotted a couple of bits in it that I missed before finishing it off.At this point I decided to get the engine/gearbox installed as I wanted to get big bits bolted on!
Its a bit of an unwieldy beast as you have to tilt it to first get it in the bay then gradually lower and untilt, plenty of protection needed! In the end it went quite well and got it sat on its mounts.
Now the engine was sat roughly where it needed to be I could get the exhaust bolted up. I opted to get it coated with Cerakote in burnt bronze, for some reason the pictures make it look like gold. Eventually I had to take the silencer off again as it turns out the way the lambda bungs were meant the sensor would be at the bottom which isn't ideal. I got the silencer off and asked a local exhaust place to weld a bung on, fortunately its just after the collector in the manifold but right before the cat in the silencer.
Now the engine was in place I was itching to get the ITBs fitted, there's just something cool about machined trumpets.
The front axles were built up, the ATR brake upgrade is pretty substantial and is most likely overkill for this weight of car but the weight saving over the Sierra calipers and disk is pretty big. They do offer a lightweight hub upgrade but they aren't the cheapest so opted for the Sierra hubs, I may retrofit them at a later date.
It's now starting to look like a car! I'd got the radiator mounted but that turned into a pain later down the line, I needed to redo the mount on the chassis as it didn't seem to fit under the nose cone. The issue with that was the fan was on the engine side of the radiator so there was limited room to squeeze it all in, I never did find out if it was an issue with the mounts or if I'd made a mistake in mounting it originally.
Got the rear discs and calipers on, the calipers are mounted upside-down so they need flipping to bleed them which is awkward. Some of the bits did come off again, like the hubs and calipers, as I ended up painting them all.
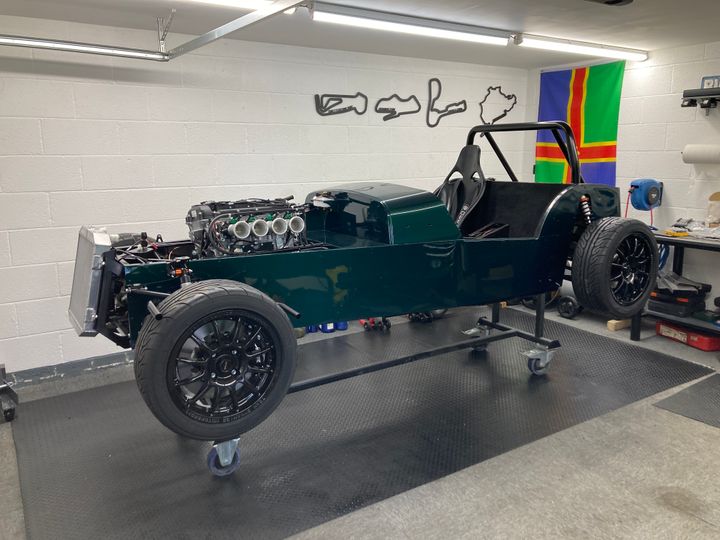
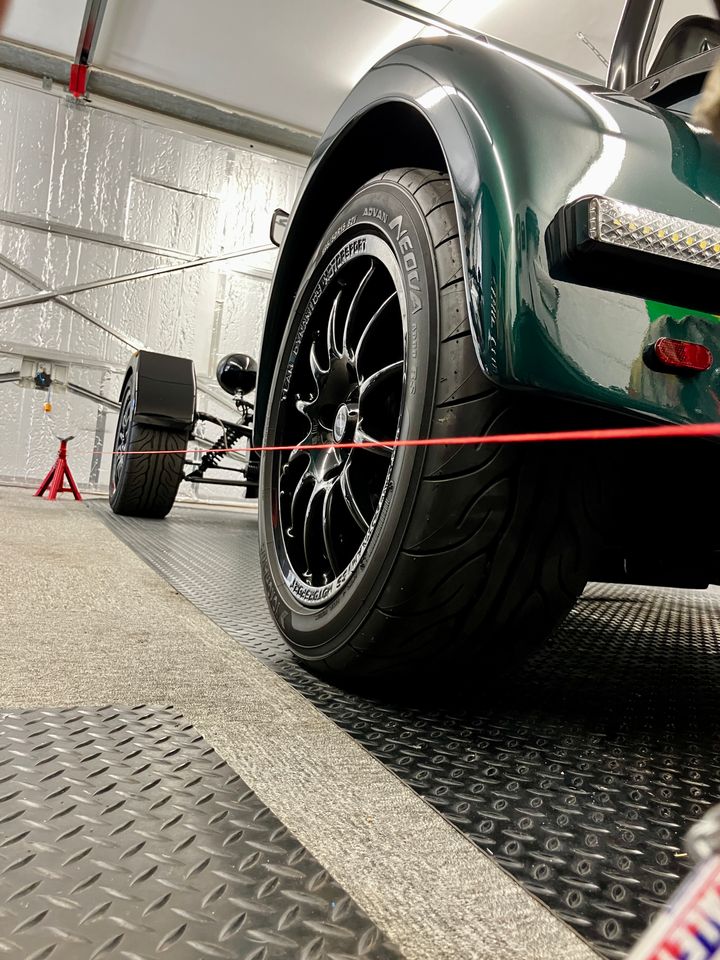
I decided to chuck the wheels on to see how it looked.
It was the first time I could see a glimmer of the end in sight, the whole build was up and down with motivation as there was a fair bit of waiting then working away meant I couldn't always work on it. I found times where I just had to get it to a point where it looked like I'd done something, even though I'd have to take it back off, so I had some motivation for the next bit. There was a want to rush through it so I could get it finished and drive it then the sensible side of me kicked in and I knew that X needed painting or Y needing fitting.
With the wheels on I knew I had to get it on the ground. The build stand is supplied by GBS and its brilliant as all the work you do on the car is at a decent height and you can get underneath it easily but knowing it could sit on its own wheels meant it felt like it was that bit nearer to finishing.
et voila
As I'd been so used to it up in the air it felt ridiculously low, I had taken a demo ride in GBS's demo car so knew how low they are but it had been a while. After getting my pics and sitting in it back in the air it went, I'd still got quite a bit left to do so it wasn't ready to be on the deck full time.
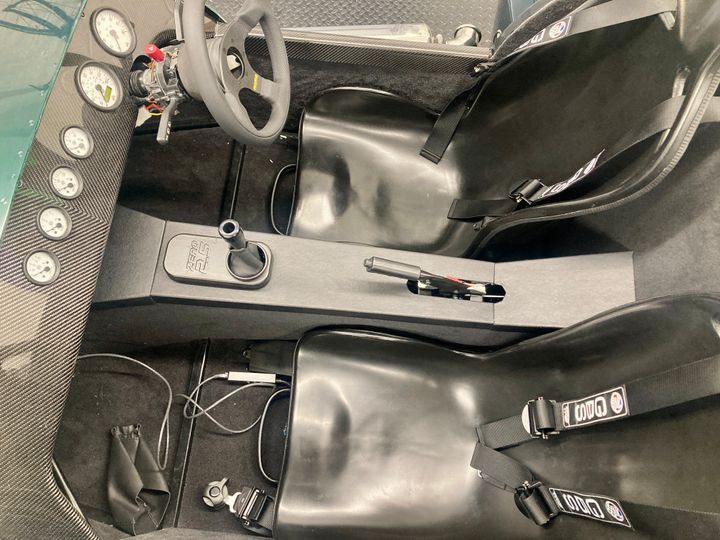
I got the seats fitted so I could get an idea of the driving position, even though they look like a torture device I've found them to be pretty comfortable. I would like to source some pads or get some made at some point in the future to give it a little comfort. I would say they are on the narrow side, great for fast road as theres no movement in the seat but not the best if you're on the larger side.
The nose cone was the next item to fit along with the wings, I did find the bottom part of the fibreglass for nose to be a bit on the thin side. During the panel stage GBS give you a polyurethane sealant for attaching the panels, it adds rigidity to the chassis and its strong stuff. I decided to reinforce the bottom of the nose cone with an aluminium plate bonded to it as I will use that to mount my number plate.
Now the nose was on I could fit the bonnet ready for cutting round the exhaust, after that it was off for paint.
I cracked on with the engine bay routing all the loom and fitting the fuel system. There's a Bosch pump in the corner near the passenger footwell along with a swirl pot. The cooling system was piped up and the breather catch can was fitted, with the breather I had to modify the cam cover to accept the AN fitting and blank a port off.
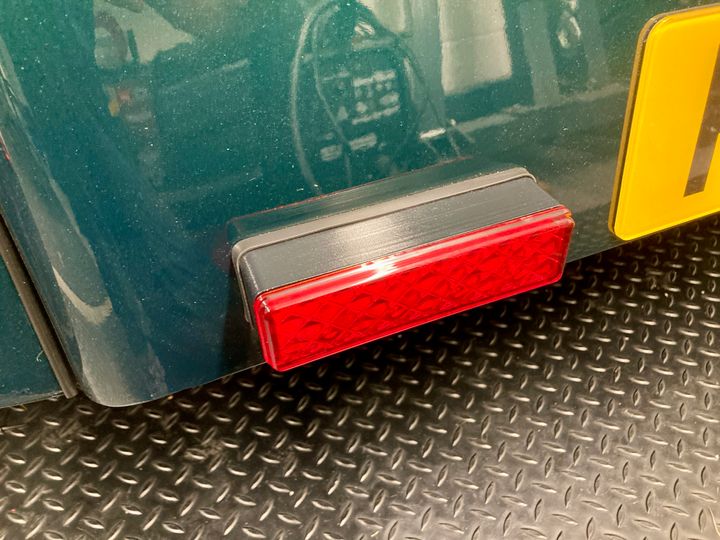
I moved onto the lights for the car, this was an area I went my own way as GBS supply the typical Caterham/Kit Car rear lights that originated from a caravan or trailer I believe....and they look s t.
t.
As I wanted a more modern style to it I'd found some LED ones that I liked the look of, they were however for a flat vertical panel and not a curved wing.
During the whole build I had a constant eye on the IVA document as I knew it would eventually need the test for me to get on the road, now GBS has been around for a while so the car is designed and built with this in mind. The lights are no exception, the rear lights are required to be within a certain angle of vertical for the car to pass, the lights I wanted wouldn't have achieved that.
My original idea was to create a mould so I could make them in fibreglass, this turned out like a pigs ear! I'd had my eye on 3D printers and avoided that route as it was another cost but eventually came round to the idea and got one bought, looking back now it was one of the best investments for the project!
I've used CAD before so I knocked up a design and before you know it I had mounts I could use for the rear lights that angled them towards vertical.
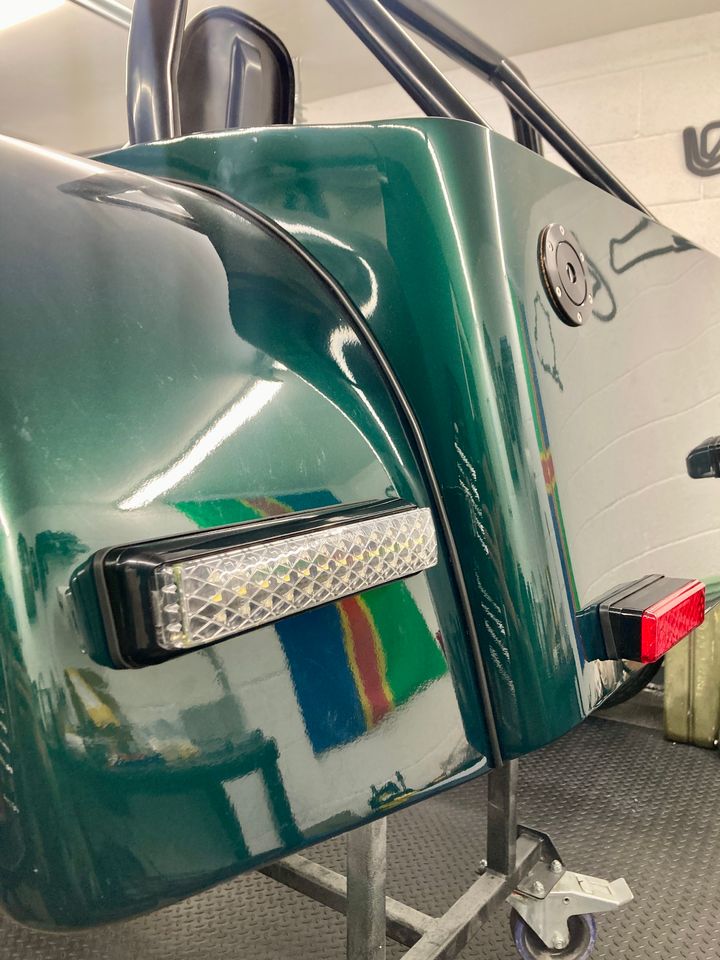
The lights I'd gone with had integrated reverse lights which meant the rear loom needed changing as the supplied lights didn't, I changed to dual LED fogs so it made the rear look a bit more symmetrical.
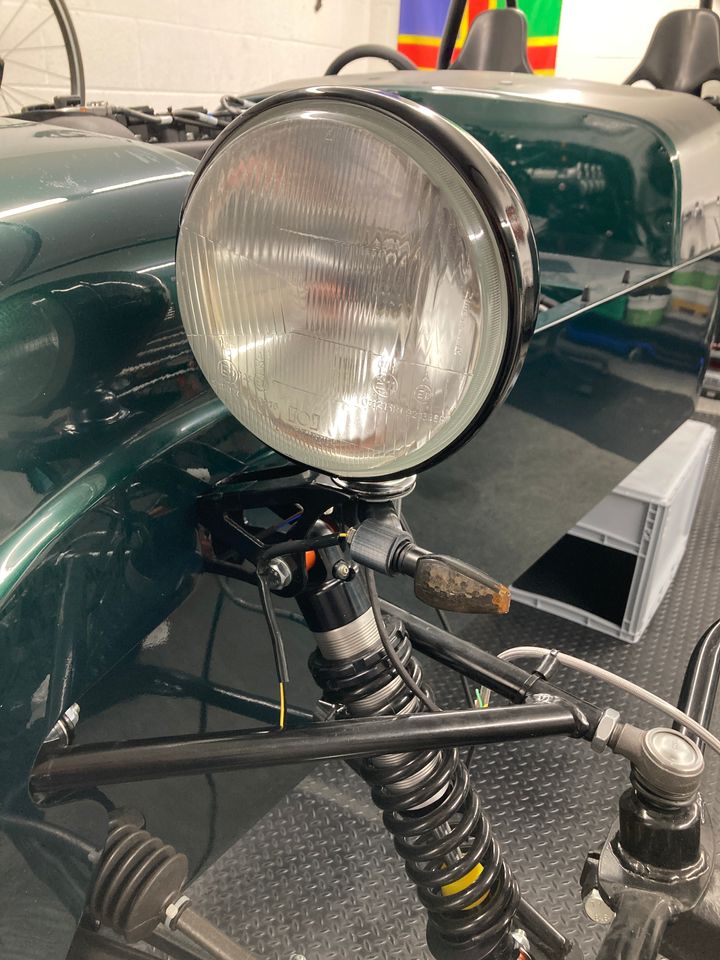
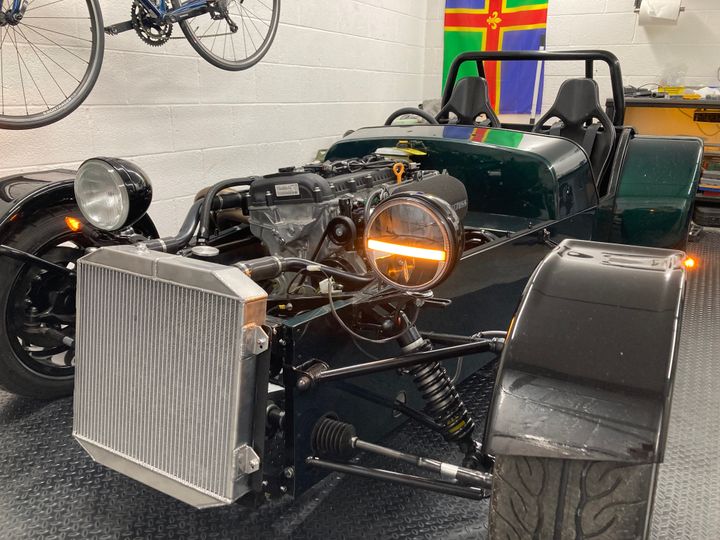
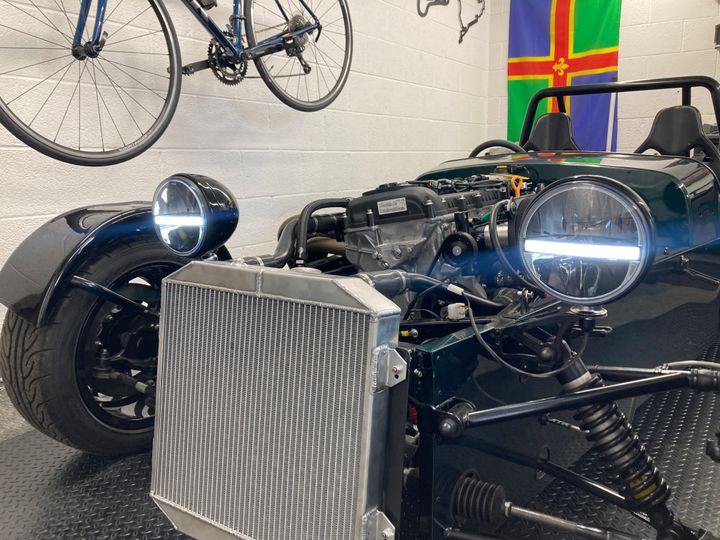
The headlights were fitted so it had some eyes.
After getting more confident with the 3D printing I tackled the issue of the gear selector linkage, it sits above the tunnel cover so it needed modifying and a cover making for it.
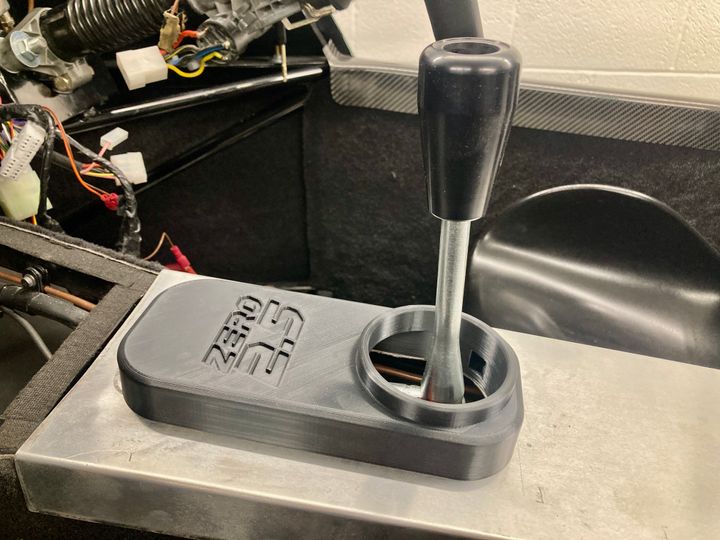
It was eventually painted and some heat insulation was stuck underneath so it doesn't melt.
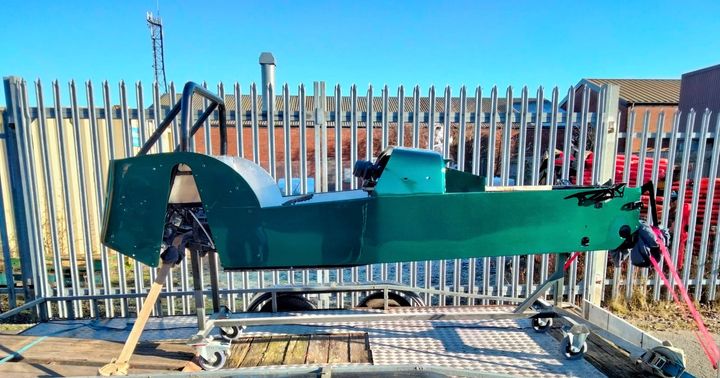
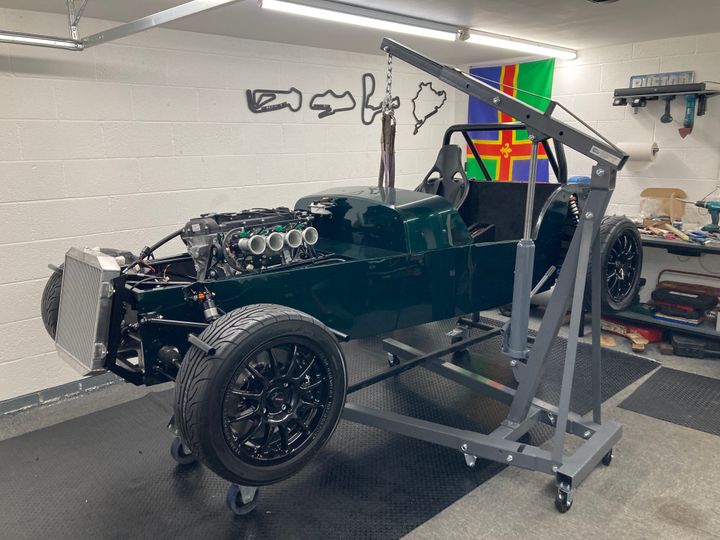
It was at this point where I decided it should fly again for the last time.
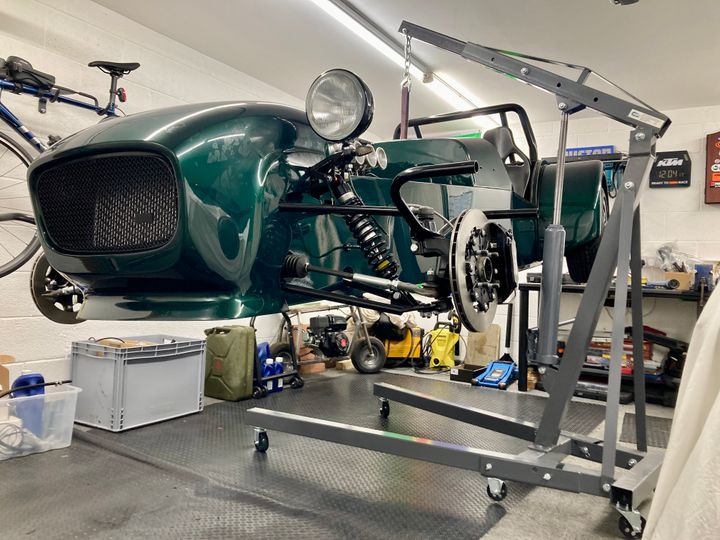
Just so I could roll it out the garage and let it see the light of day.
I decided to chuck the wheels on to see how it looked.
It was the first time I could see a glimmer of the end in sight, the whole build was up and down with motivation as there was a fair bit of waiting then working away meant I couldn't always work on it. I found times where I just had to get it to a point where it looked like I'd done something, even though I'd have to take it back off, so I had some motivation for the next bit. There was a want to rush through it so I could get it finished and drive it then the sensible side of me kicked in and I knew that X needed painting or Y needing fitting.
With the wheels on I knew I had to get it on the ground. The build stand is supplied by GBS and its brilliant as all the work you do on the car is at a decent height and you can get underneath it easily but knowing it could sit on its own wheels meant it felt like it was that bit nearer to finishing.
et voila
As I'd been so used to it up in the air it felt ridiculously low, I had taken a demo ride in GBS's demo car so knew how low they are but it had been a while. After getting my pics and sitting in it back in the air it went, I'd still got quite a bit left to do so it wasn't ready to be on the deck full time.
I got the seats fitted so I could get an idea of the driving position, even though they look like a torture device I've found them to be pretty comfortable. I would like to source some pads or get some made at some point in the future to give it a little comfort. I would say they are on the narrow side, great for fast road as theres no movement in the seat but not the best if you're on the larger side.
The nose cone was the next item to fit along with the wings, I did find the bottom part of the fibreglass for nose to be a bit on the thin side. During the panel stage GBS give you a polyurethane sealant for attaching the panels, it adds rigidity to the chassis and its strong stuff. I decided to reinforce the bottom of the nose cone with an aluminium plate bonded to it as I will use that to mount my number plate.
Now the nose was on I could fit the bonnet ready for cutting round the exhaust, after that it was off for paint.
I cracked on with the engine bay routing all the loom and fitting the fuel system. There's a Bosch pump in the corner near the passenger footwell along with a swirl pot. The cooling system was piped up and the breather catch can was fitted, with the breather I had to modify the cam cover to accept the AN fitting and blank a port off.
I moved onto the lights for the car, this was an area I went my own way as GBS supply the typical Caterham/Kit Car rear lights that originated from a caravan or trailer I believe....and they look s
t.As I wanted a more modern style to it I'd found some LED ones that I liked the look of, they were however for a flat vertical panel and not a curved wing.
During the whole build I had a constant eye on the IVA document as I knew it would eventually need the test for me to get on the road, now GBS has been around for a while so the car is designed and built with this in mind. The lights are no exception, the rear lights are required to be within a certain angle of vertical for the car to pass, the lights I wanted wouldn't have achieved that.
My original idea was to create a mould so I could make them in fibreglass, this turned out like a pigs ear! I'd had my eye on 3D printers and avoided that route as it was another cost but eventually came round to the idea and got one bought, looking back now it was one of the best investments for the project!
I've used CAD before so I knocked up a design and before you know it I had mounts I could use for the rear lights that angled them towards vertical.
The lights I'd gone with had integrated reverse lights which meant the rear loom needed changing as the supplied lights didn't, I changed to dual LED fogs so it made the rear look a bit more symmetrical.
The headlights were fitted so it had some eyes.
After getting more confident with the 3D printing I tackled the issue of the gear selector linkage, it sits above the tunnel cover so it needed modifying and a cover making for it.
It was eventually painted and some heat insulation was stuck underneath so it doesn't melt.
It was at this point where I decided it should fly again for the last time.
Just so I could roll it out the garage and let it see the light of day.
Edited by CasaBianco on Thursday 28th May 19:25
The next step was to first fire the engine.
I'd taken my ECU to GBS for them to flash it to the right map for the engine then all that was required was a slight wiring change for the oil pressure sensor as it was a different type to what they've previously used.
I also eventually got the sump which was designed and built by GBS, that was fitted but leaked :facepalm: so it was back to GBS for them to fix. Turns out they pressure test them now so they don't get this issue, I got it back and fitted and it was all good.
I got it all prepped and filled with fluids and turned it over without the coils plugged in, saw it had oil pressure so we were on!
Plugged the coils in and went for it and it fired......for about 3 seconds then stopped. Turns out I needed to change the wiring for the oil pressure sensor, the LR F88 was shutting the engine down due to no oil pressure which is what you want.
Updated the wiring and went for it and away she went, got some heat into the engine and checked for leaks and it all looked good!
GBS recommends 3 full heat cycles just to test for leaks and top coolant & oil up, I set the idle on the ITBs and had to calibrate the TPS sensor then she was running fairly well.
I'd got the bonnet back from paint so it was fitted.
I concentrated on the interior, the seats were fitted and the tunnel covers were smartened up with some leatherette fabric. The steering column did eventually get a 3D printed cowl, another GBS builder was selling the stl of his design so went that route. Eventually I will print my own version but I may get rid of the Sierra controls so will wait until then.
I made some front indicator mounts, GBS supply motorcycle type indicators that they attached on the nose cone but I didn't want any holes as eventually I'd go a different way after the IVA. They actually work quite well if you want to keep the headlight as they are, I was tempted to sell some.
The front cycle wings were bonded on and bits of trim were fitted and she was about ready for a trip out.
All the way through the build I was toying with the idea of doing the IVA myself, from what I've heard its not hugely difficult. The closer and closer I got to finishing though I gradually thought more and more about using GBS, they offer an IVA service where they will do what's needed to get it through and do all the paperwork.
I actually took it over to them twice, the first time for them to check it over and give me a list of things that I could do myself then the second time was for the IVA.
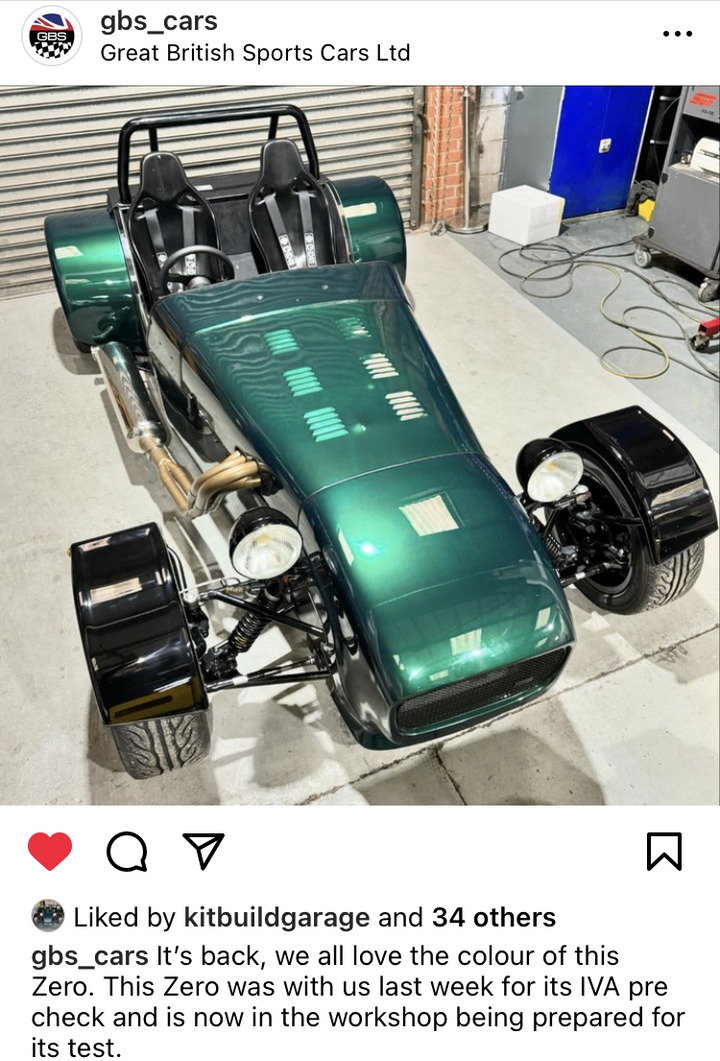
At the factory.

They even posted it on their Insta, in their workshop lighting it looks great!
She passed first time! I think that was more probably down to GBS having a good relationship with the IVA centre and knowing what's required, had I done it myself it would definitely needed another go!
As soon as I got it back it was on with the updating!
The headlights were the first thing, swapped out for some LED ones with integrated indicators.
The windscreen was fitted and it was off out up to Cadwell for my first drive......

I'd taken my ECU to GBS for them to flash it to the right map for the engine then all that was required was a slight wiring change for the oil pressure sensor as it was a different type to what they've previously used.
I also eventually got the sump which was designed and built by GBS, that was fitted but leaked :facepalm: so it was back to GBS for them to fix. Turns out they pressure test them now so they don't get this issue, I got it back and fitted and it was all good.
I got it all prepped and filled with fluids and turned it over without the coils plugged in, saw it had oil pressure so we were on!
Plugged the coils in and went for it and it fired......for about 3 seconds then stopped. Turns out I needed to change the wiring for the oil pressure sensor, the LR F88 was shutting the engine down due to no oil pressure which is what you want.
Updated the wiring and went for it and away she went, got some heat into the engine and checked for leaks and it all looked good!
GBS recommends 3 full heat cycles just to test for leaks and top coolant & oil up, I set the idle on the ITBs and had to calibrate the TPS sensor then she was running fairly well.
I'd got the bonnet back from paint so it was fitted.
I concentrated on the interior, the seats were fitted and the tunnel covers were smartened up with some leatherette fabric. The steering column did eventually get a 3D printed cowl, another GBS builder was selling the stl of his design so went that route. Eventually I will print my own version but I may get rid of the Sierra controls so will wait until then.
I made some front indicator mounts, GBS supply motorcycle type indicators that they attached on the nose cone but I didn't want any holes as eventually I'd go a different way after the IVA. They actually work quite well if you want to keep the headlight as they are, I was tempted to sell some.
The front cycle wings were bonded on and bits of trim were fitted and she was about ready for a trip out.
All the way through the build I was toying with the idea of doing the IVA myself, from what I've heard its not hugely difficult. The closer and closer I got to finishing though I gradually thought more and more about using GBS, they offer an IVA service where they will do what's needed to get it through and do all the paperwork.
I actually took it over to them twice, the first time for them to check it over and give me a list of things that I could do myself then the second time was for the IVA.
At the factory.
They even posted it on their Insta, in their workshop lighting it looks great!
She passed first time! I think that was more probably down to GBS having a good relationship with the IVA centre and knowing what's required, had I done it myself it would definitely needed another go!
As soon as I got it back it was on with the updating!
The headlights were the first thing, swapped out for some LED ones with integrated indicators.
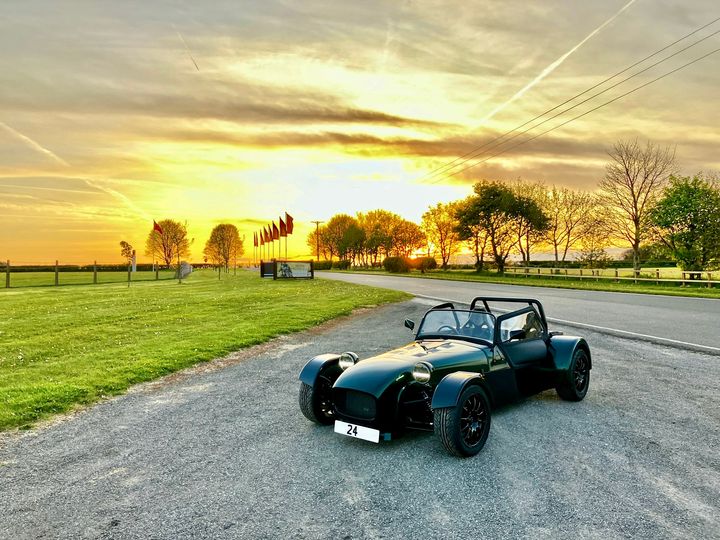
The windscreen was fitted and it was off out up to Cadwell for my first drive......
I managed to get a few drives in over the summer to get to know the car.

There were a couple of things that needed sorting to make it drive better, primary being the set up of the car.
I had mostly got the car set up ok on the front but the rear was wondering around quite a bit. There's no proper adjustment for the rear unless you opt for the lightweight hubs which I haven't got. The only thing I can do which is what GBS recommend is use shims to alter the toe.
My aim for the geometry was 1.5 degrees front camber, slight amount of front toe in and slight amount of rear toe in until I've gotten used to the car then I might alter the front toe.
I got the string out and went to work, it turns out there was quite a bit of toe out on the rear so I made some shims and placed them between the rear bearing and hub. After a drive it felt much nicer, not darting all over the road and I had more confidence, I'll eventually get it on a laser alignment to see what its like but I love tinkering with things myself.
The car has 4 gauges in the dash (oil pressure, coolant temp, volts and fuel level) which are fine but there are more things that I'd like to see, especially in a digital format. The oil pressure gauge has always been a bit....digital...with it just going off the gauge or nothing which isn't ideal, I have tried to look into the problem but in the meantime I needed something better.
Fortunately the LR F88 ECU is canbus, GBS already wired into the loom one of the canbus allocations for the AIM dash option so I decided I'd use the other.
I'd had my eyes on CanChecked stuff for a while and noticed their MFD15 would be ideal for what I need.
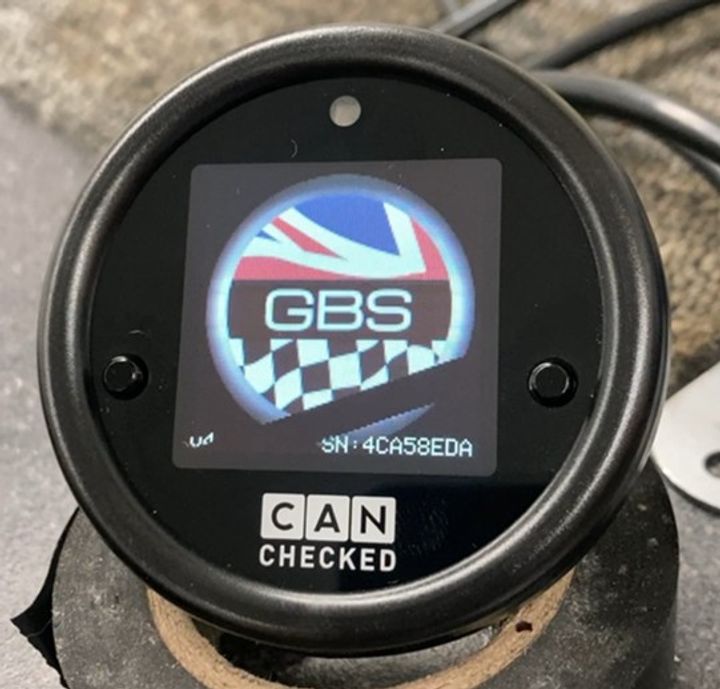
I got the GBS logo on there and fiddled around (excuse the black line, its the refresh rate on the screen vs the camera), I now have digital readings for inlet air temps, coolant temp, oil temp, oil pressure, rpm, volts, lambda and throttle position. It also has some other interesting features like adjustable shift lights and warnings for the inputs incase they go out of limits you set, this can all be set via wifi on a web browser too so no messing around with the laptop.
I did think of swapping the oil pressure gauge out with this gauge (may still do) but its line of sight is behind the steering wheel so its not ideal. For the time being I 3D printed a new centre dash which I fitted a USB charger and the fog light switch. I also reprinted the gear linkage cover, after a drive and leaving it in direct hot sun with it being painted black made it start to sag slightly. Its surprising how much heat comes down the tunnel, the open port of the cover is almost like its own hand warmer! The cover and the centre dash were painted in the same colour as the body and linkage cover was better heat protected underneath this time (so far its been on for over a year with no issues).
I had found whilst driving that although the windscreen takes the brunt of the airflow, at higher speeds the air whips round and smacks you right in the face to the point of it being uncomfortable. I ordered the GBS doors, which took a while to come and were not the cheapest of parts, but they are very good. I got them fitted which required bending the aluminium frame to suit and drilling them out for the hinges.

Since fitting them its transformed the drive, it makes a massive difference and you can have a conversation with the person next to you even at speed.
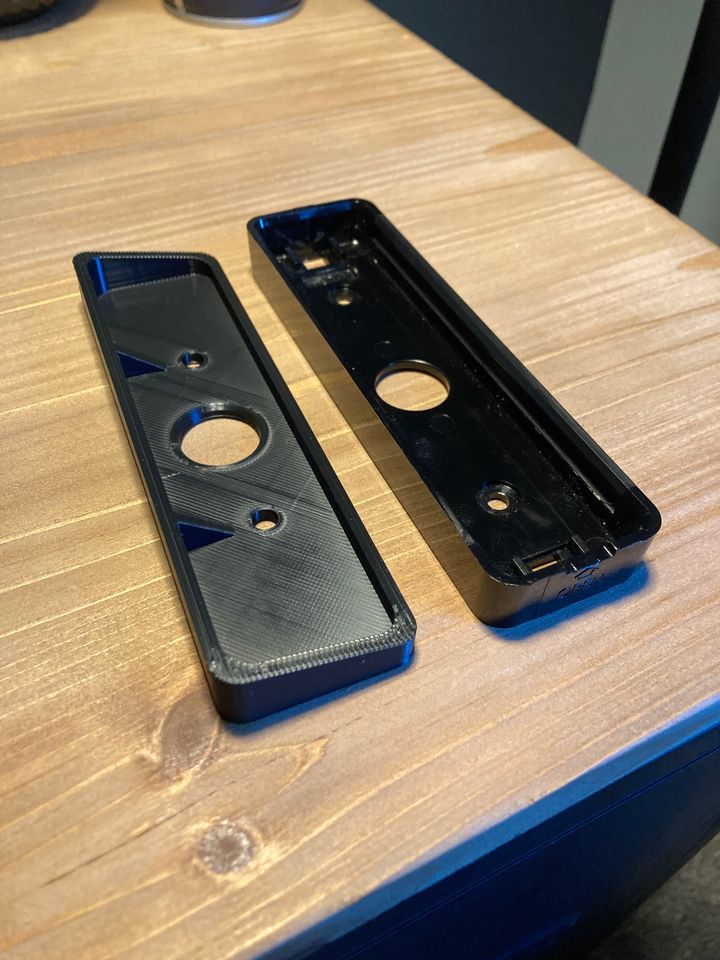
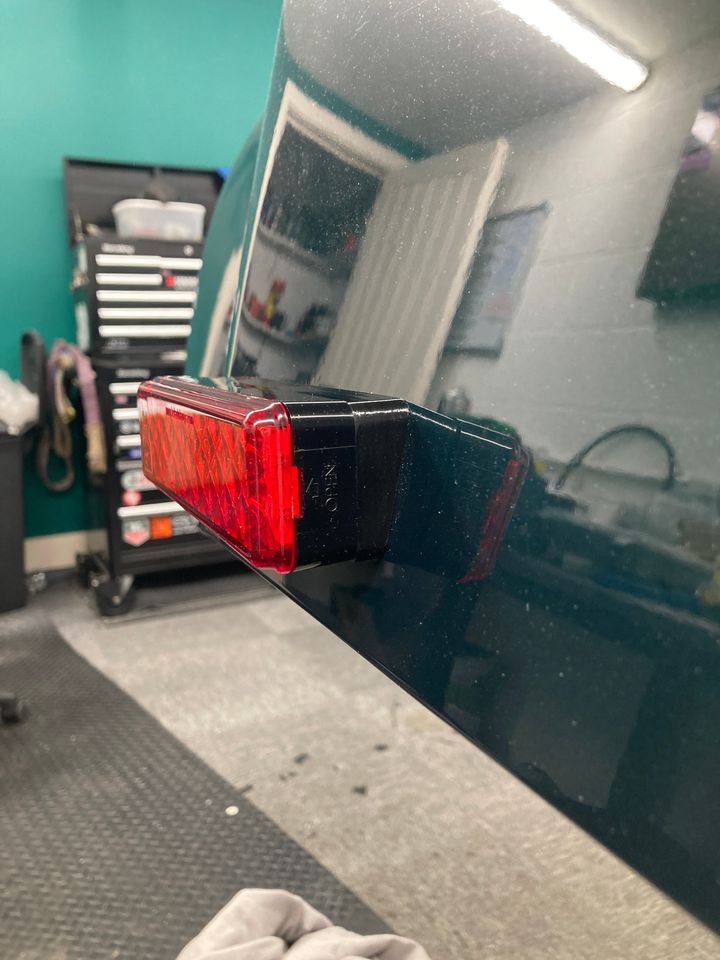
I did have an issue with the rear fog, sometimes when filling up there's the inevitable spill of fuel which runs directly down onto the foglight, moreso the mount. I did think my 3D printed part would kick the bucket first but it turns out the mount that came with the fog was first to give up the ghost!
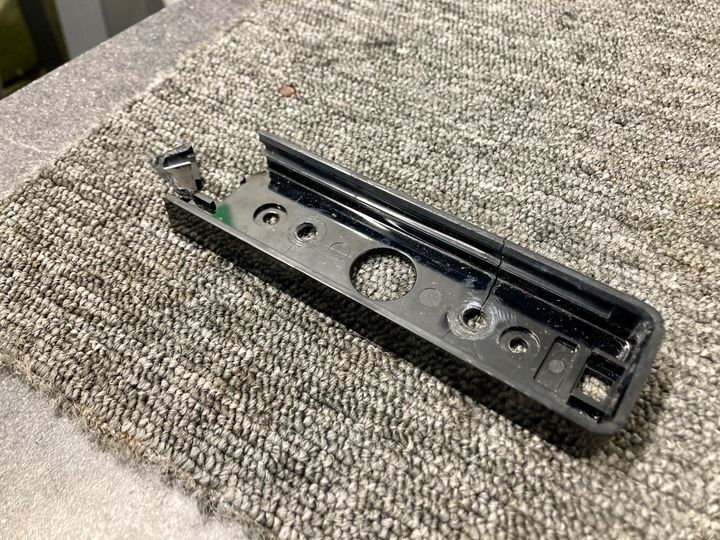
The fuel must eat into the plastic as it was so brittle, back to the drawing board! I integrated my angled mount with a copy of the manufactured mount into a single piece which turned out really well.
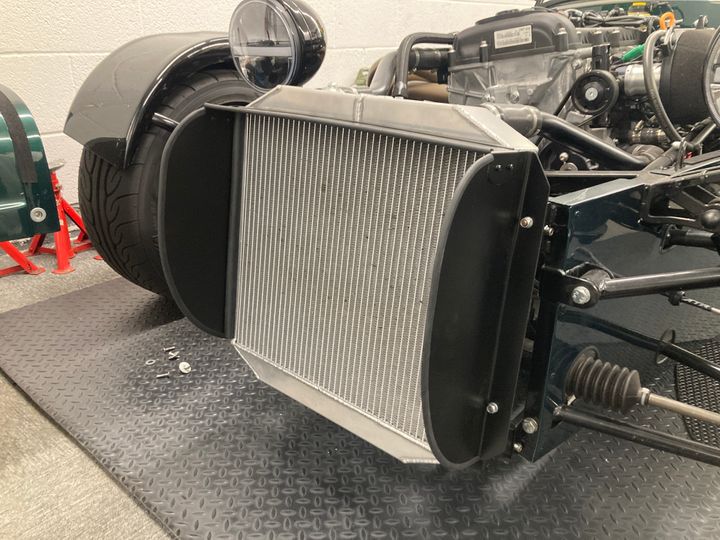
I then added some cowling to the radiator, it wasn't getting hot but I did notice after installing the gauge that the temps took a while to come down whilst driving. It seems to have improved things but maybe not by a huge amount.
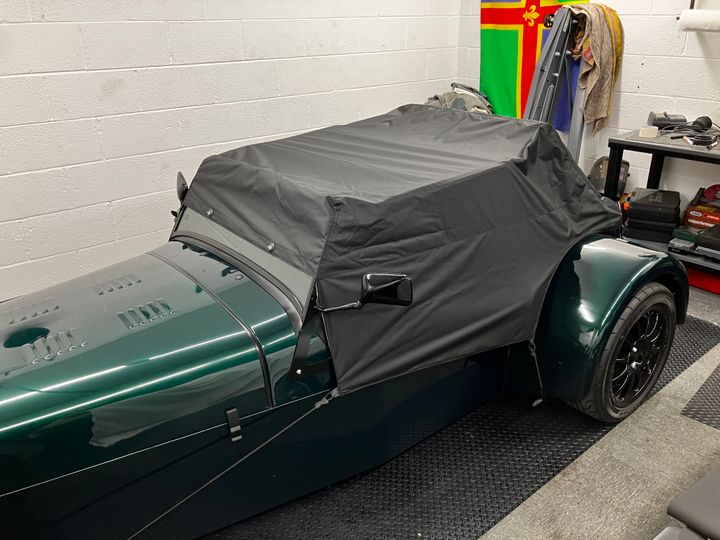
I also got a rain cover from Soft Bits For Sevens, just in case I go anywhere overnight I've at least got some protection and it won't turn into a bathtub.
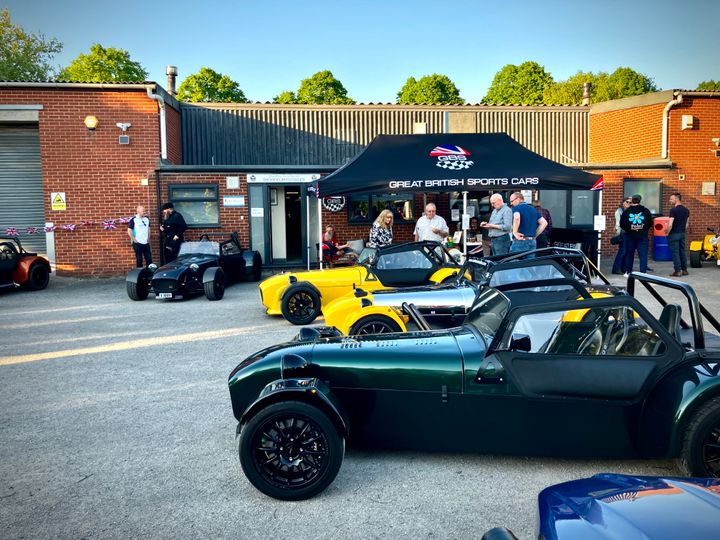
I managed to get across to GBS's meets they regularly have, its a really nice community of people and its nice that GBS do regular events like drive outs, trackdays and cars & coffee meets.
In terms of the car itself now I've had it a while, its actually not as harsh as what I was expecting. With the dampers set to a comfortable setting it takes in bumps quite well, the really harsh ones you do know about but its very civilised when you're just doddering around. Getting in and out is not the easiest but thats the nature of the beast, once you're in you can do a decent journey without feeling knackered.
Performance wise its bloody quick, I've had a tuned M135i (400hp) and a Cayman S and it would easily out handle and out accelerate them up to silly speeds. Top end they would take over but thats not where the enjoyment lies, the feeling you get when driving it at any speeds is brilliant. The sense of speed is multiplied vs other conventional road cars, going north of the NSL (private road officer) is intense and without any driving aids it does make you think more about what you're doing.
The sound of the car is just about right or if anything a little too quiet. Its not particularly loud when driving normally which is good but a bit more drama from the exhaust would be good, obviously this is just down to personal preference though. I am contemplating a different exhaust or to remove some of the wadding from the silencer just to get that bit extra.
When pushing on though it sounds fantastic, the ITBs come alive and you get to hear everything.
That bring us up to speed with the car, I've had the car on the road for 2 years now and I've done around 1300 miles which is less than I'd have liked but I'm planning on some longer journeys this year. It does have a weep from the rear diff propshaft seal which needs looking at but apart from that its been golden. I've also fitted a cooling mod to help the fuel pump and air intake temps, I've got a fan blower directing air in that area, it's not quite finished yet and needs some testing to figure out if it works.
There were a couple of things that needed sorting to make it drive better, primary being the set up of the car.
I had mostly got the car set up ok on the front but the rear was wondering around quite a bit. There's no proper adjustment for the rear unless you opt for the lightweight hubs which I haven't got. The only thing I can do which is what GBS recommend is use shims to alter the toe.
My aim for the geometry was 1.5 degrees front camber, slight amount of front toe in and slight amount of rear toe in until I've gotten used to the car then I might alter the front toe.
I got the string out and went to work, it turns out there was quite a bit of toe out on the rear so I made some shims and placed them between the rear bearing and hub. After a drive it felt much nicer, not darting all over the road and I had more confidence, I'll eventually get it on a laser alignment to see what its like but I love tinkering with things myself.
The car has 4 gauges in the dash (oil pressure, coolant temp, volts and fuel level) which are fine but there are more things that I'd like to see, especially in a digital format. The oil pressure gauge has always been a bit....digital...with it just going off the gauge or nothing which isn't ideal, I have tried to look into the problem but in the meantime I needed something better.
Fortunately the LR F88 ECU is canbus, GBS already wired into the loom one of the canbus allocations for the AIM dash option so I decided I'd use the other.
I'd had my eyes on CanChecked stuff for a while and noticed their MFD15 would be ideal for what I need.
I got the GBS logo on there and fiddled around (excuse the black line, its the refresh rate on the screen vs the camera), I now have digital readings for inlet air temps, coolant temp, oil temp, oil pressure, rpm, volts, lambda and throttle position. It also has some other interesting features like adjustable shift lights and warnings for the inputs incase they go out of limits you set, this can all be set via wifi on a web browser too so no messing around with the laptop.
I did think of swapping the oil pressure gauge out with this gauge (may still do) but its line of sight is behind the steering wheel so its not ideal. For the time being I 3D printed a new centre dash which I fitted a USB charger and the fog light switch. I also reprinted the gear linkage cover, after a drive and leaving it in direct hot sun with it being painted black made it start to sag slightly. Its surprising how much heat comes down the tunnel, the open port of the cover is almost like its own hand warmer! The cover and the centre dash were painted in the same colour as the body and linkage cover was better heat protected underneath this time (so far its been on for over a year with no issues).
I had found whilst driving that although the windscreen takes the brunt of the airflow, at higher speeds the air whips round and smacks you right in the face to the point of it being uncomfortable. I ordered the GBS doors, which took a while to come and were not the cheapest of parts, but they are very good. I got them fitted which required bending the aluminium frame to suit and drilling them out for the hinges.
Since fitting them its transformed the drive, it makes a massive difference and you can have a conversation with the person next to you even at speed.
I did have an issue with the rear fog, sometimes when filling up there's the inevitable spill of fuel which runs directly down onto the foglight, moreso the mount. I did think my 3D printed part would kick the bucket first but it turns out the mount that came with the fog was first to give up the ghost!
The fuel must eat into the plastic as it was so brittle, back to the drawing board! I integrated my angled mount with a copy of the manufactured mount into a single piece which turned out really well.
I then added some cowling to the radiator, it wasn't getting hot but I did notice after installing the gauge that the temps took a while to come down whilst driving. It seems to have improved things but maybe not by a huge amount.
I also got a rain cover from Soft Bits For Sevens, just in case I go anywhere overnight I've at least got some protection and it won't turn into a bathtub.
I managed to get across to GBS's meets they regularly have, its a really nice community of people and its nice that GBS do regular events like drive outs, trackdays and cars & coffee meets.
In terms of the car itself now I've had it a while, its actually not as harsh as what I was expecting. With the dampers set to a comfortable setting it takes in bumps quite well, the really harsh ones you do know about but its very civilised when you're just doddering around. Getting in and out is not the easiest but thats the nature of the beast, once you're in you can do a decent journey without feeling knackered.
Performance wise its bloody quick, I've had a tuned M135i (400hp) and a Cayman S and it would easily out handle and out accelerate them up to silly speeds. Top end they would take over but thats not where the enjoyment lies, the feeling you get when driving it at any speeds is brilliant. The sense of speed is multiplied vs other conventional road cars, going north of the NSL (private road officer) is intense and without any driving aids it does make you think more about what you're doing.
The sound of the car is just about right or if anything a little too quiet. Its not particularly loud when driving normally which is good but a bit more drama from the exhaust would be good, obviously this is just down to personal preference though. I am contemplating a different exhaust or to remove some of the wadding from the silencer just to get that bit extra.
When pushing on though it sounds fantastic, the ITBs come alive and you get to hear everything.
That bring us up to speed with the car, I've had the car on the road for 2 years now and I've done around 1300 miles which is less than I'd have liked but I'm planning on some longer journeys this year. It does have a weep from the rear diff propshaft seal which needs looking at but apart from that its been golden. I've also fitted a cooling mod to help the fuel pump and air intake temps, I've got a fan blower directing air in that area, it's not quite finished yet and needs some testing to figure out if it works.
That looks awesome, I would love something like this, it's basically a big complicated Lego set :-)
Also great to read a thread where it's retrospective so you get to see the finish without waiting months or in some cases, years.
I think for the pure thrill and enjoyment of driving, this or something like this is just about as good as it gets pound for pound.
Great colour choice too.
Also great to read a thread where it's retrospective so you get to see the finish without waiting months or in some cases, years.
I think for the pure thrill and enjoyment of driving, this or something like this is just about as good as it gets pound for pound.
Great colour choice too.
DaveK-S1 said:
have you thought of dropping some cams in it, they really liven up the 2.5
It's definitely up there for future intentions, home life has been pretty busy lately so its taken a back seat but I'd like to constantly improve it over the next few years. GBS offer a 260bhp upgrade I think but it sounds like you can get a a decent 230bhp from just cams so I may just do that, even at around 200bhp its fairly crazy. The 2.5 doesn't have a great top end, which I know it was never intended to, but has bags of torque so if I could just get a bit more spiciness in the higher revs then I'd be happy. The Dictator said:
That looks awesome, I would love something like this, it's basically a big complicated Lego set :-)
Also great to read a thread where it's retrospective so you get to see the finish without waiting months or in some cases, years.
I think for the pure thrill and enjoyment of driving, this or something like this is just about as good as it gets pound for pound.
Great colour choice too.
Thanks, I did think this as I've read a few readers cars threads where you get invested then realise its still miles away from completion even after a few years. I thought I'd hold off until its properly finished then people can see the whole process of the build easier, with the way legislation is changing the car market I wanted to show that there are still 'new' options out there to get that fix.Also great to read a thread where it's retrospective so you get to see the finish without waiting months or in some cases, years.
I think for the pure thrill and enjoyment of driving, this or something like this is just about as good as it gets pound for pound.
Great colour choice too.
Message Board | Readers' Cars | Top of Page | What's New | My Stuff