Chassis weight
Discussion


It will have some kind of zinc base coat, two pack. Might be Jotun or similar brand, but industrial paint rather than powder coat. The reason is I’m not changing the suspension bushes as the seem fine. I used the crane scale in the picture to compare deflection with a new one and they were pretty much the same.
The heat from powder coating would not do them any good though, hence paint.
The heat from powder coating would not do them any good though, hence paint.
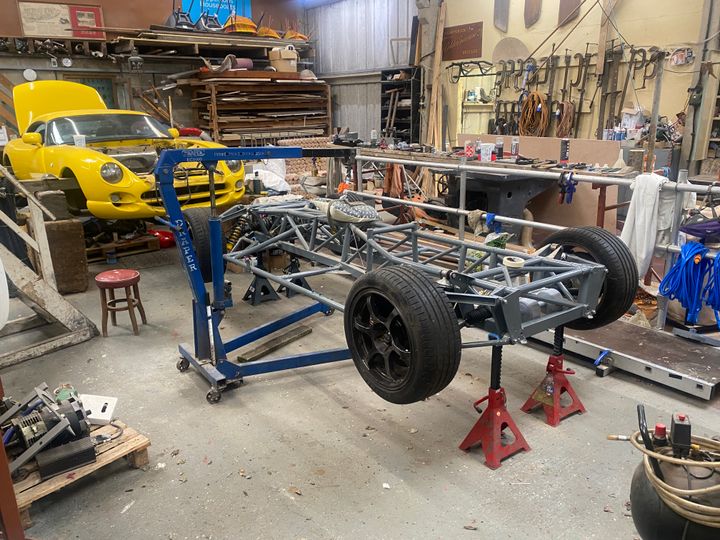
I used my son’s skateboard underneath the diff end to ‘wheelbarrow’ the chassis underneath the car. It took a bit of fiddling around to get it at an angle that would work, a crowbar was used for the last bit. It was worth doing before the chassis is painted, otherwise I’d have damaged the finish.
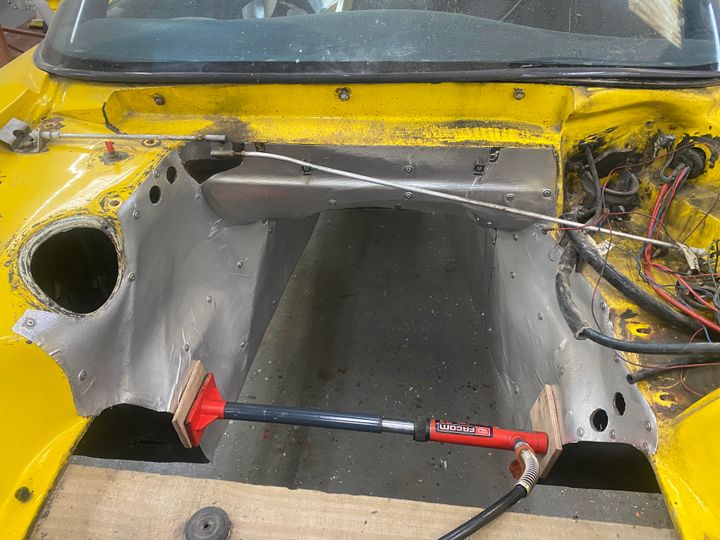
I made a spreader out of some scrap wood so I wouldn't damage the powder coat or heat shield on the tub.
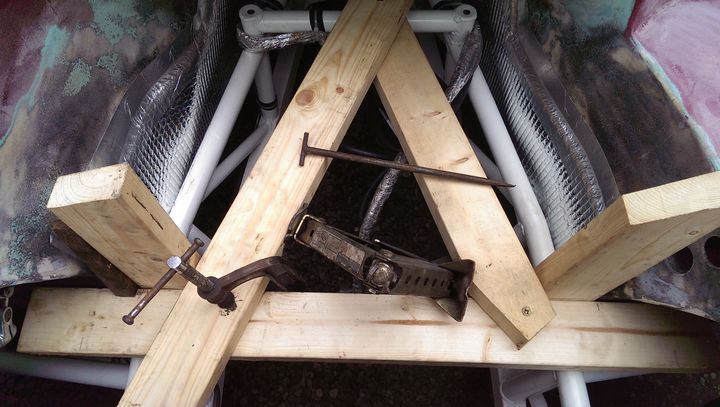
The 'A' is screwed at the bottom right and the top of the 'A'. The bottom left slides along the horizontal bar - the clamp is loose and just stops the leg from springing up. Winding the scissor jack flexes the tub, just enough to drop over the chassis.
The 'A' is screwed at the bottom right and the top of the 'A'. The bottom left slides along the horizontal bar - the clamp is loose and just stops the leg from springing up. Winding the scissor jack flexes the tub, just enough to drop over the chassis.
For ships we use the following paint system for exposed areas. This is International, but Jotun or Hempel will have a similar system.
Aluminium primer. Single pack. (Aluminium refers to the colour, not the application purpose).
Red or grey primer. Single pack. Colour depends on the top cost.
2 pack colour coat.
This can be sprayed or rollered on.
The aluminium primer has an etch quality.
The second coat is in a contrast colour to prove coverage.
The final cost can go straight on top, unless it’s white, in which case a single pack white primer is used.
If I ever do my TVR chassis this is what I’ll do with brush & roller.
I can get you product codes in the new year if you like.
Supateg said:
The important part is make sure they get into the corners. I have seen plenty of chassis blasted and when the operatives rush, the corners are missed, then not matter what you cover the chassis with, it’s the corners that rust first.
Hth
Thanks, they've done a good job getting in to all the nooks and crannies. Hth

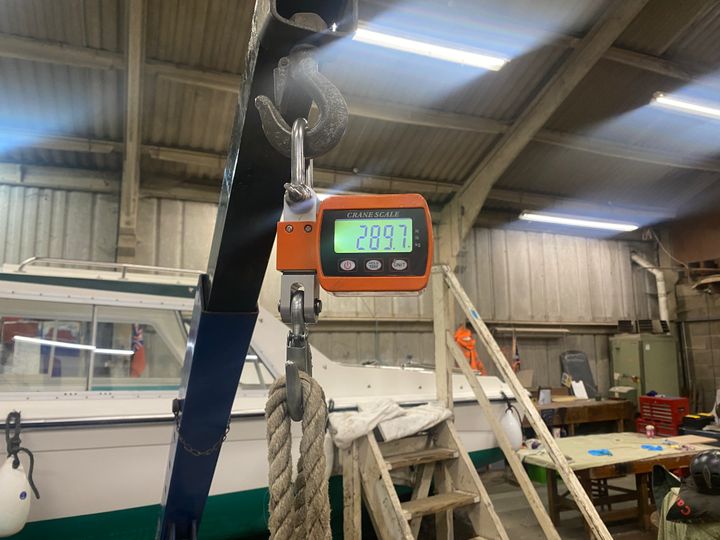
Just over a year later and a bit more trivia. With all the suspension, brakes and diff installed the weight is 290kg
With the wheels on its 365kg
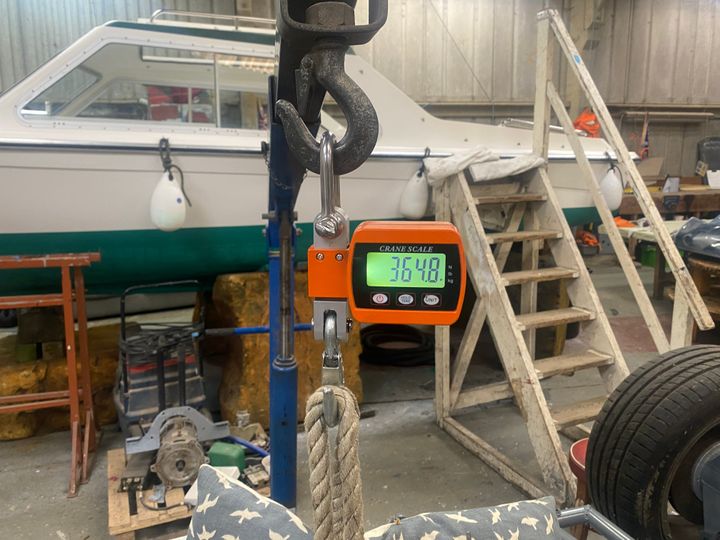
I noticed afterwards that the engine host was on the 250kg setting, but it all seemed fine. In both cases deduct 5kg as I used a dumb bell as trimming weight to ensure level flight....
With the wheels on its 365kg
I noticed afterwards that the engine host was on the 250kg setting, but it all seemed fine.
In both cases deduct 5kg as I used a dumb bell as trimming weight to ensure level flight....notaping said:
I made a spreader out of some scrap wood so I wouldn't damage the powder coat or heat shield on the tub.
The 'A' is screwed at the bottom right and the top of the 'A'. The bottom left slides along the horizontal bar - the clamp is loose and just stops the leg from springing up. Winding the scissor jack flexes the tub, just enough to drop over the chassis.
Did you spread it far enough that the chassis just went straight up with no tilt? I've measured my top rails as being 64cm wide and the tub at that point is 62cm. I used a portapower to spread them to 63cm to see what it was like and it did do it albeit with a bit of creaking.....as I'm not ready to join the body to chassis yet I left it for today.The 'A' is screwed at the bottom right and the top of the 'A'. The bottom left slides along the horizontal bar - the clamp is loose and just stops the leg from springing up. Winding the scissor jack flexes the tub, just enough to drop over the chassis.
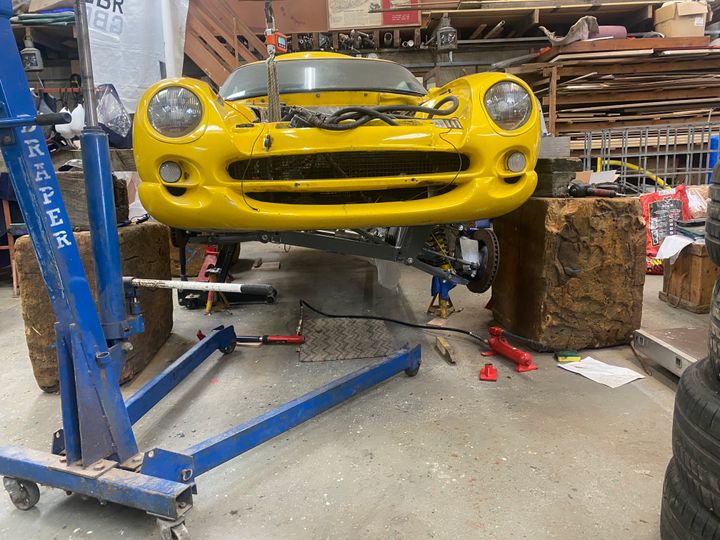
Finally the chassis is reunited with the body, took a lot longer than I'd hoped (as do so many of the jobs....). Possibly complicated by needing to raise the chassis up into the suspended body, so gravity was working against me. The portapower was need to flex the tub wider
After several aborted attempts I used a tip someone else gave and attached polythene sheet to the engine bay and chassis to help them slide over each other.
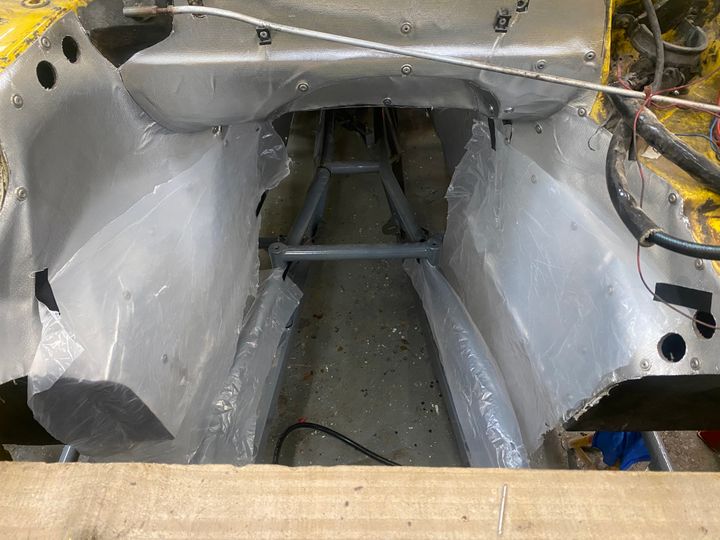
Even with this, quite an angle was needed...
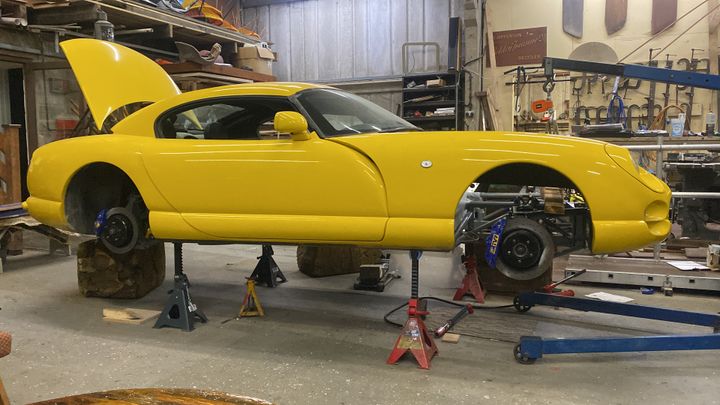
finally in place, adding this information in case it can help someone else.
After several aborted attempts I used a tip someone else gave and attached polythene sheet to the engine bay and chassis to help them slide over each other.
Even with this, quite an angle was needed...
finally in place, adding this information in case it can help someone else.
Message Board | Cerbera | Top of Page | What's New | My Stuff