
A couple of general questions!
Discussion


Firstly I was changing my otter switch for a lower temp one and straight away noticed it was a pig to get a spanner on, (mine is on the rad)... done it in the end but I was looking to take the air intake out to give me more room but couldn't seem to pull it through, I took the end off the air filter but it didn't want to move, I noticed there was a couple of cable ties near the middle, but i couldn't see what was stopping it at the end. I'm only curious because I'll be changing it for a smooth bore one soon probably.
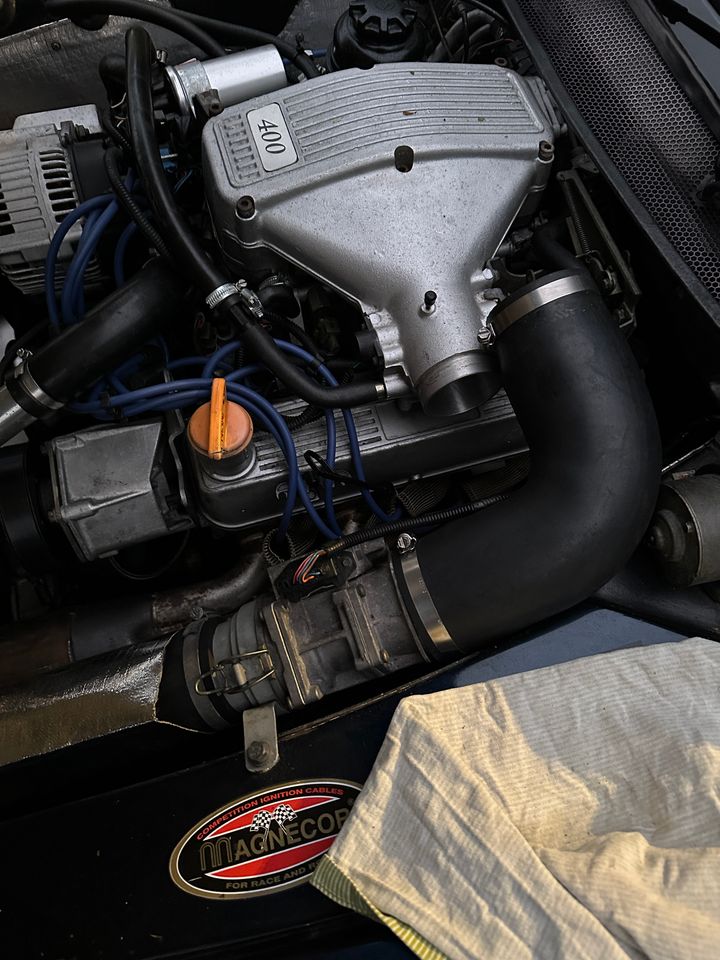
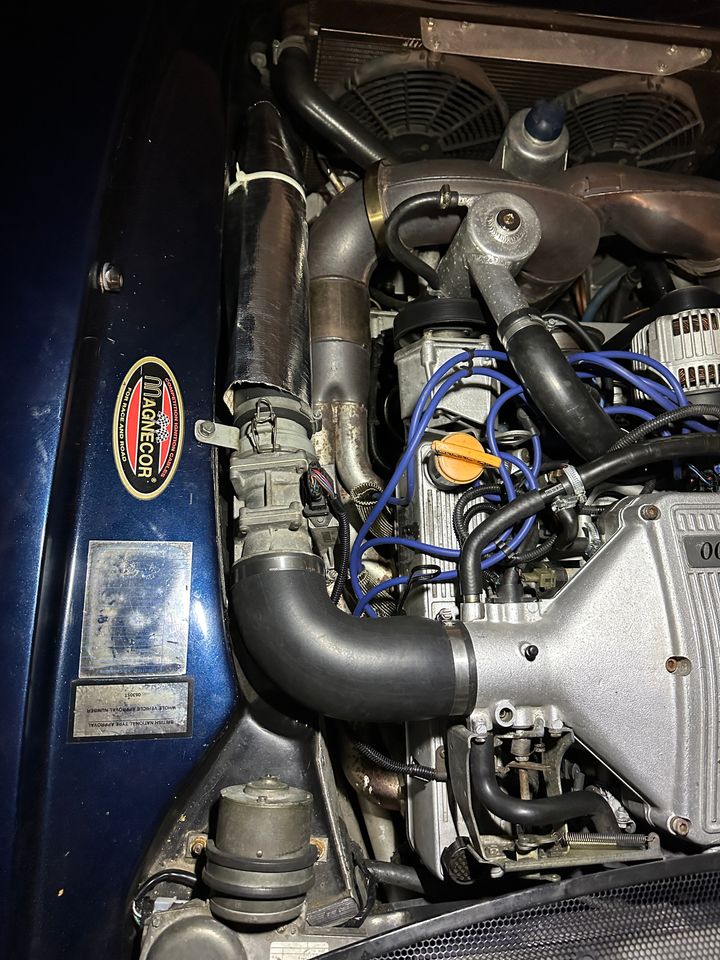
The other thing is that I was changing a vacuum hose as as the rubber cap looked perished and noticed there was another tube coming out the back, should there the something on there, if so to go where? its a 2000 plate by the way. See pic
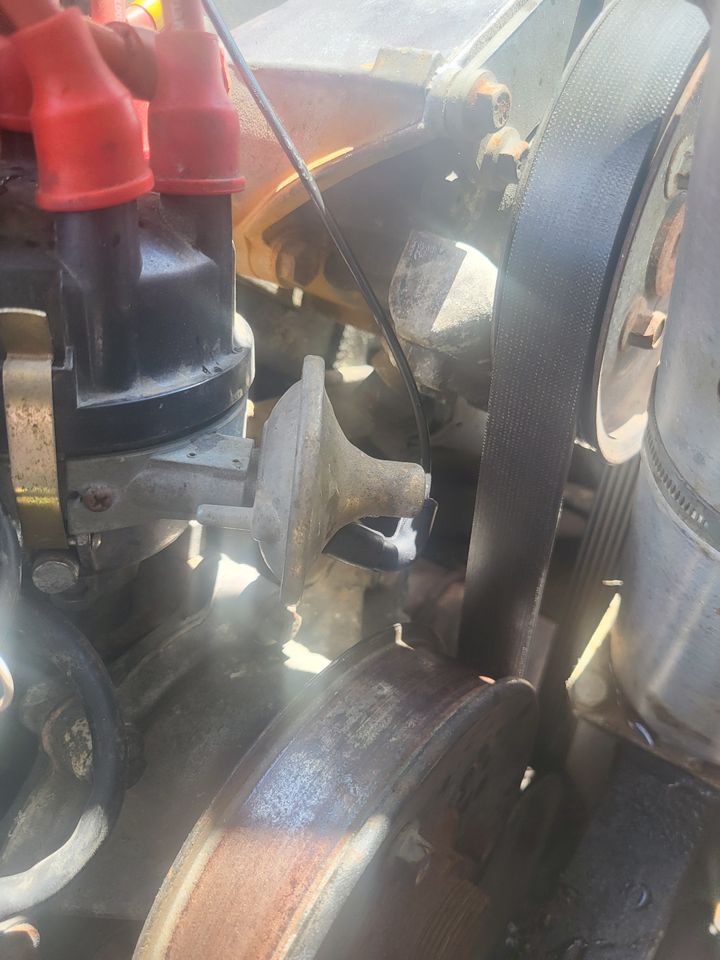
The other thing is that I was changing a vacuum hose as as the rubber cap looked perished and noticed there was another tube coming out the back, should there the something on there, if so to go where? its a 2000 plate by the way. See pic
Removing the intake pipe is best done by going in through the front and stretching the pipe out straight as it goes through a tight bend inside the nose cone then pulling it out through the wing via engine bay.
With age that pipe can degrade, if you do remove it stretch it out and you might find it has many pin prick holes in it.
They tend to be in the folds of the pipe so to some extent when pipe is more compressed this possibly keeps it air tight but it’s not ideal especially if it’s in the part running up past the manifold. Drawing in very hot air is not great.
Personally I’d not remove it unless you have a replacement or are prepared to repair ( tape up ) the holes as putting it back through the hole in the wing is a PITA
The smooth bore set up is much better which uses a sleeve where it goes through the wing and the section in the nose cone being pre shaped provides a far less restrictive flow and after having mine on for about 5 years I reckon the thing will last longer than the car. It’s meaty bit of kit.
With age that pipe can degrade, if you do remove it stretch it out and you might find it has many pin prick holes in it.
They tend to be in the folds of the pipe so to some extent when pipe is more compressed this possibly keeps it air tight but it’s not ideal especially if it’s in the part running up past the manifold. Drawing in very hot air is not great.
Personally I’d not remove it unless you have a replacement or are prepared to repair ( tape up ) the holes as putting it back through the hole in the wing is a PITA
The smooth bore set up is much better which uses a sleeve where it goes through the wing and the section in the nose cone being pre shaped provides a far less restrictive flow and after having mine on for about 5 years I reckon the thing will last longer than the car. It’s meaty bit of kit.
BritishTvr450 said:
Removing the intake pipe is best done by going in through the front and stretching the pipe out straight as it goes through a tight bend inside the nose cone then pulling it out through the wing via engine bay.
With age that pipe can degrade, if you do remove it stretch it out and you might find it has many pin prick holes in it.
They tend to be in the folds of the pipe so to some extent when pipe is more compressed this possibly keeps it air tight but it s not ideal especially if it s in the part running up past the manifold. Drawing in very hot air is not great.
Personally I d not remove it unless you have a replacement or are prepared to repair ( tape up ) the holes as putting it back through the hole in the wing is a PITA
The smooth bore set up is much better which uses a sleeve where it goes through the wing and the section in the nose cone being pre shaped provides a far less restrictive flow and after having mine on for about 5 years I reckon the thing will last longer than the car. It s meaty bit of kit.
Brilliant thanks for that, so basically a lot of wriggling, I've heard a smooth bore pipe works better hence the change really, cheersWith age that pipe can degrade, if you do remove it stretch it out and you might find it has many pin prick holes in it.
They tend to be in the folds of the pipe so to some extent when pipe is more compressed this possibly keeps it air tight but it s not ideal especially if it s in the part running up past the manifold. Drawing in very hot air is not great.
Personally I d not remove it unless you have a replacement or are prepared to repair ( tape up ) the holes as putting it back through the hole in the wing is a PITA
The smooth bore set up is much better which uses a sleeve where it goes through the wing and the section in the nose cone being pre shaped provides a far less restrictive flow and after having mine on for about 5 years I reckon the thing will last longer than the car. It s meaty bit of kit.
I replaced the intake pipes on mine, getting them out isn't so bad, I managed to pull it out into the engine bay.
The most critical way they break down is the inner layer collapsing when the engine is asking for more air. Mine was just looking shabby and reminded me of a tumbledryer pipe, so I went for the ACT kit.
It's a bit of a faff getting it in, but arguably worthwhile.
My key tips are:
the elbow will need trimming
the main pipe might need trimming
use the large jubilee clip to mark where you want to cut, tighten it to stay still, then cut along its edge.
fit the aluminium joining piece to the nose pipe first, then feed that through the hole, then fit the longer section to that - it's awkward, but this is where you have the best access.
I opted to mount the filter joining bracket to the top of the nose area, and had to make a simple aluminium bracket to get the position right. The advantage of this is that the filter sits higher in the nose. The filter would just be hanging on the nose pipe section otherwise.
get the heat sleeve too, it's good value, and use a couple of zip ties to fold the excess out of sight so it looks neat.
the zip ties on the current pipe go to a small bracket that you can't see
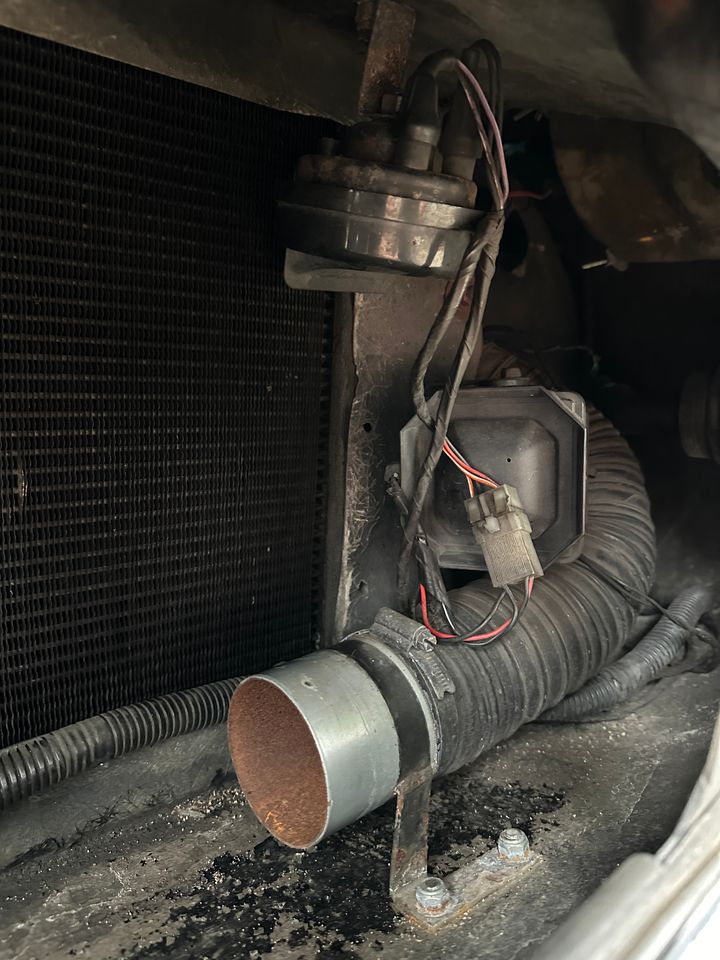
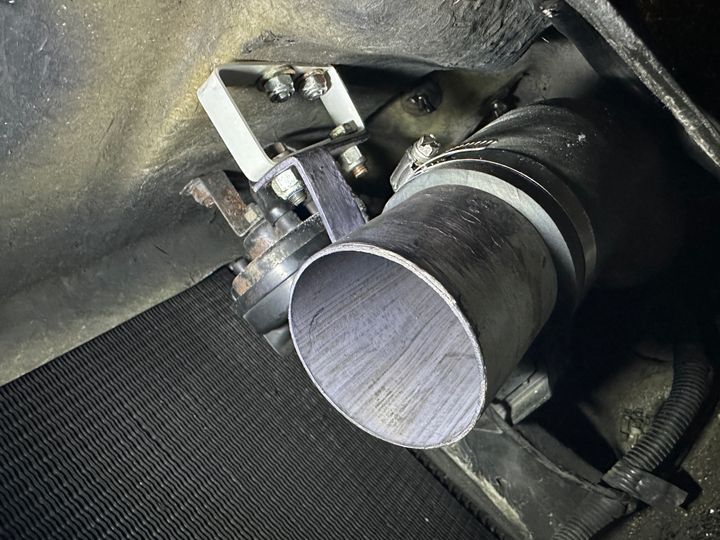
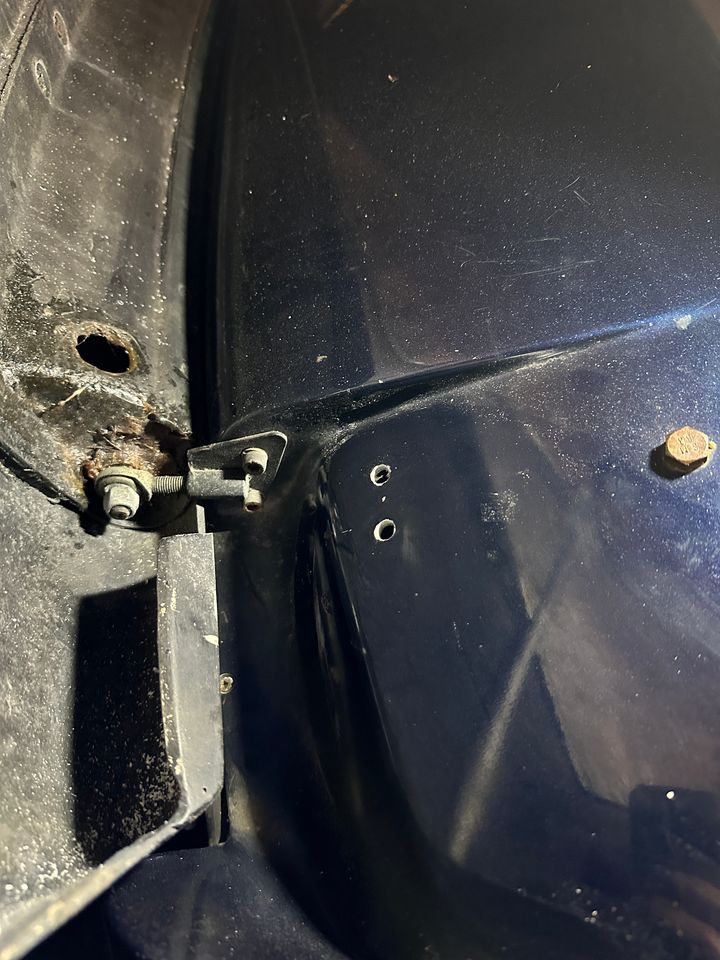
The most critical way they break down is the inner layer collapsing when the engine is asking for more air. Mine was just looking shabby and reminded me of a tumbledryer pipe, so I went for the ACT kit.
It's a bit of a faff getting it in, but arguably worthwhile.
My key tips are:
the elbow will need trimming
the main pipe might need trimming
use the large jubilee clip to mark where you want to cut, tighten it to stay still, then cut along its edge.
fit the aluminium joining piece to the nose pipe first, then feed that through the hole, then fit the longer section to that - it's awkward, but this is where you have the best access.
I opted to mount the filter joining bracket to the top of the nose area, and had to make a simple aluminium bracket to get the position right. The advantage of this is that the filter sits higher in the nose. The filter would just be hanging on the nose pipe section otherwise.
get the heat sleeve too, it's good value, and use a couple of zip ties to fold the excess out of sight so it looks neat.
the zip ties on the current pipe go to a small bracket that you can't see
[quote=PabloGee]I replaced the intake pipes on mine, getting them out isn't so bad, I managed to pull it out into the engine bay.
The most critical way they break down is the inner layer collapsing when the engine is asking for more air. Mine was just looking shabby and reminded me of a tumbledryer pipe, so I went for the ACT kit.
It's a bit of a faff getting it in, but arguably worthwhile.
My key tips are:
the elbow will need trimming
the main pipe might need trimming
use the large jubilee clip to mark where you want to cut, tighten it to stay still, then cut along its edge.
fit the aluminium joining piece to the nose pipe first, then feed that through the hole, then fit the longer section to that - it's awkward, but this is where you have the best access.
I opted to mount the filter joining bracket to the top of the nose area, and had to make a simple aluminium bracket to get the position right. The advantage of this is that the filter sits higher in the nose. The filter would just be hanging on the nose pipe section otherwise.
get the heat sleeve too, it's good value, and use a couple of zip ties to fold the excess out of sight so it looks neat.
the zip ties on the current pipe go to a small bracket that you can't see
That's brilliant, thank you for that, my filter is already mounted to the top of the nose, I accessed it from under the bonnet, as long as I know that a bit of jigging and tugging will do it that, I was looking at the ACT hose too, I've already got the smooth bore plenum elbow, I think I got it off someone from here if I recall and now my filter is as new now it's had a good wash and blow out with my dog blaster, I don't need the full kit
The most critical way they break down is the inner layer collapsing when the engine is asking for more air. Mine was just looking shabby and reminded me of a tumbledryer pipe, so I went for the ACT kit.
It's a bit of a faff getting it in, but arguably worthwhile.
My key tips are:
the elbow will need trimming
the main pipe might need trimming
use the large jubilee clip to mark where you want to cut, tighten it to stay still, then cut along its edge.
fit the aluminium joining piece to the nose pipe first, then feed that through the hole, then fit the longer section to that - it's awkward, but this is where you have the best access.
I opted to mount the filter joining bracket to the top of the nose area, and had to make a simple aluminium bracket to get the position right. The advantage of this is that the filter sits higher in the nose. The filter would just be hanging on the nose pipe section otherwise.
get the heat sleeve too, it's good value, and use a couple of zip ties to fold the excess out of sight so it looks neat.
the zip ties on the current pipe go to a small bracket that you can't see
That's brilliant, thank you for that, my filter is already mounted to the top of the nose, I accessed it from under the bonnet, as long as I know that a bit of jigging and tugging will do it that, I was looking at the ACT hose too, I've already got the smooth bore plenum elbow, I think I got it off someone from here if I recall and now my filter is as new now it's had a good wash and blow out with my dog blaster, I don't need the full kit
Hey Pablow, sorry to hack my own thread, but I've noticed you've blanked off your breather pipe on the top of the Plenum.... I guess it's not too much off topic as that was part a of my question.... I just replaced mine as it was looking grim and seems to run a bit better, but what does blanking it off do? presumably you bung the other end too? My car still runs a bit rough, loads better than it was as I've addressed a couple of vacuum leaks, cleaned my air filter and added some cataclean to fuel, since then it's ran loads better but still idles high as I pull up to a stop before it settles when i do stoop and a tad lumpy, so curious as to what you've done there?
It's blanked as it has the vacuum advance mod that is popular to make the car run a little better. If you search for the god damn shunt is killing me thread it will explain the mod.
It can help cars that shunt badly, mine didn't but I did notice some small improvements in low speed manners, seem to remember it can lower under bonnet temperature slightly too.
Needs reversing come Mot time but its easy to do.
It can help cars that shunt badly, mine didn't but I did notice some small improvements in low speed manners, seem to remember it can lower under bonnet temperature slightly too.
Needs reversing come Mot time but its easy to do.
As Belle said.
You need to use a different source for the dizzy vacuum advance - definitely read through the other thread.
Interestingly, I forgot to reverse that detail for the last MOT, and it still passed.
The theory is that using retarded ignition timing at idle lowers emissions - something that came into play before the 90s, and the original set up was a solution.
The knock-on effect is that with performance tuning, the timing is better with more advance to get the engine to run smoother and more responsively from the lower rev range.
The consequence is that emissions can increase above legislated levels.
The mod is very easy to reverse (I have the original vacuum connecting hose in my glovebox pouch), but I have already found it wasn't necessary with my MOT tester.
I have now removed the catalytic converters from the exhaust manifolds (leaving the bigger main cat in the Y piece), as a principle of helping flow (all I have really noticed is that the engine note is marginally louder) - so I will have a next level risk for MOT emissions next time
You need to use a different source for the dizzy vacuum advance - definitely read through the other thread.
Interestingly, I forgot to reverse that detail for the last MOT, and it still passed.
The theory is that using retarded ignition timing at idle lowers emissions - something that came into play before the 90s, and the original set up was a solution.
The knock-on effect is that with performance tuning, the timing is better with more advance to get the engine to run smoother and more responsively from the lower rev range.
The consequence is that emissions can increase above legislated levels.
The mod is very easy to reverse (I have the original vacuum connecting hose in my glovebox pouch), but I have already found it wasn't necessary with my MOT tester.
I have now removed the catalytic converters from the exhaust manifolds (leaving the bigger main cat in the Y piece), as a principle of helping flow (all I have really noticed is that the engine note is marginally louder) - so I will have a next level risk for MOT emissions next time
Forums | Chimaera | Top of Page | What's New | My Stuff