1995 Griffith 500 restoration
Discussion


Polly Grigora said:
Hard to believe that there's so little interest in such a good topic
Oh I have read every word.The problem with Rob’s threads are how many timescan you say ‘Wow!’.
This & the XJ-6C are pretty much 2 of my ‘real world dream cars’ and Rob’s dedication, skill & hard work are fantastic to watch.
Not sure about the wow……..a compliment is a compliment though 
Well I thought I would check the new leds before finalising the soldering? low and behold I have a dud!
Not that well thought out though as I had glued it into position first.
For future reference when looking at the circuit board as fitted to the veneered panel, the positive leg of the led is to the right on all positions on the circuit board
RobXjcoupe said:
Not sure about the wow……..a compliment is a compliment though
Well I thought I would check the new leds before finalising the soldering? low and behold I have a dud!
Not that well thought out though as I had glued it into position first.
For future reference when looking at the circuit board as fitted to the veneered panel, the positive leg of the led is to the right on all positions on the circuit board
Love it, done the same over and over to find later that nothing should be taken for grantedWell I thought I would check the new leds before finalising the soldering? low and behold I have a dud!
Not that well thought out though as I had glued it into position first.
For future reference when looking at the circuit board as fitted to the veneered panel, the positive leg of the led is to the right on all positions on the circuit board
Anyway, you're on your last LEG
Replacement led arrived this morning so cracked on to finish the heater controls.
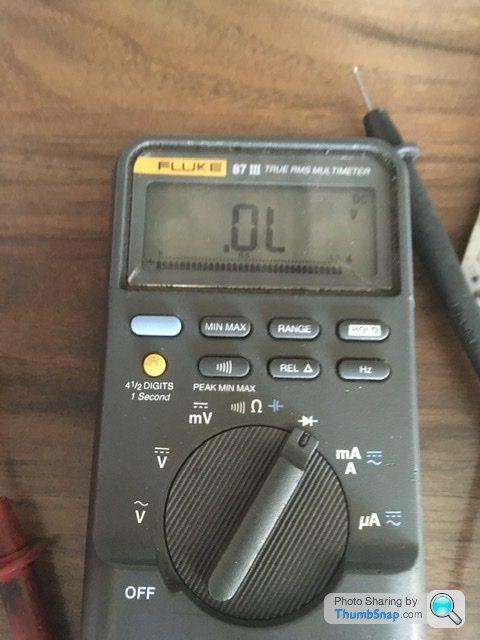
Multimeter to diode and I checked and triple checked all was good to glue in the replacement diode and solder all the new components to the circuit board.
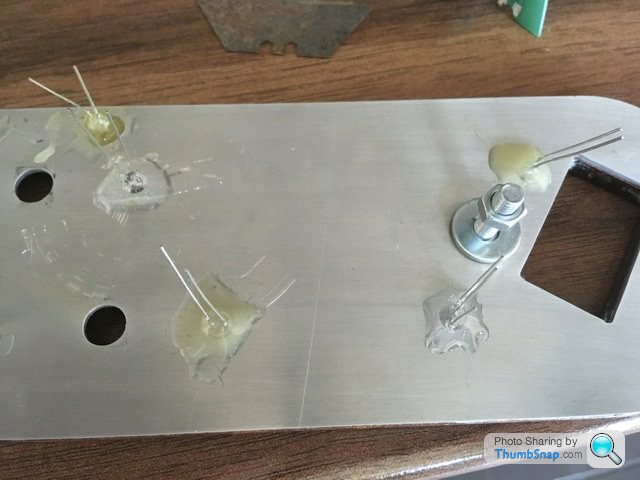

Oh and to note I had to reduce the diameter of a socket so as it would fit into the veneer pocket to tighten up the 4 securing nuts on the 4 rotary switches.
I machined that a while back.
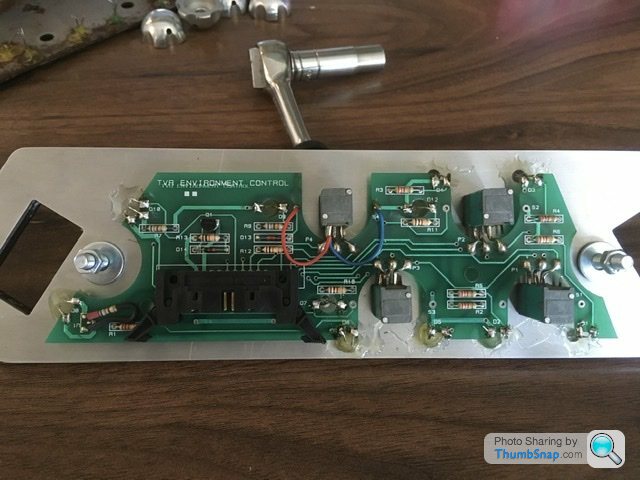
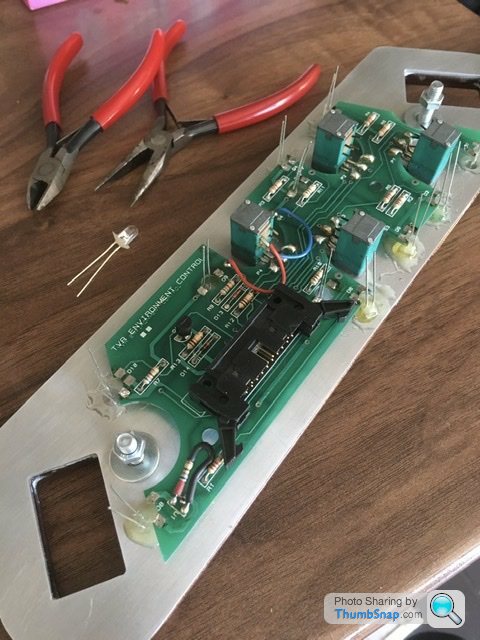
Above shows components all soldered into position. I then checked the diodes again, which all work so anything not lighting up when plugging the unit back in will be a circuit issue.
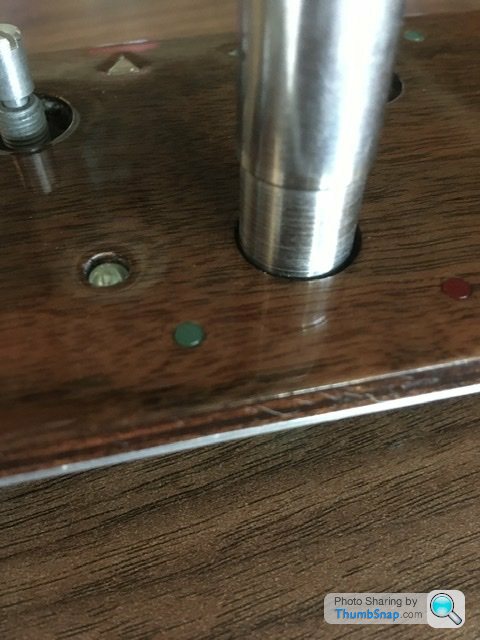
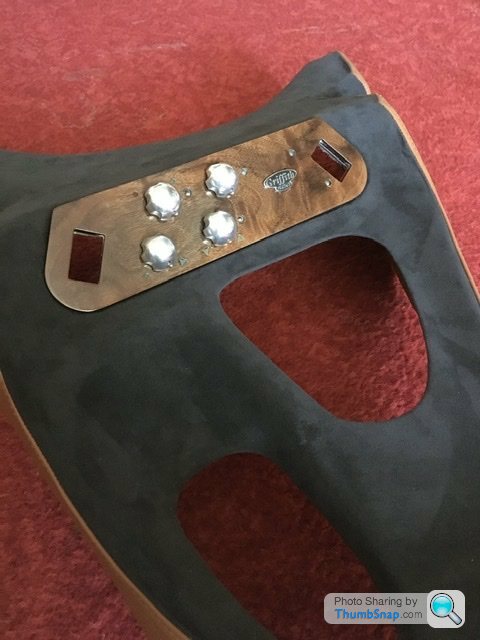
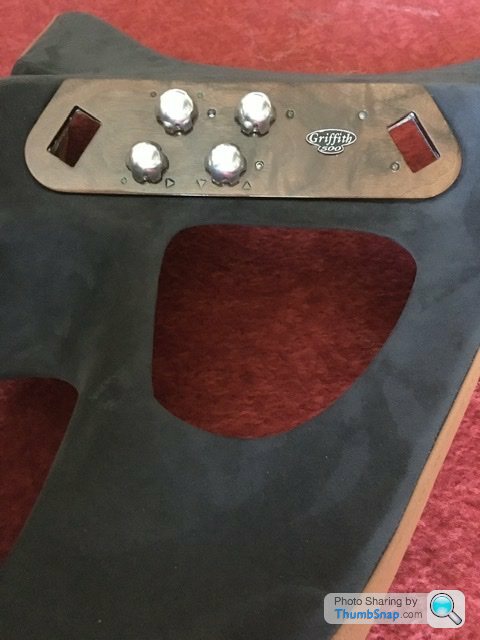
Lastly picture below with the control knobs fitted. I gave them a polish before hand to look as good as new again.

Multimeter to diode and I checked and triple checked all was good to glue in the replacement diode and solder all the new components to the circuit board.
Oh and to note I had to reduce the diameter of a socket so as it would fit into the veneer pocket to tighten up the 4 securing nuts on the 4 rotary switches.
I machined that a while back.
Above shows components all soldered into position. I then checked the diodes again, which all work so anything not lighting up when plugging the unit back in will be a circuit issue.
Lastly picture below with the control knobs fitted. I gave them a polish before hand to look as good as new again.
That’s surgical levels of skill and the sort of job I dread but then find it very therapeutic especially if it came out like that. Top class modelling skills employed there I feel lol.
Not everyone can turn down a socket at a moments notice but we should be able too!
Every man should have a lathe and the ability to use it if you think about it!
So how much would this have cost if a customer wanted this level of service. This cars gotta be worth 50 big ones when it’s done.
Fantastic attention to detail.
Not everyone can turn down a socket at a moments notice
but we should be able too! Every man should have a lathe and the ability to use it if you think about it!
So how much would this have cost if a customer wanted this level of service.
This cars gotta be worth 50 big ones when it’s done. Fantastic attention to detail.
Thank you for the positive comments. I do try to explain in straight forward detail. Lathe work or any machining is my trade or I should say was my trade of 31 years. All manual toolroom stuff. Was also involved with automotive body tooling, pre production and production stuff.
Now I help teach basic engineering to college students. Pay is shocking but I do have a full engineering workshop at my disposal. Not quite a Ford motor company toolroom but enough for my needs
Now I help teach basic engineering to college students. Pay is shocking but I do have a full engineering workshop at my disposal. Not quite a Ford motor company toolroom but enough for my needs
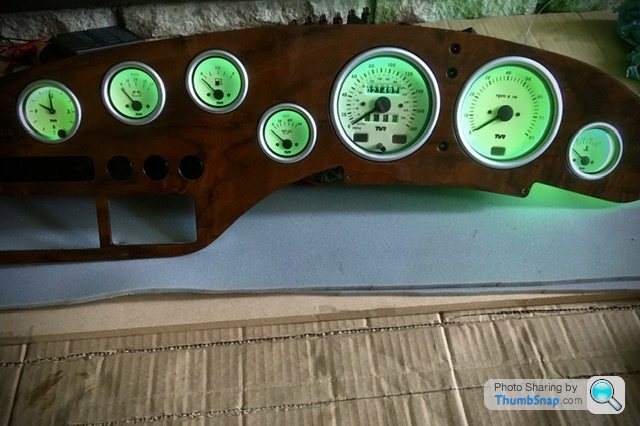
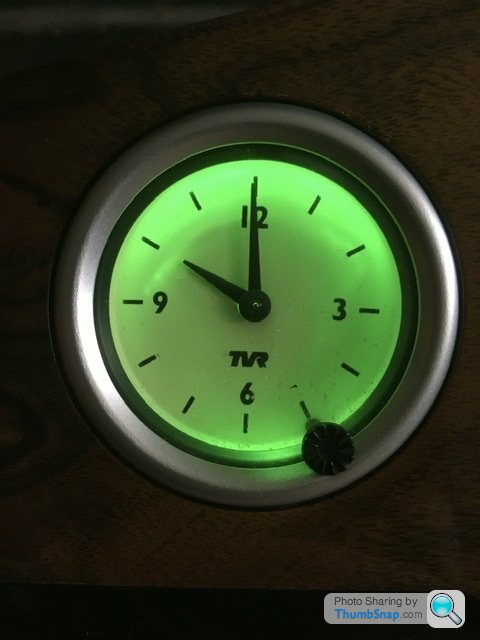
Just finalising the dash refitting the wiring etc.
I put a constant 12v through the illumination bulbs as I had been testing adhoc as I built up the dials. My repaired temp gauge body is a little greener but all look good to be honest.
A more detailed look I noticed the time clock has a bit of shadow and dirt behind the glass.
The bezels are crimped around the tvr dials which makes it extremely difficult to remove to simple wipe a bit of dirt away. Undecided whether to dismantle that or not. I’ve ordered another bulb for it which has side illumination so fingers crossed it gets rid of the shadow and possibly doesn’t highlight the dirt inside.
RobXjcoupe said:
Polly Grigora said:
Do you know anyone that will supply you with a knackered gauge to play with?
Unfortunately not. I’m hoping the new bulb being lit on the sides as well as the front will get rid of the shadow and possibly not highlight the bit of dirt behind the glass front.Shame that nobody is able to send you a gauge to play with
Bevelled all around?
Have only done the job once on a gauge that had a bevelled chrome ring, it was ok after but not perfect by any means
Would cutting the bevelled part of the ring in several places with a dremel circular saw give you a fix?
Polly Grigora said:
RobXjcoupe said:
Polly Grigora said:
Do you know anyone that will supply you with a knackered gauge to play with?
Unfortunately not. I’m hoping the new bulb being lit on the sides as well as the front will get rid of the shadow and possibly not highlight the bit of dirt behind the glass front.Shame that nobody is able to send you a gauge to play with
Bevelled all around?
Have only done the job once on a gauge that had a bevelled chrome ring, it was ok after but not perfect by any means
Would cutting the bevelled part of the ring in several places with a dremel circular saw give you a fix?
Then once repaired I could gently squeeze the aluminium bezel back into place with a line of sealant to finish the repair.

The crimp is a horrible shape
Each to their own, I'd be concerned about the bezel possibly spinning around the body of the clock if attempting to use a lathe to cut it
Looking forward to your future posts on this should you decide to tackle it
Earlier I thought about the possibility of cutting most of the crimped part of the bevel off using small hand tools leaving 4 small tags at 90 degrees apart to refit it later
Gassing Station | Griffith | Top of Page | What's New | My Stuff