
Scanning for the Web ... Help Please!
Discussion


I have a good quality 10x8 print originally shot on medium format.
I need to put this, to be large thumbmail size, on the web.
The 'Host' has asked me to upload a jpeg about 320 x 190 Pixels.
I have scanned it and it looks good (large file size) but then I reduced it to the required size in Photoshop and it looks cr*p
on the screen.
What I am doing wrong?
I need to put this, to be large thumbmail size, on the web.
The 'Host' has asked me to upload a jpeg about 320 x 190 Pixels.
I have scanned it and it looks good (large file size) but then I reduced it to the required size in Photoshop and it looks cr*p
on the screen.
What I am doing wrong?
How to describe cr*p ? Even at the actual very small size it's going to appear at, it's 'fuzzy' (unsharp) and
pixilates even at a reasonable slightly larger smallish size.
I've tried scanning at both 300 dpi and 72 dpi, sharpening, reducing in size, then saving jpegs in Photoshop at large (12) and medium (5),
nothing seems to give an acceptable image.
Is there a 'best' procedure for what I am trying to achieve??
pixilates even at a reasonable slightly larger smallish size.
I've tried scanning at both 300 dpi and 72 dpi, sharpening, reducing in size, then saving jpegs in Photoshop at large (12) and medium (5),
nothing seems to give an acceptable image.
Is there a 'best' procedure for what I am trying to achieve??
should be absolutely fine
if i reduce an 336mb medium format scan from 7000 pixels wide down to 300 pixels in one hit it looks perfect. I have even larger Hasselblad H3D files here which are exactly the same.
have you checked you interpolation prefs ?
go:
edit
preferences
general
and check that Image Interpolation is on Bicubic (and not nearest neighbour !)
if i reduce an 336mb medium format scan from 7000 pixels wide down to 300 pixels in one hit it looks perfect. I have even larger Hasselblad H3D files here which are exactly the same.
have you checked you interpolation prefs ?
go:
edit
preferences
general
and check that Image Interpolation is on Bicubic (and not nearest neighbour !)
Edited by jackal on Friday 20th February 21:15
jackal said:
shoudl be fine really
hard to say without knowing what 'crap' means exactly
maybe size it down in stages with a little 30% unsharp mask at each resize
Don't do that. JPEGs are lossy files, so you're best taking the original scan and reducing it in one go, then sharpen or unsharp mask a little.hard to say without knowing what 'crap' means exactly
maybe size it down in stages with a little 30% unsharp mask at each resize
I frequently reduce large JPGs s (ie 3,700-4,000 px on the the long side) to 800px for decent viewing on the web, and 200px for thumbnails. However I do always need to apply some sharpening, and the fewer pixels you have left, the more they need sharpening. You'd think that an image would automatically appear sharper as it was shrunk, but that isn't the case.
Also make sure you're viewing the smaller version at 100% - ie if the dimensions are 300 x 200px then it should occupy 300 x 200px of your monitor. Some people may think that '100%' means 'full screen'.
The file size will shrink rapidly as you reduce image size. I normally save thumbnails at quality '8', which for a 200px image gives abut 40Kb.
As you're starting from artwork and not a digital image, I'd do a nice hi-res scan first, then re-size from there. OK JPGs are technically lossy but the web is a fairly blunt implement; you're making a thumbnail, not a double-page spread for 'Vogue' etc!
Also make sure you're viewing the smaller version at 100% - ie if the dimensions are 300 x 200px then it should occupy 300 x 200px of your monitor. Some people may think that '100%' means 'full screen'.
The file size will shrink rapidly as you reduce image size. I normally save thumbnails at quality '8', which for a 200px image gives abut 40Kb.
As you're starting from artwork and not a digital image, I'd do a nice hi-res scan first, then re-size from there. OK JPGs are technically lossy but the web is a fairly blunt implement; you're making a thumbnail, not a double-page spread for 'Vogue' etc!
Edited by Simpo Two on Saturday 21st February 10:18
Thanks for all the tips. Yes I have checked the interpolation preferences and they are as they should be.
I will apply more sharpening and see if that does it, and that could start a whole new topic!!!
I've so far applied 50%, Radius 1.8 Pixels and Remove Lens Blur.
I'm actually doing this for a friend and I though it would be a doddle .
.
Now she has asked for another to be done which is only 139 pixels each side and is to be shown
on a website 'Gallery' at an actual size of about 1.5" x 1.5", isn't that a very big thumbnail for
such a small amount of pixels?
Would it help if I could get hold of the MF negative and scan that instead of the print?
I will apply more sharpening and see if that does it, and that could start a whole new topic!!!
I've so far applied 50%, Radius 1.8 Pixels and Remove Lens Blur.
I'm actually doing this for a friend and I though it would be a doddle
.Now she has asked for another to be done which is only 139 pixels each side and is to be shown
on a website 'Gallery' at an actual size of about 1.5" x 1.5", isn't that a very big thumbnail for
such a small amount of pixels?
Would it help if I could get hold of the MF negative and scan that instead of the print?
Elderly said:
I've so far applied 50%, Radius 1.8 Pixels and Remove Lens Blur.
That sounds way too low to me. You may find that just ordinary 'sharpen' works well on small images. It's a bit vicious sometimes, but try it.Elderly said:
Now she has asked for another to be done which is only 139 pixels each side and is to be shown on a website 'Gallery' at an actual size of about 1.5" x 1.5", isn't that a very big thumbnail for such a small amount of pixels?
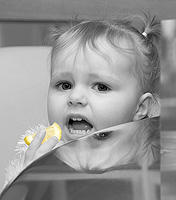
On my monitor (17" running at 1280 x 1024px) 200 px is just over 2", so she's about right. It's simply a matter of dot pitch - the closer the pixels are together, the smaller an image of any given pixel dimensions will be.This is 176 x 200px:
Thanks for the offer mrm96 but I would like to master this myself and I am getting there (I hope!).
I've taken on-board Simpo's sharpen it much more.
So I sharpened it to what looked like a ridiculous amount using unsharp mask and then reduced the luminosity,
and it does seem much improved.
I've taken on-board Simpo's sharpen it much more.
So I sharpened it to what looked like a ridiculous amount using unsharp mask and then reduced the luminosity,
and it does seem much improved.
Gassing Station | Photography & Video | Top of Page | What's New | My Stuff