
Discussion


At last the S3 chassis is back with alterations to take my S2 body/running gear, shot blasted, zinc and powder coated. Finally got a good day to lay it out and take the pics. I'm a good 3 months behind Barkychop, and boy he has set a high bar.
Here they are;


Notice the bottom mounting point for the rear shock on the trailing arm has been moved back. Also the rear outer body mounting brackets are changed to match the original S2 type (lower).
Here they are;
Notice the bottom mounting point for the rear shock on the trailing arm has been moved back. Also the rear outer body mounting brackets are changed to match the original S2 type (lower).
Bloody stunning isn't it when it comes back.
You'd be amazed how quick it goes back together - I've been fairly relaxed about my build as I can't drive till next April.
The first step is to get a rolling chassis, once the trailing arms have the bushes in it soon goes together.
I've used medium strength blue threadlock on many of my bolts (eg hub to trailing arm) so hopefully it won't fall to bits.........
Nice job moving those trailing arm suspension mountings by the way, did you cut the old ones off and move them or fabricate a new mount?
Chris
You'd be amazed how quick it goes back together - I've been fairly relaxed about my build as I can't drive till next April.
The first step is to get a rolling chassis, once the trailing arms have the bushes in it soon goes together.
I've used medium strength blue threadlock on many of my bolts (eg hub to trailing arm) so hopefully it won't fall to bits.........
Nice job moving those trailing arm suspension mountings by the way, did you cut the old ones off and move them or fabricate a new mount?
Chris
Edited by Barkychoc on Monday 22 September 16:38
Chris
Yes I am being so carful not to scratch it, but it's sure to happen. The old mounts were cut off and new ones fabricated and full welded back. My cousin did that for me 'he actually knows what he is doing'.
I noticed from your progress pics that you still haven't tightened alot of your suspension bolts. Is this deliberate are you waiting untill the suspension is loaded?
By the way Chris thanks again for the offset dimension you gave me for the mounting point on the later trailing arms - you can see why I asked now. The trailing arm and shock were offered up to the chassis before the powder coat to ensure that the alignment of the shock mounting was correct. I intend to record the differences between the S2 & S3 chassis for future reference. You seem to be doing a great job in documenting all the info you can. Will there be another Bible (the Barkychoc version) coming soon.
Yes I am being so carful not to scratch it, but it's sure to happen. The old mounts were cut off and new ones fabricated and full welded back. My cousin did that for me 'he actually knows what he is doing'.
I noticed from your progress pics that you still haven't tightened alot of your suspension bolts. Is this deliberate are you waiting untill the suspension is loaded?
By the way Chris thanks again for the offset dimension you gave me for the mounting point on the later trailing arms - you can see why I asked now. The trailing arm and shock were offered up to the chassis before the powder coat to ensure that the alignment of the shock mounting was correct. I intend to record the differences between the S2 & S3 chassis for future reference. You seem to be doing a great job in documenting all the info you can. Will there be another Bible (the Barkychoc version) coming soon.
Edited by TonupS2 on Monday 22 September 18:58
TonupS2 said:
Chris
Yes I am being so carful not to scratch it, but it's sure to happen. The old mounts were cut off and new ones fabricated and full welded back. My cousin did that for me 'he actually knows what he is doing'.
I noticed from your progress pics that you still haven't tightened alot of your suspension bolts. Is this deliberate are you waiting untill the suspension is loaded?
By the way Chris thanks again for the offset dimension you gave me for the mounting point on the later trailing arms - you can see why I asked now. The trailing arm and shock were offered up to the chassis before the powder coat to ensure that the alignment of the shock mounting was correct. I intend to record the differences between the S2 & S3 chassis for future reference. You seem to be doing a great job in documenting all the info you can. Will there be another Bible (the Barkychoc version) coming soon.
Yes I am going to do the final suspension bolt tightening when it is all at rest with the weight of everything on the car - my understanding is that it should be done that way.Yes I am being so carful not to scratch it, but it's sure to happen. The old mounts were cut off and new ones fabricated and full welded back. My cousin did that for me 'he actually knows what he is doing'.
I noticed from your progress pics that you still haven't tightened alot of your suspension bolts. Is this deliberate are you waiting untill the suspension is loaded?
By the way Chris thanks again for the offset dimension you gave me for the mounting point on the later trailing arms - you can see why I asked now. The trailing arm and shock were offered up to the chassis before the powder coat to ensure that the alignment of the shock mounting was correct. I intend to record the differences between the S2 & S3 chassis for future reference. You seem to be doing a great job in documenting all the info you can. Will there be another Bible (the Barkychoc version) coming soon.
As for the Barkychoc Bible (it has a kind of ring to it doesn't it?) I don't think so - I'm happy to put what info I can on this forum and receive great info and advice in return.
By the way - while I remember - the top rear suspension mounting needs a half height nut (its on the bolt list) but you also need to cut the bolt off so it is flush with the end of the nut - otherwise you may find the body doesn't go back on it will foul on the bolt.
I've just cleaned up all the captive threads on my chassis tonight (some had got a bit of powder coat in them)- I found that if I cut a slot in the end of a bolt (about 5mm in) it worked a treat - the ones that needed to be done were the seatbelt ones.
I've caught my chassis here and there with the end of a spanner or a screwdriver (or the angle grinder doing the steering rack
 ) I've touched it up using smooth red hammerite, its near enough.
Edited by Barkychoc on Saturday 4th October 18:55
TonupS2 said:
I bought the car as a project in bits and I don't know which drive shaft goe's to which side. Would I be right in thinking that it won't matter? Can anybody advise?
I think they are the same length, I would measure each side between diff & drive hub to see if they are the same.martym said:
I think they are the same length, I would measure each side between diff & drive hub to see if they are the same.
The diff is off-centre (by about 1cm I cant remember to which side) to the chassis so I suspect they are slightly different in length. You'll find that if you need to drop the diff for any reason as you really struggle to get a spanner on one of the lower mounting bolts as it fouls on the chassisThanks guys I will set about putting them on tomorrow and check to see if there is any slight difference in length. If not I assume that the CV joint has not got a prefered direction.
Ken I haven't seen any posts from you for such a long time that I thought you might have moved on (sold the S). I still have your old chassis and it's still in 2 halves although there is so much rust I think it might be in a few more bits shortly. It was a great help for reference and I haven't dumped it (yet). I have been hoping to find time to measure and record the slight differences between the S3 and S2 chassis (CAD them). You might come home one day and find it back down the side of your house! I don't think I will be able to go to SCH this yesr as I owe too many PHers a pint or 2 and I won't be able to afford it.
Ken I haven't seen any posts from you for such a long time that I thought you might have moved on (sold the S). I still have your old chassis and it's still in 2 halves although there is so much rust I think it might be in a few more bits shortly. It was a great help for reference and I haven't dumped it (yet). I have been hoping to find time to measure and record the slight differences between the S3 and S2 chassis (CAD them). You might come home one day and find it back down the side of your house! I don't think I will be able to go to SCH this yesr as I owe too many PHers a pint or 2 and I won't be able to afford it.
I had my driveshafts side by side before I put them back on and they were definately identical.
I am pretty sure the position of the driveshaft flanges are central to the chassis - its the input shaft & outer casing at the front of the diff thats offset (due to the design with the pinion & wheel in the diff).
Best pics I could find - look at the driveshafts they are equal each side - but the diff casing isn't.
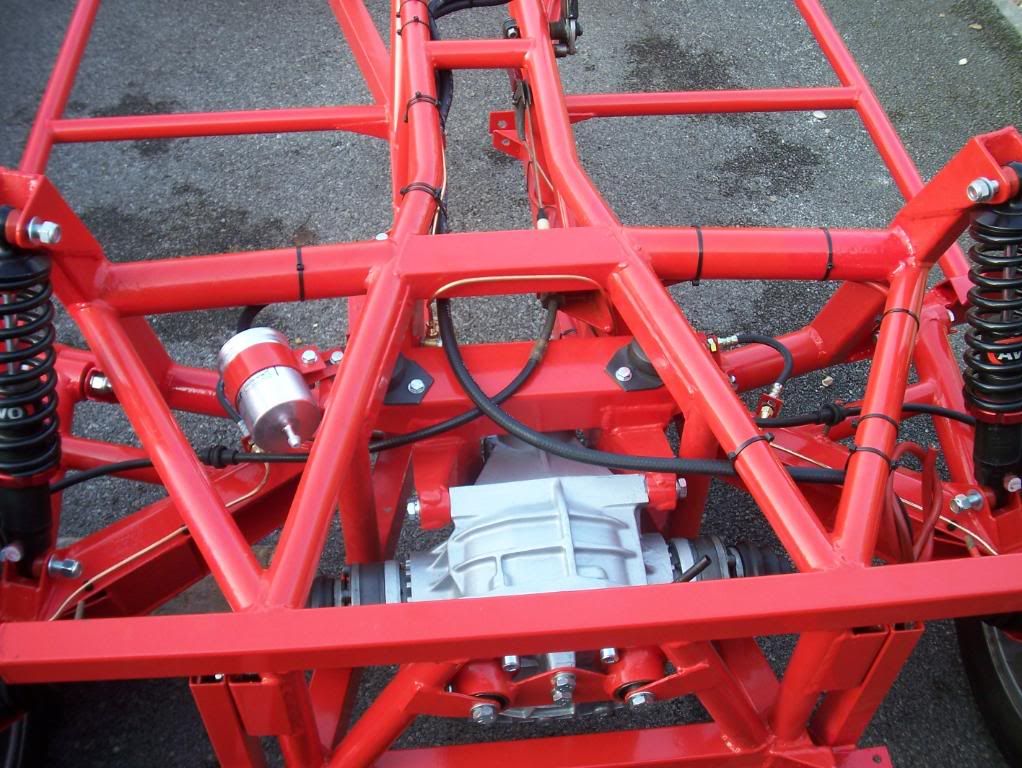
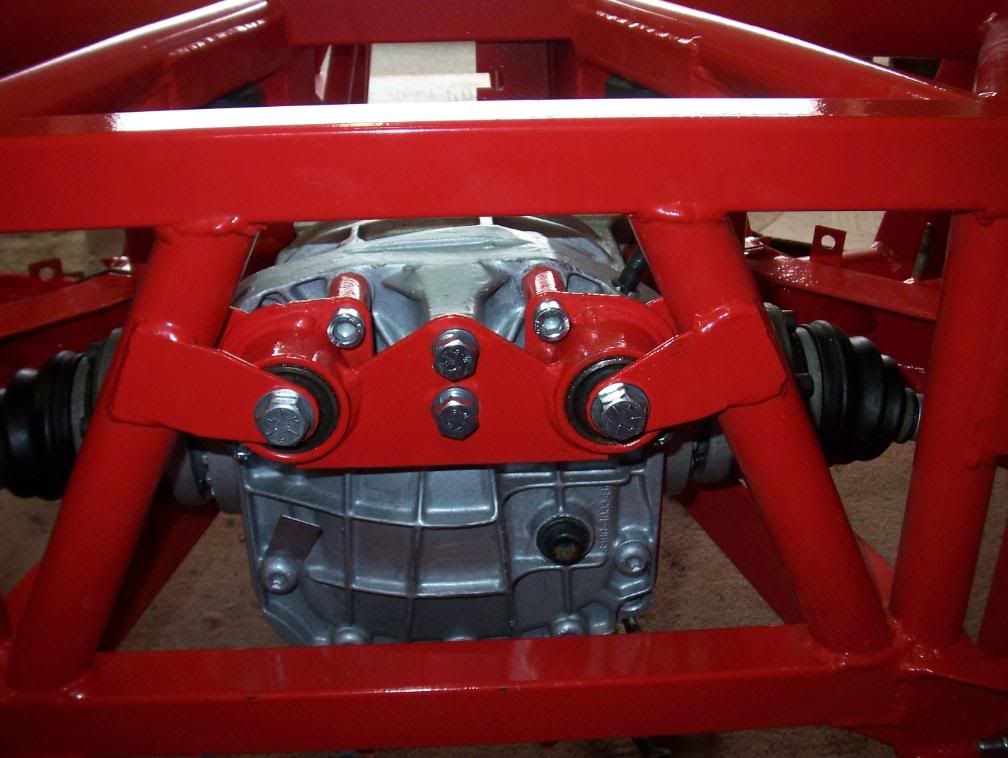
I am pretty sure the position of the driveshaft flanges are central to the chassis - its the input shaft & outer casing at the front of the diff thats offset (due to the design with the pinion & wheel in the diff).
Best pics I could find - look at the driveshafts they are equal each side - but the diff casing isn't.
Edited by Barkychoc on Saturday 10th January 20:47
Edited by Barkychoc on Saturday 10th January 20:49
Update: the driveshafts look identical including length. But I now notice that the drive shaft ends are left and right hand threads. The V6 sierra haynes manual states that the wheel bearing nut on the left of the car is left hand thread and the nut on the right is right hand thread. So I can now work out which is which. I have thoughly cleaned the drive shafts and the gaitors and have noticed a small split in one of the outer gaitors. So it goes on. I will get a new gaitor tomorrow, then have a look at the state of the grease inside, to see I think the CV joint is shot. Hopefully the split in the gaitor was done when they took the drive shafts off.
OK next small problem. I tryed fitting the Anti Roll Bar today and the 2 'U' brackets won't bolt to the S3 chassis. The bolt centres for the brackets are a little wider. I can get the brackets modified or change the ARB for an S3 ARB (if I can find one). I am assuming that the S3 ARB is 26mm dia. and that this is the reason for the wider bolt to bolt centres (my ARB is off a S2 & is 22mm dia). Anybody Know if the S3 ARB is in fact the bigger 26mm dia? Also a long time ago I think I remember somebody posting that a certain garage had a pile of ARB's stored in a corner of their workshop, anybody remember this? or was it a dream? I will try the 2 specialist breakers but I know they want top dollar for these type of bits in which case I'll probably just mod the brackets.
merky300 said:
I have an S3 and can confirm that the ARB is 26mm as you suspected.
Tony
Concur having just rebushed mineTony
Barkychoc said:
It was TVRCarparts that have a pile of ARB's. I think the brackets to hold it on are sierra.
Also concur having seen the pile of them there for just about every car and diameter when collecting the bushesMark
Gassing Station | S Series | Top of Page | What's New | My Stuff