Front bumper and spoiler
Discussion
From memory on my car you have to take the headlamps out to gain access to the bumper mountings (they're inboard of the pod recesses) but you don't gain anything in terms of access to the radiator with the bumper off anyway.
The airdam is fixed to the shell in about 8 places as I recall, around a moulded top flange that meets a similar flange on the lower edge of the bodyshell. I seem to think I had to get destructive as they'd used plain mild steel bolts and nuts and everything was rusted solid - but they're only about M6 so not hard to break, just not easy to access from underneath - might also be a lights-out job.
While mine was off I took the opportunity to renew the grille mesh with stainless and also used stainless fixings to put it all back together.
As an aside, while my airdam was off I looked up under the nose and on the underside, about where the TVR logo would be, are the autographs of the three guys who laid-up the GRP shell. You don't get that with a Porsche

To change the radiator, the front lower air dam needs to come off. As above, there are a pair of bolts tucked away in the outer corners. Mine were rusted solid so had to use a junior hacksaw to get at them. As well as access via the headlamp pods, I also had to dig deep via the inner wheel arches. I replaced the bolts with stainless ones when I refitted.
What's a big job, getting the airdam off?
Should be easy enough. Pop the lights up, take the fuses out so you can extract the headlamps and then ideally the pods as well, otherwise it's like keyhole surgery trying to work through the headlight orifices.
As it happens I was in there on my car this afternoon as I remembered I had a pod issue - they'd raise OK but when lowering one would start to move then drop like a stone: classic symptom of the nylon gear being stripped (and that's exactly what it was, luckily I had a spare).
I took a few pics to show the fasteners so you have an idea of where to look; on mine there are three M6 screws with Nyloc nuts along the side of the car, from just behind the front corner to just in front of the wheelarch, plus another one that's just above the brake cooling airduct (probably above the fog light on a 350i) - and the same the other side of course.
As noted above, you do need access from above and below, though I guess if you wanted to get enthusiastic about it you could add glassed-in fixings to the airdam so you'd only need to work from one side next time.
The radiator's held in by brackets bolted through the plywood/GRP 'crumple zone' - expect more corroded fasteners.
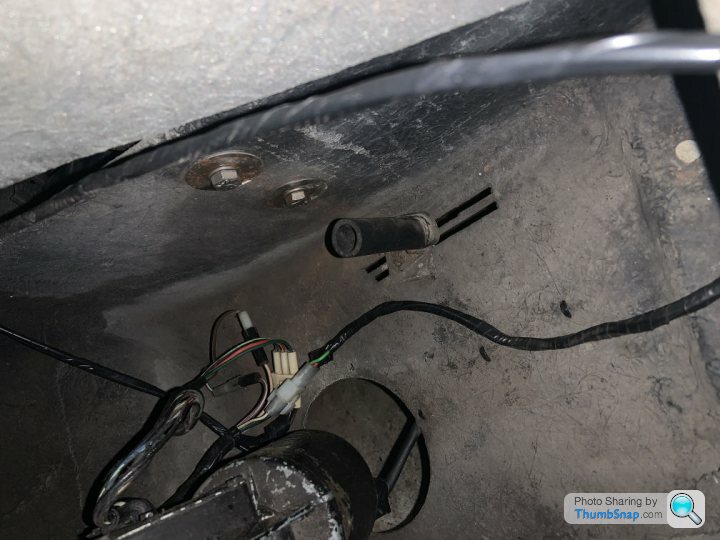
Pics have all been messed around by the forum software ... first is the radiator mount bolts (picture should be 90 deg CW)
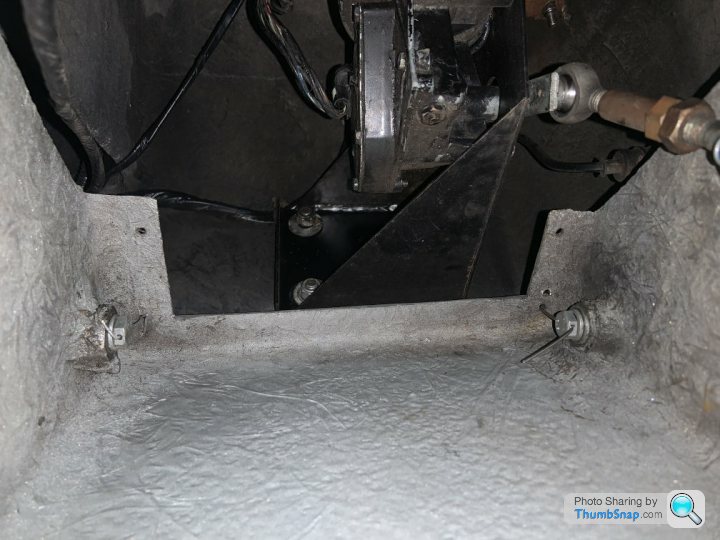
This one's upside-down, just shows the lock-wiring for the pod pivot bolts (stainless steel welding rod!)
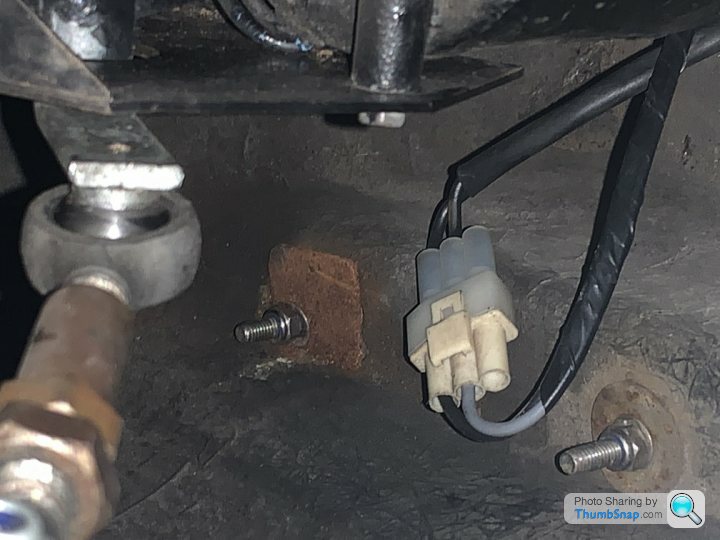
This should be 90 deg CW as well; two of the airdam mountings on the O/S of the car
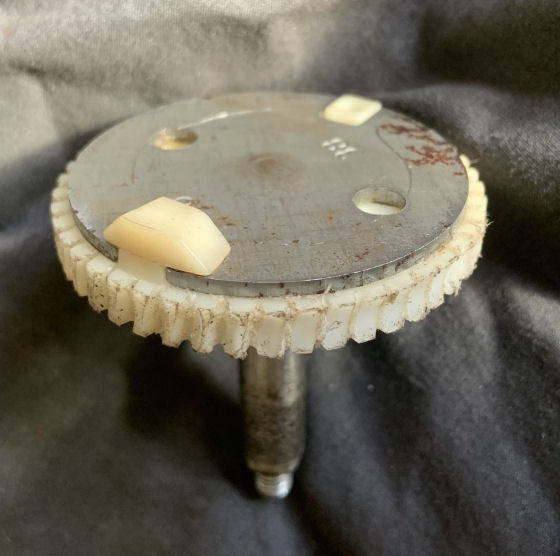
...and for completeness, one stripped gear

Should be easy enough. Pop the lights up, take the fuses out so you can extract the headlamps and then ideally the pods as well, otherwise it's like keyhole surgery trying to work through the headlight orifices.
As it happens I was in there on my car this afternoon as I remembered I had a pod issue - they'd raise OK but when lowering one would start to move then drop like a stone: classic symptom of the nylon gear being stripped (and that's exactly what it was, luckily I had a spare).
I took a few pics to show the fasteners so you have an idea of where to look; on mine there are three M6 screws with Nyloc nuts along the side of the car, from just behind the front corner to just in front of the wheelarch, plus another one that's just above the brake cooling airduct (probably above the fog light on a 350i) - and the same the other side of course.
As noted above, you do need access from above and below, though I guess if you wanted to get enthusiastic about it you could add glassed-in fixings to the airdam so you'd only need to work from one side next time.
The radiator's held in by brackets bolted through the plywood/GRP 'crumple zone' - expect more corroded fasteners.
Pics have all been messed around by the forum software
 ... first is the radiator mount bolts (picture should be 90 deg CW)
This one's upside-down, just shows the lock-wiring for the pod pivot bolts (stainless steel welding rod!)

This should be 90 deg CW as well; two of the airdam mountings on the O/S of the car

...and for completeness, one stripped gear


Edited by Wedg1e on Sunday 7th April 00:52
My car is a 1985 so may have the same front spoiler.
The upright parts of the spoiler were blended into the body so you couldn’t see the join nor the bolts.
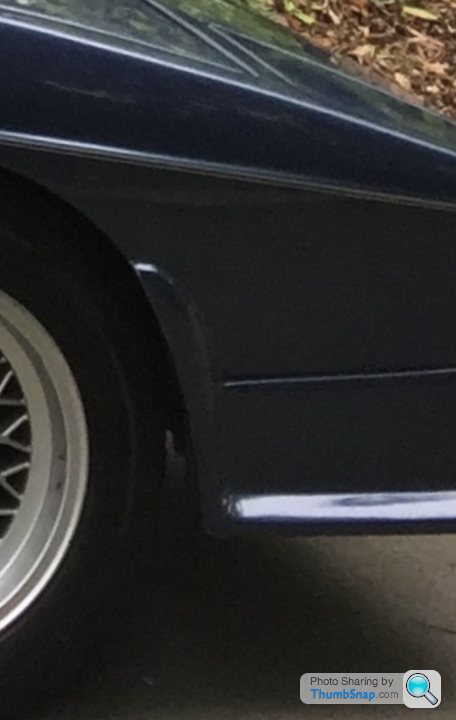
Last year I had work done by Jim Gamsby where he removed the spoiler to replace the radiator. He said the spoiler has to come off to prevent any twisting or damage to the radiator when fitting.
He refitted the spoiler and used sealant to bond the upright part and the bolt location is still exposed.
Unfortunately Jim passed away before the job went any further.
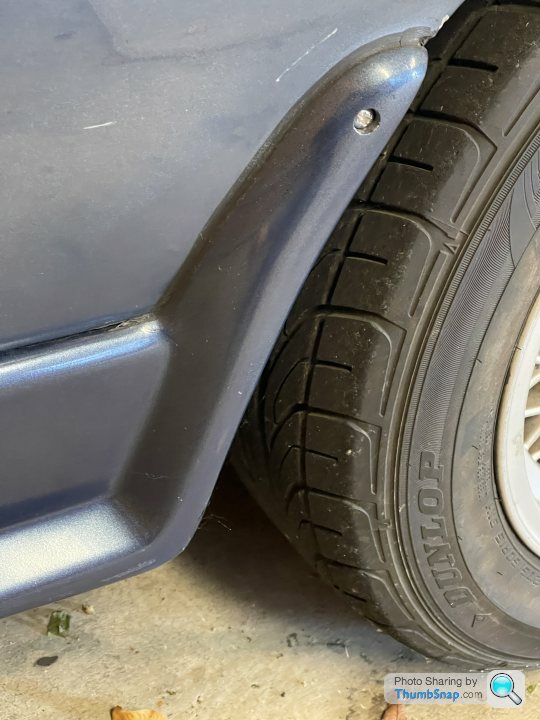
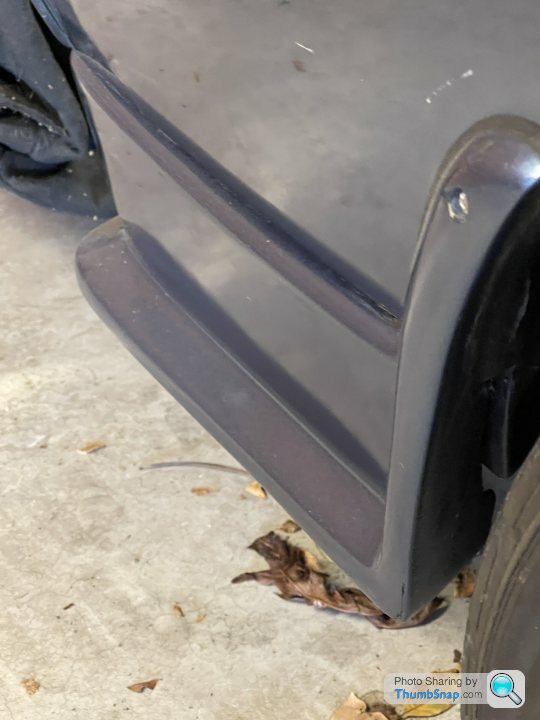
The upright parts of the spoiler were blended into the body so you couldn’t see the join nor the bolts.

Last year I had work done by Jim Gamsby where he removed the spoiler to replace the radiator. He said the spoiler has to come off to prevent any twisting or damage to the radiator when fitting.
He refitted the spoiler and used sealant to bond the upright part and the bolt location is still exposed.
Unfortunately Jim passed away before the job went any further.


Gassing Station | Wedges | Top of Page | What's New | My Stuff


