MGB Sebring conversion
Discussion


I'm wanting to do one to mine before I get it painted to save getting it done twice.
Does anyone know of any guides available so I can look at what's necessary?
Or even better has anyone done one?
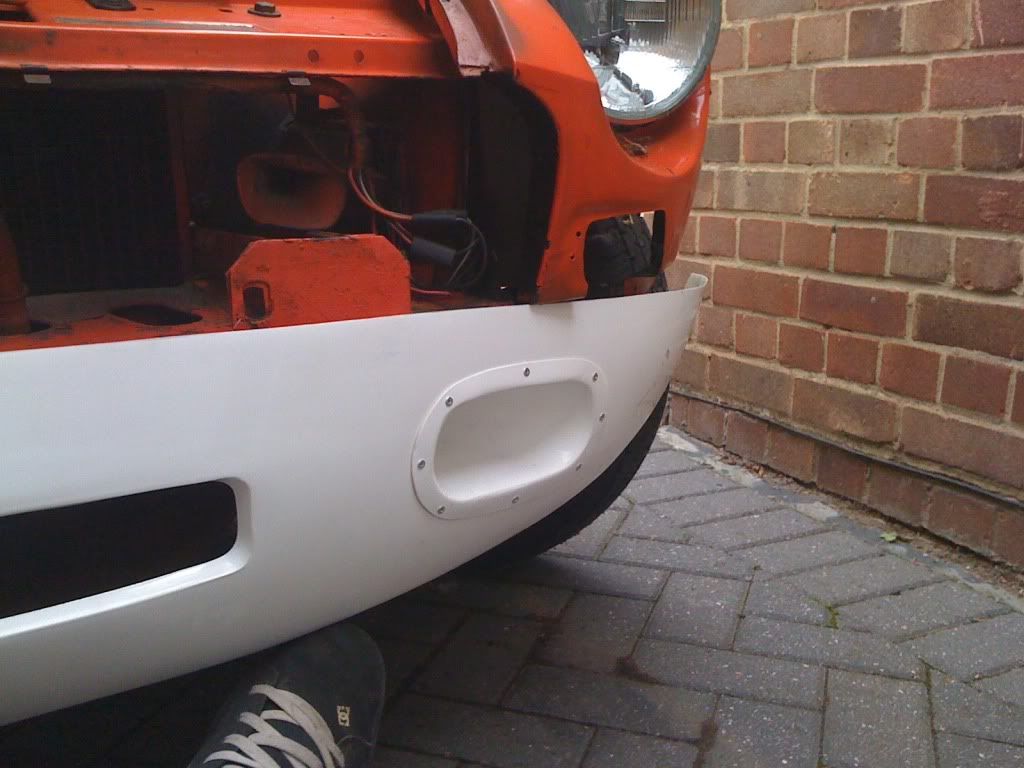
I'd be doing it to my rubber bumper and as far as I can tell you remove the bumpers / mountings, replace the front valance, Fit front indicators to the wings, get a chrome bumper grill, fit a rear valance and have it smoothed?
Only trouble I can see is putting any large amounts of filler on the back could lead to it cracking?
I'm full of questions me!
Does anyone know of any guides available so I can look at what's necessary?
Or even better has anyone done one?
I'd be doing it to my rubber bumper and as far as I can tell you remove the bumpers / mountings, replace the front valance, Fit front indicators to the wings, get a chrome bumper grill, fit a rear valance and have it smoothed?
Only trouble I can see is putting any large amounts of filler on the back could lead to it cracking?
I'm full of questions me!
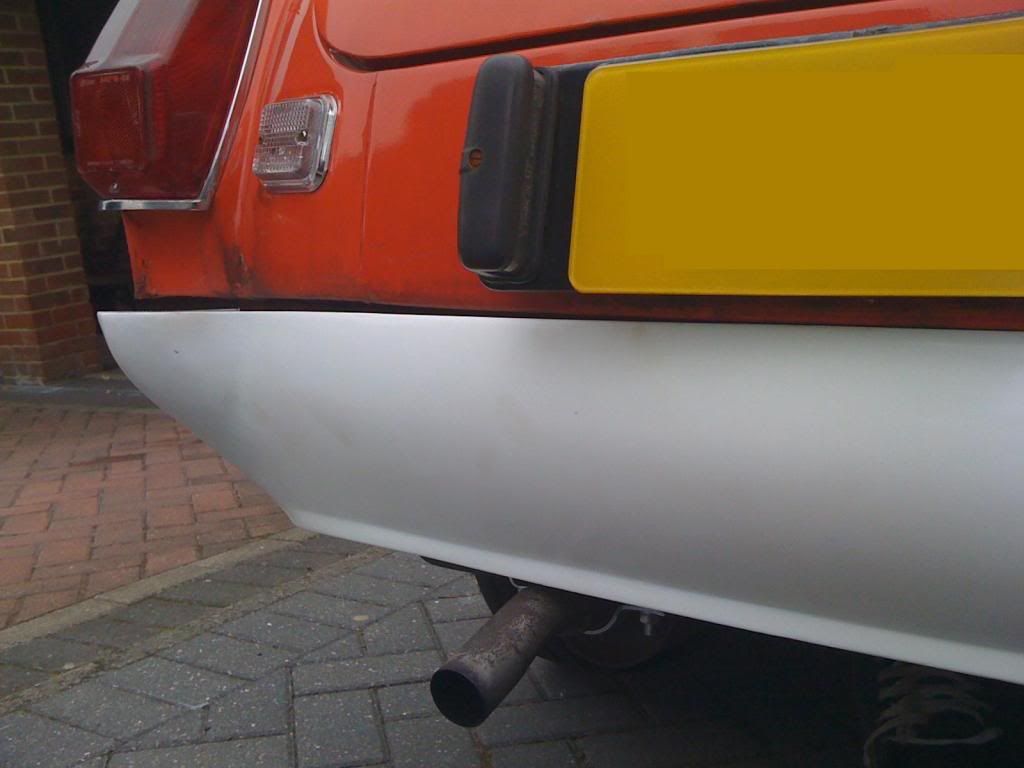
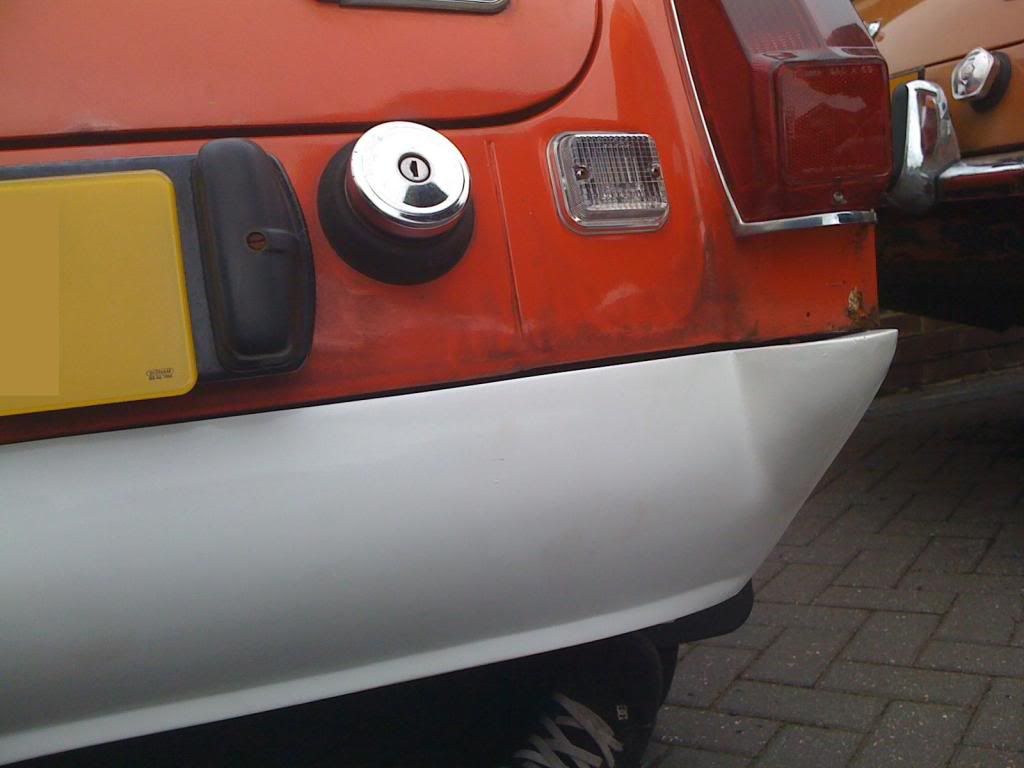
I've got the front sebring valance on mine, like all fibreglass it required a lot of fettling to get it to fit properly. Not put the back on yet, might just de-bumper and be done with it, not sure. I'm not keen to use filler on it though as i don't want to permanently change the car. Having seen pics of LBL 591E minus the rear bumper I might leave mine like that as its a GT also.
Yours is rubber bumper, I would definately lower the car, the standard rubber bumper ride heightjust looks wrong with the valences fitted. You'll be pleased you did. fit a 7/8th arb while your at it. Mines a #72 but i lowered it 1", you have to be carefull grounding out the bottom lip of the front valance on tall kerbs or uneven ground if you go that low though.
HTH.
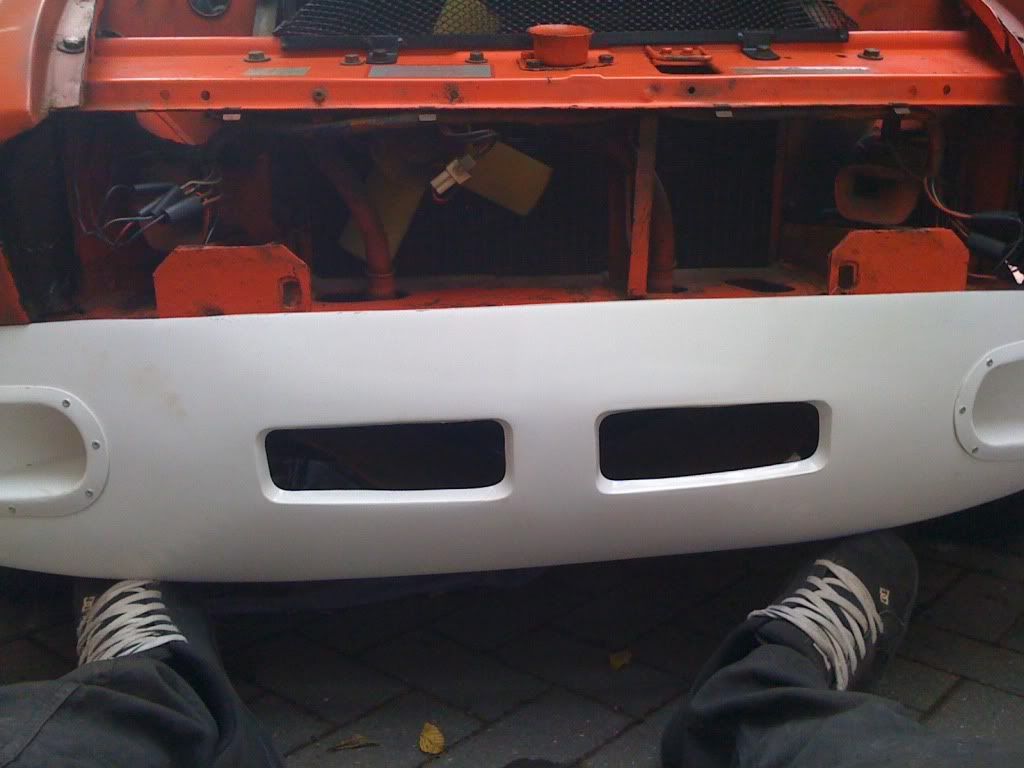
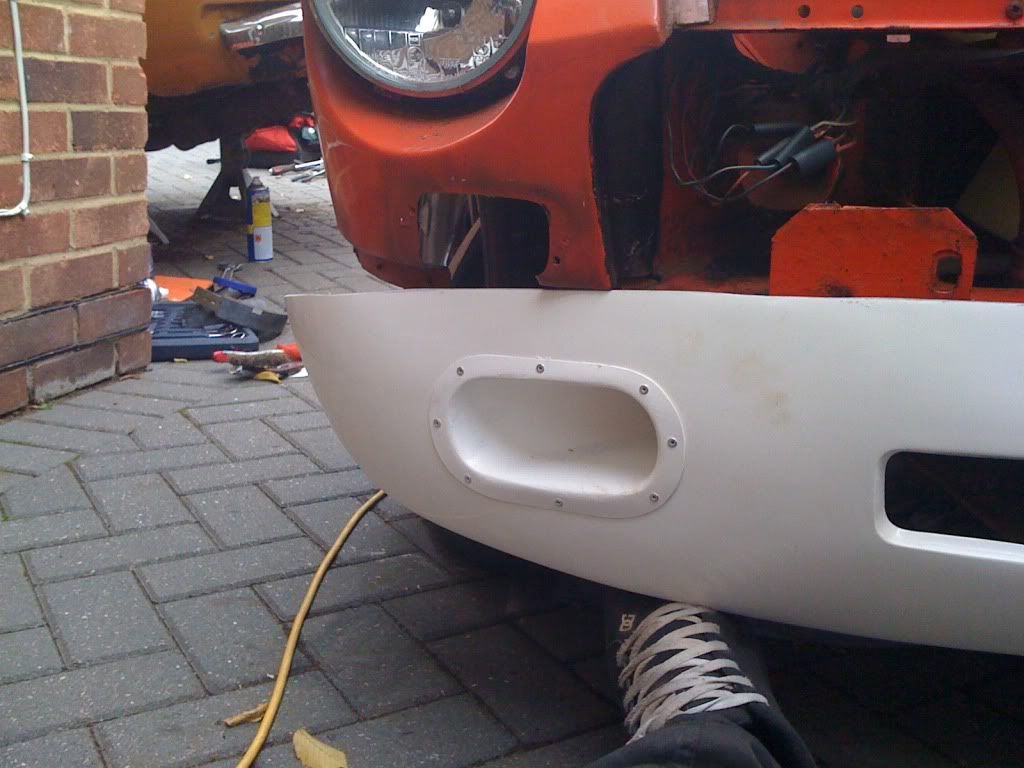
I've done the front & rear conversion. No welding reqd. by me to the back though. I glued 8mm threaded studs to the valance poked through existing steel to nuts which successfully mounted that end. However I stooped to what everyone else seems to have done to the front, in that I had bolts showing. I am currently modifying the front to include a lip (also glued on) which may remove these bolts. Also fitting an MGC bonnet. 
More pictures@ > http://i34.tinypic.com/2dnl6t.jpg
http://i34.tinypic.com/2qjx5c0.jpg
bashed! > http://i35.tinypic.com/5vrnm1.jpg
More pictures@ > http://i34.tinypic.com/2dnl6t.jpg
http://i34.tinypic.com/2qjx5c0.jpg
bashed! > http://i35.tinypic.com/5vrnm1.jpg
pauldm28 said:
I've done the front & rear conversion. No welding reqd. by me to the back though. I glued 8mm threaded studs to the valance poked through existing steel to nuts which successfully mounted that end. However I stooped to what everyone else seems to have done to the front, in that I had bolts showing. I am currently modifying the front to include a lip (also glued on) which may remove these bolts. Also fitting an MGC bonnet.
More pictures@ > http://i34.tinypic.com/2dnl6t.jpg
http://i34.tinypic.com/2qjx5c0.jpg
bashed! > http://i35.tinypic.com/5vrnm1.jpg
But why would you want to put an MGC bonnet on it More pictures@ > http://i34.tinypic.com/2dnl6t.jpg
http://i34.tinypic.com/2qjx5c0.jpg
bashed! > http://i35.tinypic.com/5vrnm1.jpg

Rower
MGB BOY A guide exists here > http://www.kewengineering.co.uk/upgrades4mgs/Body/...
I started with a rubber bumper £275 parts car ( http://i36.tinypic.com/20v0qqf.jpg ); shortened race springs are fitted to the front to lower (a 2 hour job).
If any of this doesn't make sense just ask for more photos.
I wouldn't attempt to smooth over the transition between valance & steel. These cars look good on teh internetz (2nd car down > http://www.kewengineering.co.uk/upgrades4mgs/Body/... ) but in real life a light knock from some little scote's football will result in a hairline crack at the join; not to mention the different coefficients of expansion.
Another consideration is that in the event of a breakdown it is difficult to tow the car because the valance covers any tow rope mount points. I fitted 1/2 inch whitworth tapped 6 inch long spiggots to the chassis rails as mounts for threaded rod which provide towing eyes. You can see the 1 inch round plug covering these spigots on one of my pictures. (Incidentally Youtube video of me welding them on here> http://www.youtube.com/user/pauldm#p/u/27/KFc7Fcco...
Rower - I wasn't happy with my "Corsa boy" black bonnet & the MGC bonnet offers more height if I chose to fit a V8 in the future.
Moikey - it will hopefully be a mean looking mofo when these get fitted!
Edited by pauldm28 on Friday 20th August 12:59


Yes, I've had the car approx 9 years..it's an original factory V8 that I used as a daily driver until getting a contract that meant a 120 mile daily commute so it sat and slowly started rotting away as MGB's tend to do when not being used.
I tried selling it..no one was interested in it..I always liked the look of the MGC GTS cars (MBL 546E, RMO 699F) and took the decision to make the conversion
Front valence, wheels and rear suspension from MG Motorsport
Wings,bonnet and rear valence from MGOC..
Numerous other new parts from various suppliers and some secondhand doors from a fellow MGOC member
The car was fully stripped out..and usable parts such as seats, rear bench, wheels and lights sold off to recoup some funds
Rusty front/rear wings replaced with the wing kits..sills replaced.. repositioning of fuel tank battery and fuel pump...roll bar installed..
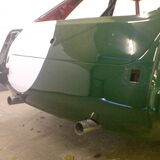
Interior taken back to bare metal and repainted..Engine stripped and rebuilt and installed.. custom exhaust fabricated..custom front grille fabricated ..exterior repaited painted BRG
all new wiring..interior installed .. wheels on.. petrol in ...sorted!
OK so the wing panels were a real paint to fit and numerous problems needed to be sorted out even down to reshaping the moulding on the new rear lights so they sat properly
There are few areas that need "revisting" such as the chrome windscreen surround and the headlamp covers..but I'm using it to iron out all problems now and will slowly rectify the remaining niggles
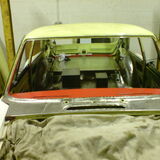
some pics during transformation..


I tried selling it..no one was interested in it..I always liked the look of the MGC GTS cars (MBL 546E, RMO 699F) and took the decision to make the conversion
Front valence, wheels and rear suspension from MG Motorsport
Wings,bonnet and rear valence from MGOC..
Numerous other new parts from various suppliers and some secondhand doors from a fellow MGOC member
The car was fully stripped out..and usable parts such as seats, rear bench, wheels and lights sold off to recoup some funds
Rusty front/rear wings replaced with the wing kits..sills replaced.. repositioning of fuel tank battery and fuel pump...roll bar installed..
Interior taken back to bare metal and repainted..Engine stripped and rebuilt and installed.. custom exhaust fabricated..custom front grille fabricated ..exterior repaited painted BRG
all new wiring..interior installed .. wheels on.. petrol in ...sorted!
OK so the wing panels were a real paint to fit and numerous problems needed to be sorted out even down to reshaping the moulding on the new rear lights so they sat properly
There are few areas that need "revisting" such as the chrome windscreen surround and the headlamp covers..but I'm using it to iron out all problems now and will slowly rectify the remaining niggles
some pics during transformation..
Edited by Moikey Fortune on Friday 20th August 14:52


@Moikey Fortune have you moved the fuel tank into the boot? More details please!
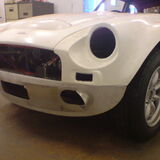
Test fitting the panels...
Looks like the rear valance needs trimming or the rear wings need modifying. The front is a completely different kettle of fish though. It seems to fit like crap! Maybe the plates on the end of the chassis need trimming, I'm not quite sure yet but there is a massive gap between the valance and the wings. (Not as bad as the pictures show but I was taking pictures holding up the valance with my feet!)
Edited by MGB Boy on Saturday 21st August 21:53
Hi,
The problem with the Sebring valence is that it's not made to replace a valence on an RB car, they're supposed to replace the standard valence on the CB cars. Having said that you can obviously get them to fit and look right but it's a lot more effort. I would think you're going to need to make up some spacing brackets to "kick" the valence out and get the curve right. Probably either side of the chassis brackets.
What grille are you going to use as you may want to get that in place too so as you can see how it all lines up. You may very well need to remove the chassis brackets all together. Mine are cut down and I have used them as fixing points for the "custom" grille, the spot lamps and the towing eye.
You may also want to consider the front indicators too, what are you planning to use there? you may need to weld a small section in to make up the apeture as there is going to be a gap.
For the rear valence, have you got the infill sections that sit under the tail lights? If not you'll need to get them or make some up.
Oh yeah...my fuel tank was relocated into the spare wheel well, this was to get the twin exhaust to run straight out the back and also to get the car lower, I also wanted to move the filler pipe up to the the "c" pillar so the filler neck needed to be turned on the tank too.
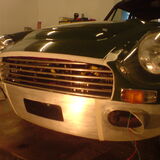
Here are some pics showing the rear valence during fitment and also the front valence, however the front is an aluminium GTS one from MG Motorsport which are made to fit the flared wings so slightly different to the one you have..also a pic of the repositioned fuel tank...I hope these help
Cheers
Mike


The problem with the Sebring valence is that it's not made to replace a valence on an RB car, they're supposed to replace the standard valence on the CB cars. Having said that you can obviously get them to fit and look right but it's a lot more effort. I would think you're going to need to make up some spacing brackets to "kick" the valence out and get the curve right. Probably either side of the chassis brackets.
What grille are you going to use as you may want to get that in place too so as you can see how it all lines up. You may very well need to remove the chassis brackets all together. Mine are cut down and I have used them as fixing points for the "custom" grille, the spot lamps and the towing eye.
You may also want to consider the front indicators too, what are you planning to use there? you may need to weld a small section in to make up the apeture as there is going to be a gap.
For the rear valence, have you got the infill sections that sit under the tail lights? If not you'll need to get them or make some up.
Oh yeah...my fuel tank was relocated into the spare wheel well, this was to get the twin exhaust to run straight out the back and also to get the car lower, I also wanted to move the filler pipe up to the the "c" pillar so the filler neck needed to be turned on the tank too.
Here are some pics showing the rear valence during fitment and also the front valence, however the front is an aluminium GTS one from MG Motorsport which are made to fit the flared wings so slightly different to the one you have..also a pic of the repositioned fuel tank...I hope these help
Cheers
Mike
I'll most likely use a chrome bumper grill and front indicators, as for the rear 'plinths' (as the parts suppliers call them) I haven't ordered any as of yet as I want to look at possibly getting the valance to sit higher or make some up myself.
How have you adapted the filler neck to have your tank repositioned? What filler cap did you get and does it lock?
Having seen yours and a few others I'm considering moving the filler to have a smoother finish across the back. (As well as a vinyl number plate and 'custom' numberplate lights)
How have you adapted the filler neck to have your tank repositioned? What filler cap did you get and does it lock?
Having seen yours and a few others I'm considering moving the filler to have a smoother finish across the back. (As well as a vinyl number plate and 'custom' numberplate lights)
Hi,
On mine the existing filler neck was cut, turned and rewelded in position
I have seen examples where the tank is in its original location and with the use of elbow joints the filler tube is routed behind the rear panel and lights then up the inside of the "c" pillar" to the inlet cap
I've used a "Le Mans" style cap (or is it called an Aston filler cap) you can just see it on this pic..

Hope this helps
Cheers
Mike
On mine the existing filler neck was cut, turned and rewelded in position
I have seen examples where the tank is in its original location and with the use of elbow joints the filler tube is routed behind the rear panel and lights then up the inside of the "c" pillar" to the inlet cap
I've used a "Le Mans" style cap (or is it called an Aston filler cap) you can just see it on this pic..
Hope this helps
Cheers
Mike

Hi,
Yes it takes time
The new filler hole was cut and then recessed into the "C" pillar, the filler cap is part of a 3 piece kit and is screwed to a base plate that is bolted to the bodywork
Hopefully these will show it better..


You don't need to recess the filler cap base plate, this was done to get a "level" surface to get a good fixing without using a thick rubber gasket
It all depends on how you want it to look
Cheers
Mike
Yes it takes time
The new filler hole was cut and then recessed into the "C" pillar, the filler cap is part of a 3 piece kit and is screwed to a base plate that is bolted to the bodywork
Hopefully these will show it better..
You don't need to recess the filler cap base plate, this was done to get a "level" surface to get a good fixing without using a thick rubber gasket
It all depends on how you want it to look
Cheers
Mike
Gassing Station | Classic Cars and Yesterday's Heroes | Top of Page | What's New | My Stuff