Provence Moulage Flying Lizard Porsche 2005 911 GT3 RSR 1:43
Discussion


I warn you now, this is going to be a long build thread. A very long build thread, not least as I may start a couple of others I have in the loft as well, so they'll all need fitting in between paying work.
Anyway, on to the build.
The car portrayed is the 2005 Flying Lizard 911 GT3 RSR as raced at Le Mans by Johannes van Overbee, Lonnie Pechnik and Lizard regular Seth Neiman. The car came home third in GT2, completing 323 laps. Here's how the real thing looked;

The model is traditional Provence fare, a nicely cast resin bodyshell and baseplate, very little flash and nice and crisp detailing.

Included are some whitemetal and photo etch parts as well.
One slight issue is that the body is slightly warped, as can be seen from the picture below, the screw holes don't quite match up.
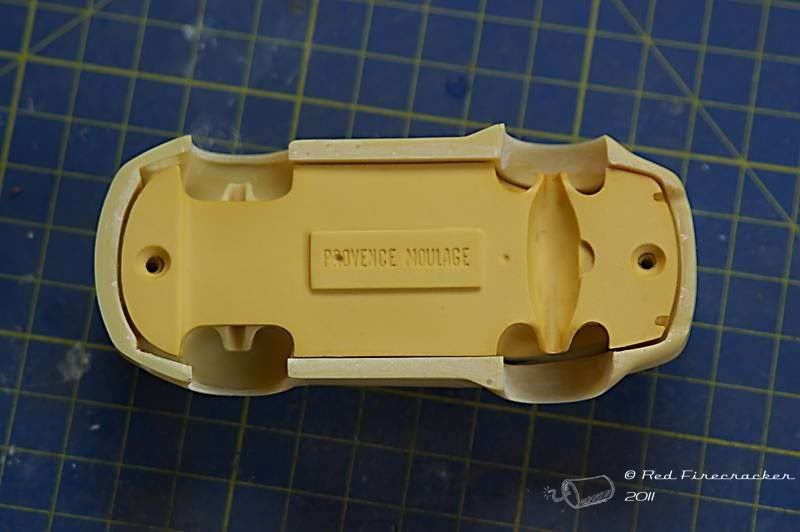
This is easy enough to fix, just leave the body screwed to the baseplate whenever possible.
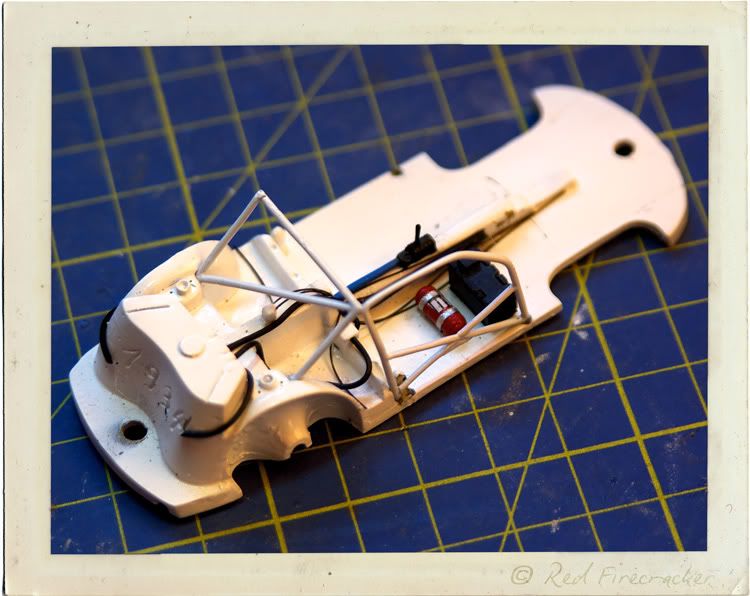
The baseplate has some detail cast in, which is okay, but could be better.
This I will remove and replace with more pleasing wires and cables.
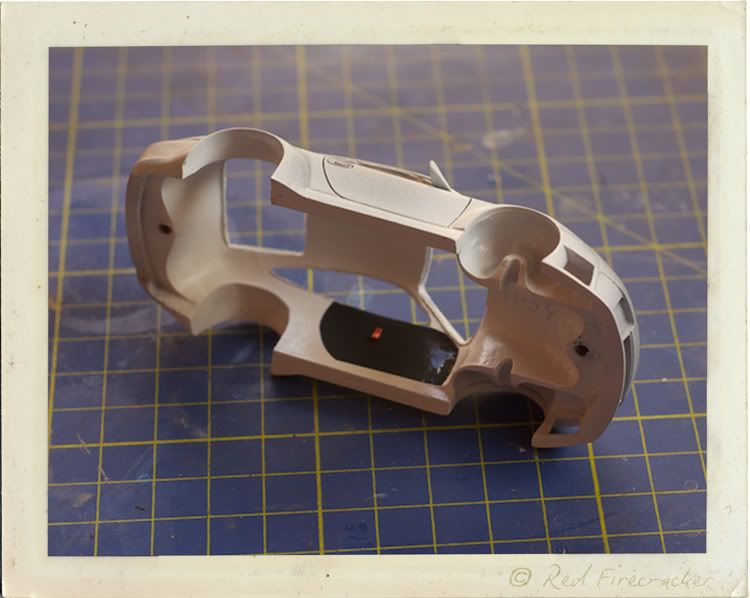
To jump on a bit, here is the body after wing mirror attachment, initial cleaning and a session of priming and rubbing down;
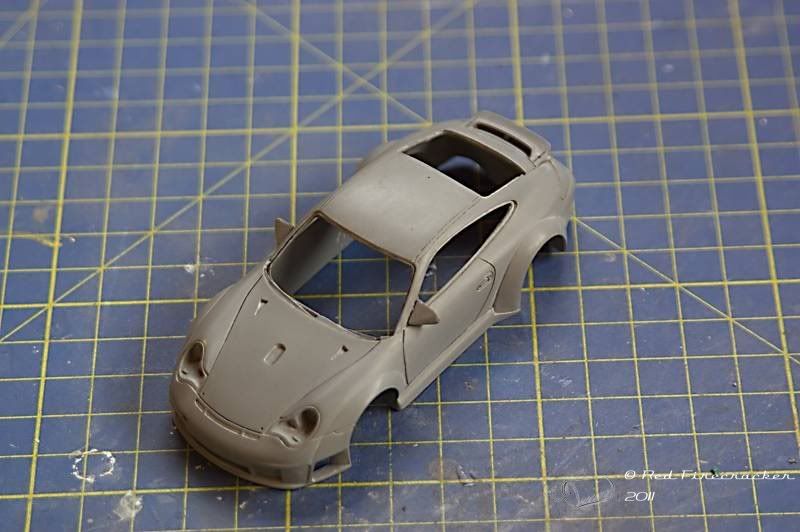
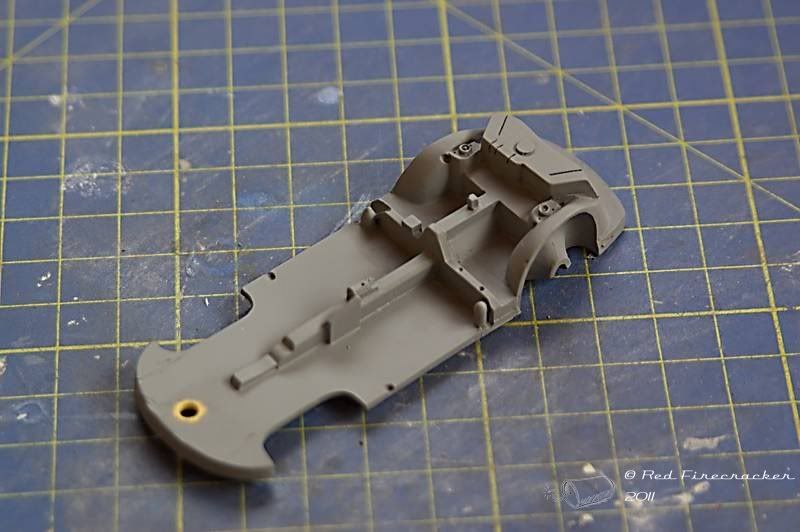
it is now nice and smooth and ready for a coat of white inside. The same process on the baseplate has seen the cast cables and hoses removed, primer and sand.
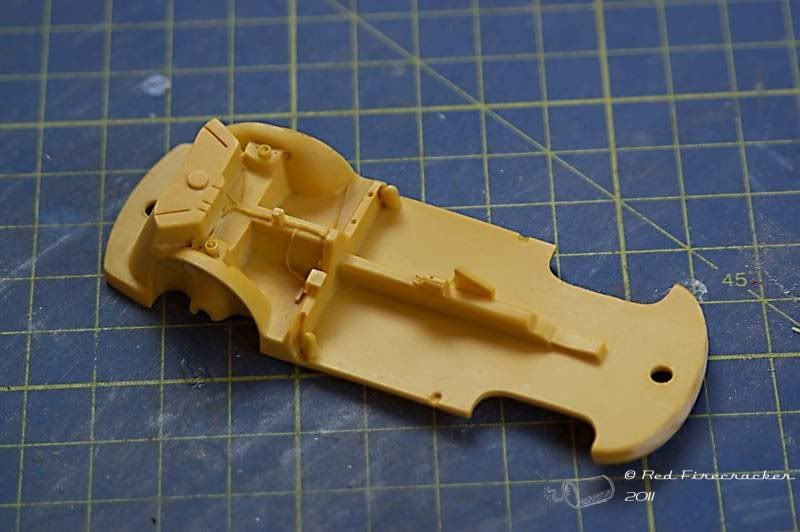
A couple of interior items have also seen some attention, the seat has had the moulded in belts removed and the dashboard has been cleaned up and the significant dent in the binnacle filled and sanded.

They will see further work.
That's all for now.
Anyway, on to the build.
The car portrayed is the 2005 Flying Lizard 911 GT3 RSR as raced at Le Mans by Johannes van Overbee, Lonnie Pechnik and Lizard regular Seth Neiman. The car came home third in GT2, completing 323 laps. Here's how the real thing looked;
The model is traditional Provence fare, a nicely cast resin bodyshell and baseplate, very little flash and nice and crisp detailing.
Included are some whitemetal and photo etch parts as well.
One slight issue is that the body is slightly warped, as can be seen from the picture below, the screw holes don't quite match up.
This is easy enough to fix, just leave the body screwed to the baseplate whenever possible.
The baseplate has some detail cast in, which is okay, but could be better.
This I will remove and replace with more pleasing wires and cables.
To jump on a bit, here is the body after wing mirror attachment, initial cleaning and a session of priming and rubbing down;
it is now nice and smooth and ready for a coat of white inside. The same process on the baseplate has seen the cast cables and hoses removed, primer and sand.
A couple of interior items have also seen some attention, the seat has had the moulded in belts removed and the dashboard has been cleaned up and the significant dent in the binnacle filled and sanded.
They will see further work.
That's all for now.
Well it's been a while.
Finally had chance to do some more to the Lizard, so here's a few more pictures.
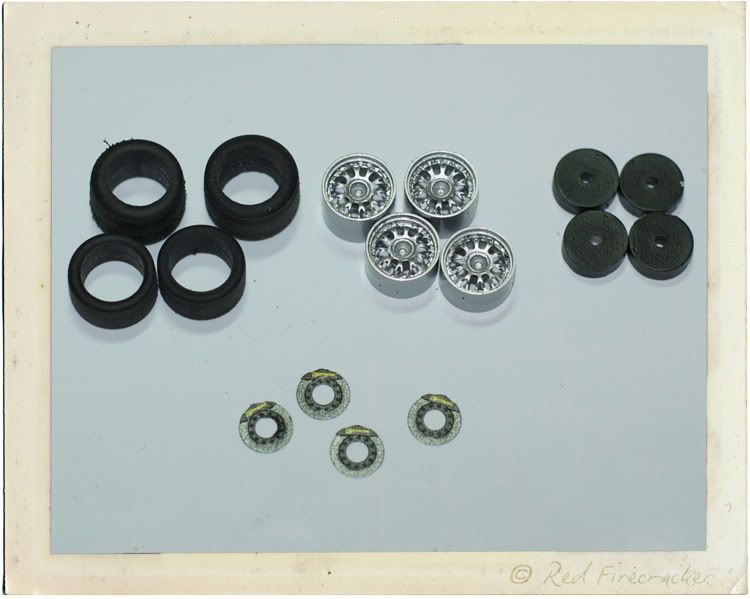
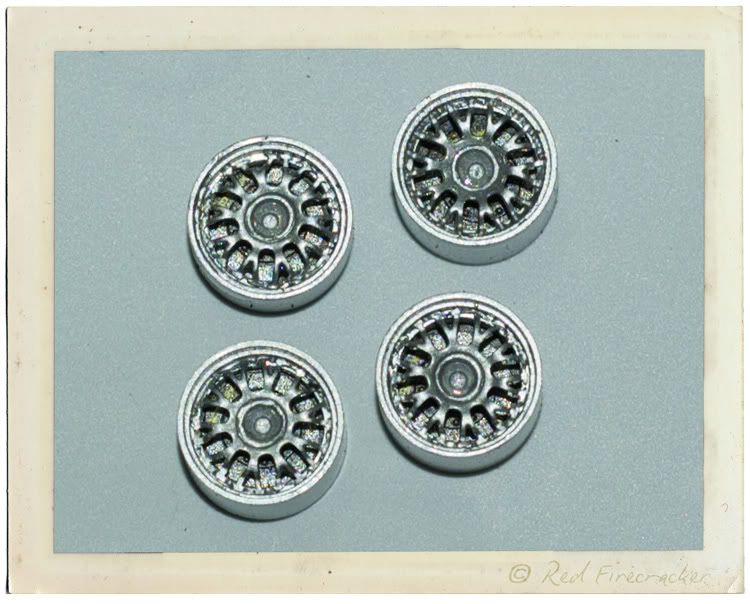
Firstly, the wheels. Provence Moulage very kindly provide a resin press so that you can form the etched wheel centres into the correct shape, which is a form of 's'. I say very kindly, but they really shouldn't have bothered as it doesn't work. So after modifying it somewhat and then using a plastic screwdriver to press the etches into shape, you get these;
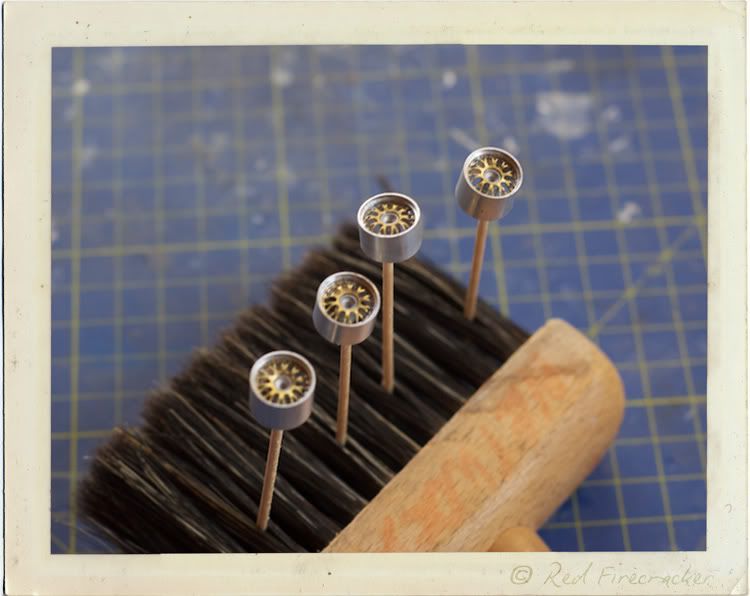
The etches have been fixed into the wheel hubs and the whitemetal centres have been fixed to the etches.
Elsewhere, lots of little bits have been seeing attention, such as the rear wing, cage components and interior items;
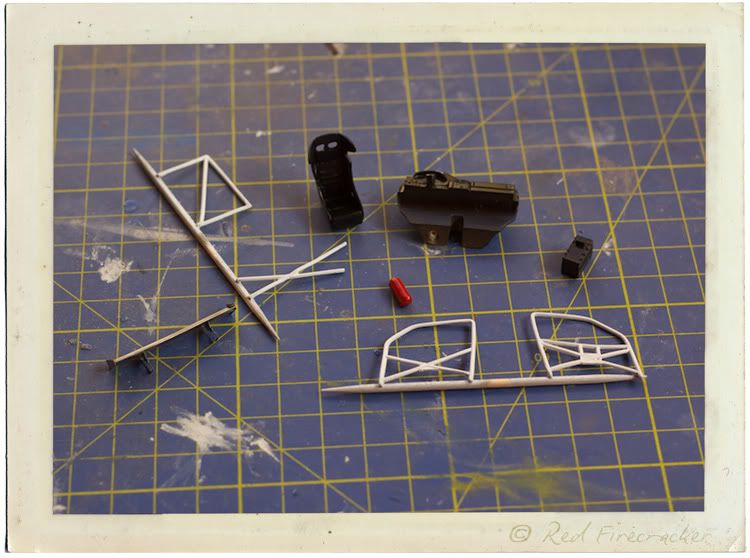
Slightly boring in their current form, but necessary to the end result.
Finally for now, the interior of the body has had some carbon door cards applied and also the webbing straps, made from painted masking tape, that are used to close the doors;
Hopefully the next update will be a bit swifter than this one.
Finally had chance to do some more to the Lizard, so here's a few more pictures.
Firstly, the wheels. Provence Moulage very kindly provide a resin press so that you can form the etched wheel centres into the correct shape, which is a form of 's'. I say very kindly, but they really shouldn't have bothered as it doesn't work. So after modifying it somewhat and then using a plastic screwdriver to press the etches into shape, you get these;
The etches have been fixed into the wheel hubs and the whitemetal centres have been fixed to the etches.
Elsewhere, lots of little bits have been seeing attention, such as the rear wing, cage components and interior items;
Slightly boring in their current form, but necessary to the end result.
Finally for now, the interior of the body has had some carbon door cards applied and also the webbing straps, made from painted masking tape, that are used to close the doors;
Hopefully the next update will be a bit swifter than this one.
I have to admit, the paintbrush cocktail stick holder was a first. I'd just finished cleaning the bench as I've been doing a lot of casting which is filthy work and I was suddenly stuck for something to hold the wheels and cocktail sticks. The brush was there so got stabbed. Works quite well.
Shock horror, another update and so soon.
Work has concentrated on the wheels and discs. Wheels painted silver and discs painted (bells black, discs titanium over black, callipers black over gold over titanium over black);
I also printed some AP Racing decals for the callipers, the decals being just under 3mm long;
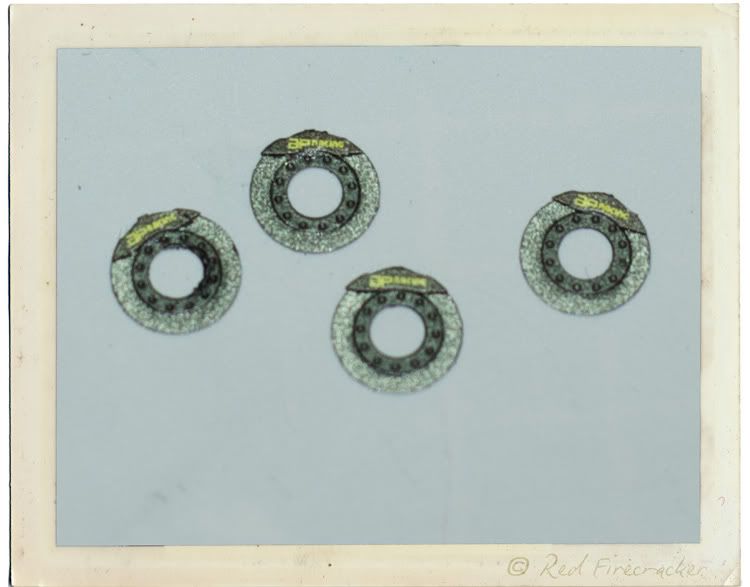
Once altogether, of course, you can't really see any of the detail!
Finally, this is what Provence Moulage consider is the sort of steering wheel that three drivers are going to hang onto for 24 hours flying through the French countryside.
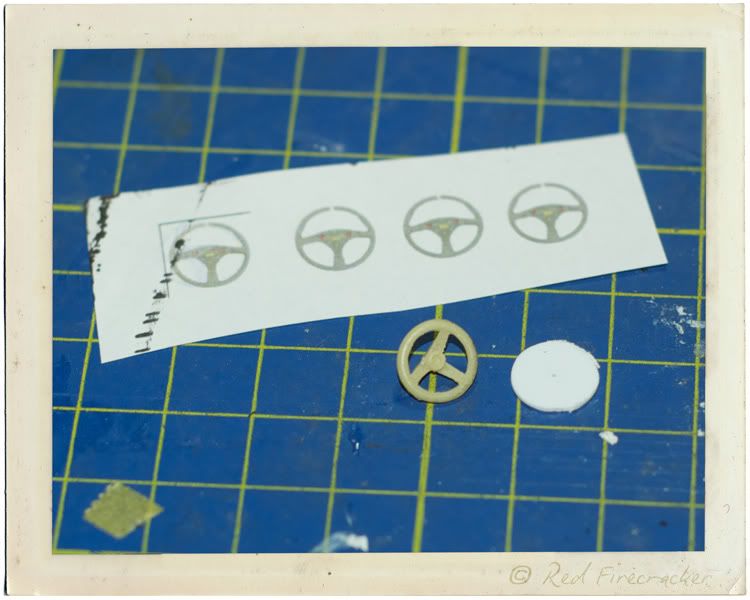
I'm not so sure. To that end, I've printed off a real steering wheel at scale size and will use the rim of the kit wheel and construct a new inner using the print out as a template. I'll probably end up replacing the rim as well.
Work has concentrated on the wheels and discs. Wheels painted silver and discs painted (bells black, discs titanium over black, callipers black over gold over titanium over black);
I also printed some AP Racing decals for the callipers, the decals being just under 3mm long;
Once altogether, of course, you can't really see any of the detail!
Finally, this is what Provence Moulage consider is the sort of steering wheel that three drivers are going to hang onto for 24 hours flying through the French countryside.
I'm not so sure. To that end, I've printed off a real steering wheel at scale size and will use the rim of the kit wheel and construct a new inner using the print out as a template. I'll probably end up replacing the rim as well.
perdu said:
lovely work
I wonder why they didn't make the proper wheel, surely an easier shape than the rimmed centre boss?
Old Airfix cars get a better stab at the steering wheel than that
Oh yes
I can see your decals
very nice
Cheer Perdu. The wheel is very much Nascar-esq, but a new one is nearly complete.I wonder why they didn't make the proper wheel, surely an easier shape than the rimmed centre boss?
Old Airfix cars get a better stab at the steering wheel than that
Oh yes
I can see your decals
very nice
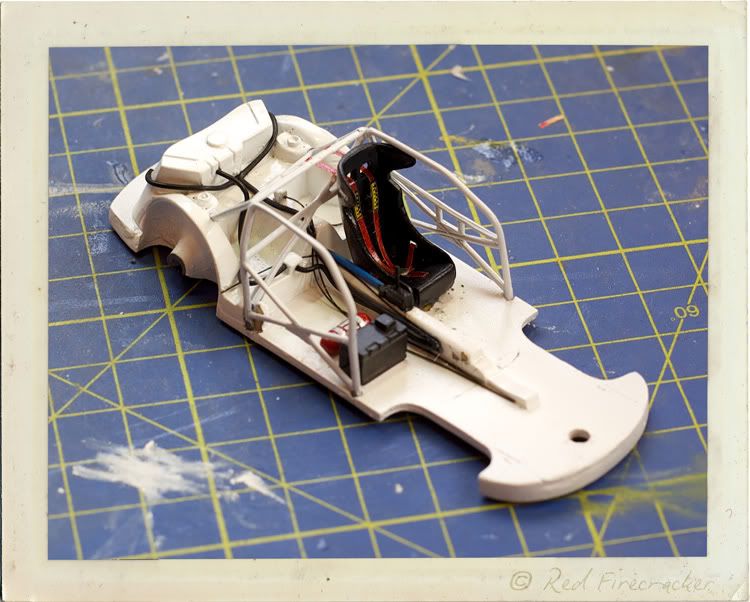
Bit more work on the interior. The cast in lines have been removed and replaced with a combination of looming cord (the thicker black bits) and also fibre optic cable (the thinner black bits). The blue gear change rodding is copper cable sheathing.
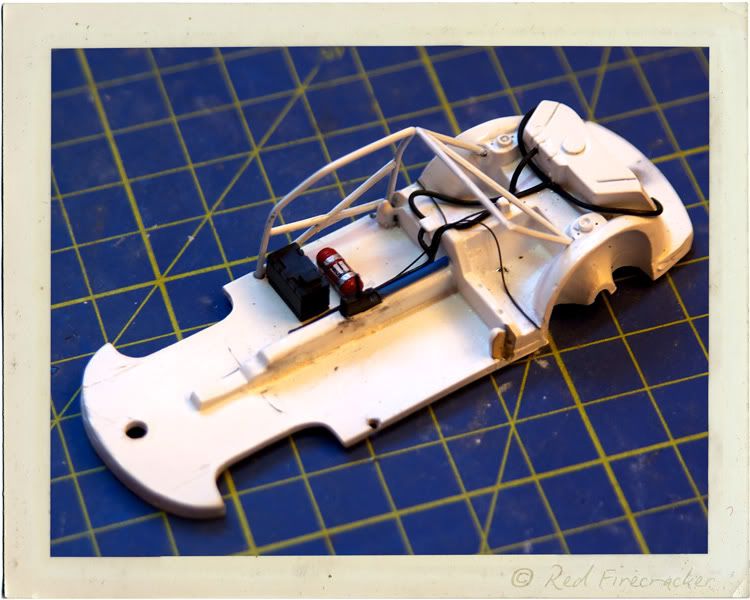
In this view you can see the fire extinguisher which has had silver strapping applied and also a decal created from a real image. Also visible is the gearstick which replaces the needlework pin (!) supplied by Provence Moulage, which is a shaped piece of plastic rod.
The cage has started to go in as well, which has needed quite a bit of adjustment. I'll not put the final piece in until the seat has been done, including the belts, as it would be extremely tricky otherwise. The cage also locates the dash unit.
SlipStream77 said:
Looking good, it's interesting seeing a resin model being made, I've always built with polystyrene.
Presumeably the parts have to be joined using cyanoacrylate?
Thanks.Presumeably the parts have to be joined using cyanoacrylate?
The only resin on resin in those pics is the battery (?) box in front of the extinguisher, everything else is mixed media, the cage being whitemetal as is the extinguisher, the other bits being etched or plastic, but yes, cyanoacrylate is a good way to fix things together. There is more etched to come along with more whitemetal.
dr_gn said:
Coming along very nicely. Is this model for you or a customer? I've got a lump of Carbon fibre off-cut that would be just right for a base for a 1:43 car.
Cheers.This one is purely personal, always have a soft spot for the Lizards when in France. I might drop you an email re: that carbon. I've been doing some of your favourite task today, carbon decaling the back of the seat. Must admit, not sure how prototypical it is for Le Mans 2005, but they used similar in other races.
Bit more progress.
The interior is now more or less complete, just really the final fitting of the dash remains.
The seat has had a carbon decal applied to the back and sides and the 'Recaro' decals. I have also added belts (not included in the kit) from painted tape. The centre buckle is an adapted Ferrari 250 GTO wheel hub spinner! The shoulder belts go back to an addition to the rear section of the cage.
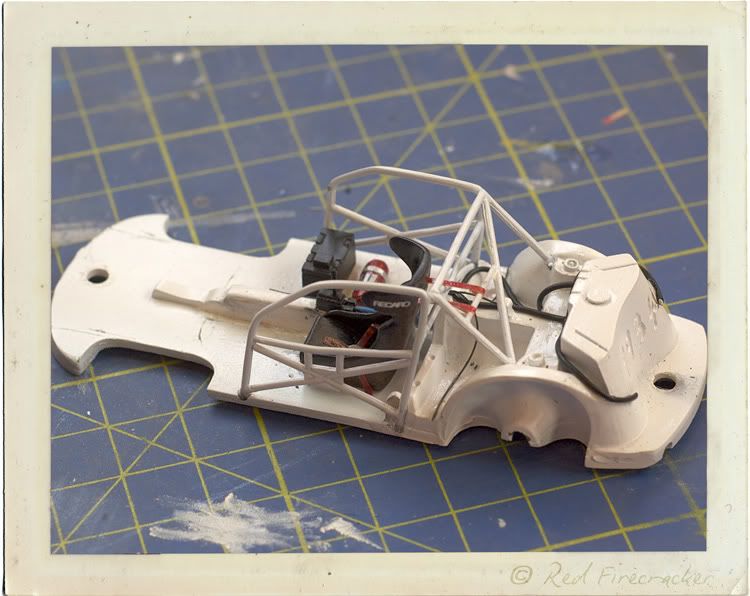
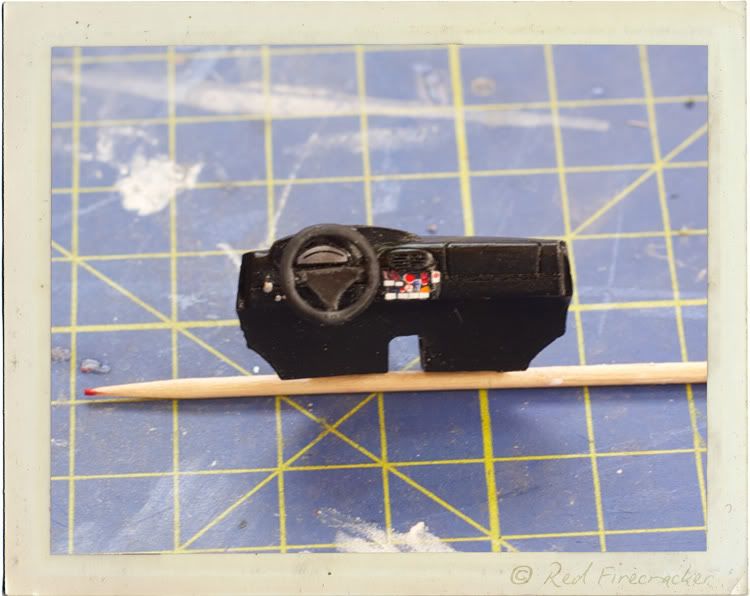
The new steering wheel is also complete, just awaiting a couple of decals. Here it is on installed on the completed dash;
I've started colour coating the body as well, which is going to take a bit of time I think.
The interior is now more or less complete, just really the final fitting of the dash remains.
The seat has had a carbon decal applied to the back and sides and the 'Recaro' decals. I have also added belts (not included in the kit) from painted tape. The centre buckle is an adapted Ferrari 250 GTO wheel hub spinner! The shoulder belts go back to an addition to the rear section of the cage.
The new steering wheel is also complete, just awaiting a couple of decals. Here it is on installed on the completed dash;
I've started colour coating the body as well, which is going to take a bit of time I think.
dr_gn said:
Coming together nicely. Have to remind myself it's 1:43.
Wouldn't the dash top look better matt?
It would, yes, and it would be if my Xtracrylix matt clear coat had stayed matt. Used it yesterday (just to test, luckily) and it is now gloss. Nice.Wouldn't the dash top look better matt?
I'll probably just knock back my normal clear coat a hell of a lot to get a matt effect before I finally install the dash, but I still need to put the decals on the steering wheel. Wonder if they'll still be legible?
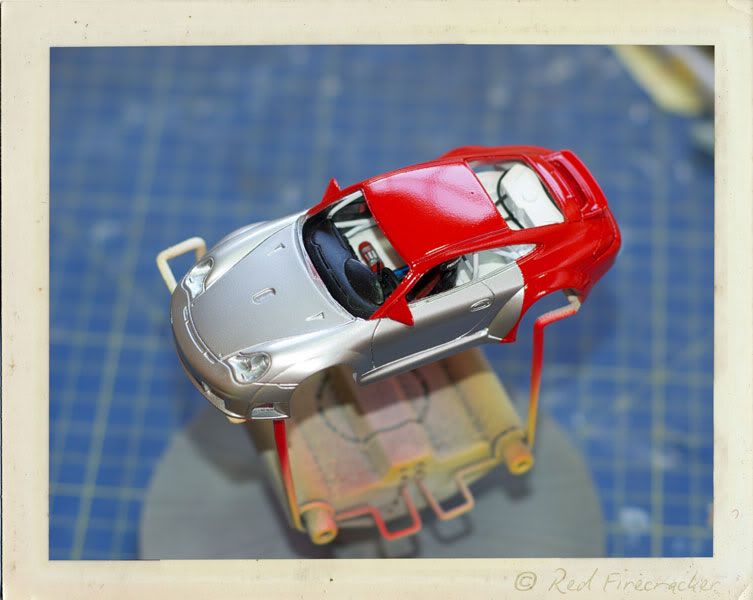
Not much progress recently, but the body is now in colour. Not totally happy with it, the interior now needs some remedial work, but considering how long it sat with masking tape on it, not too bad.
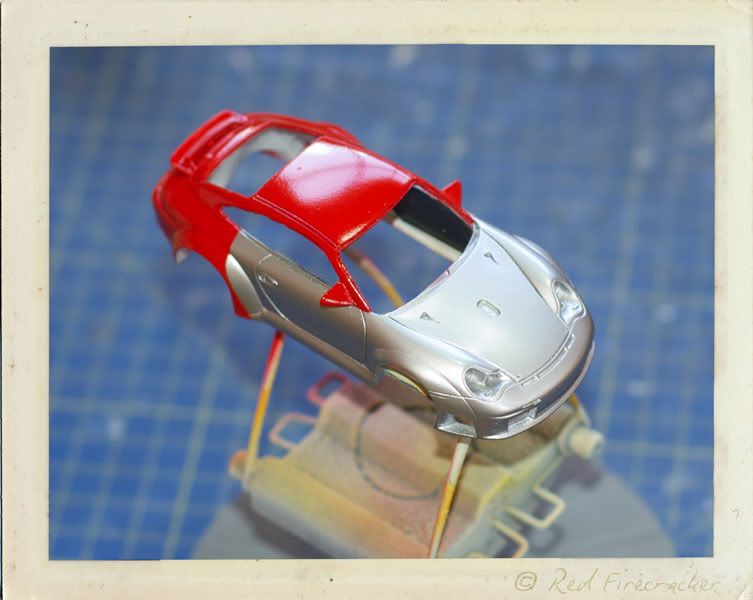
and here's a couple to show how little of the interior work is now visible.
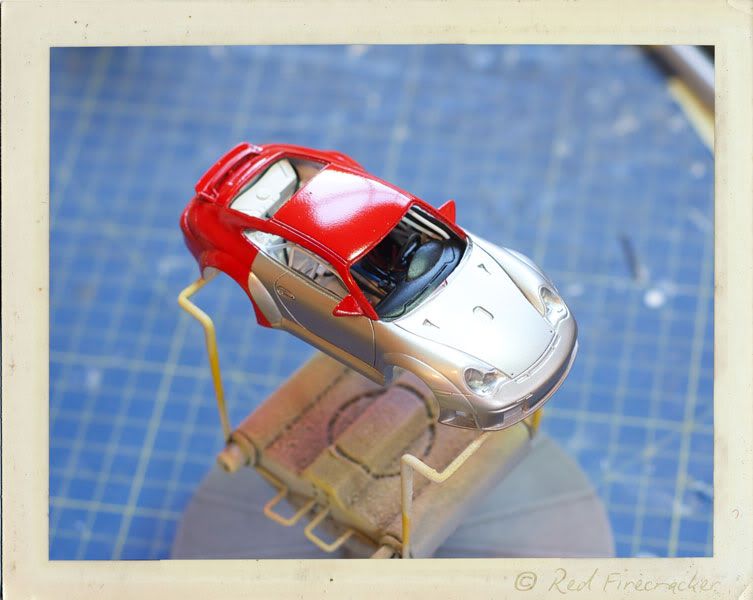
I just need to sand back the clear coat, apply the decals and then start final clear coating.
The roll cage has proven its strength though, I dropped it and no damage done.
and here's a couple to show how little of the interior work is now visible.
I just need to sand back the clear coat, apply the decals and then start final clear coating.
The roll cage has proven its strength though, I dropped it and no damage done.
Micromesh and Tamiya compounds are my normal weapons of choice. I'm a bit like yourself with panel lines when it comes to car clear coats, you see so many that are overdone, especially race cars, to the point of pastiche. Saying that, as this is a demo piece, it will be more towards what I call the commercial end of the scale, so shiny shiny.
I've knocked back the clear already with the Micromesh pads and have started to apply the decals, which are to traditional, familiar, PM quality of usability.
I've knocked back the clear already with the Micromesh pads and have started to apply the decals, which are to traditional, familiar, PM quality of usability.


Gassing Station | Scale Models | Top of Page | What's New | My Stuff