Miniman & Schmalex's Hotshot Build Thread
Discussion


Oops. Just bought a Dirt Tuned motor for her as a starter for 10 to include in the initial build.
My initial upgrades are planned to be:
My initial upgrades are planned to be:
- Brushless motor (no idea on these, so much research required)
- LiPo battery. Again, not much clue here, but the connections are very different and they have an extra wire on them that looks quite scary! I might have to take it to a model shop for this upgrade!
Hotshots are great - not the best handling, but they go well and are pretty strong.
Be careful with li-po, you have to charge and store them carefully - You must use a li-po charger. But they last a lot longer and give more oomph.
For brushless I use ez-run (ebay) dont worry they are from hk, get a combined kit with esc that has li-po cutout.
something like -
http://www.ebay.co.uk/itm/eZrun-RC-1-10-12-CAR-8-5...
Also fit ball bearings instead of the brass and plastic bushes.
 good idea for a thread, nice one.
 I am still waiting for a set of proper bearings to arrive, but I thought I'd see how far I could get through the build before I needed them this evening as the wife is out and I had a clear table and a bottle of vino. Turns out I got as far as step 1.

Box by binaryimage, on Flickr

Inside by binaryimage, on Flickr

Lots of stuff by binaryimage, on Flickr
Top stuff. My wife is out for the evening & nicked the camera, but safe to say my lounge floor was covered in exactly the same stuff! I've got a big bid due in at work on Monday, so shall be starting my build properly on Tuesday when I have some time. However, over the weekend, I intend to paint the shell and driver up so that they are ready to go for when the time comes....
I am, however, having a bit of a crisis of confidence in 4 areas at the moment:
1: Cutting the bodyshell, as with my sausage fingers, there is a risk it's going to look pretty shoddy!!!!
2: Whether to paint it red or light blue (I remember seeing a light blue one as a kid and it looked awesome)
3: Notwithstanding the appropriate LiPo precautions, I just can't figure out how the LiPo batteries connect. I've bought 2 regular batteries with the kit, so no hurry, but I can't get my head around the LiPo connections as they have an extra wire and not the same connectors.
4: The controller I got with it is one of these new fangled 2.4g DSSS ones. I assume that I don't have to cut an aerial hole in the bodywork if that's the case.....
Edited by schmalex on Wednesday 25th January 22:46
Blakeatron said:
Hotshots are great - not the best handling, but they go well and are pretty strong.
Be careful with li-po, you have to charge and store them carefully - You must use a li-po charger. But they last a lot longer and give more oomph.
For brushless I use ez-run (ebay) dont worry they are from hk, get a combined kit with esc that has li-po cutout.
something like -
http://www.ebay.co.uk/itm/eZrun-RC-1-10-12-CAR-8-5...
Also fit ball bearings instead of the brass and plastic bushes.
Thanks BT.Be careful with li-po, you have to charge and store them carefully - You must use a li-po charger. But they last a lot longer and give more oomph.
For brushless I use ez-run (ebay) dont worry they are from hk, get a combined kit with esc that has li-po cutout.
something like -
http://www.ebay.co.uk/itm/eZrun-RC-1-10-12-CAR-8-5...
Also fit ball bearings instead of the brass and plastic bushes.
If I were to accidentaly purchase the above mentioned kit on ebay and the appropriately sized li-po battery to fit in the car, would I need to anything else? I've read that for more powerful motors, the pinion needs to be changed from the standard 15T to anywhere between 13T and 27T!!!!! Aside from that, would I just build the motor, ESC, cutout etc into the car and plug the battery in?
My bearings arrived today, so will be going straight into the build!
schmalex said:
Top stuff. My wife is out for the evening & nicked the camera, but safe to say my lounge floor was covered in exactly the same stuff! I've got a big bid due in at work on Monday, so shall be starting my build properly on Tuesday when I have some time. However, over the weekend, I intend to paint the shell and driver up so that they are ready to go for when the time comes....
I am, however, having a bit of a crisis of confidence in 4 areas at the moment:
1: Cutting the bodyshell, as with my sausage fingers, there is a risk it's going to look pretty shoddy!!!!
2: Whether to paint it red or light blue (I remember seeing a light blue one as a kid and it looked awesome)
3: Notwithstanding the appropriate LiPo precautions, I just can't figure out how the LiPo batteries connect. I've bought 2 regular batteries with the kit, so no hurry, but I can't get my head around the LiPo connections as they have an extra wire and not the same connectors.
4: The controller I got with it is one of these new fangled 2.4g DSSS ones. I assume that I don't have to cut an aerial hole in the bodywork if that's the case.....
You want a LiPo like this for a Hotshot http://www.ebay.co.uk/itm/TEAM-ORION-Rocket-Pack-L...I am, however, having a bit of a crisis of confidence in 4 areas at the moment:
1: Cutting the bodyshell, as with my sausage fingers, there is a risk it's going to look pretty shoddy!!!!
2: Whether to paint it red or light blue (I remember seeing a light blue one as a kid and it looked awesome)
3: Notwithstanding the appropriate LiPo precautions, I just can't figure out how the LiPo batteries connect. I've bought 2 regular batteries with the kit, so no hurry, but I can't get my head around the LiPo connections as they have an extra wire and not the same connectors.
4: The controller I got with it is one of these new fangled 2.4g DSSS ones. I assume that I don't have to cut an aerial hole in the bodywork if that's the case.....
Edited by schmalex on Wednesday 25th January 22:46
It connects to the car with the standard Tamiya connector, the other lead is used to make sure the cells charge to the same voltage, you just connect both leads to the charger and it sorts it all out.
A brushless set up like the one mentioned earlier would be fine but i think a 10.5 motor would be ample for a Hotshot to cope with.
Status update:
Front and rest gearboxes are built. Rear suspension and driveshafts are installed. Everything fully ball raced. I'm now up to #12 in the instructions.
Injuries sustained so far include a cut thumb from trying to use a modelling knife as a lever to remove a cog from the rear gearbox (it was a b h getting the casing to go together smoothly).
Tomorrows job will be to finish painting the driver, cut and paint the body and get the front & rear gearboxes mounted to the tub.
Front and rest gearboxes are built. Rear suspension and driveshafts are installed. Everything fully ball raced. I'm now up to #12 in the instructions.
Injuries sustained so far include a cut thumb from trying to use a modelling knife as a lever to remove a cog from the rear gearbox (it was a b
h getting the casing to go together smoothly).Tomorrows job will be to finish painting the driver, cut and paint the body and get the front & rear gearboxes mounted to the tub.
I'm almost there!! Pics coming soon. As I type this, my wife is cutting the body shell out, as my ham-fisted attempts at cutting out always end up in tears!!
One hint - when making the front uprights, make damn sure the little red disks are the right way up...
I've not spoken to the family all weekend and the kitchen table is a sea of plastic that can't be moved. My back and neck are killing me from leaning over and concentrating so hard for hours and hours on end, but it's oing to be well worth it :
:
One hint - when making the front uprights, make damn sure the little red disks are the right way up...
I've not spoken to the family all weekend and the kitchen table is a sea of plastic that can't be moved. My back and neck are killing me from leaning over and concentrating so hard for hours and hours on end, but it's oing to be well worth it
:Edited by schmalex on Sunday 29th January 13:31
OK a little progress, I have the front and rear suspension assemblies finished. Enough for today, as Chinese, wine and Top Gear are calling

Rear gearbox by binaryimage, on Flickr

Front gearbox by binaryimage, on Flickr

Rear suspension by binaryimage, on Flickr

Rotating by binaryimage, on Flickr

Hot by binaryimage, on Flickr

Front suspension by binaryimage, on Flickr
Rear gearbox by binaryimage, on Flickr
Front gearbox by binaryimage, on Flickr
Rear suspension by binaryimage, on Flickr
Rotating by binaryimage, on Flickr
Hot by binaryimage, on Flickr
Front suspension by binaryimage, on Flickr
Finished this off now, haven't run it yet though, waiting for a break in the miserable rainy sleety crap weather.

Chassis by binaryimage, on Flickr

Shocks by binaryimage, on Flickr

Needs body by binaryimage, on Flickr

Done by binaryimage, on Flickr
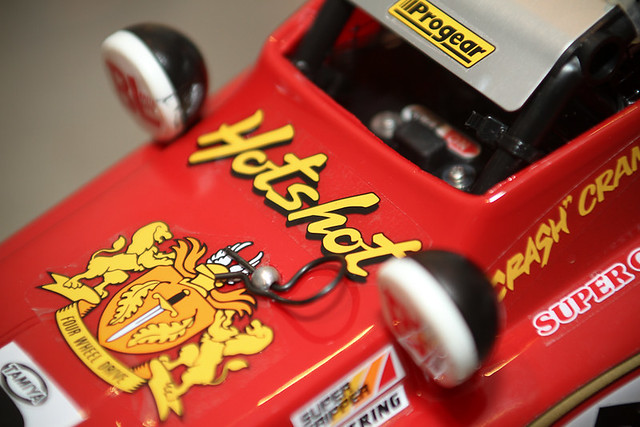
Hotshot by binaryimage, on Flickr
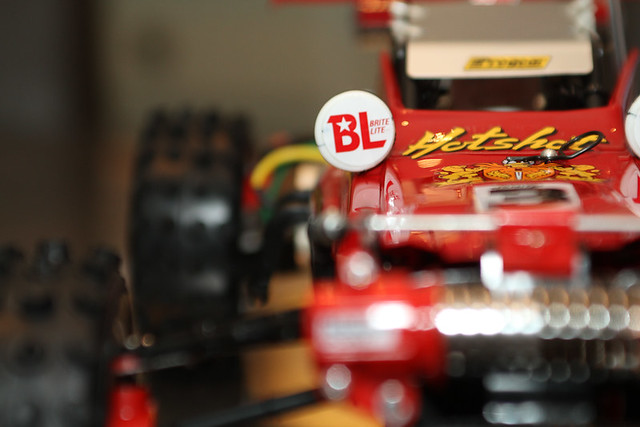
BL by binaryimage, on Flickr

Crash by binaryimage, on Flickr

Hotshot by binaryimage, on Flickr
Chassis by binaryimage, on Flickr
Shocks by binaryimage, on Flickr
Needs body by binaryimage, on Flickr
Done by binaryimage, on Flickr
Hotshot by binaryimage, on Flickr
BL by binaryimage, on Flickr
Crash by binaryimage, on Flickr
Hotshot by binaryimage, on Flickr
That looks immense - much better finished than mine. How did you get the decals looking so good - did you cut around the individual decal? I have a new body coming through the post to try again - my spray job was excellent, but the stickers really let it down 
Unfortunately, I've fitted a really hot motor to it, which is blindly quick, but seems to have played hell with the rear diffs - it's going into a model shop tomorrow for a quick gearbox re-build.
Photo's will be forthcoming once I'm happy with the bodywork in a few days.
Unfortunately, I've fitted a really hot motor to it, which is blindly quick, but seems to have played hell with the rear diffs - it's going into a model shop tomorrow for a quick gearbox re-build.
Photo's will be forthcoming once I'm happy with the bodywork in a few days.
schmalex said:
That looks immense - much better finished than mine. How did you get the decals looking so good - did you cut around the individual decal? I have a new body coming through the post to try again - my spray job was excellent, but the stickers really let it down
Unfortunately, I've fitted a really hot motor to it, which is blindly quick, but seems to have played hell with the rear diffs - it's going into a model shop tomorrow for a quick gearbox re-build.
Photo's will be forthcoming once I'm happy with the bodywork in a few days.
I cut around them fairly close, but not to the point of cutting around individual letters. I've also managed to break the battery cover already Unfortunately, I've fitted a really hot motor to it, which is blindly quick, but seems to have played hell with the rear diffs - it's going into a model shop tomorrow for a quick gearbox re-build.
Photo's will be forthcoming once I'm happy with the bodywork in a few days.
Not sure where to get a new one. Gassing Station | Scale Models | Top of Page | What's New | My Stuff