
2cv BMW engine conversion
Discussion


I'm mid-way through this project but thought I'd start to write this up and provide updates as I go. I started this at the end of last year and aim to complete it this winter. Hope that it's of interest...
I loved the 2CV6 Special I had just after leaving university and drove it as a daily for three years until it started to rust away and I wanted something faster. Many years later I'm lucky enough to be able to treat myself to another one and happily drive around in it for a year or so...
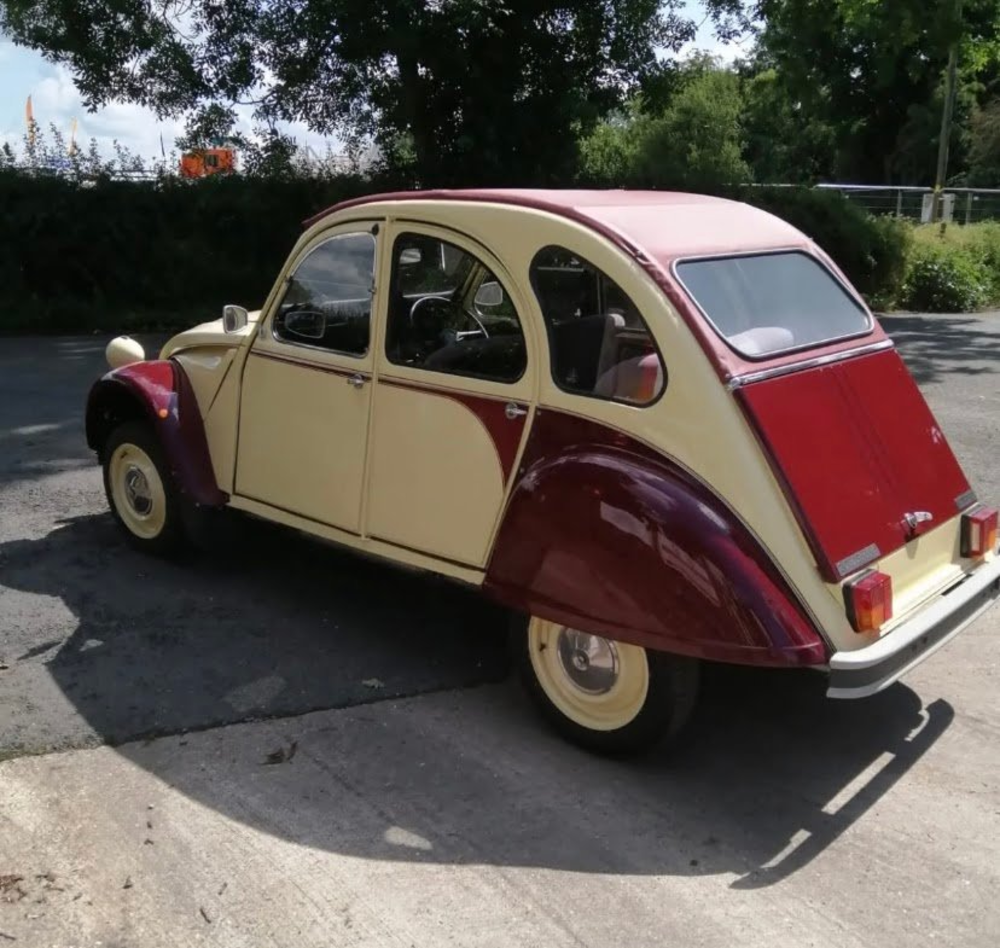
...before deciding that it would be fun to put a bigger engine in it. This was a path that others have trodden before me so I could get some parts from Sparrow Automotive and I figured that I could fabricate the rest of them. This is the story of that build. The first job was to buy a donor engine end to make life a lot easier I bought the whole bike so that I had all of the loom and hopefully everything else I needed. The gearbox on this bike was broken so I got this 1100RT for £500...
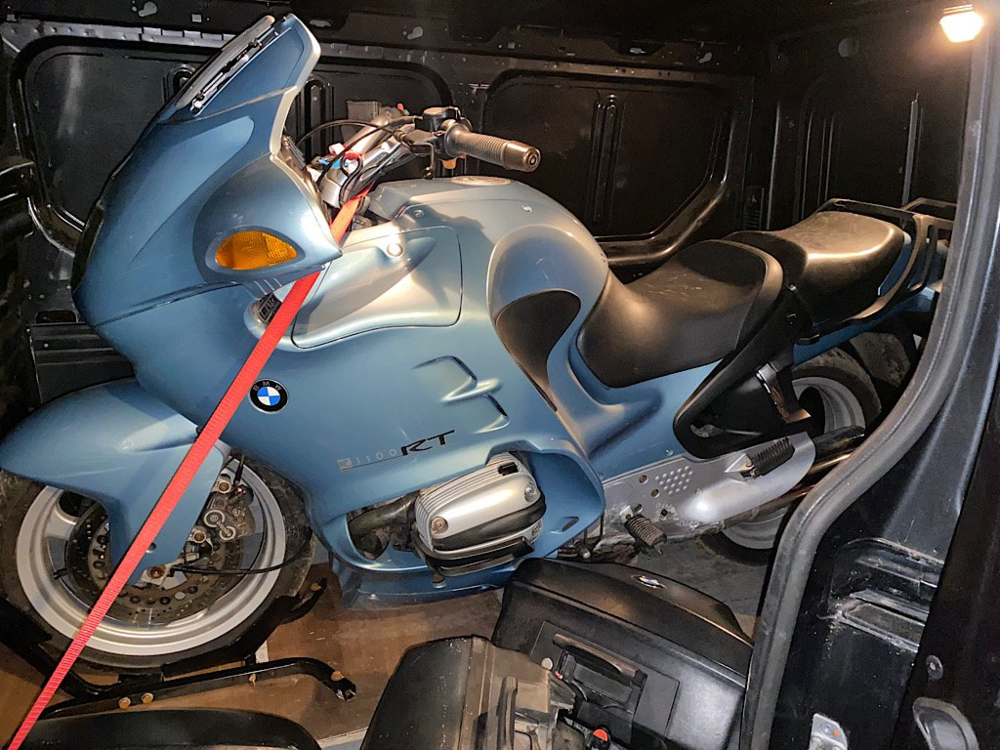
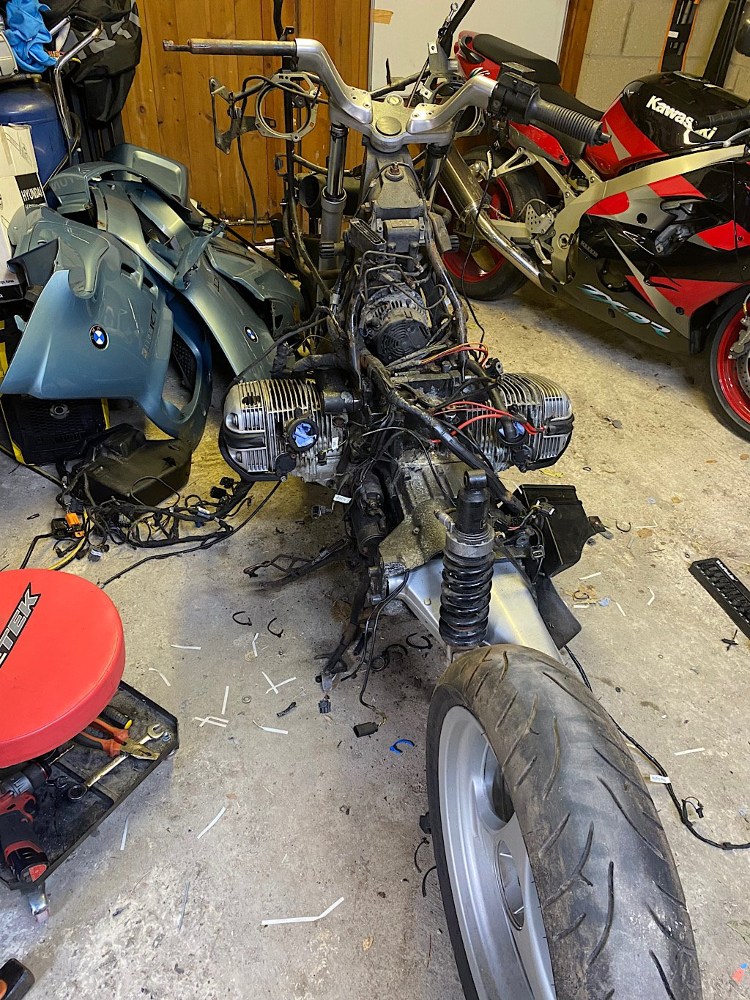
The engine is an 1100 horizontally opposed twin cylinder that's roughly the same shape and dimensions as the original 2CV6 engine. The original engine is 602cc and made 29bhp and the bmw engine is nearly twice the capacity and, with a bit of fettling, makes nearly four times the power. The first job is to strip the bike down and keep everything I'll need and then find a good home for the rest.
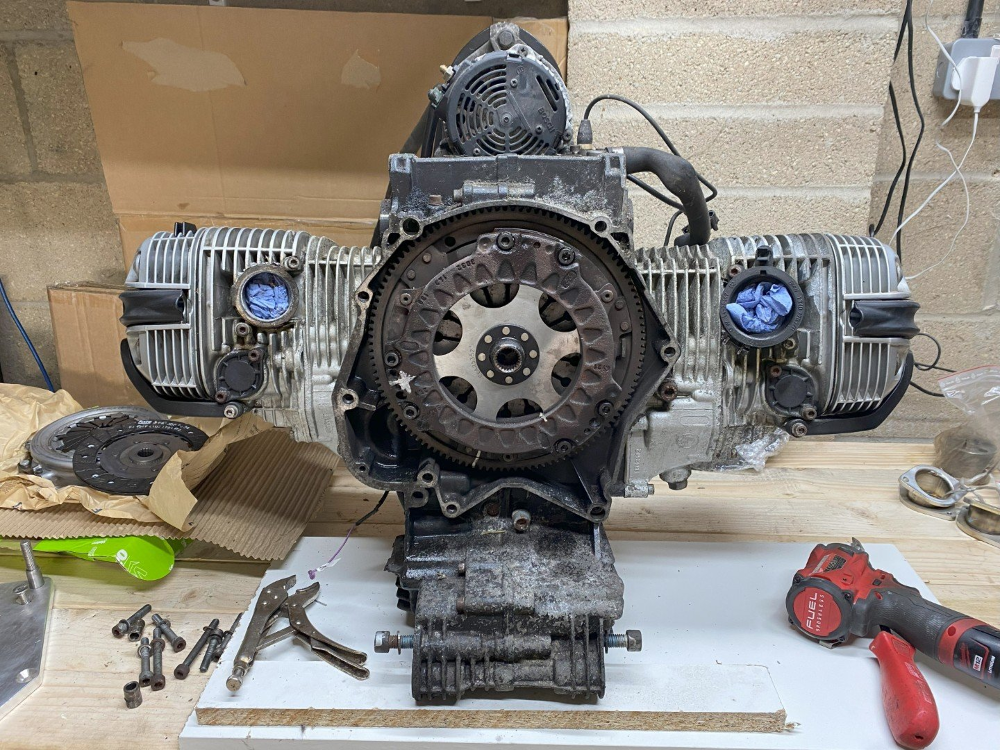
Once the engine is out of the bike we can pull the gearbox and put it to one side as we won't be using it. We'll be using an adapter plate and using the 2CV gearbox. This shows the bmw flywheel and clutch in the engine on the bench...
We now remove the clutch and flywheel and fit the adapter plate supplied by Sparrow Automotive...
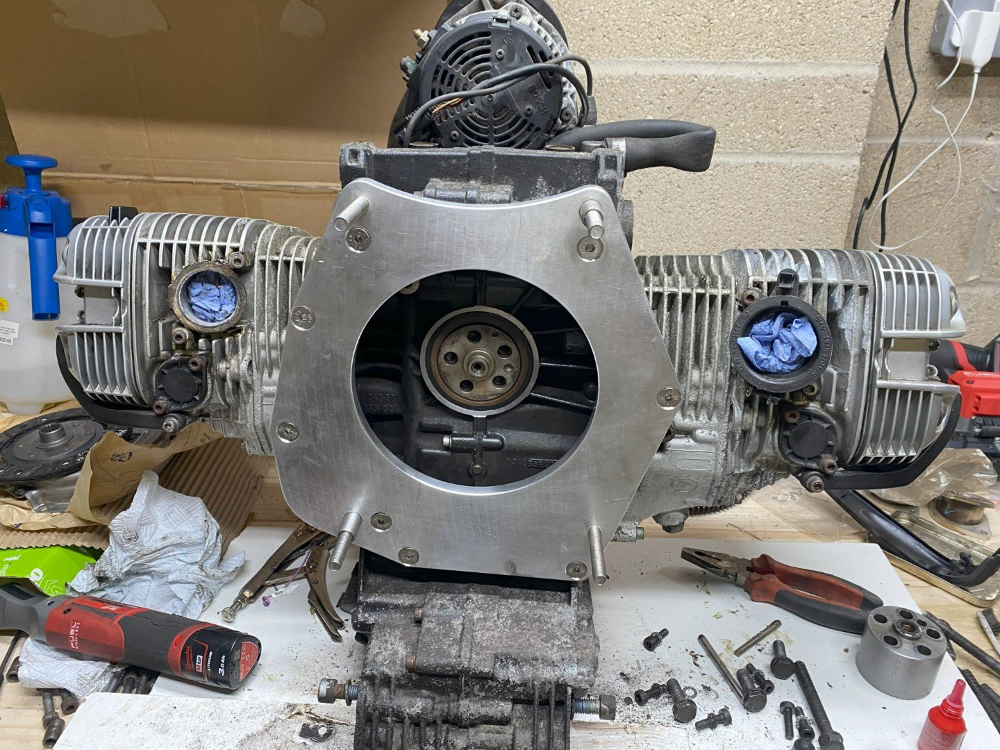
Finally we can fit the modified 2cv flywheel and the new Valeo 2CV clutch...
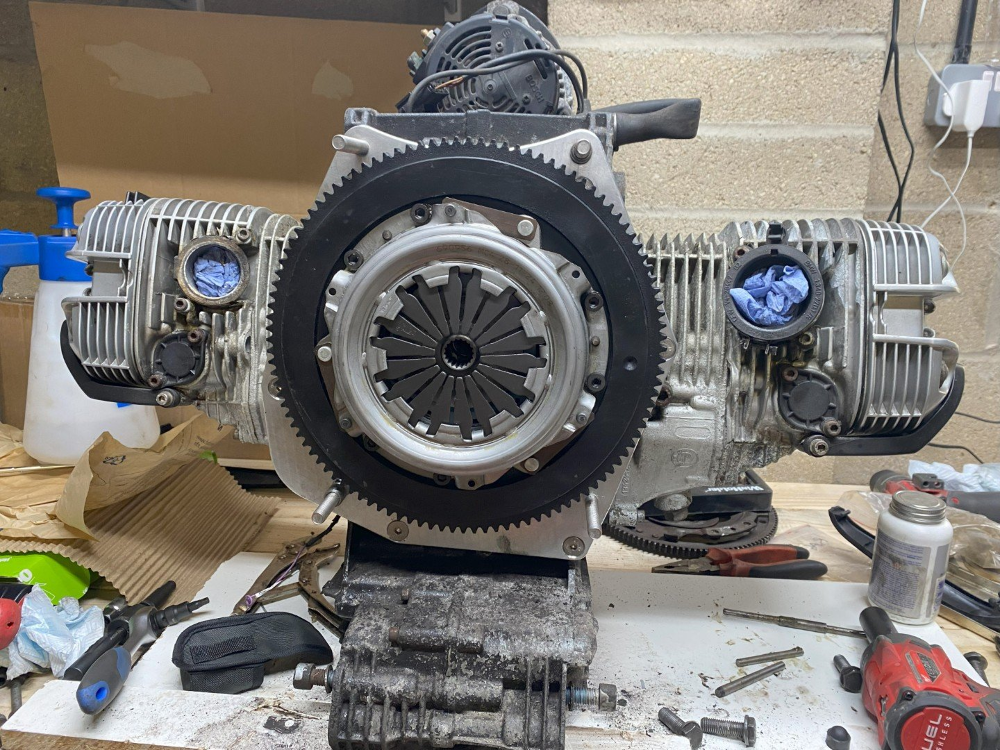
We're now ready to fit the gearbox but at the moment it's still in the car. The next step is to remove the original engine.
Published on Drivers Garage Stories: https://driversgarage.co.uk/story/preparing-the-do...
Service history logged with Drivers Garage
I loved the 2CV6 Special I had just after leaving university and drove it as a daily for three years until it started to rust away and I wanted something faster. Many years later I'm lucky enough to be able to treat myself to another one and happily drive around in it for a year or so...
...before deciding that it would be fun to put a bigger engine in it. This was a path that others have trodden before me so I could get some parts from Sparrow Automotive and I figured that I could fabricate the rest of them. This is the story of that build. The first job was to buy a donor engine end to make life a lot easier I bought the whole bike so that I had all of the loom and hopefully everything else I needed. The gearbox on this bike was broken so I got this 1100RT for £500...
The engine is an 1100 horizontally opposed twin cylinder that's roughly the same shape and dimensions as the original 2CV6 engine. The original engine is 602cc and made 29bhp and the bmw engine is nearly twice the capacity and, with a bit of fettling, makes nearly four times the power. The first job is to strip the bike down and keep everything I'll need and then find a good home for the rest.
Once the engine is out of the bike we can pull the gearbox and put it to one side as we won't be using it. We'll be using an adapter plate and using the 2CV gearbox. This shows the bmw flywheel and clutch in the engine on the bench...
We now remove the clutch and flywheel and fit the adapter plate supplied by Sparrow Automotive...
Finally we can fit the modified 2cv flywheel and the new Valeo 2CV clutch...
We're now ready to fit the gearbox but at the moment it's still in the car. The next step is to remove the original engine.
Published on Drivers Garage Stories: https://driversgarage.co.uk/story/preparing-the-do...
Service history logged with Drivers Garage
Now we have an engine ready and a pile of bits to fit, we need to prepare the 2CV to fit the engine and this means removing the old engine. On a 2CV this is very easy as access is excellent. This is what the car looks like with the bonnet removed...
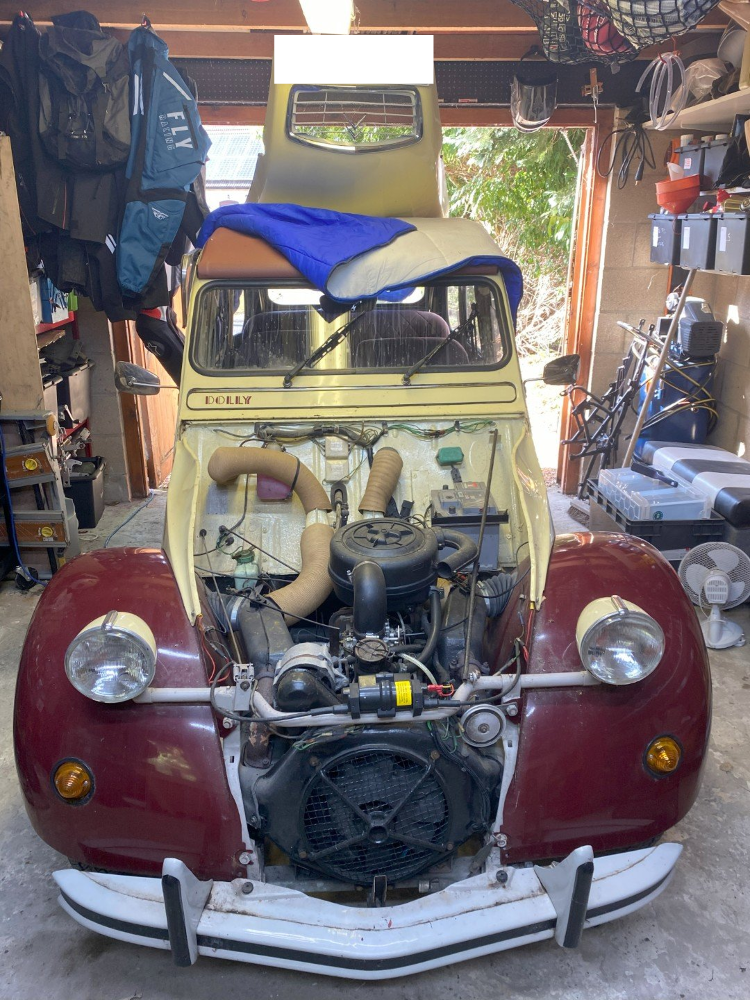
The next step is to remove the wings, bumper and light bar. We can now see the engine, gearbox, driveshafts, brakes and so on...
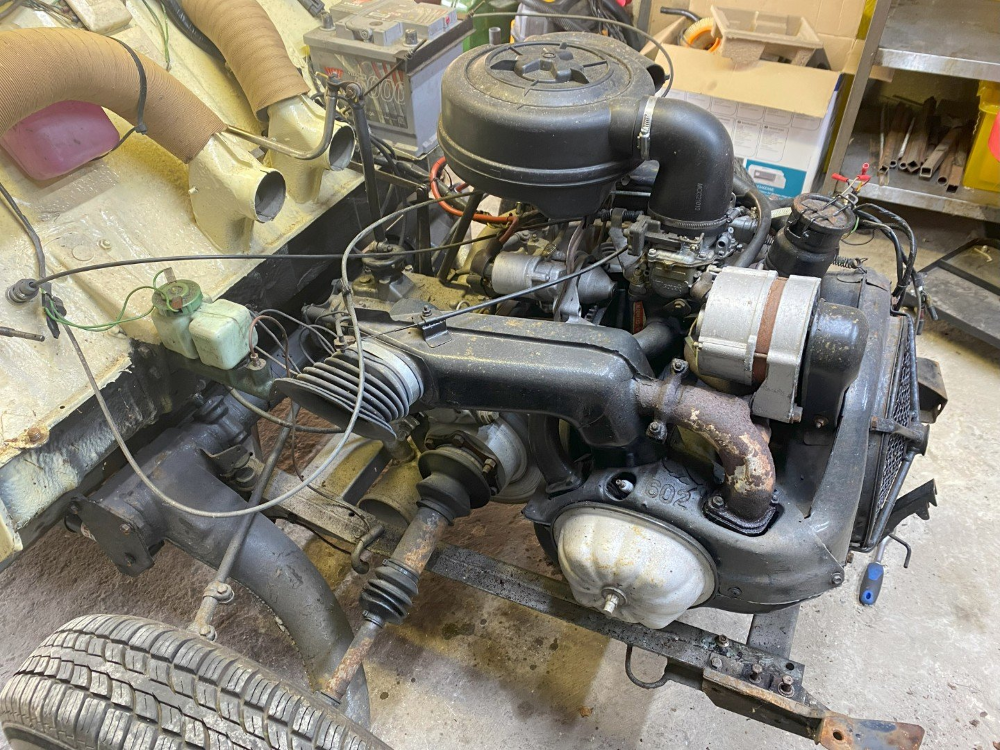
We can now remove a lot of the ancillaries in preparation for lifting the engine out. We can take the fan that bolted to the crank off along with the alternator that was connected to the crank by a belt. The exhaust is disconnected and we can remove the heat exchangers. I'm leaving the manifold in place so that I don't have to crack the very rusty bolts and we can remove the air filter and carb. We can also disconnect the loom as it connects to the engine.
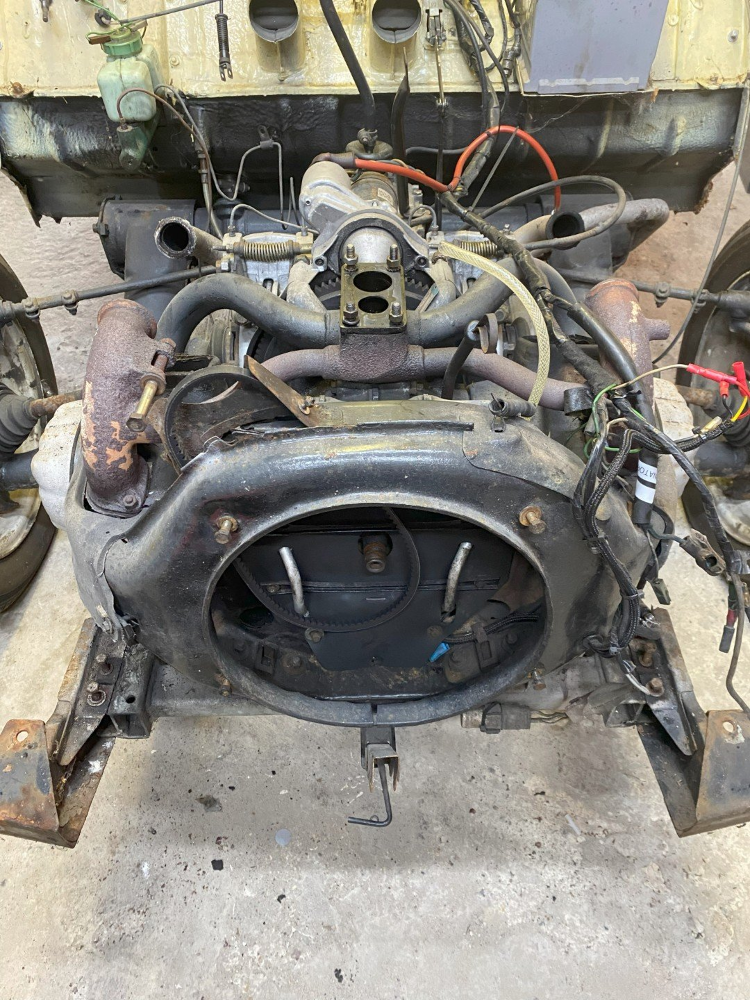
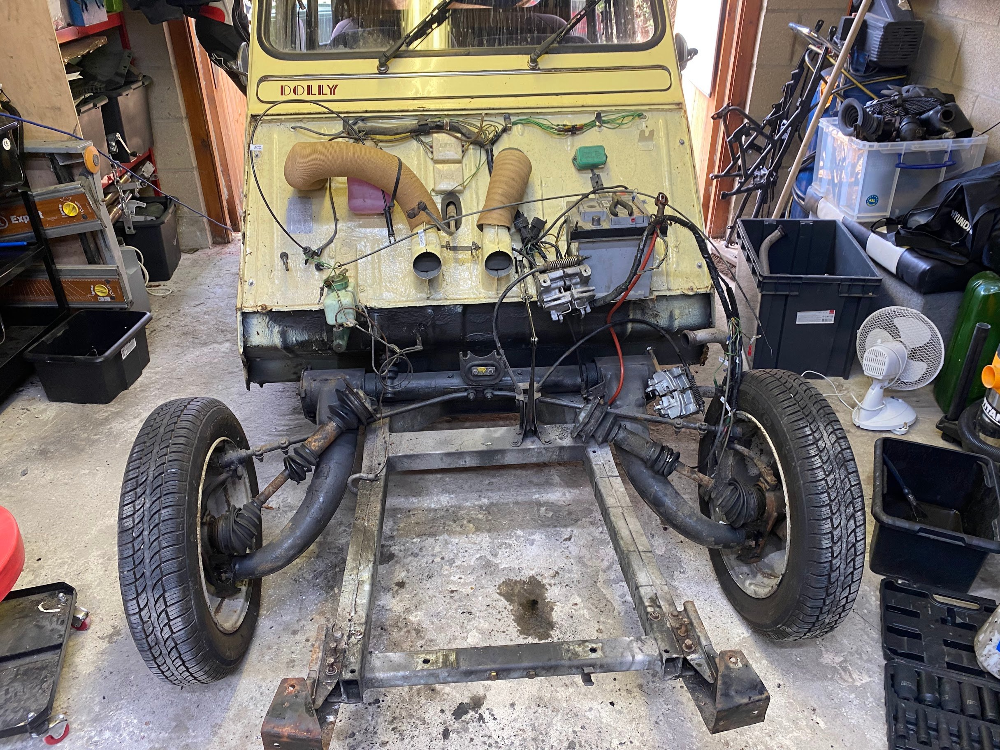
The engine and the gearbox are bolted to the chassis and all that remains is to connect an engine hoist the the engine, undo the bolts and lift it our. On my last 2cv (when I was a lot younger) we lifted the engine out by hand to change the clutch but I'm not sure I fancy the consequences of trying that these days. What we're left with is the bare chassis. You can see the driveshafts laid on the suspension arms and the gearbox mount in the middle of the cross-suspension member. The state of the chassis here is excellent as at some point the original was replaced with a galvanised chassis.
Published on Drivers Garage Stories: https://driversgarage.co.uk/story/preparing-the-2c...
Service history logged with Drivers Garage
The next step is to remove the wings, bumper and light bar. We can now see the engine, gearbox, driveshafts, brakes and so on...
We can now remove a lot of the ancillaries in preparation for lifting the engine out. We can take the fan that bolted to the crank off along with the alternator that was connected to the crank by a belt. The exhaust is disconnected and we can remove the heat exchangers. I'm leaving the manifold in place so that I don't have to crack the very rusty bolts and we can remove the air filter and carb. We can also disconnect the loom as it connects to the engine.
The engine and the gearbox are bolted to the chassis and all that remains is to connect an engine hoist the the engine, undo the bolts and lift it our. On my last 2cv (when I was a lot younger) we lifted the engine out by hand to change the clutch but I'm not sure I fancy the consequences of trying that these days. What we're left with is the bare chassis. You can see the driveshafts laid on the suspension arms and the gearbox mount in the middle of the cross-suspension member. The state of the chassis here is excellent as at some point the original was replaced with a galvanised chassis.
Published on Drivers Garage Stories: https://driversgarage.co.uk/story/preparing-the-2c...
Service history logged with Drivers Garage
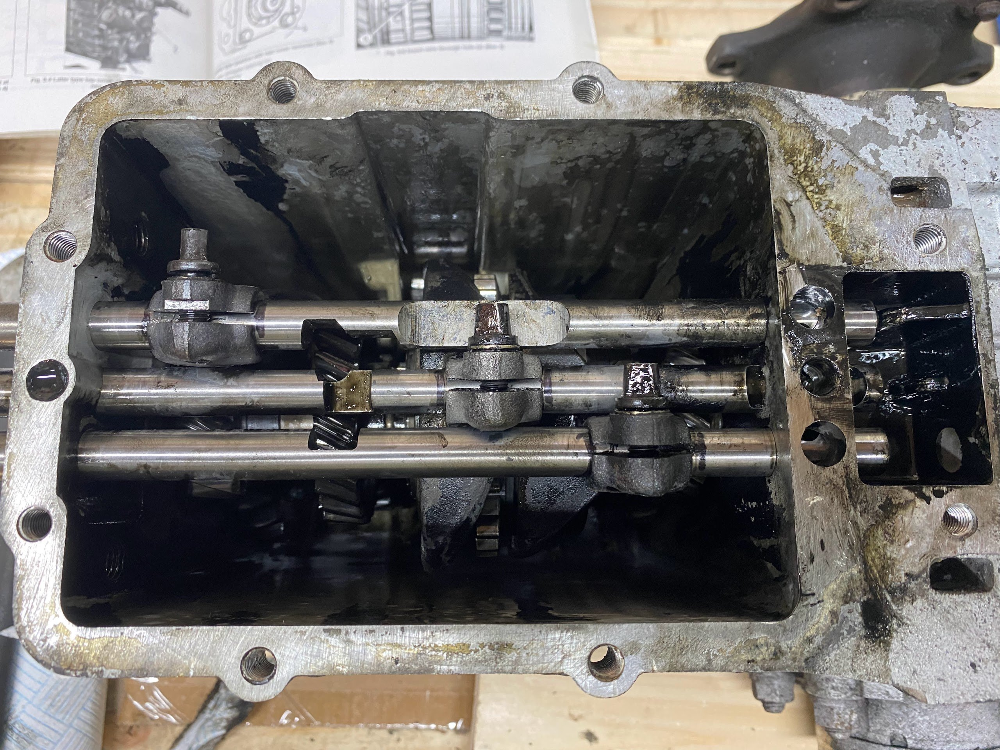
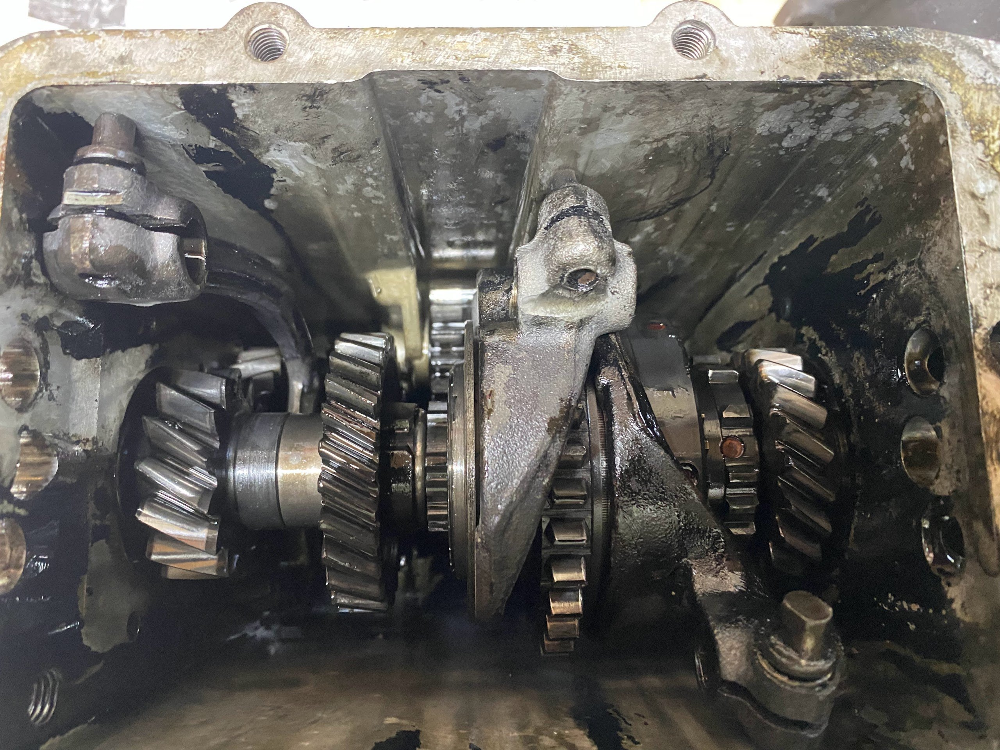
The next step of the project was to install the engine. There was some work to take the input shaft out of the gearbox and install a double lipped seal to replace the scroll on the input shaft. This is because the higher speeds that the car will be capable of, can cause the scroll seal to be overwhelmed by the amount of oil thrown around. This is a pretty straight forward modification but does require the gearbox to be opened up, the change shafts removed, the bell housing removed and the input shaft removed for the modification. The seals are supplied by Sparrow Engineering and they will send a load of photos showing how this is done. However, I managed to break one of the selector shafts by not being careful enough to get everything in the right position before bolting down the gearbox lid. They are available from France but it's a pain to get hold of them. If there's any resistance when installing the lid then take it off and make sure nothing has moved.
Anyway, once your gearbox is back together and bolted to the engine, it's time to see how it looks in the chassis. For comparison, this is the original engine in place...
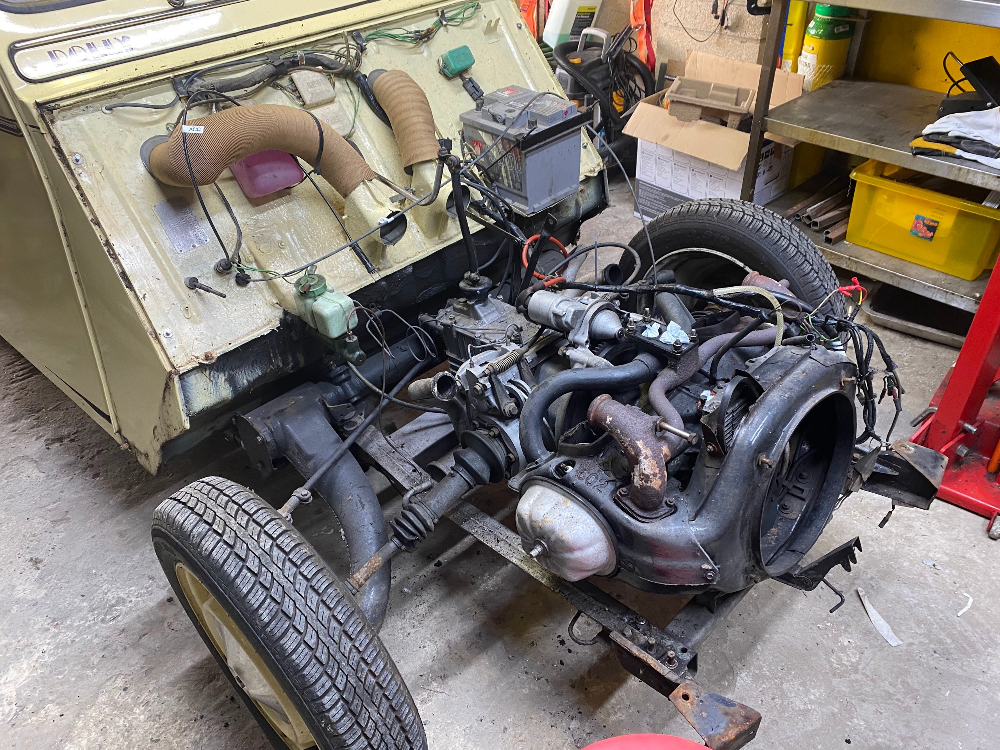
We can put the engine roughly in place by attaching the back of the gearbox to its mount. There are two spacers that we can replace with thinner spacers to move back the engine and gearbox as much as possible without hitting the back of the engine bay. The following picture shows the engine resting on some wood shims so that it's roughly in place. You can also see that the driveshafts have been rebuilt with new seals as the old one were showing some wear and cracking.
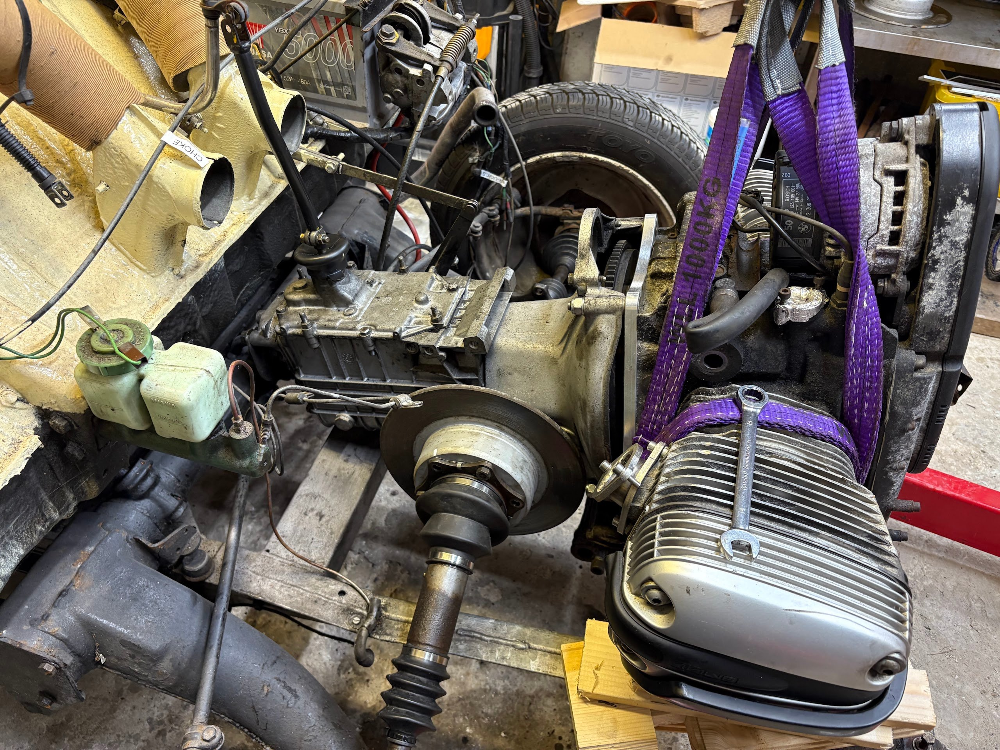
The problem as shown in the next picture is that the engine does not clear the front chassis member and therefore sits far too high at the front.
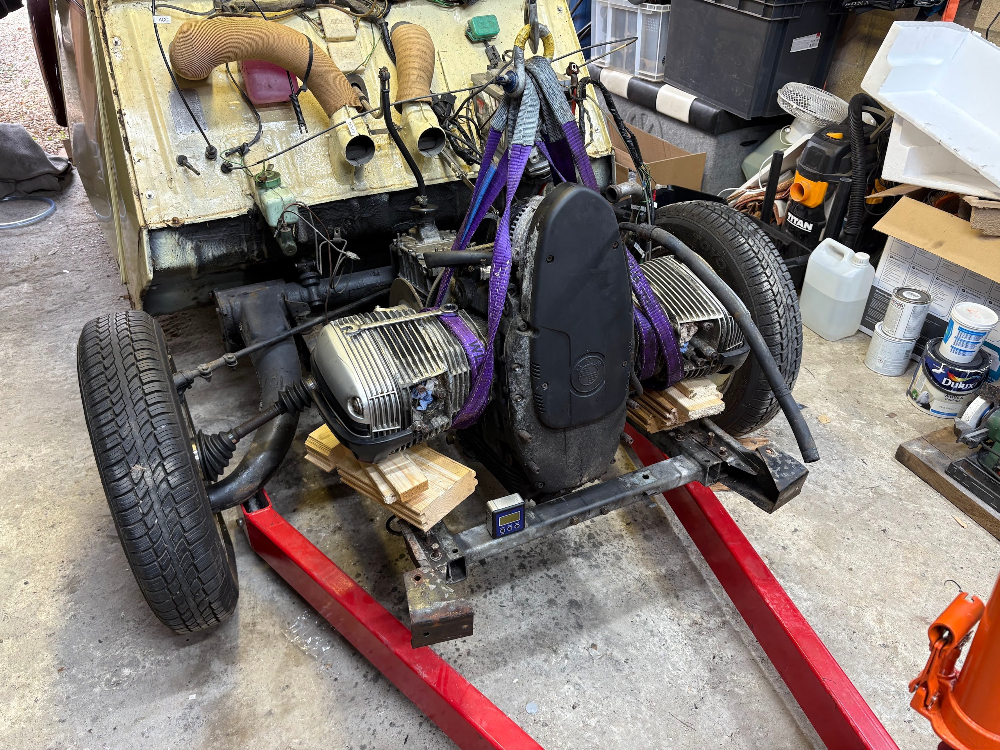
So it's time to take a brave pill and notch the front chassis member. When the engine is in place I'll weld the resulting hole and add some reinforcement.
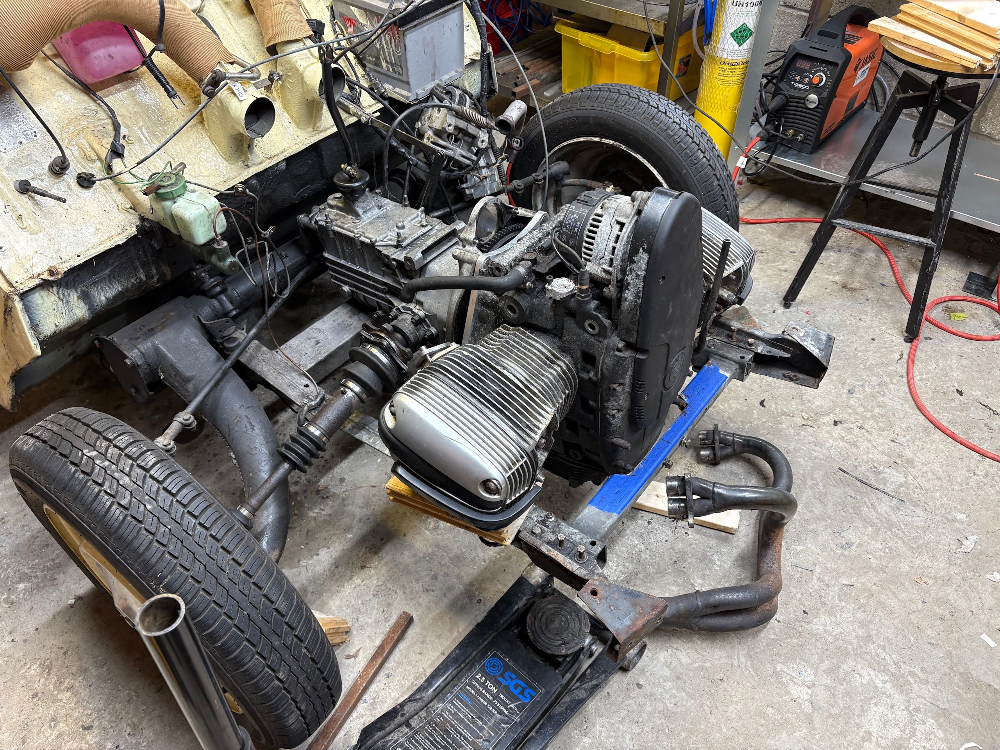
The engine is now in the right place and at the right height. The wings no longer fit as the cylinders are wider than the originals and the driveshafts are slightly further back and also foul the wings. This is a problem for the future though. The next step is to make some engine mounts.
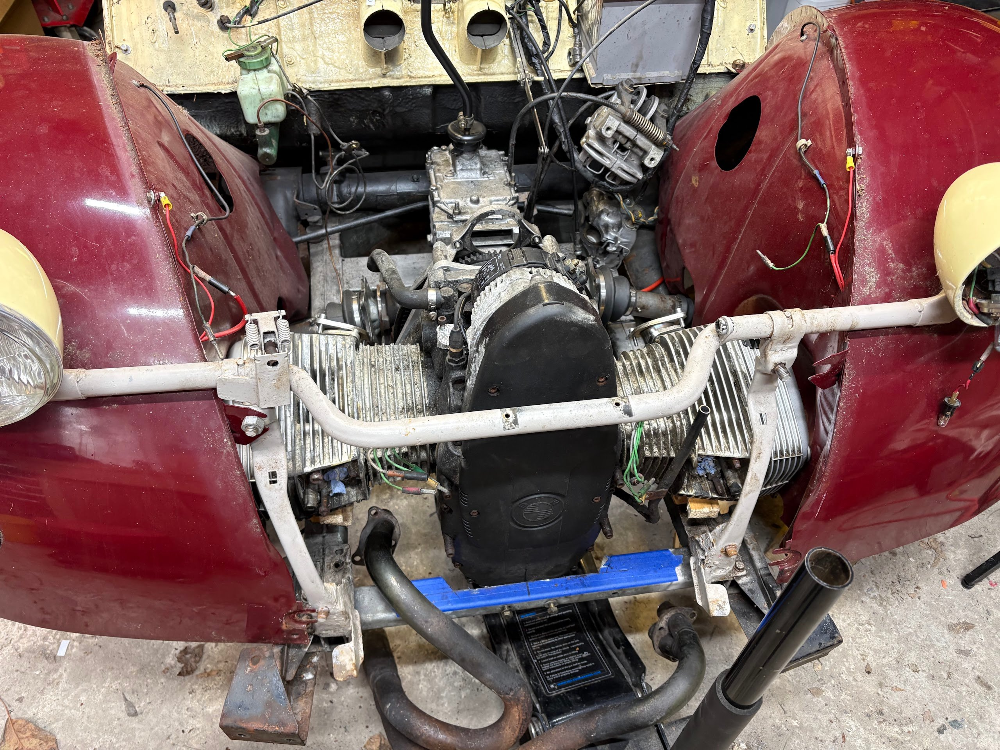
You'll in the above picture that the BMW manifold is optimistically near the engine. However, it doesn't fit as it fouls with the chassis. This is another problem for the future.
Published on Drivers Garage Stories: https://driversgarage.co.uk/story/starting-to-inst...
Service history logged with Drivers Garage
Anyway, once your gearbox is back together and bolted to the engine, it's time to see how it looks in the chassis. For comparison, this is the original engine in place...
We can put the engine roughly in place by attaching the back of the gearbox to its mount. There are two spacers that we can replace with thinner spacers to move back the engine and gearbox as much as possible without hitting the back of the engine bay. The following picture shows the engine resting on some wood shims so that it's roughly in place. You can also see that the driveshafts have been rebuilt with new seals as the old one were showing some wear and cracking.
The problem as shown in the next picture is that the engine does not clear the front chassis member and therefore sits far too high at the front.
So it's time to take a brave pill and notch the front chassis member. When the engine is in place I'll weld the resulting hole and add some reinforcement.
The engine is now in the right place and at the right height. The wings no longer fit as the cylinders are wider than the originals and the driveshafts are slightly further back and also foul the wings. This is a problem for the future though. The next step is to make some engine mounts.
You'll in the above picture that the BMW manifold is optimistically near the engine. However, it doesn't fit as it fouls with the chassis. This is another problem for the future.
Published on Drivers Garage Stories: https://driversgarage.co.uk/story/starting-to-inst...
Service history logged with Drivers Garage
Gassing Station | French Bred | Top of Page | What's New | My Stuff