Ceiling shadow gap with LED lighting
Discussion


I'm wanting to create a ceiling shadow gap for our hall way ideally with an LED light to be used a night light maybe...
Just after advice from anyone who has built one to how big a gap/ recess you made etc...
I'm still researching into it and trying to find out if we can get a plaster beading/ edging profile which does all we need or if I need to edge the hallway ceiling with plasterboard, then build a frame for the lower ceiling and frame over that, creating a pocket around the lower plasterboard ceiling allowing for an LED strip to be hidden creating hopefully an edge glow.
I can get something like below as a beading, but this won't allow the installation of an led strip to be hidden.

Well that's the idea, but who knows. Currently I have the ceiling pulled down.
Just after advice from anyone who has built one to how big a gap/ recess you made etc...
I'm still researching into it and trying to find out if we can get a plaster beading/ edging profile which does all we need or if I need to edge the hallway ceiling with plasterboard, then build a frame for the lower ceiling and frame over that, creating a pocket around the lower plasterboard ceiling allowing for an LED strip to be hidden creating hopefully an edge glow.
I can get something like below as a beading, but this won't allow the installation of an led strip to be hidden.
Well that's the idea, but who knows. Currently I have the ceiling pulled down.
Loads of options, without having to lower the ceiling.
https://www.led-supplies.com/aluminium-channel-for...
https://www.led-supplies.com/aluminium-channel-for...
Well this is currently the ceiling....
It was horrid pine boarded like the rest of the house, so it's all being changed.

This is what I was proposing to build if I had to do it from scratch. But I'm not sure of the going dimensions for the gap where the strip goes, I guess the larger the gap the more light spread and the same for the shadow gap width. Wider the better. But I've not one to hand to measure.

It was horrid pine boarded like the rest of the house, so it's all being changed.
This is what I was proposing to build if I had to do it from scratch. But I'm not sure of the going dimensions for the gap where the strip goes, I guess the larger the gap the more light spread and the same for the shadow gap width. Wider the better. But I've not one to hand to measure.
Edited by Gingerbread Man on Tuesday 4th September 14:43
skilly1 said:
Prices would help 
B17NNS said:
Gingerbread Man said:
I'm in Oz, so probably no help to me but hope it helps you.
I'm thinking of just using end beads for the plast board and batten it off the ceiling.
Gingerbread Man said:
Thanks. £104 for 2 metres of what looks like door threshold is a bit rich for my blood This is a bit more like it at £14m.
Bit of jiggery pokery required...

http://www.mr-resistor.co.uk/item.aspx?i=12859
Bit of jiggery pokery required...
http://www.mr-resistor.co.uk/item.aspx?i=12859
Edited by B17NNS on Thursday 6th September 01:21

Something like this, then you can make the gaps whatever you want. plasterboard edging bead
B17NNS said:
This is a bit more like it at £14m.
Bit of jiggery pokery required...
http://www.mr-resistor.co.uk/item.aspx?i=12859
I did think about just finishing the plasterboard short of the edges and having an infilled led strip with diffuser, but thought that hiding it would look better.Bit of jiggery pokery required...
http://www.mr-resistor.co.uk/item.aspx?i=12859
Edited by B17NNS on Thursday 6th September 01:21
So using this annotated picture. I guess that
A: Thinking that this measurement won't have to be much deeper than the profile depth. The profile I'm looking at is 13.5mm deep. So maybe 20mm.
B: Doesn't need to be much of a reveal. Just enough to hide the LED profile from view. Maybe 30mm?
C: I think increasing this would allow the light to flood out better, so I think this is the critical measurement. round 50mm was my thoughts. But this takes away from being a shadow edge as such and more a feature light, which I guess ours kinda wants to be. But will hopefully flood the light out a bit.
I can see this going wrong. haha
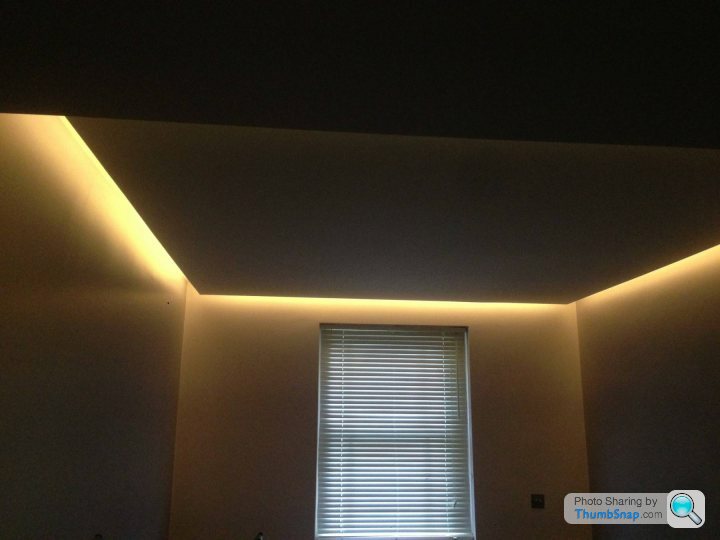
Did similar in my lads bedroom
Screwed 30x30 battens to the ceiling, plasterboard and skimmed.
The plaster board extended about 30mm beyond the batten and the led strip is stuck to the batten
Plaster board edge is just finished off with a a stop end skim bead
Very simple, took a day to do.
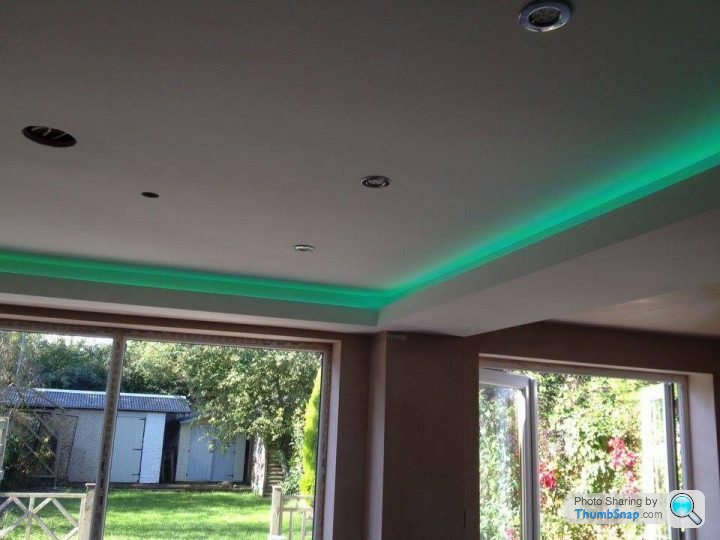
These are remote control, dimmable colour change strips
(Pic is on its side


Screwed 30x30 battens to the ceiling, plasterboard and skimmed.
The plaster board extended about 30mm beyond the batten and the led strip is stuck to the batten
Plaster board edge is just finished off with a a stop end skim bead
Very simple, took a day to do.
These are remote control, dimmable colour change strips
(Pic is on its side
MellowshipSlinky said:
Did similar in my lads bedroom
Screwed 30x30 battens to the ceiling, plasterboard and skimmed.
The plaster board extended about 30mm beyond the batten and the led strip is stuck to the batten
Plaster board edge is just finished off with a a stop end skim bead
Very simple, took a day to do.
These are remote control, dimmable colour change strips
(Pic is on its side
Nice. Did you use a diffuser? Also what size LEDs- 5050, 5630?Screwed 30x30 battens to the ceiling, plasterboard and skimmed.
The plaster board extended about 30mm beyond the batten and the led strip is stuck to the batten
Plaster board edge is just finished off with a a stop end skim bead
Very simple, took a day to do.
These are remote control, dimmable colour change strips
(Pic is on its side
No diffuser, just good quality led strip
There's no noticeable light dots which you get with cheaper strips.
Not sure what those numbers mean though...
I think from memory this is the kit I used
https://www.alertelectrical.com/ansell-viper-rgb-3...
There's no noticeable light dots which you get with cheaper strips.
Not sure what those numbers mean though...
I think from memory this is the kit I used
https://www.alertelectrical.com/ansell-viper-rgb-3...
Edited by MellowshipSlinky on Thursday 6th September 13:13
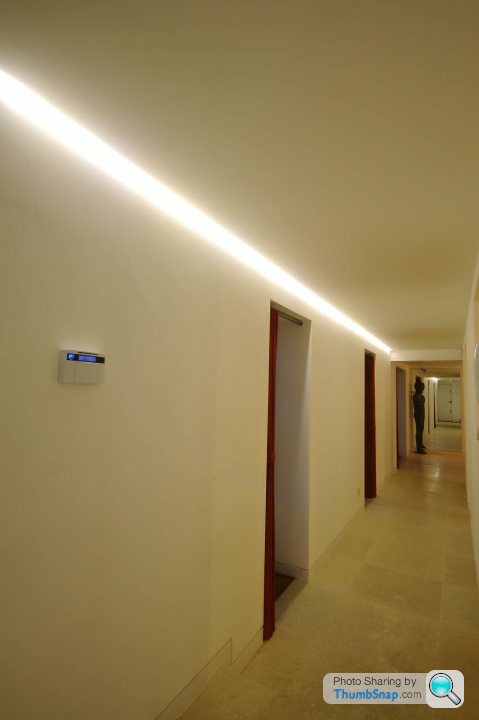
Knew I'd got a couple of pictures of one I did a while back.
Had the luxury of a decent ceiling height here. Framed out in CLS, boarded and skimmed.

Current project I'm fighting a 2.25m ceiling so the slimmer the better. I want to use the LED's to wall the wash the textured tile from above.
Had the luxury of a decent ceiling height here. Framed out in CLS, boarded and skimmed.
Current project I'm fighting a 2.25m ceiling so the slimmer the better. I want to use the LED's to wall the wash the textured tile from above.
Gingerbread Man said:
can see this going wrong. haha
Cheap enough to make a mock up and play about with it to see what works.Edited by B17NNS on Thursday 6th September 13:15
MellowshipSlinky said:
No diffuser, just good quality led strip
There's no noticeable light dots which you get with cheaper strips.
Not sure what those numbers mean though...
I think from memory this is the kit I used
https://www.alertelectrical.com/ansell-viper-rgb-3...
Nice thanks. I've bought a diffuser, but worse case I could just not use it. Nice install.There's no noticeable light dots which you get with cheaper strips.
Not sure what those numbers mean though...
I think from memory this is the kit I used
https://www.alertelectrical.com/ansell-viper-rgb-3...
Edited by MellowshipSlinky on Thursday 6th September 13:13
Gassing Station | Homes, Gardens and DIY | Top of Page | What's New | My Stuff