Help! Wardrobe end panel with uneven floor and wall!
Discussion


This is making my brain explode! After last weeks how do I level a pax wardrobe (done), I now am fitting end panels for a built in look.
However as the floor is out by 16mm front to back (!) and the wall is uneven, how on earth do I scribe it?
If I do floor first (which seems logical) when I then scribe the wall it’ll be out on the floor, and visa versa.
Am I missing something or is this basically impossible?
However as the floor is out by 16mm front to back (!) and the wall is uneven, how on earth do I scribe it?
If I do floor first (which seems logical) when I then scribe the wall it’ll be out on the floor, and visa versa.
Am I missing something or is this basically impossible?
Pheo said:
Yeah but then the back will move the panel in, throwing the floor scribe off
So the floor is uneven as well as tilting in? Is it bare floorboards? If it's just a uniform angle then sliding it back a tiny amount once the rear is scribed and cut really wouldn't show. Is it possible that you are having this issue because you haven't yet done the first trim to the back of the decor panel to get rid of all the excess so the panel is still 10-20cm deeper than the wardrobe?
Hi folks!
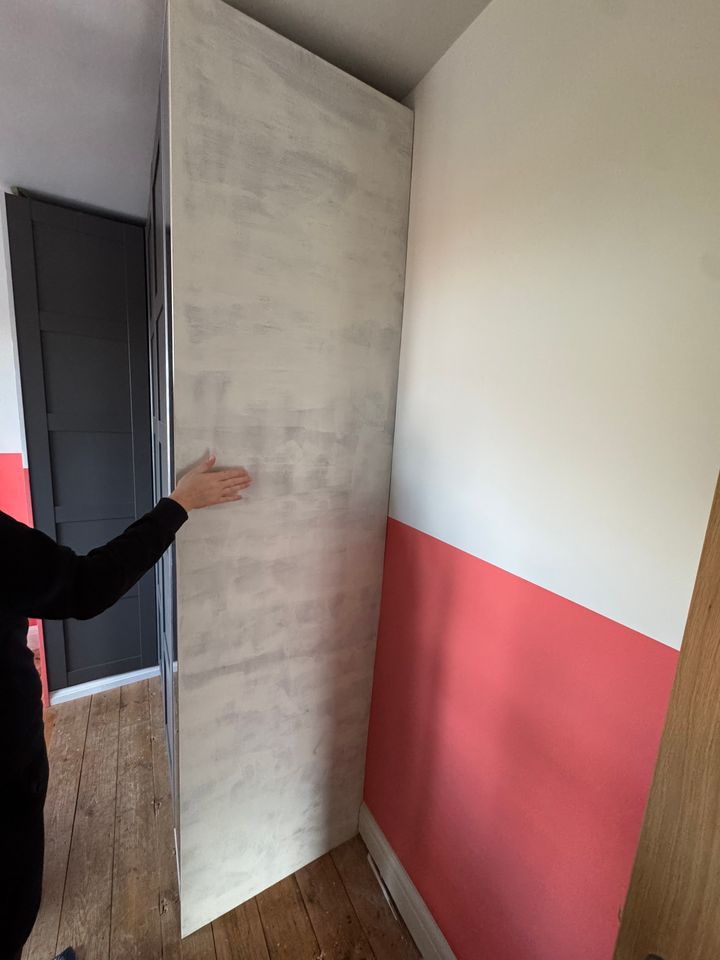
Thanks for the helpful comments. Panel is now cut and scribed and I’m somewhat proud of the effort!
To help others in future, here is my method:
1) took measurements from the two outer corners of the wardrobe down to the floor.
2) established top and bottom depths to wall (to set the floor angle)
3) used both of these to “draw” the end of the unit onto the MDF, starting in top right corner.
4) cut the angle at bottom. Decided not to scribe to floorboards due to time, but you could if desperate. Likely will get covered in carpet in due course so not a problem for me.
5) went to wickes and bought 2.4m run of strip wood and used it to create a scribe template. Used my easyscribe to take the pattern from the wall
6) cut the scribe template with handsaw and plane back smooth.
7) mark up scribe on MDF ensuring top and bottom of scribe are at the points identified in 3)
8) nervously jigsaw it
9) plane the MDF back a bit on an angle on the scribe to give greater tolerance.
10) fit end panel and bask in glory.
(Now just need to paint it!)
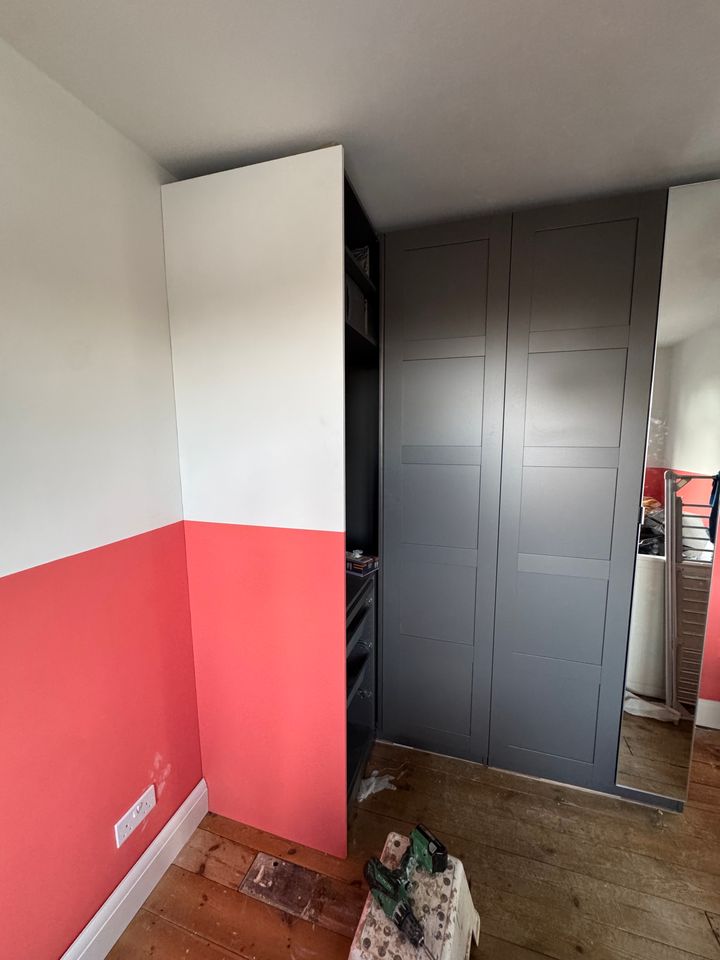
Here is a painted one from the other side for comparison (made yesterday!
Thanks for all the suggestions!
Thanks for the helpful comments. Panel is now cut and scribed and I’m somewhat proud of the effort!
To help others in future, here is my method:
1) took measurements from the two outer corners of the wardrobe down to the floor.
2) established top and bottom depths to wall (to set the floor angle)
3) used both of these to “draw” the end of the unit onto the MDF, starting in top right corner.
4) cut the angle at bottom. Decided not to scribe to floorboards due to time, but you could if desperate. Likely will get covered in carpet in due course so not a problem for me.
5) went to wickes and bought 2.4m run of strip wood and used it to create a scribe template. Used my easyscribe to take the pattern from the wall
6) cut the scribe template with handsaw and plane back smooth.
7) mark up scribe on MDF ensuring top and bottom of scribe are at the points identified in 3)
8) nervously jigsaw it
9) plane the MDF back a bit on an angle on the scribe to give greater tolerance.
10) fit end panel and bask in glory.
(Now just need to paint it!)
Here is a painted one from the other side for comparison (made yesterday!
Thanks for all the suggestions!
Gassing Station | Homes, Gardens and DIY | Top of Page | What's New | My Stuff