
Fixing a cracked porcelain kitchen floor tile .
Discussion


Some quality work (years ago, not me…) in my kitchen has led to a cracked floor tile. I don’t have a replacement, so need to finesse a fix.
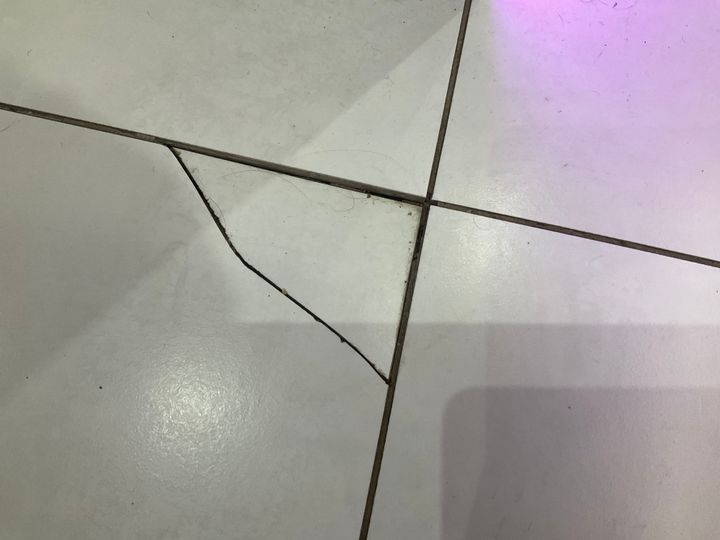
I have managed to lift the small corner piece out. The good news is that it’s quite a clean break. I think it can be re-inserted with superglue along the crack line to effect a repair.
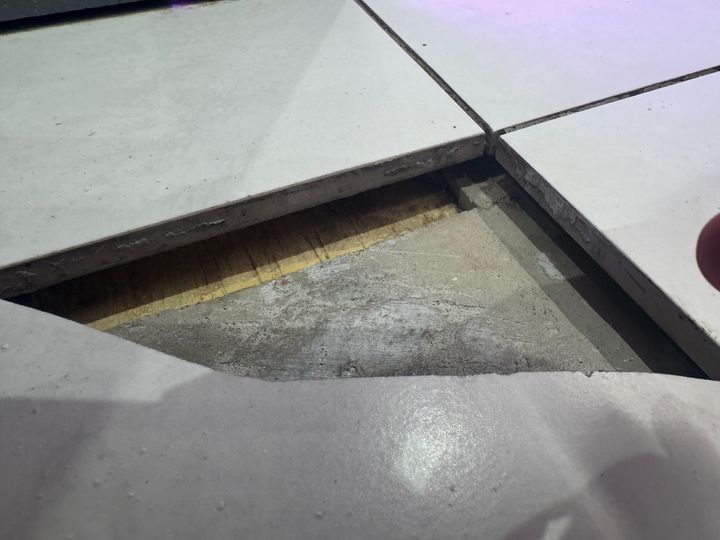
However, the reason for the crack is also clear. The corner of the tile - and the corners of the three adjoining tiles are entirely unsupported by adhesive.
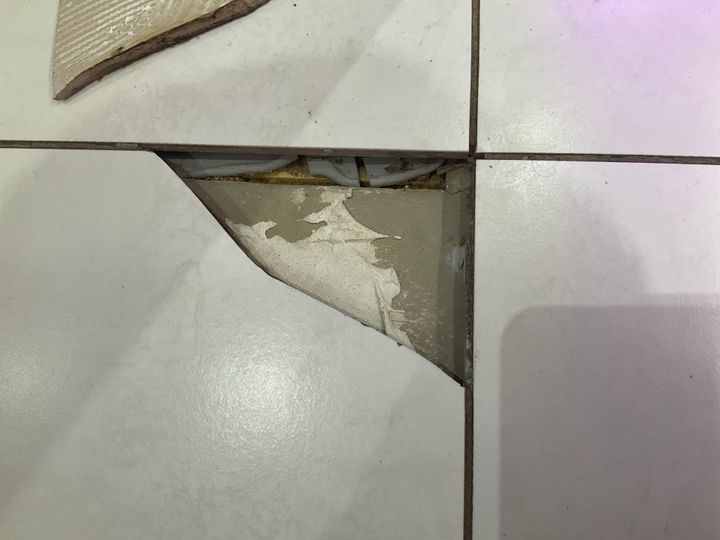
There is space to slide a solid plate of some sort - perhaps a 40mm x 40mm piece of plastic, or even a piece of ceramic tile - under the area where the four tile corners meet.
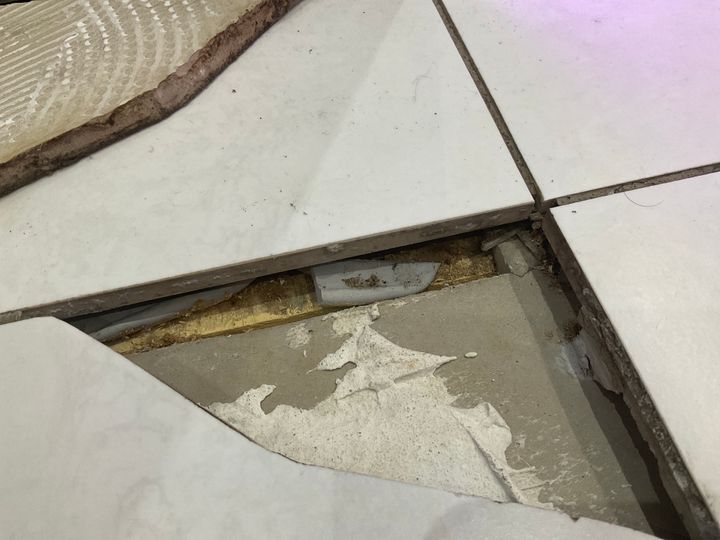
I’m thinking of:
1. cleaning everything up and removing as much grout and adhesive as possible from all surfaces
2. positioning a (glue-covered) plate under the point where the corners meet
3. filling the remaining area with some sort of non-expanding filler or tile cement(?)
4. carefully re-inserting the tile fragment, with glue of some sort along the break
5. re-grouting the joints
So, some questions if I may…
A. What sort of non-expanding filler or cement will be most effective?
B. What glue will be best along the crack to reattach the fragment
C. What have I missed? Is there a better way to fix this???
Thoughts and advice sought, and welcomed! Thank you in advance.
I have managed to lift the small corner piece out. The good news is that it’s quite a clean break. I think it can be re-inserted with superglue along the crack line to effect a repair.
However, the reason for the crack is also clear. The corner of the tile - and the corners of the three adjoining tiles are entirely unsupported by adhesive.
There is space to slide a solid plate of some sort - perhaps a 40mm x 40mm piece of plastic, or even a piece of ceramic tile - under the area where the four tile corners meet.
I’m thinking of:
1. cleaning everything up and removing as much grout and adhesive as possible from all surfaces
2. positioning a (glue-covered) plate under the point where the corners meet
3. filling the remaining area with some sort of non-expanding filler or tile cement(?)
4. carefully re-inserting the tile fragment, with glue of some sort along the break
5. re-grouting the joints
So, some questions if I may…
A. What sort of non-expanding filler or cement will be most effective?
B. What glue will be best along the crack to reattach the fragment
C. What have I missed? Is there a better way to fix this???
Thoughts and advice sought, and welcomed! Thank you in advance.
Just mix some flexible tile adhesive quite thick, and keep pushing it under the tiles that are down with a scraper. Then set the tile piece down with tile adhesive. Personally I would leave a slightest gap as possible on the crack and use some light grey grout just on the crack.
Edited by mart 63 on Wednesday 11th March 05:38
mart 63 said:
Just mix some flexible tile adhesive quite thick, and keep pushing it under the tiles that are down with a scraper. Then set the tile piece down with tile adhesive. Personally I would leave a slightest gap as possible on the crack and use some light grey grout just on the crack.
That’s what I would do. Use Mapie adhesive that you mix yourself (not readymix) and push it as far into the gaps in the surrounding tiles. There is a specific cartridge glue that you can inject into the gaps; I tried in once to fix a similar problem in my friends bathroom and it’s rubbish/doesn’t set, so avoid it.Edited by mart 63 on Wednesday 11th March 05:38
My wife used to a run a high end hotel that had recently been built/renovated and a few years later the bathroom tiles (large format) started cracking. I used to go in once a week to fix them and it was a nightmare. The “tilers” who did the work had used dot and dab in the areas where the floor wasn’t level, so in between guests staying I used to have remove the broken tile then fill the surrounding gaps with as much adhesive as I could before replacing the tile.
And this is why I refuse to use ‘professionals’ for work on my house. The vast majority are utter cowboys.
Having had the same issue, I’d go with standard tile adhesive (the one you mix yourself, not ready mix). The downside of CT1 or the tube stuff is that when you eventually rip the floor up it does totally screw the subfloor as the bond is very strong and it’s very hard to remove.
Having had the same issue, I’d go with standard tile adhesive (the one you mix yourself, not ready mix). The downside of CT1 or the tube stuff is that when you eventually rip the floor up it does totally screw the subfloor as the bond is very strong and it’s very hard to remove.
Coxey said:
netherfield said:
CT1 pumped under to support the remaining tiles,
What is CT1 I ve a similar issue and like the idea of pumping something in under the tile to fill the voidsMultipurpose gap filling "glue"
CHLEMCBC said:
clarkmagpie said:
thebraketester said:
You could Kintsugi it....
This!! Thank you to everyone who’s responded with advice - I appreciate it.
I’ve dug out everything loose and cleaned it all up. I’ve also bought some Mapei (I used to have a Mapei cycling shirt!) adhesive and grout. Plan is to do this in three stages - first to push as much adhesive under the adjoining three tiles as I can, and to create a supportive base. Then to set the tile fragment on a new adhesive bed, with superglue along the broken edge. Finally to grout.
WindyCommon said:
Tempting .
Thank you to everyone who s responded with advice - I appreciate it.
I ve dug out everything loose and cleaned it all up. I ve also bought some Mapei (I used to have a Mapei cycling shirt!) adhesive and grout. Plan is to do this in three stages - first to push as much adhesive under the adjoining three tiles as I can, and to create a supportive base. Then to set the tile fragment on a new adhesive bed, with superglue along the broken edge. Finally to grout.
Get the aligning and levelling spacers I referenced from Amazon, they will make this easy. Thank you to everyone who s responded with advice - I appreciate it.
I ve dug out everything loose and cleaned it all up. I ve also bought some Mapei (I used to have a Mapei cycling shirt!) adhesive and grout. Plan is to do this in three stages - first to push as much adhesive under the adjoining three tiles as I can, and to create a supportive base. Then to set the tile fragment on a new adhesive bed, with superglue along the broken edge. Finally to grout.
Self leveller? Build a small 'damn' to contain it under the tile, allowing it to flow under the tiles. As it starts to go off, ram it further under the title to ensure compact. Scrape off anything that sits where it shouldn't.
Normal flexible tile adhesive for the snapped corner, and a magic man to make the crack invisible for £100
Ct1 etc will be too flexible.
Normal flexible tile adhesive for the snapped corner, and a magic man to make the crack invisible for £100
Ct1 etc will be too flexible.
bennno said:
Ok, fit the spacers before adding any adhesive, do the adhesive in one go along with adding the tile piece.
Don t bother with superglue.
Thanks. Why should I not use the superglue? Don t bother with superglue.
Is there an easy way to colour the grout grey/dark to match the aged existing grout?
Edited by WindyCommon on Thursday 12th March 17:23
Gassing Station | Homes, Gardens and DIY | Top of Page | What's New | My Stuff