
Springy floor (chip) "boards"
Discussion


We are shortly moving into an 80's bungalow & it has 600mm joist gaps & chipboard "floorboards".
My intention is to replace the boards in the worst areas and add "noggins" between the joists for extra help, is there anything else that will help with longevity of the floor?
Perhaps short sections of joist sized wood to the under-floor or similar, or am I just over-thinking it?
My intention is to replace the boards in the worst areas and add "noggins" between the joists for extra help, is there anything else that will help with longevity of the floor?
Perhaps short sections of joist sized wood to the under-floor or similar, or am I just over-thinking it?

I understand that 18mm was standard for 400 ( or maybe 450 ) space , but 22mm for higher. Could be 19 which would be 3/4" in old money
I did this once upstairs in 2 rooms in our old house as it was mess of old boards and chipboard. I went 22mm . I also ( perhaps just thinking like you ) added some "noggins" , particularly under the join ends ( short side) of the 2400mm lengths
I did note at the time the joists seemed to be in very good condition so was not overly worried.
I have no actual professional experience with flooring. I just went with what observationally helped , did one room and was happy ....so went with the same in other (much bigger) room .
I did this once upstairs in 2 rooms in our old house as it was mess of old boards and chipboard. I went 22mm . I also ( perhaps just thinking like you ) added some "noggins" , particularly under the join ends ( short side) of the 2400mm lengths
I did note at the time the joists seemed to be in very good condition so was not overly worried.
I have no actual professional experience with flooring. I just went with what observationally helped , did one room and was happy ....so went with the same in other (much bigger) room .
PM3 said:
I understand that 18mm was standard for 400 ( or maybe 450 ) space , but 22mm for higher. Could be 19 which would be 3/4" in old money
Point noted, I will double check when I start the job before ordering anything.PM3 said:
I have no actual professional experience with flooring. I just went with what observationally helped , did one room and was happy ....so went with the same in other (much bigger) room .
This was going to be my approach also.Remove all flooring, see where it is worst & try to quantify it.
Remove the boards & physically check for any issues.
Try noggins & extra screws.
Try to quantify any difference.
Change boards & try again to see how much difference it makes.
Then just do whatever works on other areas, both neighbours when speaking to them had the same issue & just went straight for new boards in the worst areas but joists etc were all fine, which is encouraging.
Depends if the boards are loose/flexing on their own, or if the joists are moving as well. If the former, replace with new boards, glued and screwed to each other and the joists.
If the latter, then you can strengthen the joists against flex by bolting new timbers to the joists, or using metal plates à la flitch beam.
And check for loose mortar where the ends of the joists are supported.
If the latter, then you can strengthen the joists against flex by bolting new timbers to the joists, or using metal plates à la flitch beam.
And check for loose mortar where the ends of the joists are supported.
Ah the 80s bungalow. Welcome to the club.
I've ripped out the living room and utility floor in mine so far. Additional things to consider depending on what rooms you're doing:
1) Insulation. Not as cheap and quick to do as you expect, but long term win depending how long you expect to stay
2) Whilst the floor is up review your utilities. I ran new pipework for extra rads and doubled the amount of sockets. Data cable if required.
3) Under the washing machine and dishwasher I reinforced the joists with multiple noggins and added a layer of backer board on top of the chipboard. Likely overkill, but I've seen first hand what a washing machine leak can do
4) If doing the bathroom, swap to waterproof ply. Tiling over chipboard is a no go (although it didn't stop my previous owners).
I've ripped out the living room and utility floor in mine so far. Additional things to consider depending on what rooms you're doing:
1) Insulation. Not as cheap and quick to do as you expect, but long term win depending how long you expect to stay
2) Whilst the floor is up review your utilities. I ran new pipework for extra rads and doubled the amount of sockets. Data cable if required.
3) Under the washing machine and dishwasher I reinforced the joists with multiple noggins and added a layer of backer board on top of the chipboard. Likely overkill, but I've seen first hand what a washing machine leak can do
4) If doing the bathroom, swap to waterproof ply. Tiling over chipboard is a no go (although it didn't stop my previous owners).
Sargeant Orange said:
Ah the 80s bungalow. Welcome to the club.
I've ripped out the living room and utility floor in mine so far. Additional things to consider depending on what rooms you're doing:
1) Insulation. Not as cheap and quick to do as you expect, but long term win depending how long you expect to stay
2) Whilst the floor is up review your utilities. I ran new pipework for extra rads and doubled the amount of sockets. Data cable if required.
3) Under the washing machine and dishwasher I reinforced the joists with multiple noggins and added a layer of backer board on top of the chipboard. Likely overkill, but I've seen first hand what a washing machine leak can do
4) If doing the bathroom, swap to waterproof ply. Tiling over chipboard is a no go (although it didn't stop my previous owners).
Most of what you say I have/am already thinking about but a heads up id always welcome.I've ripped out the living room and utility floor in mine so far. Additional things to consider depending on what rooms you're doing:
1) Insulation. Not as cheap and quick to do as you expect, but long term win depending how long you expect to stay
2) Whilst the floor is up review your utilities. I ran new pipework for extra rads and doubled the amount of sockets. Data cable if required.
3) Under the washing machine and dishwasher I reinforced the joists with multiple noggins and added a layer of backer board on top of the chipboard. Likely overkill, but I've seen first hand what a washing machine leak can do
4) If doing the bathroom, swap to waterproof ply. Tiling over chipboard is a no go (although it didn't stop my previous owners).
I am completely re-plumbing the "microbore" central heating anyway and adding data cables to each end (for sky) also from the central "boiler cupboard" where I will site a network switch & the DVR for CCTV and also sockets where I am likely to want more.
Good call on the washing machine, never a bad idea to strengthen that area especially when it is doing a high spin on a "springy" floor!
Bathroom we are going LVT & will most likely give it a top layer of 6mm marine ply for added protection.
Just had to "chip" in as I'm going through this now and was also advised to use 22 although some said 18 was enough too. I'm mostly doing it to get level in one area where there is about a 10cm drop to the middle of the space. I have another area though which is reasonably level but some, maybe 20% of the floorboards are in a poor condition. I'm hoping there I can lift all the boards carefully, put down the OSB and then tidy up some of the original floor boards and lay them on top as I too like the look.
Sargeant Orange said:
3) Under the washing machine and dishwasher I reinforced the joists with multiple noggins and added a layer of backer board on top of the chipboard. Likely overkill, but I've seen first hand what a washing machine leak can do
You can get 18mm and 22mm TG4 cement flooring, no need to mess about with backer overlays. Goes in just like the regular boards do with glue etc. Only difference is needing a 4 tooth diamond tipped blade for cutting it. Avoids a lot of messing about and future problems!
The structural timber is cheap, as are fixings, so add as much as you like. D3 structural glue is cheap too if you want to really make sure your joints are solid.
One warning - D4 flooring glue goes off very quickly, especially the 5 minute stuff, so not a lot of scope for sorting issues as you go.
Also worth mentioning, though an one easy to ignore - this level of work possibly trips into 'renovation of a thermal element'. Consider whether that potential paperwork bothers you, though I doubt anyone would ever know or care. Like with major replastering. Doing it 'properly' can involve much more improvement work than most would want, so it's easier to just to do what you want to and ignore the officialdom.
Last year I decided to sort a springy floor in our lounge extension (4x3m) that had been put up over 20 yrs ago before we moved in. On lifting the laminate, I found an absolute horror show of poor quality work. The floor was made up of bits of chipboard, a lot of it not fixed down at all. There were gaps around the floor to the wall at least 12mm that let terrible draughts through the badly fitted skirting. The joists had no noggins at all. Any joist hangers were fixed with the minimum number of nails possible.The wall plates were fixed to the brickwork with door frame screws. There was over an inch difference in height between the house and extension wall plates, to sort this they nailed tapered roof firings on top of the joists to try to level it. The insulation between the joists was ill fitting, supported by a bit of string running from one side to the other, this had sagged and utterly useless. Although there were two air bricks on the extension, they had covered over the flow path to the rest of the house and effectively dead ended both areas.
I spent two months renovating the whole lot, went probably over the top on noggins and securing it all together, every joist hanger was fully nailed.
As I was mating up to the existing floor boards in the original part of the lounge, I used 19mm plywood , the original floorboards were 3/4 in so it fits flush together.
The result is super solid now, no springy floor or wobbling cabinets, all fully tested by 4 manic grandkids running around the house.
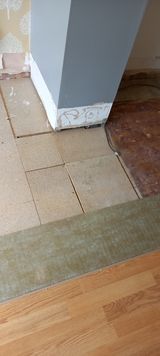
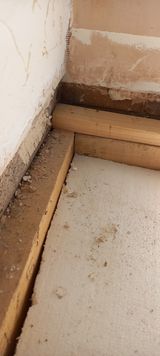
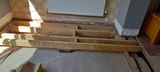
I spent two months renovating the whole lot, went probably over the top on noggins and securing it all together, every joist hanger was fully nailed.
As I was mating up to the existing floor boards in the original part of the lounge, I used 19mm plywood , the original floorboards were 3/4 in so it fits flush together.
The result is super solid now, no springy floor or wobbling cabinets, all fully tested by 4 manic grandkids running around the house.
Edited by Twolane on Tuesday 4th August 16:31
Same issue here - 60s build
Did my hallway as it was very spongy & then did small bedroo, room.
I replaced the chipboard with floorboards and varnished them as had younger kids and pets etc, plus we can add carpet later in life etc.
My thoughts:
The joists were in good confition, bar where the CH installer in the 90s had done some butchering, but it wasnt too bad. There were hardly any noggins, which was par the corse at the time, I added some , but I wish I added more as its a high traffic narrow corridor. For me (im a heavy handed idiot) the noggins and adding extra support took lots of time that I didnt have.
Use as thick and good qulity wood as you can, I used s tty B&Q floorboards and regret it bit, but they function fine.
Take loads of photos / draw a diagram of what is underneath for future reference.
Old chipboard can be easy to take up, you get the odd bit that is a PITA and will teach you new swear words!! Where the boards spanned two rooms was painful at times, but I am an idiot who was learning on my own as I went along
A powerful multitool and an expensive blade helpted me, cheap blades were utter shiitte.
You might find other suprises such as damp. dodgy wiring , rodents etc , this is a given . I found st loads of waste builders chucked in the voids from the newer extension on our house.
Wear a mask when you can , good quality gloves and safety glasses. Ive learnt those lessons the hard way!!
Did my hallway as it was very spongy & then did small bedroo, room.
I replaced the chipboard with floorboards and varnished them as had younger kids and pets etc, plus we can add carpet later in life etc.
My thoughts:
The joists were in good confition, bar where the CH installer in the 90s had done some butchering, but it wasnt too bad. There were hardly any noggins, which was par the corse at the time, I added some , but I wish I added more as its a high traffic narrow corridor. For me (im a heavy handed idiot) the noggins and adding extra support took lots of time that I didnt have.
Use as thick and good qulity wood as you can, I used s
tty B&Q floorboards and regret it bit, but they function fine. Take loads of photos / draw a diagram of what is underneath for future reference.
Old chipboard can be easy to take up, you get the odd bit that is a PITA and will teach you new swear words!! Where the boards spanned two rooms was painful at times, but I am an idiot who was learning on my own as I went along
A powerful multitool and an expensive blade helpted me, cheap blades were utter shiitte.
You might find other suprises such as damp. dodgy wiring , rodents etc , this is a given . I found s
t loads of waste builders chucked in the voids from the newer extension on our house. Wear a mask when you can , good quality gloves and safety glasses. Ive learnt those lessons the hard way!!
TwistingMyMelon said:
My thoughts:
The joists were in good confition, bar where the CH installer in the 90s had done some butchering, but it wasnt too bad. There were hardly any noggins, which was par the corse at the time, I added some , but I wish I added more as its a high traffic narrow corridor. For me (im a heavy handed idiot) the noggins and adding extra support took lots of time that I didnt have.
Use as thick and good qulity wood as you can, I used stty B&Q floorboards and regret it bit, but they function fine.
Take loads of photos / draw a diagram of what is underneath for future reference.
Old chipboard can be easy to take up, you get the odd bit that is a PITA and will teach you new swear words!! Where the boards spanned two rooms was painful at times, but I am an idiot who was learning on my own as I went along
A powerful multitool and an expensive blade helpted me, cheap blades were utter shiitte.
You might find other suprises such as damp. dodgy wiring , rodents etc , this is a given . I found st loads of waste builders chucked in the voids from the newer extension on our house.
Wear a mask when you can , good quality gloves and safety glasses. Ive learnt those lessons the hard way!!
All good points, thanks for that experience.The joists were in good confition, bar where the CH installer in the 90s had done some butchering, but it wasnt too bad. There were hardly any noggins, which was par the corse at the time, I added some , but I wish I added more as its a high traffic narrow corridor. For me (im a heavy handed idiot) the noggins and adding extra support took lots of time that I didnt have.
Use as thick and good qulity wood as you can, I used s
tty B&Q floorboards and regret it bit, but they function fine. Take loads of photos / draw a diagram of what is underneath for future reference.
Old chipboard can be easy to take up, you get the odd bit that is a PITA and will teach you new swear words!! Where the boards spanned two rooms was painful at times, but I am an idiot who was learning on my own as I went along
A powerful multitool and an expensive blade helpted me, cheap blades were utter shiitte.
You might find other suprises such as damp. dodgy wiring , rodents etc , this is a given . I found s
t loads of waste builders chucked in the voids from the newer extension on our house. Wear a mask when you can , good quality gloves and safety glasses. Ive learnt those lessons the hard way!!
Relevant thread as I’ve not long moved into what was originally a 70s bungalow, now extended up and out. One of the downstairs bedrooms was incredibly musty smelling, carpet being lifted helped but the chipboard itself (which looks well installed) smells. Reading anywhere from 15-19% with a cheapo moisture meter.
I’m very tempted to lift a section to see what’s lurking underneath, but part of me just wants to turn a blind eye to it and pretend I didn’t see it.
What’s the best method for lifting boards? They’re nailed down and the nails are rusted. From another room it looks like a hole saw has been used to cut around/cut them out.
I’m very tempted to lift a section to see what’s lurking underneath, but part of me just wants to turn a blind eye to it and pretend I didn’t see it.
What’s the best method for lifting boards? They’re nailed down and the nails are rusted. From another room it looks like a hole saw has been used to cut around/cut them out.
Gassing Station | Homes, Gardens and DIY | Top of Page | What's New | My Stuff