My kitchen build
Discussion


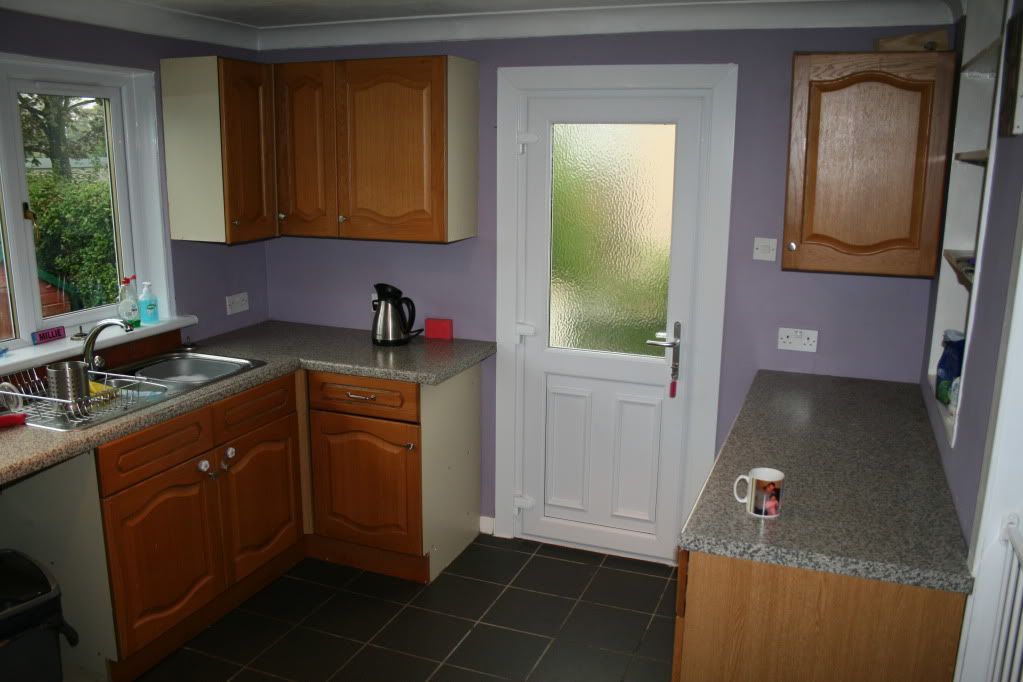
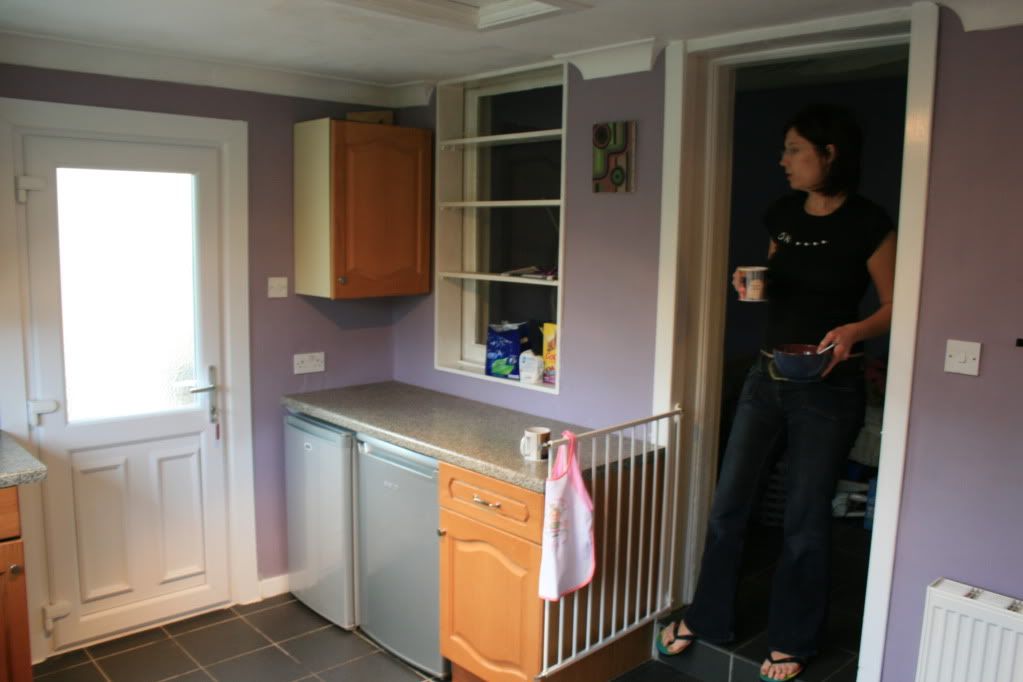
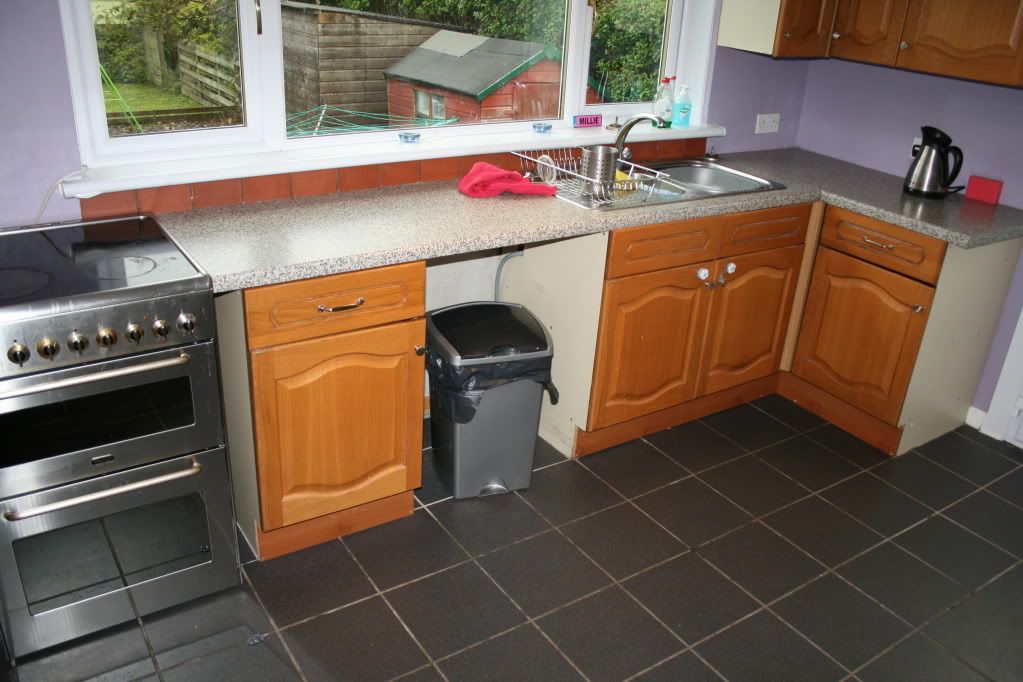
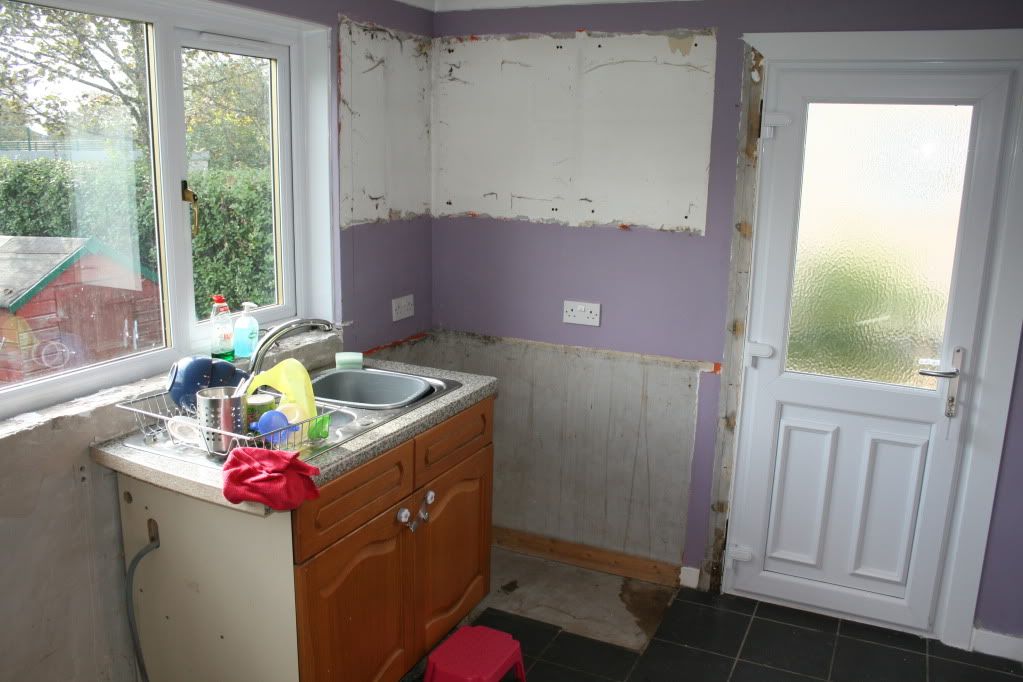
When we bought our house a few years back ( me and the soon to be wife), one of the first jobs we wanted done was the kitchen. To be honest it was rank,the use of space was poor, the units were old, the colour scheme different and some of the previous owners DIY/bodge jobs were shocking (Plasticine to seal water pipes?????)and against current building regulations.
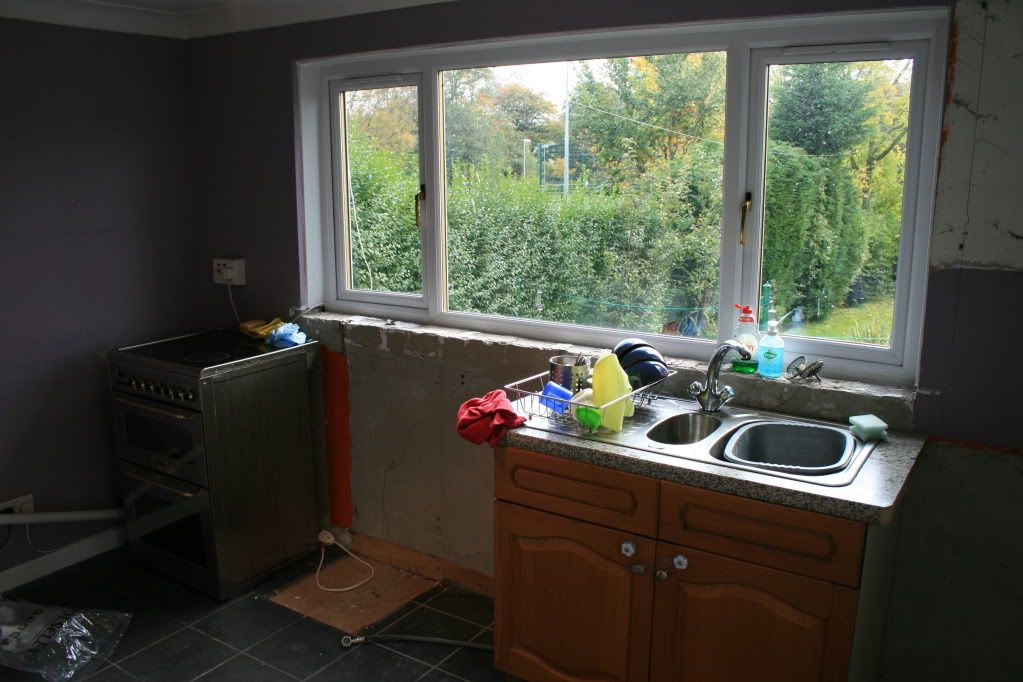
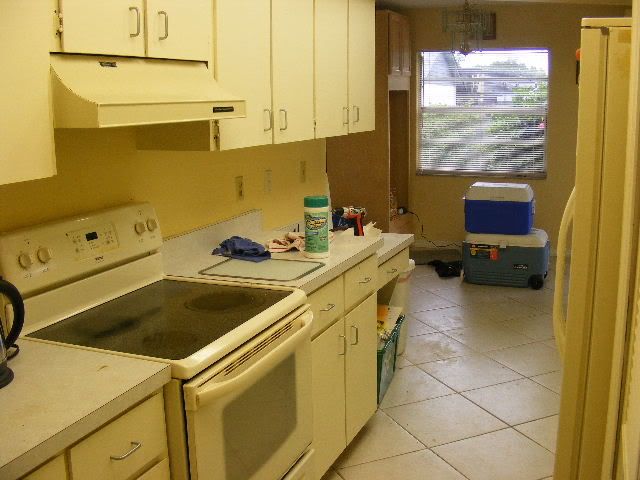
Anyway here is the old kitchen

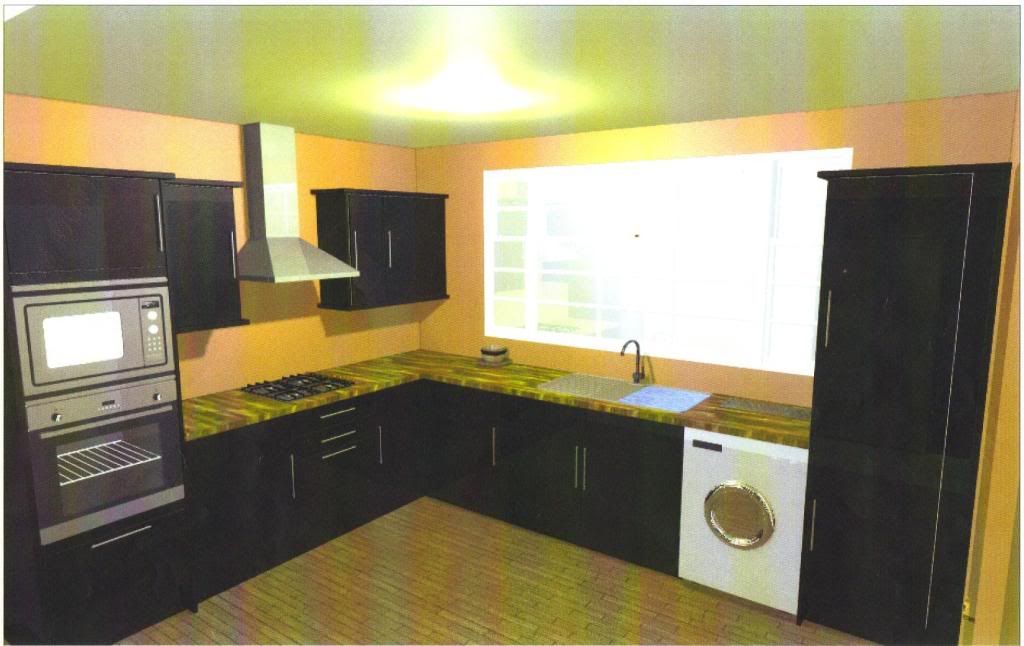
We knew a reliable builder, so got him to draw up some plans through Howdens.

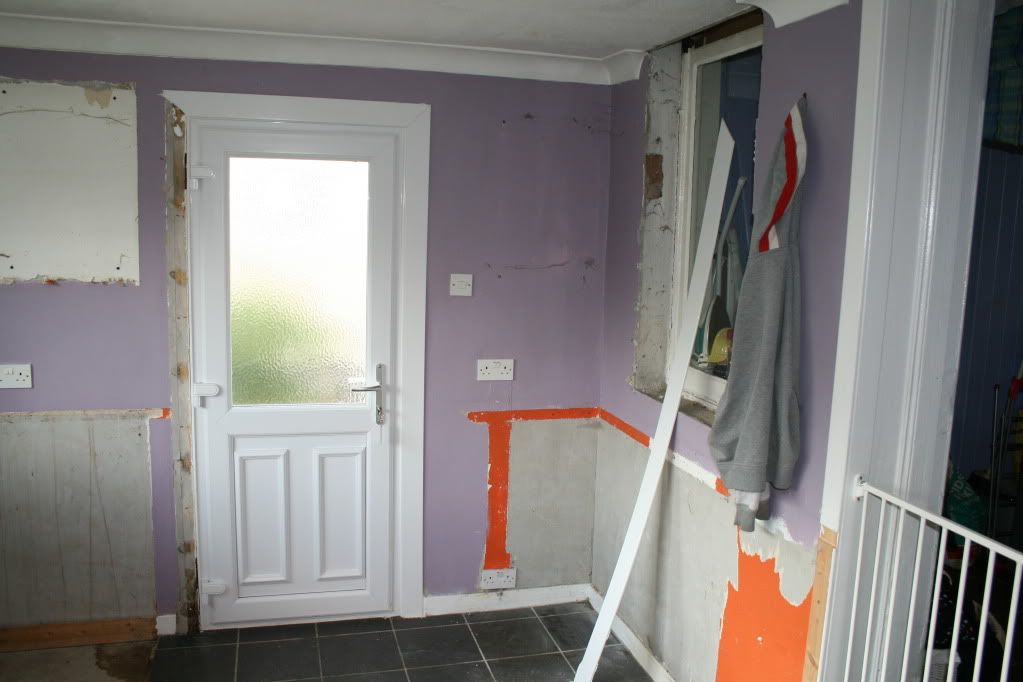
The kitchen badly needed rewiring as we found out it was running from a single socket in the dinning room (I'd love to find out who was responsible for that!). We also needed gas pipes to be run into the kitchen and most of the walls re plastered.
I then went about sourcing appliances through the interweb.
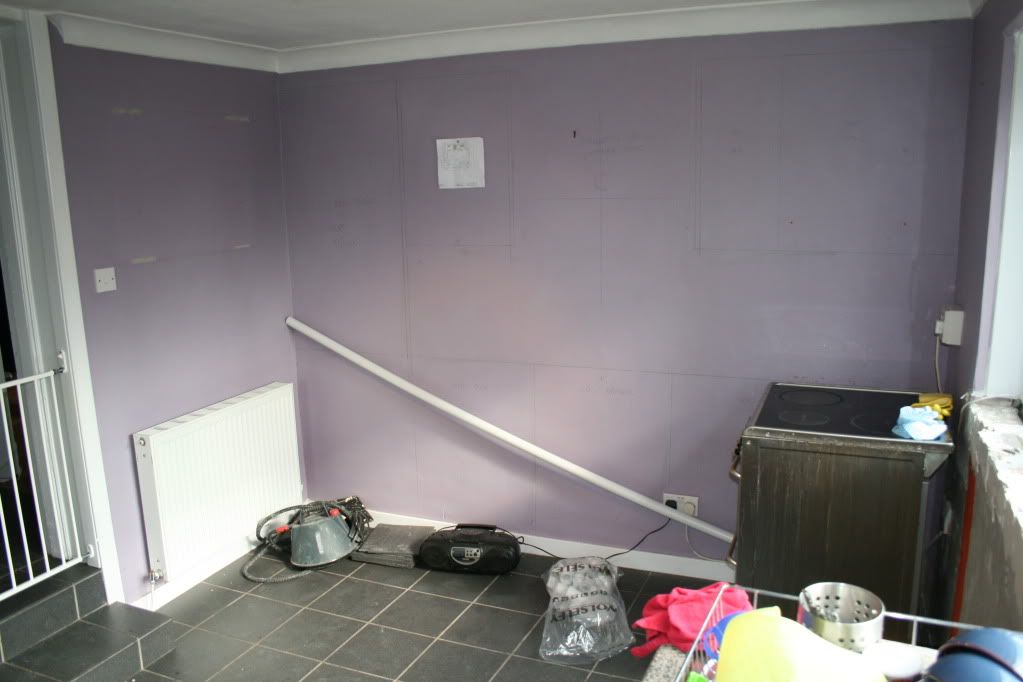
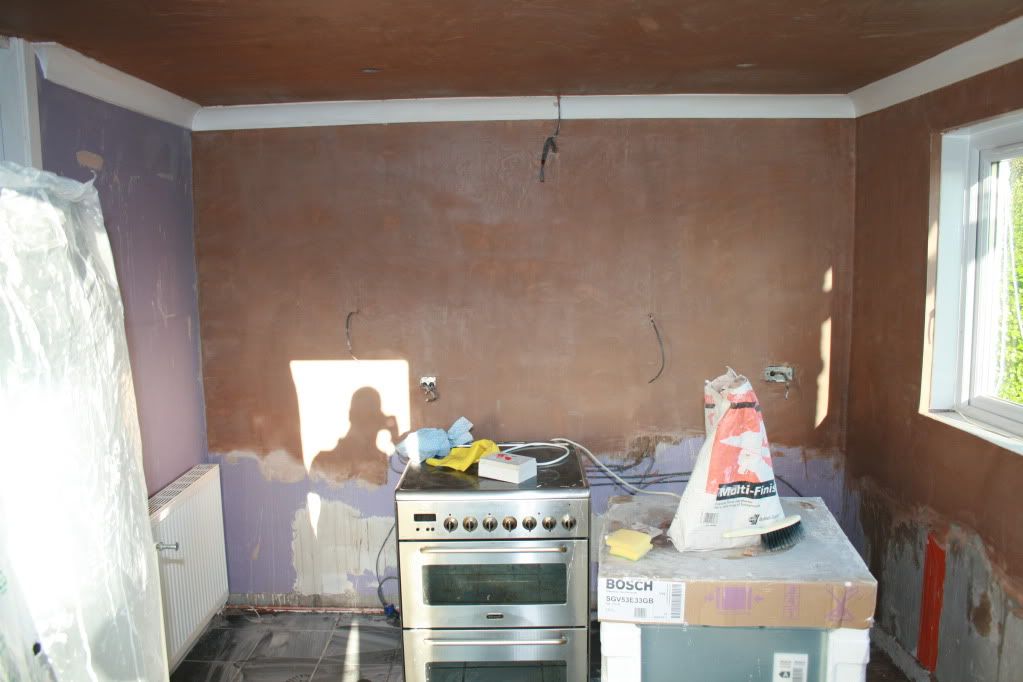
Work begins
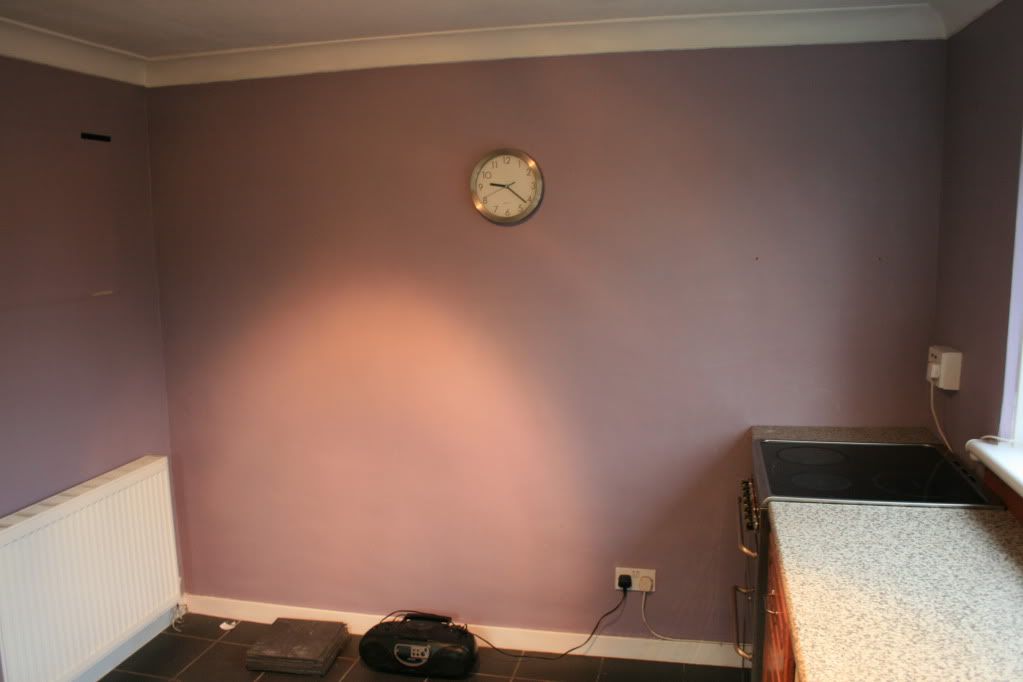
And then the plastering

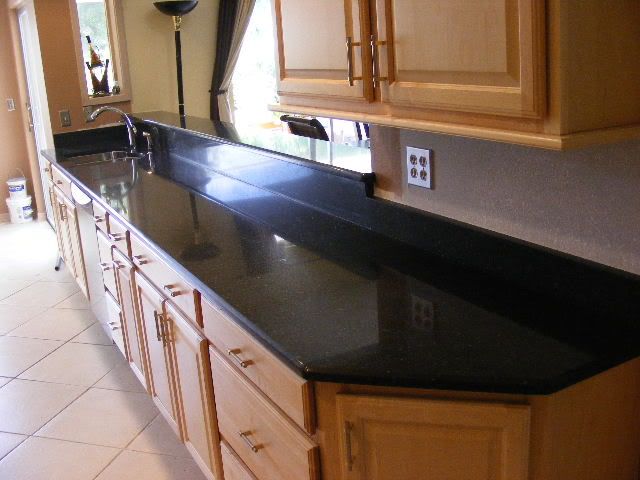
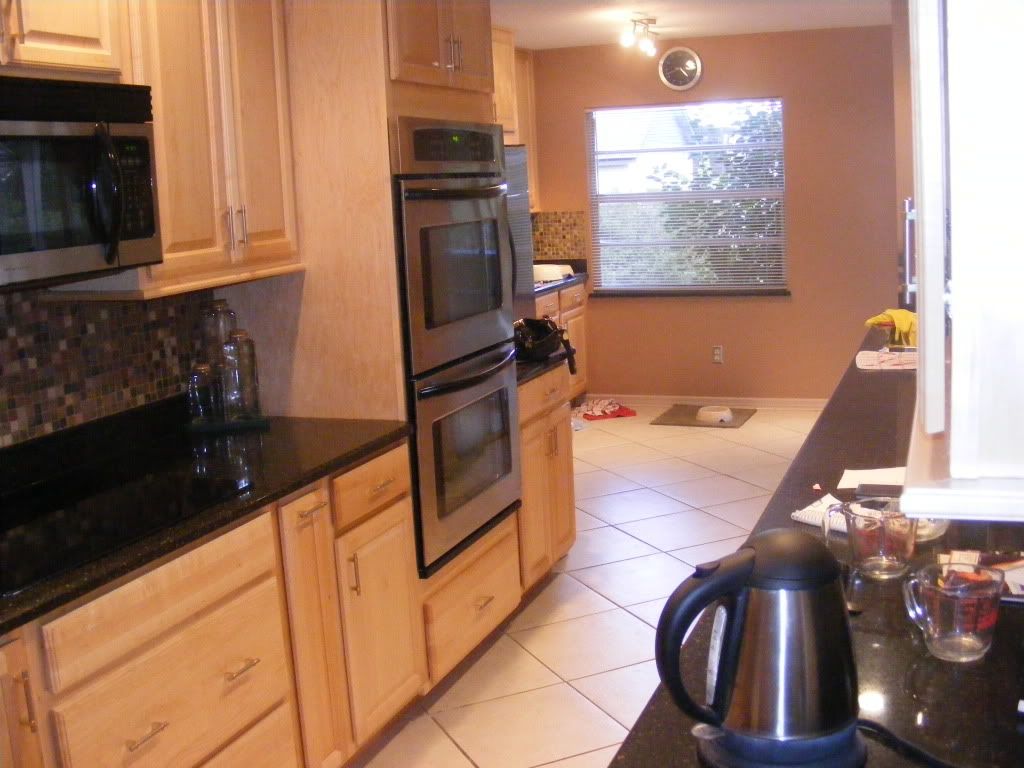
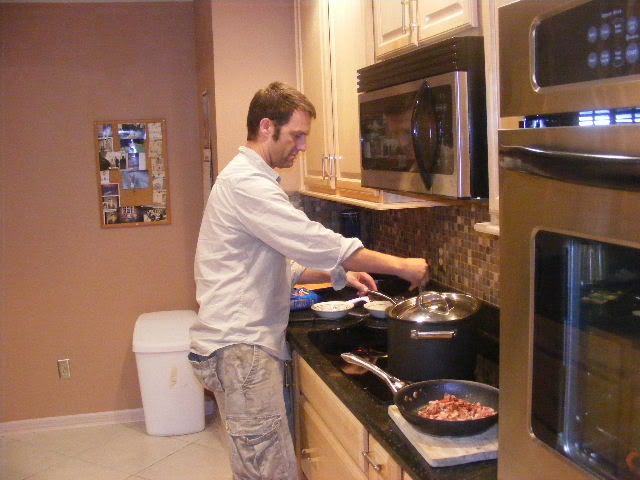
And after a few days of fitting, painting, and then a gap of a few months before getting the tiling done, we ended up with this
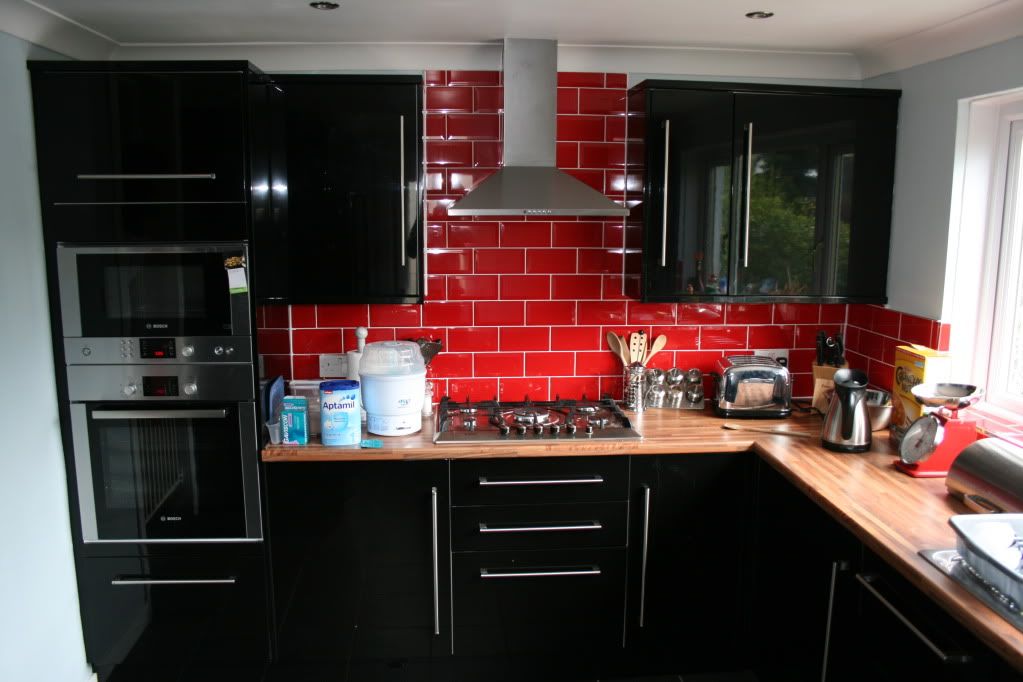
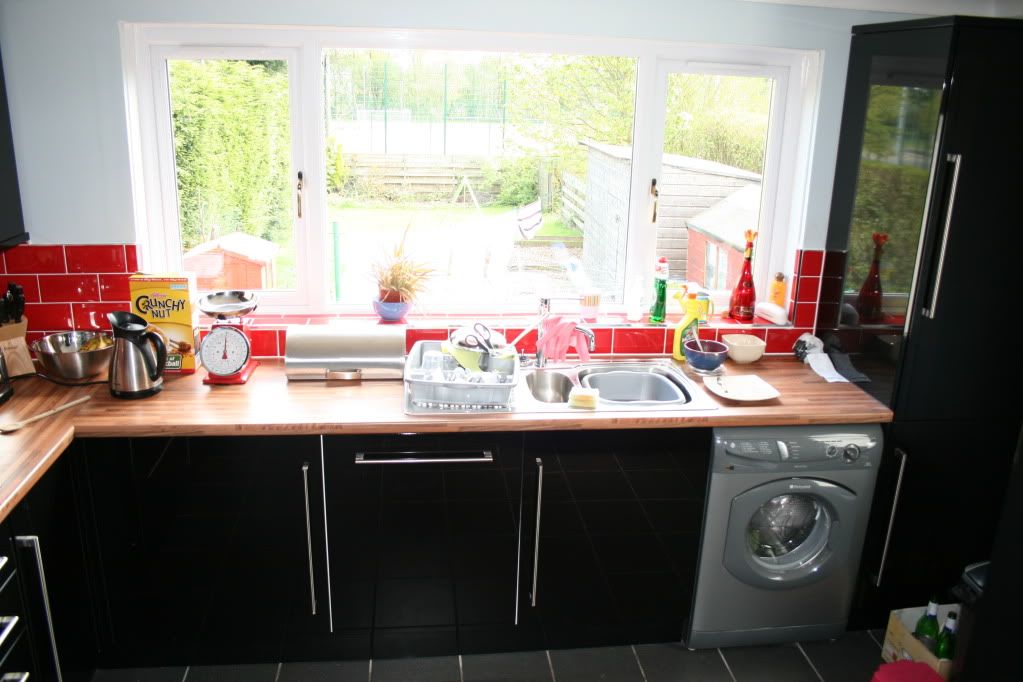
We will probably change the colour of the walls, but apart from that, i think it's a vast improvement over what was there before (plus safer)
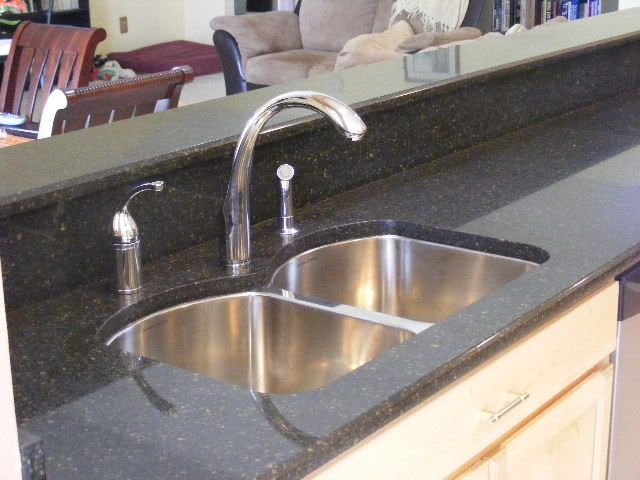
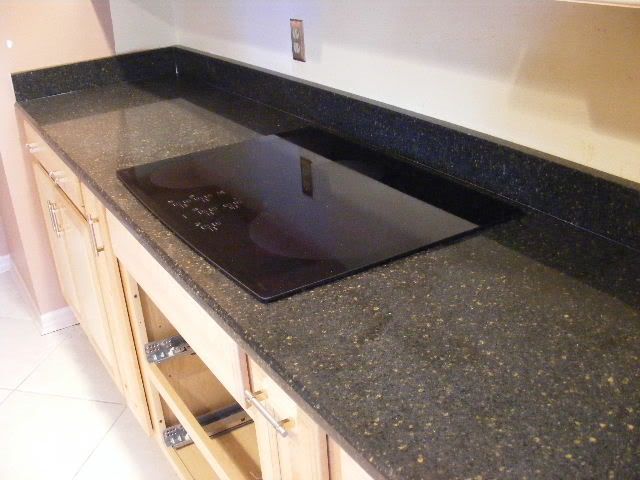
The appliances cost approx 2.5k
Bosch hob
Bosch Oven
Bosch integrated dish washer
Bosch Micro combi Grill
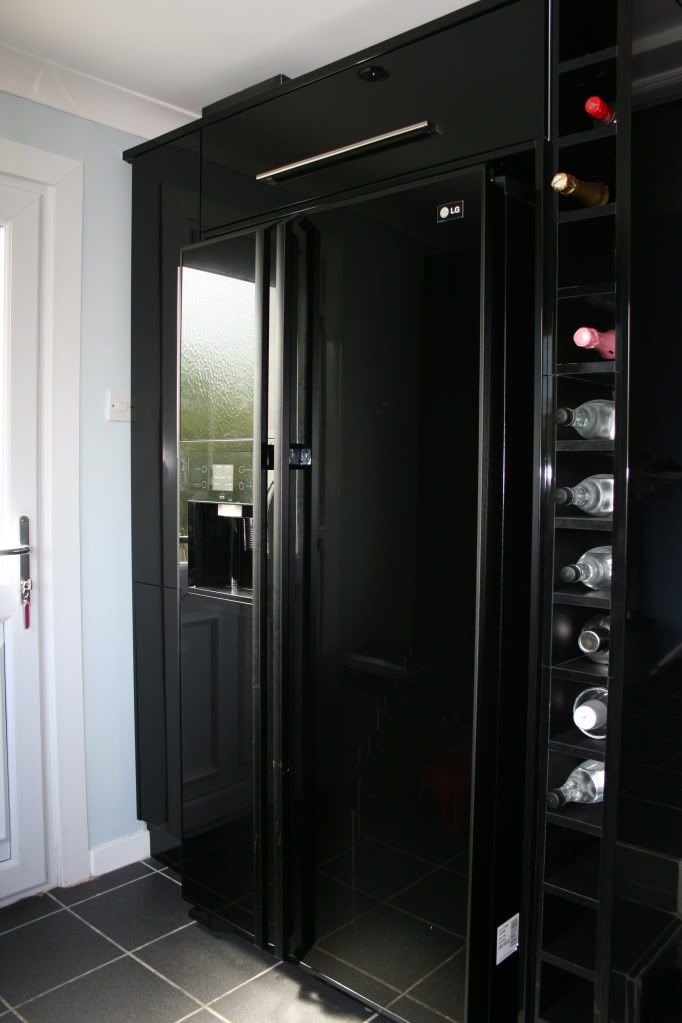
LG Fridge Freezer
Howdens sourced hood
We kept our old washing machine as it wasn't that old, but purchased an extra door and another length of plinth should we get and integrated one in future.
The kitchen units from Howdens were approx 4.5k and the labour for all the fitting, plastering, gas fitting and rewiring was about 1.5k
So the whole thing cost about 8.5k and took a few months
Hope you like!
Anyway here is the old kitchen
We knew a reliable builder, so got him to draw up some plans through Howdens.
The kitchen badly needed rewiring as we found out it was running from a single socket in the dinning room (I'd love to find out who was responsible for that!). We also needed gas pipes to be run into the kitchen and most of the walls re plastered.
I then went about sourcing appliances through the interweb.
Work begins
And then the plastering
And after a few days of fitting, painting, and then a gap of a few months before getting the tiling done, we ended up with this
We will probably change the colour of the walls, but apart from that, i think it's a vast improvement over what was there before (plus safer)
The appliances cost approx 2.5k
Bosch hob
Bosch Oven
Bosch integrated dish washer
Bosch Micro combi Grill
LG Fridge Freezer
Howdens sourced hood
We kept our old washing machine as it wasn't that old, but purchased an extra door and another length of plinth should we get and integrated one in future.
The kitchen units from Howdens were approx 4.5k and the labour for all the fitting, plastering, gas fitting and rewiring was about 1.5k
So the whole thing cost about 8.5k and took a few months
Hope you like!
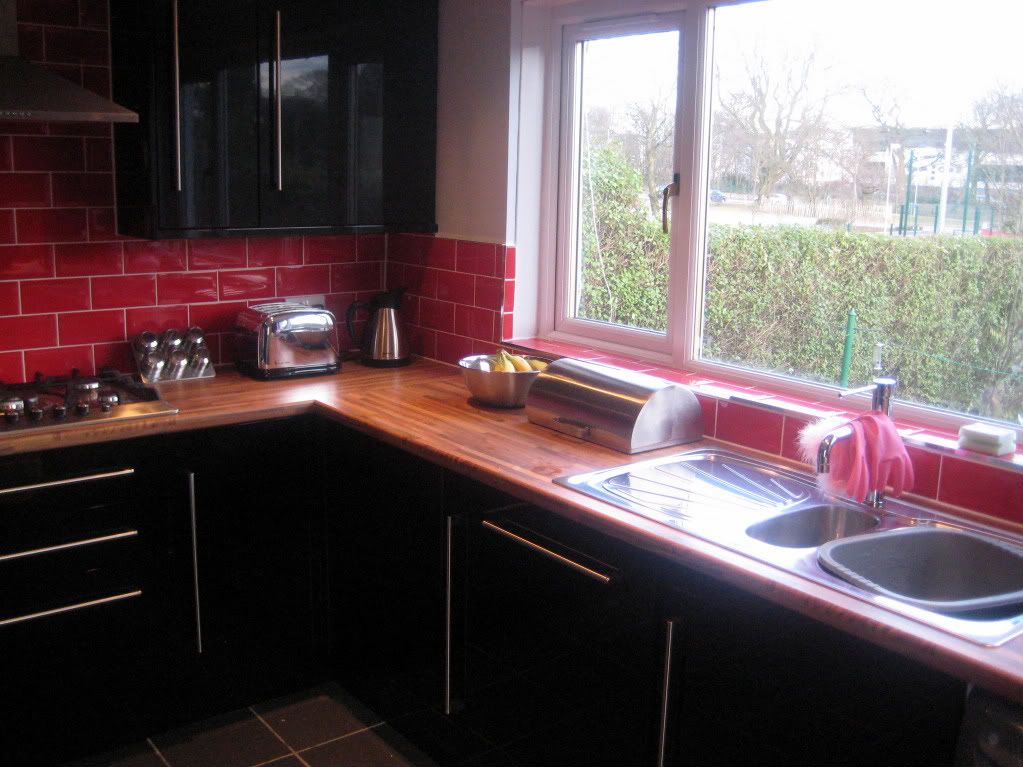
Finger marks are a pain lol. The colour combo is a bit of a contrast, but in the flesh it doesn't stand out so much as it does in some of the pictures. I've had someone joke that the fridge freezer and cabinet surround looks like Darth Vaders coffin.
The walls are going to get painted another colour which should compliment the red tiles a bit better, and if we ever get sick of the red, it shouldn't be too much of a job to change the tiles.
The walls are going to get painted another colour which should compliment the red tiles a bit better, and if we ever get sick of the red, it shouldn't be too much of a job to change the tiles.

 I love it, I have a black gloss kitchen too but it is hard work keeping it clean.
Thanks for the comments. I should have cleaned the place before taking the pictures, but that's far too much like hard work.
My garden backs onto a primary school playing field, which gets used at nights by teams for training, and at weekends for kids games. The playing field gets locked shut at 8pm each night. It's hard to tell from the pics, but my garden is quite long, so the noise when its in use isn't too bad, and the collection of balls i've gained comes in handy for my 5 a sides lol
My garden backs onto a primary school playing field, which gets used at nights by teams for training, and at weekends for kids games. The playing field gets locked shut at 8pm each night. It's hard to tell from the pics, but my garden is quite long, so the noise when its in use isn't too bad, and the collection of balls i've gained comes in handy for my 5 a sides lol
That looks really nice, I have severe OCD when it comes to kitchen cupboards/surfaces being fingerprint-free so I would probably crack after a week of living there but very nice 
Slightly off topic - those pink washing up gloves with the furry ends... mmmmm I bet they really suit you...
Slightly off topic - those pink washing up gloves with the furry ends... mmmmm I bet they really suit you...
Terzo123 said:
Thanks for the comments. I should have cleaned the place before taking the pictures, but that's far too much like hard work.
My garden backs onto a primary school playing field, which gets used at nights by teams for training, and at weekends for kids games. The playing field gets locked shut at 8pm each night. It's hard to tell from the pics, but my garden is quite long, so the noise when its in use isn't too bad, and the collection of balls i've gained comes in handy for my 5 a sides lol
I only ask as they are bulding 5 mini pitches to the right of the rear of my garden - about 500m away.My garden backs onto a primary school playing field, which gets used at nights by teams for training, and at weekends for kids games. The playing field gets locked shut at 8pm each night. It's hard to tell from the pics, but my garden is quite long, so the noise when its in use isn't too bad, and the collection of balls i've gained comes in handy for my 5 a sides lol
Good to know the noise isn't too bad for you.
We only just moved in and the rear view is thus

The searches didn't bring up this development - too far away I suppose.
I'll be doing my kitchen soon(ish) too. The room to fit it in has to built yet though.

Good work! I took on a similar kitchen re-model - and did the vast majority of the work myself. I didn't really want to risk installing the counter tops myself, due to the potential cost if I made a mistake.
I realise that you kind of leave yourself open to critique, regarding your taste and workmanship when you photo-catalog jobs like this, but I find them interesting and a good source for ideas, so here goes with mine....
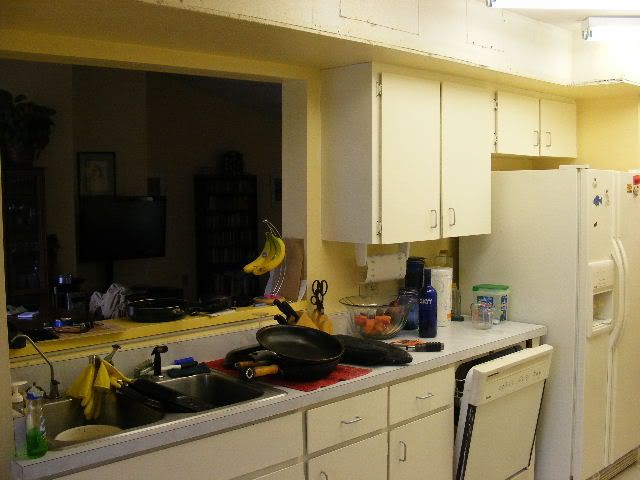
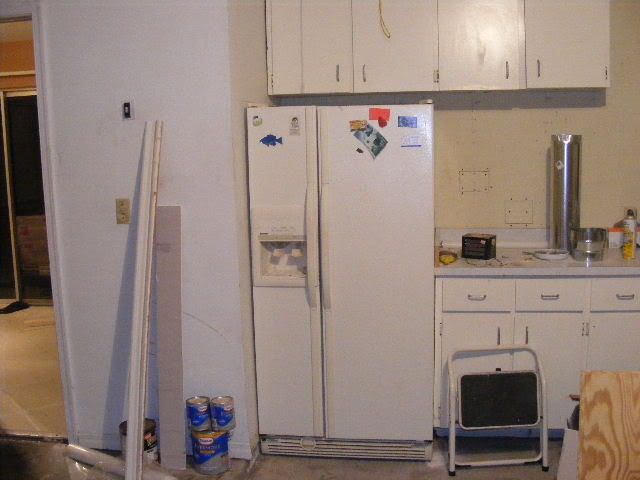
This was my start point - a long, dark, narrow kitchen with a low bulkhead ceiling and a pass-through into the dining area. I suspect it was the original, early 80's installation. We hated it.
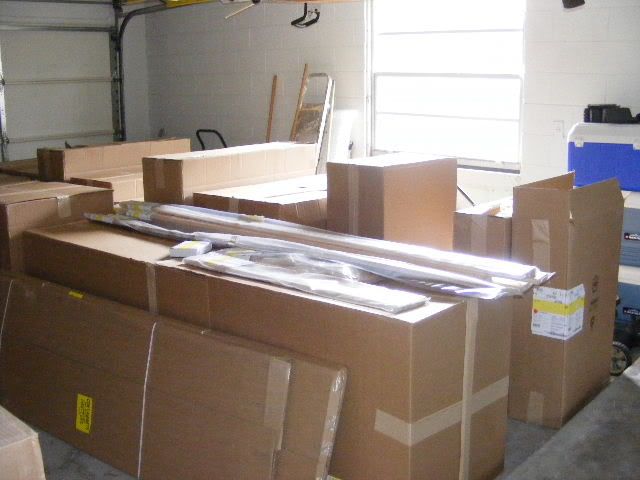
I ordered the cabinetry direct from the manufacturer, who created a plan, using my back of a fag packet sketch and all the relevant measurements. It showed-up in my garage thusly...
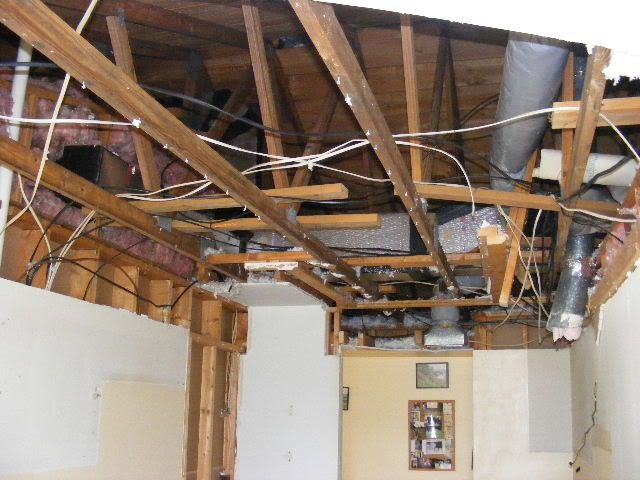
First job was to tear-out all the old gear and remove the low bulkhead ceiling. It originally had flourescents above a plastic diffuser and it sucked-ass - it all had to go, but doing this to your own house can be sa little un-nerving.

Part of the plan called for a much bigger aperture into the living area, so as to create a bar-top and make the cooking area a more social environment.
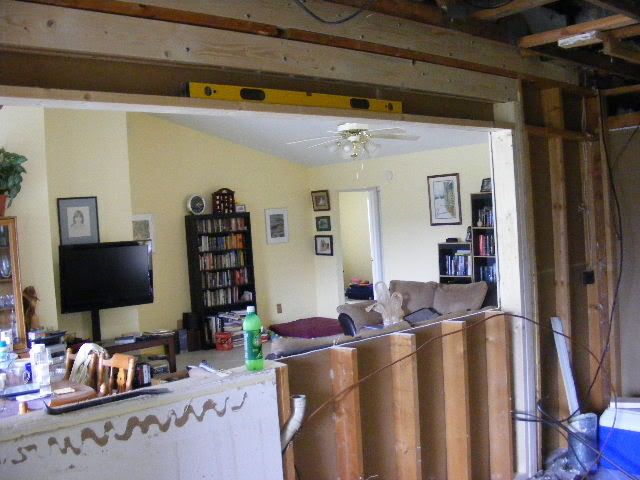
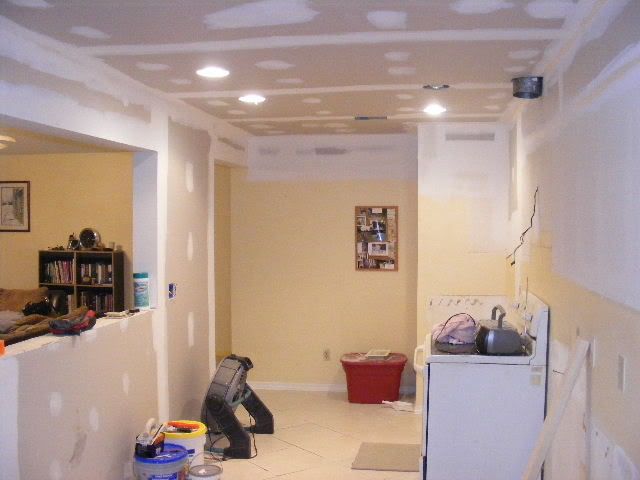
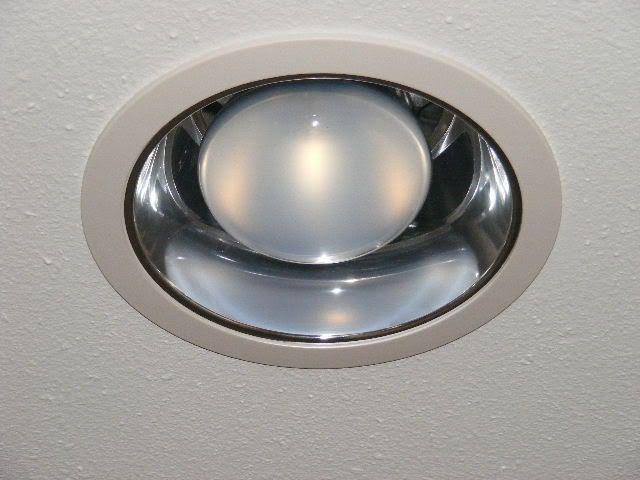
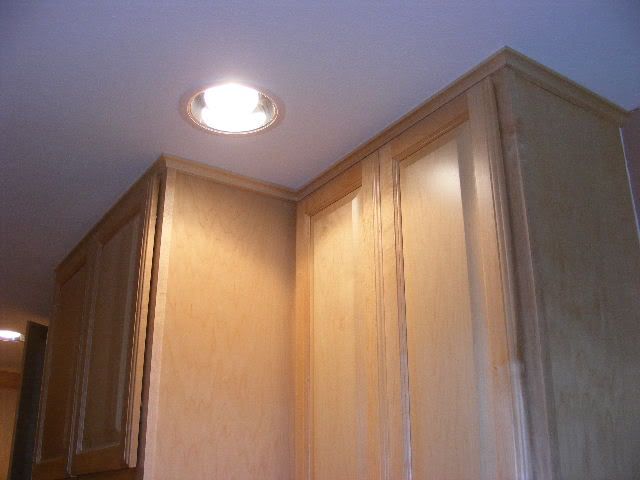
Bugger! I wondered where that level went...After that we added new sheet-rock, tape and skim and put in the obligatory recessed ceiling lighting.
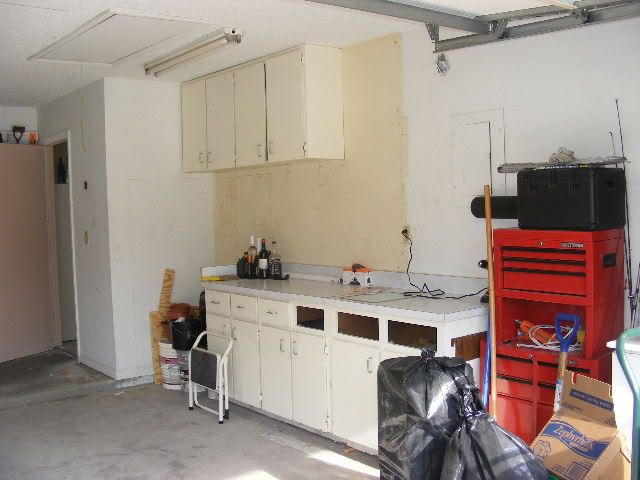
Because I'm a tight-wad, I decided to recycle the old units and installed them in the garage...
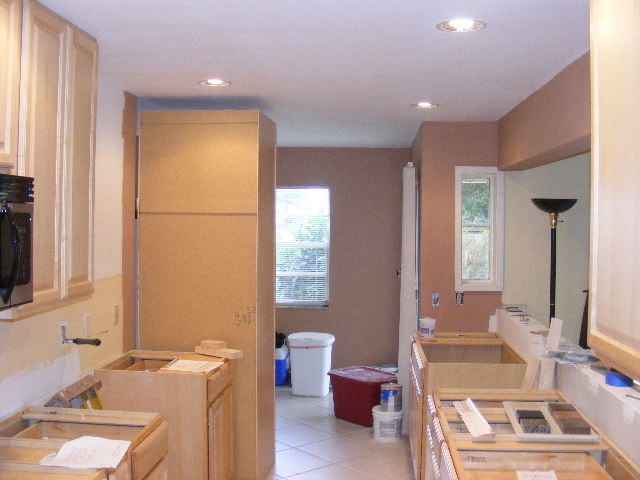
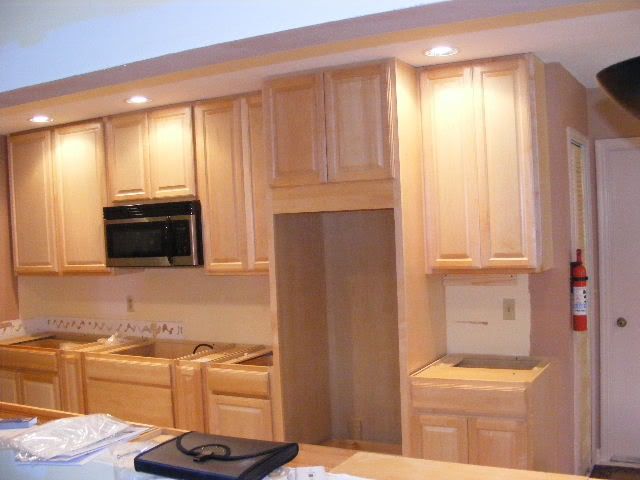
I then started installing the cabinets. They were all pre-built, which made things a lot easier than fannying around with flat-packs.
The first appliance to go in was the microwave....
This was briskly followed by the fridge. A new fresh water line had to be established, as we'd moved the fridge location across the room. This turned-out to be a bit of a pain in the arse, but we got there in the end.
The old fridge now took it's place in the garage, where it now sits, filled with beer.
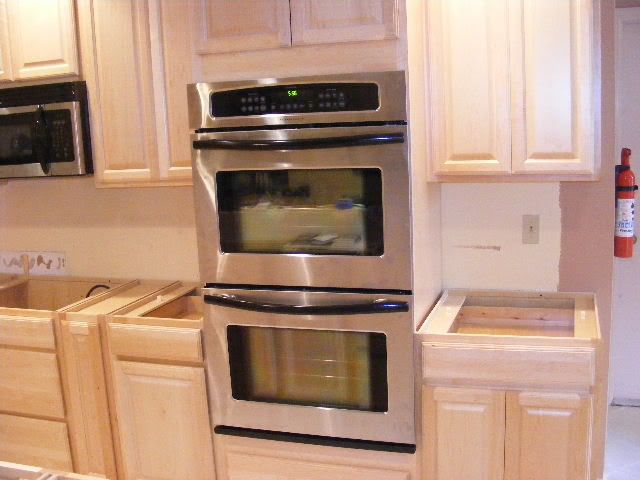
Next, I installed the tower cabinet for the oven. This unit wasn't really strong enough to bear the weight of the double-oven unit I'd ordered, so I had to re-inforce the bottom of it with a load of lumber. I also installed a new breaker and power supply, as the original wasn't rated for the current draw required by the new one.
I needed to call on a couple of friends to wrestle the new unit into place, but once installed, I was well-chuffed with it.
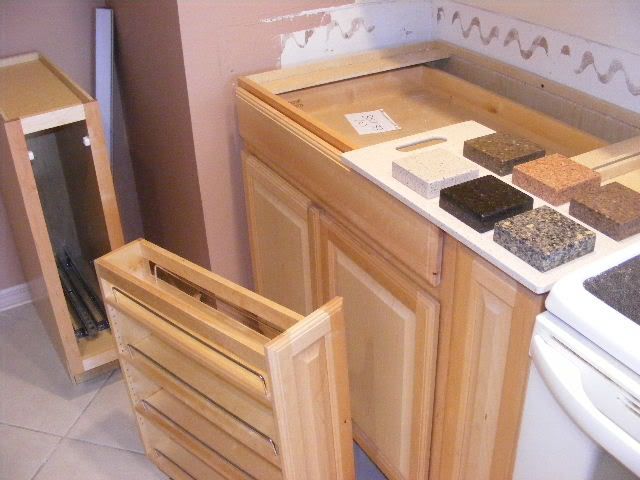
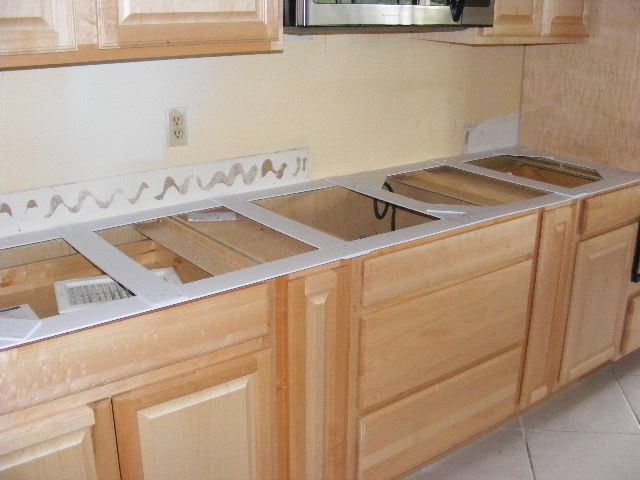
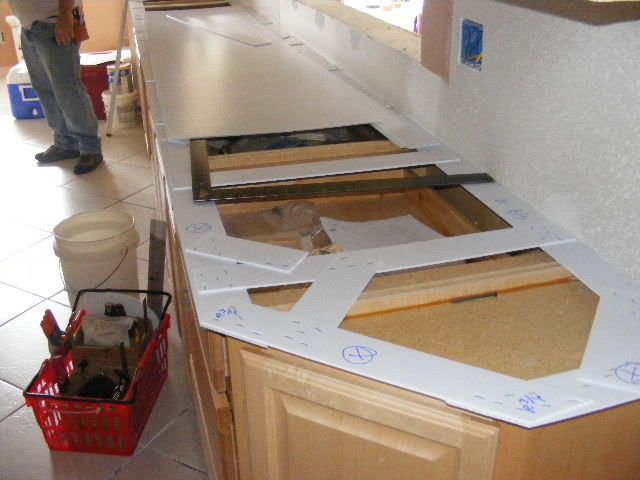
The counter-top guys arrived next - and they made templates for the surfaces. We decided to use Zodiaq engineered stone, because we didn't want visible seams in the very long runs.
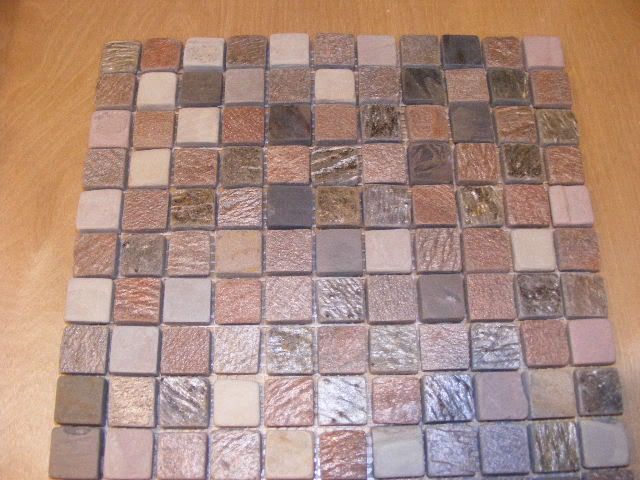
While we waited for the stone to be cut and polished, my wife chose the back-splash tile and I got busy with the finish trim on the cabinets.
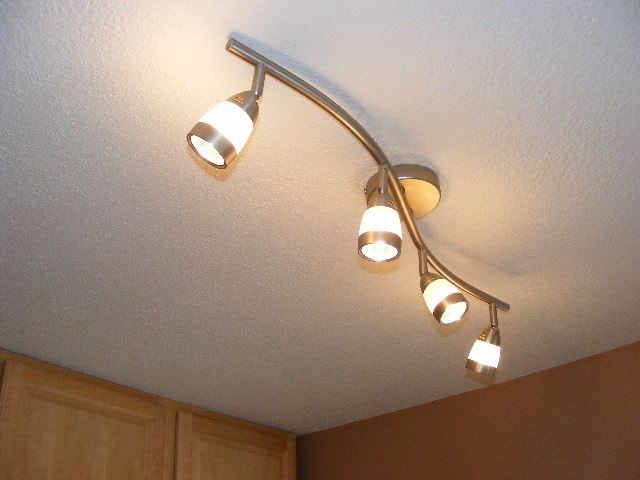
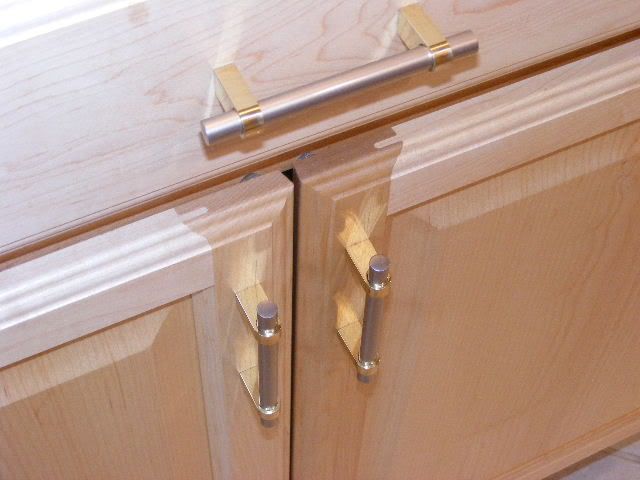
I also added some auxillary lighting and all the cabinet door furniture...
We then had to wait a week for the stone to arrive. The installation went like clockwork and the result was well worth the little extra we paid. I like granite, but it wouldn't have worked as well in this installation, I feel.

With the counters in, we were on the home stretch. The undermount sink went in next...
...followed by the dishwasher and finally the cook top. We argued up hill and down dale about what to go for (halogen, pro-gas or induction) and settled on this GE Profile induction unit. It is utterly brilliant.
That's pretty much job done. The result is a lot more space in basically the same footprint, a nice bar-top and a social rather than isolated cooking area. I'd be interested to hear thoughts on my work...
I realise that you kind of leave yourself open to critique, regarding your taste and workmanship when you photo-catalog jobs like this, but I find them interesting and a good source for ideas, so here goes with mine....
This was my start point - a long, dark, narrow kitchen with a low bulkhead ceiling and a pass-through into the dining area. I suspect it was the original, early 80's installation. We hated it.
I ordered the cabinetry direct from the manufacturer, who created a plan, using my back of a fag packet sketch and all the relevant measurements. It showed-up in my garage thusly...
First job was to tear-out all the old gear and remove the low bulkhead ceiling. It originally had flourescents above a plastic diffuser and it sucked-ass - it all had to go, but doing this to your own house can be sa little un-nerving.
Part of the plan called for a much bigger aperture into the living area, so as to create a bar-top and make the cooking area a more social environment.
Bugger! I wondered where that level went...After that we added new sheet-rock, tape and skim and put in the obligatory recessed ceiling lighting.
Because I'm a tight-wad, I decided to recycle the old units and installed them in the garage...
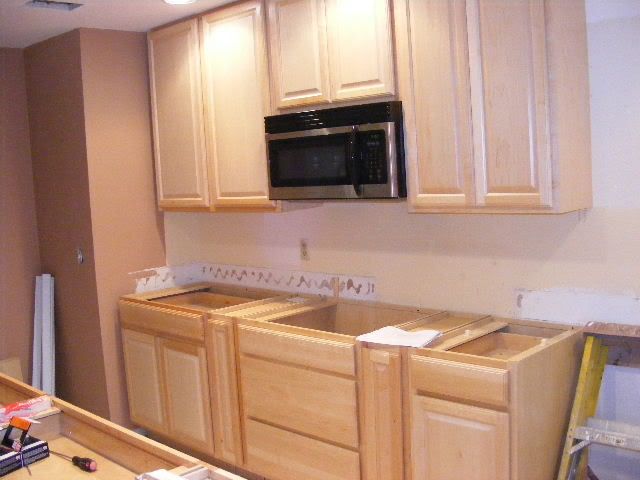
I then started installing the cabinets. They were all pre-built, which made things a lot easier than fannying around with flat-packs.
The first appliance to go in was the microwave....
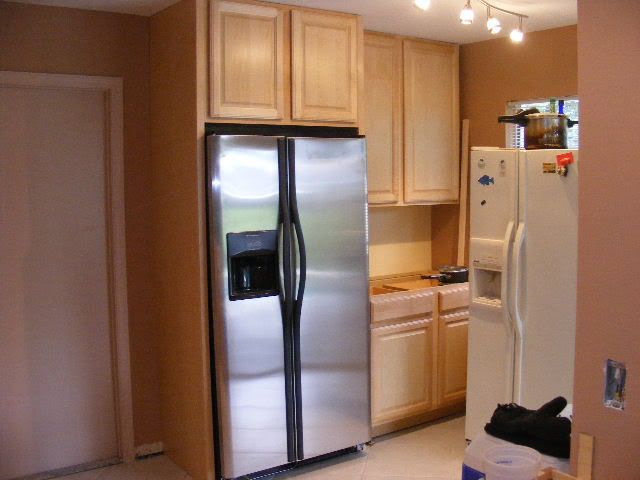
This was briskly followed by the fridge. A new fresh water line had to be established, as we'd moved the fridge location across the room. This turned-out to be a bit of a pain in the arse, but we got there in the end.
The old fridge now took it's place in the garage, where it now sits, filled with beer.
Next, I installed the tower cabinet for the oven. This unit wasn't really strong enough to bear the weight of the double-oven unit I'd ordered, so I had to re-inforce the bottom of it with a load of lumber. I also installed a new breaker and power supply, as the original wasn't rated for the current draw required by the new one.
I needed to call on a couple of friends to wrestle the new unit into place, but once installed, I was well-chuffed with it.
The counter-top guys arrived next - and they made templates for the surfaces. We decided to use Zodiaq engineered stone, because we didn't want visible seams in the very long runs.
While we waited for the stone to be cut and polished, my wife chose the back-splash tile and I got busy with the finish trim on the cabinets.
I also added some auxillary lighting and all the cabinet door furniture...
We then had to wait a week for the stone to arrive. The installation went like clockwork and the result was well worth the little extra we paid. I like granite, but it wouldn't have worked as well in this installation, I feel.
With the counters in, we were on the home stretch. The undermount sink went in next...
...followed by the dishwasher and finally the cook top. We argued up hill and down dale about what to go for (halogen, pro-gas or induction) and settled on this GE Profile induction unit. It is utterly brilliant.
That's pretty much job done. The result is a lot more space in basically the same footprint, a nice bar-top and a social rather than isolated cooking area. I'd be interested to hear thoughts on my work...
Gassing Station | Homes, Gardens and DIY | Top of Page | What's New | My Stuff