Mini Cooper S (F56) | PH Fleet
How to solve a problem like missing bonnet stripes?
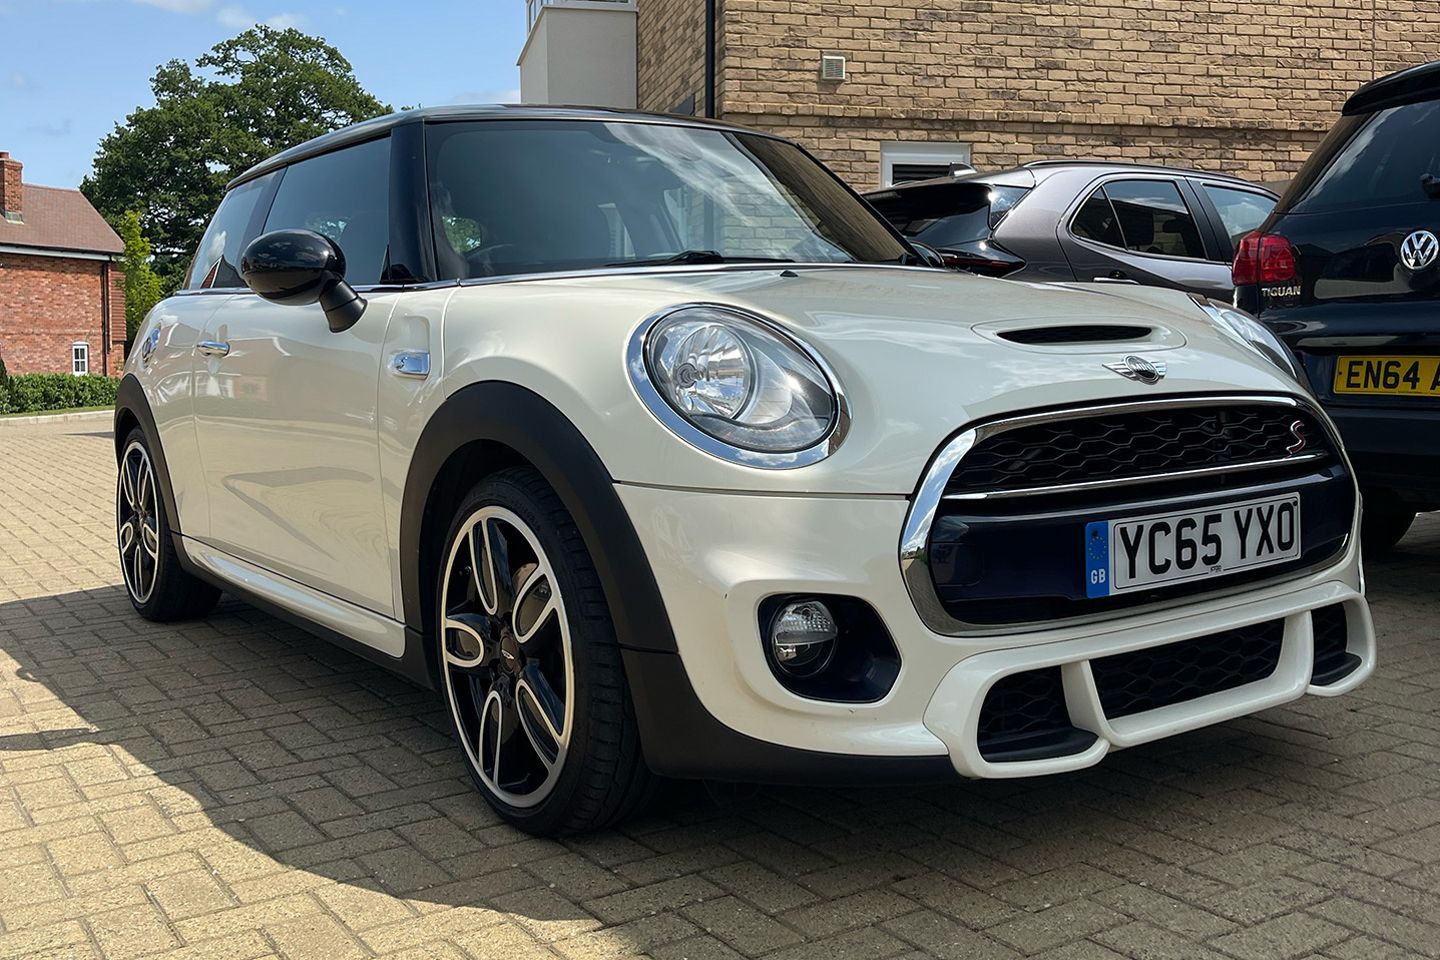
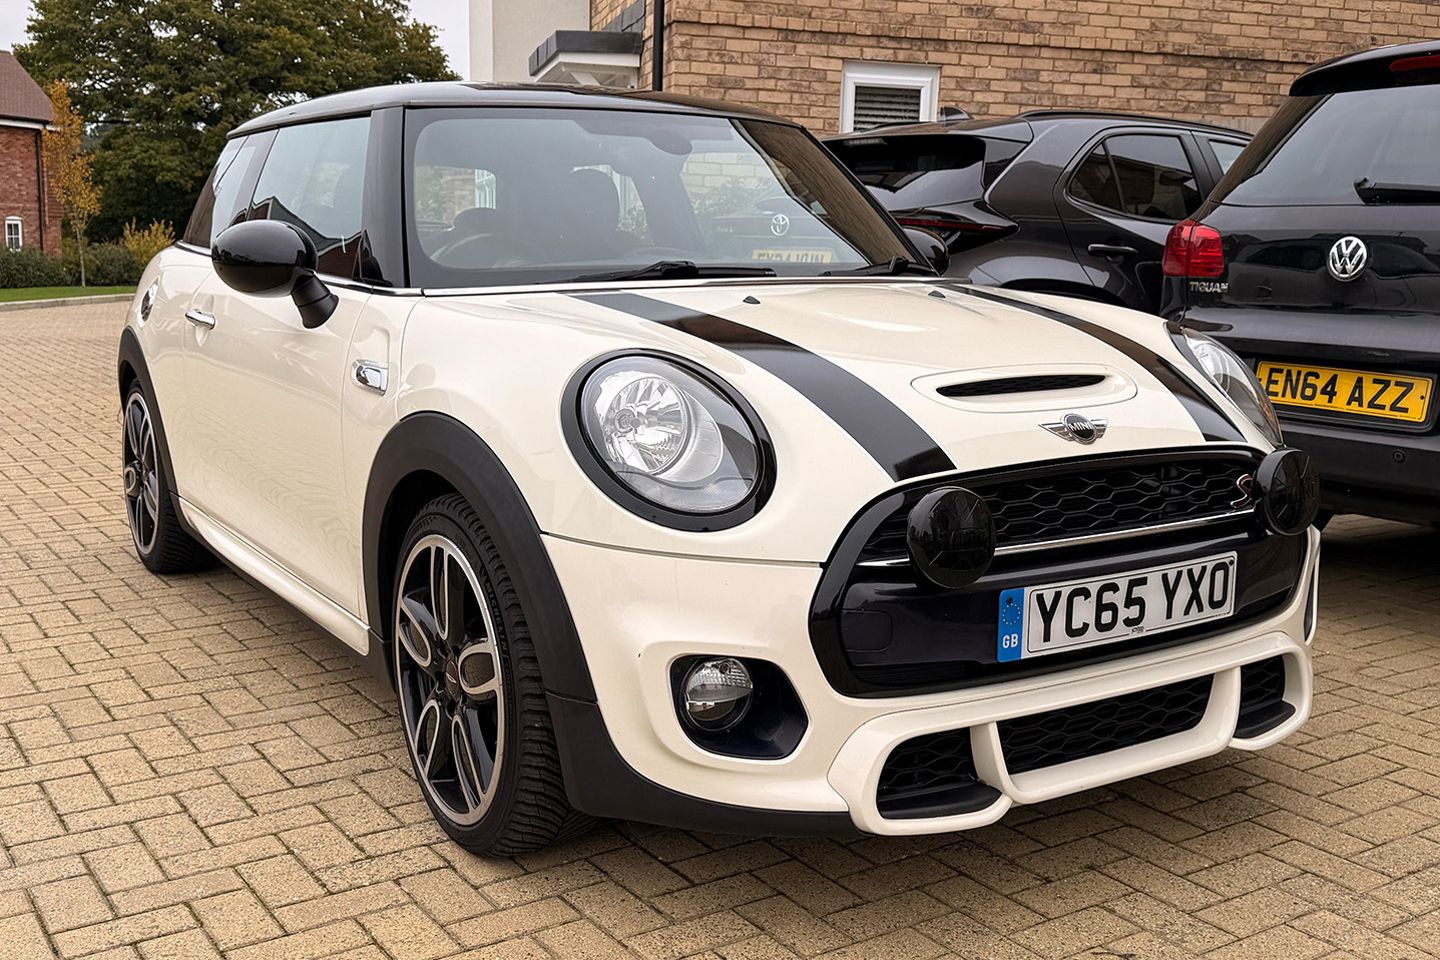
When the F56 launched, Mini offered an almost dizzying array of options, encouraging buyers to personalise to their heart’s content. The spec on my car, though, has always bugged me slightly - it’s a curious mix that never quite made sense.
The no-cost choices were straightforward enough: six-speed manual gearbox, Pepper White paint, and black roof and mirrors. The paid-for options, however, are where things get interesting: Cooper S model, JCW Exterior Pack, JCW Interior Pack and Media Pack XL.
Individually, there’s nothing wrong with that list. But taken as a whole, it’s hard to ignore the fact that a full-fat JCW would have cost roughly the same at the time. Yes, that would have brought meaningful performance gains, but also bonnet stripes, slightly flared arches and LED lights as standard. Thankfully, they didn’t go that route - leaving me with what feels like the ideal canvas for a bit of DIY JCW-ification.
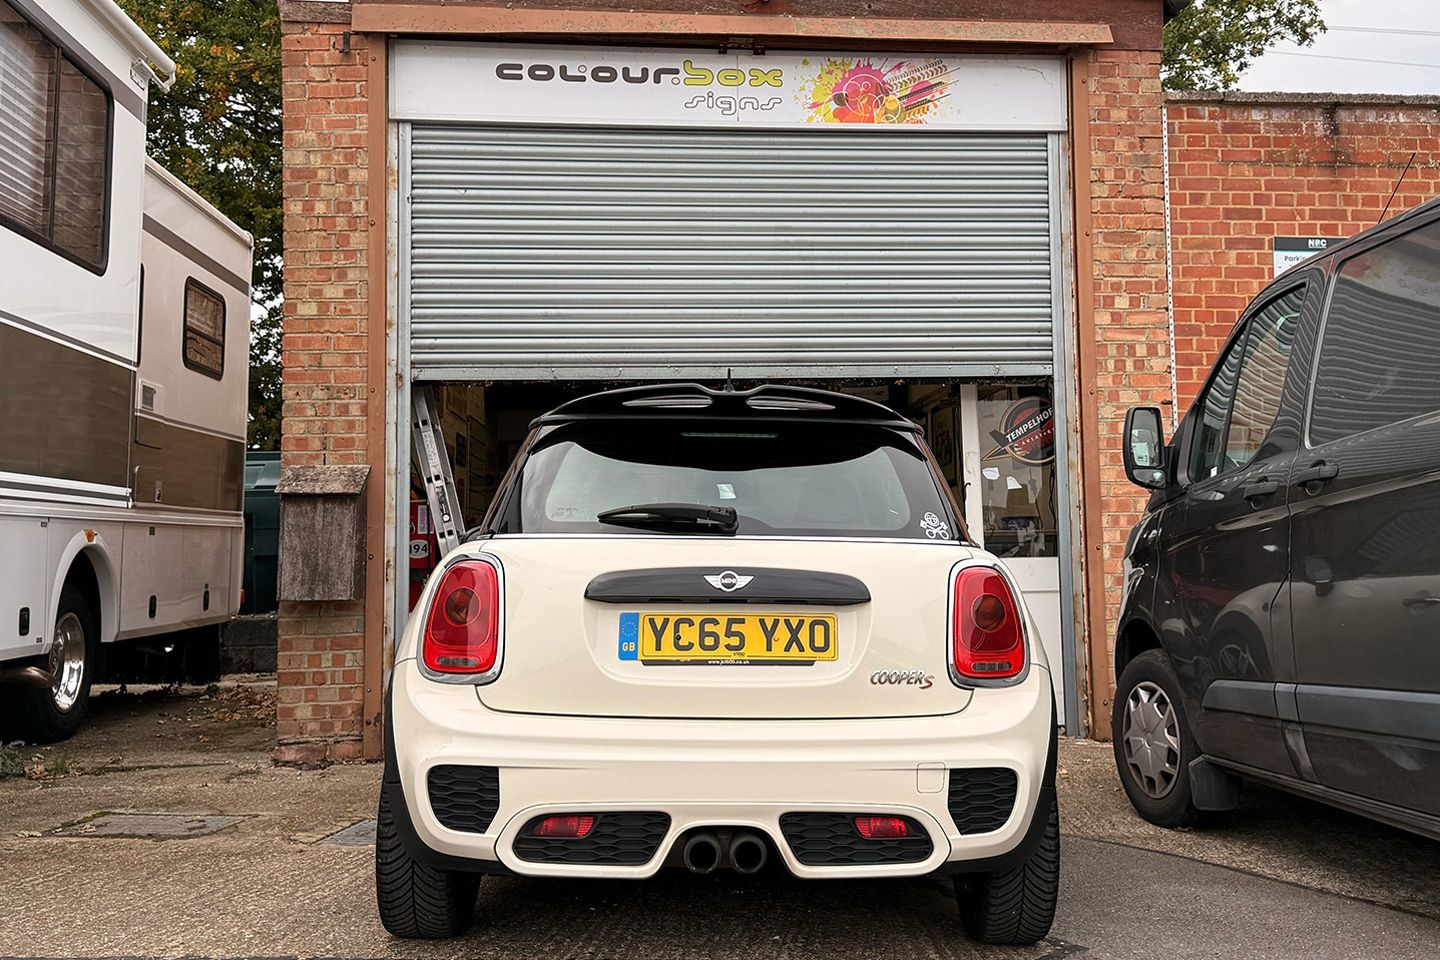
With performance upgrades coming soon, winter felt like the right time to freshen things up visually - focusing on three areas: lights, grille and bonnet stripes. There’s no shortage of suppliers when it comes to trim. OEM parts look great but get expensive fast, while the aftermarket offers plenty of ready-made alternatives of wildly varying quality. Instead, I went down the vinyl route.
Why? I can keep the original parts, choose any colour, gain a bit of extra protection without committing to full PPF, and revert everything to stock if I - or a future owner - ever decide to. Gloss black was the obvious choice, tying together the wheels, interior trim, roof and tailgate handle. I’m nothing if not consistent.
Given that I’m spectacularly cack-handed, I drafted in some help – mainly to learn how it’s done properly, and partly to make this genuinely useful for anyone considering a similar project. Enter Kev from Colourbox. We’ve worked together before; he’s got more than 20 years’ experience and can wrap just about anything, from race cars to RVs to private jets. He also knows Minis inside out, which certainly helps.
Across the three areas we tackled, Kev talked me through wrapping step by step, pointing out where things can go wrong and shared a few practical tips for anyone who wants to try this at home.
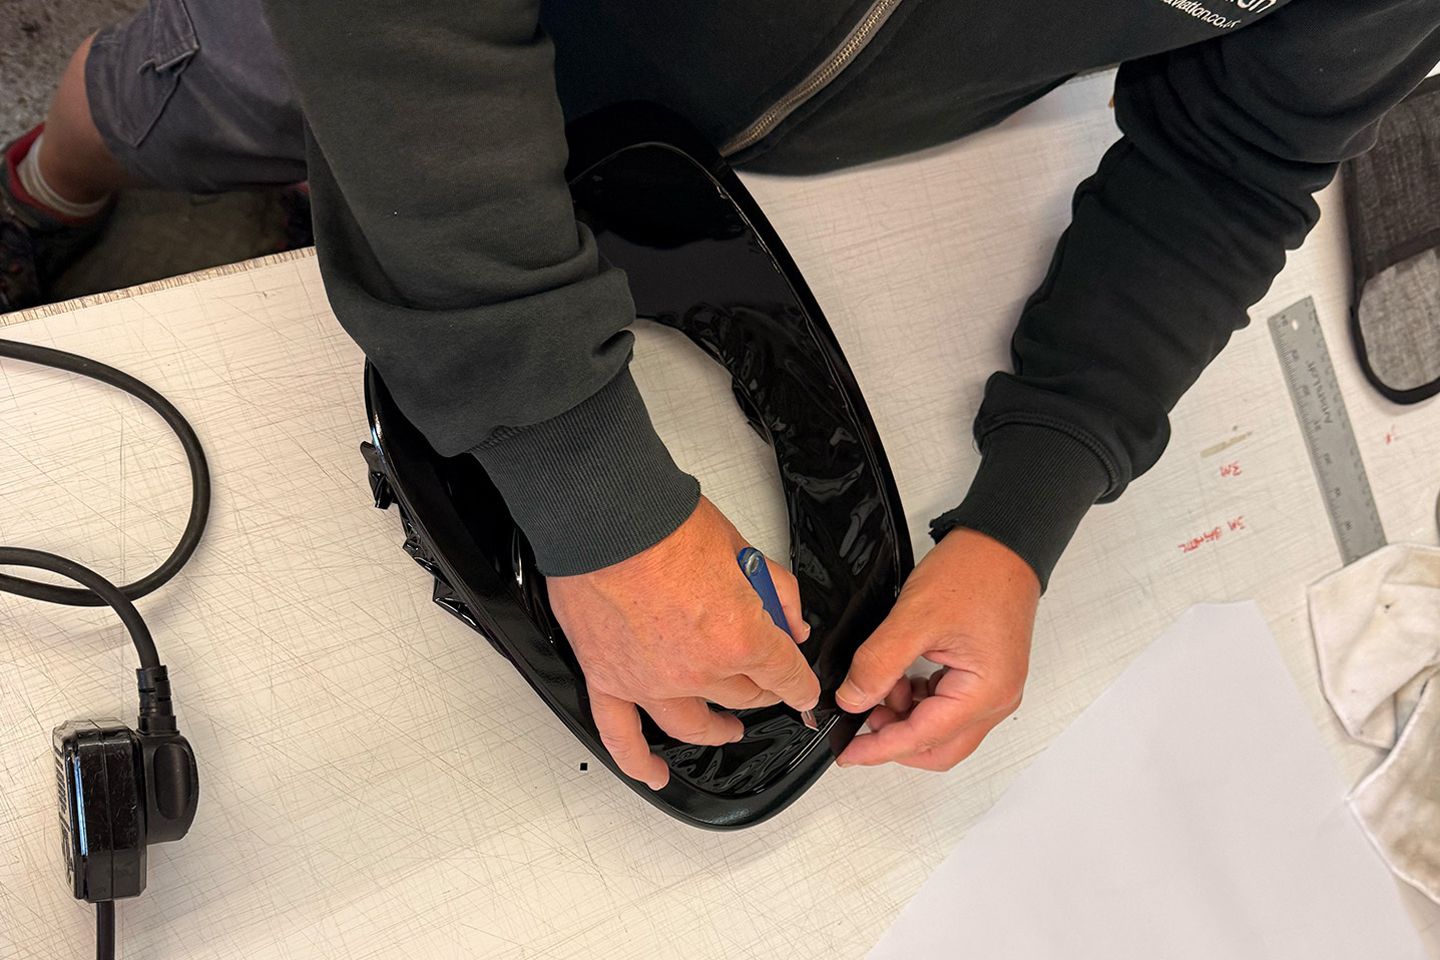
We started with the light surrounds. There are two approaches here: wrapping the trims in situ or removing them entirely. The recommended method is removal – it allows for cleaner edges, better adhesion and a far more durable finish. On Minis in particular, take care with the clips on the headlight surrounds. They’re fragile, and snapping too many quickly turns a simple job into an expensive one. A basic trim-removal kit (readily available from around £10) and a bit of patience go a long way.
With the trims off the car, clean and dry them thoroughly. A spotless surface is crucial to good adhesion and avoiding bubbles. Stretch the vinyl gently around curves, work from the centre out with a squeegee, and wrap over the edges where possible. As ever, slow and steady beats trying to fix mistakes later.
Moving on to the grille surround, again, it’s easier to remove it from the car. Although the grille is much larger, working off the car makes it far easier to achieve smooth edges and a consistent finish. Crucially, the wrap should be applied in a single piece – no joins or seams. This area takes the brunt of wind, road debris and stone chips, so durability matters. (Side note, if you are planning to remove your grill, maybe save fitting the headlamps until after… it made things a little more fiddly than anticipated.)
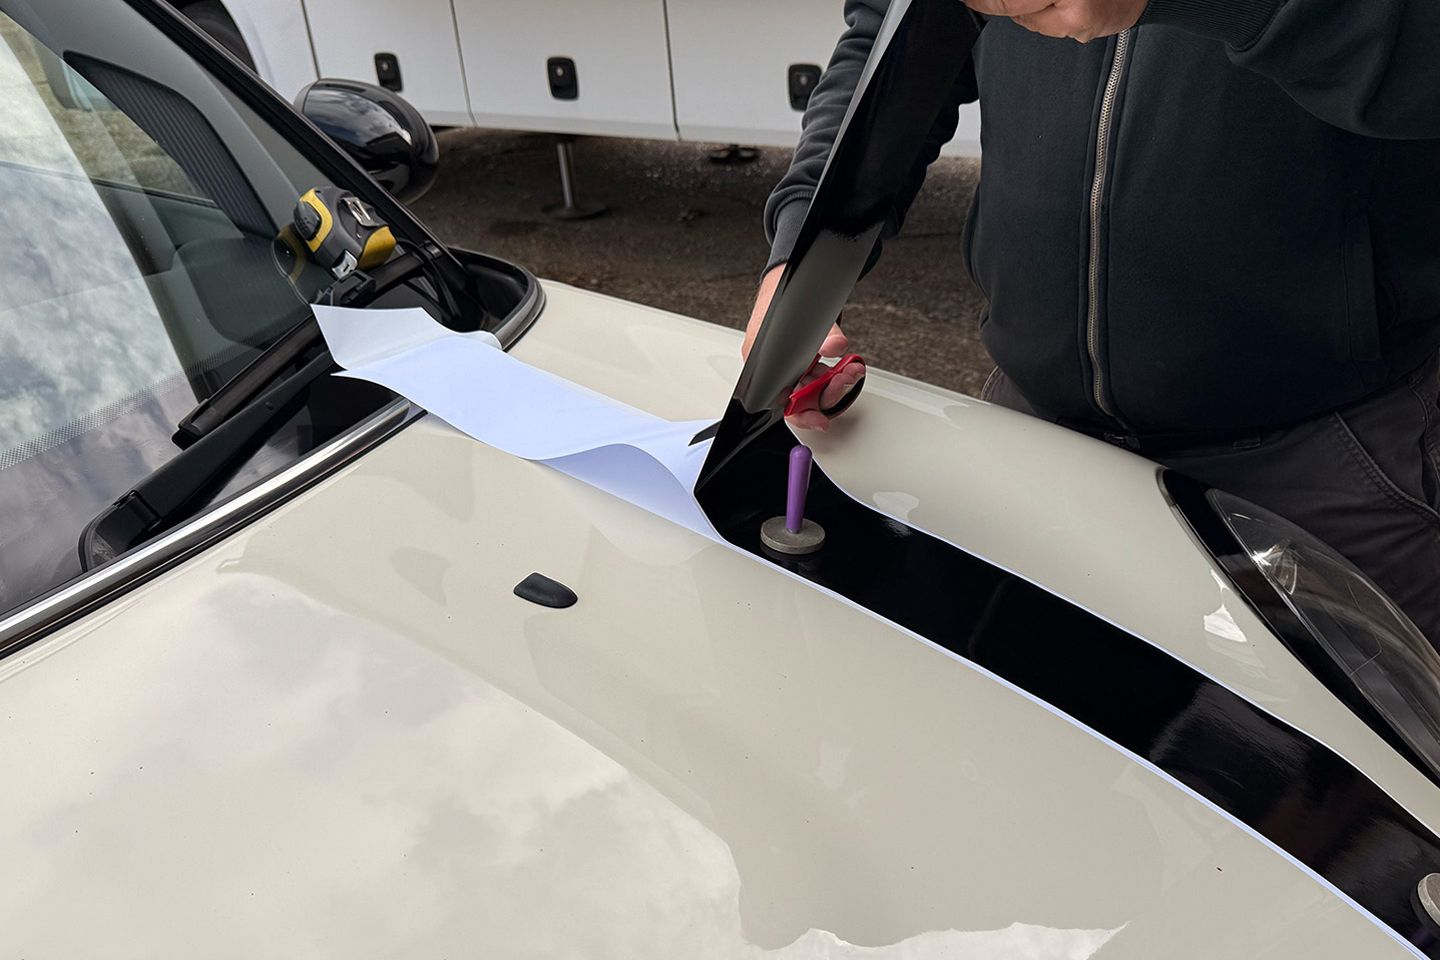
Finally, the bonnet stripes. Mini stripes are a minefield – there are almost too many options. For longevity, Kev recommends a two-layer approach: a wide white base layer with a narrower black stripe applied on top. The colours stay crisp, resist fading and look far more premium over time. Previously, factory stripes were printed decals (white vinyl with graphics printed on top), which tend to fade over time as the white shows through or discolours. Many cheaper aftermarket options use the same process, so it’s worth doing your homework.
This is one area where I’d always suggest using a professional. With years of experience, Kev had the stripes perfectly aligned and applied in minutes – something that’s deceptively hard to get right at home. So, now the Mini looks meaner, more cohesive and (possibly) a bit more grown-up - I guess it’s time to start on the serious bits…
If you’re tempted to have a go yourself, here’s what you’ll need:
- Vinyl wrap sheets (buy more than you think you need)
- Heat gun
- Felt-edge squeegee
- Precision knife or snap-off blade
- Isopropyl alcohol and microfibre cloths
- Measuring tape
- Magnets or masking tape
- Trim-removal tools
If you’re willing to splash some cash on a professional, I’d recommend it - guaranteed fit, proven materials, the right tools, and usually a same-day turnaround.
FACT SHEET
Car: 2015 Mini Cooper S (F56)
Run by: Adam Betteridge
On Fleet Since: June 2025
Mileage: 79,133


I bought the headlight/rear light trims in black for mine, and I bought the front grill in black too, but I had to remove the front bumper to swap that, and I found that a bit fiddly to be honest.
Mine ended up very black in the end to be fair!

My headlight and rearlight surrounds and front grill were OEM from BMW as well.
I bought the headlight/rear light trims in black for mine, and I bought the front grill in black too, but I had to remove the front bumper to swap that, and I found that a bit fiddly to be honest.
Mine ended up very black in the end to be fair!
I bought the headlight/rear light trims in black for mine, and I bought the front grill in black too, but I had to remove the front bumper to swap that, and I found that a bit fiddly to be honest.
Mine ended up very black in the end to be fair!
Yours is making me miss mine a lot.

I got a brand new JCW exhaust for mine, displaced when someone put the Pro exhaust on their JCW at a local dealers.
Really gave it a more meaningful exhaust note and a nice woofle on over run.
If yours has Driving Modes it can be coded to start in Sport mode, which i preferred.
Pic of mine.
Cooper S Seven. Lapis Luxury Blue, Melting Silver roof. HK sound, driving modes, dark headlining, LEDs, central armrest, plus the bits and bobs the Seven edition got.
I bought the headlight/rear light trims in black for mine, and I bought the front grill in black too, but I had to remove the front bumper to swap that, and I found that a bit fiddly to be honest.
Mine ended up very black in the end to be fair!
I have read so many different stories that i can change it or i can't has anyone actually done it and what did you use?
I guess i have to keep the PPF to pass the MOT.
Thanks
Gassing Station | General Gassing | Top of Page | What's New | My Stuff