Checking engine oil level
Discussion


Maxym said:
Anyway, what’s your experience of oil consumption
To date (40k miles), absolutely nil. Which compared to running an M car is delightful.The hatch is a cinch (use the opportunity to dab some copper grease on the bobbin threads), the cover less so but the more you do it the slicker you get.
I seem to remember seeing a set of quick release bolts for the cover, in Alpine blue, which I thought would look smart, but can't find them now.
Opening the rear and taking the cover off is easy, but I have found it a bit of a faff to put the cover back on correctly, hence I've only done it twice in 6000 miles
Opening the rear and taking the cover off is easy, but I have found it a bit of a faff to put the cover back on correctly, hence I've only done it twice in 6000 miles
With D-Ring fasteners reassembly is A LOT easier, strongly recommended!
Unfortunately the fasteners have an unusual diameter of 5 mm, pretty much all offered in the bay or amazonas have 6 mm, so they wont fit. Life110 sells the correct version in the UK, Mecaparts in France and Axel Ress in Germany.
Unfortunately the fasteners have an unusual diameter of 5 mm, pretty much all offered in the bay or amazonas have 6 mm, so they wont fit. Life110 sells the correct version in the UK, Mecaparts in France and Axel Ress in Germany.
Yuri75 said:
I'm expecting delivery of these, as well as their quick-releases for the rear windscreen, any day now. I will post my findings once I receive and install them.
Looking forward to that, cheers.Almost bought the quick releases last night but thought that I'd wait for your skinned knuckles, errrrr I meant review
Parts were delivered to me today and I just finished fitting them. It's as easy as you would expect it to be, skill level required is minimal and skinned knuckles are highly unlikely unless you are dead set on acquiring them 
First up, the quick releases for the rear windscreen. They come with instructions in three languages but it's quite self-explanatory, really. First screw them in by hand, without thread locking compound, to check that the studs don't foul the holes in the body when lowering the screen into position. The instructions say that the right-hand hole may object a bit; it does have a different shape from the others but I had no issues. Once satisfied, remove them, apply some thread locking compound and screw them back in. Lower the screen into position, and verify that the quick release buttons snap on and that there is no excess play; adjust the studs as necessary until all three buttons give a positive click and the screen is properly seated.
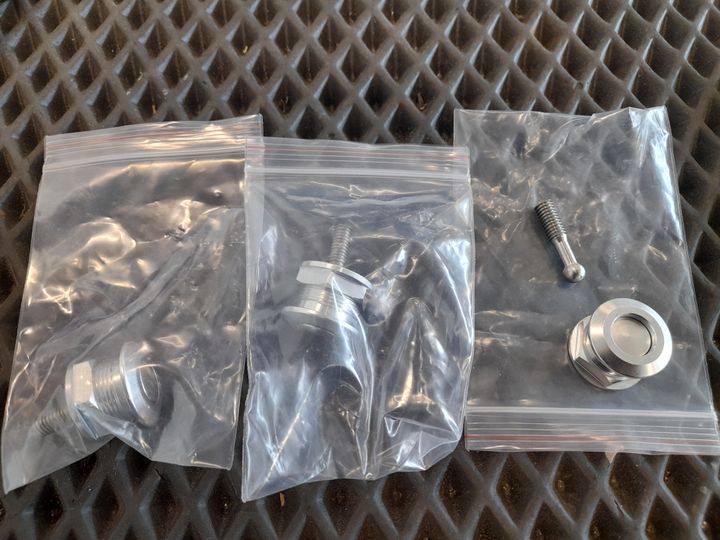
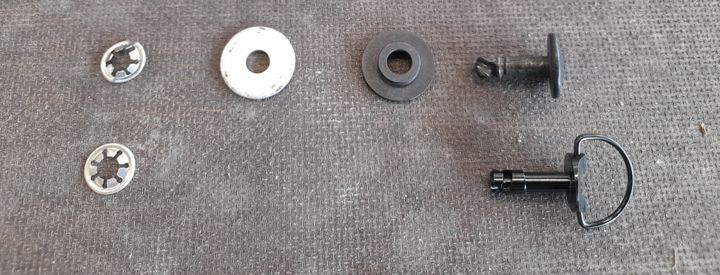
Next up, the quick releases for the engine cover. All you need is a pair of pliers to remove the retaining rings from the original fixing buttons. Once removed, you will have four parts for each fixing position as shown at the top row in the image below. The retaining rings are sacrificial, and new ones are provided. The two larger washers (one plastic, one metal) are retained and go back in the same position and orientation as they came out. Simply insert the quick release, push a new retaining ring over it from behind until it latches into the recess, and repeat seven times. All said and done, a twenty minute job at most.
The lead time of the parts was exactly one week in my case; I was notified by email when the parts were sent out, but no track&trace number was provided.
Oh, and while I was in there, I checked the oil level. After 6000 or so kilometers, still not a single drop of oil was consumed.
First up, the quick releases for the rear windscreen. They come with instructions in three languages but it's quite self-explanatory, really. First screw them in by hand, without thread locking compound, to check that the studs don't foul the holes in the body when lowering the screen into position. The instructions say that the right-hand hole may object a bit; it does have a different shape from the others but I had no issues. Once satisfied, remove them, apply some thread locking compound and screw them back in. Lower the screen into position, and verify that the quick release buttons snap on and that there is no excess play; adjust the studs as necessary until all three buttons give a positive click and the screen is properly seated.
Next up, the quick releases for the engine cover. All you need is a pair of pliers to remove the retaining rings from the original fixing buttons. Once removed, you will have four parts for each fixing position as shown at the top row in the image below. The retaining rings are sacrificial, and new ones are provided. The two larger washers (one plastic, one metal) are retained and go back in the same position and orientation as they came out. Simply insert the quick release, push a new retaining ring over it from behind until it latches into the recess, and repeat seven times. All said and done, a twenty minute job at most.
The lead time of the parts was exactly one week in my case; I was notified by email when the parts were sent out, but no track&trace number was provided.
Oh, and while I was in there, I checked the oil level. After 6000 or so kilometers, still not a single drop of oil was consumed.
Edited by Yuri75 on Friday 11th April 15:19

Gassing Station | Alpine | Top of Page | What's New | My Stuff