
My 1986 MKII Golf GTI track car (88 BTCC replica)
Discussion


Bought this car in early 09 off a friend done a few things to it so will sum up the last few years quickly.
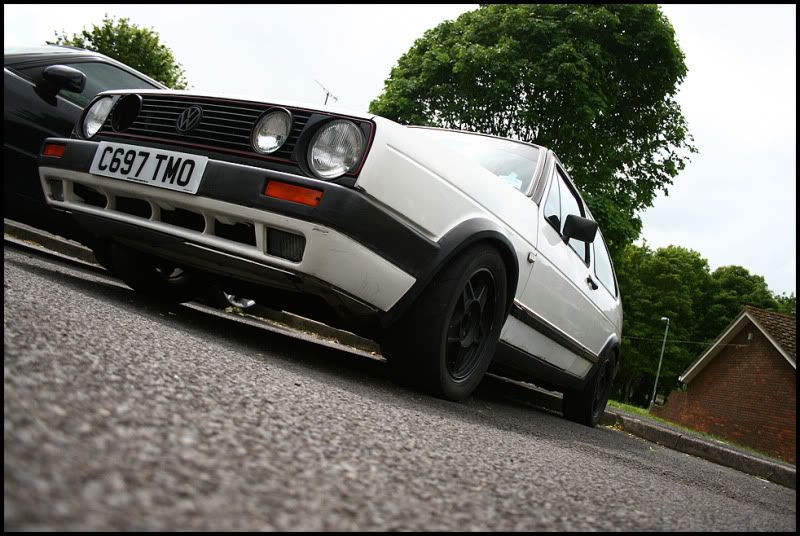
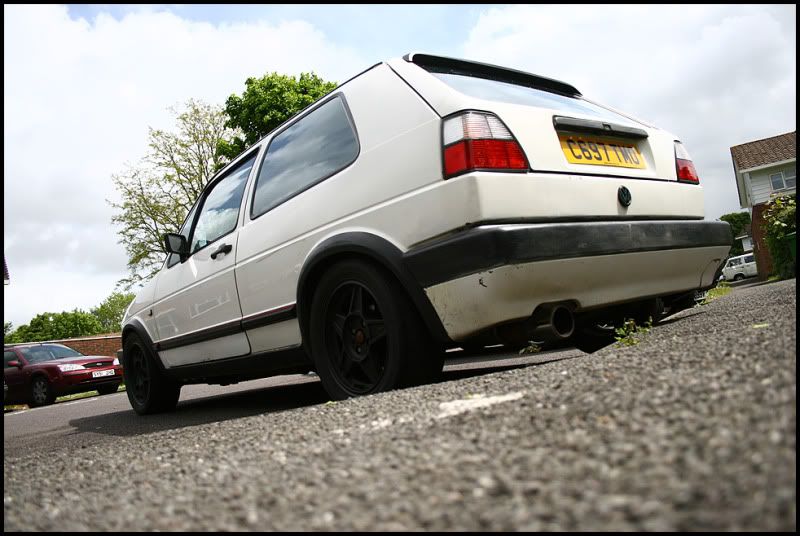
Bought it like this for £550:
[quote]
VW mk2 Golf GTi track day car
1986 3 door GTi
Shell
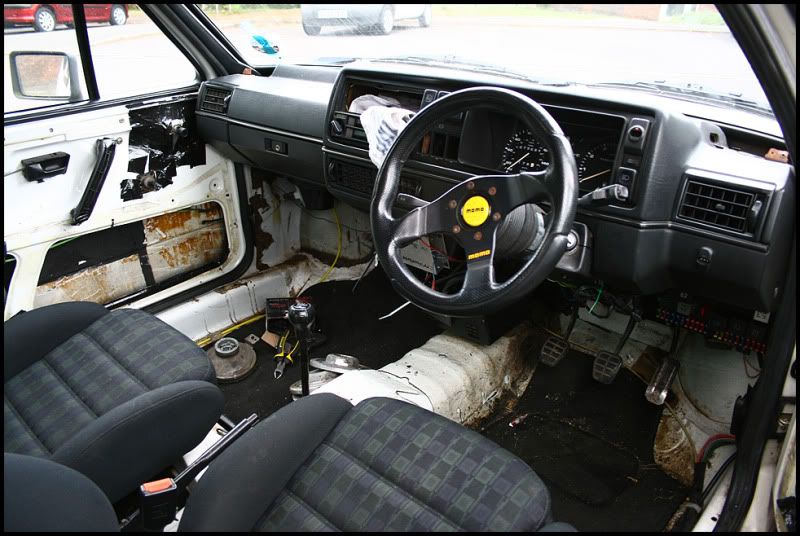
Striped out except for central locking, roof lining and dash.
Corrado front seats
Small Momo steering wheel.
A few dents, but ***.
Engine
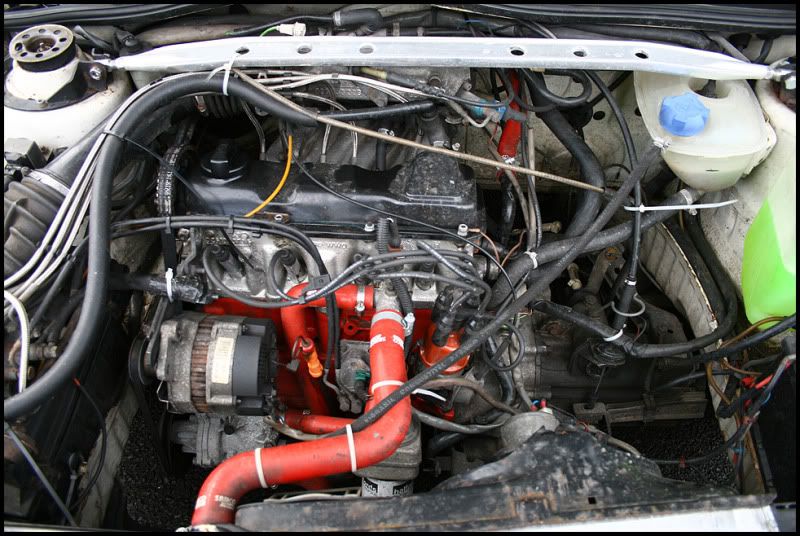
1.9 8v with K-Jet injection. Modified head, inlet and exhaust manifolds. Cam is a high lift long duration (Piper 286). Vsam Pro engine management with 5th injector.
Recent head gasket, head skim and cam belt. Last year it had all new bearings and an oil pump. New radiator and water pump.
Custom power flow exhaust (96DB@6000 rpm perfect for track days).
Power output should be around 140+bhp.
Suspension
Koni adjustable dampers and Spax springs. Poly bushed all round. Front strut brace. G60 top mounts.
Brakes
Front: Late 16v front callipers/hubs with 256mm drilled and grooved disks, Mintex 1155 pads
Rear: std mk2 golf callipers with std disks and pads.
Modified brake bias valve for stable braking. Racing brake fluid.
Wheels/Tyres
Compomotive 5 spoke 15” alloys finished in matt black.
Toyo R888s in medium compound.
[/quote]
Over the next 2 years it went through a few changes and did a couple of trackdays and an autosolo:

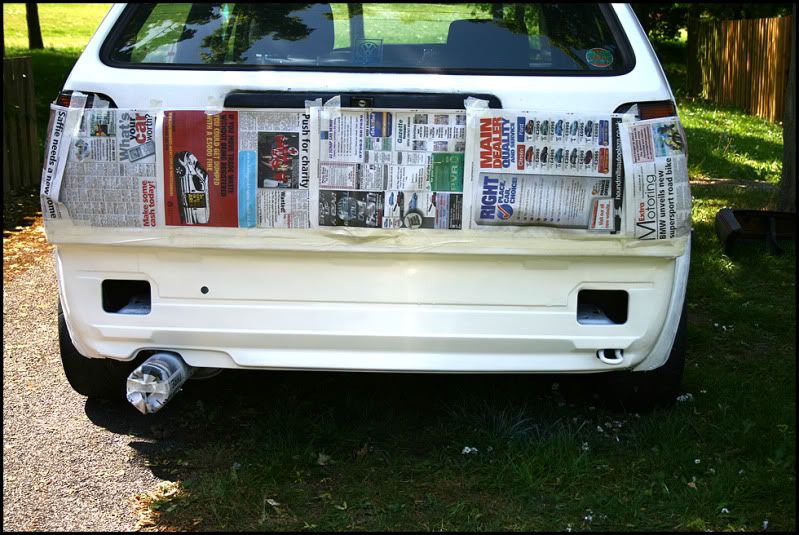
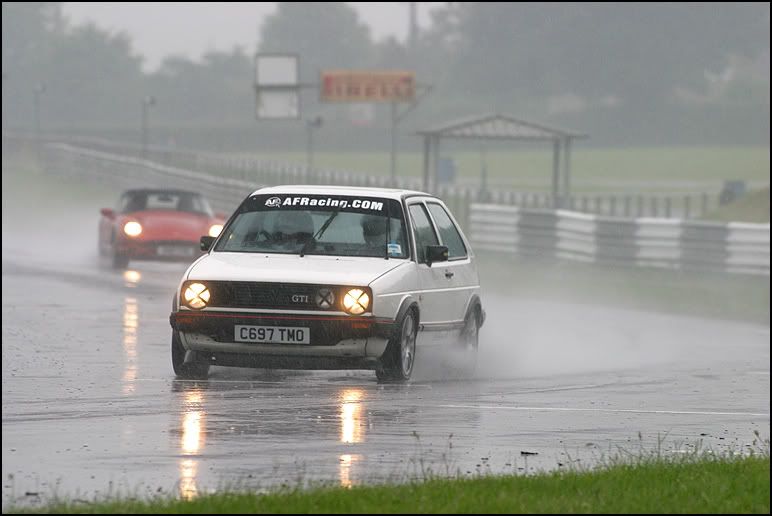
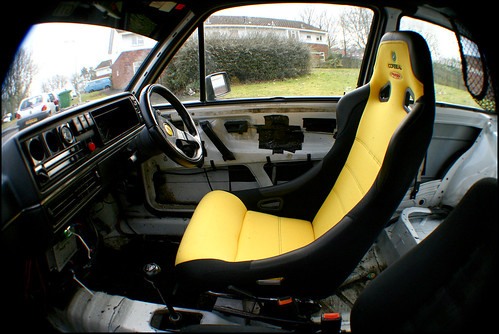
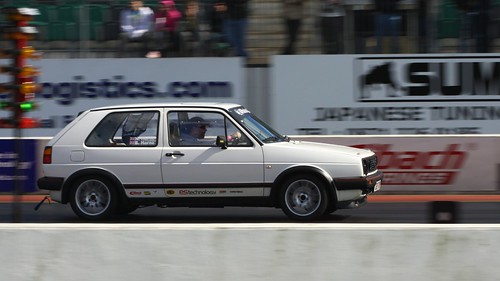
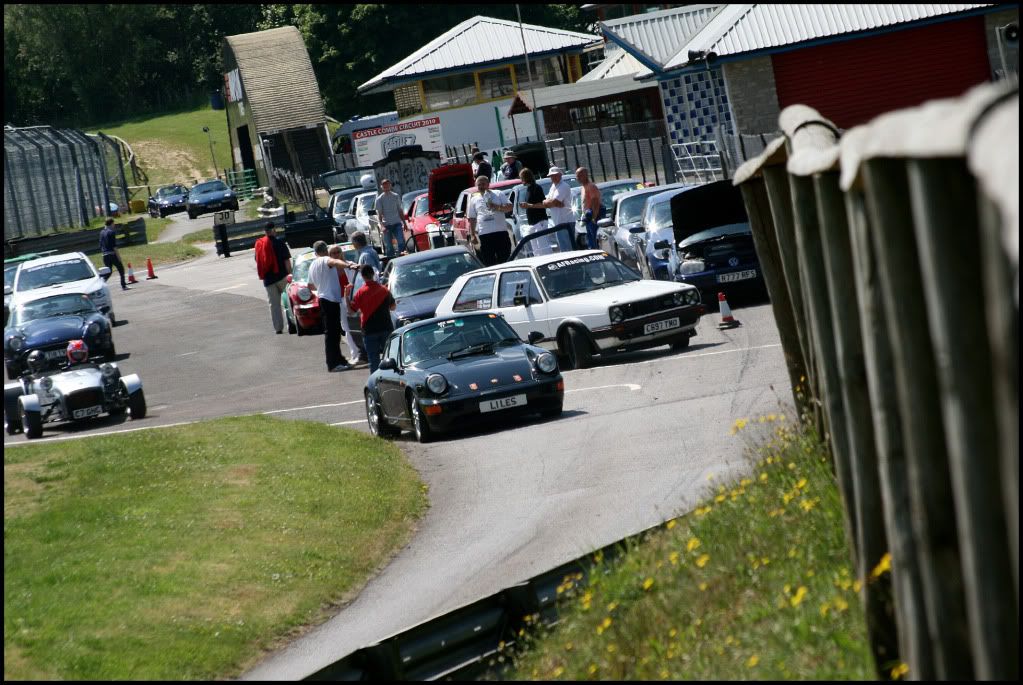
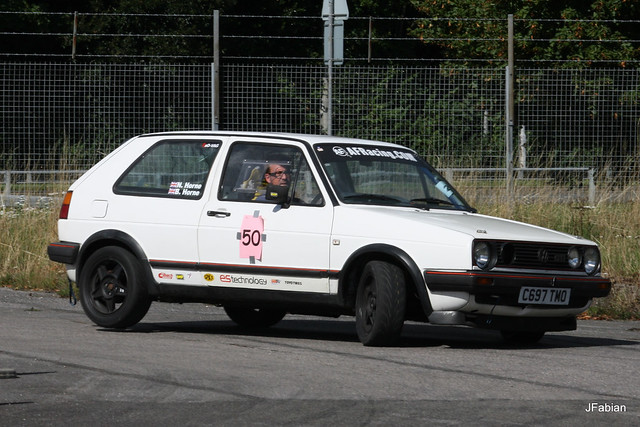
My [lan had always been to build it up as a replica of the late 80's BTCC entry.
So in the last 18 months since the sum total of nothing has happened on this car. Well that's not entirely true. I drove it to one VW meet and then the MOT ran out and I put it in a friend's council garage. I lost my job 12 months ago and although i found another one I took a considerable paycut that meant this project had to be shelved for the foreseeable future.
2012 and things have changed. Having sold my TDI Polo daily and bought the MX5 for a more enjoyable daily I have just been having fun with that but a new year and a new job with a decent wage and a car allowance mean that project BTCC rep is being revived and then some. I'm not selling the MX5 though as it's too much fun. This means I'll have 3 cars. Is that being greedy? lol.
I'm currently arranging purchase of an OMP cage and in the next few weeks the Golf will be dragged out of the council garage and taken up to my friend's workshop where things will start to progress.
I want to go from:
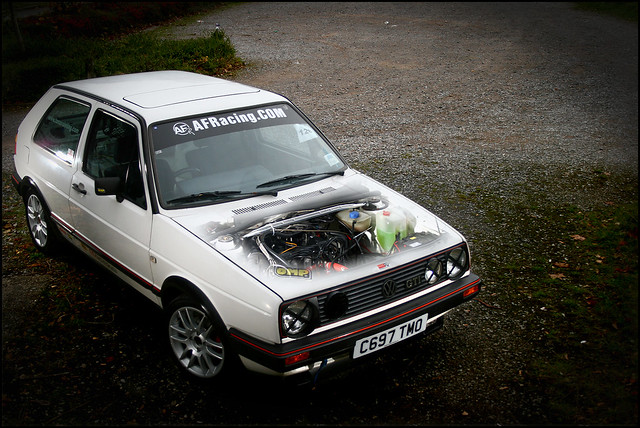
IMG_7049_edit by Nicholas R Horne, on Flickr
to:
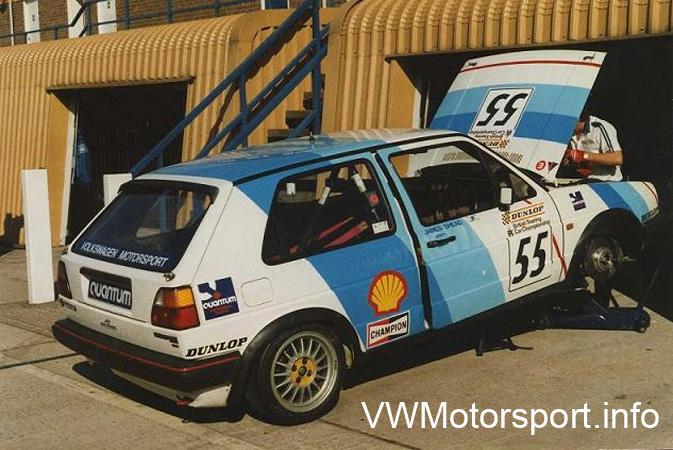
One of the main stumbling blocks at the moment is the wheels. Seems the 15" Ronal R8's in 4x100 fitment are like rocking horse poop.
Stay tuned!
Nick
Bought it like this for £550:
[quote]
VW mk2 Golf GTi track day car
1986 3 door GTi
Shell
Striped out except for central locking, roof lining and dash.
Corrado front seats
Small Momo steering wheel.
A few dents, but ***.
Engine
1.9 8v with K-Jet injection. Modified head, inlet and exhaust manifolds. Cam is a high lift long duration (Piper 286). Vsam Pro engine management with 5th injector.
Recent head gasket, head skim and cam belt. Last year it had all new bearings and an oil pump. New radiator and water pump.
Custom power flow exhaust (96DB@6000 rpm perfect for track days).
Power output should be around 140+bhp.
Suspension
Koni adjustable dampers and Spax springs. Poly bushed all round. Front strut brace. G60 top mounts.
Brakes
Front: Late 16v front callipers/hubs with 256mm drilled and grooved disks, Mintex 1155 pads
Rear: std mk2 golf callipers with std disks and pads.
Modified brake bias valve for stable braking. Racing brake fluid.
Wheels/Tyres
Compomotive 5 spoke 15” alloys finished in matt black.
Toyo R888s in medium compound.
[/quote]
Over the next 2 years it went through a few changes and did a couple of trackdays and an autosolo:
My [lan had always been to build it up as a replica of the late 80's BTCC entry.
So in the last 18 months since the sum total of nothing has happened on this car. Well that's not entirely true. I drove it to one VW meet and then the MOT ran out and I put it in a friend's council garage. I lost my job 12 months ago and although i found another one I took a considerable paycut that meant this project had to be shelved for the foreseeable future.
2012 and things have changed. Having sold my TDI Polo daily and bought the MX5 for a more enjoyable daily I have just been having fun with that but a new year and a new job with a decent wage and a car allowance mean that project BTCC rep is being revived and then some. I'm not selling the MX5 though as it's too much fun. This means I'll have 3 cars. Is that being greedy? lol.
I'm currently arranging purchase of an OMP cage and in the next few weeks the Golf will be dragged out of the council garage and taken up to my friend's workshop where things will start to progress.
I want to go from:
IMG_7049_edit by Nicholas R Horne, on Flickr
to:
One of the main stumbling blocks at the moment is the wheels. Seems the 15" Ronal R8's in 4x100 fitment are like rocking horse poop.
Stay tuned!
Nick


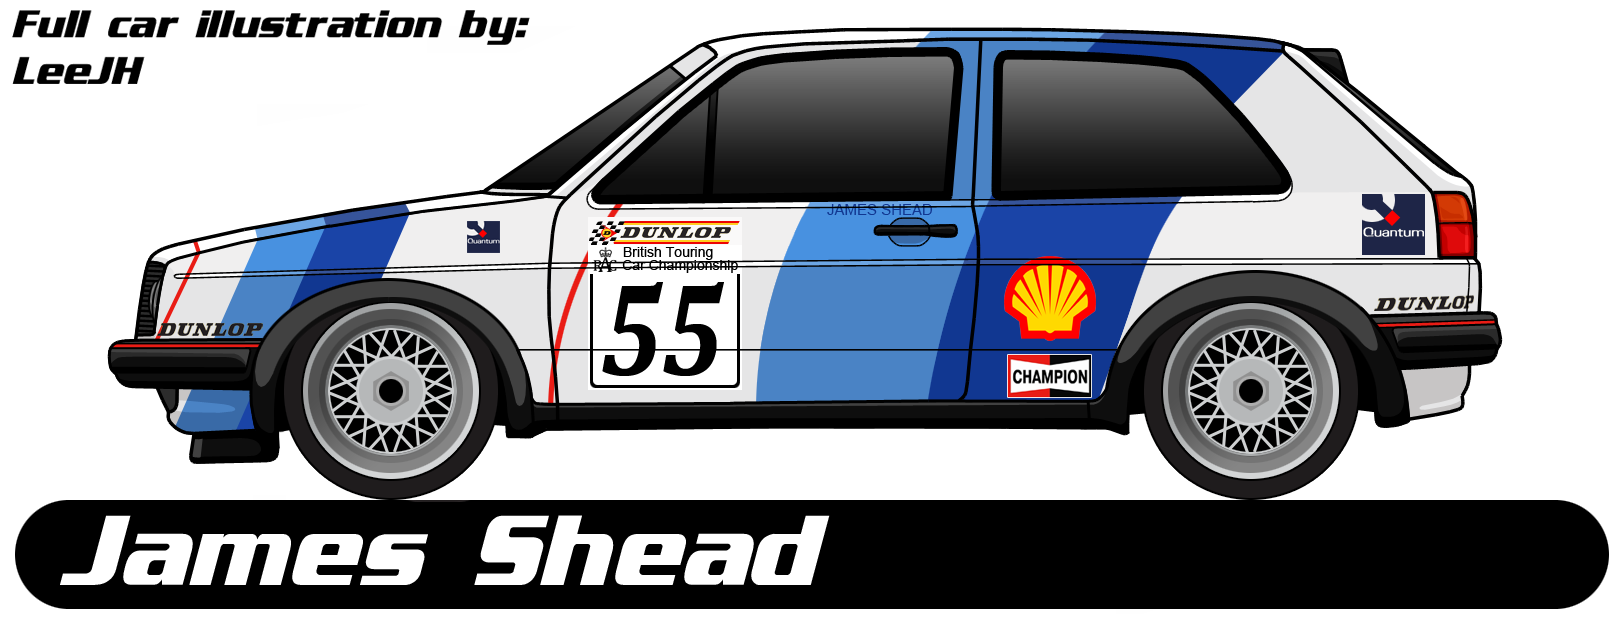
So today the project to turn it into the rep of James Shead's car started in earnest.
Open the garage to find it still there to much relief as it hadn't been checked on since I put it in there months ago and it's in quite a rough area.

IMAG0073#1.jpg by Nicholas R Horne, on Flickr
Pushed it out and found it had enough juice left in the battery to unlock etc but not enough to fire up:

IMAG0075#1.jpg by Nicholas R Horne, on Flickr
Ash arrived with the truck and we got it loaded up:

IMAG0076#1.jpg by Nicholas R Horne, on Flickr

IMAG0077#1.jpg by Nicholas R Horne, on Flickr

IMAG0078#1.jpg by Nicholas R Horne, on Flickr

IMAG0079.jpg by Nicholas R Horne, on Flickr

IMAG0080.jpg by Nicholas R Horne, on Flickr
Massive thanks to Ash and Marcus for sorting out the transport and arrived at the workshop:

IMAG0081.jpg by Nicholas R Horne, on Flickr

IMAG0083.jpg by Nicholas R Horne, on Flickr
After a quick jump off the MX5 it fired up and sounded OK, me and marcus then decided to rag it round the yard. Fun times.
[youtube]http://www.youtube.com/watch?v=YMszZS2Pc_Q[/youtube]
Left it running and I went off to get some antifreeze to top it up and came back to find it had run out of petrol. Doh! Off out again for a jerry can of fuel (and a McDs).
Parked it up in it's new home and began stripping the front end down so we can start on the welding. Chassis leg is first on the list.
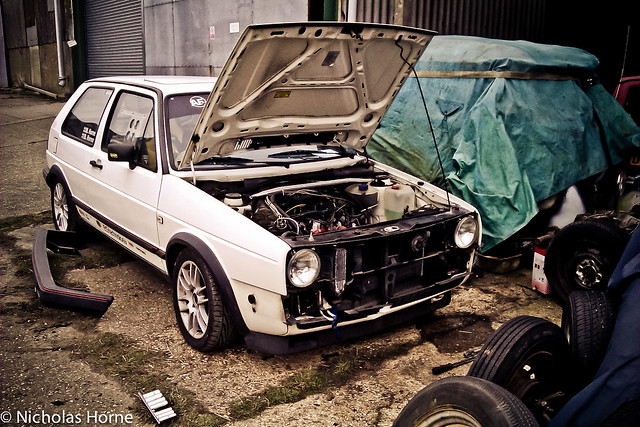
IMAG0084.jpg by Nicholas R Horne, on Flickr
Snuggled up next to Archies Volksrod project and Marcus's split.
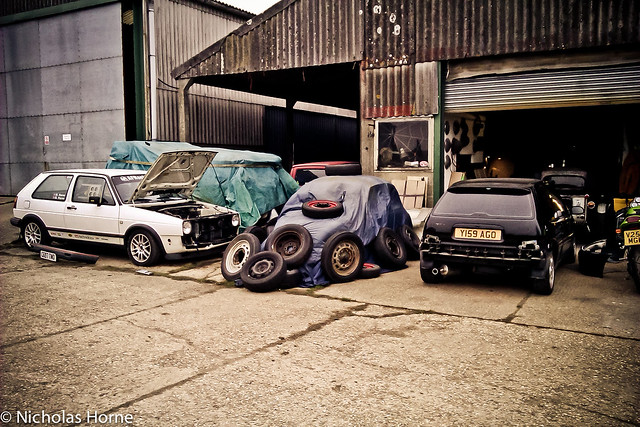
IMAG0085.jpg by Nicholas R Horne, on Flickr

IMAG0086.jpg by Nicholas R Horne, on Flickr
That's it for this weekend probably as I'm out for my Dad's birthday tomorrow.
Nick
Open the garage to find it still there to much relief as it hadn't been checked on since I put it in there months ago and it's in quite a rough area.
IMAG0073#1.jpg by Nicholas R Horne, on Flickr
Pushed it out and found it had enough juice left in the battery to unlock etc but not enough to fire up:
IMAG0075#1.jpg by Nicholas R Horne, on Flickr
Ash arrived with the truck and we got it loaded up:
IMAG0076#1.jpg by Nicholas R Horne, on Flickr
IMAG0077#1.jpg by Nicholas R Horne, on Flickr
IMAG0078#1.jpg by Nicholas R Horne, on Flickr
IMAG0079.jpg by Nicholas R Horne, on Flickr
IMAG0080.jpg by Nicholas R Horne, on Flickr
Massive thanks to Ash and Marcus for sorting out the transport and arrived at the workshop:
IMAG0081.jpg by Nicholas R Horne, on Flickr
IMAG0083.jpg by Nicholas R Horne, on Flickr
After a quick jump off the MX5 it fired up and sounded OK, me and marcus then decided to rag it round the yard. Fun times.
[youtube]http://www.youtube.com/watch?v=YMszZS2Pc_Q[/youtube]
Left it running and I went off to get some antifreeze to top it up and came back to find it had run out of petrol. Doh! Off out again for a jerry can of fuel (and a McDs).
Parked it up in it's new home and began stripping the front end down so we can start on the welding. Chassis leg is first on the list.
IMAG0084.jpg by Nicholas R Horne, on Flickr
Snuggled up next to Archies Volksrod project and Marcus's split.
IMAG0085.jpg by Nicholas R Horne, on Flickr
IMAG0086.jpg by Nicholas R Horne, on Flickr
That's it for this weekend probably as I'm out for my Dad's birthday tomorrow.
Nick
For 2012 staying 1.9 8v as it's pretty quick already. 2013 it'll be getting a 2.0 16v on ITB's (approx 180bhp). Keep getting told I should go 20v Turbo but it doesn't fit with the ethos of the build and I'm not a fan of turbo cars for track work. Chassis wise I'm happy with the current set up as it's fully polybushed and the Koni sports kit is great on track. I will hopefully add some stiffer ARBs though. Long term future I fancy some coilvers with 3 way adjustment and then get it corner weighted.
F*ck me it was cold today.
Anyhoo finished stripping the front down and dropped the front cross member off:

IMAG0088#1.jpg by Nicholas R Horne, on Flickr
N/S chassis leg was bit more rotten than I thought!

IMAG0089#1.jpg by Nicholas R Horne, on Flickr
Cut off the rotten bit and here it is next to the replacement bit from Mark's old car:

IMAG0091.jpg by Nicholas R Horne, on Flickr
Didn't get any more pics but the new piece is now cut down to the same shape as the removed piece. Just needs some more fettling and some more trimmed off the car for a snug fit. Also need to clean it all up and shoot some under seal and rust killer over it all.
Popped round to another unit and picked up a black bootlid which is less rusty than mine for £20. Win!
Might get back up for an hour or two tomorrow if Marcus is about.
Nick
F*ck me it was cold today.
Anyhoo finished stripping the front down and dropped the front cross member off:
IMAG0088#1.jpg by Nicholas R Horne, on Flickr
N/S chassis leg was bit more rotten than I thought!
IMAG0089#1.jpg by Nicholas R Horne, on Flickr
Cut off the rotten bit and here it is next to the replacement bit from Mark's old car:
IMAG0091.jpg by Nicholas R Horne, on Flickr
Didn't get any more pics but the new piece is now cut down to the same shape as the removed piece. Just needs some more fettling and some more trimmed off the car for a snug fit. Also need to clean it all up and shoot some under seal and rust killer over it all.
Popped round to another unit and picked up a black bootlid which is less rusty than mine for £20. Win!
Might get back up for an hour or two tomorrow if Marcus is about.
Nick
Another day of messing abooot with zee Golf.
Arrived and was greated with Archie working on the Volksrod:

IMAG0092.jpg by Nicholas R Horne, on Flickr

IMAG0093.jpg by Nicholas R Horne, on Flickr
Chassis leg all trimmed up and ready for the replacement piece:

IMAG0095.jpg by Nicholas R Horne, on Flickr
Replacement piece offered up for sinal trimming:

IMAG0094.jpg by Nicholas R Horne, on Flickr
Wing removed for better access for welding:
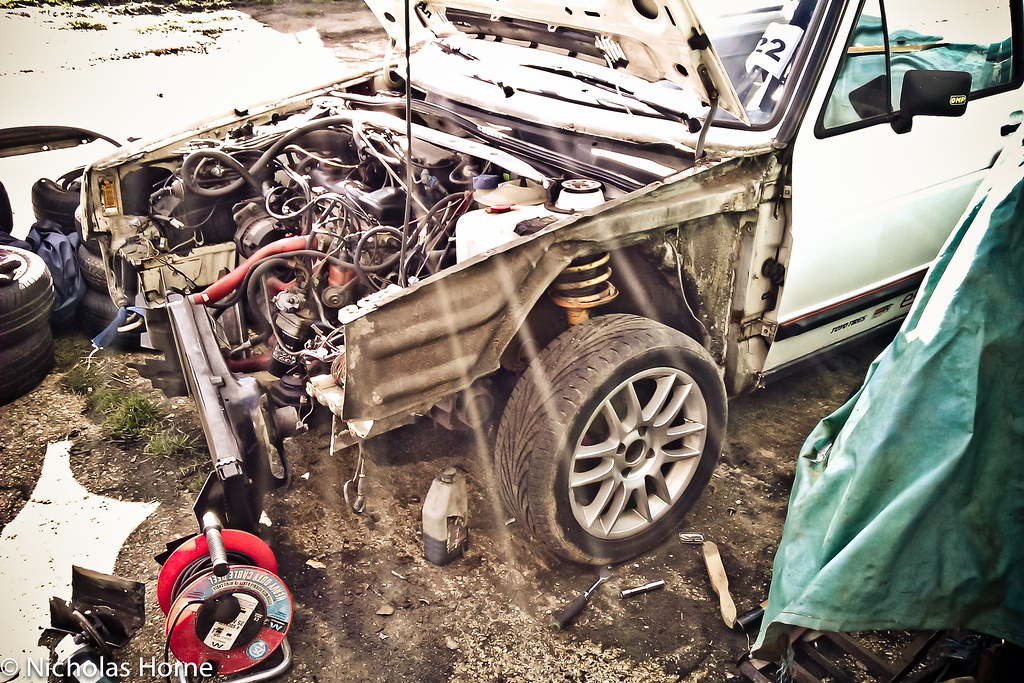
IMAG0097.jpg by Nicholas R Horne, on Flickr

IMAG0096.jpg by Nicholas R Horne, on Flickr
Turns out it's a bit rotten behind the plastic arch but not beyond repair.
Marcus welding in the chassis leg piece:

IMAG0101.jpg by Nicholas R Horne, on Flickr

IMAG0102.jpg by Nicholas R Horne, on Flickr
All done:

IMAG0103.jpg by Nicholas R Horne, on Flickr

IMAG0104.jpg by Nicholas R Horne, on Flickr

IMAG0105.jpg by Nicholas R Horne, on Flickr
I then ground the welds back:

IMAG0106.jpg by Nicholas R Horne, on Flickr

IMAG0107.jpg by Nicholas R Horne, on Flickr
Then rattle canned with some High Temp Paint that was knocking about to keep it rust free:

IMAG0109.jpg by Nicholas R Horne, on Flickr

IMAG0110.jpg by Nicholas R Horne, on Flickr

IMAG0111.jpg by Nicholas R Horne, on Flickr
Took the flap wheel to the bubbling on the door:

IMAG0098.jpg by Nicholas R Horne, on Flickr

IMAG0099.jpg by Nicholas R Horne, on Flickr
Worse than I thought but savable so the doors will be coming off next weekend so I can chop out the grot and Marcus can weld in some fresh metal when he has some spare time (of which he has little!).
All tidied up until next weekend:

IMAG0112.jpg by Nicholas R Horne, on Flickr
Nick
Arrived and was greated with Archie working on the Volksrod:
IMAG0092.jpg by Nicholas R Horne, on Flickr
IMAG0093.jpg by Nicholas R Horne, on Flickr
Chassis leg all trimmed up and ready for the replacement piece:
IMAG0095.jpg by Nicholas R Horne, on Flickr
Replacement piece offered up for sinal trimming:
IMAG0094.jpg by Nicholas R Horne, on Flickr
Wing removed for better access for welding:
IMAG0097.jpg by Nicholas R Horne, on Flickr
IMAG0096.jpg by Nicholas R Horne, on Flickr
Turns out it's a bit rotten behind the plastic arch but not beyond repair.
Marcus welding in the chassis leg piece:
IMAG0101.jpg by Nicholas R Horne, on Flickr
IMAG0102.jpg by Nicholas R Horne, on Flickr
All done:
IMAG0103.jpg by Nicholas R Horne, on Flickr
IMAG0104.jpg by Nicholas R Horne, on Flickr
IMAG0105.jpg by Nicholas R Horne, on Flickr
I then ground the welds back:
IMAG0106.jpg by Nicholas R Horne, on Flickr
IMAG0107.jpg by Nicholas R Horne, on Flickr
Then rattle canned with some High Temp Paint that was knocking about to keep it rust free:
IMAG0109.jpg by Nicholas R Horne, on Flickr
IMAG0110.jpg by Nicholas R Horne, on Flickr
IMAG0111.jpg by Nicholas R Horne, on Flickr
Took the flap wheel to the bubbling on the door:
IMAG0098.jpg by Nicholas R Horne, on Flickr
IMAG0099.jpg by Nicholas R Horne, on Flickr
Worse than I thought but savable so the doors will be coming off next weekend so I can chop out the grot and Marcus can weld in some fresh metal when he has some spare time (of which he has little!).
All tidied up until next weekend:
IMAG0112.jpg by Nicholas R Horne, on Flickr
Nick
A good day on the car today.
Bonnet, drivers door and wing off, polycarb windows removed:

IMAG0113.jpg by Nicholas R Horne, on Flickr

IMAG0114.jpg by Nicholas R Horne, on Flickr
Some panels:

IMAG0115.jpg by Nicholas R Horne, on Flickr
Windscreen out and the grot was a little worse than I thought but nothing tha can't be easily sorted:

IMAG0116.jpg by Nicholas R Horne, on Flickr
More panels off:

IMAG0120.jpg by Nicholas R Horne, on Flickr
Bumper and lights removed:

IMAG0122.jpg by Nicholas R Horne, on Flickr

IMAG0123.jpg by Nicholas R Horne, on Flickr

IMAG0124.jpg by Nicholas R Horne, on Flickr
Front cross member reffited:

IMAG0125.jpg by Nicholas R Horne, on Flickr
If I put the battery back in it would still drive like this. Quite tempting! :grin:
All tucked up for the night:

IMAG0126.jpg by Nicholas R Horne, on Flickr

IMAG0127.jpg by Nicholas R Horne, on Flickr
Tomorrow will be some grinder action!
Nick
Bonnet, drivers door and wing off, polycarb windows removed:
IMAG0113.jpg by Nicholas R Horne, on Flickr
IMAG0114.jpg by Nicholas R Horne, on Flickr
Some panels:
IMAG0115.jpg by Nicholas R Horne, on Flickr
Windscreen out and the grot was a little worse than I thought but nothing tha can't be easily sorted:
IMAG0116.jpg by Nicholas R Horne, on Flickr
More panels off:
IMAG0120.jpg by Nicholas R Horne, on Flickr
Bumper and lights removed:
IMAG0122.jpg by Nicholas R Horne, on Flickr
IMAG0123.jpg by Nicholas R Horne, on Flickr
IMAG0124.jpg by Nicholas R Horne, on Flickr
Front cross member reffited:
IMAG0125.jpg by Nicholas R Horne, on Flickr
If I put the battery back in it would still drive like this. Quite tempting! :grin:
All tucked up for the night:
IMAG0126.jpg by Nicholas R Horne, on Flickr
IMAG0127.jpg by Nicholas R Horne, on Flickr
Tomorrow will be some grinder action!
Nick
Another day, another load of pics:
Chopped out the rotten bit of scuttle panel:

IMAG0128.jpg by Nicholas R Horne, on Flickr

IMAG0129.jpg by Nicholas R Horne, on Flickr
Drivers side rear window surround also has a bit of grot:

IMAG0130.jpg by Nicholas R Horne, on Flickr

IMAG0131.jpg by Nicholas R Horne, on Flickr
Then started wire wheeling the back panel to see what was lurking under the paint and filler from when it has been replaced in the past:

IMAG0133.jpg by Nicholas R Horne, on Flickr

IMAG0137.jpg by Nicholas R Horne, on Flickr

IMAG0138.jpg by Nicholas R Horne, on Flickr

IMAG0140.jpg by Nicholas R Horne, on Flickr

IMAG0141.jpg by Nicholas R Horne, on Flickr
Also attacked the inner rear wheel arch with the wire wheel and rust inspecting hammer. Another hole to weld up!

IMAG0135.jpg by Nicholas R Horne, on Flickr
That's it for this week. Roll on next weekend and more grinding, cutting and wire wheeling.
Nick
Chopped out the rotten bit of scuttle panel:
IMAG0128.jpg by Nicholas R Horne, on Flickr
IMAG0129.jpg by Nicholas R Horne, on Flickr
Drivers side rear window surround also has a bit of grot:
IMAG0130.jpg by Nicholas R Horne, on Flickr
IMAG0131.jpg by Nicholas R Horne, on Flickr
Then started wire wheeling the back panel to see what was lurking under the paint and filler from when it has been replaced in the past:
IMAG0133.jpg by Nicholas R Horne, on Flickr
IMAG0137.jpg by Nicholas R Horne, on Flickr
IMAG0138.jpg by Nicholas R Horne, on Flickr
IMAG0140.jpg by Nicholas R Horne, on Flickr
IMAG0141.jpg by Nicholas R Horne, on Flickr
Also attacked the inner rear wheel arch with the wire wheel and rust inspecting hammer. Another hole to weld up!
IMAG0135.jpg by Nicholas R Horne, on Flickr
That's it for this week. Roll on next weekend and more grinding, cutting and wire wheeling.
Nick
3 hours battling the sunroof today and it's all out!

IMAG0149.jpg by Nicholas R Horne, on Flickr

IMAG0150.jpg by Nicholas R Horne, on Flickr
Then set about the rear seat base:

IMAG0151.jpg by Nicholas R Horne, on Flickr
Then trial fitted the cage:

IMAG0155.jpg by Nicholas R Horne, on Flickr

IMAG0156.jpg by Nicholas R Horne, on Flickr

IMAG0157.jpg by Nicholas R Horne, on Flickr

IMAG0159.jpg by Nicholas R Horne, on Flickr

IMAG0160.jpg by Nicholas R Horne, on Flickr
As can be see there is quite a bit of rust up in the roof, need to tackle that once the cage mounts are all fab'd up and prep for the paint begins. Tomorrow need to cut out all the seat rails and tidy up all the other stuff I trimmed out today.
Nick
IMAG0149.jpg by Nicholas R Horne, on Flickr
IMAG0150.jpg by Nicholas R Horne, on Flickr
Then set about the rear seat base:
IMAG0151.jpg by Nicholas R Horne, on Flickr
Then trial fitted the cage:
IMAG0155.jpg by Nicholas R Horne, on Flickr
IMAG0156.jpg by Nicholas R Horne, on Flickr
IMAG0157.jpg by Nicholas R Horne, on Flickr
IMAG0159.jpg by Nicholas R Horne, on Flickr
IMAG0160.jpg by Nicholas R Horne, on Flickr
As can be see there is quite a bit of rust up in the roof, need to tackle that once the cage mounts are all fab'd up and prep for the paint begins. Tomorrow need to cut out all the seat rails and tidy up all the other stuff I trimmed out today.
Nick
Another day, more gringer work.
Trimmed back and tidied up all the brackets I cut off yesterday:

IMAG0168.jpg by Nicholas R Horne, on Flickr

IMAG0169.jpg by Nicholas R Horne, on Flickr

IMAG0170.jpg by Nicholas R Horne, on Flickr

IMAG0171.jpg by Nicholas R Horne, on Flickr
Also hacked the one of the seat rails but didn't get any pics of that.
Finally I removed the back box (Which took an hour, it was proper stuck on!). I'll be cutting the tail pipe off and welding on something a little more in keeping with the car.

IMAG0167.jpg by Nicholas R Horne, on Flickr
That's it for this weekend, off to France @ 5am for work tomorrow but I'll be back on it next weekend. The car is booked in for 26th and 27th for Marcus to fab up and weld in the stands for the cage.
Nick
Trimmed back and tidied up all the brackets I cut off yesterday:
IMAG0168.jpg by Nicholas R Horne, on Flickr
IMAG0169.jpg by Nicholas R Horne, on Flickr
IMAG0170.jpg by Nicholas R Horne, on Flickr
IMAG0171.jpg by Nicholas R Horne, on Flickr
Also hacked the one of the seat rails but didn't get any pics of that.
Finally I removed the back box (Which took an hour, it was proper stuck on!). I'll be cutting the tail pipe off and welding on something a little more in keeping with the car.
IMAG0167.jpg by Nicholas R Horne, on Flickr
That's it for this weekend, off to France @ 5am for work tomorrow but I'll be back on it next weekend. The car is booked in for 26th and 27th for Marcus to fab up and weld in the stands for the cage.
Nick
New exhaust tip welded on:

IMAG0184.jpg by Nicholas R Horne, on Flickr

IMAG0185.jpg by Nicholas R Horne, on Flickr
and refitted to the car:

IMAG0186.jpg by Nicholas R Horne, on Flickr

IMAG0187.jpg by Nicholas R Horne, on Flickr
I got it on a bit further after the photos and it needs a bit more adjustment but over all well chuffed, much less chavtastic than the old one.
Nick
IMAG0184.jpg by Nicholas R Horne, on Flickr
IMAG0185.jpg by Nicholas R Horne, on Flickr
and refitted to the car:
IMAG0186.jpg by Nicholas R Horne, on Flickr
IMAG0187.jpg by Nicholas R Horne, on Flickr
I got it on a bit further after the photos and it needs a bit more adjustment but over all well chuffed, much less chavtastic than the old one.
Nick
Roll cage fitting started yesterday.

IMG_4118.jpg by Nicholas R Horne, on Flickr
Correct PPE :grin:

IMG_4114.jpg by Nicholas R Horne, on Flickr
First job was to get the mounting plates supplied with cage 'adjusted' to fit the car. These are the rear pair that sit behind where the seats will go:

IMG_4116.jpg by Nicholas R Horne, on Flickr

IMG_4117.jpg by Nicholas R Horne, on Flickr
Marcus in the process of above mentioned adjustment:

IMG_4127.jpg by Nicholas R Horne, on Flickr

IMG_4129.jpg by Nicholas R Horne, on Flickr
It was decided that the floor of the golf was a bit flimsy and some extra load spreading can never be a bad thing right? Plates added to the floor where the rear platforms will be welded:

IMG_4136.jpg by Nicholas R Horne, on Flickr

IMG_4138.jpg by Nicholas R Horne, on Flickr
McLaren F1 seating arrangement?

IMG_4139.jpg by Nicholas R Horne, on Flickr
:grin:
It was at this point we had a small fire. I thought the fuel lines ran down the middle of the car, they don't, the melted, we needed a fire extinguisher.
Here's Darren modelling said fire extinguisher. He's quite big and it's quite small.

IMG_4140.jpg by Nicholas R Horne, on Flickr
Platforms tacked in for trial fitting of the rear cage section:

IMG_4147.jpg by Nicholas R Horne, on Flickr
Houstan we have a problem, it's just a little too tight at the top:
IMG_4147.jpg by Nicholas R Horne, on Flickr

IMG_4154.jpg by Nicholas R Horne, on Flickr
Today we'll take a few mm off the platforms to bring the cage down and then it should fit nice and snug. Then it's on the rear wheel arch mounting and the front leg mounting.
Nick
IMG_4118.jpg by Nicholas R Horne, on Flickr
Correct PPE :grin:
IMG_4114.jpg by Nicholas R Horne, on Flickr
First job was to get the mounting plates supplied with cage 'adjusted' to fit the car. These are the rear pair that sit behind where the seats will go:
IMG_4116.jpg by Nicholas R Horne, on Flickr
IMG_4117.jpg by Nicholas R Horne, on Flickr
Marcus in the process of above mentioned adjustment:
IMG_4127.jpg by Nicholas R Horne, on Flickr
IMG_4129.jpg by Nicholas R Horne, on Flickr
It was decided that the floor of the golf was a bit flimsy and some extra load spreading can never be a bad thing right? Plates added to the floor where the rear platforms will be welded:
IMG_4136.jpg by Nicholas R Horne, on Flickr
IMG_4138.jpg by Nicholas R Horne, on Flickr
McLaren F1 seating arrangement?
IMG_4139.jpg by Nicholas R Horne, on Flickr
:grin:
It was at this point we had a small fire. I thought the fuel lines ran down the middle of the car, they don't, the melted, we needed a fire extinguisher.
Here's Darren modelling said fire extinguisher. He's quite big and it's quite small.
IMG_4140.jpg by Nicholas R Horne, on Flickr
Platforms tacked in for trial fitting of the rear cage section:
IMG_4147.jpg by Nicholas R Horne, on Flickr
Houstan we have a problem, it's just a little too tight at the top:
IMG_4147.jpg by Nicholas R Horne, on Flickr
IMG_4154.jpg by Nicholas R Horne, on Flickr
Today we'll take a few mm off the platforms to bring the cage down and then it should fit nice and snug. Then it's on the rear wheel arch mounting and the front leg mounting.
Nick

Got a bit out of order with this lot.
So, Dropped the platforms down 5mm and he cage now fits properly:

IMG_4235.jpg by Nicholas R Horne, on Flickr

IMG_4236.jpg by Nicholas R Horne, on Flickr

IMG_4237.jpg by Nicholas R Horne, on Flickr
New seats and side mounts arrived:

IMAG0201 by Nicholas R Horne, on Flickr
Trial fitted in the car and as can be seen the cross member had to go as it was in the way to getting the seat far enough forward:

IMAG0202.jpg by Nicholas R Horne, on Flickr

IMAG0203.jpg by Nicholas R Horne, on Flickr

IMAG0204.jpg by Nicholas R Horne, on Flickr
Seat now fits far enough forward:

IMAG0206.jpg by Nicholas R Horne, on Flickr

IMAG0210.jpg by Nicholas R Horne, on Flickr

IMAG0212.jpg by Nicholas R Horne, on Flickr

IMAG0213.jpg by Nicholas R Horne, on Flickr
While I was messing about with the flap wheel grinding back the cross member I buzzed back the rust on the roof:

IMAG0214.jpg by Nicholas R Horne, on Flickr
I also got the wire wheel out on the sealant that was holding the rear arch plastics on:

IMAG0216.jpg by Nicholas R Horne, on Flickr

IMAG0217.jpg by Nicholas R Horne, on Flickr

IMAG0219.jpg by Nicholas R Horne, on Flickr

IMAG0220.jpg by Nicholas R Horne, on Flickr
Then we messed about putting the front half the cage in and seeing what the door bars looked like:

IMAG0221.jpg by Nicholas R Horne, on Flickr

IMAG0222.jpg by Nicholas R Horne, on Flickr

IMAG0223.jpg by Nicholas R Horne, on Flickr

IMAG0224.jpg by Nicholas R Horne, on Flickr
Finally today I cleaned up where the cross member was and seam sealed it all to stop moisture getting in where it was removed. I also removed the remnants of the seat rails:

IMAG0244.jpg by Nicholas R Horne, on Flickr

IMAG0246.jpg by Nicholas R Horne, on Flickr
and another pic of my zorst, because I love it!

IMAG0253.jpg by Nicholas R Horne, on Flickr
That's all for this weekend as I'm out tomorrow for my Dad's birthday.
Nick
So, Dropped the platforms down 5mm and he cage now fits properly:
IMG_4235.jpg by Nicholas R Horne, on Flickr
IMG_4236.jpg by Nicholas R Horne, on Flickr
IMG_4237.jpg by Nicholas R Horne, on Flickr
New seats and side mounts arrived:
IMAG0201 by Nicholas R Horne, on Flickr
Trial fitted in the car and as can be seen the cross member had to go as it was in the way to getting the seat far enough forward:
IMAG0202.jpg by Nicholas R Horne, on Flickr
IMAG0203.jpg by Nicholas R Horne, on Flickr
IMAG0204.jpg by Nicholas R Horne, on Flickr
Seat now fits far enough forward:
IMAG0206.jpg by Nicholas R Horne, on Flickr
IMAG0210.jpg by Nicholas R Horne, on Flickr
IMAG0212.jpg by Nicholas R Horne, on Flickr
IMAG0213.jpg by Nicholas R Horne, on Flickr
While I was messing about with the flap wheel grinding back the cross member I buzzed back the rust on the roof:
IMAG0214.jpg by Nicholas R Horne, on Flickr
I also got the wire wheel out on the sealant that was holding the rear arch plastics on:
IMAG0216.jpg by Nicholas R Horne, on Flickr
IMAG0217.jpg by Nicholas R Horne, on Flickr
IMAG0219.jpg by Nicholas R Horne, on Flickr
IMAG0220.jpg by Nicholas R Horne, on Flickr
Then we messed about putting the front half the cage in and seeing what the door bars looked like:
IMAG0221.jpg by Nicholas R Horne, on Flickr
IMAG0222.jpg by Nicholas R Horne, on Flickr
IMAG0223.jpg by Nicholas R Horne, on Flickr
IMAG0224.jpg by Nicholas R Horne, on Flickr
Finally today I cleaned up where the cross member was and seam sealed it all to stop moisture getting in where it was removed. I also removed the remnants of the seat rails:
IMAG0244.jpg by Nicholas R Horne, on Flickr
IMAG0246.jpg by Nicholas R Horne, on Flickr
and another pic of my zorst, because I love it!
IMAG0253.jpg by Nicholas R Horne, on Flickr
That's all for this weekend as I'm out tomorrow for my Dad's birthday.
Nick
Picked up the keys and blipper for the entrance gate for my council garage this morning and thought it would be rude nto to swing by and get a couple of snaps before heading to work. THis is where the Golf will be living once it's finished.

IMAG0255 by Nicholas R Horne, on Flickr

IMAG0256 by Nicholas R Horne, on Flickr
It's underground and secure which is a result.
Nick
IMAG0255 by Nicholas R Horne, on Flickr
IMAG0256 by Nicholas R Horne, on Flickr
It's underground and secure which is a result.
Nick

Gassing Station | Readers' Cars | Top of Page | What's New | My Stuff