
Nissan S15 Build
Discussion


Hi! I'm a long term reader, but I've never posted for some reason! Here is my S15 build, it's copied and pasted from other forums, but hopefully should read alright haha!
So after many years of Japanese car ownership I’ve finally saved up enough for an S15!
After many months searching I finally found one I really liked with a massive spec list! After viewing the car a deal was made and a couple weeks later I collected the car with my friend Jamie.
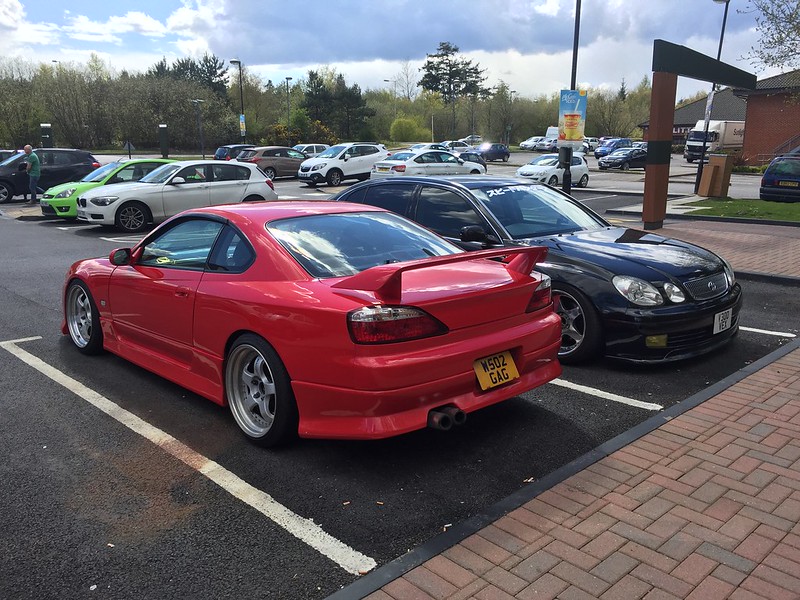 IMG_0252 by Josh Jennings, on Flickr
I was extremely happy with it however after driving it home something didn’t feel quite right with the suspension and it needed to be raised as the roads on the Isle of Wight are shocking. During adjusting the suspension all the pre loads on each corner were different and the camber adjustment on the front left was completely loose and the right side wasn’t done up that tight either! With the suspension sorted it was now looking like this!
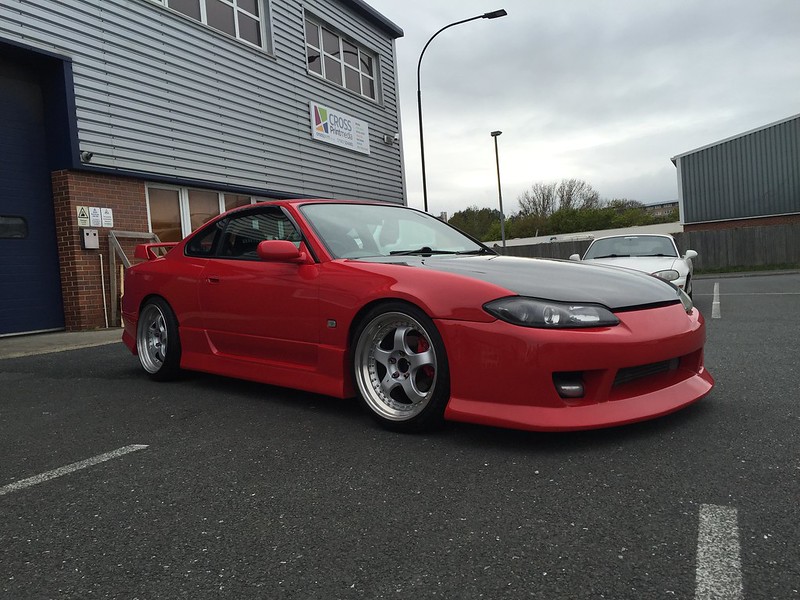 IMG_0265 by Josh Jennings, on Flickr
I’m not a fan of stretched tyres so while the suspension was being adjusted my friend and I worked out the tyre size and spacing that would allow them to fit correctly. I noticed the rear wheel studs had been cut in order to fit 20mm spacers so I decided to order ARP extended wheel studs to allow correct fitment of the wheels.
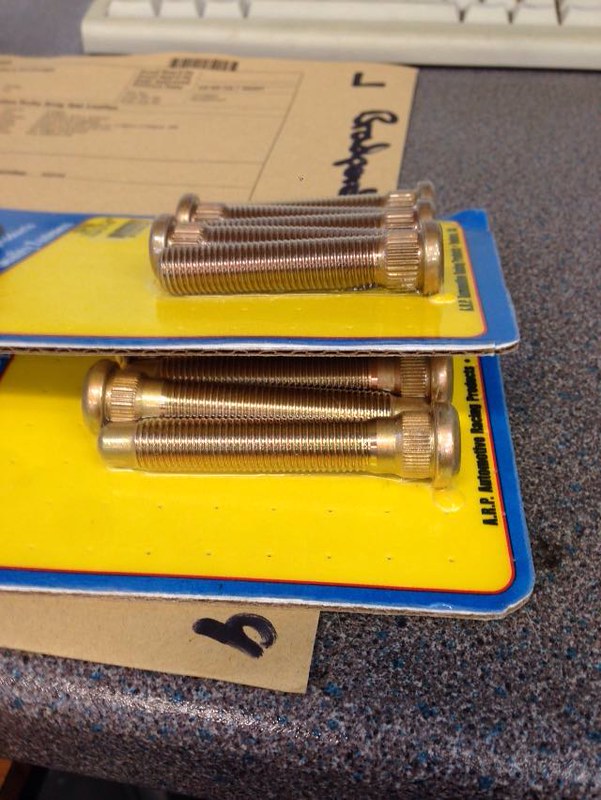 IMG_0327 by Josh Jennings, on Flickr
The 235 front tyres and 255 rear tyres were ordered as well.
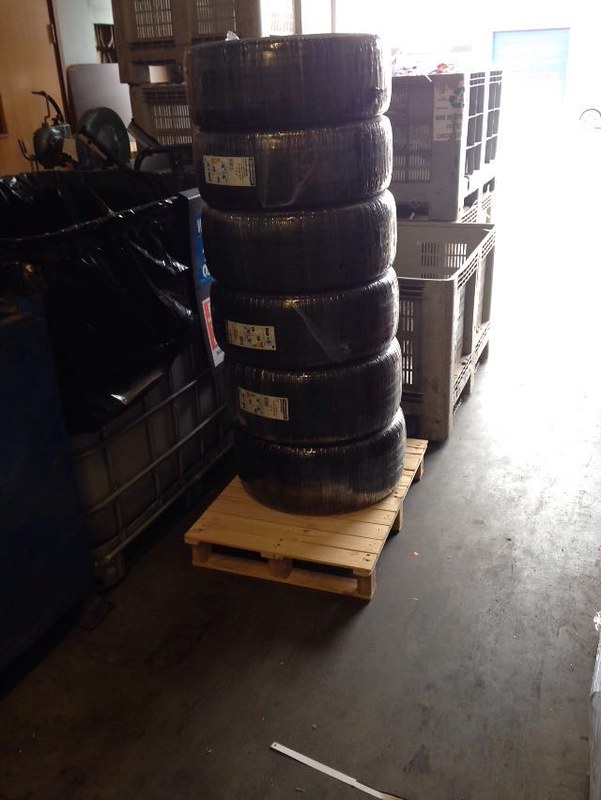 IMG_0398 by Josh Jennings, on Flickr
So what turned from wet sanding the headlights turned into this… haha! All the headlight wiring was shortened and re-routed.
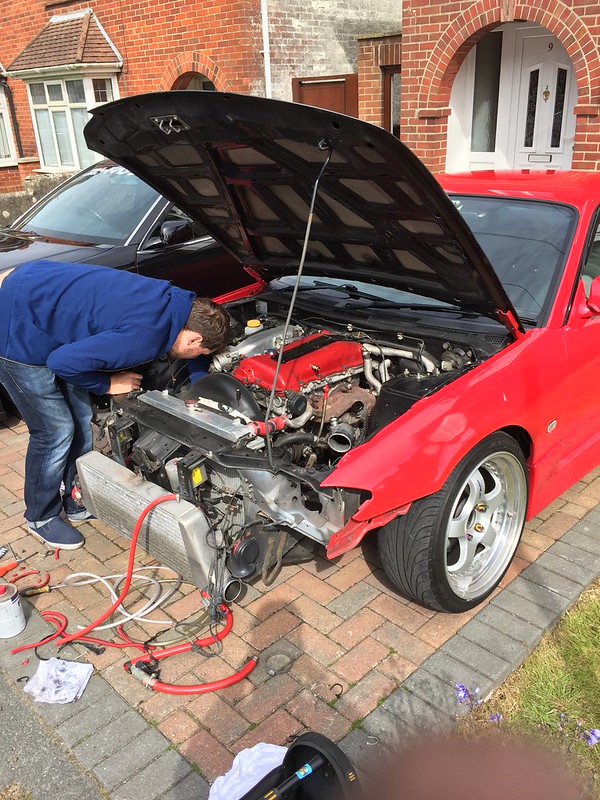 IMG_0604 by Josh Jennings, on Flickr
The intercooler piping was removed and checked over and given a quick polish. Also worked out what silicone hoses were needed, I’m not a fan of the red ones and some were pretty bodged together so a whole set of black samco ones have been ordered. When putting it back together I made sure to tighten the hose clamps down properly as they certainly weren’t done up much when I was pulling it apart!
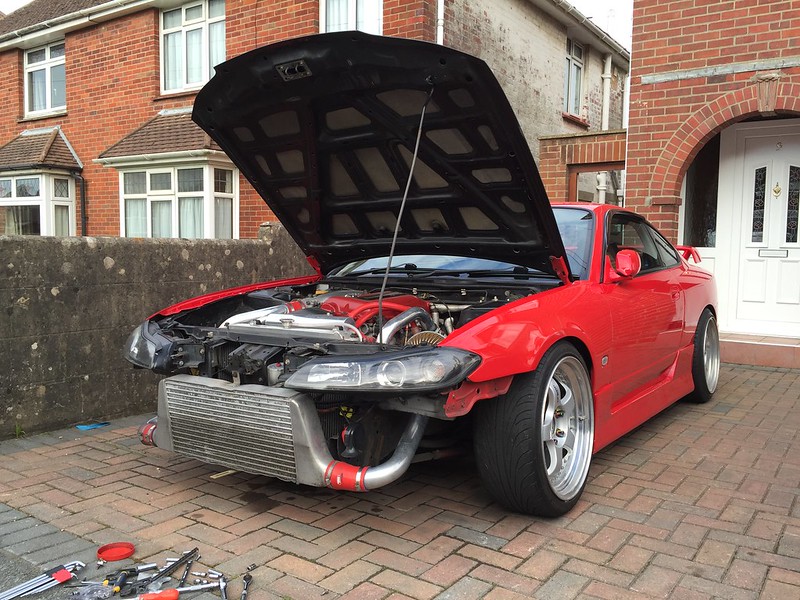 IMG_0847 by Josh Jennings, on Flickr
The wet sanded headlights look a lot better!
As sad as it sounds I had collected a few stickers to put on so they were put on… haha!
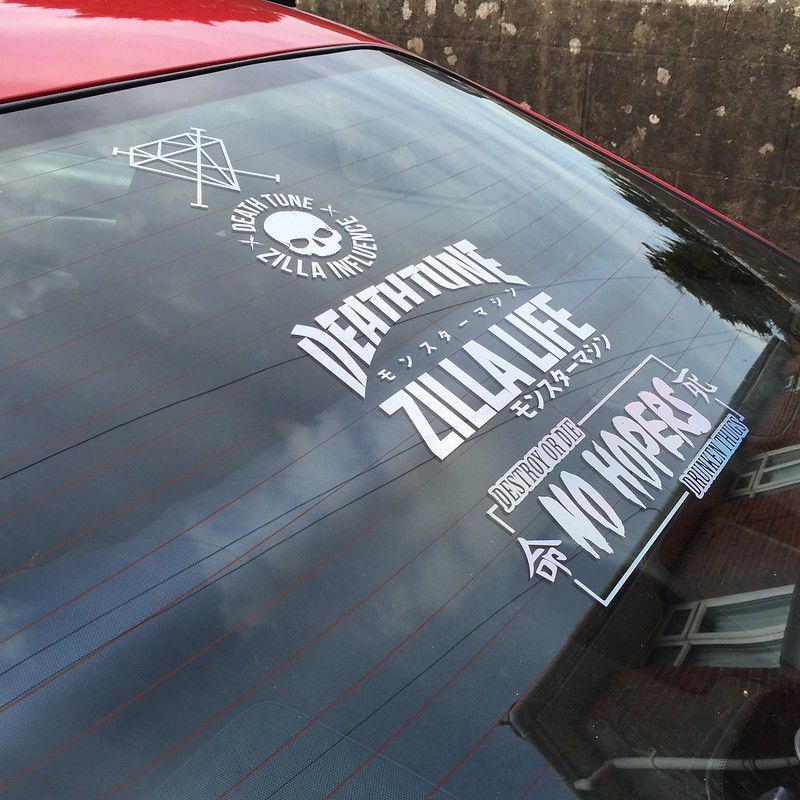 IMG_0673 by Josh Jennings, on Flickr
I then set about fitting the extended studs on all 4 corners. When fitting these I also got the Hardrace rear camber and toe arms fitted.
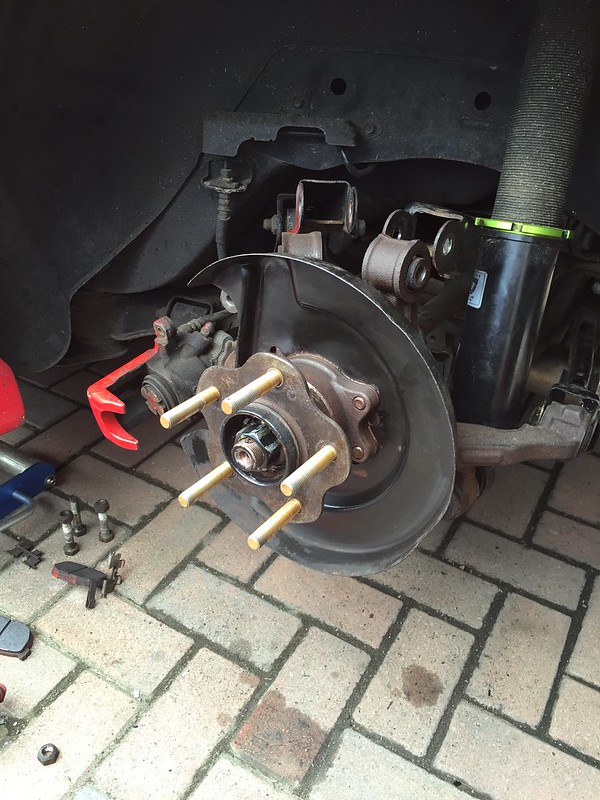 IMG_0859 by Josh Jennings, on Flickr
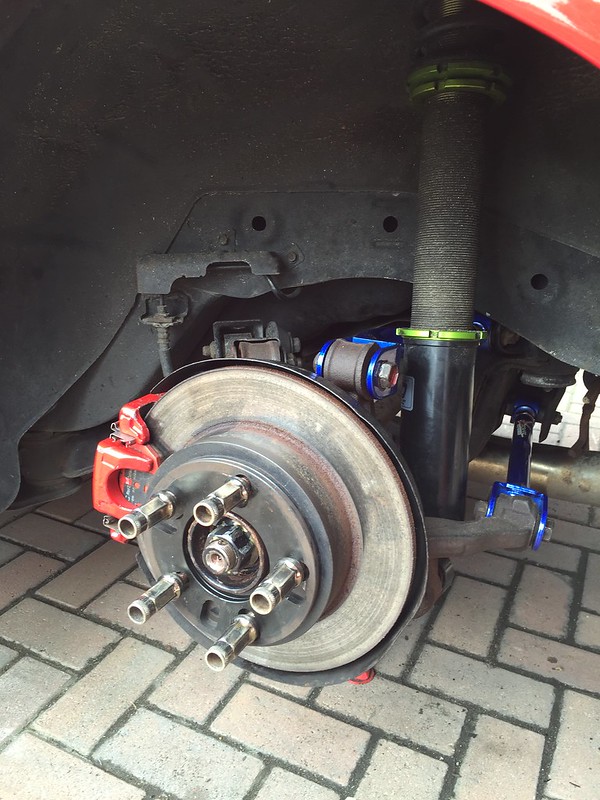 IMG_0860 by Josh Jennings, on Flickr
The tyres were then put onto the wheels. Safe to say I’m a lot happier with the spacing and look of the wheels now!
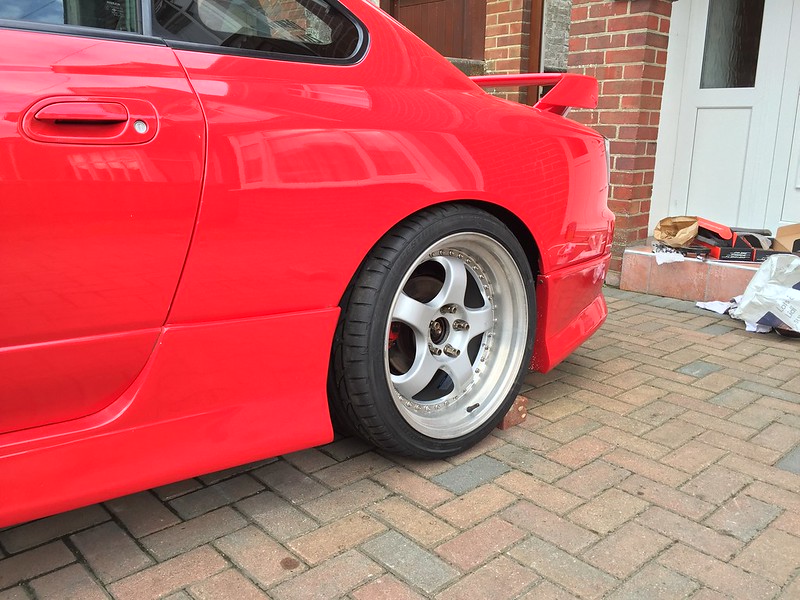 IMG_0865 by Josh Jennings, on Flickr
I then took the 15 to the Goodwood Super Car Breakfast meet. Found Seen Through Glass’s car so thought it would be rude not to get a photo together with it haha!
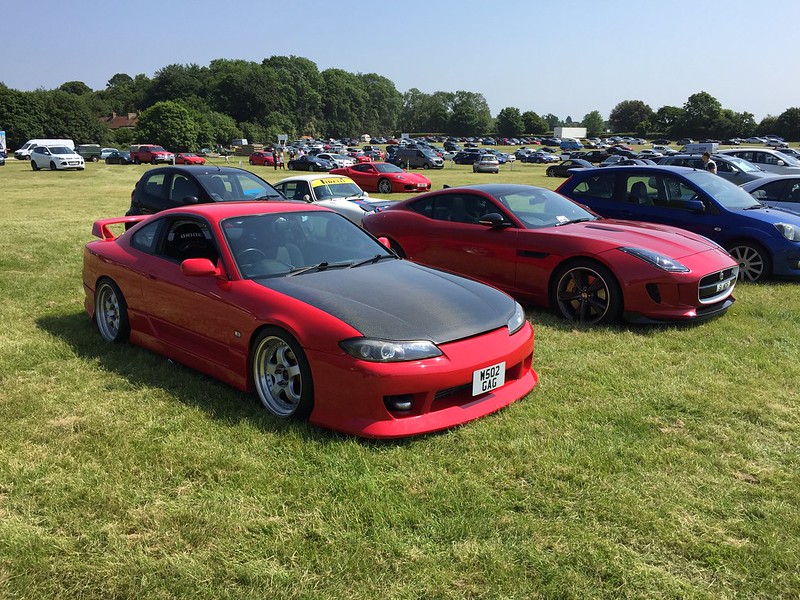 IMG_0897 by Josh Jennings, on Flickr
When I was driving back to the Isle from the meet I noticed a slight exhaust leak. After driving for a couple of more short journeys to see the misses it soon turned into a major exhaust leak from the mani to the turbo!
I set about stripping it down. When undoing the bolts to the mani etc. I found that all of them weren’t done up nearly tight enough! My friend came round to help me pull the mani and turbo out while I was undoing the final bolts underneath, he pulled the mani expecting the turbo to come with it… just the manifold came away! The nuts had worked themselves loose and weren’t even present anymore!
With it all out I was left with this!
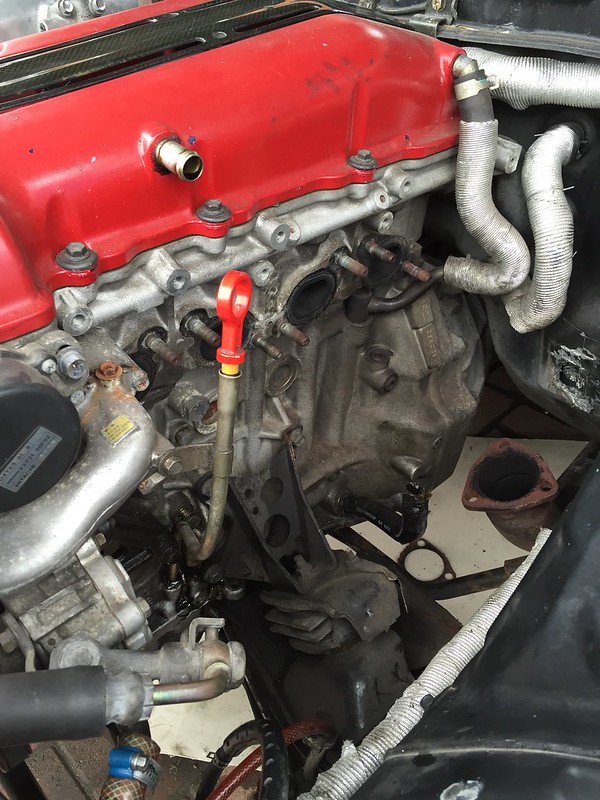 IMG_0980 by Josh Jennings, on Flickr
I decided to give the turbo a good looking over and clean up while it was off, would be rude not to haha!
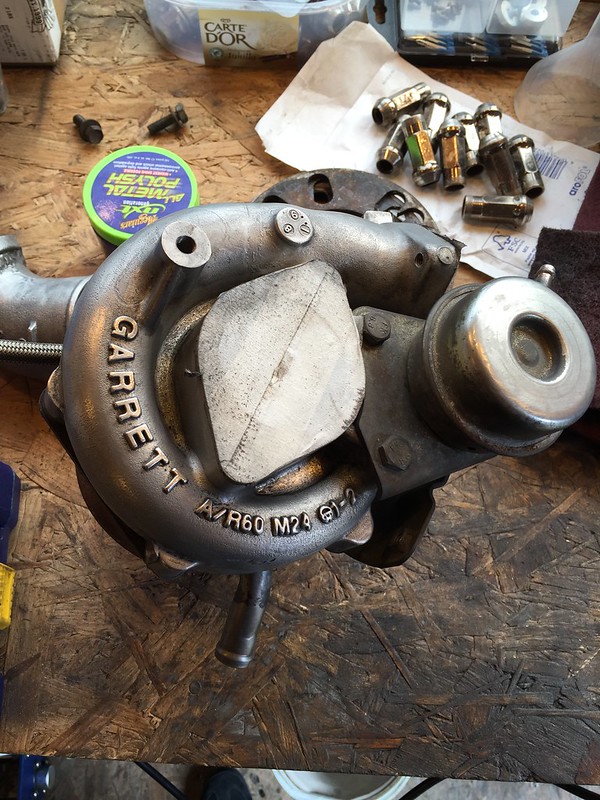 IMG_1012 by Josh Jennings, on Flickr
The previous owner had included a tubular manifold that had cracked. I went round to my good friend Joes and he welded up making sure to beef all the welds up significantly. We also added some bracing from each flange to try and help prevent cracking again. Hopefully this will sort the problem, if not I will just go back to the standard mani. I gave it a quick clean up, not perfect but so much better than it was!
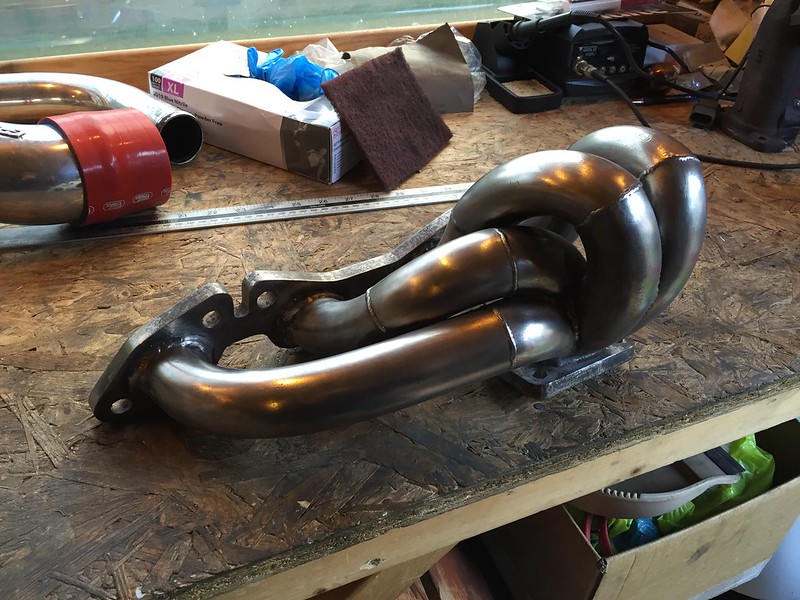 IMG_1029 by Josh Jennings, on Flickr
I’ve got a stainless turbo elbow on order and the downpipe has been taken off the car ready for a clean-up and heat wrapping.
Today my Splitfire coil packs have turned up so they’ll be fitted this eve!
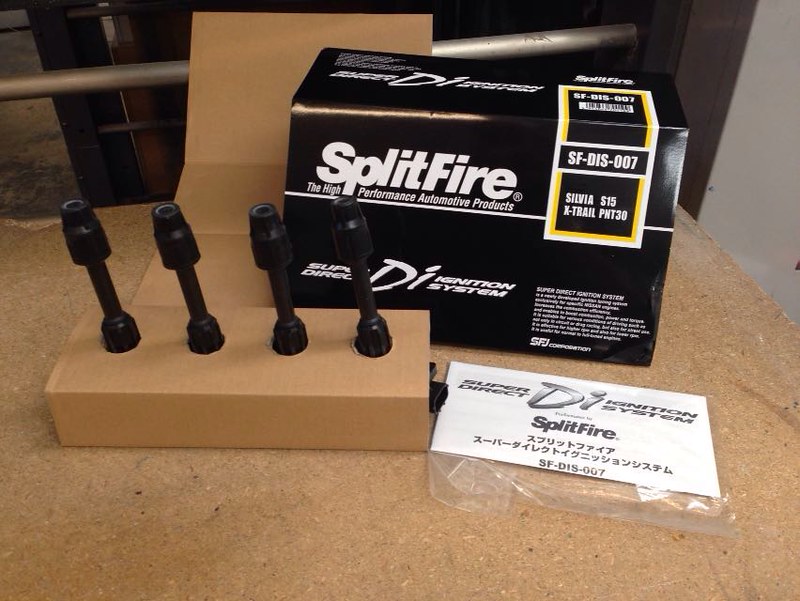 IMG_1044 by Josh Jennings, on Flickr
I’ve got all my servicing fluids on the way as well as booking it in for a 4 wheel alignment in a couple of weeks. Hoping by the time all this is done it should feel like a different car!
Still plenty more work to do, but who likes spare time anyway!
Well I got home from work and noticed that the 15 had been attacked by a load of bird crap haha!
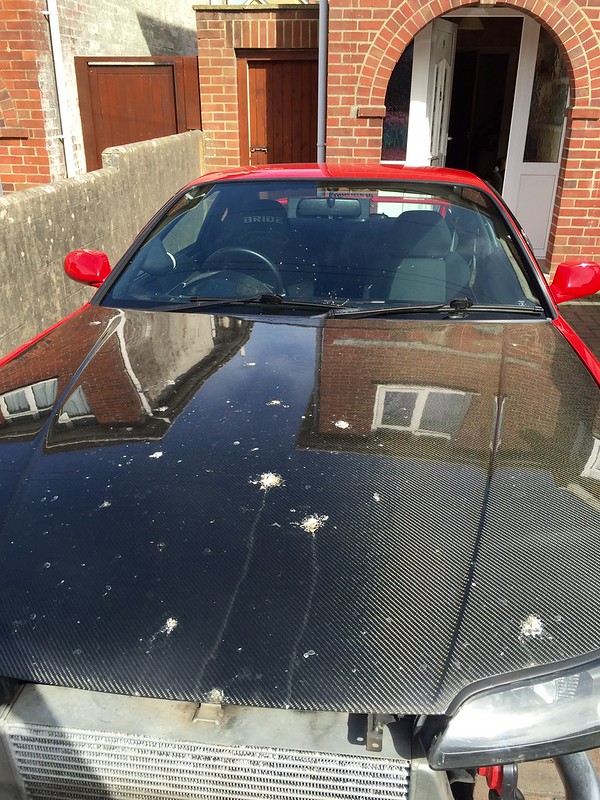 Untitled by Josh Jennings, on Flickr
After I cleaned all that off I did a couple more jobs, the Splitfire coil packs were fitted along with new NGK spark plugs. Then I heat wrapped the downpipe.
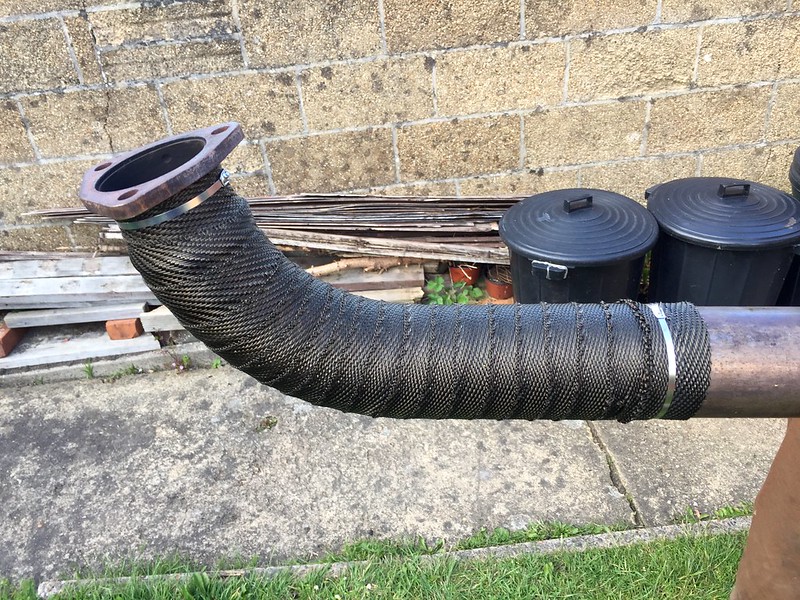 Untitled by Josh Jennings, on Flickr
I may have also done a buy last night… haha! I wasn’t a big fan of the Japspeed Shotgun exhaust on there currently. Had a look on eBay and there was this lovely Kakimoto Regu 06&R Cat Back, should be a bit quieter and look a lot better imo as well!
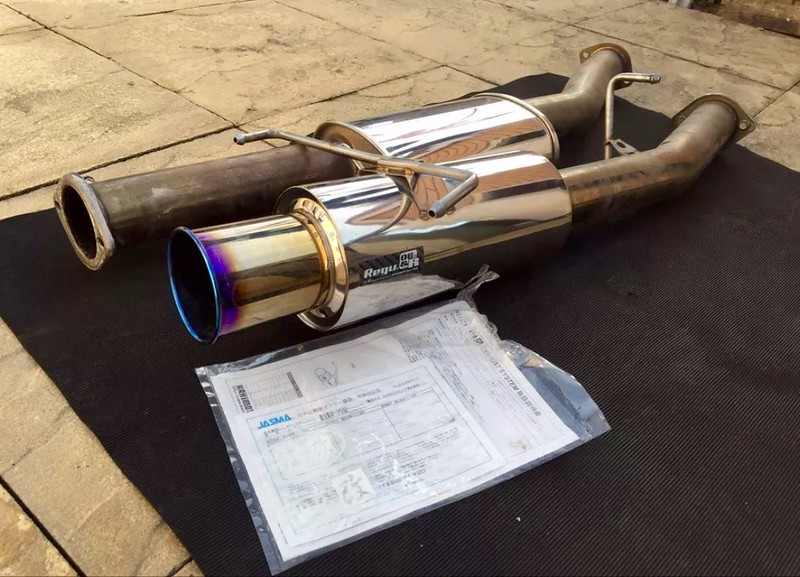 Untitled by Josh Jennings, on Flickr
My new stainless turbo elbow has arrived today, this will be heat wrapped when more arrives through the post!
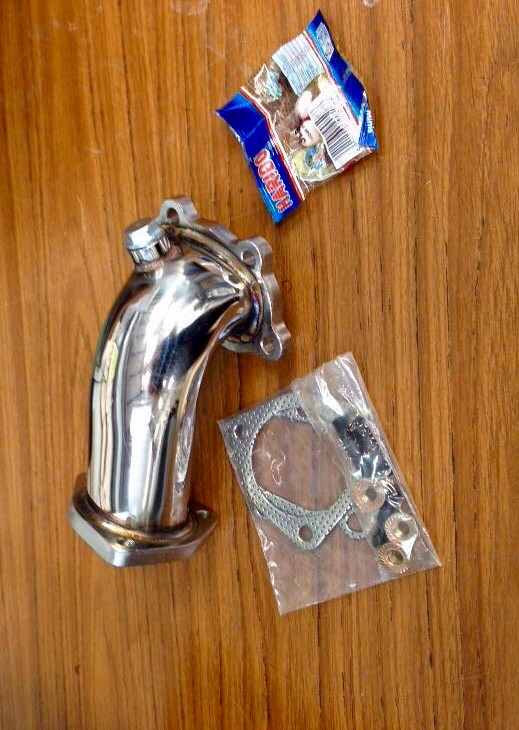 Untitled by Josh Jennings, on Flickr
Slowly coming together!
So last week I had a week off work and may have got a bit carried away with doing some jobs on the S15 haha!
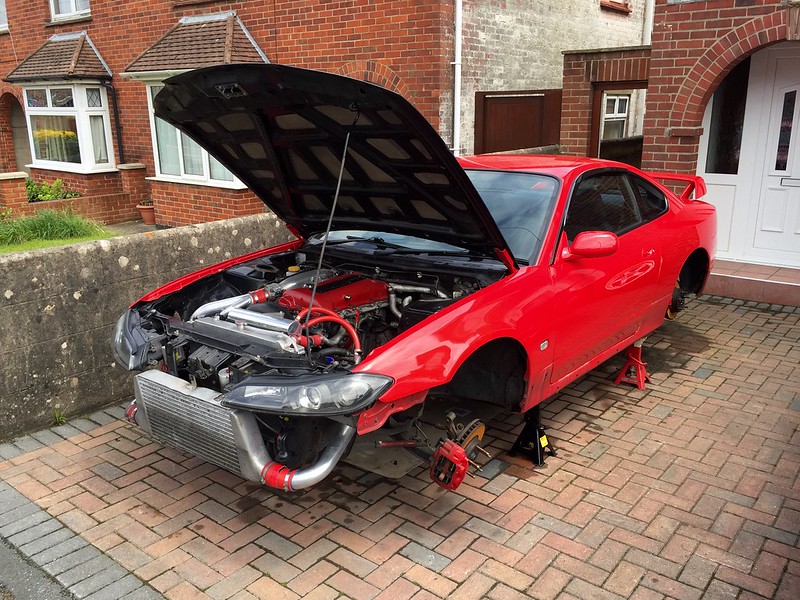 Untitled by Josh Jennings, on Flickr
 Untitled by Josh Jennings, on Flickr
 Untitled by Josh Jennings, on Flickr
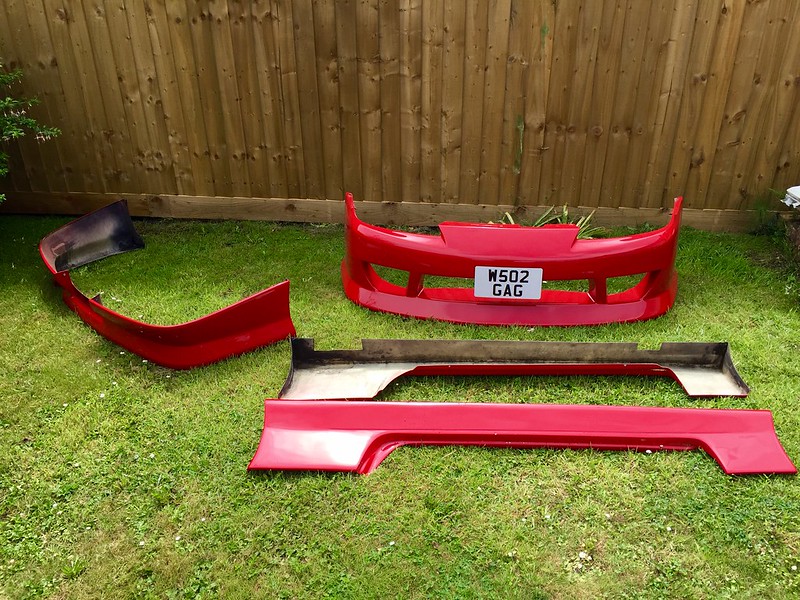
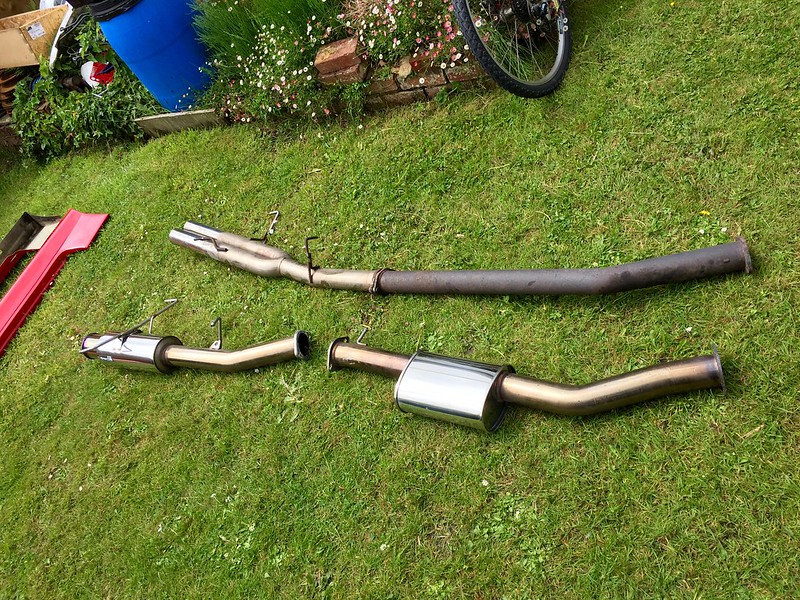
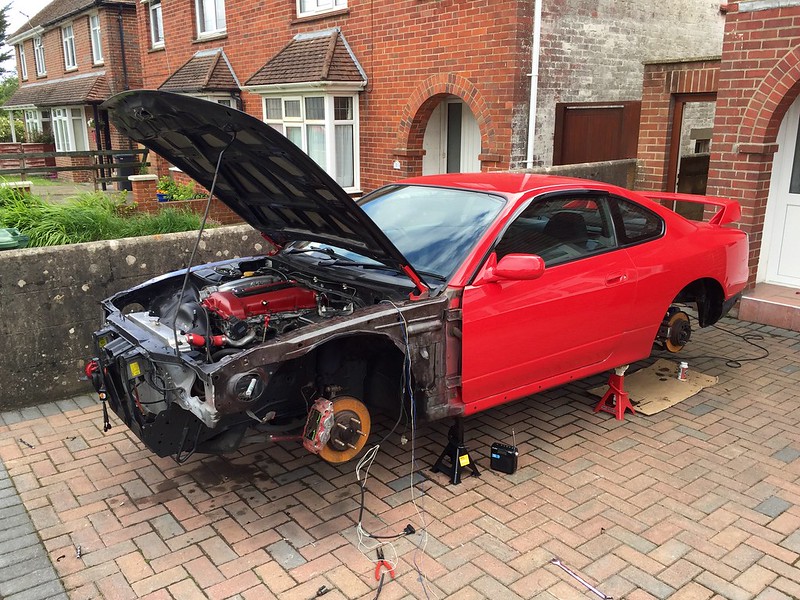
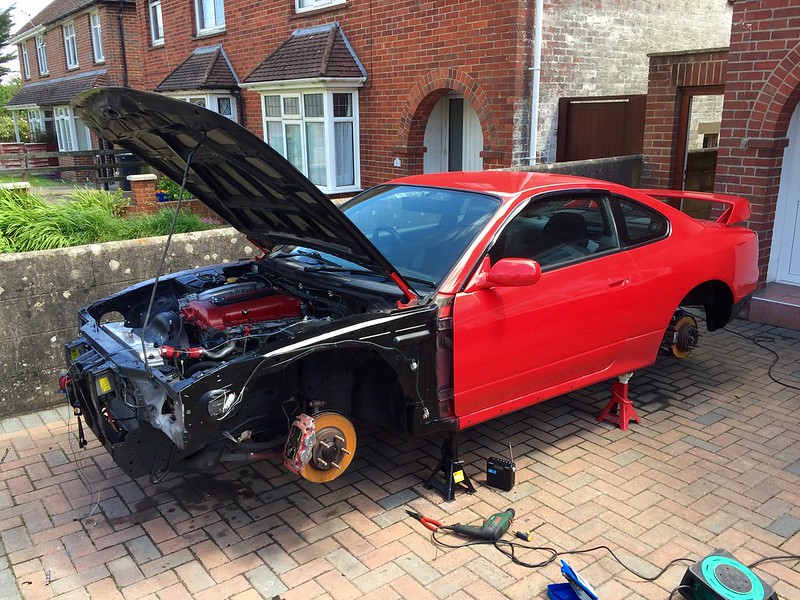
So with the coilovers off, body kit off and exhaust off the chassis was then prepared for protection. All the arches were wire brushed back to bare metal, any rust treated, zinc primer applied and then a nice thick layer of stone chip applied. I then got a bit more carried away and decided to do a wire tuck on the passenger side for now. I will do one on the other side but I want to drive it again soon haha!
 Untitled by Josh Jennings, on Flickr
 Untitled by Josh Jennings, on Flickr
This was the dirt that came out the bottom of the front fenders, it had just been sitting there! It won’t ever be like that again haha!
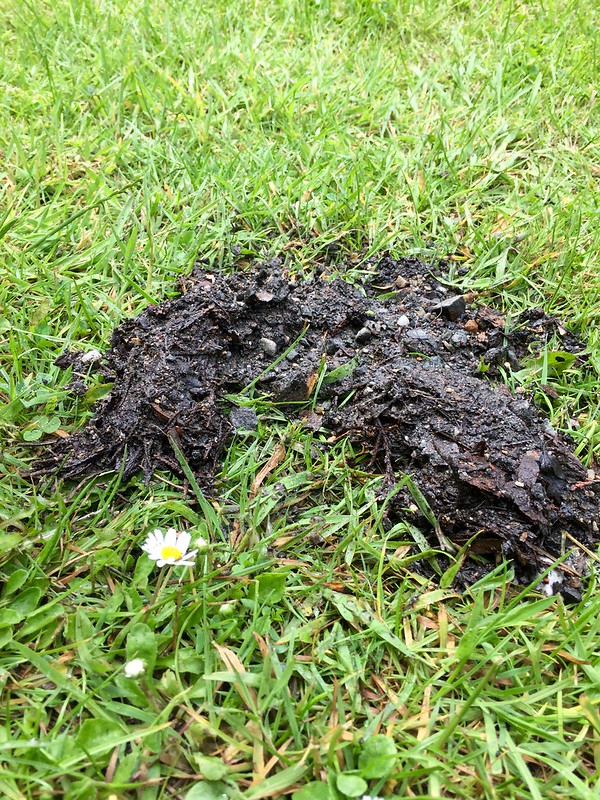 Untitled by Josh Jennings, on Flickr
The same was carried out behind the rear bumper.
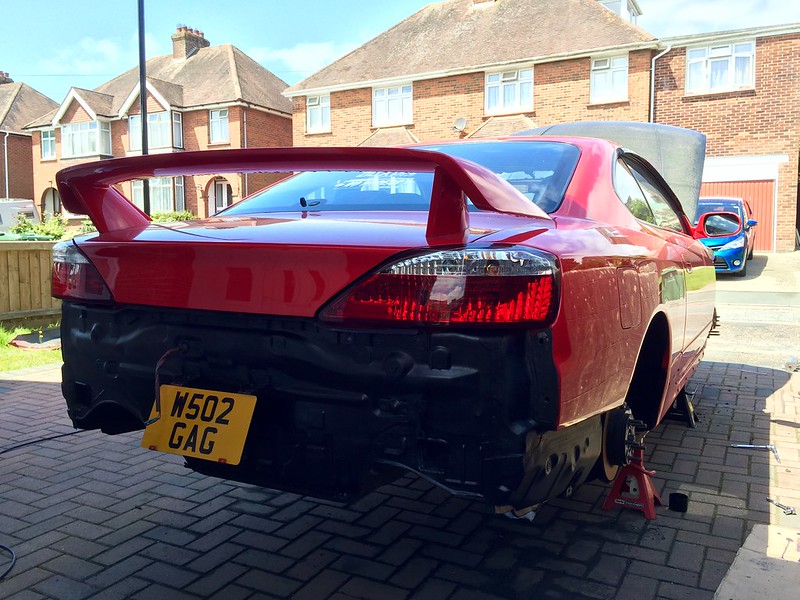 Untitled by Josh Jennings, on Flickr
I then painted the brakes black, I hate red calipers with a passion! I will sand the Nissan back to bare metal once the paint has hardened enough. You can also see the coilover covers I fitted to keep them in mint condition.
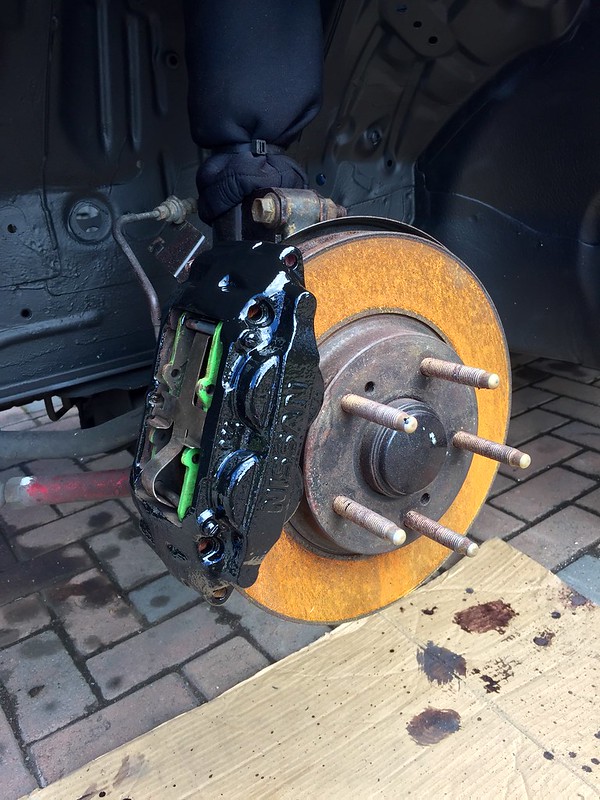 Untitled by Josh Jennings, on Flickr
I then fitted my exhaust to keep moral up haha! Much happier with this, still yet to find out how it will sound! It needs modifying to sit further out once the bumper and rear lip is on, this will happen in time.
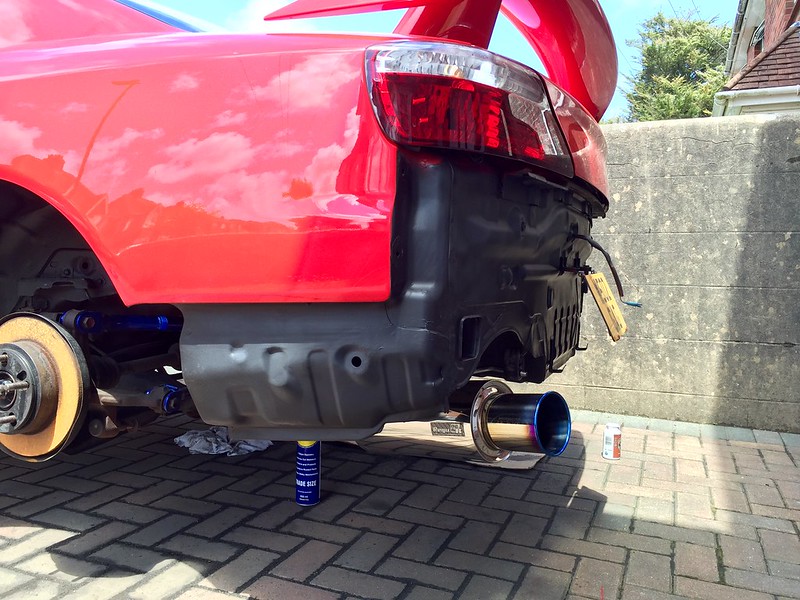 Untitled by Josh Jennings, on Flickr
While the front suspension was off I noticed that the outer tie rods looked a bit worse for wear along with the bump steer tie rods. So another package from Hardrace was delivered haha!
 Untitled by Josh Jennings, on Flickr
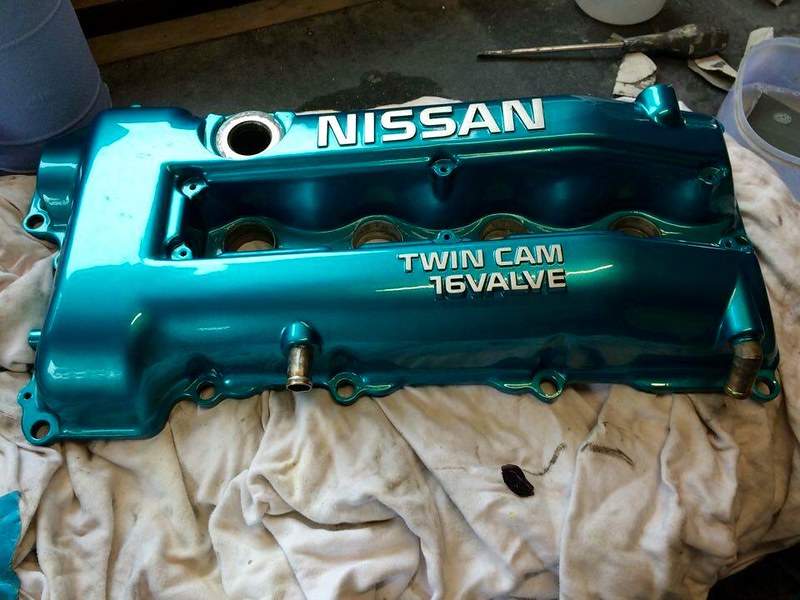
I got sent a picture of my replacement cam cover after being sprayed the other day. So pleased with this compared to the horrible one that’s on there. Think it will transform the engine bay.
 Untitled by Josh Jennings, on Flickr
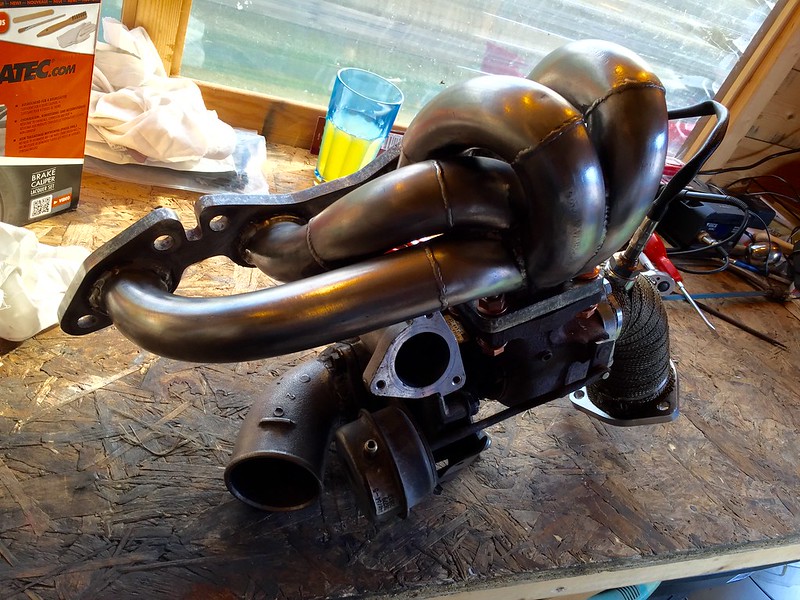
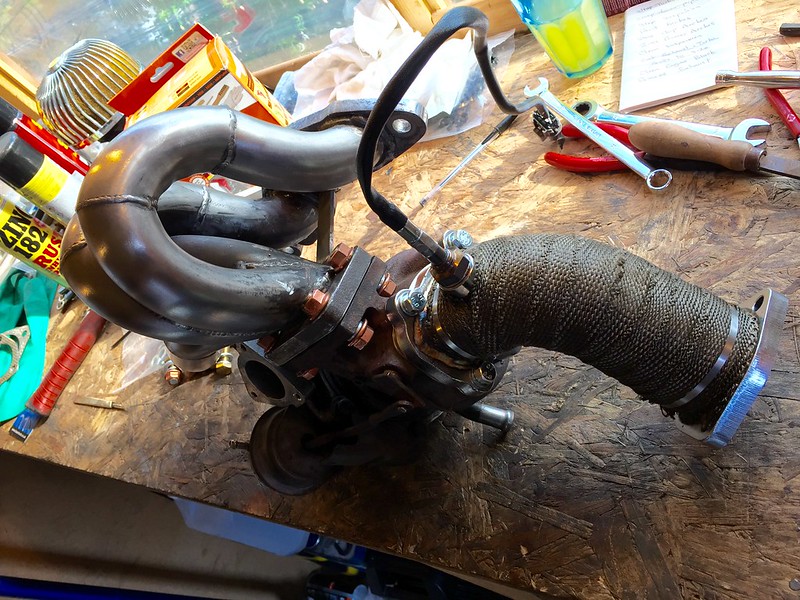
I also re-assembled the turbo setup, I might have over engineered a few bits, but I don’t want the gasket leaking again haha!
 Untitled by Josh Jennings, on Flickr
 Untitled by Josh Jennings, on Flickr
So now I am just waiting on my black Samco hoses (should be here this week) and it will all be put back together then off for a 4 wheel alignment!
It’s all back together now, I couldn’t wait for these blaady black silicone hoses any longer so the red ones went back on for now! The engine feels so much stronger now, don’t know if it’s the manifold, the Splitfire coil packs, or just the fact it’s all tight now ahaha! But it feels smoother, pulls better and there is definitely more power up top now!
Still need to get the alignment done but it’s all booked in for next Friday.
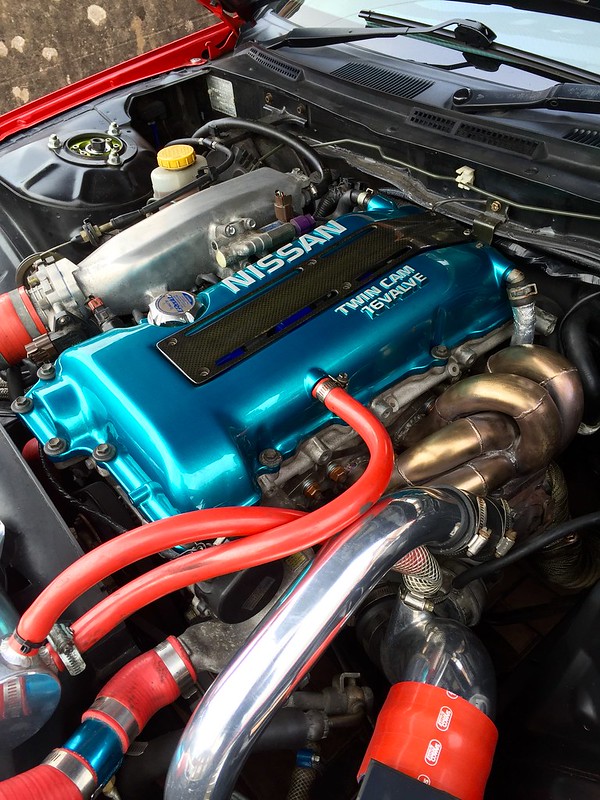
Got the cam cover fitted last night, looks so much better, can’t wait to sack these red hoses off!
 Untitled by Josh Jennings, on Flickr
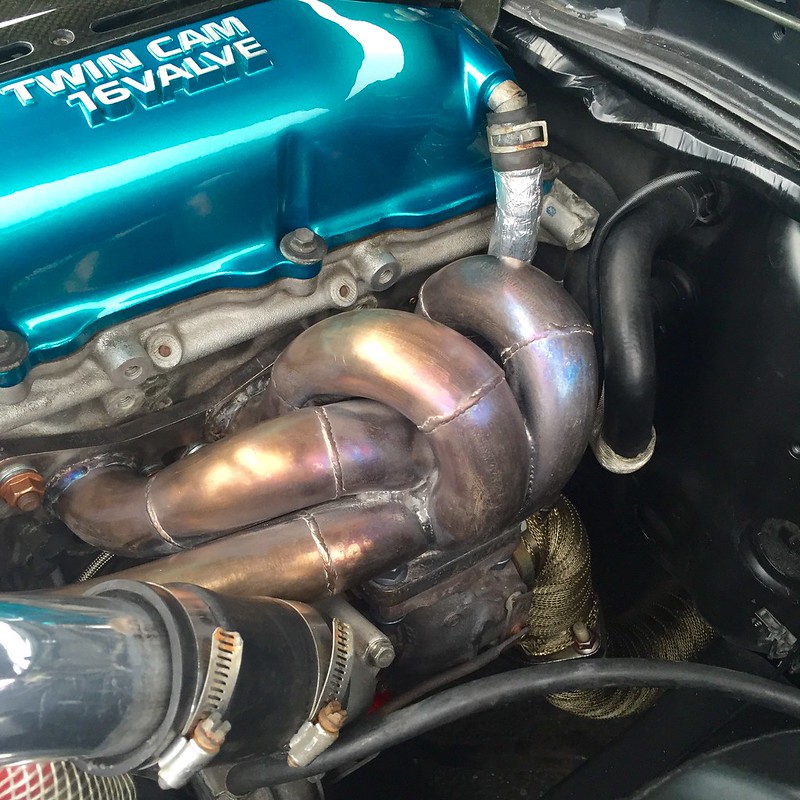
The manifold is going nice colours now as well haha!
 Untitled by Josh Jennings, on Flickr
Not much has happened recently! Still waiting for the hoses to come and a few other bits! After weeks of waiting I’m finally booked in for a wheel alignment!
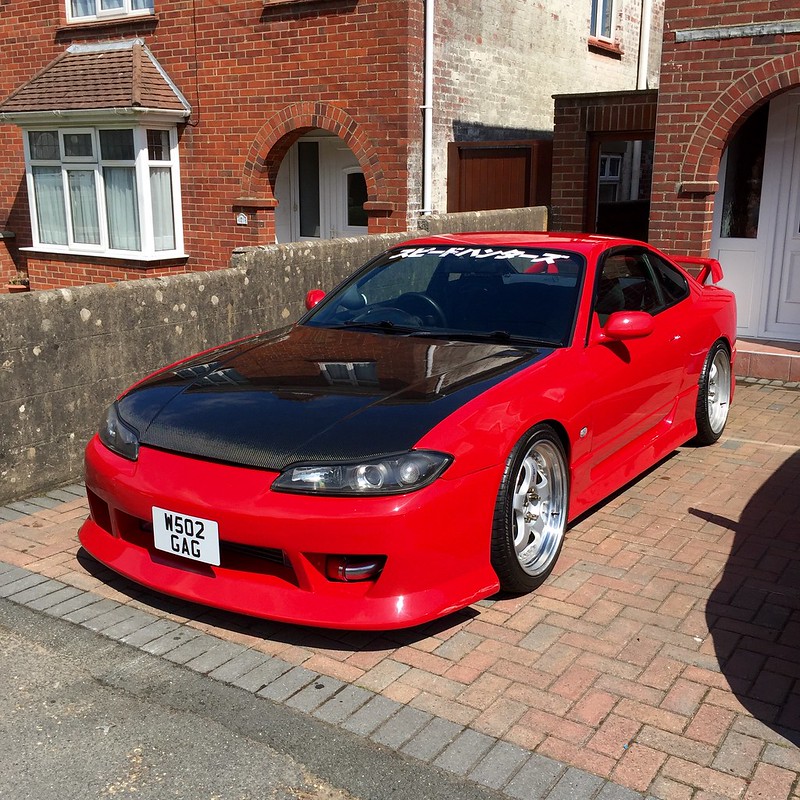
I tweaked the ride height the other, got it sitting better I think and gave it a good clean to get the grubby finger prints off it haha!
 Untitled by Josh Jennings, on Flickr
Finally got my alignment done, drives so much nicer! It’s got just under 3 degrees negative on the front and 1 and a half degrees on the rear. It still spins the rear wheels up even with 255s haha!
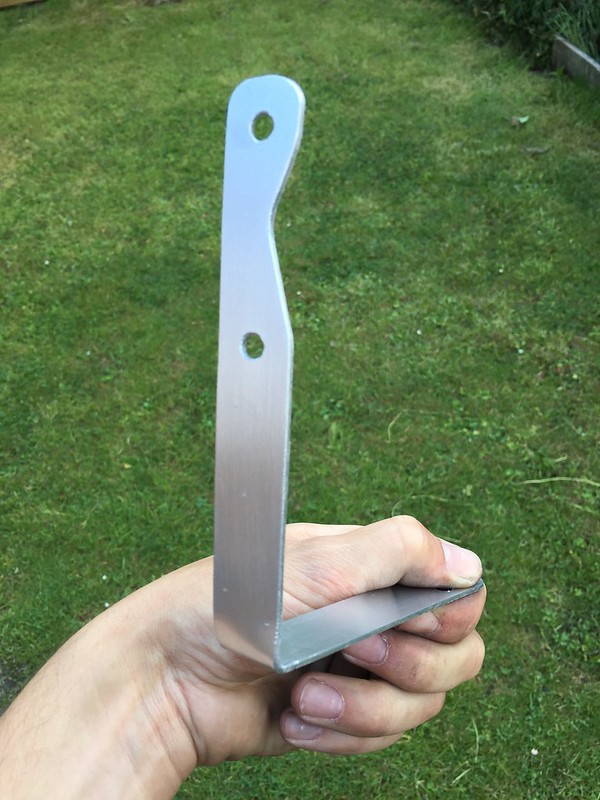
Made up a bracket to hold my air filter in place… Not that interesting but I was pretty happy with it haha!
 Untitled by Josh Jennings, on Flickr
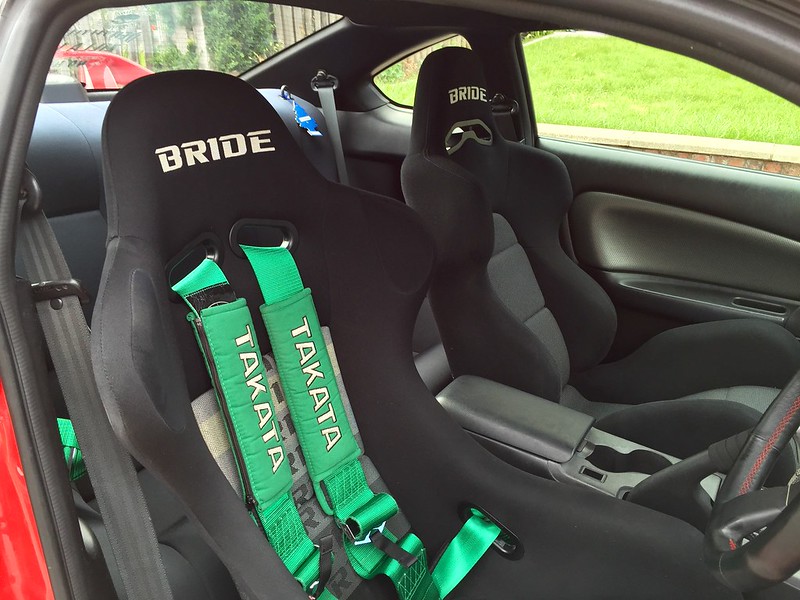
After winning a passenger seat rail off eBay the other day, I moved the driver’s Bride to the passenger side and put my Zeta bucket in the driver’s side with a Driftworks rail. Love the driving position even more now!
 Untitled by Josh Jennings, on Flickr
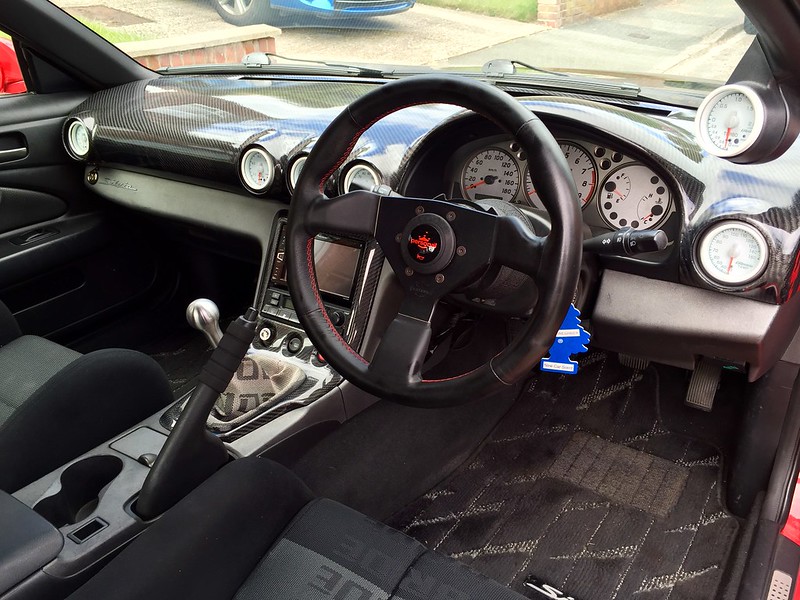 Untitled by Josh Jennings, on Flickr
After changing the diff fluid I lowered the rear slightly more, much happier with the ride height now. Only couple of jobs left now are a transmission fluid change and a coolant flush and change!
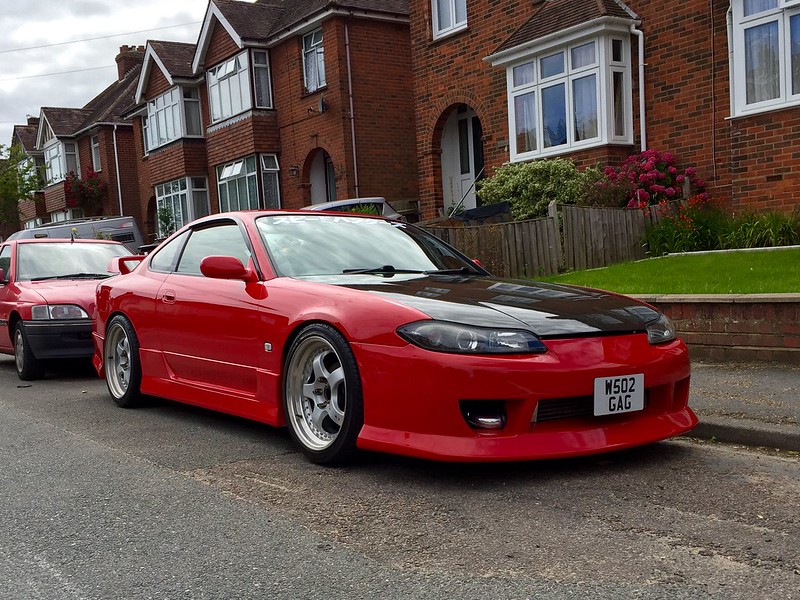 Untitled by Josh Jennings, on Flickr
So I finally got round to a pointless job last night… But it does look cool haha!
The bonnet came off…
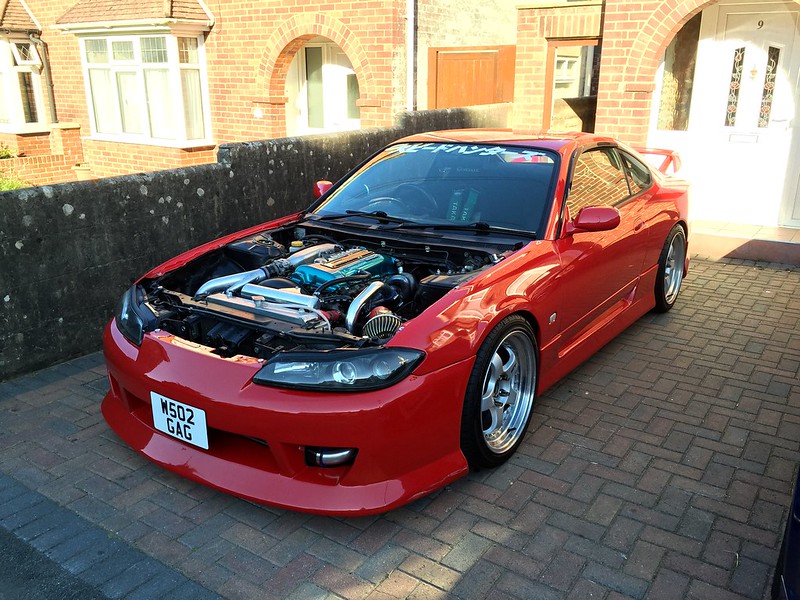 Untitled by Josh Jennings, on Flickr
Then I put this on haha!
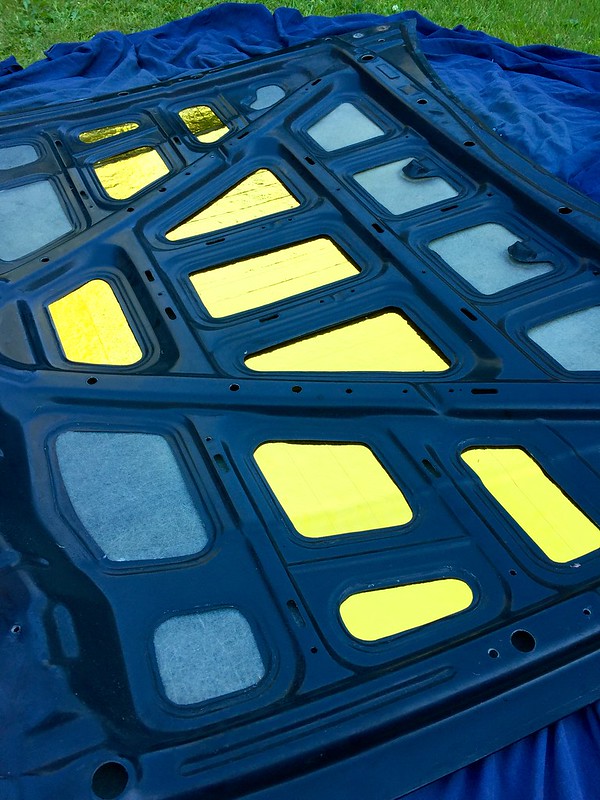 Untitled by Josh Jennings, on Flickr
I ran of tape so could only get those bits done, will order some more and get the rest of it done soon!
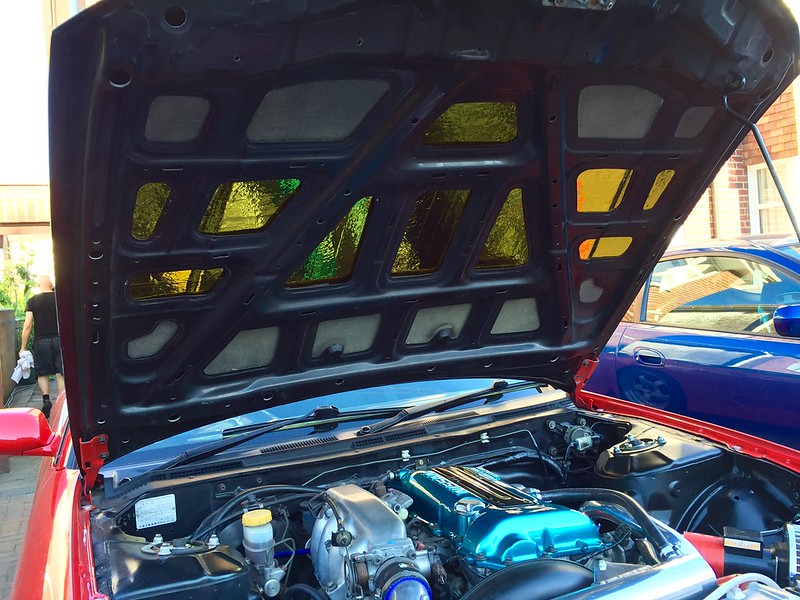 Untitled by Josh Jennings, on Flickr
Been a while since I’ve updated this, progress has been a bit slow where I’ve been out of the UK working so much but here it is!
Decided to go for some more power after the old turbo shagged itself!
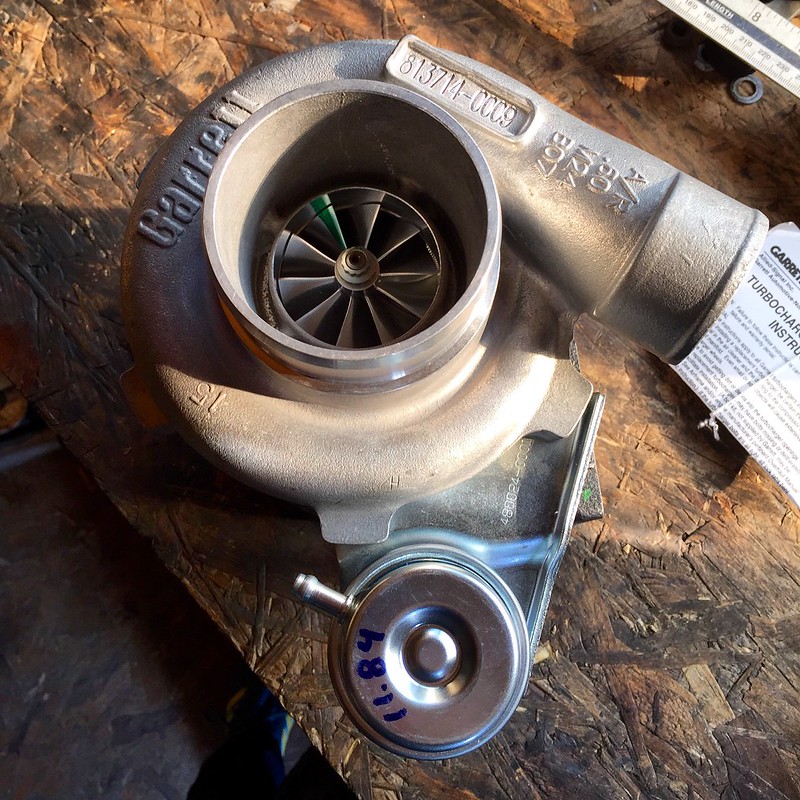 Untitled by Josh Jennings, on Flickr
It’s a Garrett GTX 2867.64 turbo, much newer technology so should spoil quicker and give more power! Teamed that with an APW manifold and a new air filter & MAF set up.
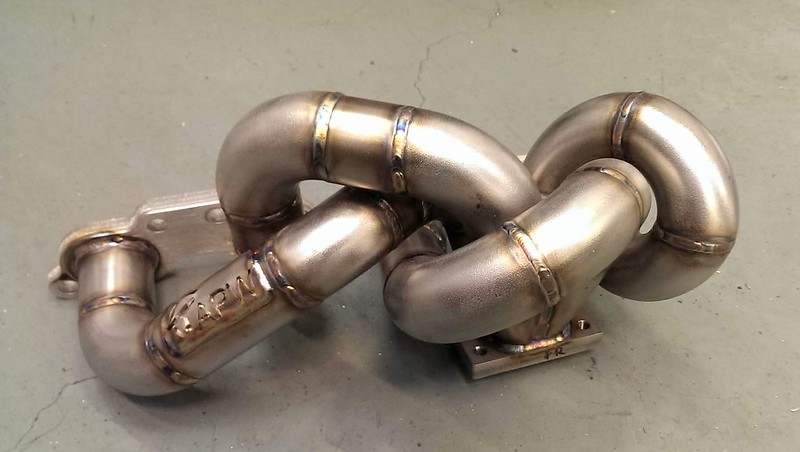 Untitled by Josh Jennings, on Flickr
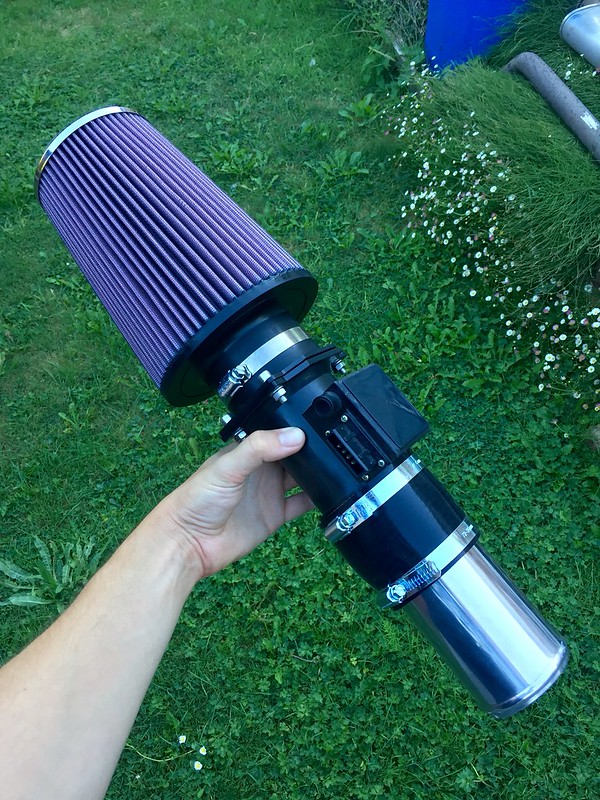 Untitled by Josh Jennings, on Flickr
While it was all out I continued wire tucking, there are now no more un-needed wires in the engine bay and any ones left have been routed and hidden.
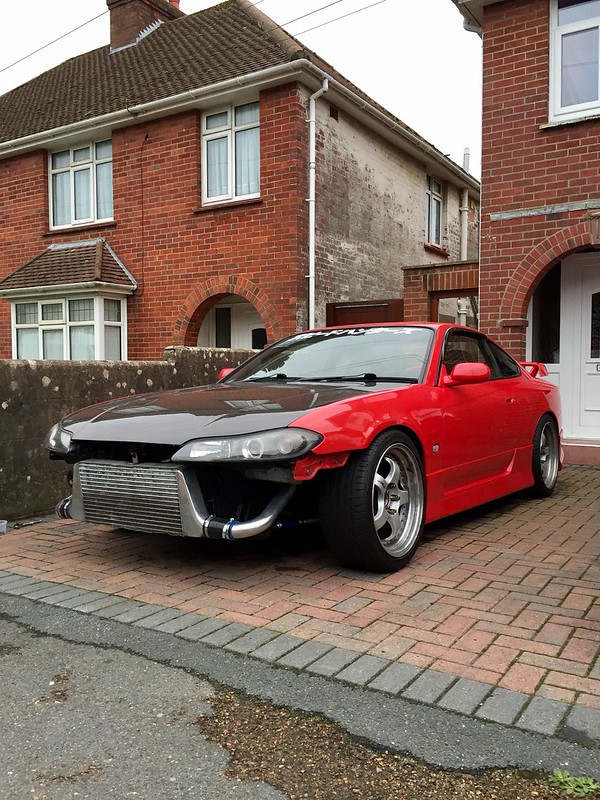 Untitled by Josh Jennings, on Flickr
Me and my good friend Joe decided to then make a new exhaust, the shotgun one was far too loud, the Kakimoto sat far too low and was too quiet for my liking. The parts were purchased.
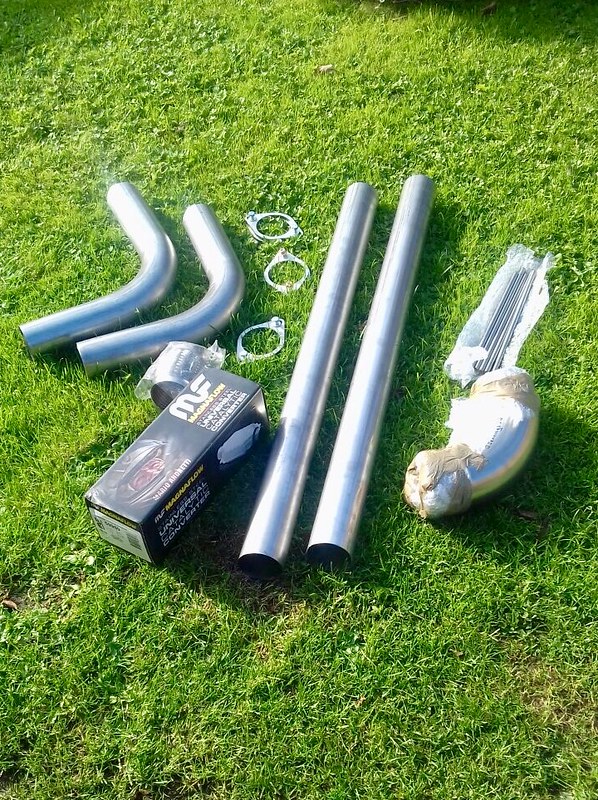 Untitled by Josh Jennings, on Flickr
Decided to get a sports cat as well, this should hopefully help me pass an MOT, pretty sure for the past 2 years it has been in the country it’s had dodgy MOTs which isn’t good!
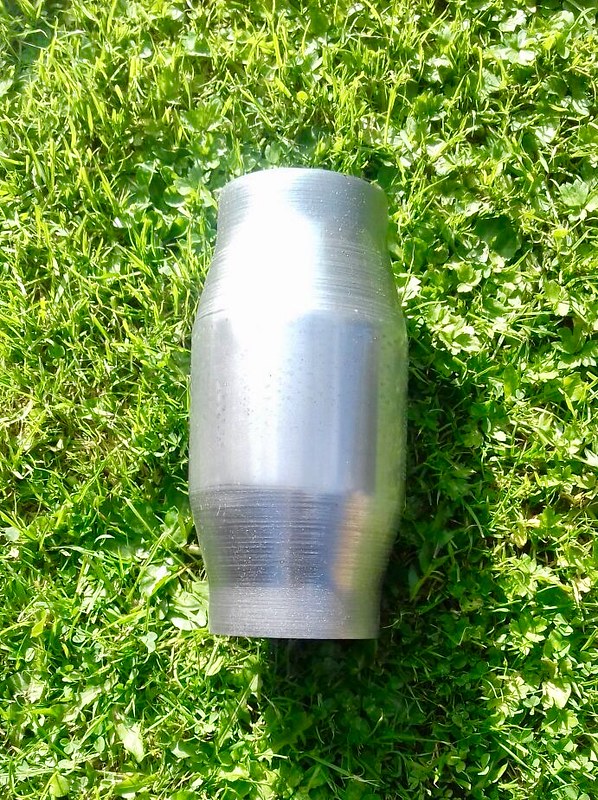 Untitled by Josh Jennings, on Flickr
Was a horrible day, but we needed to crack on and get it done as it is booked in for mapping on the 22nd of this month!
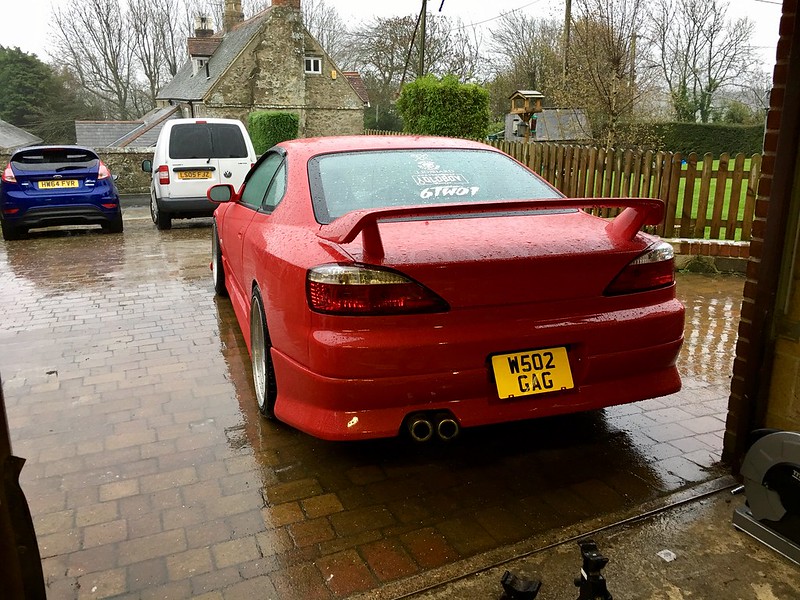 Untitled by Josh Jennings, on Flickr
Sports cat done.
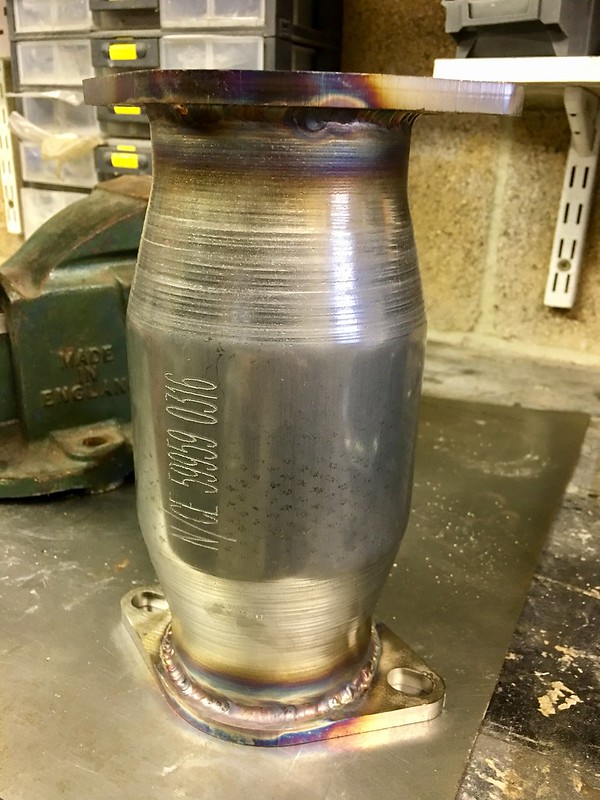 Untitled by Josh Jennings, on Flickr
De-cat done.
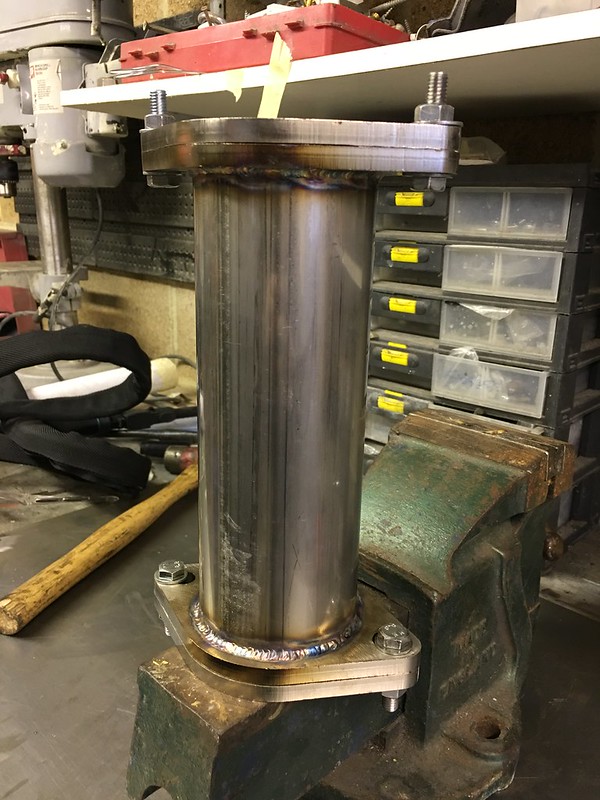 Untitled by Josh Jennings, on Flickr
As some of you may know I like having a droooop on my exhaust, we cut the rolled tip off and tacked the 90 degree bend we had cut on.
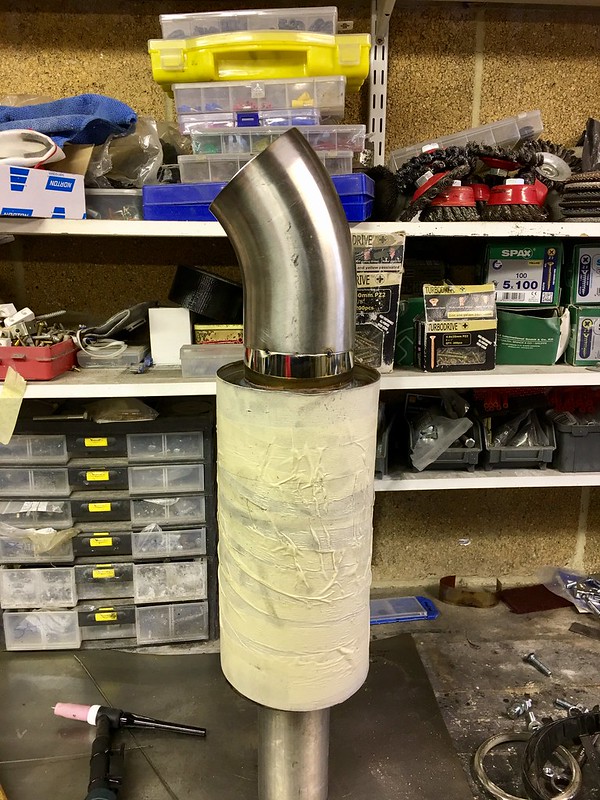 Untitled by Josh Jennings, on Flickr
Lovely welding by Joe.
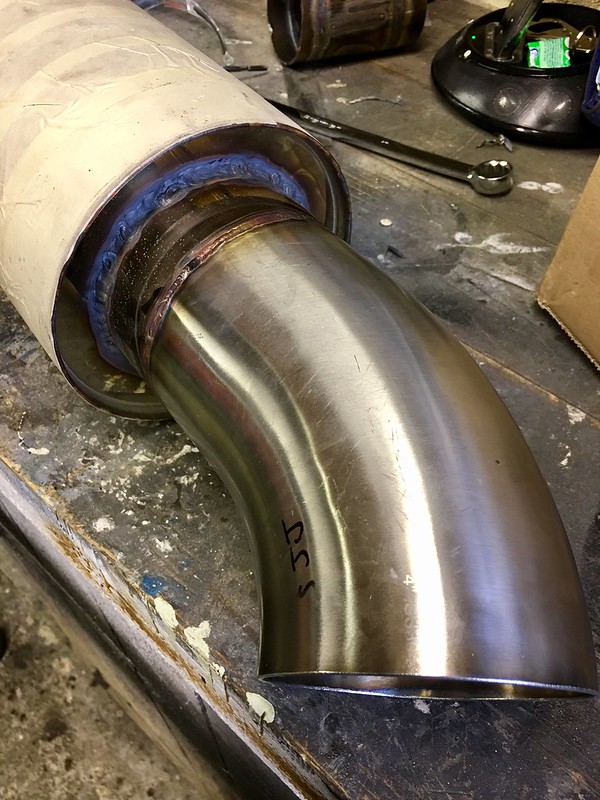 Untitled by Josh Jennings, on Flickr
New downpipe section with a flexi was made, I will heat wrap it again this weekend.
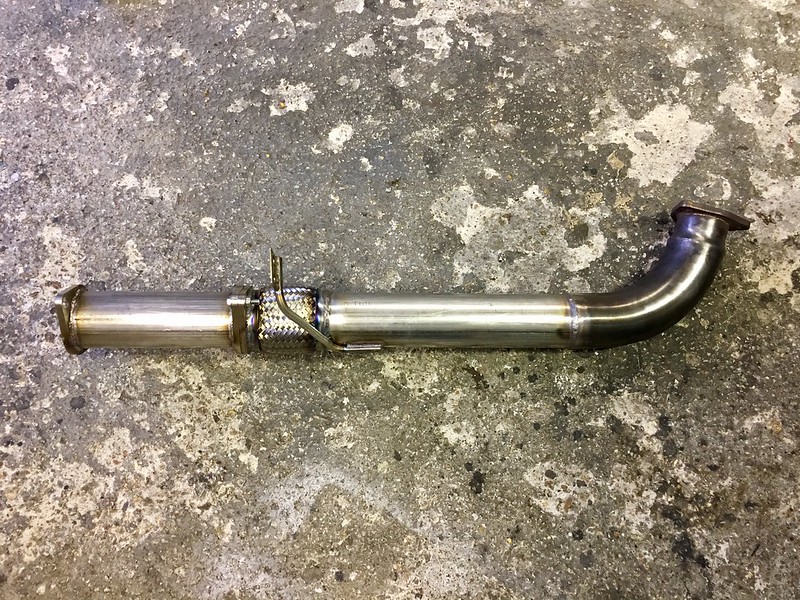 Untitled by Josh Jennings, on Flickr
Here’s how the droop sat… I personally love it, but I doubt anyone else will haha!
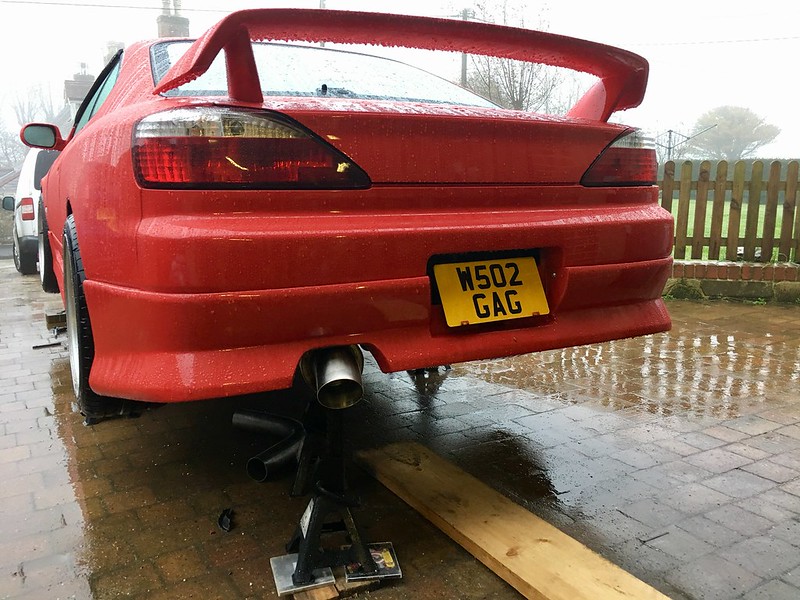 Untitled by Josh Jennings, on Flickr
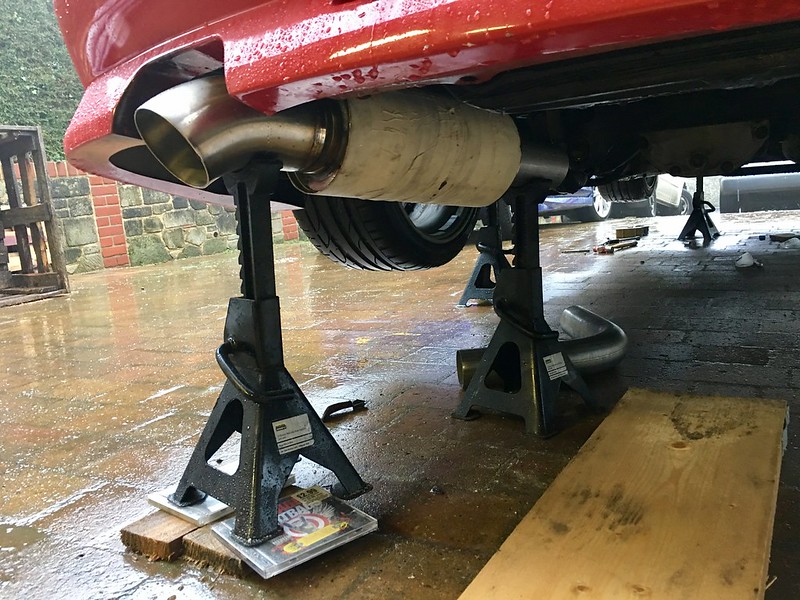 Untitled by Josh Jennings, on Flickr
That completed day one.
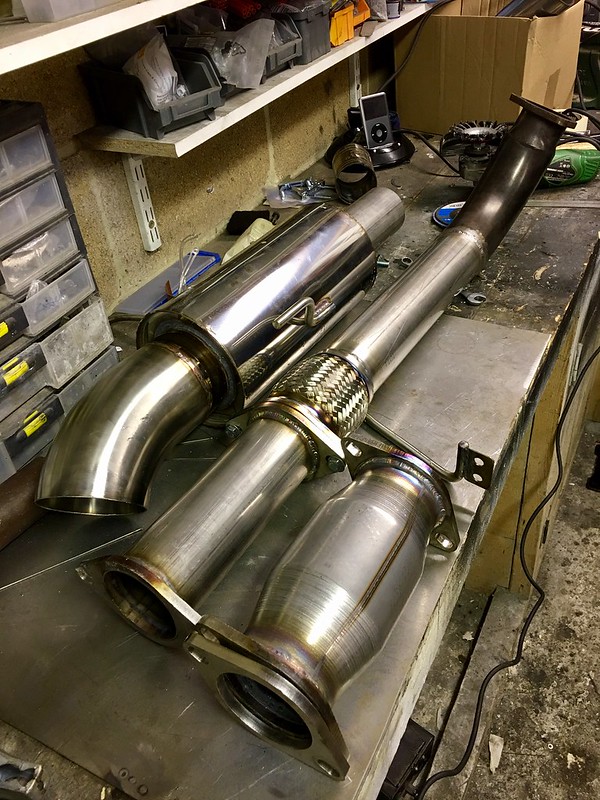 Untitled by Josh Jennings, on Flickr
Day 2 continued, as you can see it is all tucked up under the chassis rail.
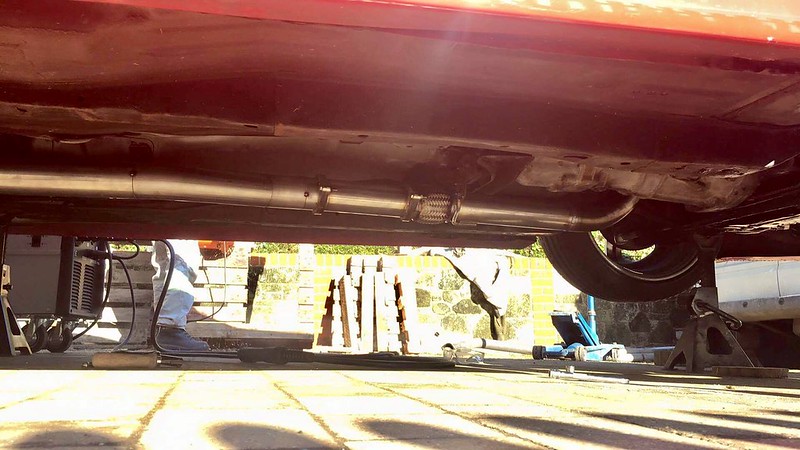 Untitled by Josh Jennings, on Flickr
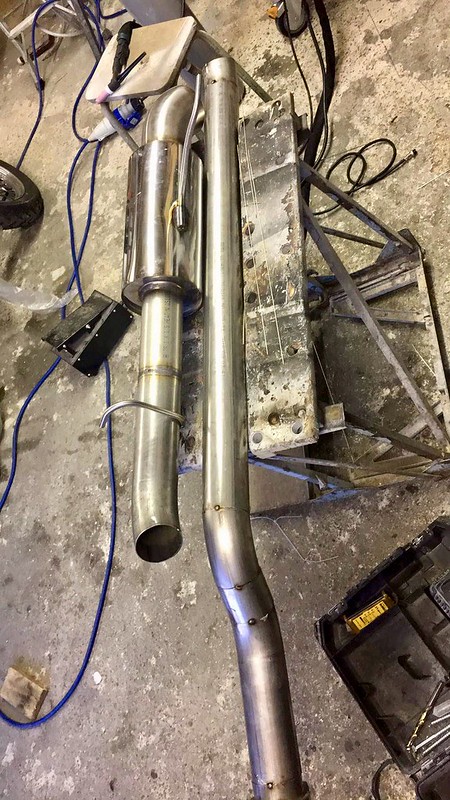 Untitled by Josh Jennings, on Flickr
Just needs final welding now and heat wrap applying before mapping next week. Can’t wait to get it back now!
So here is the final product, to say I'm happy is an understatement. Just the right level of loud now haha! Tucks up nice and close now and gives me loads of room to go lower!
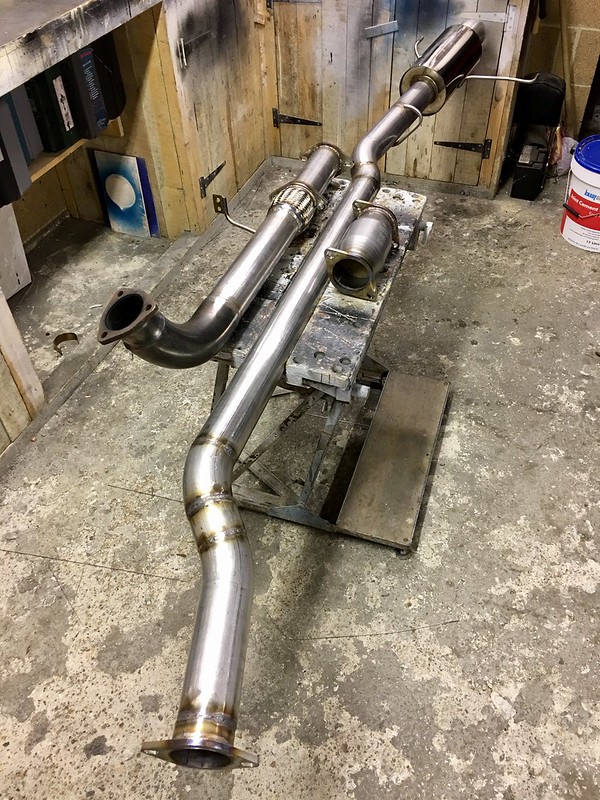 Untitled by Josh Jennings, on Flickr
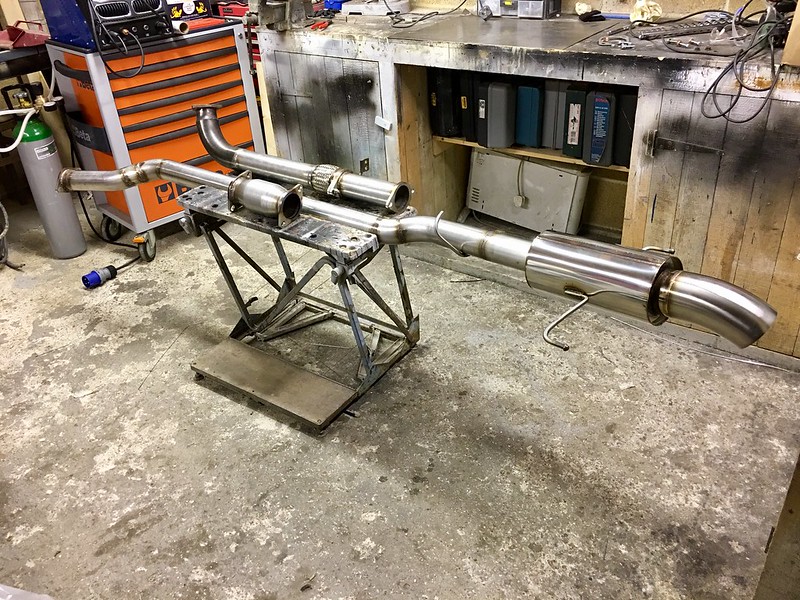 Untitled by Josh Jennings, on Flickr
So this weekend I did a few tidy up jobs, just waiting on a catch can to turn up now.
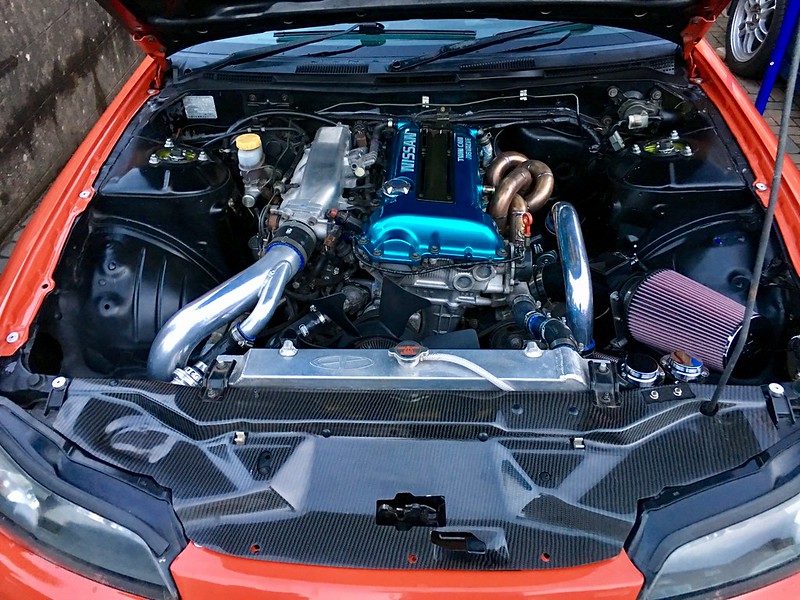 Untitled by Josh Jennings, on Flickr
Put heat wrap back onto my downpipe.
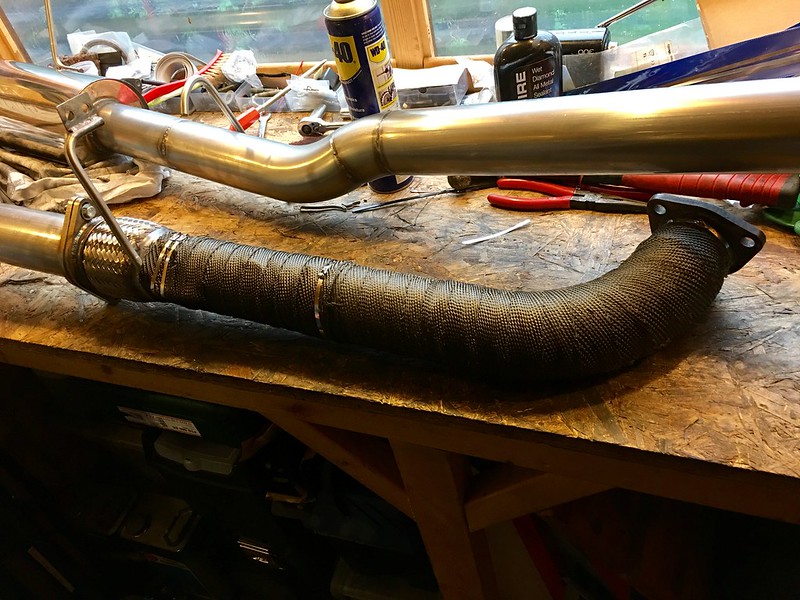 Untitled by Josh Jennings, on Flickr
Polished all the greasy finger prints off the exhaust and put some sealant on to keep it nice.
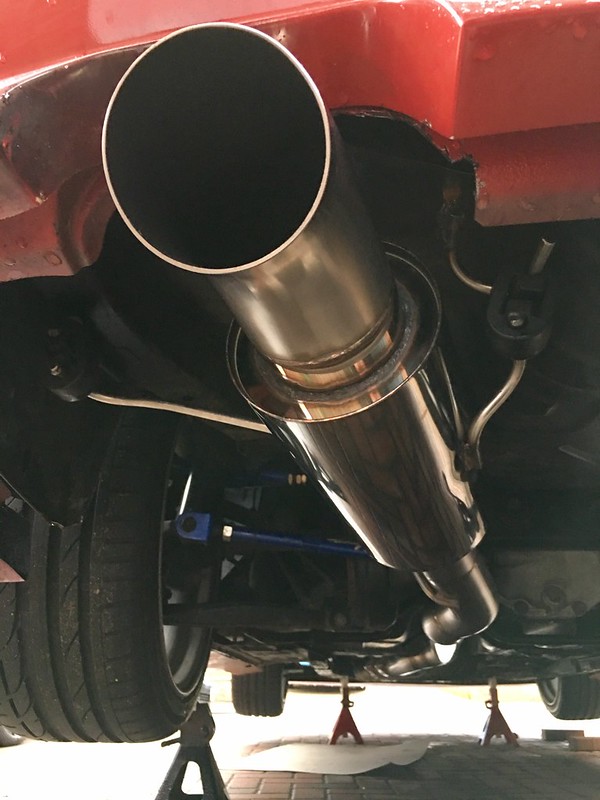 Untitled by Josh Jennings, on Flickr
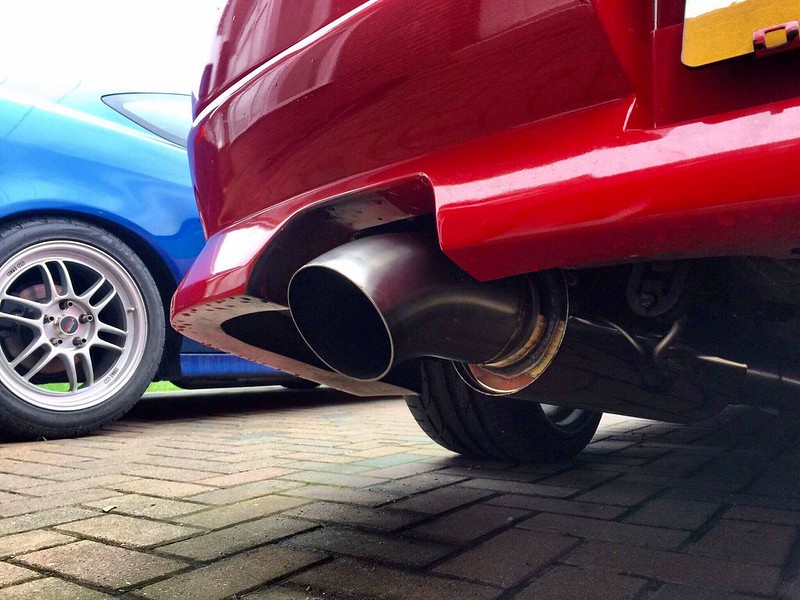 Untitled by Josh Jennings, on Flickr
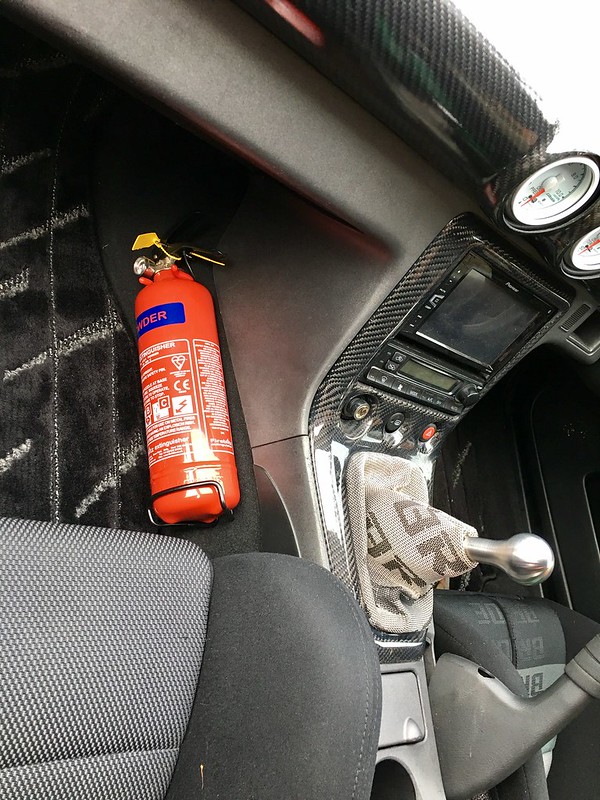
As I have great faith in my car I fitted a fire extinguisher ahaha! After seeing a car set alight at a car show this year I’ve been contemplating getting one, I don’t actually mind how it looks really haha!
 Untitled by Josh Jennings, on Flickr
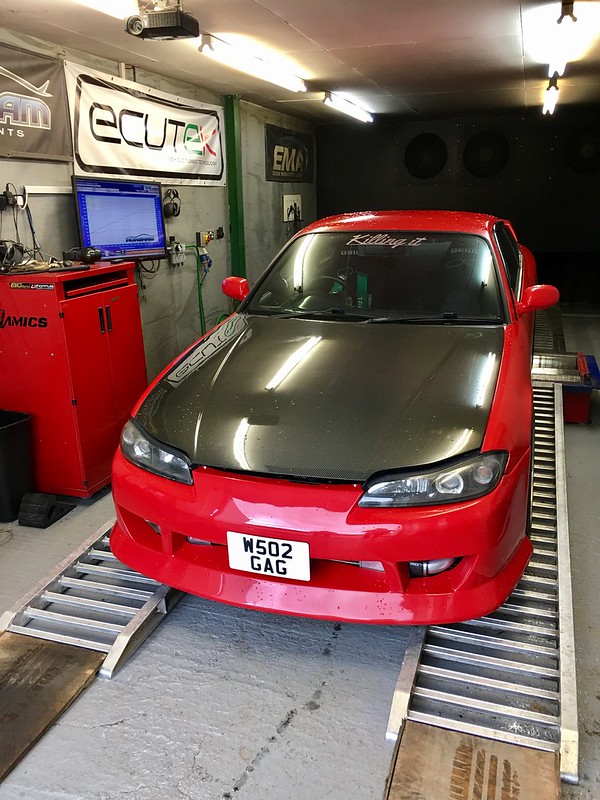
So yesterday it went off for tuning. Good and bad results haha! A high flow fuel pump was fitted and then a boost leak was done, all my work paid off and the boost leak hose popped off cause there were no leaks in the system haha! Onto the dyno it went!
 Untitled by Josh Jennings, on Flickr
Due to the injectors not arriving at the tuners in time and my work commitments the mapping had to be carried out without them. On the first power run they informed me that the injectors were already maxed out… f ks sake ahaha! Mapping was continued but with a 5500rpm limit, a bit annoying but at least I could drive it again in the knowledge I’m not doing any damage. Anyway down to figures, it made 313hp this was with the injectors maxed out, revving to 5.5k and no boost added with the boost controller! The tuner was sure it could easily make 400hp which I’m very pleased with it is booked in again for beginning of January to have the rest of the work carried out. I’m just happy to have it back again right now, still feels quick as it is haha!
 Untitled by Josh Jennings, on Flickr
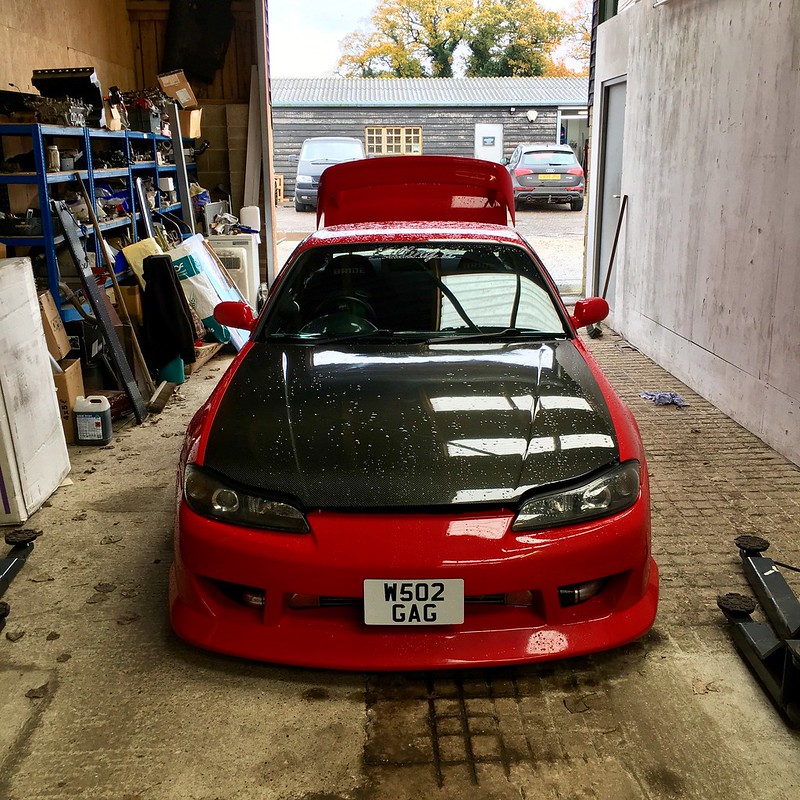
I better update this as it’s been a while!
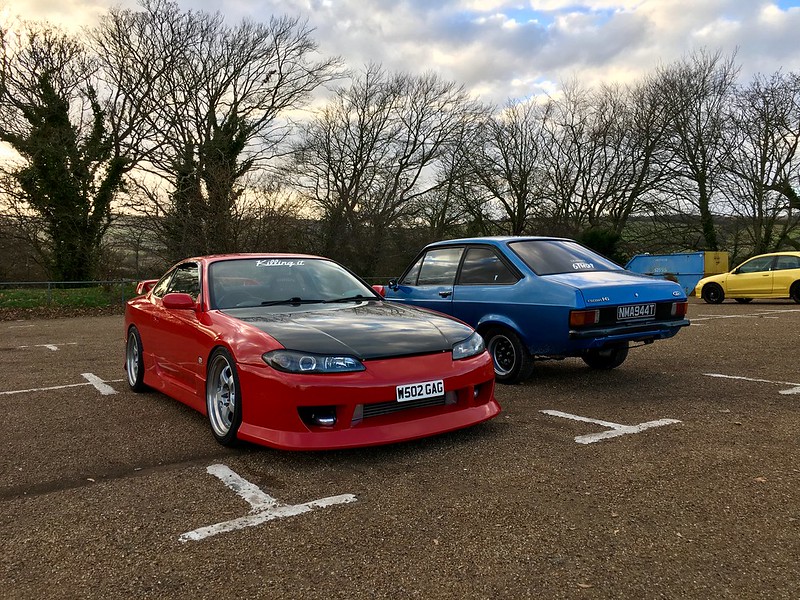
After getting it back from mapping I just enjoyed actually driving it for a bit. Even with a 5500rpm limit it was still fun! Met up with my mate with a MK2 Escort and a 430hp MR2 haha!
 Untitled by Josh Jennings, on Flickr
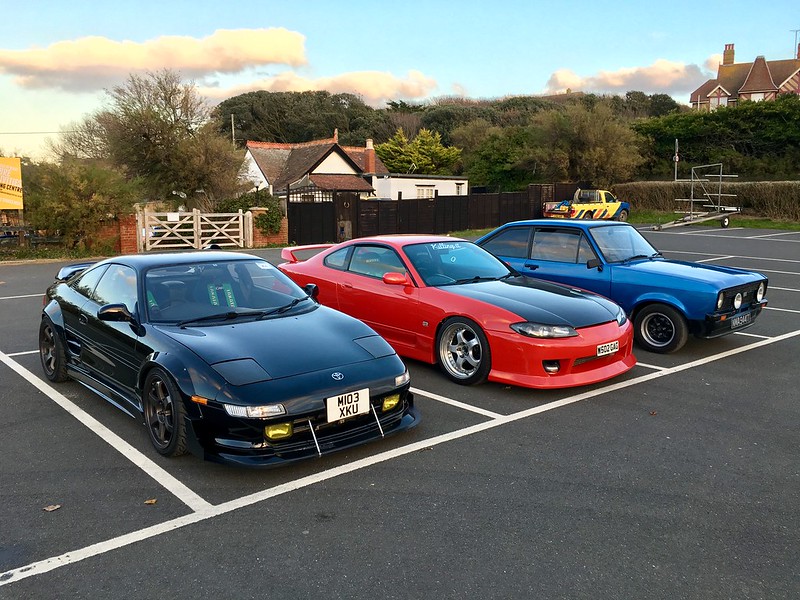 Untitled by Josh Jennings, on Flickr
I noticed the clutch was starting to slip so that got swapped out with the flywheel and slave cylinder!
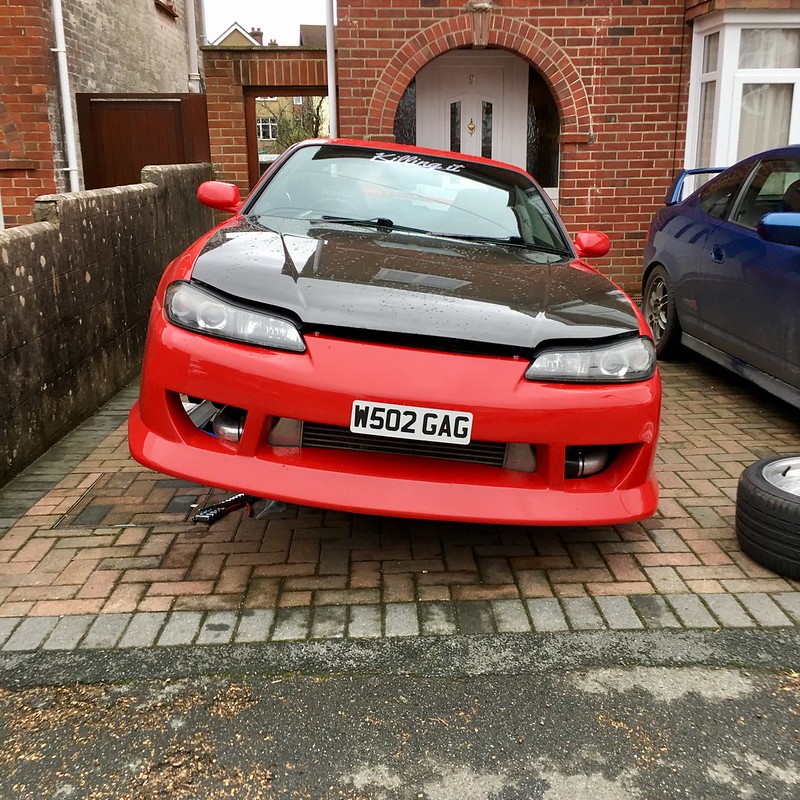 Untitled by Josh Jennings, on Flickr
Aero catches were then fitted as I was scared of the bonnet wobble on the motorway haha!
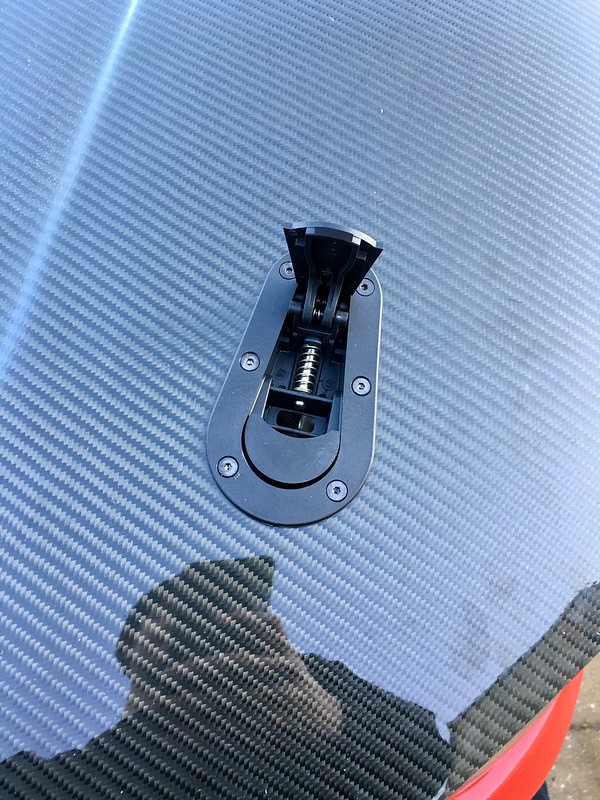 Untitled by Josh Jennings, on Flickr
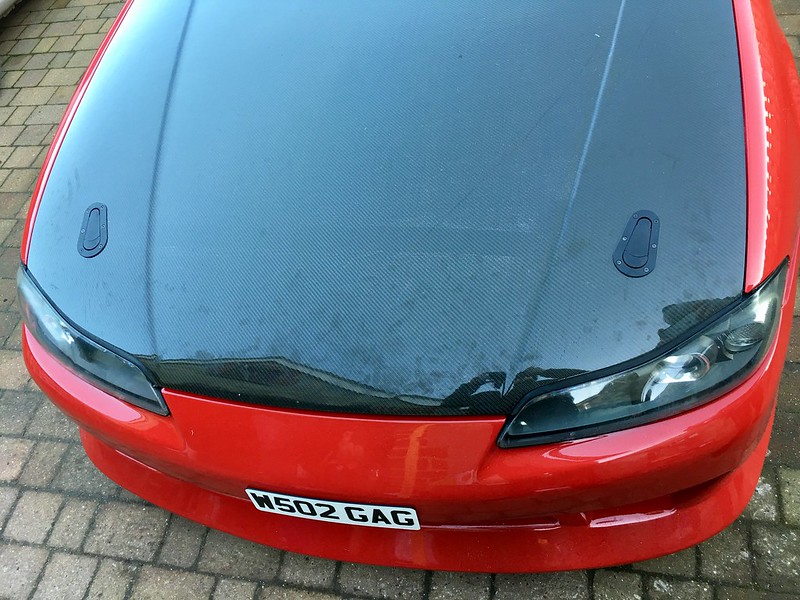 Untitled by Josh Jennings, on Flickr
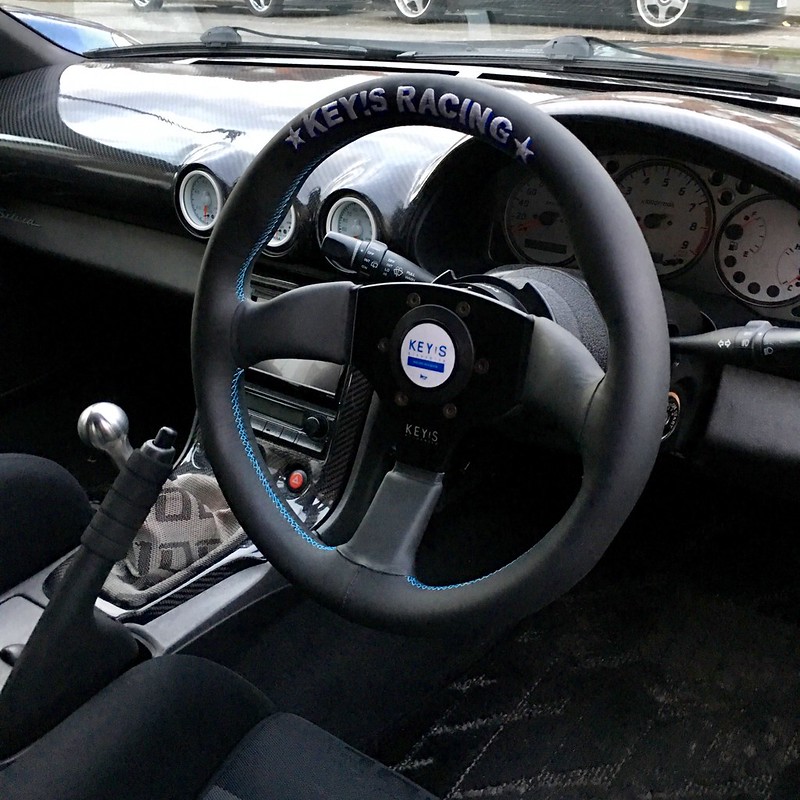
I had wanted a Key’s Racing for years, finally bought one! So glad I did!
 Untitled by Josh Jennings, on Flickr
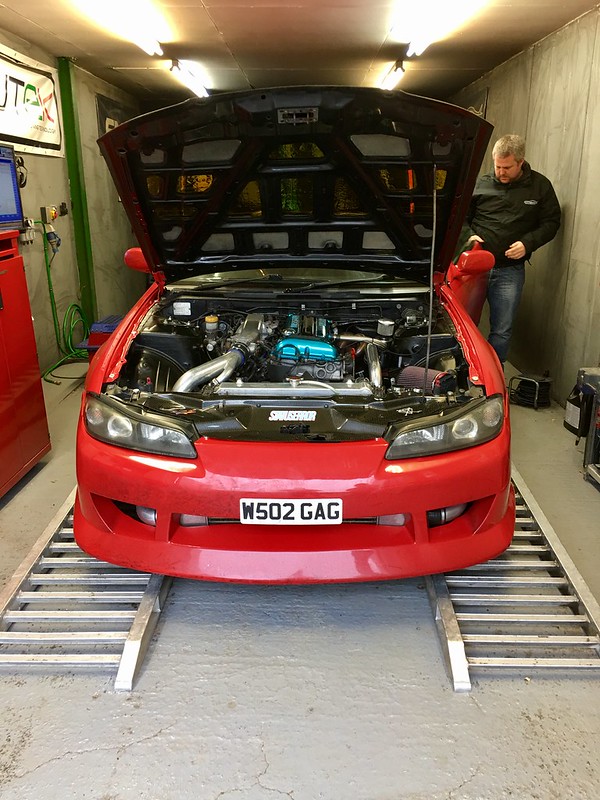
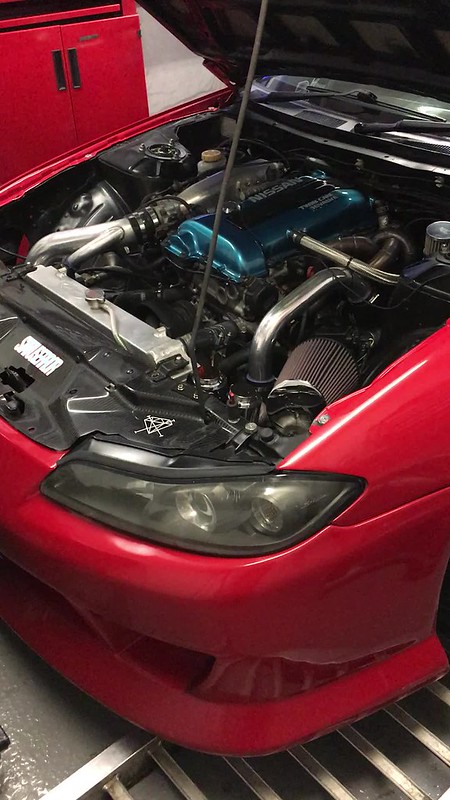
Then came mapping day 2! 740cc injectors were fitted then it went onto the dyno!
 Untitled by Josh Jennings, on Flickr
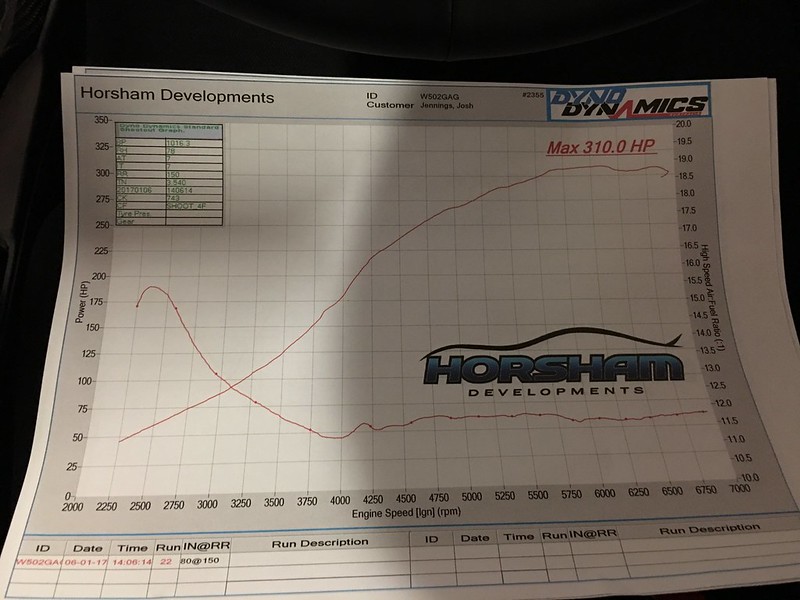
Here is one of the pulls
 Untitled by Josh Jennings, on Flickr
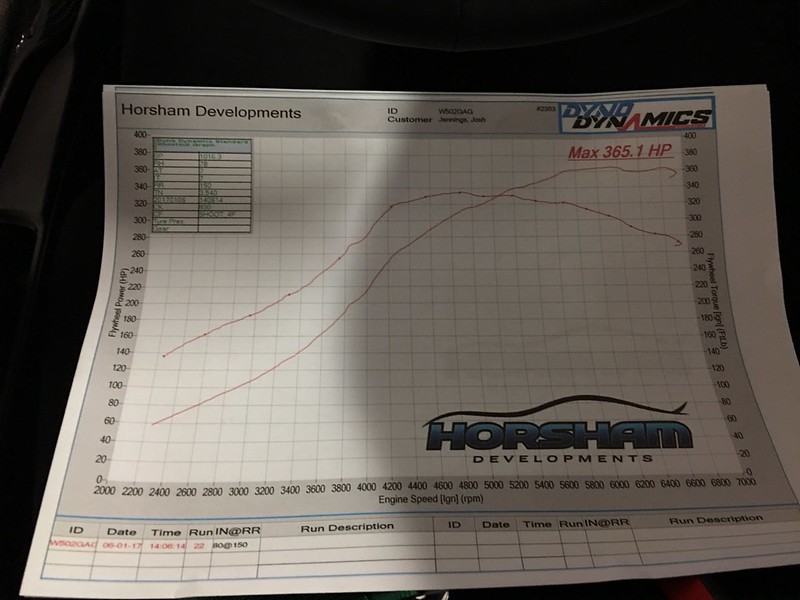
It made 365.1 at the fly and 310 at the wheels. Safe to say it’s pretty scary, well for me at least! Never owned anything this quick haha!
 Untitled by Josh Jennings, on Flickr
 Untitled by Josh Jennings, on Flickr
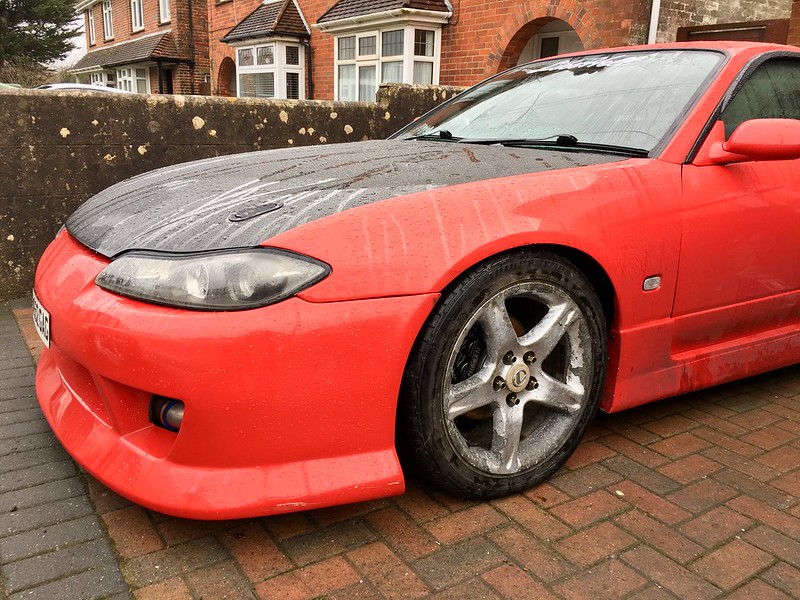
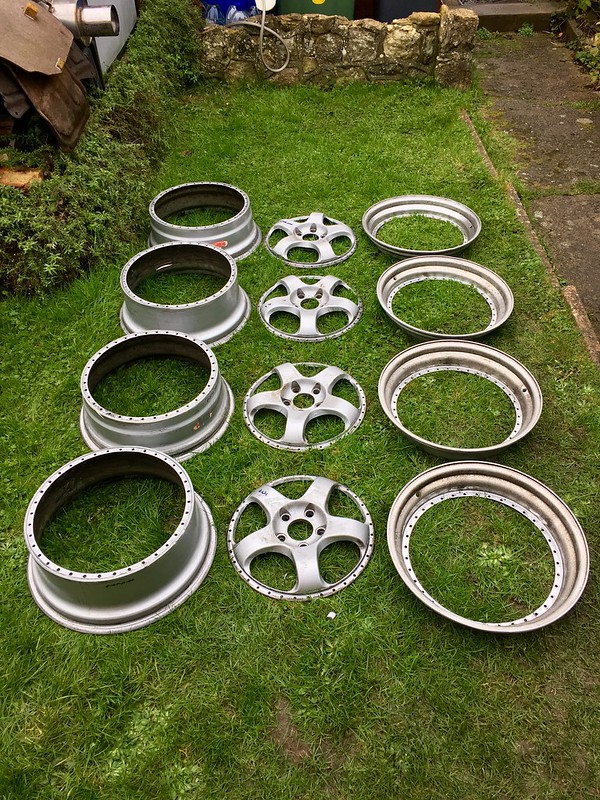
Day after mapping the Works came off and split down for a refurb whilst I was out of the country with work! Can’t wait to get them back! It’s sitting on manky Lexus wheels currently haha!
 Untitled by Josh Jennings, on Flickr
 Untitled by Josh Jennings, on Flickr
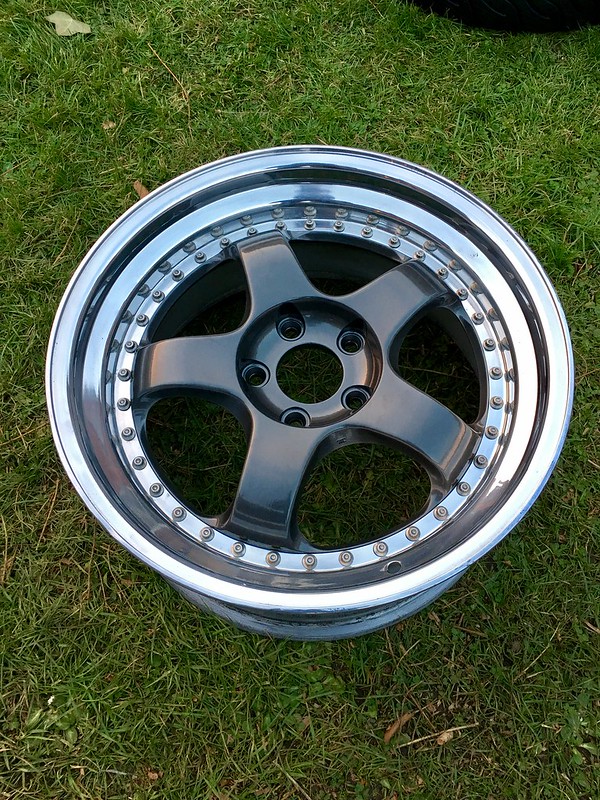
The Works came back from having the lips polished and centres powder coated. I re-assembled the wheels ready for the new tyres to be fitted.
 Untitled by Josh Jennings, on Flickr
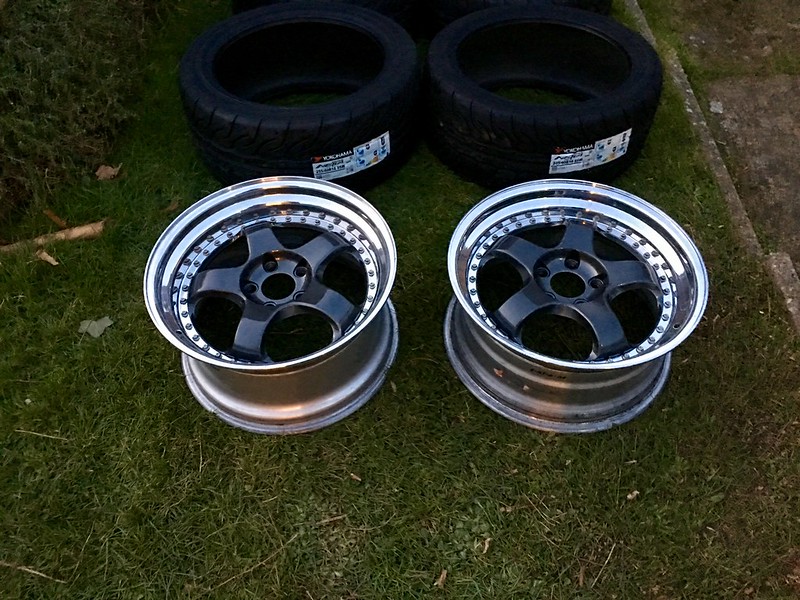 Untitled by Josh Jennings, on Flickr
I went for some AD08s in 235/40/18 on the front and a 255/40/18 on the rear.
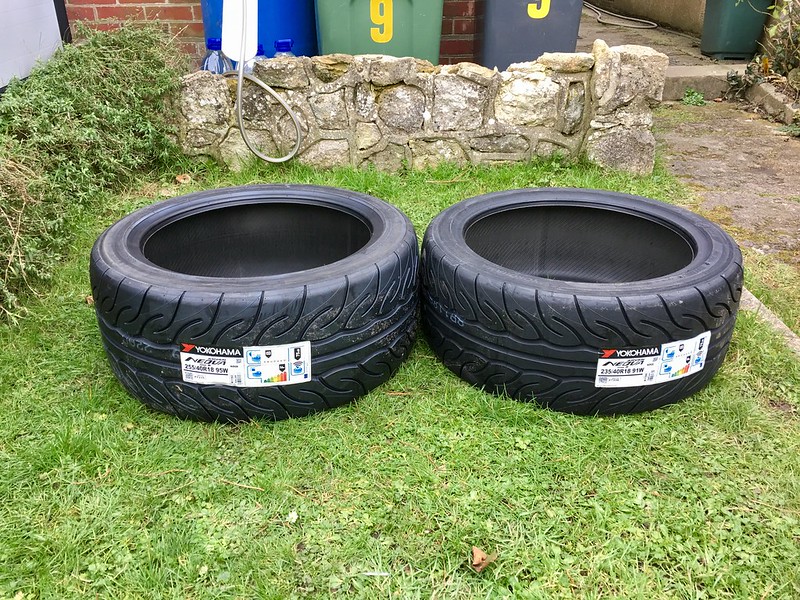 Untitled by Josh Jennings, on Flickr
Then got them onto the car!
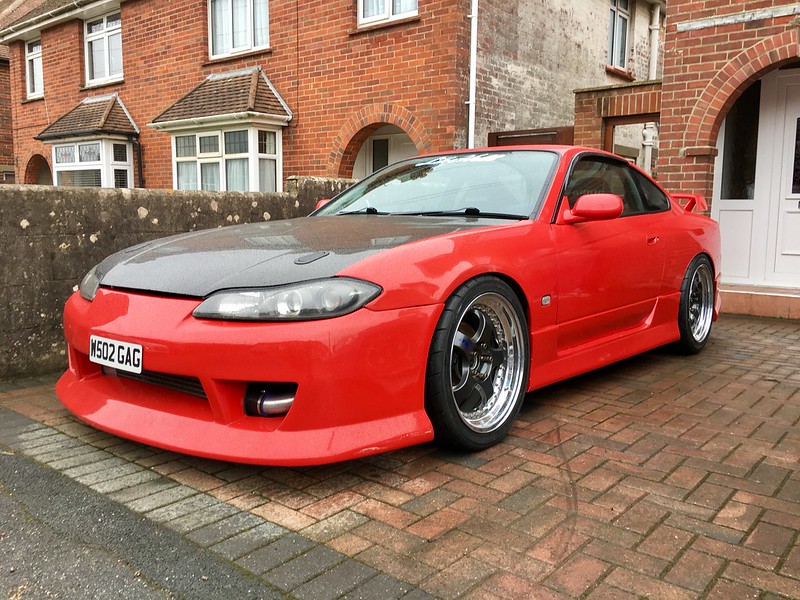 Untitled by Josh Jennings, on Flickr
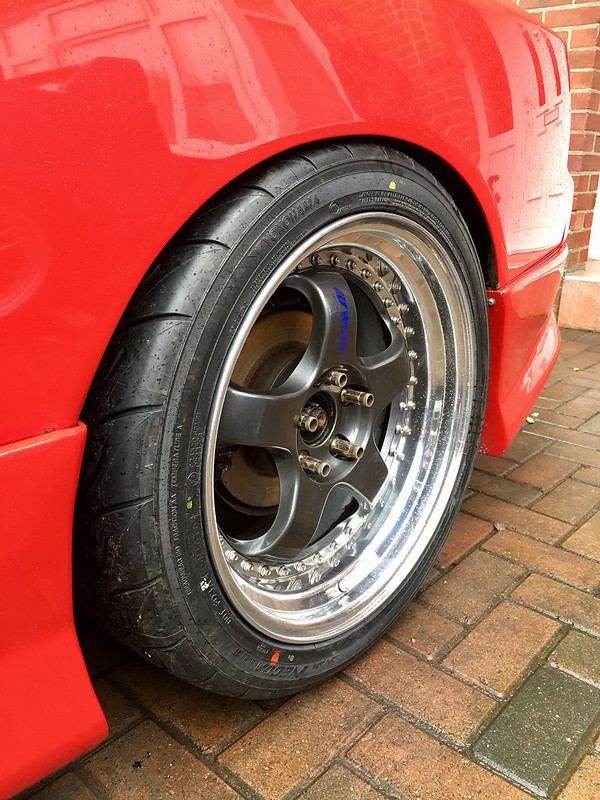 Untitled by Josh Jennings, on Flickr
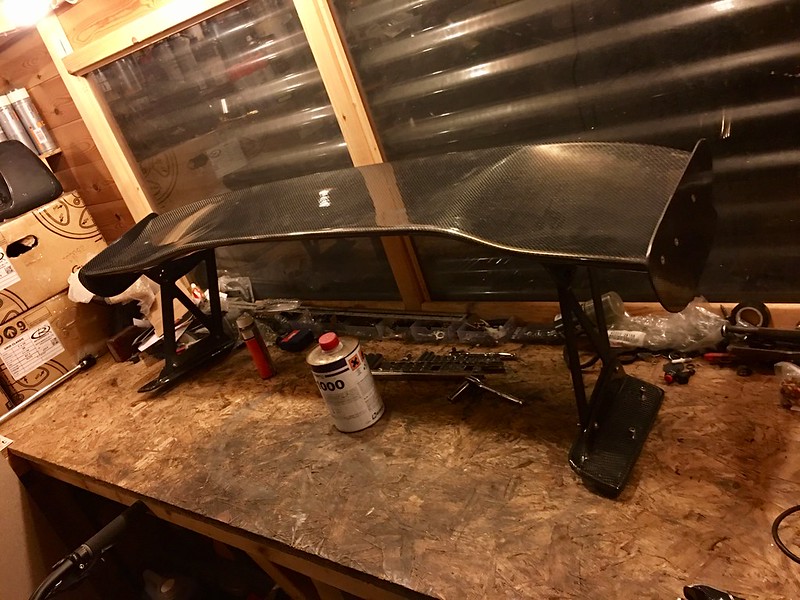
So I picked up this the other day!
 Untitled by Josh Jennings, on Flickr
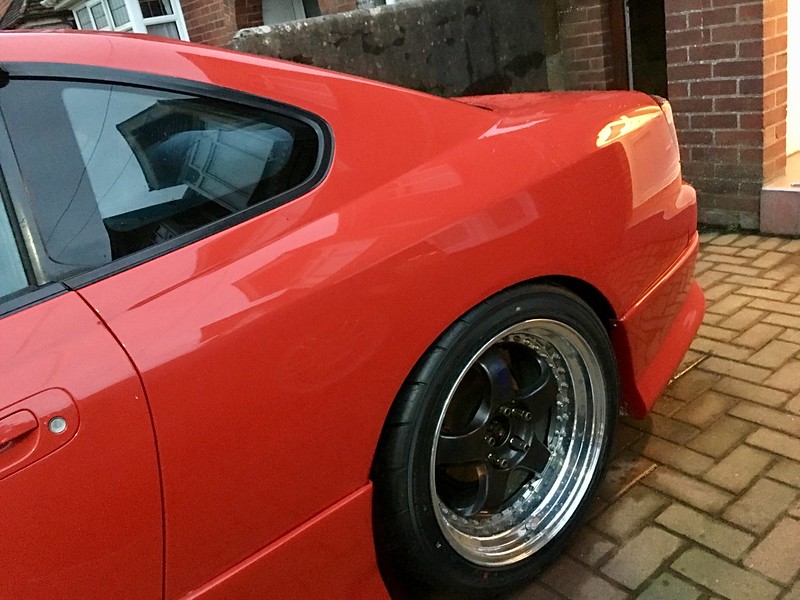
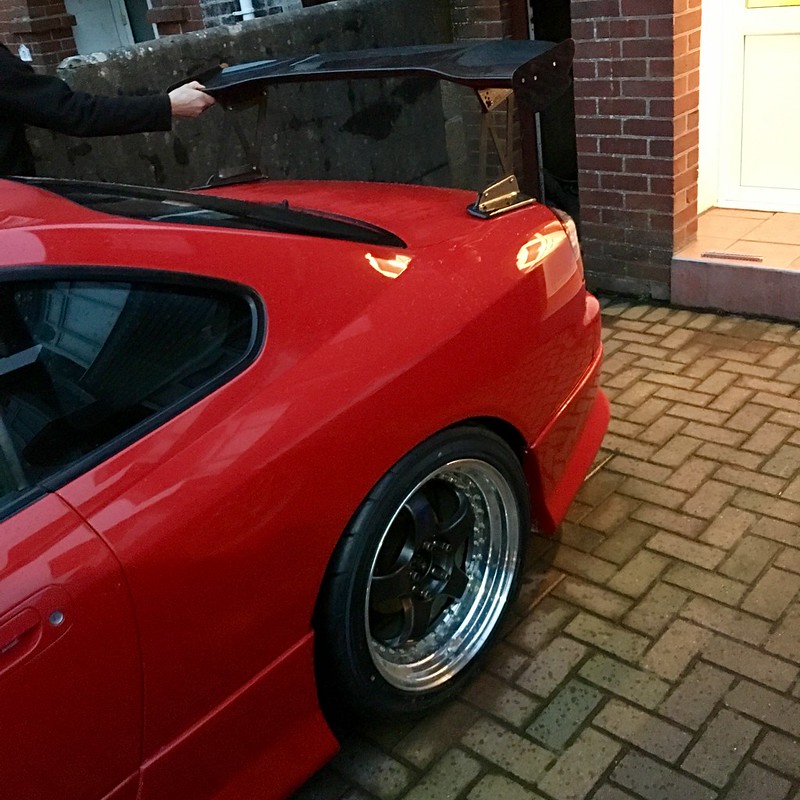
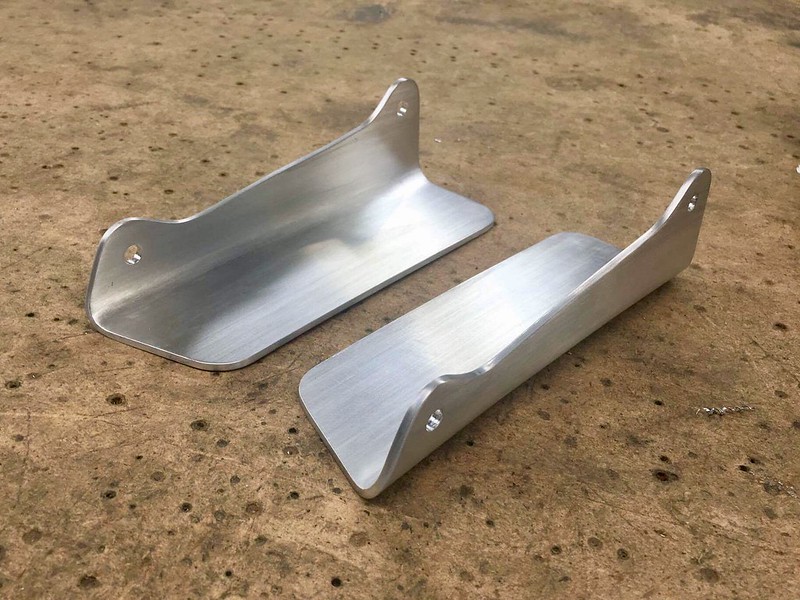
A J’s Racing Type 1 spoiler! Looks a lot better than the copies in my opinion. While it wasn’t raining I gave it a quick size up and confirmed that I would need to make up some new brackets to get it to fit correctly.
 Untitled by Josh Jennings, on Flickr
 Untitled by Josh Jennings, on Flickr
 Untitled by Josh Jennings, on Flickr
Should be getting it fitted on Friday depending on the weather along with a couple of other jobs!
So after many years of Japanese car ownership I’ve finally saved up enough for an S15!
After many months searching I finally found one I really liked with a massive spec list! After viewing the car a deal was made and a couple weeks later I collected the car with my friend Jamie.
IMG_0252 by Josh Jennings, on FlickrI was extremely happy with it however after driving it home something didn’t feel quite right with the suspension and it needed to be raised as the roads on the Isle of Wight are shocking. During adjusting the suspension all the pre loads on each corner were different and the camber adjustment on the front left was completely loose and the right side wasn’t done up that tight either! With the suspension sorted it was now looking like this!
IMG_0265 by Josh Jennings, on FlickrI’m not a fan of stretched tyres so while the suspension was being adjusted my friend and I worked out the tyre size and spacing that would allow them to fit correctly. I noticed the rear wheel studs had been cut in order to fit 20mm spacers so I decided to order ARP extended wheel studs to allow correct fitment of the wheels.
IMG_0327 by Josh Jennings, on FlickrThe 235 front tyres and 255 rear tyres were ordered as well.
IMG_0398 by Josh Jennings, on FlickrSo what turned from wet sanding the headlights turned into this… haha! All the headlight wiring was shortened and re-routed.
IMG_0604 by Josh Jennings, on FlickrThe intercooler piping was removed and checked over and given a quick polish. Also worked out what silicone hoses were needed, I’m not a fan of the red ones and some were pretty bodged together so a whole set of black samco ones have been ordered. When putting it back together I made sure to tighten the hose clamps down properly as they certainly weren’t done up much when I was pulling it apart!
IMG_0847 by Josh Jennings, on FlickrThe wet sanded headlights look a lot better!
As sad as it sounds I had collected a few stickers to put on so they were put on… haha!
IMG_0673 by Josh Jennings, on FlickrI then set about fitting the extended studs on all 4 corners. When fitting these I also got the Hardrace rear camber and toe arms fitted.
IMG_0859 by Josh Jennings, on FlickrIMG_0860 by Josh Jennings, on FlickrThe tyres were then put onto the wheels. Safe to say I’m a lot happier with the spacing and look of the wheels now!
IMG_0865 by Josh Jennings, on FlickrI then took the 15 to the Goodwood Super Car Breakfast meet. Found Seen Through Glass’s car so thought it would be rude not to get a photo together with it haha!
IMG_0897 by Josh Jennings, on FlickrWhen I was driving back to the Isle from the meet I noticed a slight exhaust leak. After driving for a couple of more short journeys to see the misses it soon turned into a major exhaust leak from the mani to the turbo!
I set about stripping it down. When undoing the bolts to the mani etc. I found that all of them weren’t done up nearly tight enough! My friend came round to help me pull the mani and turbo out while I was undoing the final bolts underneath, he pulled the mani expecting the turbo to come with it… just the manifold came away! The nuts had worked themselves loose and weren’t even present anymore!
With it all out I was left with this!
IMG_0980 by Josh Jennings, on FlickrI decided to give the turbo a good looking over and clean up while it was off, would be rude not to haha!
IMG_1012 by Josh Jennings, on FlickrThe previous owner had included a tubular manifold that had cracked. I went round to my good friend Joes and he welded up making sure to beef all the welds up significantly. We also added some bracing from each flange to try and help prevent cracking again. Hopefully this will sort the problem, if not I will just go back to the standard mani. I gave it a quick clean up, not perfect but so much better than it was!
IMG_1029 by Josh Jennings, on FlickrI’ve got a stainless turbo elbow on order and the downpipe has been taken off the car ready for a clean-up and heat wrapping.
Today my Splitfire coil packs have turned up so they’ll be fitted this eve!
IMG_1044 by Josh Jennings, on FlickrI’ve got all my servicing fluids on the way as well as booking it in for a 4 wheel alignment in a couple of weeks. Hoping by the time all this is done it should feel like a different car!
Still plenty more work to do, but who likes spare time anyway!
Well I got home from work and noticed that the 15 had been attacked by a load of bird crap haha!
Untitled by Josh Jennings, on FlickrAfter I cleaned all that off I did a couple more jobs, the Splitfire coil packs were fitted along with new NGK spark plugs. Then I heat wrapped the downpipe.
Untitled by Josh Jennings, on FlickrI may have also done a buy last night… haha! I wasn’t a big fan of the Japspeed Shotgun exhaust on there currently. Had a look on eBay and there was this lovely Kakimoto Regu 06&R Cat Back, should be a bit quieter and look a lot better imo as well!
Untitled by Josh Jennings, on FlickrMy new stainless turbo elbow has arrived today, this will be heat wrapped when more arrives through the post!
Untitled by Josh Jennings, on FlickrSlowly coming together!
So last week I had a week off work and may have got a bit carried away with doing some jobs on the S15 haha!
Untitled by Josh Jennings, on FlickrUntitled by Josh Jennings, on FlickrUntitled by Josh Jennings, on FlickrSo with the coilovers off, body kit off and exhaust off the chassis was then prepared for protection. All the arches were wire brushed back to bare metal, any rust treated, zinc primer applied and then a nice thick layer of stone chip applied. I then got a bit more carried away and decided to do a wire tuck on the passenger side for now. I will do one on the other side but I want to drive it again soon haha!
Untitled by Josh Jennings, on FlickrUntitled by Josh Jennings, on FlickrThis was the dirt that came out the bottom of the front fenders, it had just been sitting there! It won’t ever be like that again haha!
Untitled by Josh Jennings, on FlickrThe same was carried out behind the rear bumper.
Untitled by Josh Jennings, on FlickrI then painted the brakes black, I hate red calipers with a passion! I will sand the Nissan back to bare metal once the paint has hardened enough. You can also see the coilover covers I fitted to keep them in mint condition.
Untitled by Josh Jennings, on FlickrI then fitted my exhaust to keep moral up haha! Much happier with this, still yet to find out how it will sound! It needs modifying to sit further out once the bumper and rear lip is on, this will happen in time.
Untitled by Josh Jennings, on FlickrWhile the front suspension was off I noticed that the outer tie rods looked a bit worse for wear along with the bump steer tie rods. So another package from Hardrace was delivered haha!
Untitled by Josh Jennings, on FlickrI got sent a picture of my replacement cam cover after being sprayed the other day. So pleased with this compared to the horrible one that’s on there. Think it will transform the engine bay.
Untitled by Josh Jennings, on FlickrI also re-assembled the turbo setup, I might have over engineered a few bits, but I don’t want the gasket leaking again haha!
Untitled by Josh Jennings, on FlickrUntitled by Josh Jennings, on FlickrSo now I am just waiting on my black Samco hoses (should be here this week) and it will all be put back together then off for a 4 wheel alignment!
It’s all back together now, I couldn’t wait for these blaady black silicone hoses any longer so the red ones went back on for now! The engine feels so much stronger now, don’t know if it’s the manifold, the Splitfire coil packs, or just the fact it’s all tight now ahaha! But it feels smoother, pulls better and there is definitely more power up top now!
Still need to get the alignment done but it’s all booked in for next Friday.
Got the cam cover fitted last night, looks so much better, can’t wait to sack these red hoses off!
Untitled by Josh Jennings, on FlickrThe manifold is going nice colours now as well haha!
Untitled by Josh Jennings, on FlickrNot much has happened recently! Still waiting for the hoses to come and a few other bits! After weeks of waiting I’m finally booked in for a wheel alignment!
I tweaked the ride height the other, got it sitting better I think and gave it a good clean to get the grubby finger prints off it haha!
Untitled by Josh Jennings, on FlickrFinally got my alignment done, drives so much nicer! It’s got just under 3 degrees negative on the front and 1 and a half degrees on the rear. It still spins the rear wheels up even with 255s haha!
Made up a bracket to hold my air filter in place… Not that interesting but I was pretty happy with it haha!
Untitled by Josh Jennings, on FlickrAfter winning a passenger seat rail off eBay the other day, I moved the driver’s Bride to the passenger side and put my Zeta bucket in the driver’s side with a Driftworks rail. Love the driving position even more now!
Untitled by Josh Jennings, on FlickrUntitled by Josh Jennings, on FlickrAfter changing the diff fluid I lowered the rear slightly more, much happier with the ride height now. Only couple of jobs left now are a transmission fluid change and a coolant flush and change!
Untitled by Josh Jennings, on FlickrSo I finally got round to a pointless job last night… But it does look cool haha!
The bonnet came off…
Untitled by Josh Jennings, on FlickrThen I put this on haha!
Untitled by Josh Jennings, on FlickrI ran of tape so could only get those bits done, will order some more and get the rest of it done soon!
Untitled by Josh Jennings, on FlickrBeen a while since I’ve updated this, progress has been a bit slow where I’ve been out of the UK working so much but here it is!
Decided to go for some more power after the old turbo shagged itself!
Untitled by Josh Jennings, on FlickrIt’s a Garrett GTX 2867.64 turbo, much newer technology so should spoil quicker and give more power! Teamed that with an APW manifold and a new air filter & MAF set up.
Untitled by Josh Jennings, on FlickrUntitled by Josh Jennings, on FlickrWhile it was all out I continued wire tucking, there are now no more un-needed wires in the engine bay and any ones left have been routed and hidden.
Untitled by Josh Jennings, on FlickrMe and my good friend Joe decided to then make a new exhaust, the shotgun one was far too loud, the Kakimoto sat far too low and was too quiet for my liking. The parts were purchased.
Untitled by Josh Jennings, on FlickrDecided to get a sports cat as well, this should hopefully help me pass an MOT, pretty sure for the past 2 years it has been in the country it’s had dodgy MOTs which isn’t good!
Untitled by Josh Jennings, on FlickrWas a horrible day, but we needed to crack on and get it done as it is booked in for mapping on the 22nd of this month!
Untitled by Josh Jennings, on FlickrSports cat done.
Untitled by Josh Jennings, on FlickrDe-cat done.
Untitled by Josh Jennings, on FlickrAs some of you may know I like having a droooop on my exhaust, we cut the rolled tip off and tacked the 90 degree bend we had cut on.
Untitled by Josh Jennings, on FlickrLovely welding by Joe.
Untitled by Josh Jennings, on FlickrNew downpipe section with a flexi was made, I will heat wrap it again this weekend.
Untitled by Josh Jennings, on FlickrHere’s how the droop sat… I personally love it, but I doubt anyone else will haha!
Untitled by Josh Jennings, on FlickrUntitled by Josh Jennings, on FlickrThat completed day one.
Untitled by Josh Jennings, on FlickrDay 2 continued, as you can see it is all tucked up under the chassis rail.
Untitled by Josh Jennings, on FlickrUntitled by Josh Jennings, on FlickrJust needs final welding now and heat wrap applying before mapping next week. Can’t wait to get it back now!
So here is the final product, to say I'm happy is an understatement. Just the right level of loud now haha! Tucks up nice and close now and gives me loads of room to go lower!
Untitled by Josh Jennings, on FlickrUntitled by Josh Jennings, on FlickrSo this weekend I did a few tidy up jobs, just waiting on a catch can to turn up now.
Untitled by Josh Jennings, on FlickrPut heat wrap back onto my downpipe.
Untitled by Josh Jennings, on FlickrPolished all the greasy finger prints off the exhaust and put some sealant on to keep it nice.
Untitled by Josh Jennings, on FlickrUntitled by Josh Jennings, on FlickrAs I have great faith in my car I fitted a fire extinguisher ahaha! After seeing a car set alight at a car show this year I’ve been contemplating getting one, I don’t actually mind how it looks really haha!
Untitled by Josh Jennings, on FlickrSo yesterday it went off for tuning. Good and bad results haha! A high flow fuel pump was fitted and then a boost leak was done, all my work paid off and the boost leak hose popped off cause there were no leaks in the system haha! Onto the dyno it went!
Untitled by Josh Jennings, on FlickrDue to the injectors not arriving at the tuners in time and my work commitments the mapping had to be carried out without them. On the first power run they informed me that the injectors were already maxed out… f
ks sake ahaha! Mapping was continued but with a 5500rpm limit, a bit annoying but at least I could drive it again in the knowledge I’m not doing any damage. Anyway down to figures, it made 313hp this was with the injectors maxed out, revving to 5.5k and no boost added with the boost controller! The tuner was sure it could easily make 400hp which I’m very pleased with it is booked in again for beginning of January to have the rest of the work carried out. I’m just happy to have it back again right now, still feels quick as it is haha!Untitled by Josh Jennings, on FlickrI better update this as it’s been a while!
After getting it back from mapping I just enjoyed actually driving it for a bit. Even with a 5500rpm limit it was still fun! Met up with my mate with a MK2 Escort and a 430hp MR2 haha!
Untitled by Josh Jennings, on FlickrUntitled by Josh Jennings, on FlickrI noticed the clutch was starting to slip so that got swapped out with the flywheel and slave cylinder!
Untitled by Josh Jennings, on FlickrAero catches were then fitted as I was scared of the bonnet wobble on the motorway haha!
Untitled by Josh Jennings, on FlickrUntitled by Josh Jennings, on FlickrI had wanted a Key’s Racing for years, finally bought one! So glad I did!
Untitled by Josh Jennings, on FlickrThen came mapping day 2! 740cc injectors were fitted then it went onto the dyno!
Untitled by Josh Jennings, on FlickrHere is one of the pulls
Untitled by Josh Jennings, on FlickrIt made 365.1 at the fly and 310 at the wheels. Safe to say it’s pretty scary, well for me at least! Never owned anything this quick haha!
Untitled by Josh Jennings, on FlickrUntitled by Josh Jennings, on FlickrDay after mapping the Works came off and split down for a refurb whilst I was out of the country with work! Can’t wait to get them back! It’s sitting on manky Lexus wheels currently haha!
Untitled by Josh Jennings, on FlickrUntitled by Josh Jennings, on FlickrThe Works came back from having the lips polished and centres powder coated. I re-assembled the wheels ready for the new tyres to be fitted.
Untitled by Josh Jennings, on FlickrUntitled by Josh Jennings, on FlickrI went for some AD08s in 235/40/18 on the front and a 255/40/18 on the rear.
Untitled by Josh Jennings, on FlickrThen got them onto the car!
Untitled by Josh Jennings, on FlickrUntitled by Josh Jennings, on FlickrSo I picked up this the other day!
Untitled by Josh Jennings, on FlickrA J’s Racing Type 1 spoiler! Looks a lot better than the copies in my opinion. While it wasn’t raining I gave it a quick size up and confirmed that I would need to make up some new brackets to get it to fit correctly.
Untitled by Josh Jennings, on FlickrUntitled by Josh Jennings, on FlickrUntitled by Josh Jennings, on FlickrShould be getting it fitted on Friday depending on the weather along with a couple of other jobs!


Got some up to date pictures the other day, may as well put them up!
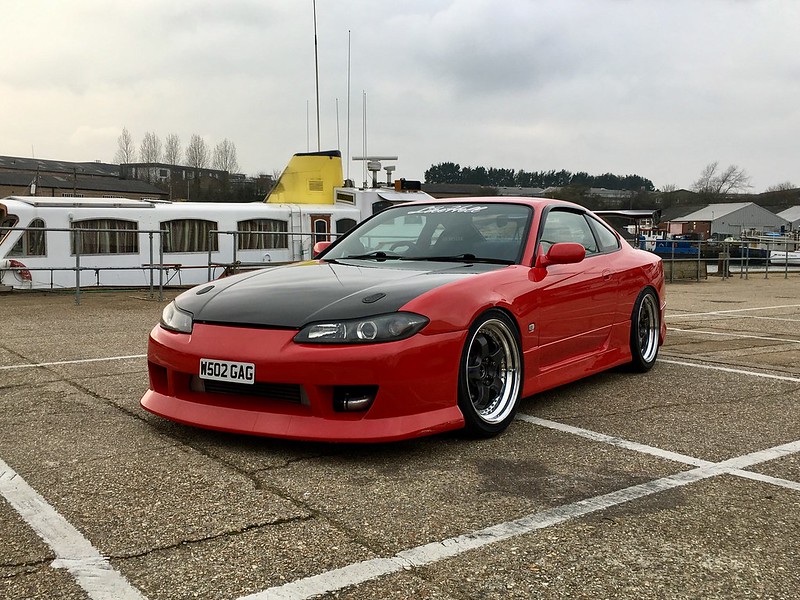 Untitled by Josh Jennings, on Flickr
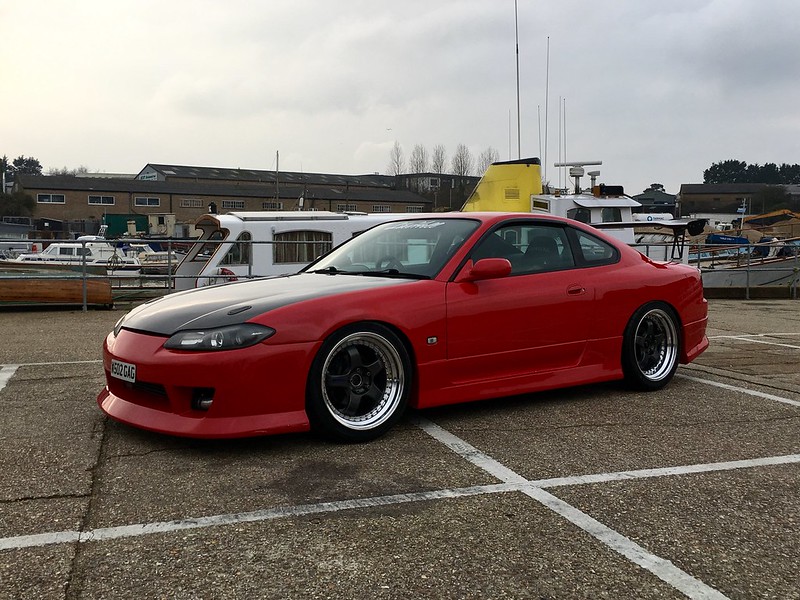 Untitled by Josh Jennings, on Flickr
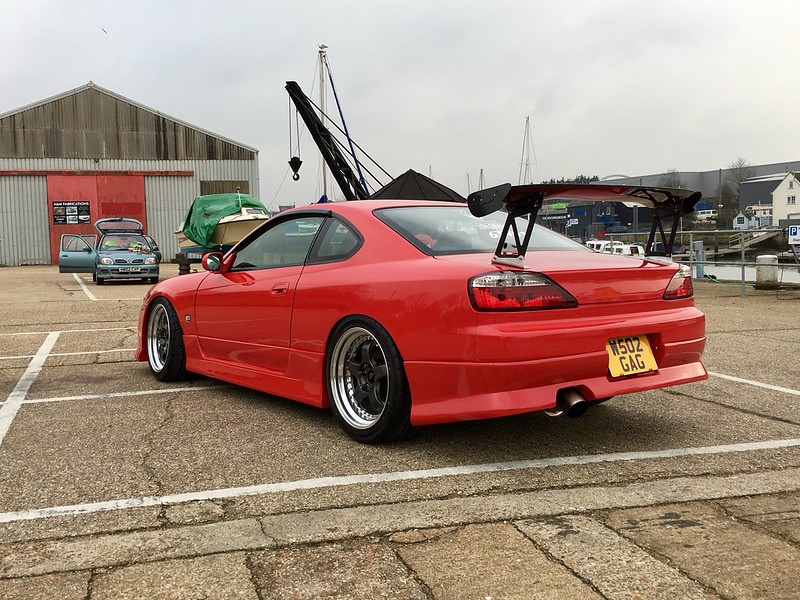 Untitled by Josh Jennings, on Flickr
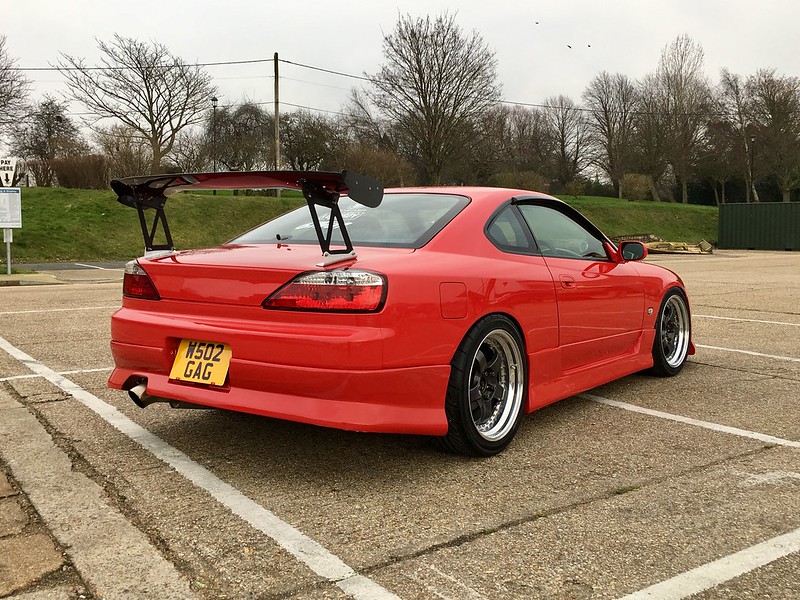 Untitled by Josh Jennings, on Flickr
As projects are never actually finished I’ve got more jobs planned for this. Ordered some 20mm vented front fenders, this will get rid of my current ones which I not happy with, also give me a bit more clearance. From my experience wide arches never come up as wide as advertised!
Got a Nismo short shifter fitted the other day, I was a bit sceptical but it has improved the shift quite a bit which is good.
There’s a few small jobs left like spraying the spoiler mounts and finishing the gold tape under the bonnet etc. They will get done one day… one day!
Oh and… haha!
Untitled by Josh Jennings, on FlickrUntitled by Josh Jennings, on FlickrUntitled by Josh Jennings, on FlickrUntitled by Josh Jennings, on FlickrAs projects are never actually finished I’ve got more jobs planned for this. Ordered some 20mm vented front fenders, this will get rid of my current ones which I not happy with, also give me a bit more clearance. From my experience wide arches never come up as wide as advertised!
Got a Nismo short shifter fitted the other day, I was a bit sceptical but it has improved the shift quite a bit which is good.
There’s a few small jobs left like spraying the spoiler mounts and finishing the gold tape under the bonnet etc. They will get done one day… one day!
Oh and… haha!


Gassing Station | Readers' Cars | Top of Page | What's New | My Stuff