
NA 1.8 MX5 Revival
Discussion


Following a gap where I haven't had a project with wheels for quite a while I decided to buy a project. It's my first time owning something this common. Previous ownership thread here: https://www.pistonheads.com/gassing/topic.asp?h=0&...
So a guy I worked with had this car, after months of him offering it to anyone and everyone for 500 quid I got it for £150 and an old sailor radio.
 |https://thumbsnap.com/BHe2n3FP[/url]
Sept 19, drag it out of hedge, cut up the brambles entwined with the rear wheels and inside the boot.
Standard rot on sills both sides. Inner and outer.


At first I was going to break it or sell it on for a little profit but things got well out of hand. Will keep updating until I'm up to speed but it's safe to say that this project has gotten well and truly out of hand! Update again soon.
1998 Mazda MX5 Harvard
1800cc
5 speed
Has been off the road 5 years
Front suspension destroyed
Alot of corrosion. Sills, inner arch patch, floor patch, inner wings, all parts underneath...
Roof torn.
Lots of bubbling under paint.
Noisy engine.
No clutch pedal.
So a guy I worked with had this car, after months of him offering it to anyone and everyone for 500 quid I got it for £150 and an old sailor radio.
|https://thumbsnap.com/BHe2n3FP[/url]Sept 19, drag it out of hedge, cut up the brambles entwined with the rear wheels and inside the boot.
Standard rot on sills both sides. Inner and outer.
At first I was going to break it or sell it on for a little profit but things got well out of hand. Will keep updating until I'm up to speed but it's safe to say that this project has gotten well and truly out of hand! Update again soon.
1998 Mazda MX5 Harvard
1800cc
5 speed
Has been off the road 5 years
Front suspension destroyed
Alot of corrosion. Sills, inner arch patch, floor patch, inner wings, all parts underneath...
Roof torn.
Lots of bubbling under paint.
Noisy engine.
No clutch pedal.
Edited by Roverload on Tuesday 12th May 21:15
A bit more rot I only discovered recently. Both sides under the windscreen. I had previously spotted it but it wasnt until it fully came to bits that I realised how bad it was. Finding it now at this stage of the build is causing a head scratcher as I would rather repair before paint but with the lockdown it's not really possible as it's not something I want to attempt myself.

First thing was to investigate and get an idea on weather it was worth saving. The thing that really swung it for me was firstly the cost of new parts. Next to my old transit connect it's the cheapest car for parts I've ever owned. Secondly I've always dreamed of going nuts on a car and building something awesome for myself. I achieved this to a point when I built my campervan but it's a world away from a well sorted performance machine that I crave. So for 150 quid I couldn't loose especially if i buy good second hand parts. Then came the inspiration. While researching I discovered how cheap it is to stick a turbo or supercharger on and see impressive gains for not alot. Great bang for buck. By a stroke of luck another friend messaged me offering this cooper s to me with a blown head gasket for £150 again. A sign methinks...

Currently it's still parked in my mates garage. I'll have the charger and throttle off it and the front seats for my van, I've already sold the remains to another friend for £250.
Around the same time I came across this car

And that cemented it for me. Let's make this happen!
First thing was to investigate and get an idea on weather it was worth saving. The thing that really swung it for me was firstly the cost of new parts. Next to my old transit connect it's the cheapest car for parts I've ever owned. Secondly I've always dreamed of going nuts on a car and building something awesome for myself. I achieved this to a point when I built my campervan but it's a world away from a well sorted performance machine that I crave. So for 150 quid I couldn't loose especially if i buy good second hand parts. Then came the inspiration. While researching I discovered how cheap it is to stick a turbo or supercharger on and see impressive gains for not alot. Great bang for buck. By a stroke of luck another friend messaged me offering this cooper s to me with a blown head gasket for £150 again. A sign methinks...
Currently it's still parked in my mates garage. I'll have the charger and throttle off it and the front seats for my van, I've already sold the remains to another friend for £250.
Around the same time I came across this car
And that cemented it for me. Let's make this happen!
First port of call was a friends garage. Got it up on a ramp to have a proper poke. To my amazement no rot on the chassis or other vital componants. I did however find light crash damage to the front end.

Both front springs snapped. One of which in 4 places! How!?
£90 later I had a set of ebay coilovers from a cheap just outside the village. Will do for now but from what I've read and seen on youtube they're not all that bad but don't expect theyll last more than a couple of years.

Clutch hydraulics were £20 on ebay for slave and master.
Lots of scraping and rust converting...


A mate welded the sills. I got both sides, inner and outer repair panels from a chap who didnt need them £70 delivered. Plus £50 to my mate who must not like money.


Bought wheels. Tyres were knackered and turned out to be kerbed to help. All four. Not happy as wasnt apparent in the pics. Anyway 9J ET0 15" Rota fake splits. £400. I know some people think fake splits are the antichrist but I'm cornwall theres no way in hell I'm driving around with £2k wheels. Just No.

Over christmas I spent some time cleaning it up some more and servicing it. It was tappeting like crazy but some Wurth gunk sorted that out along with fresh oil. At this point the car may or may not have found it's own way back to my workshop...
Where it sat until lockdown. Totally forgotten about but with a small mountain of parts I had been collecting...
Both front springs snapped. One of which in 4 places! How!?
£90 later I had a set of ebay coilovers from a cheap just outside the village. Will do for now but from what I've read and seen on youtube they're not all that bad but don't expect theyll last more than a couple of years.
Clutch hydraulics were £20 on ebay for slave and master.
Lots of scraping and rust converting...
A mate welded the sills. I got both sides, inner and outer repair panels from a chap who didnt need them £70 delivered. Plus £50 to my mate who must not like money.
Bought wheels. Tyres were knackered and turned out to be kerbed to help. All four. Not happy as wasnt apparent in the pics. Anyway 9J ET0 15" Rota fake splits. £400. I know some people think fake splits are the antichrist but I'm cornwall theres no way in hell I'm driving around with £2k wheels. Just No.
Over christmas I spent some time cleaning it up some more and servicing it. It was tappeting like crazy but some Wurth gunk sorted that out along with fresh oil. At this point the car may or may not have found it's own way back to my workshop...
Where it sat until lockdown. Totally forgotten about but with a small mountain of parts I had been collecting...
PushedDover said:
WOW
Never seen that much rust / orang coloured air on a MX5 - and I’ve had mine done !
This seems to be an epic resurrection
Thanks, I got lucky, it looked alot worse than it was, except for the drivers front area, I've been told it was parked in a deep puddle for a couple of winters. Never seen that much rust / orang coloured air on a MX5 - and I’ve had mine done !
This seems to be an epic resurrection
So, the saga continues.
Parts that were piling up included fake rocket bunny arches off ebay, boy oh boy I should have researched rocket bunny kits alot more before I bought it. This has turned out to be a massive job, requiring the rear arch and quarter panel to be modified. Since this project is kinda on a shoestring I've elected to do the fabrication myself.


I've been making my paterns to spot weld in today out of an E36 bonnet I was gifted. Looking forward to getting them on tomorrow with any luck.
The kit is one of these bolt on kits, they're marmite but I love that look personally. Should need 25mm spacers on the rear from the look of it but the fronts sit just right.
My son snapped one of the mirrors by accident so obviously I bought the tiniest most ludicrous mirrors I could find...

Remember the kerbed wheels?


Continuing to trial fit everything and drill all holes etc before I paint it. Still not happy with the way the splitter and arches meet each other. The mistake I made was fitting the arches before the splitter, but when I first fitted the arches I hadn't planned on using the rocket bunny splitter. I've had to get creative with a dremel and let the splitter into the arches a few mm. Same for the sideskirts which were way too long and dont fit correctly out of the packet if you're running the front arches.


So once everything had 1 dry fit it was time to pull the last bits off and really get down to prepping the whole car for paint. I had to cut every single bolt off the front end due to corrosion. I'm still not sure how I'm going to reattach it all but I may just make it all quick release. All in all solid enough, still have those two repairs under the windscreen to do but sank off work until september from the looks of it I'm not going to let it stop me from cracking on. So here is how she stands as of Saturday. Theres plenty I've missed but will fill in over time.

It's the only thing keeping me sane while I'm stuck at home with 3 primary school aged children. Plus I get to teach them all sorts of new and colourful words in the process...
RazerSauber said:
Handful of posts and you've surpassed my own MX5 thread by about 50 miles 
Top work, looking forward to more.
Yeah I need to get as much done as possible before It get forgotten about again, the jobs list for my van and my boat grows ever longer, at some point I will need to shift my attention. I can't focus on more than one project at a time. Top work, looking forward to more.
Tyres and wheels are the same size as I've seen others using on youtube. It's safe to say I wont be using this on back roads any time soon. I shall have to raise it up a bit for every day use but this is turning into more of a track day car that I can drive to work while the van is going through it's first major overhaul since I built it.
After that it'll likely be a fair weather garage queen or get sold to fund a dream car build perhaps. Depends on the finished result.
Couple of pics of other projects...
My nice and sensible commuting vehicle. Really looking forward to being able to park in a normal parking space again...

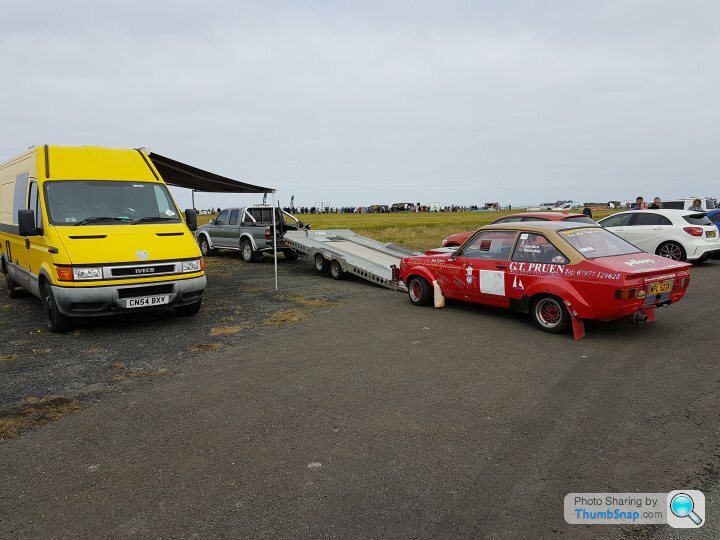
And the bane of my existence...

Hoping to take the mx5 to the finish bodywork wise and hopefully MOT'd before end of july so I can start on the van. But will need to take a week to address some rot and finish varnishing my mast. I can only focus on one thing at a time so I do worry I'll end up forgetting about the car once I'm into it with the boat.


Small update. I've still not collected the mini and all work pretty much ceased until this weekend. Welder has packed up so I have to load it onto a trailer and it's back to my friends garage we go! My plates I made to take up the gap in the rear quarters fit nicely and the welding under the windscreen isnt as bad as it looks which is very good news. I've got back on the prep sanding and filling in the easy to forget areas, inside the doors n jams etc.
Part of the reason for the lack of attention has been a build up in unexpected issues with my other toys. The van is pissing diesel at an alarming rate and after having craned my boat out a large amount of rot was discovered so now I've got to cut it all out, scarf new wood in and totally repaint it. It's a pretty big job, i want to do the car but the boat is continuing to be the bane of my existence. Not very interesting pics...


Part of the reason for the lack of attention has been a build up in unexpected issues with my other toys. The van is pissing diesel at an alarming rate and after having craned my boat out a large amount of rot was discovered so now I've got to cut it all out, scarf new wood in and totally repaint it. It's a pretty big job, i want to do the car but the boat is continuing to be the bane of my existence. Not very interesting pics...
I've had an unexpected week off so I managed to gather a couple of friends and between us we managed 24 hours of work today. I've been doing little bits and peices to it over the last few months and the welding saga has been a bit of a mare, my welder friend wasnt happy with the welder I provided but I made him do it anyway and long story short I should have listened! Anyhoo shes off to have the welding done on saturday so I'm trying to get it as close to ready for paint as possible.
I managed to source a hard top roof in tip top condition and all the fittings for £250

I bought a sand blaster and got busy cleaning every last spot of rust on the sils, inner wings and rear end no matter how small, I managed to get 3 coats if Jotun Mega coat epoxy 2 part which we usually use as a straight to bare metal primer on steel yachts followed by 3 coats of the black 2 part primer so thats nice and sealed now.
Secondly the old soft top and seal got removed as did the rusty knackered old screws left from the fuel sender cover, latch back on the new door, quarter light windows out, the rusty bracket on top of the front bumper removed and the fibreglass bodykit got keyed up, edges softened and a proper flow coat on the back so they should live a little longer than most fibreglass body parts.


I should have more updates later in the week!
On a side note I've settled on a colour scheme. Gloss black arches, hardtop, mirrors, splitter and skirts with Shelby Grabber blue for the body.

I managed to source a hard top roof in tip top condition and all the fittings for £250
I bought a sand blaster and got busy cleaning every last spot of rust on the sils, inner wings and rear end no matter how small, I managed to get 3 coats if Jotun Mega coat epoxy 2 part which we usually use as a straight to bare metal primer on steel yachts followed by 3 coats of the black 2 part primer so thats nice and sealed now.
Secondly the old soft top and seal got removed as did the rusty knackered old screws left from the fuel sender cover, latch back on the new door, quarter light windows out, the rusty bracket on top of the front bumper removed and the fibreglass bodykit got keyed up, edges softened and a proper flow coat on the back so they should live a little longer than most fibreglass body parts.
I should have more updates later in the week!
On a side note I've settled on a colour scheme. Gloss black arches, hardtop, mirrors, splitter and skirts with Shelby Grabber blue for the body.

Welding day today! That's the last of it done. I'll be making moves to get the body finished and in paint next. I'm hoping to get some space in the shed at work over the next couple of weeks to keep things moving forward. Then I can move onto the fun stuff.
In the past I've been involved with composites so I'm going to try my hand at the more complicated side to composites in motorsport, the plan is to build some working aero componants such as flat floor and diffuser, working big wing that doubles up as an air brake and a sealed radiator duct that. The whole theme of the car will be keeping that airflow attached to as much of the car as possible. I'm spending most of my free time researching and absorbing as much information as I can. It's worked in the past for sheddists around the world so I'm learning from their experiences and applying my knowledge to create something awesome. It's safe to say this is becoming a much more track focused project! More to come!


All rust in arches cleaned to shiny metal, epoxy primed and stone chipped. Rear arch panels welded up and seam sealed, the whole lot will get stonechiped and be neatly hidden away behind the big arches.

In the past I've been involved with composites so I'm going to try my hand at the more complicated side to composites in motorsport, the plan is to build some working aero componants such as flat floor and diffuser, working big wing that doubles up as an air brake and a sealed radiator duct that. The whole theme of the car will be keeping that airflow attached to as much of the car as possible. I'm spending most of my free time researching and absorbing as much information as I can. It's worked in the past for sheddists around the world so I'm learning from their experiences and applying my knowledge to create something awesome. It's safe to say this is becoming a much more track focused project! More to come!
All rust in arches cleaned to shiny metal, epoxy primed and stone chipped. Rear arch panels welded up and seam sealed, the whole lot will get stonechiped and be neatly hidden away behind the big arches.
I've taken a step back from work for a while to address the many many projects and jobs I've got backed up. My poor old iveco has finally decided to be unroadworthy as has my hateful civic leaving us with just the one car to get around, I'm not far off being ready to paint the MX5 now. I've got the Shelby Grabber blue and a deep gloss black for the arches, roof, sideskits and splitter.
I finally chose a spoiler, just the ticket bunny ducktail for now until I figure out how my big wing / airbrake is going to work. I've seen videos of a proof of concept using an MX5 headlight motor. It was successfully run in a 24hr lemons race without breakage but I dont want a motor bolted directly to the upright so it'll have to be mounted in the boot with a push rod system.
On a side note, I had to butcher the metal brackets that the bumper mounts to, I've selected some push button quick release items from Ebay. Demon tweaks sell these exact items for £15 each I believe but I was very pleased to get 4 for a tenner and they are of the same quality and appear to work very well.
I will be really focusing on getting this car over the line this month so watch this space. Doesnt look a whole lot different at the moment but it really is coming on nicely now.


I finally chose a spoiler, just the ticket bunny ducktail for now until I figure out how my big wing / airbrake is going to work. I've seen videos of a proof of concept using an MX5 headlight motor. It was successfully run in a 24hr lemons race without breakage but I dont want a motor bolted directly to the upright so it'll have to be mounted in the boot with a push rod system.
On a side note, I had to butcher the metal brackets that the bumper mounts to, I've selected some push button quick release items from Ebay. Demon tweaks sell these exact items for £15 each I believe but I was very pleased to get 4 for a tenner and they are of the same quality and appear to work very well.
I will be really focusing on getting this car over the line this month so watch this space. Doesnt look a whole lot different at the moment but it really is coming on nicely now.
My ducktail arrived. Less than impressed. If you do a job and don't do it properly that's almost certainly guaranteed to grind my gears.


There's not a fair line on the thing. Under normal circumstances I'd send it back and get a better one but I'm thinking if I fair this to something respectable and sharpen the edges up and make it just a tad higher I can take a mould of the spoiler and bootlid and make it one peice. It's a bit top heavy now.

I've accepted that this is going to be a very long haul process getting this car where I want it, i have many aerodynamic orientated plans, I've been quite lucky in that an awful lot of aerodynamic studies and theory books and videos use the mk1 MX5 as their test subject. I've been researching how to better understand CFD data and the forces involved in a well sorted racecar and I'm getting to the point where I know what my plan is.
Without going into too much detail the spoiler has been a bone of contention in my mind. The ducktail doesnt really do much for the car except for the very ends where it does catch and dispatch flow coming over the rear quarters but the hardtop renders the center of it useless as the frow detaches at the top of the window. So a big massive rear wing is more suitable. The only thing that could possibly make a difference is the use of vortex generators but I have no data to show where these would be best placed or if they will even work to keep the flow attached down the rear window so it's going to have to be trial and error with a ball of wool. I'd like to mount a big wing to the metalwork behind the number plate holder so I can detach it and hide the mounts behind it when I'm driving the 4 hours to my nearest track day. I'm not even getting into the airbrake plan, that's for another time.
Any advice welcome, especially on making arch liners if anyone here has ever done this? Got some ideas but if theres a tried and tested method I wanna hear it!
Primed all the remaining body parts, lots of lovely sanding ahead.


There's not a fair line on the thing. Under normal circumstances I'd send it back and get a better one but I'm thinking if I fair this to something respectable and sharpen the edges up and make it just a tad higher I can take a mould of the spoiler and bootlid and make it one peice. It's a bit top heavy now.
I've accepted that this is going to be a very long haul process getting this car where I want it, i have many aerodynamic orientated plans, I've been quite lucky in that an awful lot of aerodynamic studies and theory books and videos use the mk1 MX5 as their test subject. I've been researching how to better understand CFD data and the forces involved in a well sorted racecar and I'm getting to the point where I know what my plan is.
Without going into too much detail the spoiler has been a bone of contention in my mind. The ducktail doesnt really do much for the car except for the very ends where it does catch and dispatch flow coming over the rear quarters but the hardtop renders the center of it useless as the frow detaches at the top of the window. So a big massive rear wing is more suitable. The only thing that could possibly make a difference is the use of vortex generators but I have no data to show where these would be best placed or if they will even work to keep the flow attached down the rear window so it's going to have to be trial and error with a ball of wool. I'd like to mount a big wing to the metalwork behind the number plate holder so I can detach it and hide the mounts behind it when I'm driving the 4 hours to my nearest track day. I'm not even getting into the airbrake plan, that's for another time.
Any advice welcome, especially on making arch liners if anyone here has ever done this? Got some ideas but if theres a tried and tested method I wanna hear it!
Primed all the remaining body parts, lots of lovely sanding ahead.

Gassing Station | Readers' Cars | Top of Page | What's New | My Stuff