2006 Mazda MX5 Mk3 Track Car build
Discussion


I did start to post this in my other Reader's Cars thread for my 1979 Mk1 Golf Restomod project (Here: https://www.pistonheads.com/gassing/topic.asp?h=0&... ) but decided to make a separate thread.
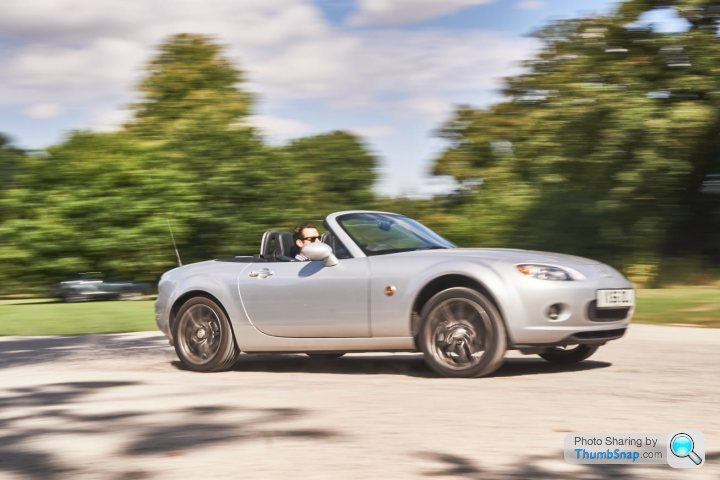
I picked up this 2006 Mazda MX5 2.0 Sport in Summer 2018 as a cheap daily driver. Had about 90,000 miles on and was a bit leggy, but not too pricey.
Some pics from when I first got it out on a drive with some friends:


Shortly afterwards I found that Amazon seemed to reduce the price of items significantly when there was only one left in stock, or something like that. The upshot was that I got a full Bilstein B12 suspension kit for £350, an SKF waterpump for £6 and an INA belt tensioner for £14.... Also picked up new belts, coolant thermostat etc to give it a good service. Also changed the gearbox and diff oil around this time too.


Fitting the suspension kit, you'll also see I had a go at vinyl wrapping. Turns out it's just as hard as it looks...


Also did some cursory rust removal/ rust proofing, but tbh I didn't do a very thorough job. However, the actual rust problems were already well underway by this point anyway, just well hidden under the rubber underseal.

Made use of the infinite headroom for carrying large loads

Other than that just was using the car for commuting to work, ride height comparison in the work car park:

Fitted £106 of Ebay's finest stainless exhaust manifold. Which did actually make quite a difference despite clearly not being tuned lengths or anything. Mainly because it removes one of the two cats. It's also proven to be very durable, probably because it retains the lower bracket that bolts to the engine block.

Before the MOT in Oct 2020 I decided to have a more thorough poke around the rear arches/sills


Lovely. Managed to get 2 days on a friends 2 post lift to sort it out


By no means my best work, but I was pushed for time, and pretty sore from doing all the work above my head for 2 days
Most recently replaced the front wheel bearings for Timken RX8 ones (marked Mazda on the back so the original supplier) The Blueprint brand equivalents had lasted less than 5000 miles before developing noticeable play.

Which brings us up to date.
It's no longer my daily driver, and I'd like to start doing track days. So over the Winter I'm going to give the underbody a refresh, and replace a few worn components to hopefully prepare it for some track use.
I picked up this 2006 Mazda MX5 2.0 Sport in Summer 2018 as a cheap daily driver. Had about 90,000 miles on and was a bit leggy, but not too pricey.
Some pics from when I first got it out on a drive with some friends:
Shortly afterwards I found that Amazon seemed to reduce the price of items significantly when there was only one left in stock, or something like that. The upshot was that I got a full Bilstein B12 suspension kit for £350, an SKF waterpump for £6 and an INA belt tensioner for £14.... Also picked up new belts, coolant thermostat etc to give it a good service. Also changed the gearbox and diff oil around this time too.
Fitting the suspension kit, you'll also see I had a go at vinyl wrapping. Turns out it's just as hard as it looks...
Also did some cursory rust removal/ rust proofing, but tbh I didn't do a very thorough job. However, the actual rust problems were already well underway by this point anyway, just well hidden under the rubber underseal.
Made use of the infinite headroom for carrying large loads
Other than that just was using the car for commuting to work, ride height comparison in the work car park:
Fitted £106 of Ebay's finest stainless exhaust manifold. Which did actually make quite a difference despite clearly not being tuned lengths or anything. Mainly because it removes one of the two cats. It's also proven to be very durable, probably because it retains the lower bracket that bolts to the engine block.
Before the MOT in Oct 2020 I decided to have a more thorough poke around the rear arches/sills
Lovely. Managed to get 2 days on a friends 2 post lift to sort it out
By no means my best work, but I was pushed for time, and pretty sore from doing all the work above my head for 2 days
Most recently replaced the front wheel bearings for Timken RX8 ones (marked Mazda on the back so the original supplier) The Blueprint brand equivalents had lasted less than 5000 miles before developing noticeable play.
Which brings us up to date.
It's no longer my daily driver, and I'd like to start doing track days. So over the Winter I'm going to give the underbody a refresh, and replace a few worn components to hopefully prepare it for some track use.
Thankfully I have an attached garage at home, so it's never really below 10deg, and I can get it to 15deg pretty quickly with an electric heater.
Inside and up on the dolly:

With help from a friend we got the rear axle out:

I'm going to pretty much ignore the axle for the time being, and get the body sorted first. I'm the master of unfinished projects, and I think it's partly because I do the easier bits first and then stall at the bodywork. So I'm going to try and do this one the other way round.
Pushed out onto the drive for a jet wash:

I'd say that in terms of the general condition, it's more grotty than the 1979 Golf...

Rust has crept under the rubber sealer all over the place.
Got a speed hole behind the brake pipe (this car is a 2006... 2006 FFS!)
There's a Mazda part number for the panel that covers this area, for around £30. I've ordered it on the slim chance that it's still available, but not holding out much hope.

Much the same story behind the fuel tank:

Started at it with the wire brushes and strip discs, followed by two coats of Bilt Hamber rust converter. I wouldn't use rust converters anywhere near the Golf as I'm chasing perfection there, so it's quite liberating to just slap it on and not worry about it haha.


Once I've done this everywhere from the floorpan backwards, it'll get a coat of epoxy primer followed by Gravitex, and finally some gloss chassis paint (just to make it easier to clean really)
Looking back inside the chassis rail from inside the cabin (thankfully accessible behind the seatbelt). 2006!!!!

I've also ordered an immaculate looking 2nd hand subframe from a US ebay seller, apparently with import duties pre-paid. Even with shipping and duty it came to £230, which is less than sellers here want for ones like mine that look like they've been in the sea for 20 years. Hopefully it turns up!

I could get mine blasted and powdercoated, but that wouldn't get inside the hollow sections, and it's in such a state I wouldn't be surprised if it was close to rusting through.
Inside and up on the dolly:
With help from a friend we got the rear axle out:
I'm going to pretty much ignore the axle for the time being, and get the body sorted first. I'm the master of unfinished projects, and I think it's partly because I do the easier bits first and then stall at the bodywork. So I'm going to try and do this one the other way round.
Pushed out onto the drive for a jet wash:
I'd say that in terms of the general condition, it's more grotty than the 1979 Golf...
Rust has crept under the rubber sealer all over the place.
Got a speed hole behind the brake pipe (this car is a 2006... 2006 FFS!)
There's a Mazda part number for the panel that covers this area, for around £30. I've ordered it on the slim chance that it's still available, but not holding out much hope.
Much the same story behind the fuel tank:
Started at it with the wire brushes and strip discs, followed by two coats of Bilt Hamber rust converter. I wouldn't use rust converters anywhere near the Golf as I'm chasing perfection there, so it's quite liberating to just slap it on and not worry about it haha.
Once I've done this everywhere from the floorpan backwards, it'll get a coat of epoxy primer followed by Gravitex, and finally some gloss chassis paint (just to make it easier to clean really)
Looking back inside the chassis rail from inside the cabin (thankfully accessible behind the seatbelt). 2006!!!!
I've also ordered an immaculate looking 2nd hand subframe from a US ebay seller, apparently with import duties pre-paid. Even with shipping and duty it came to £230, which is less than sellers here want for ones like mine that look like they've been in the sea for 20 years. Hopefully it turns up!
I could get mine blasted and powdercoated, but that wouldn't get inside the hollow sections, and it's in such a state I wouldn't be surprised if it was close to rusting through.

I've had a MK 1, 2 and a 3 and the three (also a 2006 bought in 2012 from the Mazda main dealers) was by far the rustiest of the lot... underneath, the top side was immaculate which was why I bought it without looking underneath! It was as bad as yours and I sold it pretty flippin' sharpish which was a shame as I quite liked it, more 'grown up' than the earlier cars but still as much fun.
You're doing jolly good work, keep it up
You're doing jolly good work, keep it up
Great work, it's going to be great fun on track when done.
Blimey also shocked at the rust. My NB looked like a shed underneath after just two winters! I hope the ND is somewhat better, but not looking good.
My Z4 from the same year is really like new underneath. Only the odd fastener and bracket has some surface rust.
Blimey also shocked at the rust. My NB looked like a shed underneath after just two winters! I hope the ND is somewhat better, but not looking good.
My Z4 from the same year is really like new underneath. Only the odd fastener and bracket has some surface rust.
Thanks everyone! I knew that the Mk1s and Mk2 had a bit of a rust reputation, didn't expect the Mk3 to be at the stage to need welding yet, but there we go.
Ah, I'd actually pushed it through so I could strip the rust from the other side. However I do suspect the drain pipe is the culprit, as the passenger side chassis rail is spotless by comparison. Can't come up with another explanation of why one side would be so much worse than the other?
I got a few hours on it over the last few days. Firstly got the brake and fuel pipes out of the way:

Stripped back the floorpan area above the fuel tank, I sort of had plans to do the whole lot in one go but my body had had enough. And my angle grinder started letting the smoke out, so decided to split it into sections.


Applied two coats of the Bilt Hamber rust converter


Then today got the first of two coats of Upol Epoxy Primer on by brush and roller

It's quite morale boosting to see it all in one colour, it's pretty miserable lying on your back getting covered in s t. The before and afters almost make it seem worthwile:


Just hope it keeps the rust at bay! I hope the effort invested here gives better longevity than just spraying a load of black st over the rust.
The car won't see regular winter use any more, so I'm not too concerned.
My 'new' subframe is apparently on it's way from Florida to Kentucky, to the eBay international shipping centre I presume. It's probably very sad but I'm more excited about that than Christmas
NDNDNDND said:
That disconnected drainage tube looks like it's got a lot to answer for!
Ah, I'd actually pushed it through so I could strip the rust from the other side. However I do suspect the drain pipe is the culprit, as the passenger side chassis rail is spotless by comparison. Can't come up with another explanation of why one side would be so much worse than the other?
I got a few hours on it over the last few days. Firstly got the brake and fuel pipes out of the way:
Stripped back the floorpan area above the fuel tank, I sort of had plans to do the whole lot in one go but my body had had enough. And my angle grinder started letting the smoke out, so decided to split it into sections.
Applied two coats of the Bilt Hamber rust converter
Then today got the first of two coats of Upol Epoxy Primer on by brush and roller
It's quite morale boosting to see it all in one colour, it's pretty miserable lying on your back getting covered in s
t. The before and afters almost make it seem worthwile:Just hope it keeps the rust at bay! I hope the effort invested here gives better longevity than just spraying a load of black s
t over the rust.The car won't see regular winter use any more, so I'm not too concerned.
My 'new' subframe is apparently on it's way from Florida to Kentucky, to the eBay international shipping centre I presume. It's probably very sad but I'm more excited about that than Christmas
Got stuck back into this over the last few days.
Stripped back the rest of the boot floor and chassis legs


Then got it all treated with the rust converter


Then today started the Epoxy primer


Next up will probably be welding in some repairs to the trailing edge of the wheel arches (you can see where I've cut away the rot in some of the pictures)
My new subframe has apparently departed the eBay International Shipping centre, so should be on it's way to Blighty now
Stripped back the rest of the boot floor and chassis legs
Then got it all treated with the rust converter
Then today started the Epoxy primer
Next up will probably be welding in some repairs to the trailing edge of the wheel arches (you can see where I've cut away the rot in some of the pictures)
My new subframe has apparently departed the eBay International Shipping centre, so should be on it's way to Blighty now
Nice job, looks quite shocking for 2006 year car in some areas.
What is your steps for body, uderbody protection and painting?
Do you clean metal after Bilt Hamber rust converter is used or just apply epoxy primer on to it without cleaning again to bare metal? What is the right steps to do it properly?
What is your steps for body, uderbody protection and painting?
Do you clean metal after Bilt Hamber rust converter is used or just apply epoxy primer on to it without cleaning again to bare metal? What is the right steps to do it properly?
rm36house said:
Nice job, looks quite shocking for 2006 year car in some areas.
What is your steps for body, uderbody protection and painting?
Do you clean metal after Bilt Hamber rust converter is used or just apply epoxy primer on to it without cleaning again to bare metal? What is the right steps to do it properly?
Thanks, next steps will be seam sealer brushed over all the seams (I have a tin of Bilt Hamber's seam sealer for that. I should be a Bilt Hamber salesman!)What is your steps for body, uderbody protection and painting?
Do you clean metal after Bilt Hamber rust converter is used or just apply epoxy primer on to it without cleaning again to bare metal? What is the right steps to do it properly?
Then 2 or 3 coats of Upol Gravitex stone chip, and finally a few coats of Polyurethane Enamel chassis paint. That last step isn't necessary as Gravitex can be left uncoated, but it has a very rough matte surface that I think will pick up a lot of dirt and tyre rubber. I'm hoping the chassis paint being gloss will make it easier to keep clean.
I went straight over the rust converter with the Epoxy, Bilt Hamber do say that it can be flatted back, but you must not abrade through the layer back to bare metal. I guess it's creating a barrier between the rust and subsequent coatings, so an breaks in the barrier will stop it working effectively.
This is the first time I've used it 'properly', i.e paid proper attention to prep, degreasing, coating with epoxy etc. So it's a learning experience for me too, hope it lives up to the marketing blurb!
I haven't used Raptor, but from what I've heard it sets rock hard, whereas Gravitex stays a bit flexible. Therefore I'm not sure Raptor is suited to underbody coating in my opinion. Not necessarily because it will chip, but rather it won't really deaden noise.
The main reason I'm using Gravitex here is that it's dirt cheap (£36 for 6 litres) and I'm not under time pressure for it to dry. I don't want to spend too much money on this car given it's value and intended use.
However, taking my Mk1 golf for example, for the underside and wheel arches I will probably use either a Rubberised product such as Dinitrol 447 Super, or a sprayable seam sealer product (but this will require investment in a gun to spray it).
For the sills and front panel, 3M and Dinitrol both do a range of stone chip products that give a finer finish and can be painted. TBH it's a bit confusing as they seem to do so many!
I learned a lot watching Reddish Motorsport's videos on Youtube:
https://www.youtube.com/watch?v=GsoETrDOPYg&t=...
https://www.youtube.com/watch?v=hhDAQ97WnxA
Good luck with your project!
Thank you mate!
Than looks like I'm going to use Dinitrol previousley I have some thoughts about it, but read about Raptor somewhere and thought maybe this is the right one, ok, thanks, sounds good enough that Dinitrol is the answer for me.
Thank you! You too good luck with your project! I'm following with very big interest what will follow next.
Been making steady progress on this.
Welded in a repair to the trailing edge of the driver's side arch. Didn't think to take any pictures until I was finished, but it wasn't very pretty. Tricky welding to very thin metal that was already semi-rusty. But not that bothered as it isn't structural and we're not trying to win any beauty contests here, as evidenced by my seam sealer work....
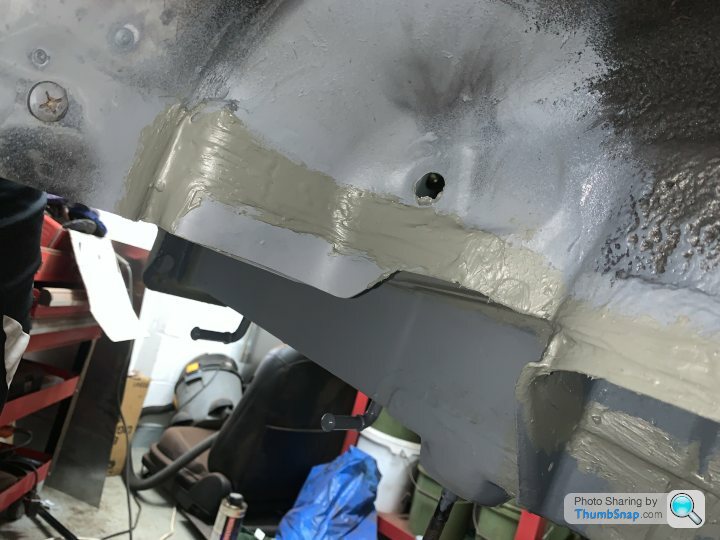
Got the majority of the rear underbody coated in Gravitex. Only did one coat in the end, the amount of build seemed plenty. Yet to do the outer parts of the wheel arches, or weld up the holes behind the brake pipes.


Then finally coated over the Gravitex with some gloss grey chassis paint to give a nice and easy to clean finish


Still need to finish the boot floor, but I'm really pleased with how it's turned out.
Also experimented with Gravitex applied by roller, followed by chassis paint on one of the undertrays. Give a much finer textured finish that works quite well I think. Might do this for some of the other undertrays, and maybe the transmission tunnel too.


Welded in a repair to the trailing edge of the driver's side arch. Didn't think to take any pictures until I was finished, but it wasn't very pretty. Tricky welding to very thin metal that was already semi-rusty. But not that bothered as it isn't structural and we're not trying to win any beauty contests here, as evidenced by my seam sealer work....
Got the majority of the rear underbody coated in Gravitex. Only did one coat in the end, the amount of build seemed plenty. Yet to do the outer parts of the wheel arches, or weld up the holes behind the brake pipes.
Then finally coated over the Gravitex with some gloss grey chassis paint to give a nice and easy to clean finish
Still need to finish the boot floor, but I'm really pleased with how it's turned out.
Also experimented with Gravitex applied by roller, followed by chassis paint on one of the undertrays. Give a much finer textured finish that works quite well I think. Might do this for some of the other undertrays, and maybe the transmission tunnel too.
Cambs_Stuart said:
Great attention to detail. Really enjoying the thread.
Thanks, it's encouraging to get positive feedback!My 'new' subframe arrived at 10pm last night, and I'm really glad I decided to go this route. It needs a little bit of work, but this is easily outweighed by the lack of corrosion. I mean look at the nuts and bolts for crying out loud.


And comparing to the condition of the old one, you'll see why I decided to replace it...


So what's wrong with the new one? Well, there's a really odd bit of damage on it. None of the arm clevis's look to be dramatically bent out of shape or anything like that, and the straight bits of the subframe are straight when checked with a straight edge. However, there's a puncture through the driver's side lower rear arm clevis. Whatever has caused it has come from the inside out, and it doesn't look big enough to be caused by the bolt or suspension arm being snapped in a crash. If anything it looks like a bullet hole, this did come from Florida after all... I guess the more likely explanation is that they drove over something on the Freeway?

The main problem with this, apart from fact that there's a hole, is that the metal is deformed locally around the hole, and that deformation encroaches on the flat area where the eccentric washer for the camber adjustment bolt could potentially want to sit.

For peace of mind (and for somewhere to store it!) I bolted it up to the car. It went onto all 6 body studs fine, and although they weren't centred in the holes, the nuts matched the witness marks on the frame from the old nuts. With fabricated steel parts like this, this is quite normal due to the tolerances in manufacture. The fact that the witness marks on the frame match up to closely when it's fitted to my car suggests that the tolerances on the body are much tighter than the subframe (albeit from a sample of 2) So, overall I'm happy that the whole frame itself isn't out of shape or anything dramatic like that.


To fix the 'bullet hole', I'll probably grind away the bulk of the 'leaves' of steel that have flared out, then hammer and dolly the clevis flat. Then drill or cut a neater hole around it and weld in a small plate. The steel is surprisingly thin, probably only 1.5mm. All the more reason to replace the old one, can't have been far from rusting through. Finally I'll send it for powdercoating and keep my fingers crossed that the wheel alignment will come out somewhere close
Oh and obviously inject Bilt Hamber (TM) anti corrosion wax inside all the tubes
Gassing Station | Readers' Cars | Top of Page | What's New | My Stuff