A MINI Adventure - His and Hers R50 Racecars
Discussion


Lots of people doing R53 builds, that and Facebook memories got me a bit in the mood for doing a thread on a bit of our build history.
So, time warping back to roughly now in 2013
After a couple of years of running arrive and drive in the Scottish MINI Cooper Cup, my (now) wife’s father had a chat about my mate and me building 2 new cars to run in 2014, 1 for my wife and 1 for me.
My wife’s car had a good few seasons under it so would benefit from a reshell, I had no car so needed to source one to reshell.
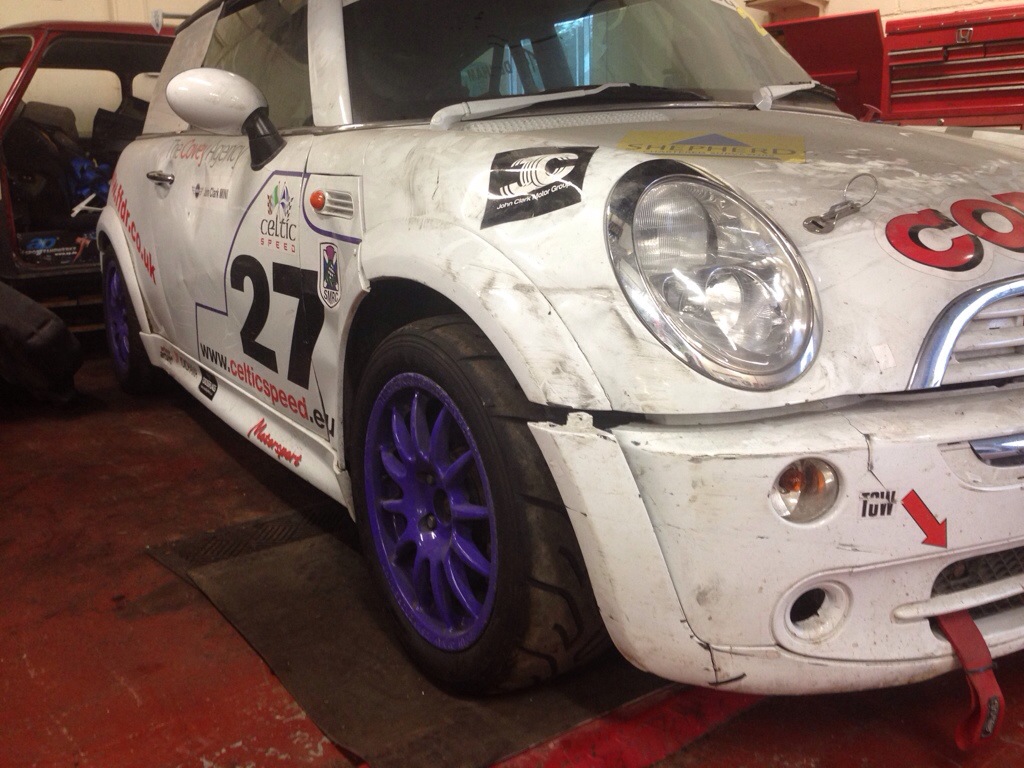
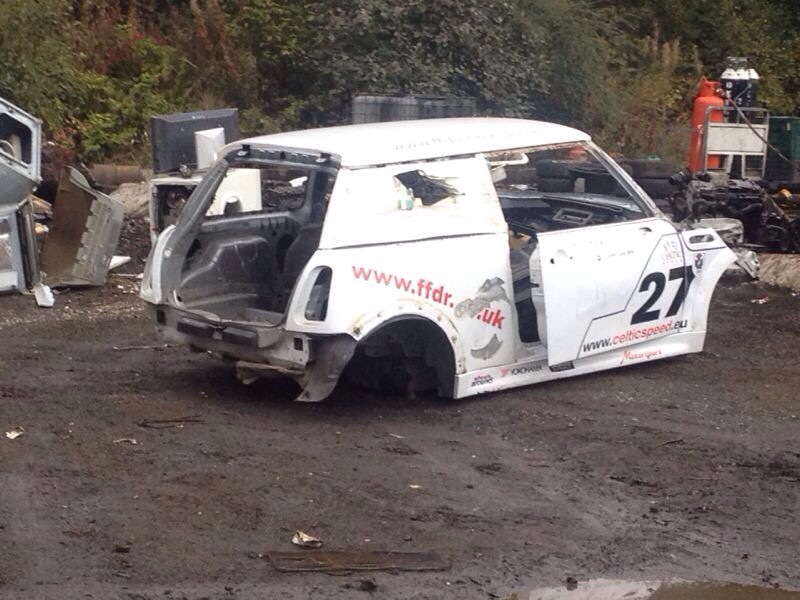
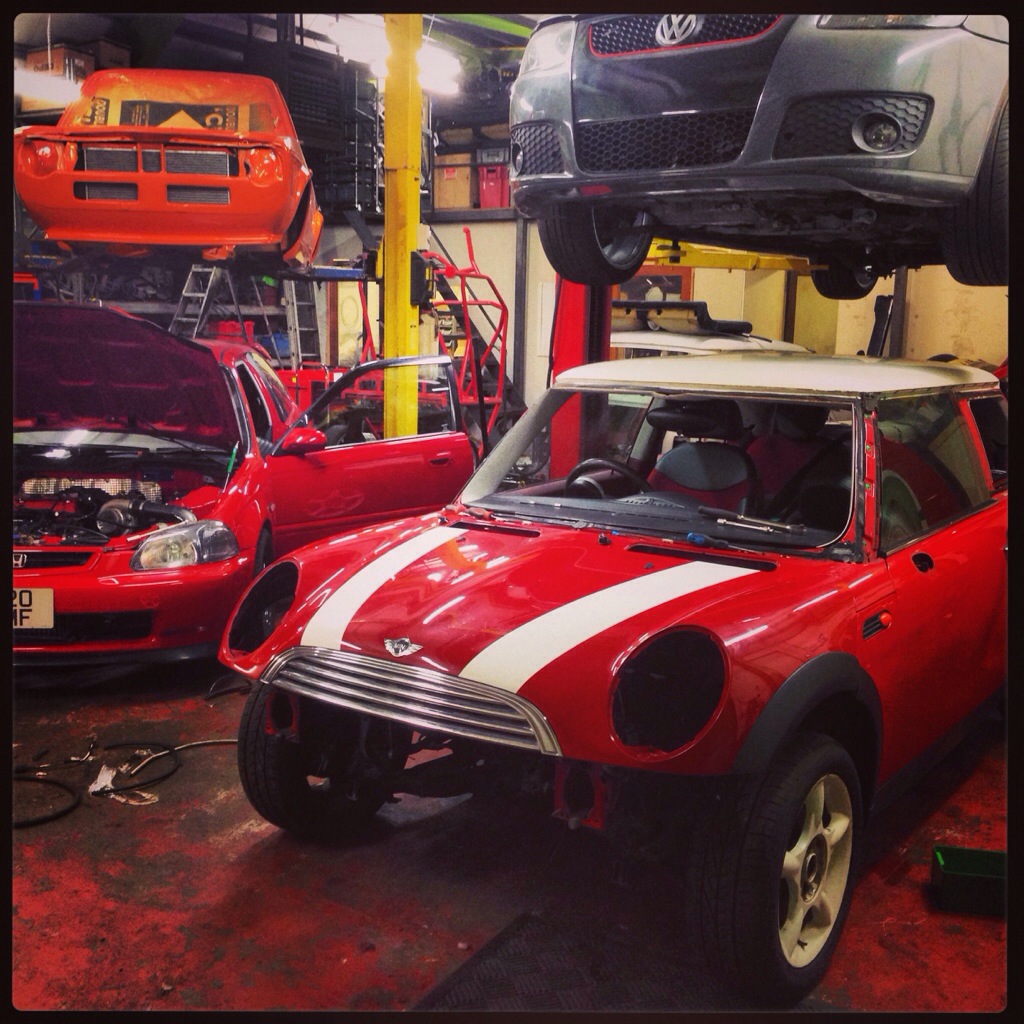
Here's the donor for my racecar, previously owned by various racers and a veteran of many years in the championship. She'd had a tough life and it shows, but the engine and gearbox are ok and the suspension and cage will be finding their way in to the new shell.

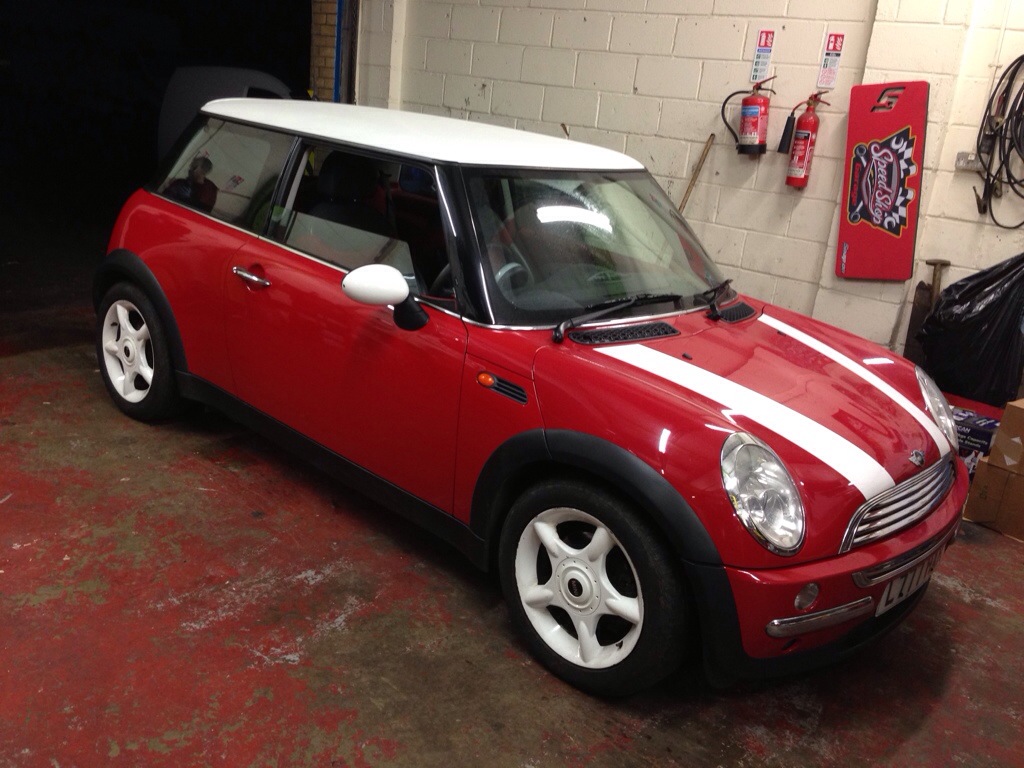
New shell is being denoted by this 2001 Cooper sourced from the hallowed pages of eBay. With 132,000 miles on the clock she was still remarkably tight and the engine ran sweet but the gearbox has the trademark Midland rumble.
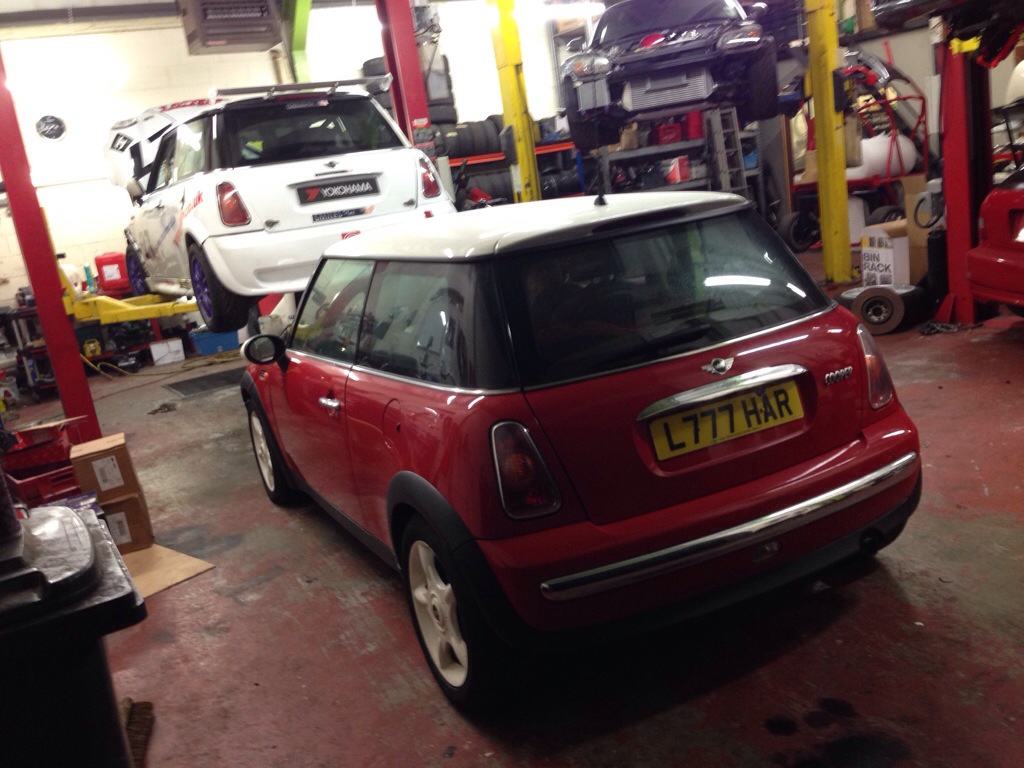
So, first part of any build, strip and survey.
Driving both cars briefly to check over engines, transmissions and suspension components before we started. Then came the teardown.
At this stage we were vaguely harbouring thoughts of rebuilding the donor racecar, then we got a proper look at the state of it...
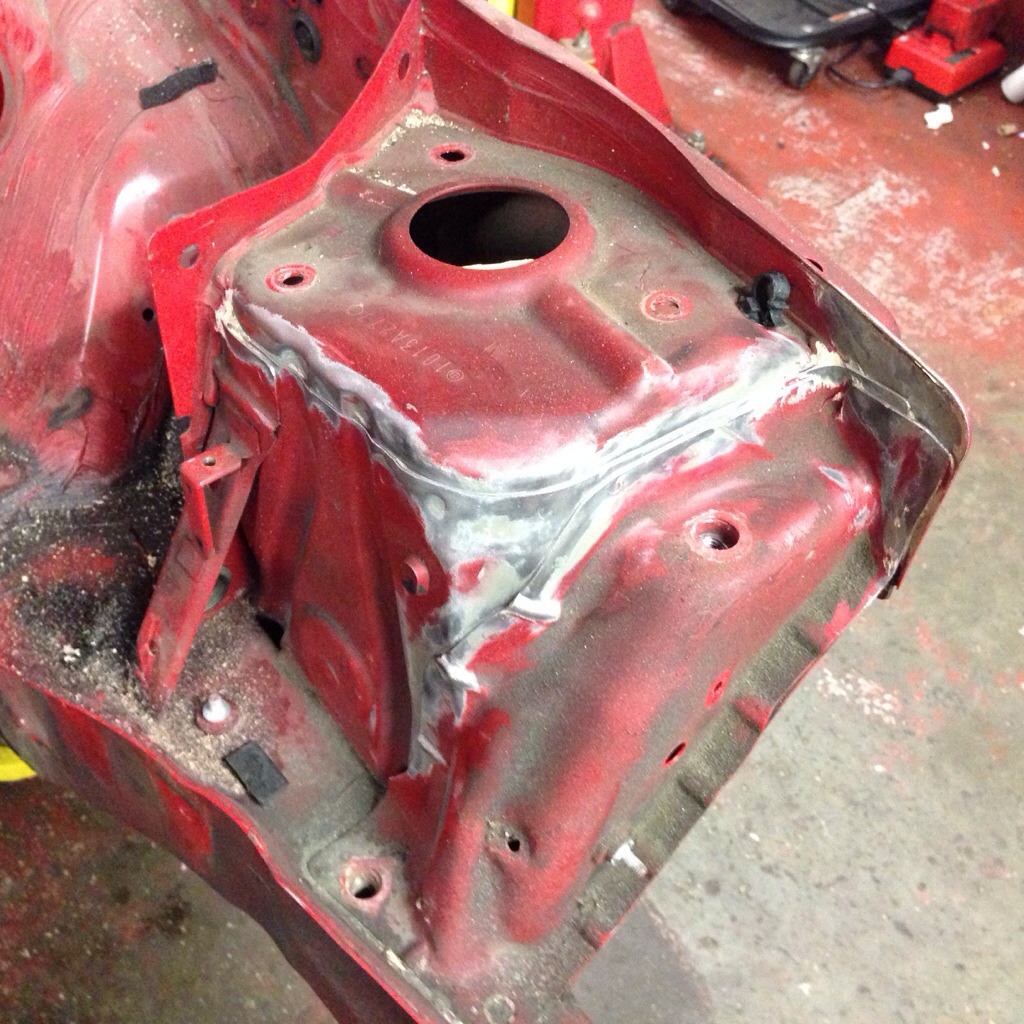
Dented turret/leg. Any transverse loading to this leg is bad news in the long run. This is a key weakness identified on our racecars where a little chassis flex starts popping driveshafts:
[img src="http://mcnab-racing.co.uk/wp-content/uploads/2013/12/20131208-184847.jpg[/img]
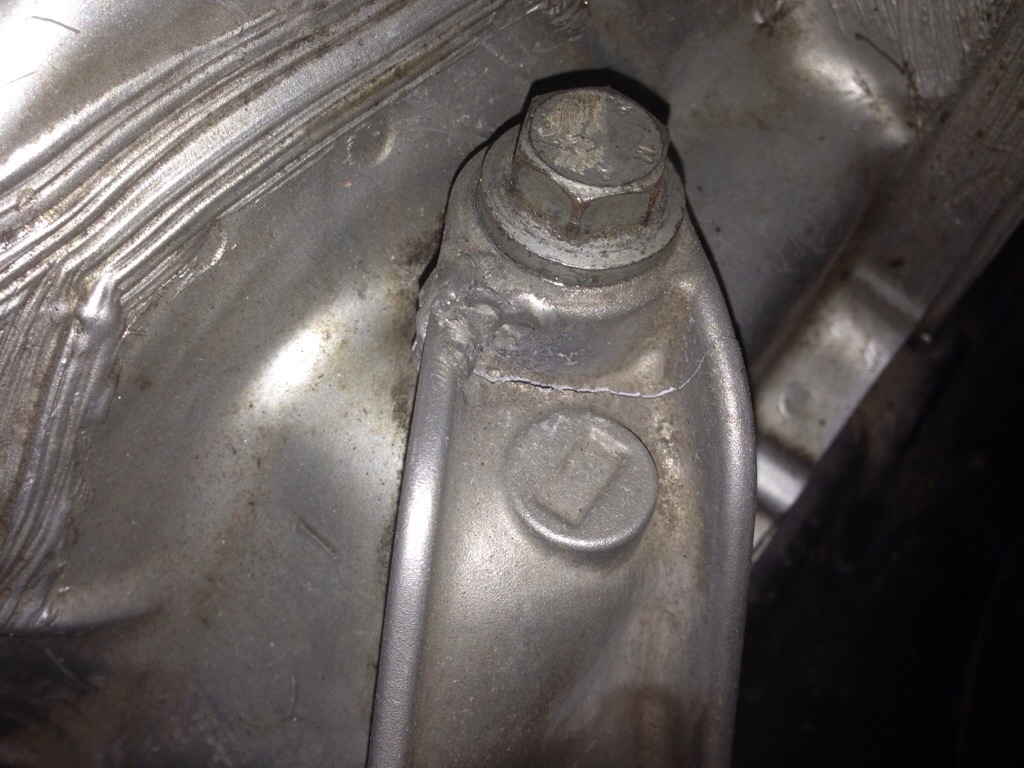
Cracked mount someone's spat some weld at:
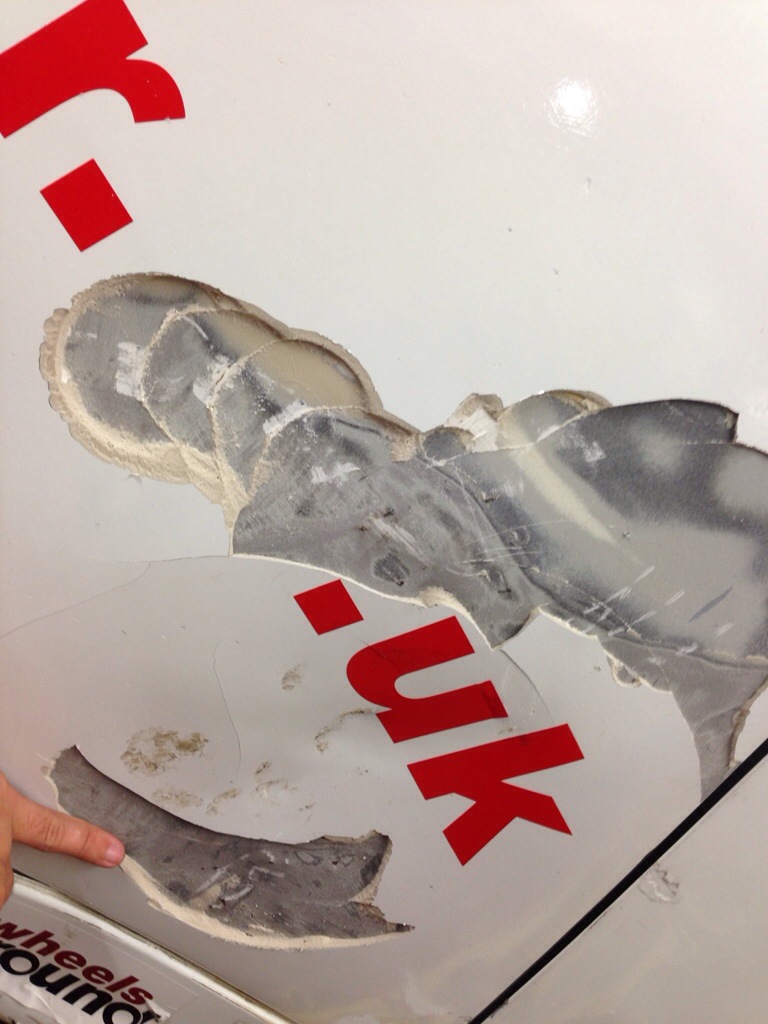
Half inch of cataloy on the rear quarter:
Other highlights included an overflow bottle that looked like it was full of sewage, dented rims and sliced tyres, battery held in (loosely) with a piece of cut down ratchet strap material, re-skinned roof that was an inch higher at the back than the front, replacement door that hadn't even had the speaker taken out, exhaust melting the rear bumper and more bullet connectors than Maplin.
As they say in the movies: Fin
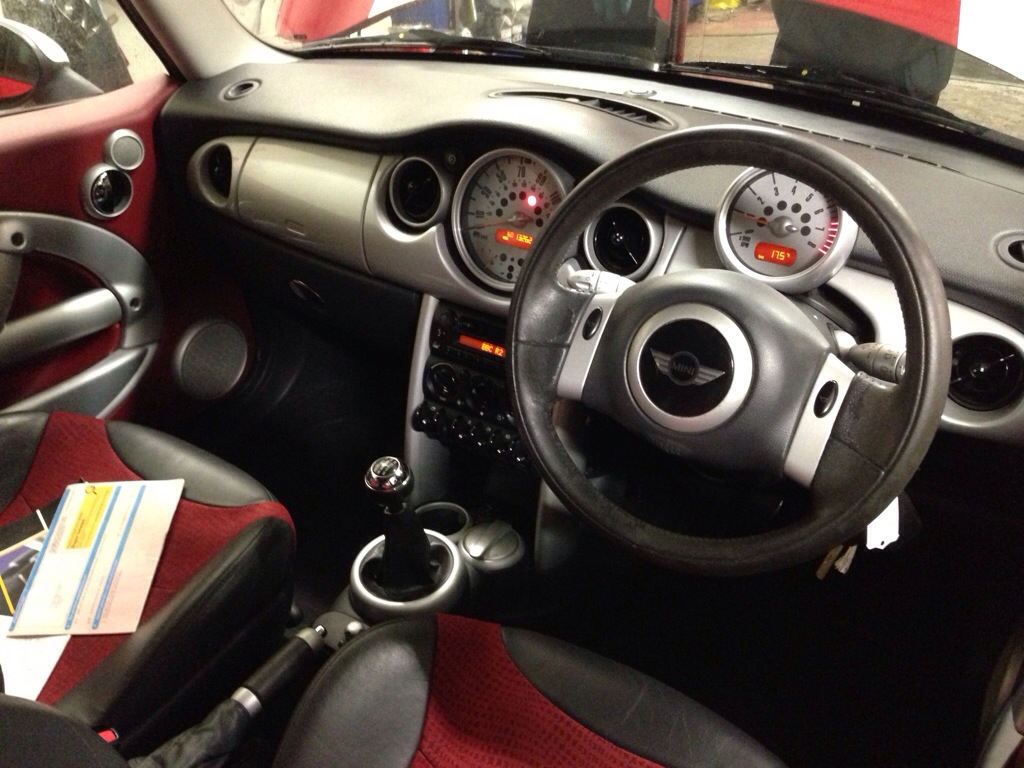
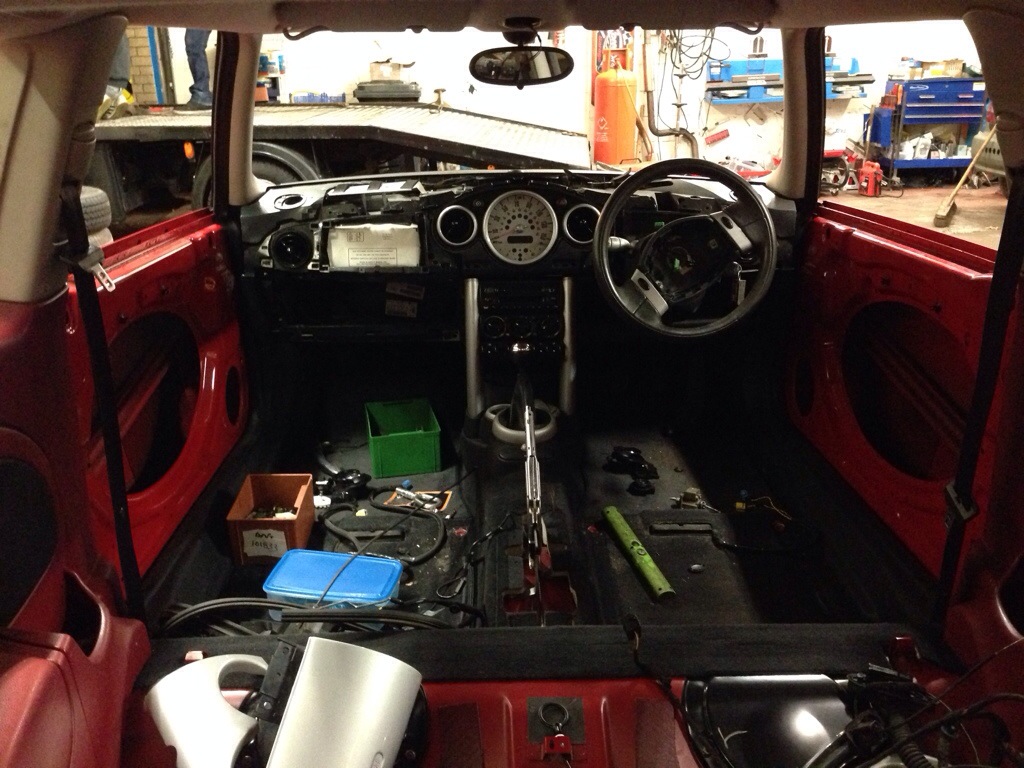
After removing all the glass, the interior was up next.
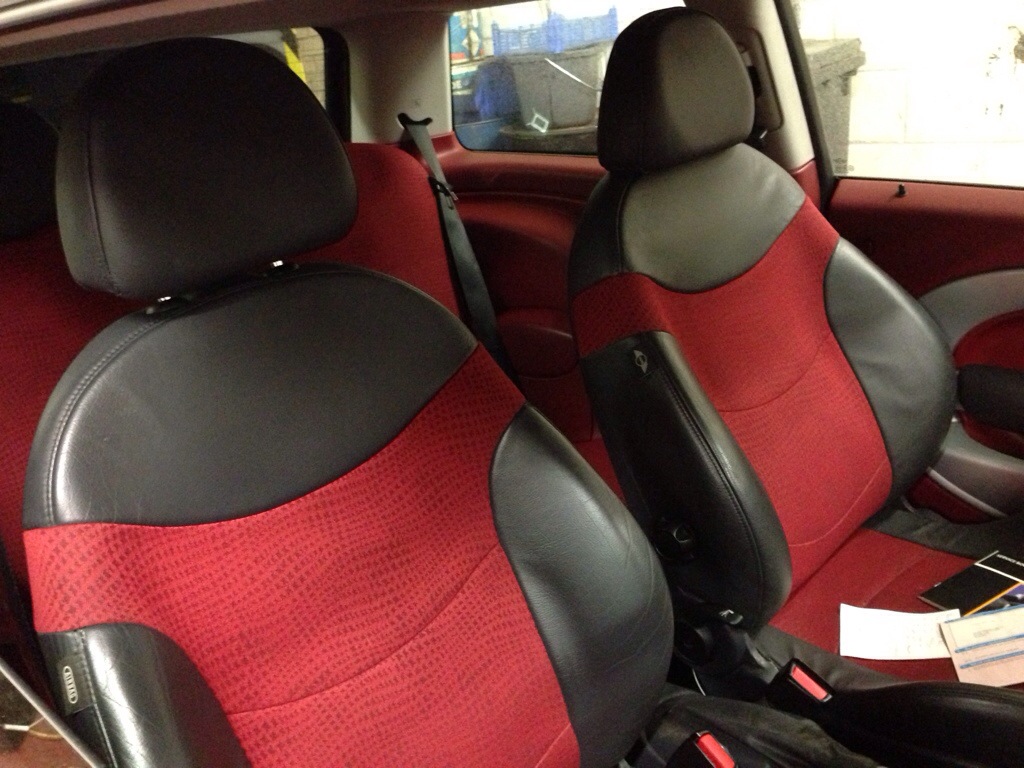
Spec'd in a delightful red cloth with burgundy door cards and trim, it was hiding the 132k miles pretty well in fairness. Once we got to pulling it apart we found a few more interesting bits and pieces.
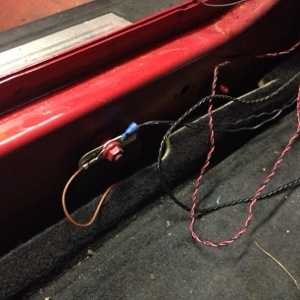
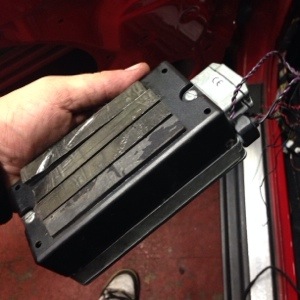
Removing the rear cards, nigh on every trim clip was mashed and mangled and not really holding anything in place. Then we spotted what looked like an aerial wire. Bit more poking around, this has the optional additional alarm system with tracker, ultrasonic sensors and tilt sensor. Presumably this was dealer fit which would explain additional wiring being zip tied to the main harness rather than properly integrated. (It doesn't explain the shockingly poor quality of work, however!)

So, time warping back to roughly now in 2013
After a couple of years of running arrive and drive in the Scottish MINI Cooper Cup, my (now) wife’s father had a chat about my mate and me building 2 new cars to run in 2014, 1 for my wife and 1 for me.
My wife’s car had a good few seasons under it so would benefit from a reshell, I had no car so needed to source one to reshell.
Here's the donor for my racecar, previously owned by various racers and a veteran of many years in the championship. She'd had a tough life and it shows, but the engine and gearbox are ok and the suspension and cage will be finding their way in to the new shell.
New shell is being denoted by this 2001 Cooper sourced from the hallowed pages of eBay. With 132,000 miles on the clock she was still remarkably tight and the engine ran sweet but the gearbox has the trademark Midland rumble.
So, first part of any build, strip and survey.
Driving both cars briefly to check over engines, transmissions and suspension components before we started. Then came the teardown.
At this stage we were vaguely harbouring thoughts of rebuilding the donor racecar, then we got a proper look at the state of it...
Dented turret/leg. Any transverse loading to this leg is bad news in the long run. This is a key weakness identified on our racecars where a little chassis flex starts popping driveshafts:
[img src="http://mcnab-racing.co.uk/wp-content/uploads/2013/12/20131208-184847.jpg[/img]
Cracked mount someone's spat some weld at:
Half inch of cataloy on the rear quarter:
Other highlights included an overflow bottle that looked like it was full of sewage, dented rims and sliced tyres, battery held in (loosely) with a piece of cut down ratchet strap material, re-skinned roof that was an inch higher at the back than the front, replacement door that hadn't even had the speaker taken out, exhaust melting the rear bumper and more bullet connectors than Maplin.
As they say in the movies: Fin
After removing all the glass, the interior was up next.
Spec'd in a delightful red cloth with burgundy door cards and trim, it was hiding the 132k miles pretty well in fairness. Once we got to pulling it apart we found a few more interesting bits and pieces.
Removing the rear cards, nigh on every trim clip was mashed and mangled and not really holding anything in place. Then we spotted what looked like an aerial wire. Bit more poking around, this has the optional additional alarm system with tracker, ultrasonic sensors and tilt sensor. Presumably this was dealer fit which would explain additional wiring being zip tied to the main harness rather than properly integrated. (It doesn't explain the shockingly poor quality of work, however!)
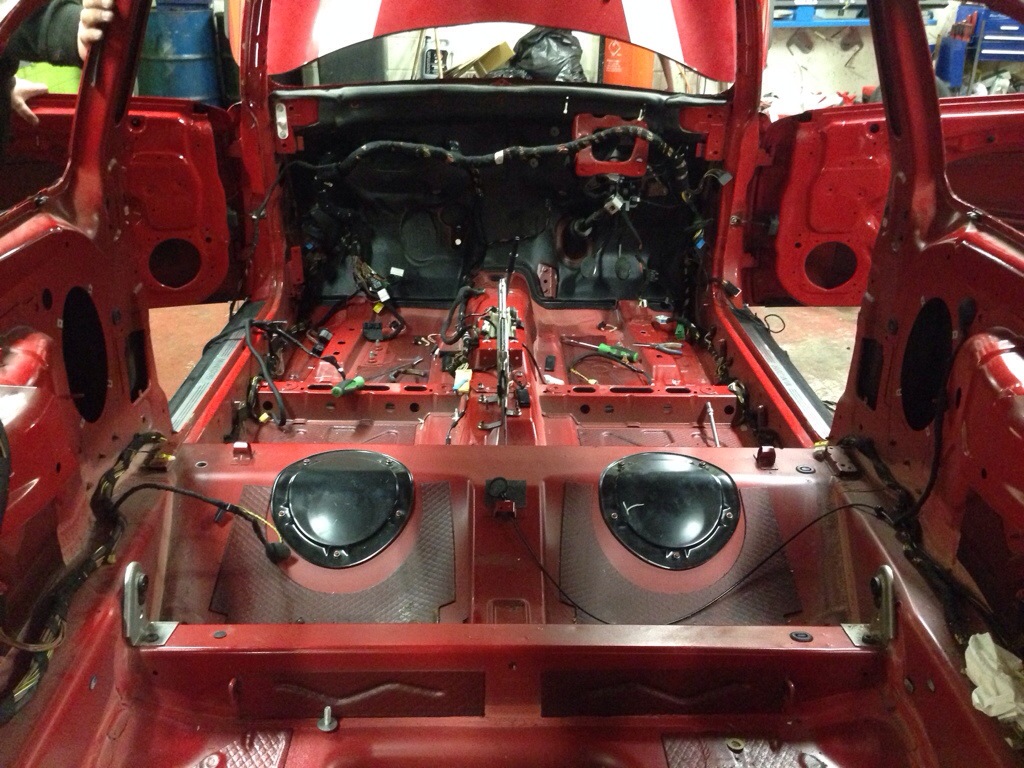
Removed the remainder of the engine bay gubbins and pulled the loom out. Really is incredible just how much wiring is packed in to a little car! Thankfully a ton of it can get ripped out for racing.


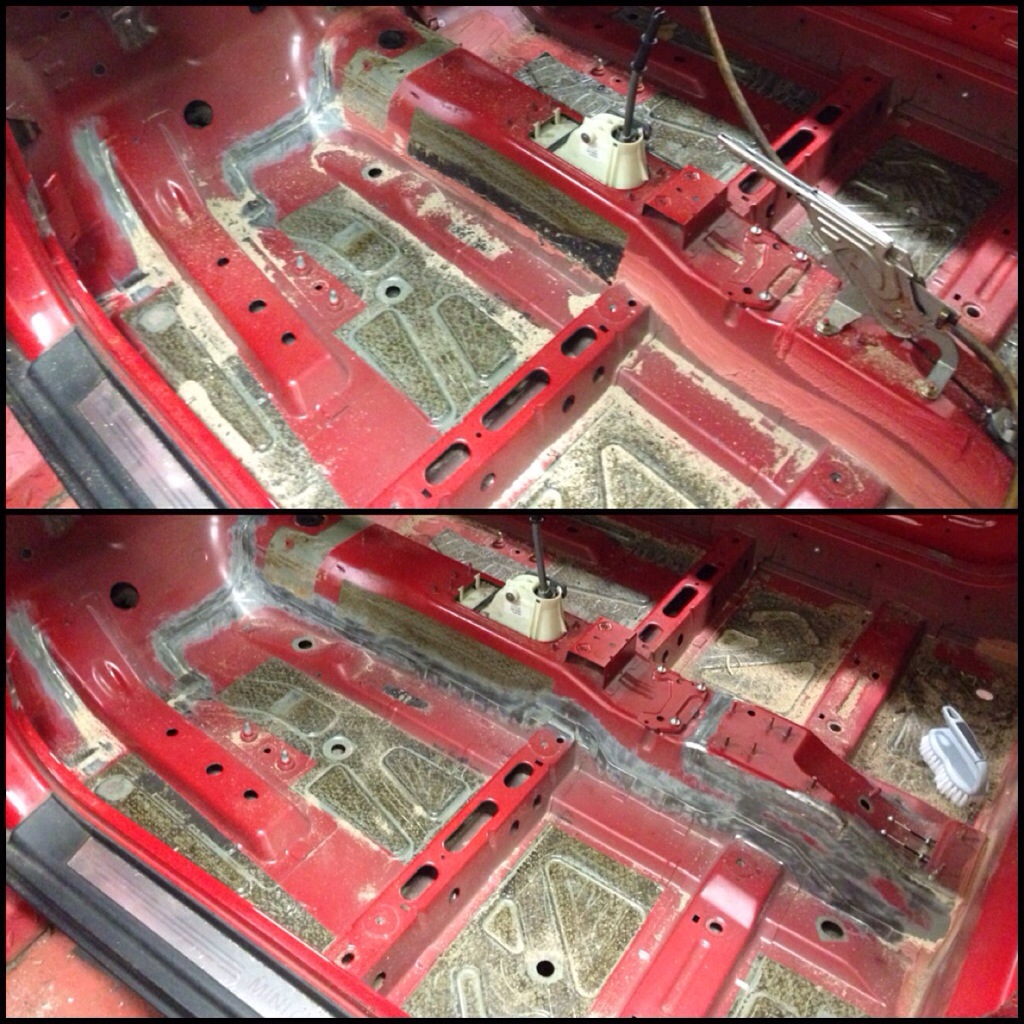
Now it's heat gun and scraper time. Here's a half and half after night one.

Out with the heat gun and scraper, sound deadening removal time. Once you get in to it, it's not so bad, leaving the residue removal until all the seam sealer has been removed as well, no point scrubbing it down twice.
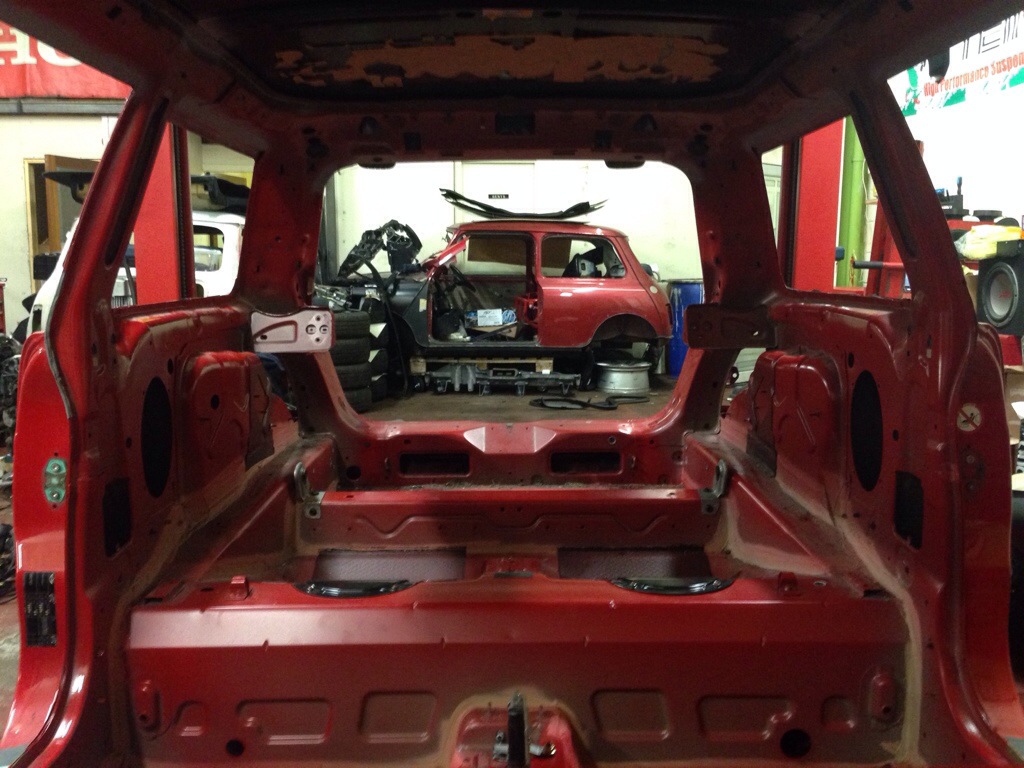
All the sound deadening out:
[img]http://mcnab-racing.co.uk/wp-content/uploads/2013/12/20131211-004257.jpg
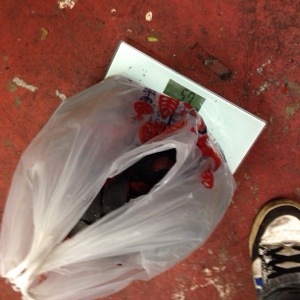
Ever wondered what 5.7kg of sound deadening, in a Tesco carrier bag, looks like? Here's your answer:
Bit of progress over the course of the night:
Couple of closer in shots around the tunnel at the start of the handbrake skin:

Out with the grinder and the luggage strap securing points are gone, quick skim of filler before paint and there will be no evidence they existed:

Finished grinding out the seam sealer that's reachable at this point. There's a few crevices that need more attention but the grinder can't get in at them with the brackets in place and need a fresh cup wheel to really attack the corners. The last little bit in the corners needs done by hand with a scraper anyways.
So, time to abuse the leftover sound deadening residue with some solvents.
Safety Note: this should be done with the doors open for ventilation. I know this. I chose not to because it was windy and wet outside. My head was pounding 10 hours after finishing!
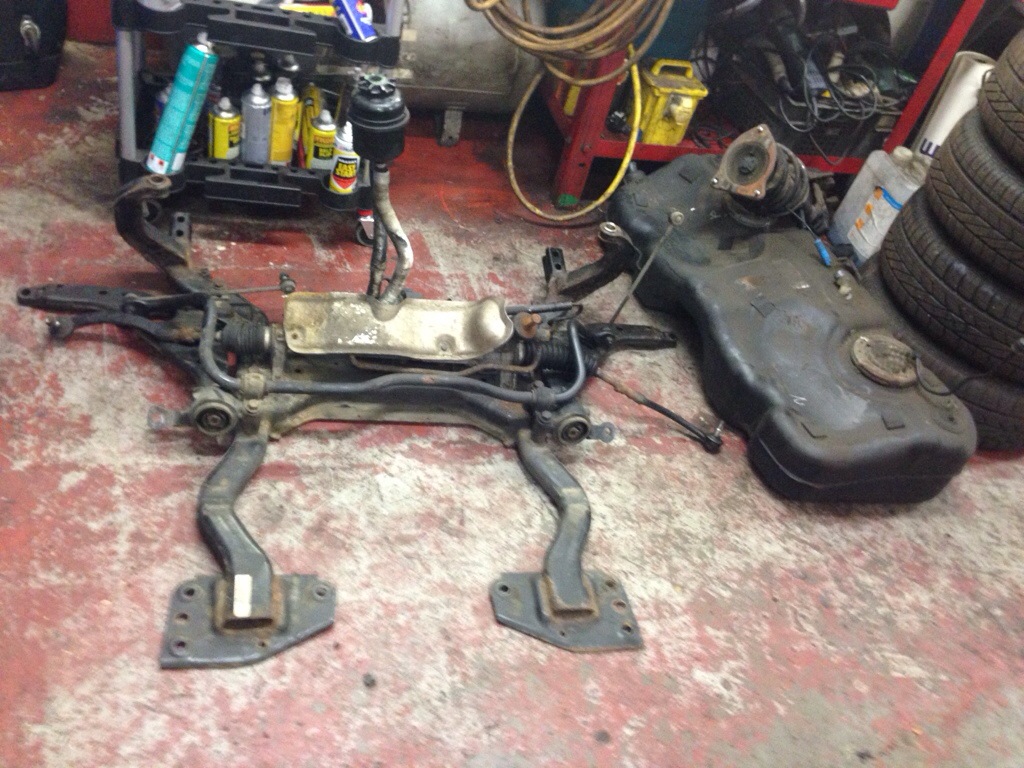
Gerry got the car up on the ramp and dropped the front subframe and steering rack off as well as the fuel tank. The subframe and rack will be getting a refurb. The tank will be getting cleaned outside and in, then getting a layer of heat shielding tape applied through the exhaust channel.
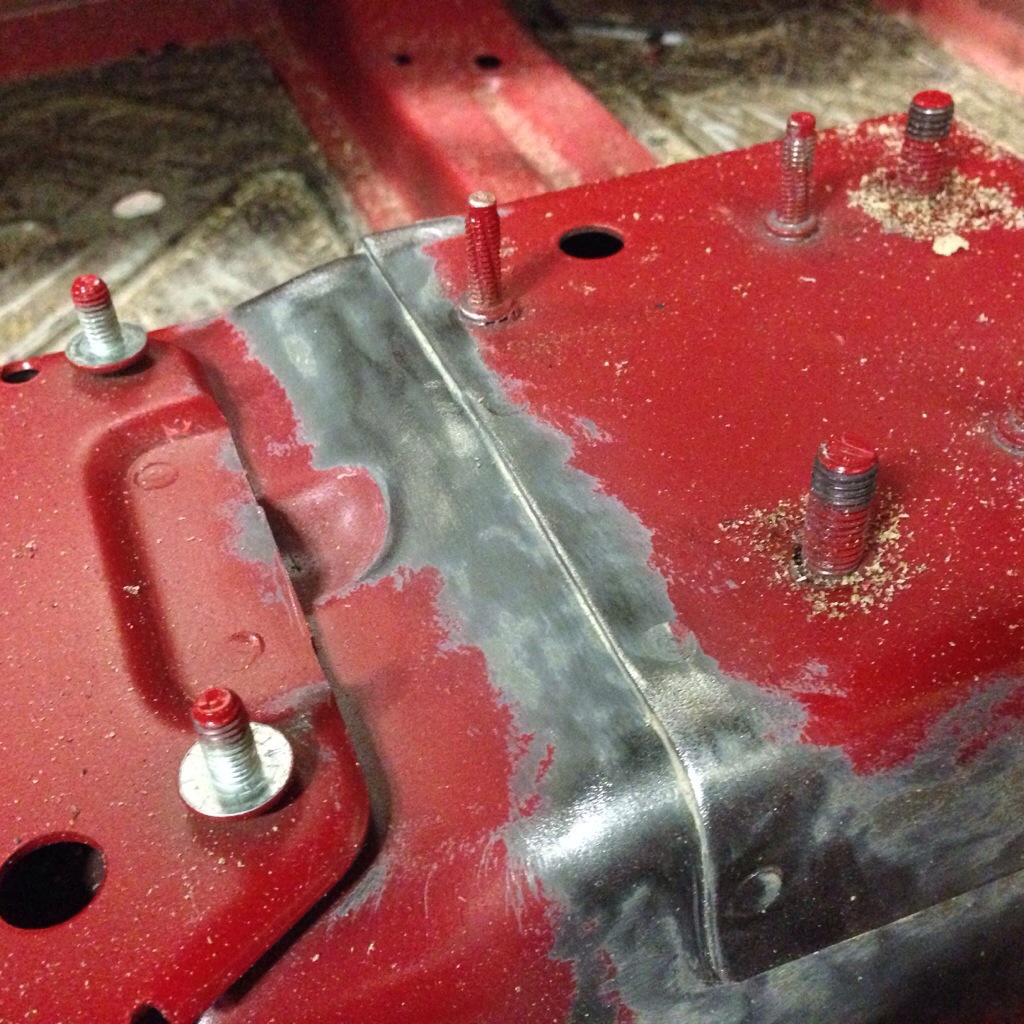
Also made a start on grinding back the sealer in the engine bay to enable the seams to be stitch welded. Per the regulations, we're allowed to stitch 25mm increments along the seams on the legs/turrets to help prevent chassis flex popping drive shafts.
Cage mounting points should be getting welded in early next week. Still need to remove the remains of the roof liner adhesive from the roof then we'll take her outside and jet wash the life out the shell with degreaser before it goes to paint.
Now it's heat gun and scraper time. Here's a half and half after night one.
Out with the heat gun and scraper, sound deadening removal time. Once you get in to it, it's not so bad, leaving the residue removal until all the seam sealer has been removed as well, no point scrubbing it down twice.
All the sound deadening out:
[img]http://mcnab-racing.co.uk/wp-content/uploads/2013/12/20131211-004257.jpg
Ever wondered what 5.7kg of sound deadening, in a Tesco carrier bag, looks like? Here's your answer:
Bit of progress over the course of the night:
Couple of closer in shots around the tunnel at the start of the handbrake skin:
Out with the grinder and the luggage strap securing points are gone, quick skim of filler before paint and there will be no evidence they existed:
Finished grinding out the seam sealer that's reachable at this point. There's a few crevices that need more attention but the grinder can't get in at them with the brackets in place and need a fresh cup wheel to really attack the corners. The last little bit in the corners needs done by hand with a scraper anyways.
So, time to abuse the leftover sound deadening residue with some solvents.
Safety Note: this should be done with the doors open for ventilation. I know this. I chose not to because it was windy and wet outside. My head was pounding 10 hours after finishing!
Gerry got the car up on the ramp and dropped the front subframe and steering rack off as well as the fuel tank. The subframe and rack will be getting a refurb. The tank will be getting cleaned outside and in, then getting a layer of heat shielding tape applied through the exhaust channel.
Also made a start on grinding back the sealer in the engine bay to enable the seams to be stitch welded. Per the regulations, we're allowed to stitch 25mm increments along the seams on the legs/turrets to help prevent chassis flex popping drive shafts.
Cage mounting points should be getting welded in early next week. Still need to remove the remains of the roof liner adhesive from the roof then we'll take her outside and jet wash the life out the shell with degreaser before it goes to paint.
One chassis leg all stitched up:

Bit more welding of a Saturday evening.


Next we got busy with the spot drill after finishing off the turret/leg welding.
Total of 2.5kg removed (found a few extra bits lying inside after taking this pic). Still a few more little ones to be vanquished but it's mostly there.


Next up, starting the strip down of the second road car and finishing off the little touches pre-paint on my car like the bonnet pin mounts and drilling out all the old brackets.
Here's the second donor:


Bit more welding of a Saturday evening.
Next we got busy with the spot drill after finishing off the turret/leg welding.
Total of 2.5kg removed (found a few extra bits lying inside after taking this pic). Still a few more little ones to be vanquished but it's mostly there.
Next up, starting the strip down of the second road car and finishing off the little touches pre-paint on my car like the bonnet pin mounts and drilling out all the old brackets.
Here's the second donor:
Last touches pre-paint, found a few more brackets to come out, well, about half a kilo of them.
Welded up the badge holes and holes for the oem spoiler.
Fitted the bonnet and boot pins to cut their holes prior to paint.


At some point she's had a new roof fitted and whatever sex offender did the work went to town with the bonding agent. That was fun removing it with a blade...

Started hitting the panels with the DA

Welding in the cage feet, aiming to take the car to the paint shop tomorrow.


Got to discussing interior and engine bay colours and decided to add some Italian flair.

Gerry's van is painted Lamborghini Grigio Telesto, but that's metallic. So with a quick spectral sample, we got a flat equivalent mixed up.


Welded up the badge holes and holes for the oem spoiler.
Fitted the bonnet and boot pins to cut their holes prior to paint.
At some point she's had a new roof fitted and whatever sex offender did the work went to town with the bonding agent. That was fun removing it with a blade...
Started hitting the panels with the DA
Welding in the cage feet, aiming to take the car to the paint shop tomorrow.
Got to discussing interior and engine bay colours and decided to add some Italian flair.
Gerry's van is painted Lamborghini Grigio Telesto, but that's metallic. So with a quick spectral sample, we got a flat equivalent mixed up.
Merry Christmas [2013] to me! Collected the car from the bodyshop with Gerry, back to the unit so the build could begin once the turkey hangover wore off.


Gerry gave us an early Christmas present.
My car, Selene, is pink (as you know). Steph's car, Sara, is going to be turquoise.
So, colour coded alcantara trimmed dashtops:


Gerry gave us an early Christmas present.
My car, Selene, is pink (as you know). Steph's car, Sara, is going to be turquoise.
So, colour coded alcantara trimmed dashtops:


Now for a bit the R53 owners might find interesting as well.
Stripping Sara down, the obvious dash board and trim changes aside, the facelift introduced quite a few body in white changes.
Additional skins up front for mounting grab handles and sun shade:

The seat belt mounts are different at the sill and there's an additional random thread on the floor pan on both sides:

The facelift centre console introduces an additional double skin section and threads at the end of the tunnel for the different centre console/tunnel cover:

Construction wise, there's a lot more seam sealer along the sills on the facelift:

After getting the last of the wiring harness out the car, sound deadening and heat gun time again:


Entering day 3 of removal, there's bloody seam sealer everywhere on this thing! Gallons of it on the seams, heaviest application I've ever seen. Plus random dods here and there to make the sound deadening removal even more of a pain in the arse than usual.


Add in freezing temperatures making ice form inside the airtools and it was a bit of an arduous one.
Whilst I was at that, Gerry got the grinder fired up on a different Mini project…


Stripping Sara down, the obvious dash board and trim changes aside, the facelift introduced quite a few body in white changes.
Additional skins up front for mounting grab handles and sun shade:
The seat belt mounts are different at the sill and there's an additional random thread on the floor pan on both sides:
The facelift centre console introduces an additional double skin section and threads at the end of the tunnel for the different centre console/tunnel cover:
Construction wise, there's a lot more seam sealer along the sills on the facelift:
After getting the last of the wiring harness out the car, sound deadening and heat gun time again:
Entering day 3 of removal, there's bloody seam sealer everywhere on this thing! Gallons of it on the seams, heaviest application I've ever seen. Plus random dods here and there to make the sound deadening removal even more of a pain in the arse than usual.
Add in freezing temperatures making ice form inside the airtools and it was a bit of an arduous one.
Whilst I was at that, Gerry got the grinder fired up on a different Mini project…
We managed to pick up sponsorship from a powder coating company for the season. Turned out the deal was dodgy as hell but it gave us free access to powder coated parts 


Some shots of the engine bay and turrets getting the seam sealer stripped off them for stitch welding per the regulations.


Whilst I was loosing my mind, and partially my hearing, on grinding all that out, Gerry was on bracket butchering. Drilling out the spot welds on unnecessary brackets and skins. The facelift ones for the tunnel and grab handles are notably heavier.
Some shots of the engine bay and turrets getting the seam sealer stripped off them for stitch welding per the regulations.
Whilst I was loosing my mind, and partially my hearing, on grinding all that out, Gerry was on bracket butchering. Drilling out the spot welds on unnecessary brackets and skins. The facelift ones for the tunnel and grab handles are notably heavier.
All welded up front, last of the brackets and seam sealer coming out.
Also received our first box of goodies back. 2 rebuilt sets of dampers back from LEDA. Our championship allows you to run either AST or LEDA, different people have different preferences, I’m in the LEDA camp.

Remember all the unnecessary brackets removed from the red car, there was a total of 2.4 kg of them. Facelift brackets are a touch beefier, an additional 2.2kg

Time to get rid of the remains of the captive threads we cut out. Before and after


This bits rather fun to be honest

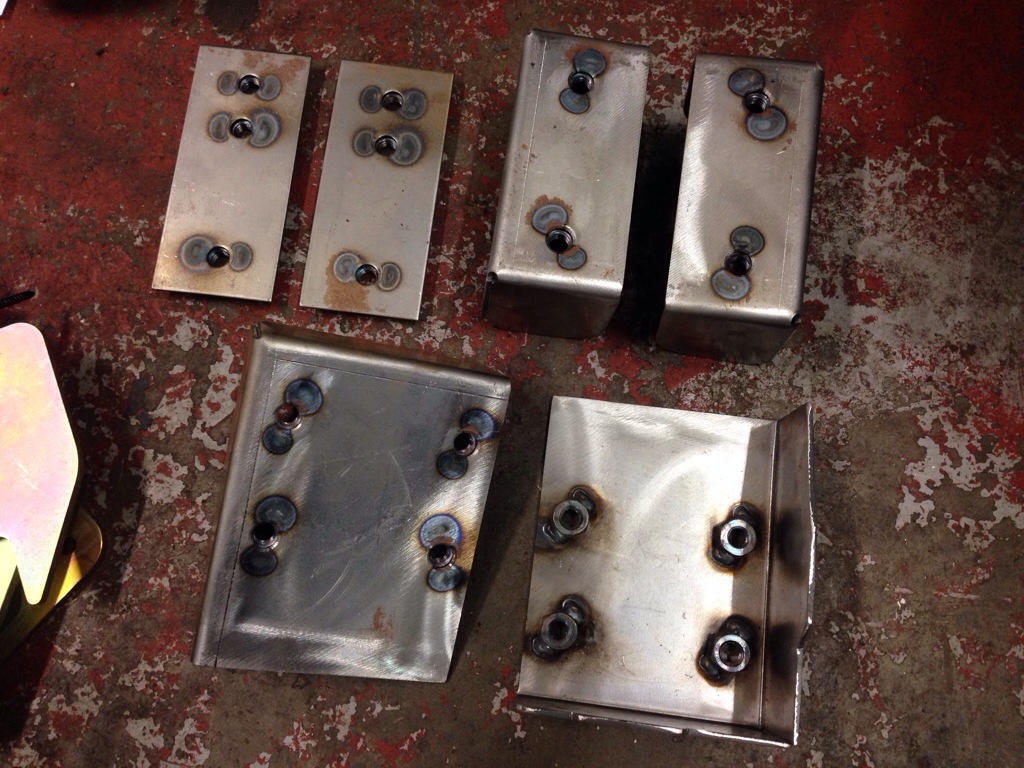
Then the adjustable suspension top mounts arrived to go along with the refurbed suspension units:

Zinc plated steel sandwich design with spherical bearings.
Next up, cage mounts for the Mrs’ car so we can get them welded in ready for paint.
Also sourced some bumpers to go to paint with the second shell. Aero front bumpers [back before they were discontinued and prices went daft!] and Cooper S rears.

Also received our first box of goodies back. 2 rebuilt sets of dampers back from LEDA. Our championship allows you to run either AST or LEDA, different people have different preferences, I’m in the LEDA camp.
Remember all the unnecessary brackets removed from the red car, there was a total of 2.4 kg of them. Facelift brackets are a touch beefier, an additional 2.2kg
Time to get rid of the remains of the captive threads we cut out. Before and after
This bits rather fun to be honest
Then the adjustable suspension top mounts arrived to go along with the refurbed suspension units:
Zinc plated steel sandwich design with spherical bearings.
Next up, cage mounts for the Mrs’ car so we can get them welded in ready for paint.
Also sourced some bumpers to go to paint with the second shell. Aero front bumpers [back before they were discontinued and prices went daft!] and Cooper S rears.
Up to early January 2014 now, cage mounts going in:


Loaded on the truck and off for paint:

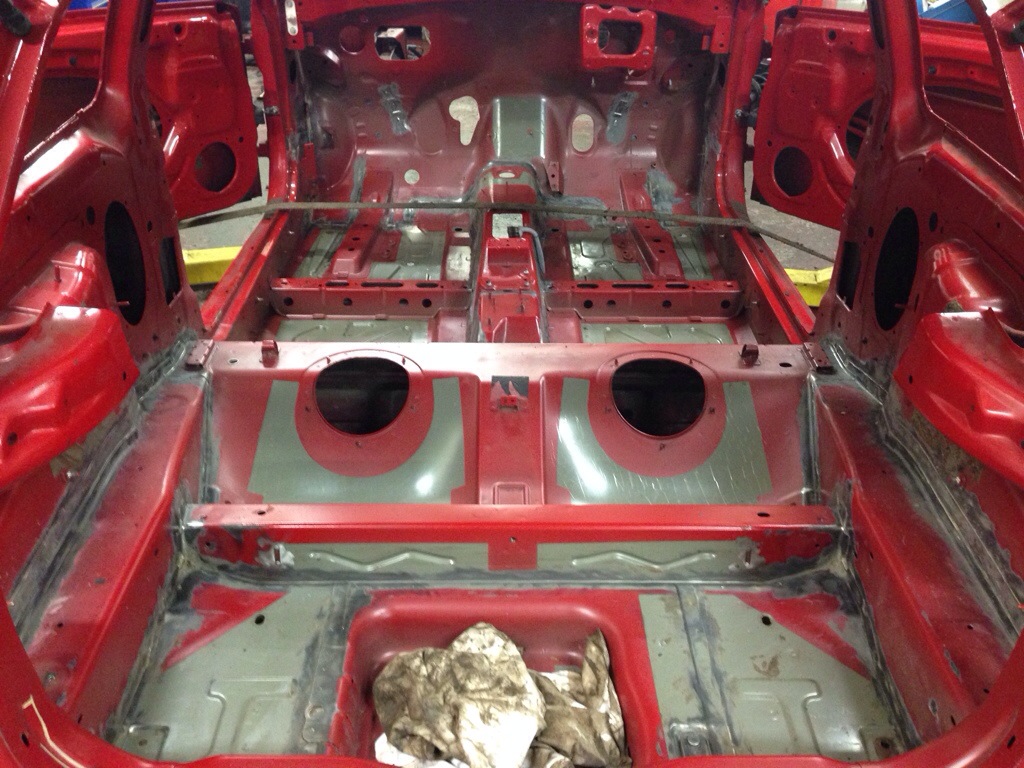
Interior and engine bay done:

Stripping down some hubs for powder coat in the mean time:

All done. Camera doesn't really do the neon paint much justice:


Preparing other bits and pieces for going back in.
Pre-facelift OEM loom on the left, race spec loom on the right. 293g lighter per pair:

Once again, facelift version is heavier. You can see the additional wiring from the puddle lights and illuminated door handles. 345g saving per pair:

Then, like the Haynes manual used to say, re-assembly is the same process but in reverse. It’s just that easy
So said the Haynes manual every time, who am I to argue...


Loaded on the truck and off for paint:
Interior and engine bay done:
Stripping down some hubs for powder coat in the mean time:
All done. Camera doesn't really do the neon paint much justice:
Preparing other bits and pieces for going back in.
Pre-facelift OEM loom on the left, race spec loom on the right. 293g lighter per pair:
Once again, facelift version is heavier. You can see the additional wiring from the puddle lights and illuminated door handles. 345g saving per pair:
Then, like the Haynes manual used to say, re-assembly is the same process but in reverse. It’s just that easy
So said the Haynes manual every time, who am I to argue...
Big deliveries start, complete bearing and ball joint overhaul for both cars. Plus discs, clutch and plugs. Driveshafts to follow.

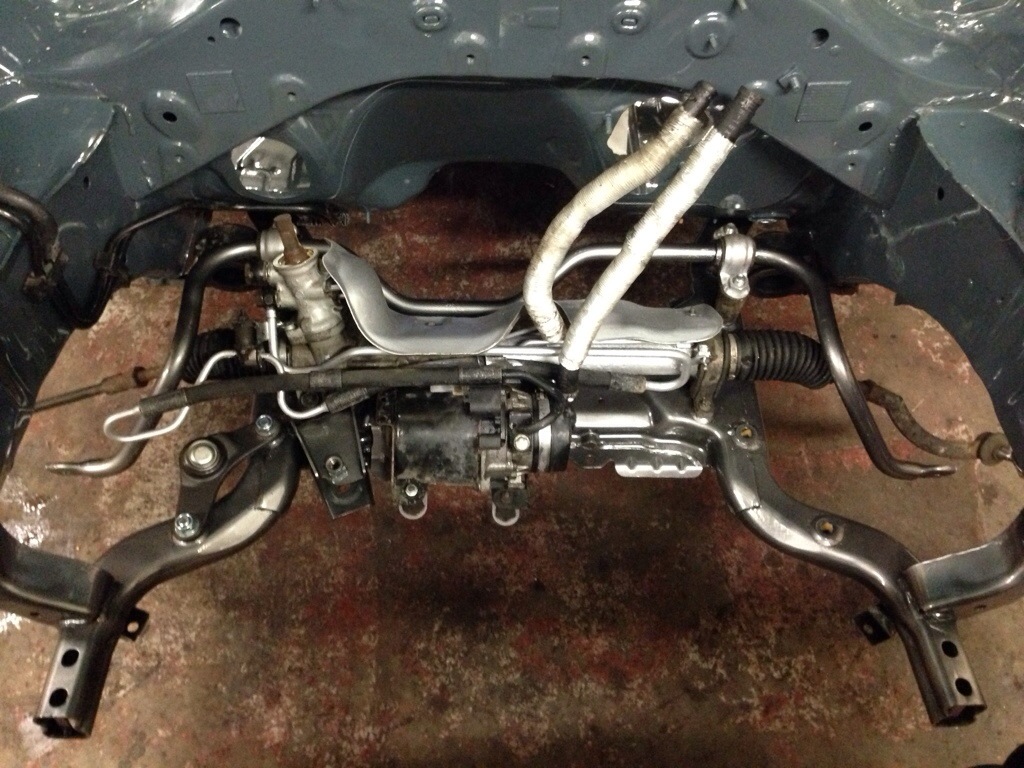
Dropped the rear subframe off Sara to coat the underside, we left it on to make the car able to be wheelbarrowed about when going for paint. Also got a few engine bay pics.


Just in time for another sizeable delivery:

Meanwhile our mate Barry had been a busy boy, dechroming the trims. Doesn’t make you faster but I detest chrome finishes on anything after I was born.


Dropped the rear subframe off Sara to coat the underside, we left it on to make the car able to be wheelbarrowed about when going for paint. Also got a few engine bay pics.
Just in time for another sizeable delivery:
Meanwhile our mate Barry had been a busy boy, dechroming the trims. Doesn’t make you faster but I detest chrome finishes on anything after I was born.
More parts back from blasting and powder coating:

Time to start rebuilding the subframes:

Small delivery from Demon Tweeks...

The only mechanical differences between the two cars will ultimately be the shell generation and the width of the drivers seat.
Gave the rear arms and extra coat of paint for added protection. The factory black coating is pretty good from a corrosion point of view, but with the shot blasting these take any time a gravel trap rally cross excursion occurs, a little added protection doesn't hurt

Rear subframe and arms all built back up. New camber adjuster bolts from BMW fitted after this pic was taken.
Gave the tank a thorough clean and degrease then added a section of heat reflective tape where the exhaust passes close. Facelift tank straps are far more corrosion resistant than pre-facelift.


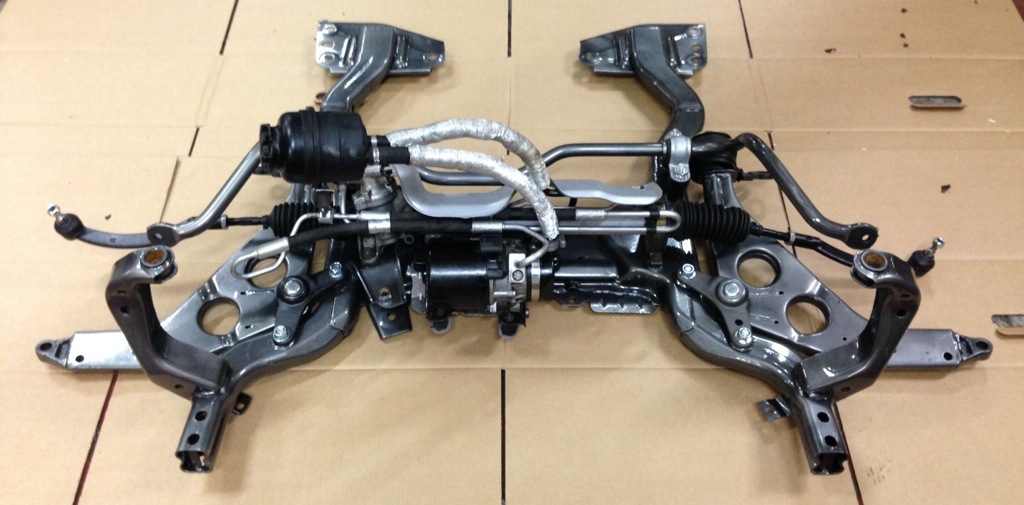
Front subframe mostly built up. Turns out we got 4 banana ball joints of one side and none of the other rather than 2 and 2 so couldn't fully build it up at that time.
Modified ARB brackets to include captive nuts and steering rack all mounted up, again added some extra protection on the PS pipes since they suffer from corrosion.
Time to start rebuilding the subframes:
Small delivery from Demon Tweeks...
The only mechanical differences between the two cars will ultimately be the shell generation and the width of the drivers seat.
Gave the rear arms and extra coat of paint for added protection. The factory black coating is pretty good from a corrosion point of view, but with the shot blasting these take any time a gravel trap rally cross excursion occurs, a little added protection doesn't hurt
Rear subframe and arms all built back up. New camber adjuster bolts from BMW fitted after this pic was taken.
Gave the tank a thorough clean and degrease then added a section of heat reflective tape where the exhaust passes close. Facelift tank straps are far more corrosion resistant than pre-facelift.
Front subframe mostly built up. Turns out we got 4 banana ball joints of one side and none of the other rather than 2 and 2 so couldn't fully build it up at that time.
Modified ARB brackets to include captive nuts and steering rack all mounted up, again added some extra protection on the PS pipes since they suffer from corrosion.
Wish said:
Loving the dedication.
This is my Wife s challenge car many years ago. Was originally the press car for the MINI CHALLENGE when it was first set up. It was used as a guest car for the series. It was originally red.
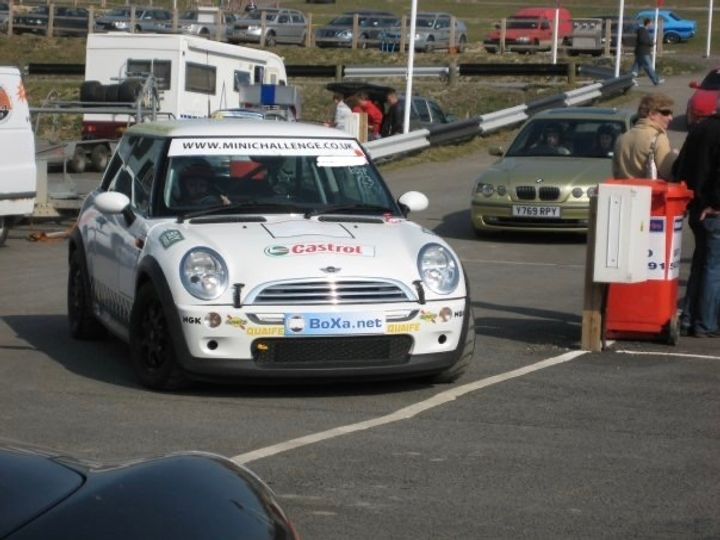
That’s properly from the early days with it running pepper pots in the dry!This is my Wife s challenge car many years ago. Was originally the press car for the MINI CHALLENGE when it was first set up. It was used as a guest car for the series. It was originally red.
Our series initially ran to the same spec as Challenge Coopers until they diverged a bit when Challenge moved to running the 6sp box for the Coopers whilst we retained the 5sp.
We’ve had some involvement running Coopers in Challenge as well as the Scottish since about 2017.
Got the front arms on with the new ball joints.
Poly bushes at the rear of the wishbones, from Powerflex. They do make offset ones to add castor but our championship regs don’t allow them, so just standard upgraded ones used.
Rear caliper and carriers on too. New rotors all round.


New handbrake cables for them rally starts and new camber bolts for the adjustable rear arms

Ever wondered what 2 car sets (a.k.a. 200 quid) of trim clips looks like?

All worth it though for good fitting trims, not a hint of tiger seal on these cars which is a bit of a novelty on MINI racers!

Car number 1 rolling

Got the trims back from dechroming

By this point Gerry had agreed to run another mate in the Scottish MINIs for the 2014 season so Scott’s car came to join us in the workshop as well as a couple of breakers picked up to assemble the spares package

Poly bushes at the rear of the wishbones, from Powerflex. They do make offset ones to add castor but our championship regs don’t allow them, so just standard upgraded ones used.
Rear caliper and carriers on too. New rotors all round.
New handbrake cables for them rally starts and new camber bolts for the adjustable rear arms
Ever wondered what 2 car sets (a.k.a. 200 quid) of trim clips looks like?
All worth it though for good fitting trims, not a hint of tiger seal on these cars which is a bit of a novelty on MINI racers!
Car number 1 rolling
Got the trims back from dechroming
By this point Gerry had agreed to run another mate in the Scottish MINIs for the 2014 season so Scott’s car came to join us in the workshop as well as a couple of breakers picked up to assemble the spares package
Back over on to my car for a bit. Prep'd the underside and assembled the rear subframe

Refurbished the entire front subframe before reassembling and installing;
- Powder coated subframe with modified ball joint mounts to accept nuts and bolts
- Powder coated and poly bushed wishbones
- New banana ball joints
- Powder coated ARB
- Modified ARB brackets for captive nuts
- Refurbished steering rack, painted and new inner and outer track rods


Getting the window trim retaining clips on and fitting the arches


Got the glass back in my wife’s car, mine has to wait another day as our glass man had to leave to go take the windows out Aiden Moffat's BTCC car after his shunt at Thruxton

Another delivery, on pallets this time

Refurbished the entire front subframe before reassembling and installing;
- Powder coated subframe with modified ball joint mounts to accept nuts and bolts
- Powder coated and poly bushed wishbones
- New banana ball joints
- Powder coated ARB
- Modified ARB brackets for captive nuts
- Refurbished steering rack, painted and new inner and outer track rods
Getting the window trim retaining clips on and fitting the arches
Got the glass back in my wife’s car, mine has to wait another day as our glass man had to leave to go take the windows out Aiden Moffat's BTCC car after his shunt at Thruxton
Another delivery, on pallets this time
Got the trims back on now the windows are in

Then got started dressing the engines


Engine mounts and ancillaries needed a bit of a freshen up

Poly bushed gearbox mount, Powerflex again

Cleaning up the last few engine bits, starting with the heat shields


Bolted back in to the bay


[img src="http://mcnab-racing.co.uk/wp-content/uploads/2014/02/20140222-011136.jpg[/img]
The fun part will be keeping it this clean all season

Better wheel gap lifted on a ramp than most R56s leave the factory with

Next up I was getting on with cleaning and heat taping my fuel tank and getting the hubs ready to go on the car


As previous, brand new Delphi ball joints and FAG bearings. Never did find out what the 1800 FAG points we had was worth
Meanwhile Gerry was setting about the wiring harness.


Not a bad weight saving

The original car loom weighed in at 12.1kg not including door looms.
Then got started dressing the engines
Engine mounts and ancillaries needed a bit of a freshen up
Poly bushed gearbox mount, Powerflex again
Cleaning up the last few engine bits, starting with the heat shields
Bolted back in to the bay
[img src="http://mcnab-racing.co.uk/wp-content/uploads/2014/02/20140222-011136.jpg[/img]
The fun part will be keeping it this clean all season
Better wheel gap lifted on a ramp than most R56s leave the factory with
Next up I was getting on with cleaning and heat taping my fuel tank and getting the hubs ready to go on the car
As previous, brand new Delphi ball joints and FAG bearings. Never did find out what the 1800 FAG points we had was worth
Meanwhile Gerry was setting about the wiring harness.
Not a bad weight saving
The original car loom weighed in at 12.1kg not including door looms.
Gassing Station | Readers' Cars | Top of Page | What's New | My Stuff