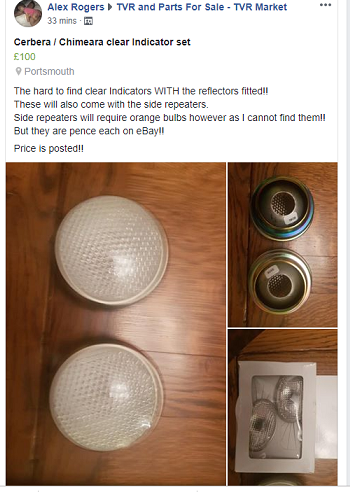
Clear front indicators
Discussion


 .
.
These are the right size, almost indistinguishable from the originals and cost £12
Britax Clear light
Britax Clear light
sparkythecat said:
Posted? At that price I'd want them filled with caviar and delivered by helicopter.
I might be wrong (it's going to happen one day) but I think the ones from Craddock are just the lens, the ones with reflectors are very hard to find?Britax look an interesting option

These Lucas part numbers might help your search. You probably want the FV939004 with the reflector but I think the side light with suitably bright bulb would do the job too. I bought a bunch with the hope of fitting round LED units but it turns out the rear of the units is crimped over the plastic lens so no chance of doing that.
FV760732 Stop/Tail
FV760733 Turnlight Rear
FV760734 Turnlight Front (fitted on all Griff/Chim/Cerb)
FV817224 Side Light (without reflector)
FV861059 Tail Light
FV939003 Fog Lamp
FV939004 Reversing Lamp
FV760732 Stop/Tail
FV760733 Turnlight Rear
FV760734 Turnlight Front (fitted on all Griff/Chim/Cerb)
FV817224 Side Light (without reflector)
FV861059 Tail Light
FV939003 Fog Lamp
FV939004 Reversing Lamp
phillpot said:
Would these do the job? ...... Chrome indicator bulbs
Wow, great find, they'll do the jobPosted this elsewhere but it probably belongs here
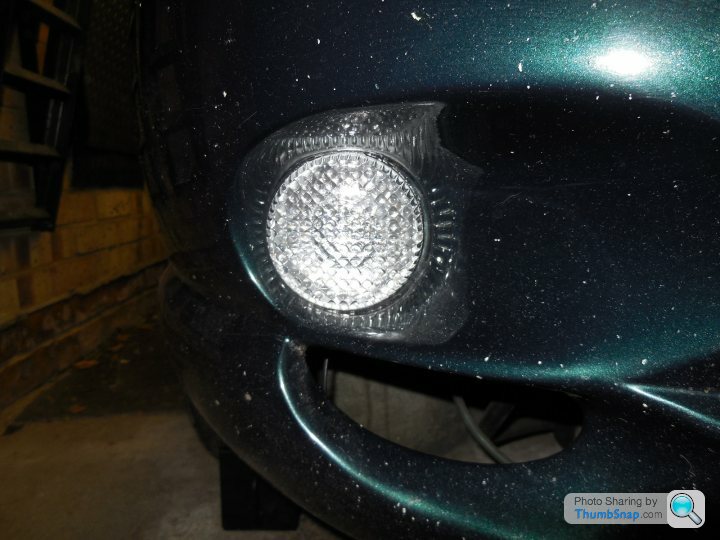
Clear front indicators for less than £12 each
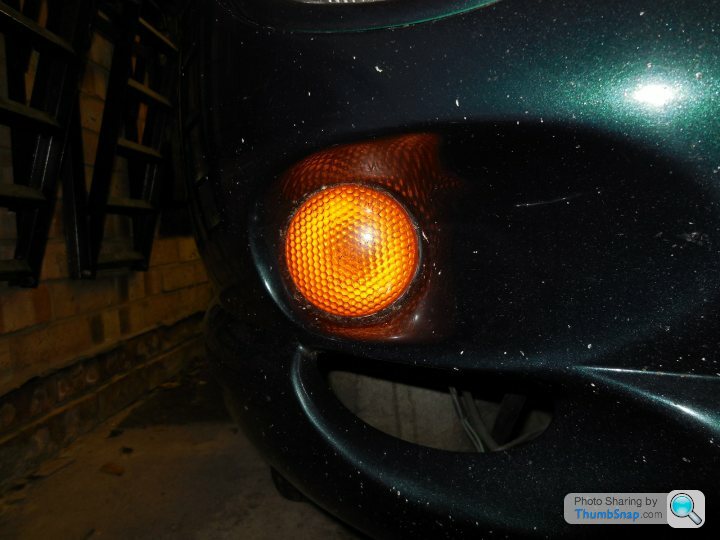
Apologies for all the stone chips, I must get around to painting this car
Britax Clear light
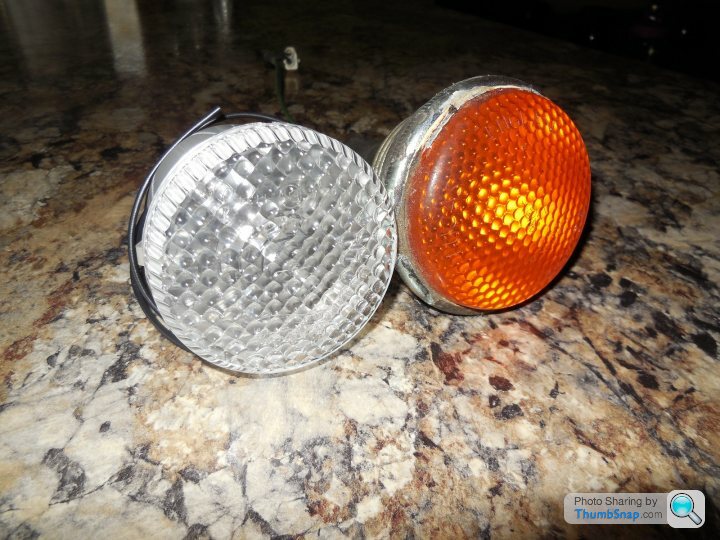
You need to buy opposite pin indicator lamps because these lamps are intended as side/reverse lamps
Opposite Pin Indicator Bulb
Removing the old lamps is just a case cutting the sealant around the lamp and pushing it into the void. Then remove and clean (including the inside so that the new sealant has something solid to grab onto)
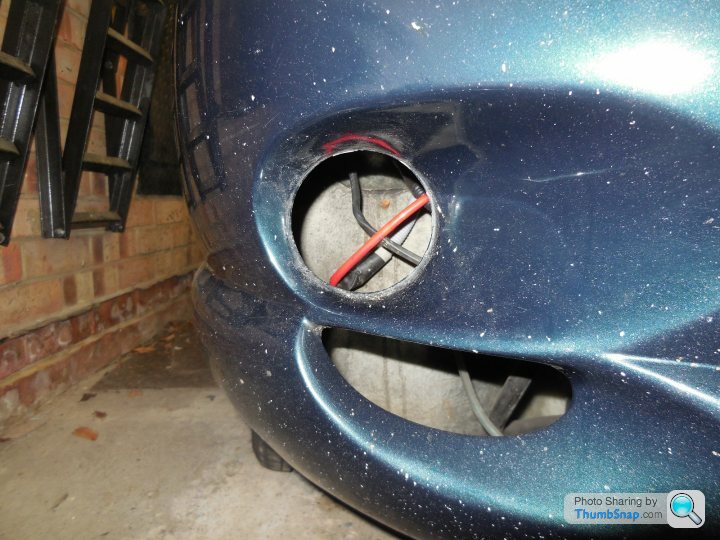
My first thoughts were to just bond the new lamps in place but I decided to go one step further. Using some scrap 3mm polyurethane sheet I cut out two discs that the lamps could slide into and hold in place with their spring retaining clips.
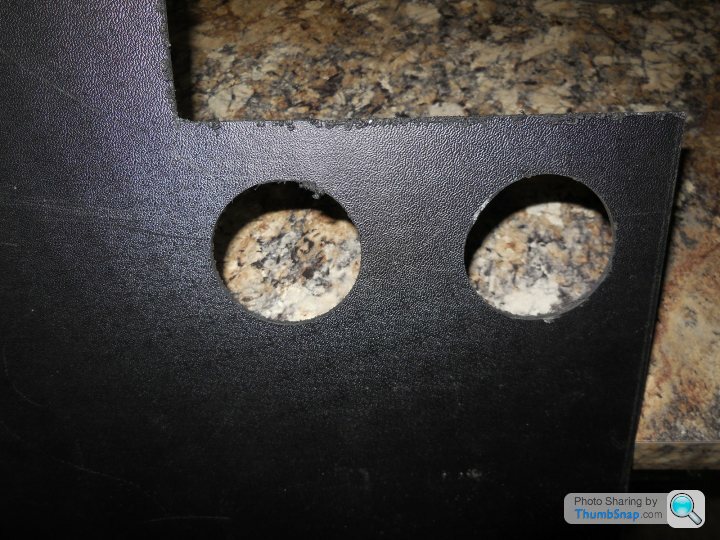


Using Sikaflex EBT polyurethane sealant I bonded the discs to the inside of the apertures and applied plenty of excess sealant via other access routes.
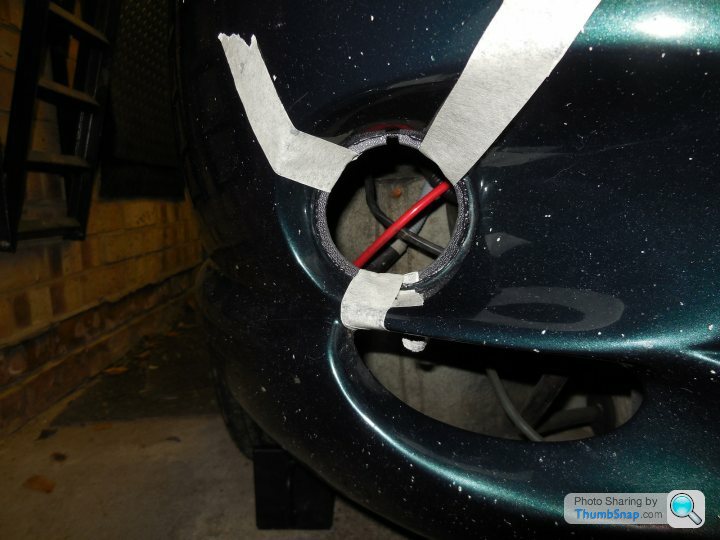
The lamps simply push in and click into place, no need for sealant. Removal is by accessing the spring clips via the aperture under the lamp

Clear front indicators for less than £12 each
Apologies for all the stone chips, I must get around to painting this car
Britax Clear light
You need to buy opposite pin indicator lamps because these lamps are intended as side/reverse lamps
Opposite Pin Indicator Bulb
Removing the old lamps is just a case cutting the sealant around the lamp and pushing it into the void. Then remove and clean (including the inside so that the new sealant has something solid to grab onto)
My first thoughts were to just bond the new lamps in place but I decided to go one step further. Using some scrap 3mm polyurethane sheet I cut out two discs that the lamps could slide into and hold in place with their spring retaining clips.
Using Sikaflex EBT polyurethane sealant I bonded the discs to the inside of the apertures and applied plenty of excess sealant via other access routes.
The lamps simply push in and click into place, no need for sealant. Removal is by accessing the spring clips via the aperture under the lamp
Gassing Station | Chimaera | Top of Page | What's New | My Stuff